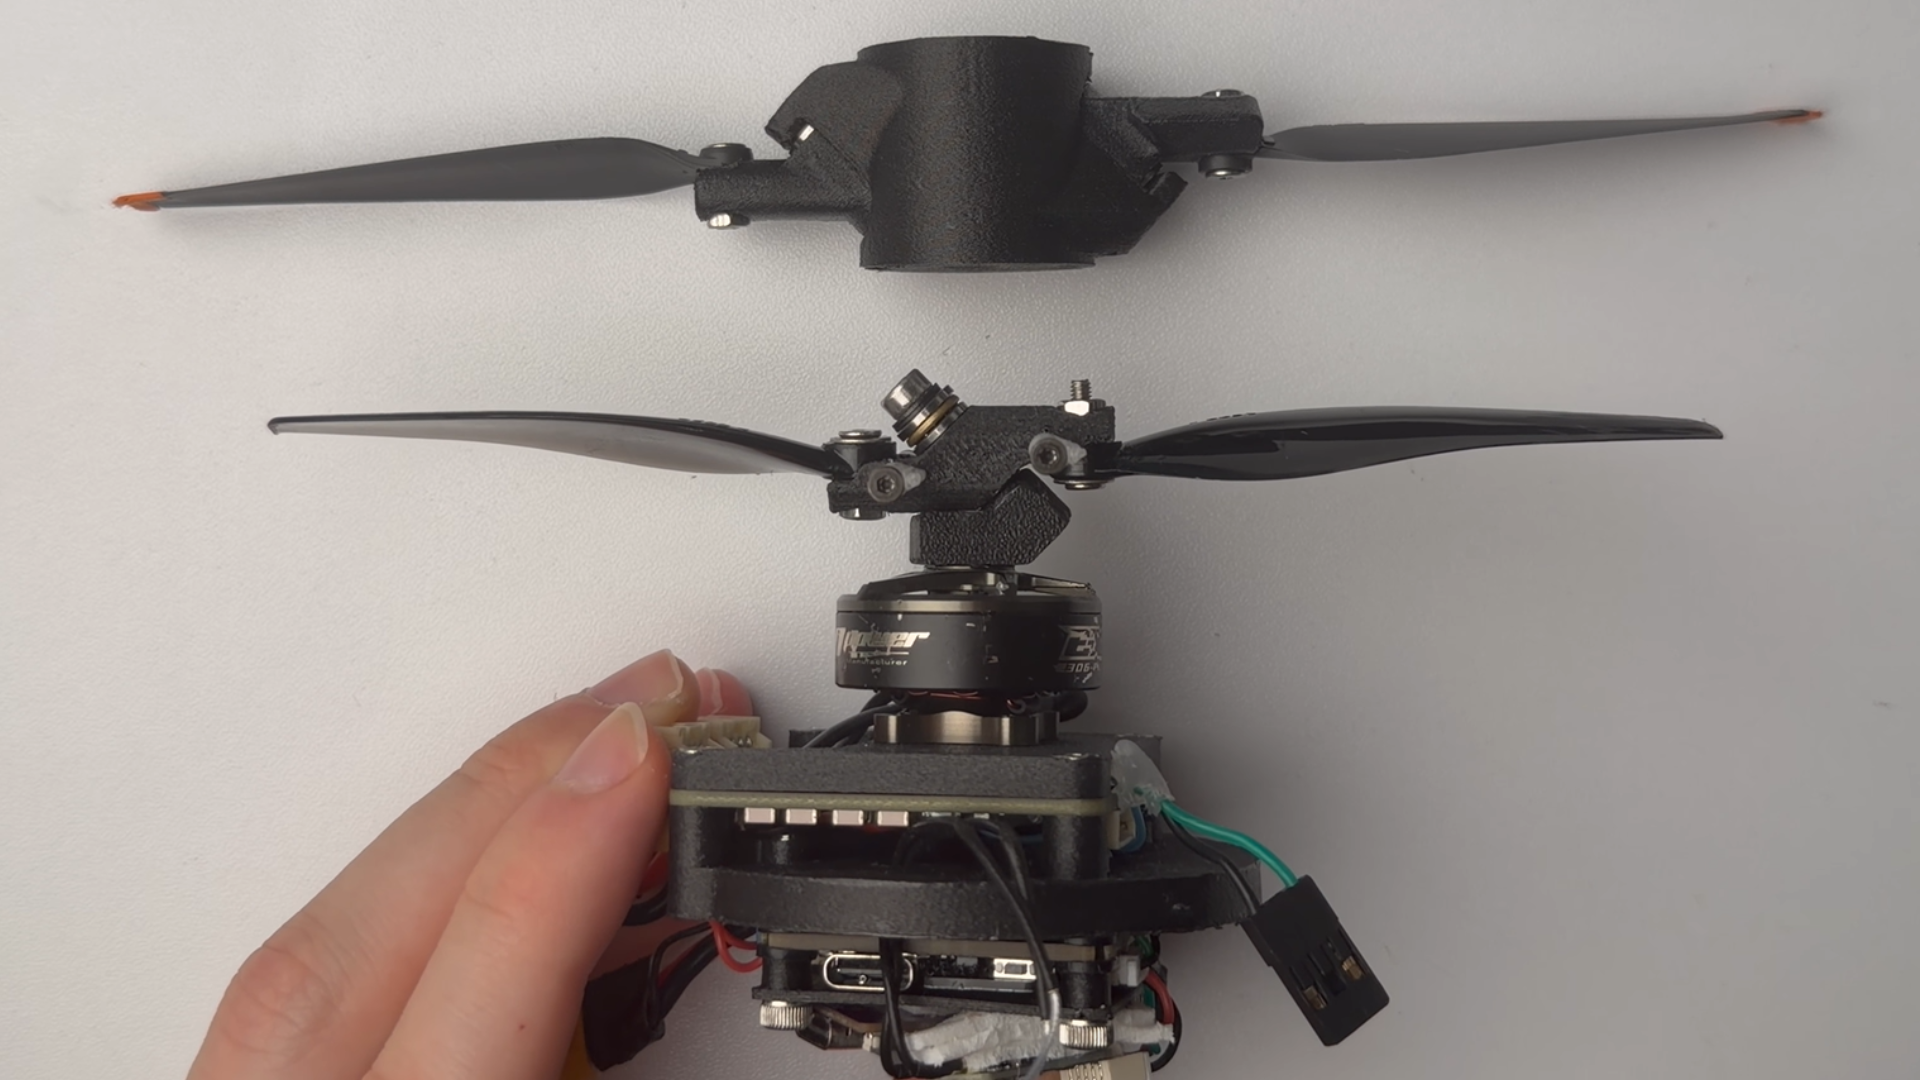
A software engineer who’s also into drones and 3D printing has shared a single-motor drone that they built inside their home and tested on their bed. Joshua Bird shared a video of how they created it on YouTube, highlighting the unique technique they used to maintain controllability and stability. The design used a combination of a hinged propeller, rapid changes to the motor’s rotation speed, and a custom flight controller and motor controller firmware that allowed the motor to react to necessary changes in under 0.2 milliseconds.
Most rotary wing aircraft require a mechanism to counteract the torque generated by the motor or engine and to change its flight direction, typically with the use of a swash plate to change rotor disk attitude and a secondary propeller. While this method has been effective for decades, it has made rotary-wing aircraft heavier and more complex. This single-motor drone cut the need for a secondary mechanism by constantly adjusting the speed of the motor — speeding it up produces more reaction torque while slowing it down applies opposite reaction torque. This essentially turns into a balancing act between these two forces to reduce the torque on the drone body to a more manageable level.
The hinged rotor also relies on the same mechanism for directional control instead of relying on a swashplate. Each rotor blade sits on a 45-degree hinge that makes it pivot when the motor accelerates. As this happens, one blade pitches up to produce more lift, while the other blade pitches down, reducing lift. By accelerating and decelerating the motor as needed, Bird would be able to change the drone’s roll and pitch movement. It also combines this with the main rotor torque, motor adjustments, and the 3D-printed stabilizing fins to produce effective yaw control as well.
This was the theoretical part — the majority of the build video focused on fixing issues, including the part where Bird built a high-speed camera using a Sony camera and a flash unit controlled by a microcontroller that gets its signals from the prototype drone’s motor controller and camera shutter. This home-made high-speed camera revealed that the drone’s propellers were too soft and had to be replaced with a 3D-printed version that used sturdier filament.
The creator had to launch several test flights from their bed, many of which resulted in a crashed drone and some wall damage as they fine-tuned the drone’s programming. Bird was eventually able to make the 3D-printed drone fly, although it was limited to the bedroom because of its fixed-base IR beacon navigation method. They said that they eventually want to add a linear camera to the build so that it could take off in other environments in the future.
While other researchers and engineers have built smaller, quieter drones, with China even revealing a mosquito-sized unit, Joshua Bird’s single-motor project is still a unique take on drones. But what made the YouTube video much more interesting is the problem-solving process and the solutions that came afterward. You can check out the complete video below and even start your own similar project by looking at the Single Propeller Drone GitHub repository.
If you're a hobbyist who needs to start soldering, you'll want a beginner-friendly soldering iron to get yourself started. Luckily, the Fanttik T1 Max soldering iron kit is down to $52.99 right now. That's a new record-low price for this model, and other than some solder and something to solder, it'll give you everything else you need to get started.
T1 Max Soldering Iron Kit: was $79.99 now $52.99 A great kit to start your soldering journey. The cordless design makes it easy to use, with no trailing wires. The kit includes everything you need to start soldering, making it the ideal soldering gift.View Deal
In our Fanttik T1 Max review, this model gained plenty of praise for its simplicity and ease for beginners. It's a wireless iron, so no need to worry about wires getting in your way. Charging is handled by a USB-C cable, with a built-in 2600mAh battery to keep things powered at 12W. You can use it wired if you prefer, though, where it'll hit up to 16W.
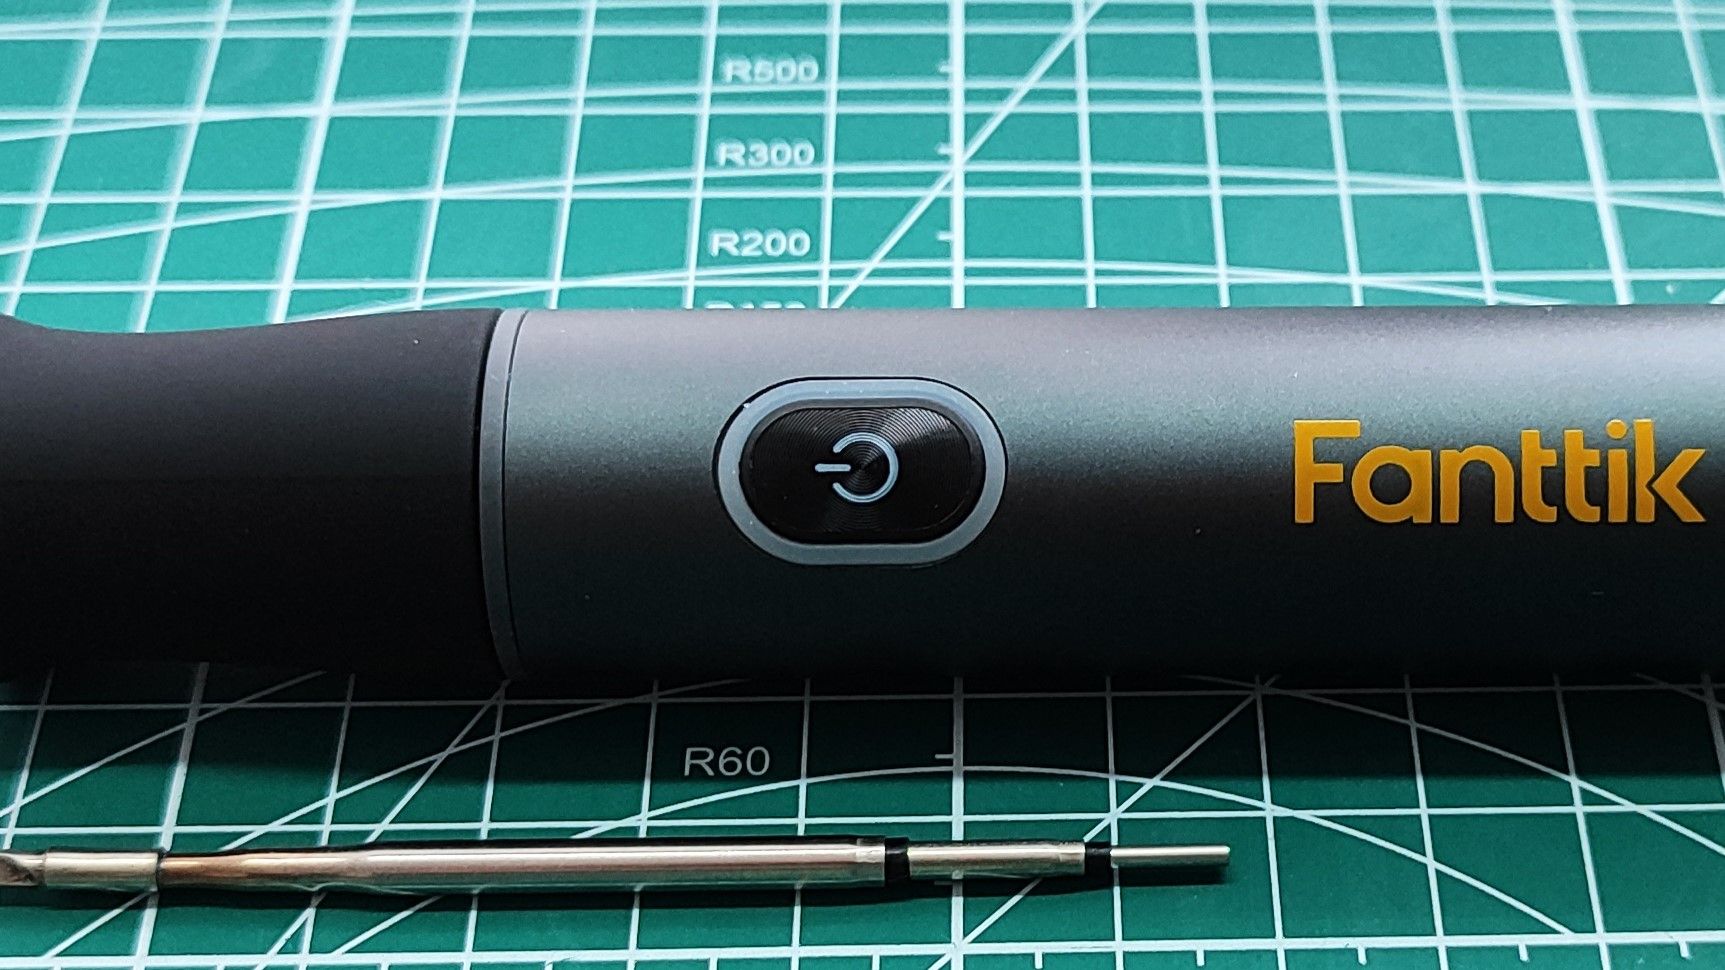
Using it is as simple as possible: you just need to add your preferred soldering tip, set the temperature using the dial, and press the button to begin. Our testing found that this model is able to hit 350°C or 662°F in just 12.14 seconds, so you don't have to wait long, either, although it can reach as high as 450°C or 842°F if you need it to.
Fanttik T1 Max specs
Power
12W on battery, 16W when connected to a USB-C power source.
Soldering Iron Tip(s)
C210 Type, selection included in kit
Controls
Power button, dial temperature control
Temperature
200-450 C (392-842 F)
Dimensions (Bare unit)
180 x 24 x 24mm
Weight (Bare unit)
102g (3.55oz)
Time to working temperature (350C)
12.14 Seconds
Time to cool down to safely remove soldering tip
2 minutes and 10 seconds
The dial makes setting the temperature easy, even if there isn't a display. You just rotate it to pick between six different temperature levels, keeping it very simple. The handle, as our review explains, is pretty large, though, so smaller hands might prefer a different model.
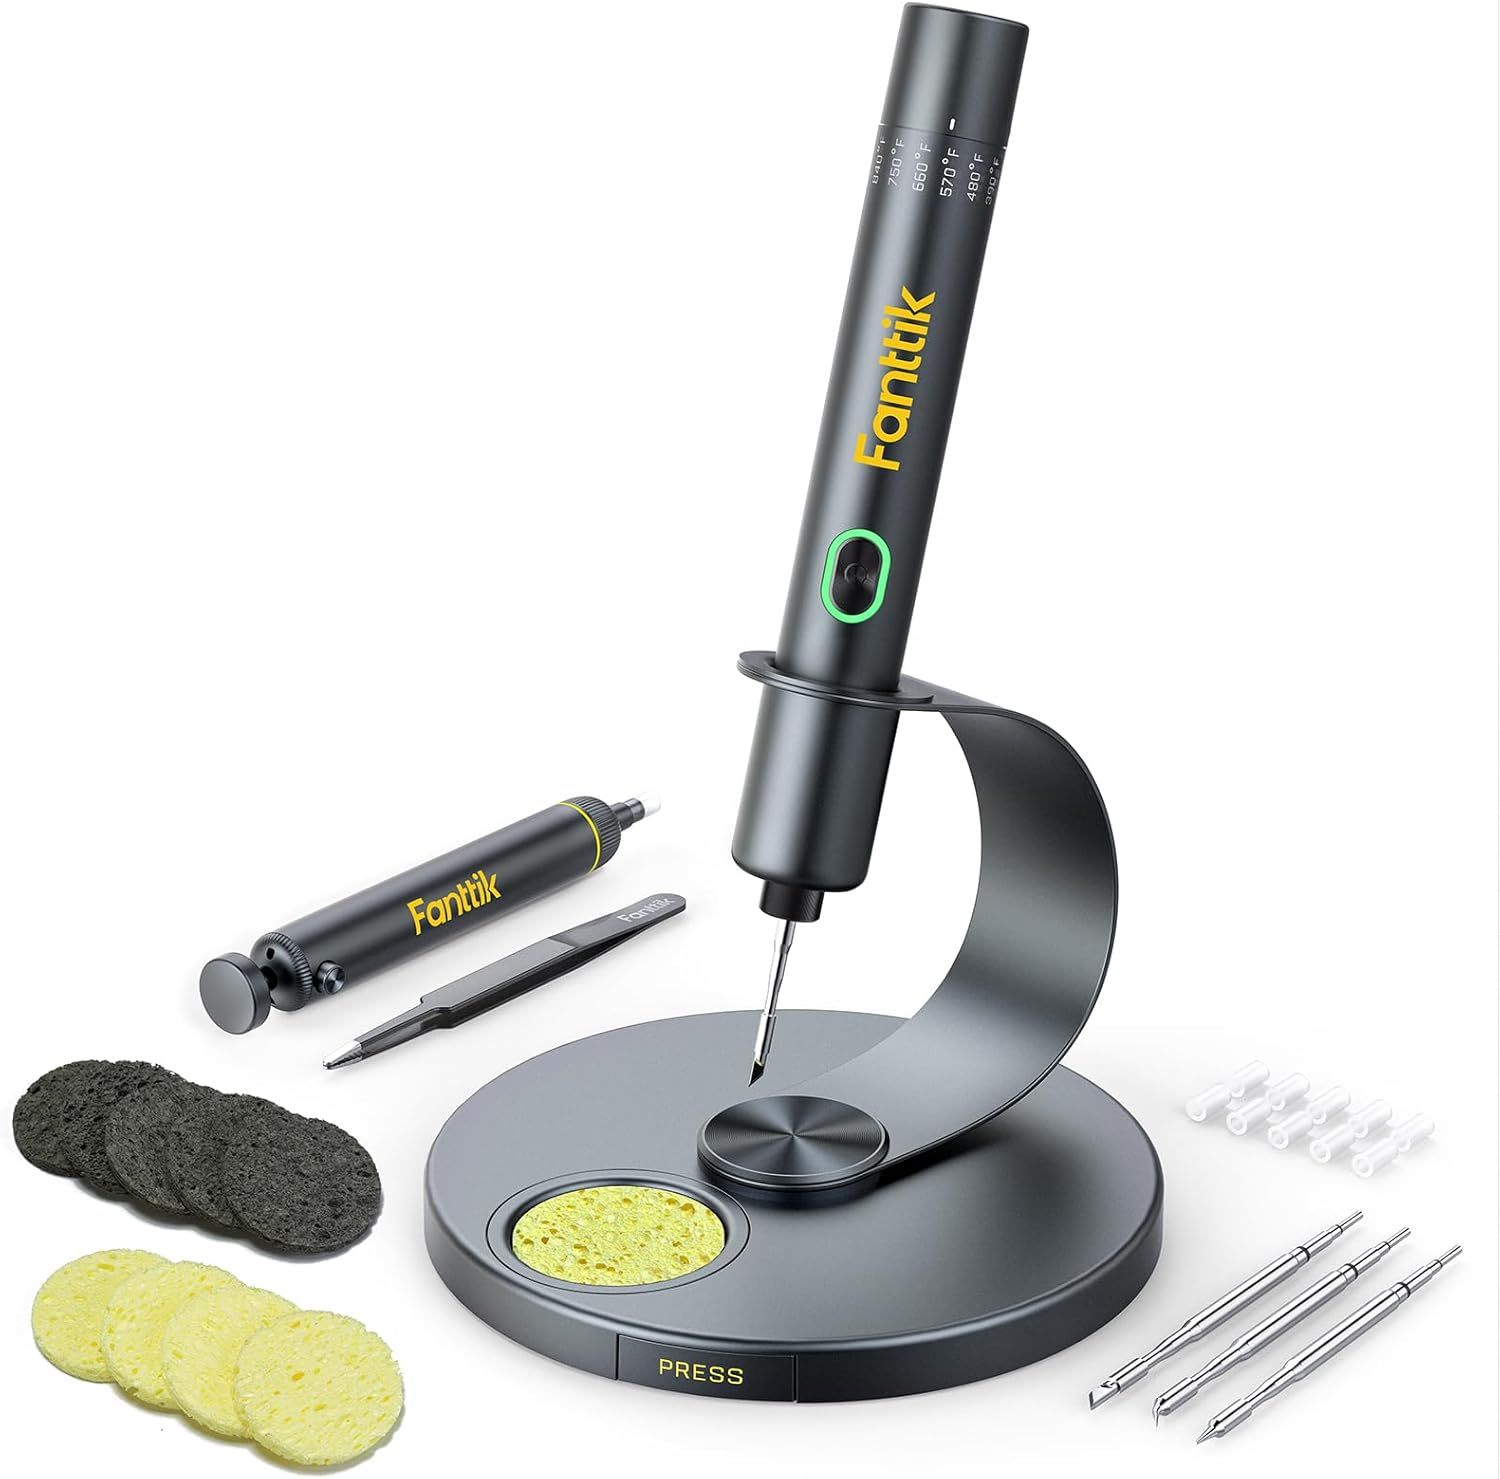
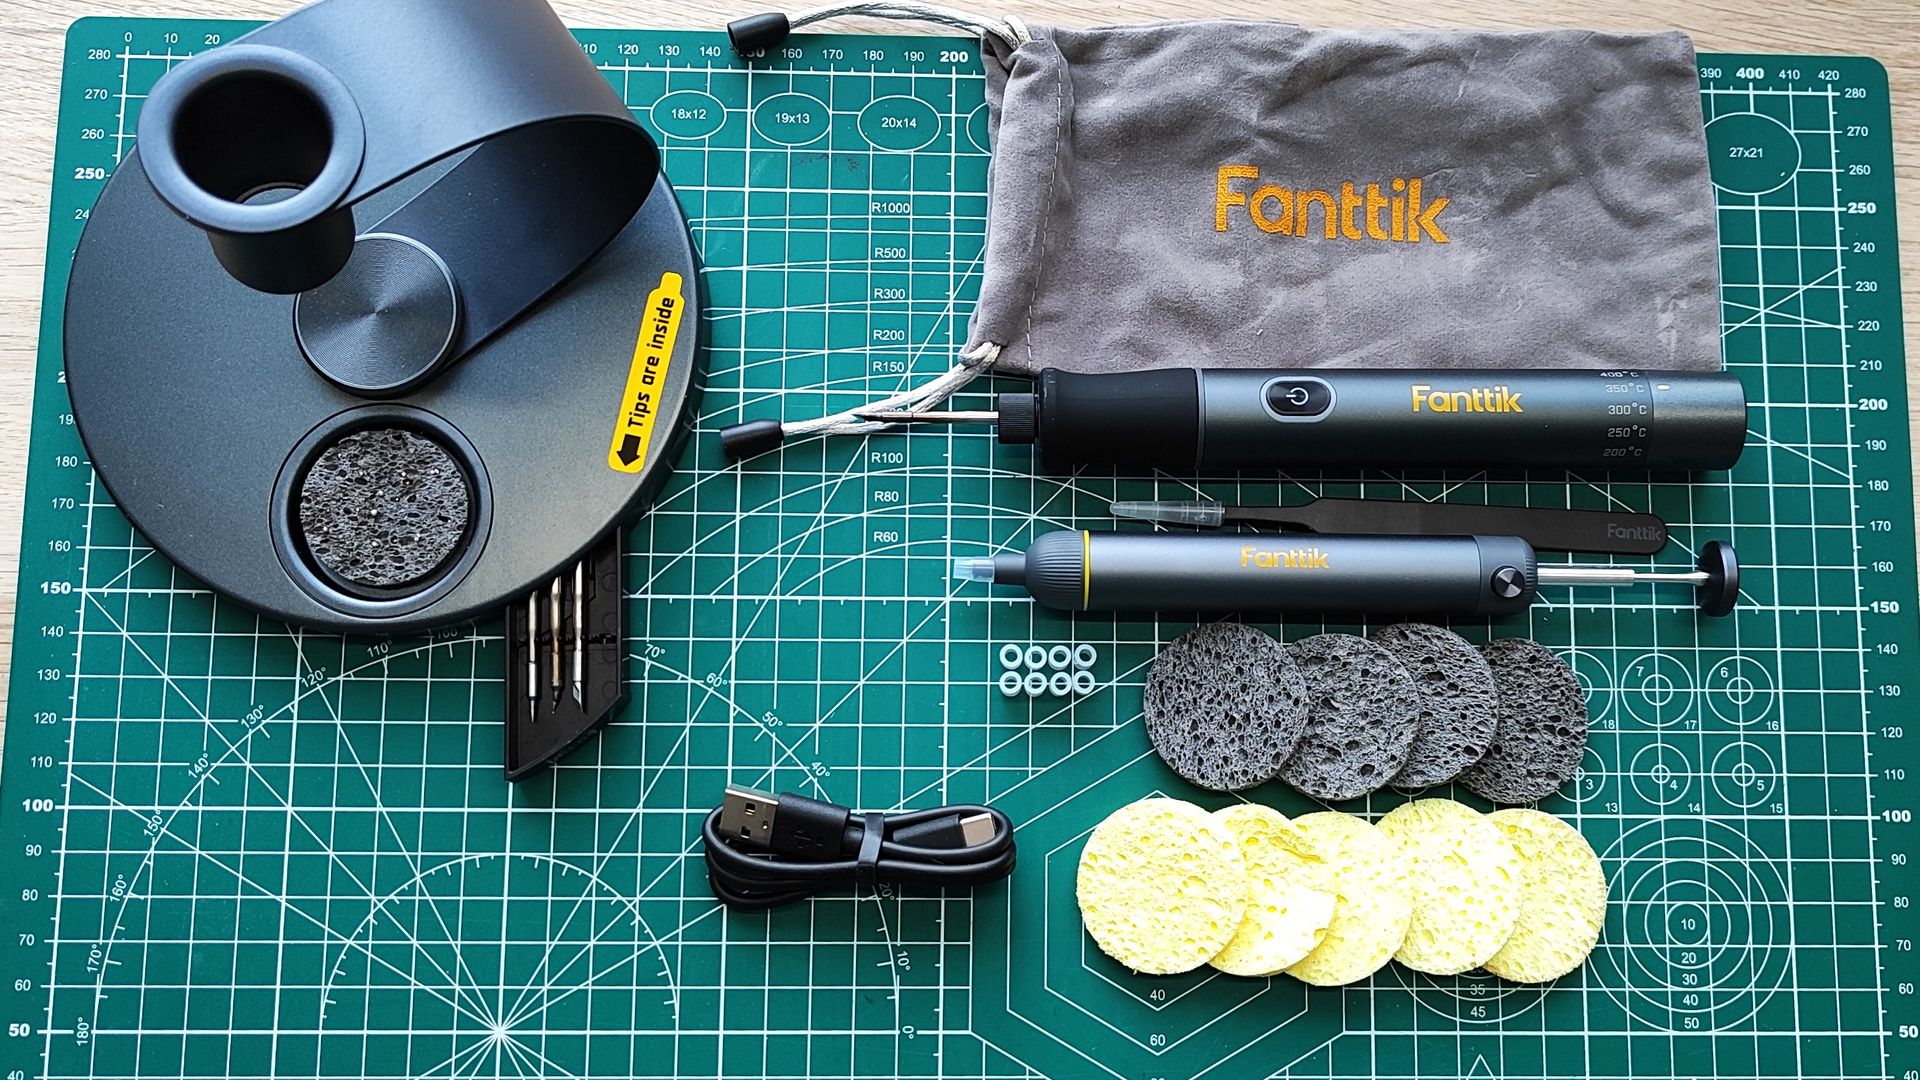
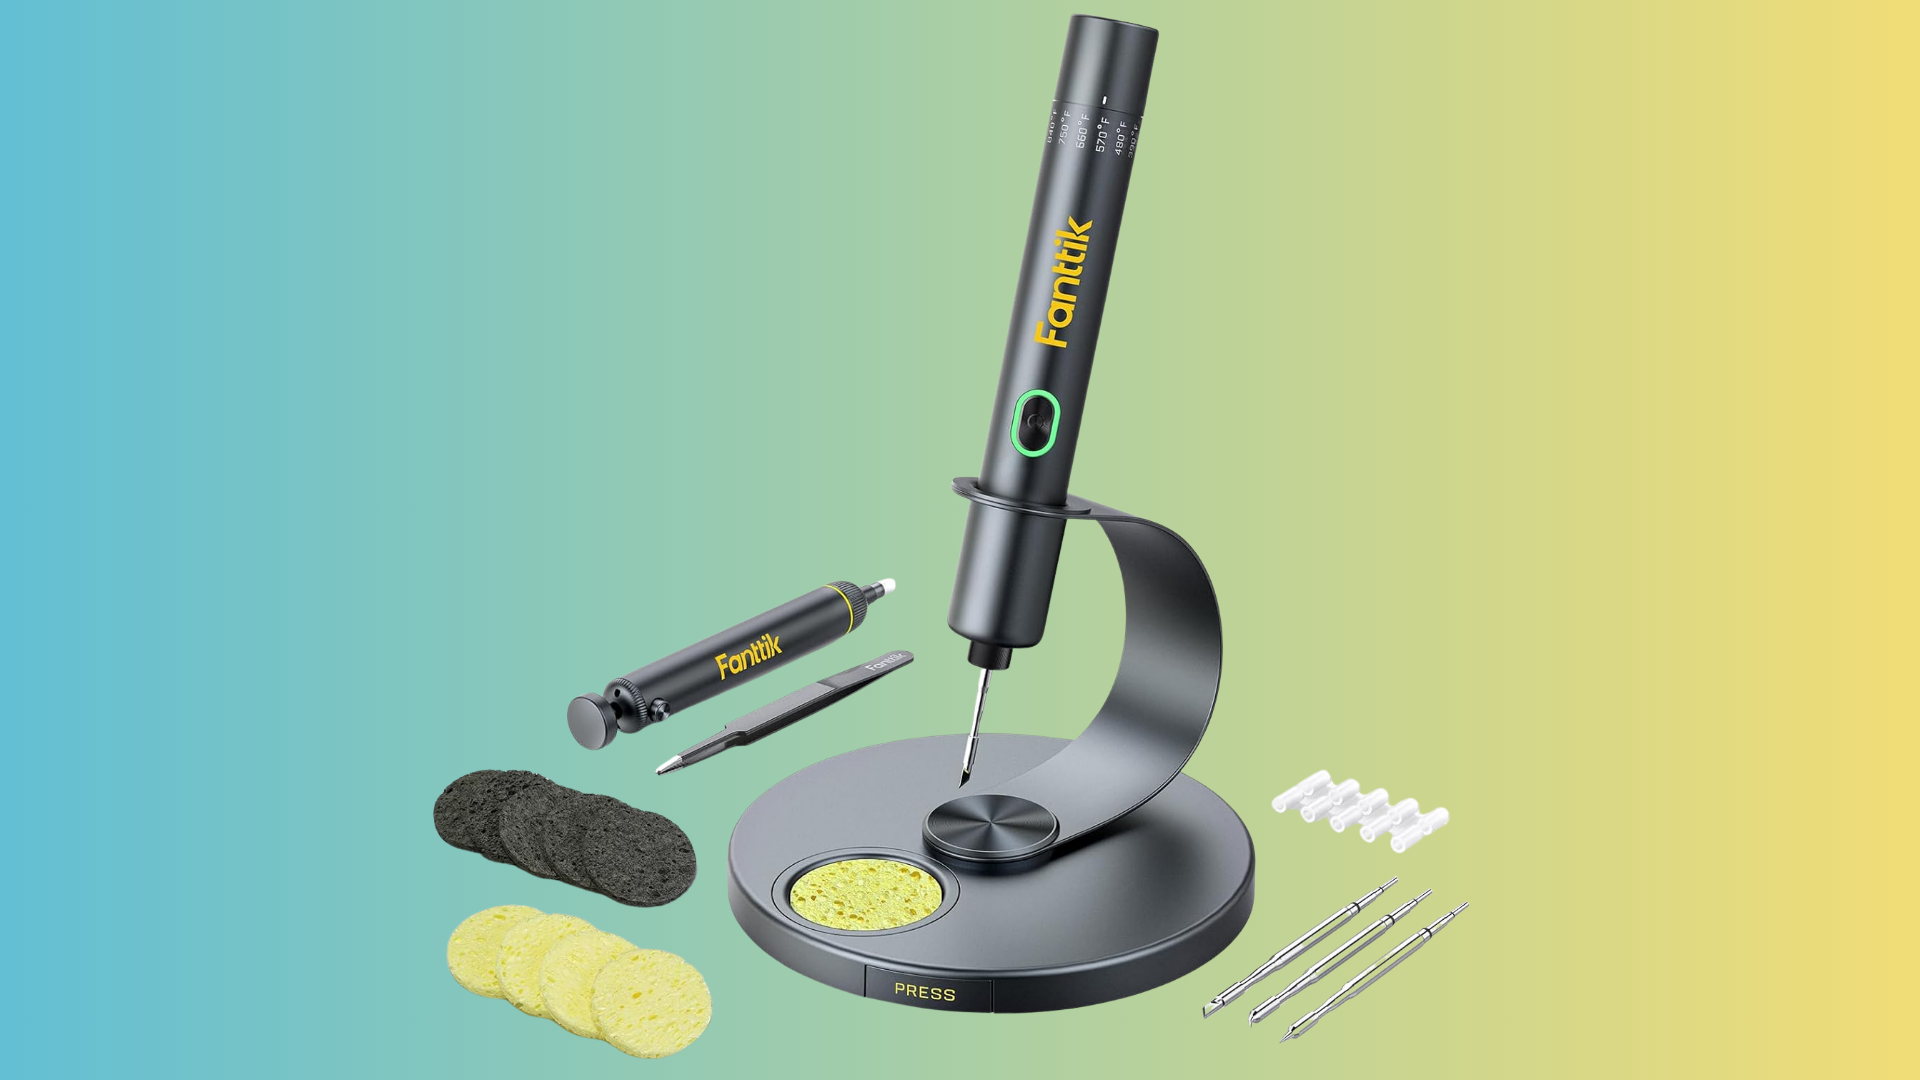
There's an aluminum stand that you can use between sessions, and the iron will shut down automatically if it's left for a few minutes, just to protect the tip and the battery.
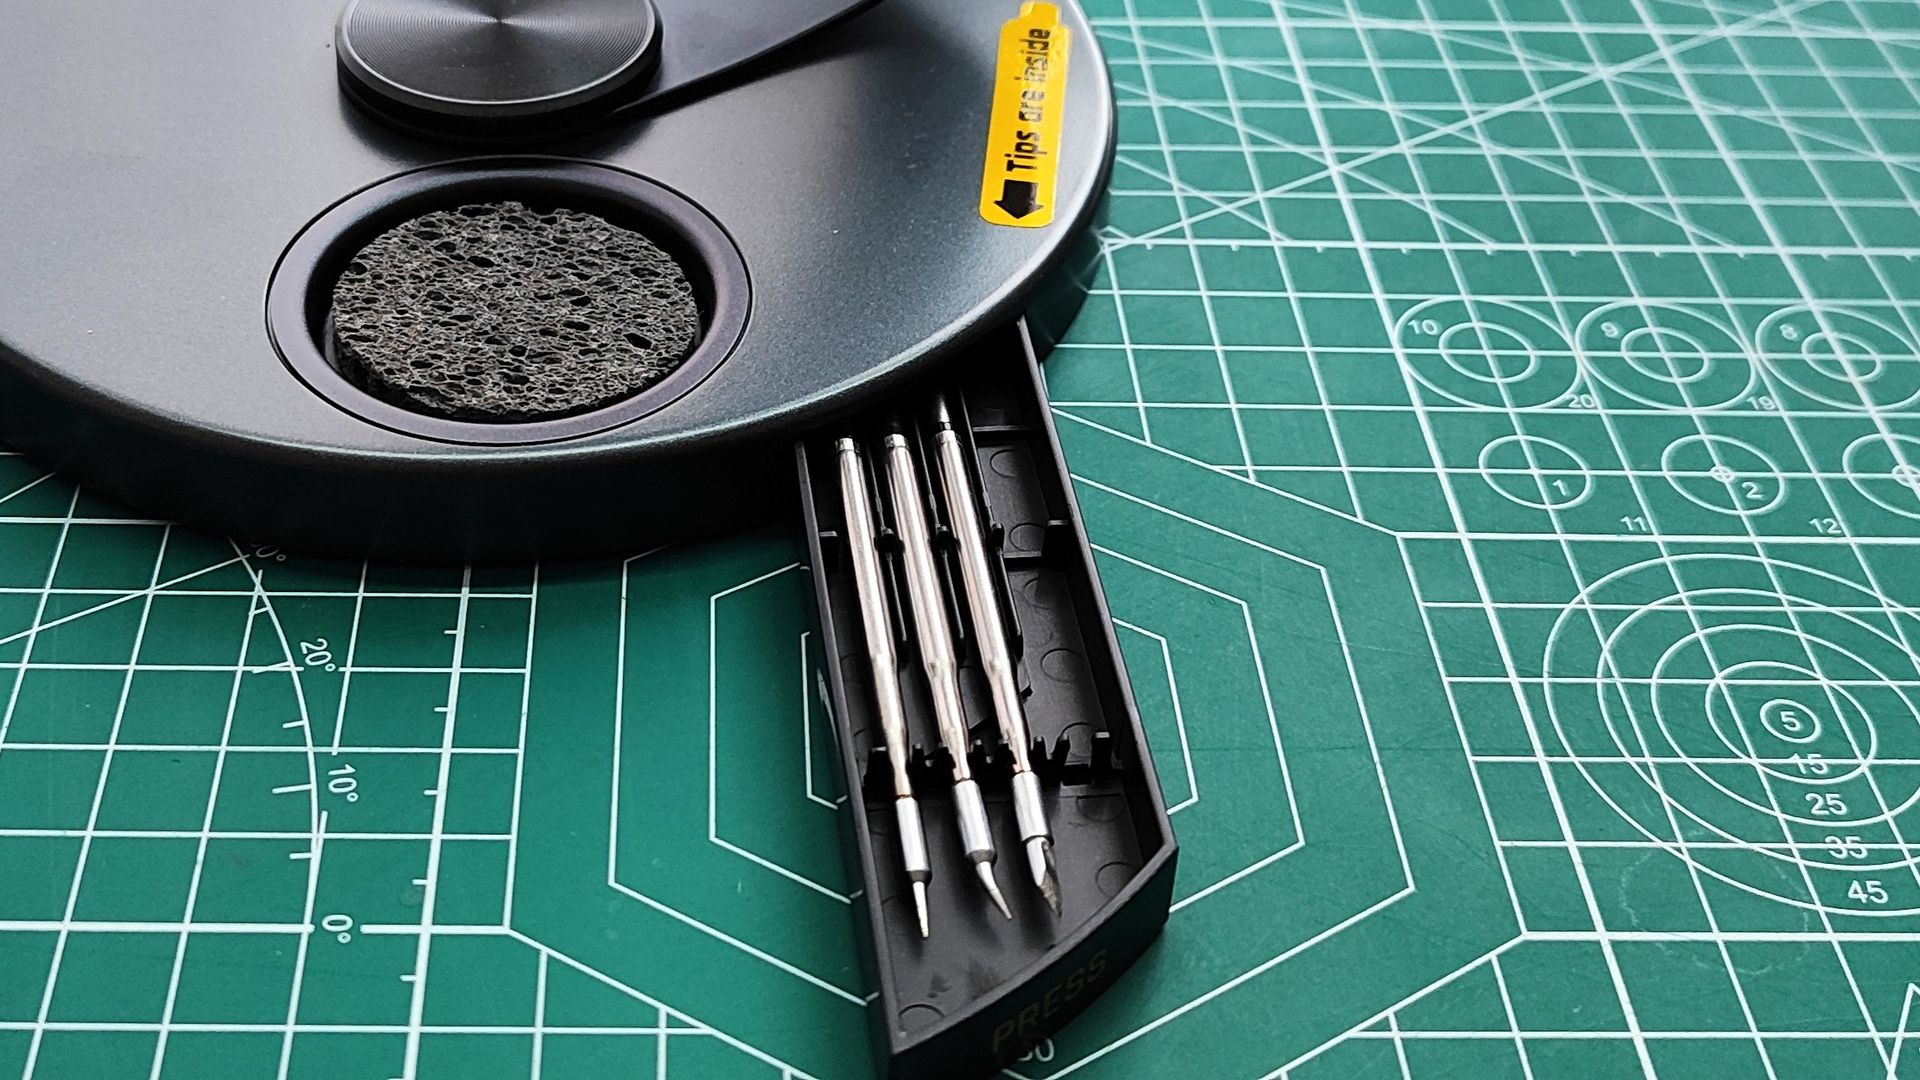
You'll need to use C210 soldering tips with the Fanttik T1 Max, and several tips are included in the base of the stand for precision and larger soldering jobs. You also get a spot for a damp sponge in the stand to help you clean leftover solder from the iron's tip.
If you're learning to solder, or you're only soldering smaller projects, then the Fanttik T1 Max would be a good option. Because it's wireless and has few controls, it's safer to use, and the lack of a trailing wire (unless you want to use it plugged in) means you don't have to worry about accidentally damaging it.
The $52.99 sale price on this Fanttik T1 Max soldering iron means you're saving 34% compared to its usual cost. With the Prime deals ending soon, however, it's set to go up in price pretty quickly. If you're a hobbyist looking for a bargain, pick up this deal while you can.
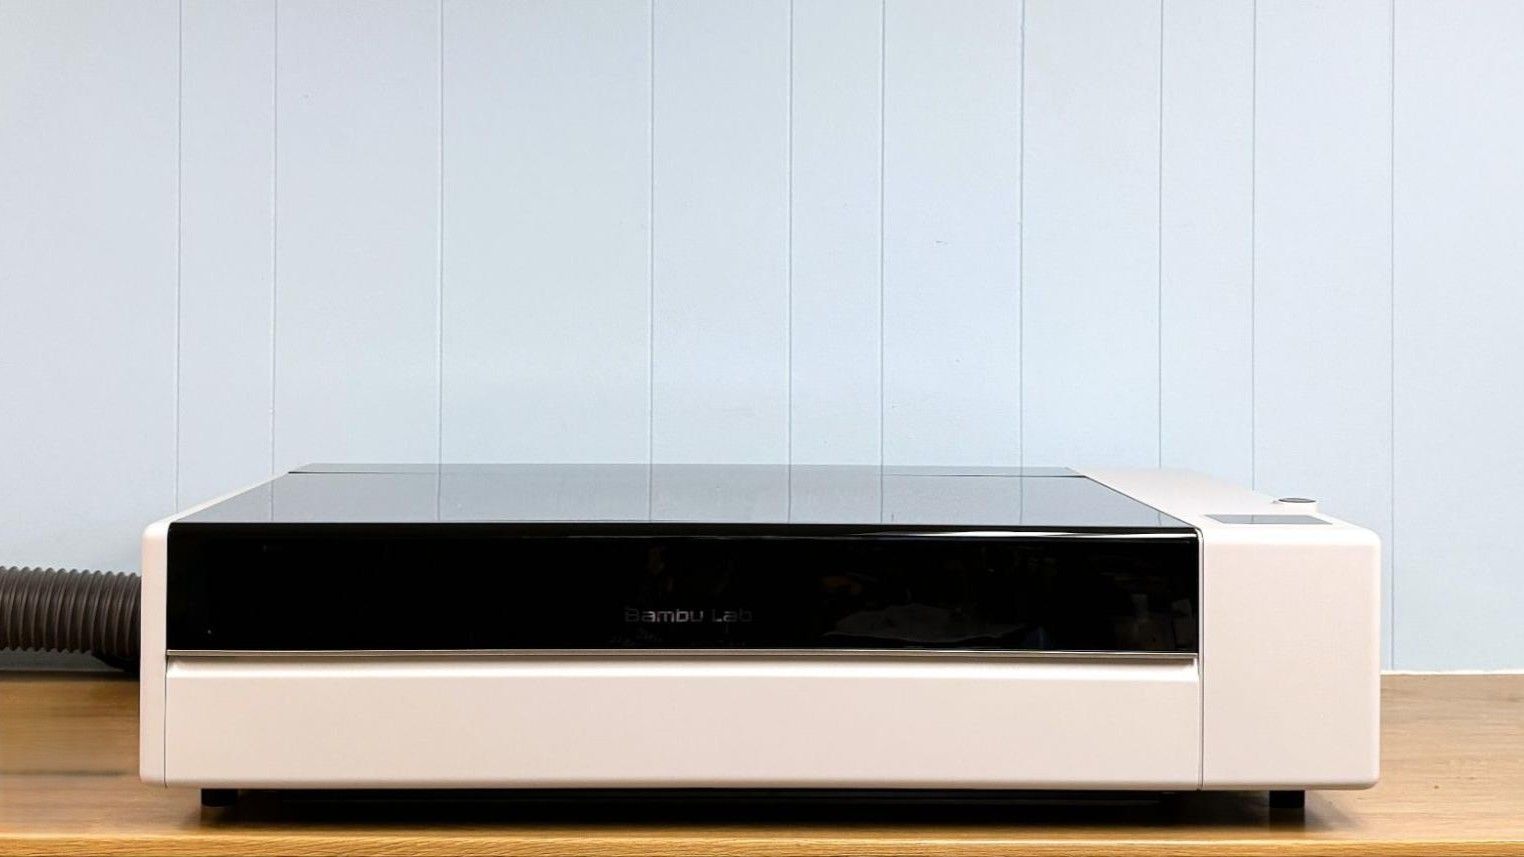
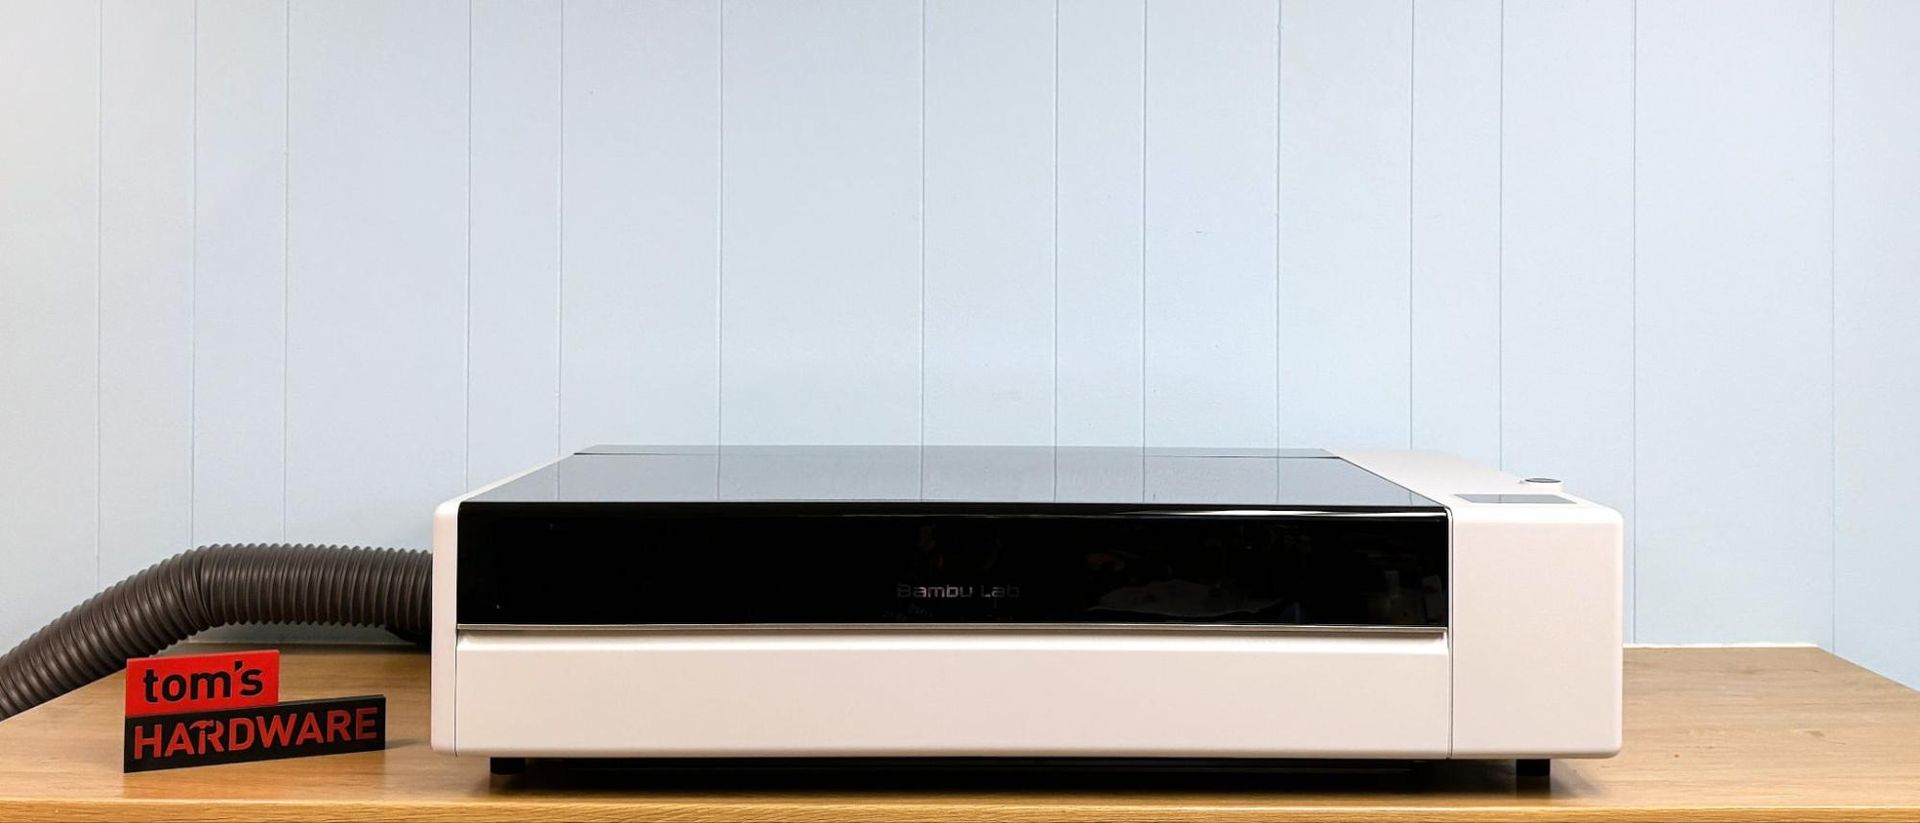
Bambu Lab has swung for the fences with its second go at making a laser cutter, and this time, it knocked it out of the park. The Bambu Lab R1 is a standalone, 55W CO2 laser with a roomy 600 x 300 mm work area, a bird’s eye camera for remote positioning, and a well-designed software suite. Priced at $2,499, the laser is a steal compared to other CO2 lasers of the same size and caliber.
You might recall the company’s first laser, a 40w diode packaged inside the H2D, was met with skepticism. Though the company pitched the H2D as the ultimate mini manufacturing machine for makers, many people felt a laser was too dirty to house in the same box as an expensive Core XY printer. Bambu must be listening, because they took everything that was good about the H2D’s diode system and gave it a standalone case with a massive CO2 laser.
The R1 has the same simple unboxing and setup experience as a Bambu Lab printer, making it easy to get started without a ton of prior experience. The only thing it is currently lacking is a more comprehensive set of material presets. Bambu Suite really shines in a market where good hardware is often let down by bad software.
While the Bambu Lab R1 is not a small machine, it does have a smaller footprint than other lasers with a similar work area. It requires a stout work table – and two people to cart it into position – as the machine is over 70 pounds. In its base configuration the R1 has a work area of 600mm x 300mm. With the optional conveyor and riser base, that 300mm can be extended to 3000mm, or 9.8 feet. Of course, you’ll need a lot of space in front of and behind the machine to pull that off. Bambu Lab did a wonderful job putting all of the controls and frequently used ports near the front of the R1 since you won’t want to move it much unless you are lasering something large.
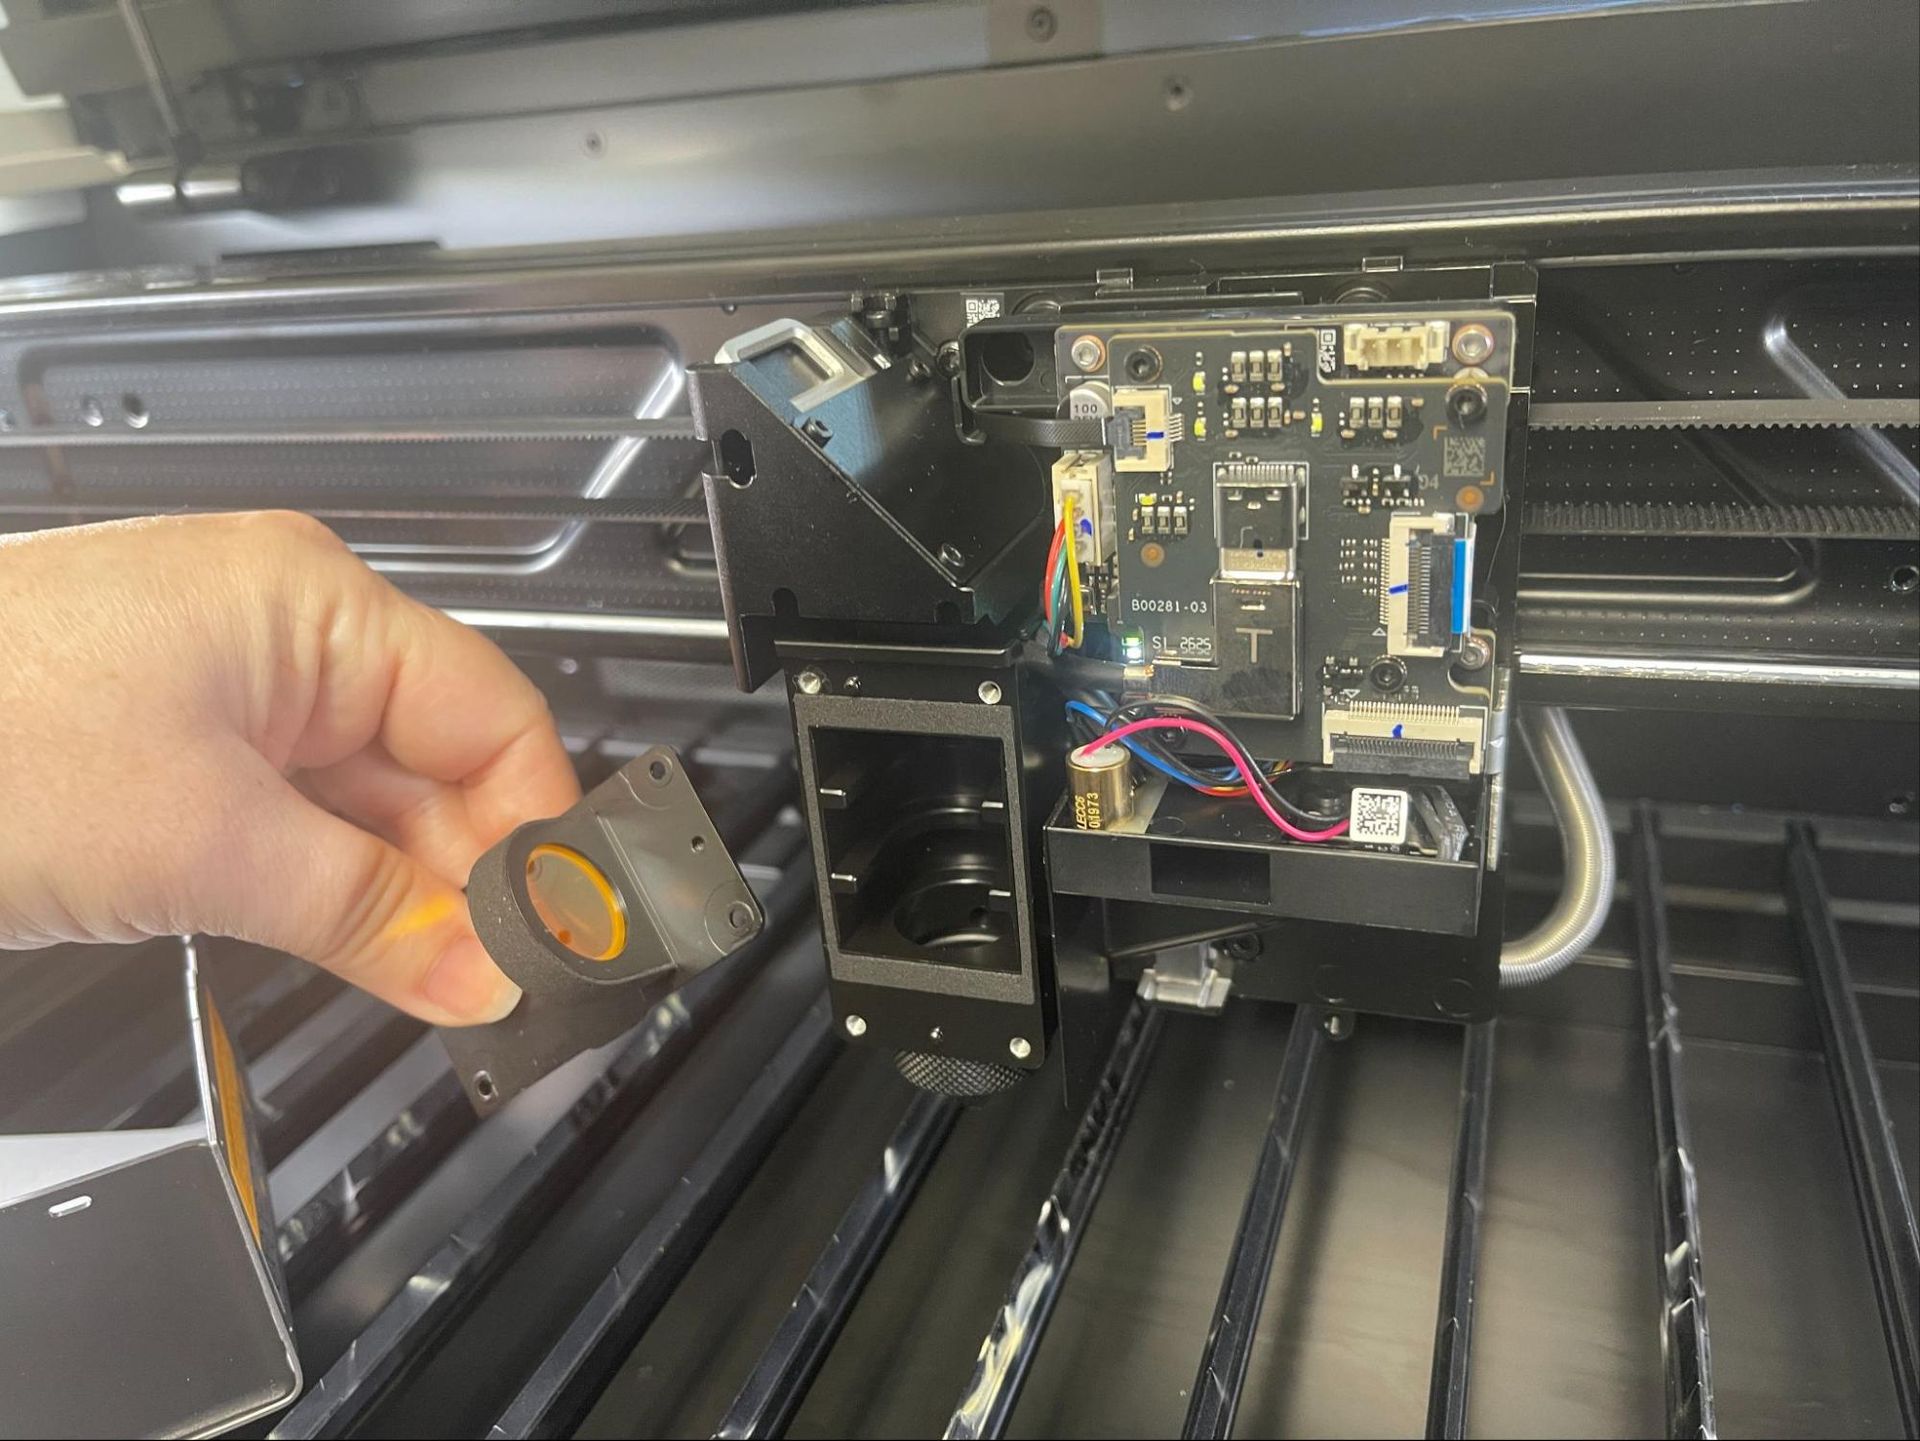
The only flaw I found was the need to manually change focus lenses to cut thicker material. The process to change lenses is tedious, with six screws needing to be removed and replaced with the new lens. The two screws for the toolhead cover are ridiculously small. This process is reminiscent of the early Bambu Lab printer nozzles that required the heater and thermistor to be detached, then reinstalled with thermal paste. Hopefully Bambu Lab will come up with a quick-release lens at some point in the future.
Specifications: Bambu Lab R1
Machine Footprint
940 x 560 x 200 mm (37 x 22 x 7.8 inches)
Machine Weight
33.5 kg (73.8 lbs)
Engraving Size
600 x 300 mm (23.6 x 11.8 inches)
With Conveyor 600 x 3000 mm (23.6 x 118.1 inches)
Material
Cuts wood, acrylic (incl. clear acrylic), leather, fabric, paper, EVA foam, and shell.
Engraves
The above plus coated metal, glass, and ceramic
Laser Type
CO2
Laser Power
55W
Laser Wave Length
10600 nm
Engraving Accuracy
0.10 mm
Cutting Platform
Metal slats and baseplate included
Connectivity
USB, Wi-Fi
Interface
Color touch screen
MSRP
$2,499
Release Date
September 22, 2026
Bambu Lab R1: Included in the Box
(Image credit: Tom's Hardware)
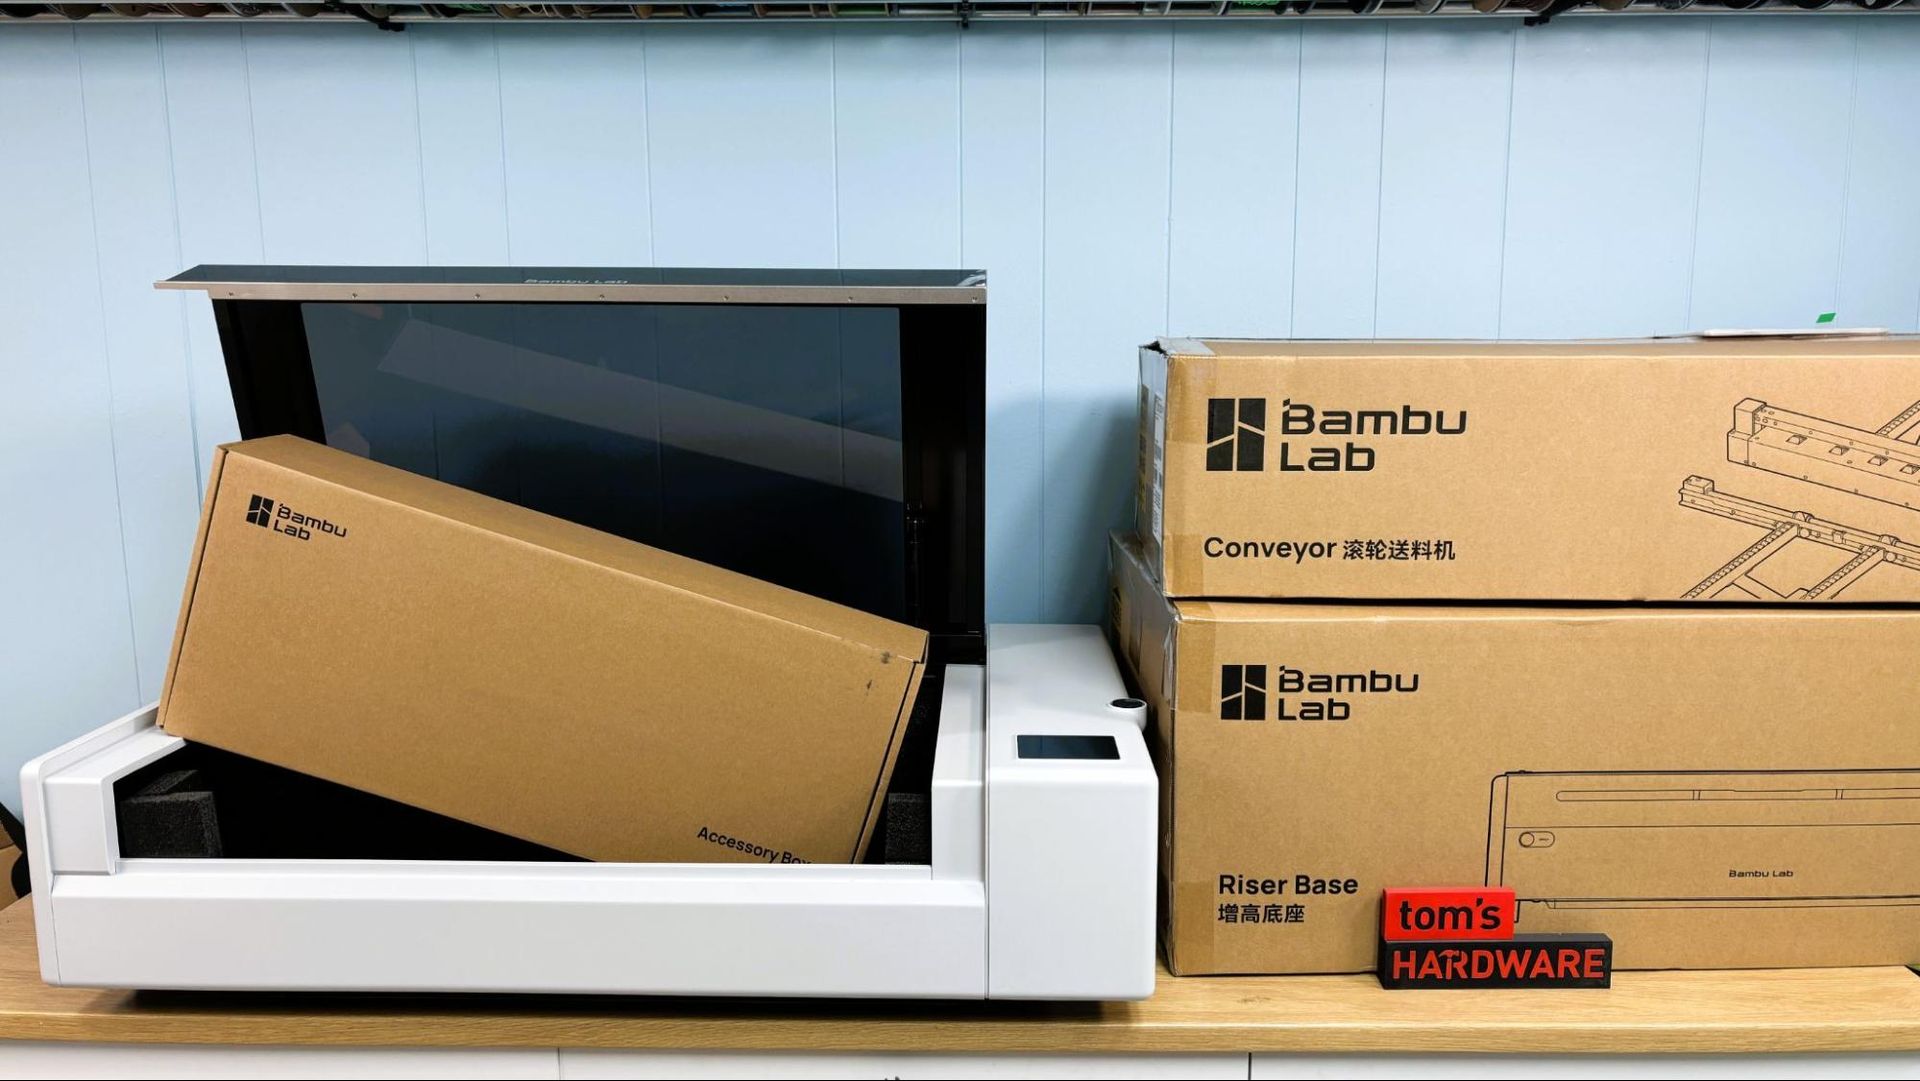
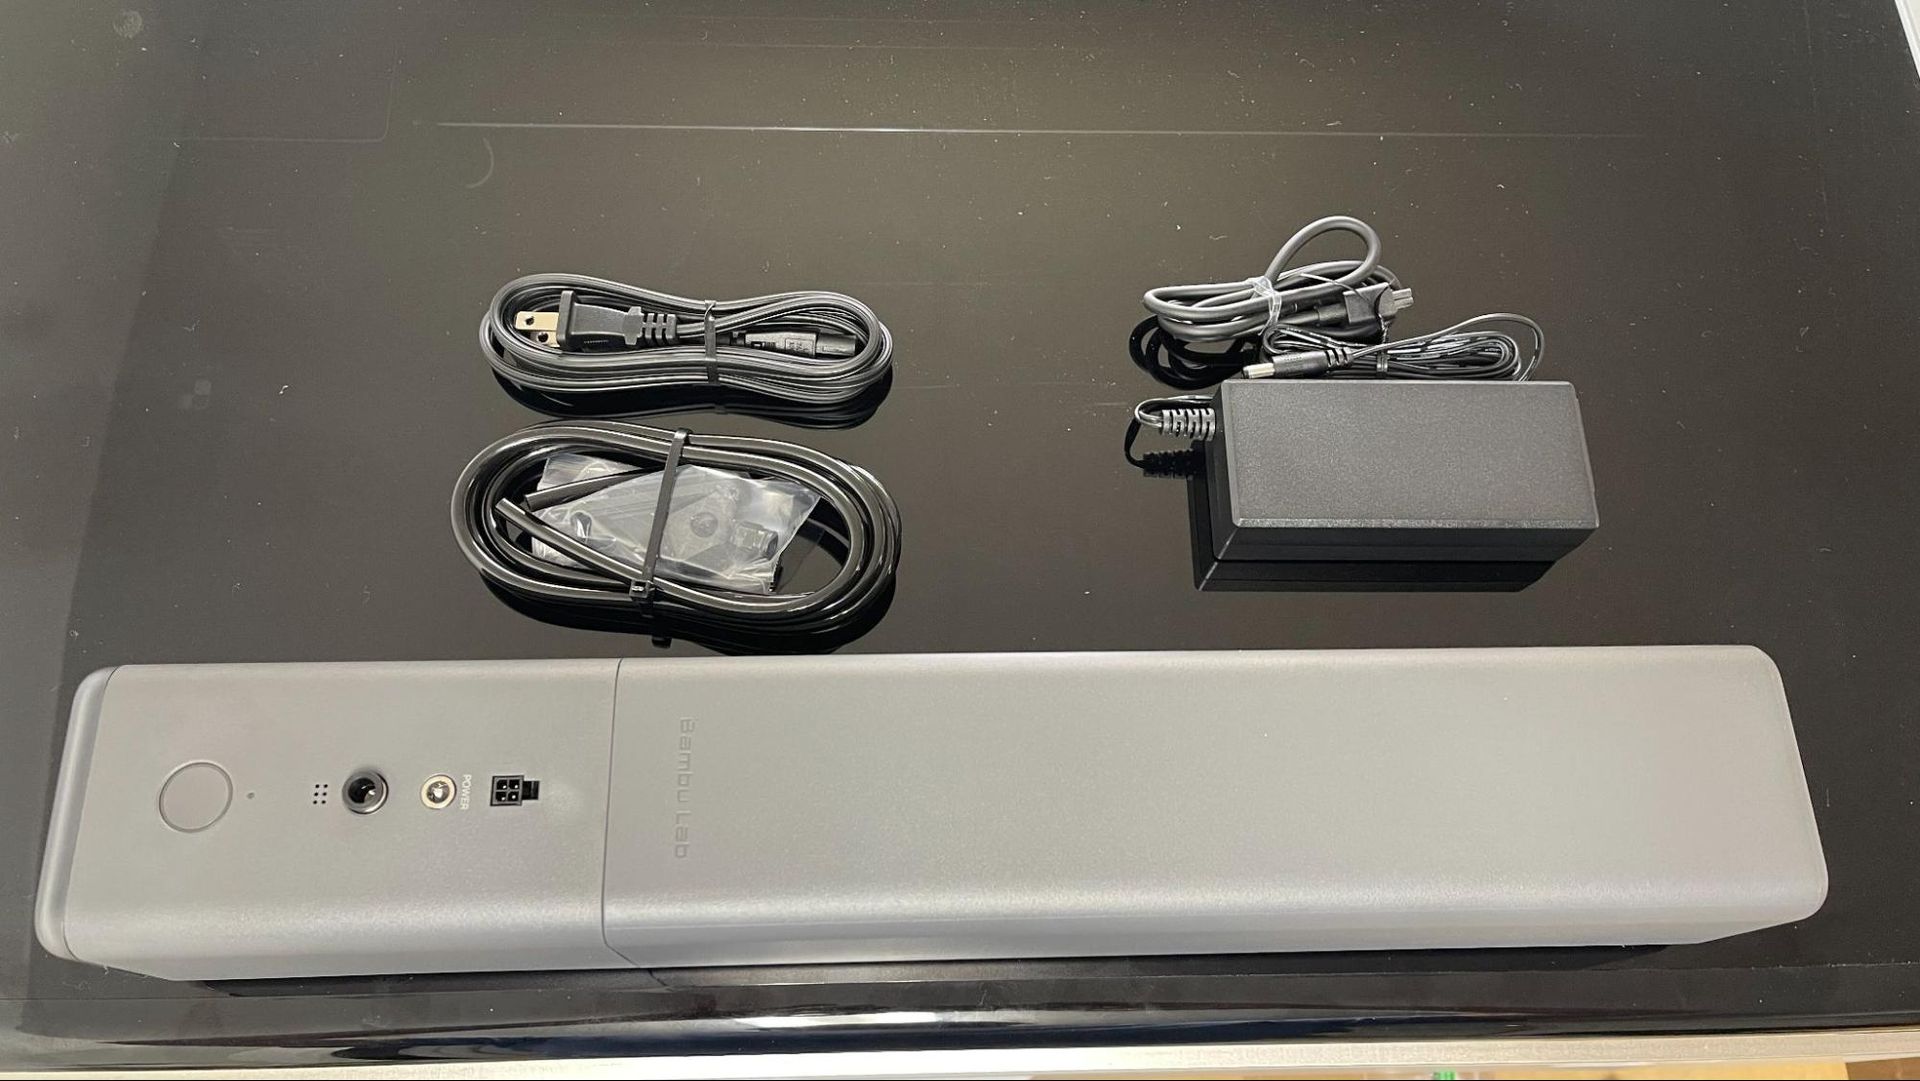
The Bambu Lab R1 arrives fully assembled with its accessory pack bundled inside the laser enclosure. Accessories include a tool kit, exhaust hose, ventilation fan, antifreeze, funnel, laser alignment sensor, calibration board, and a material pack of basswood plywood and clear acrylic. You will need to supply 1500ml of distilled water to dilute the antifreeze. For the review, we also received the medium and long focus lenses, the conveyor and the riser needed for its use, the auto fire extinguishing system, and a smoke purifier.
Design of the Bambu Lab R1
(Image credit: Tom's Hardware)
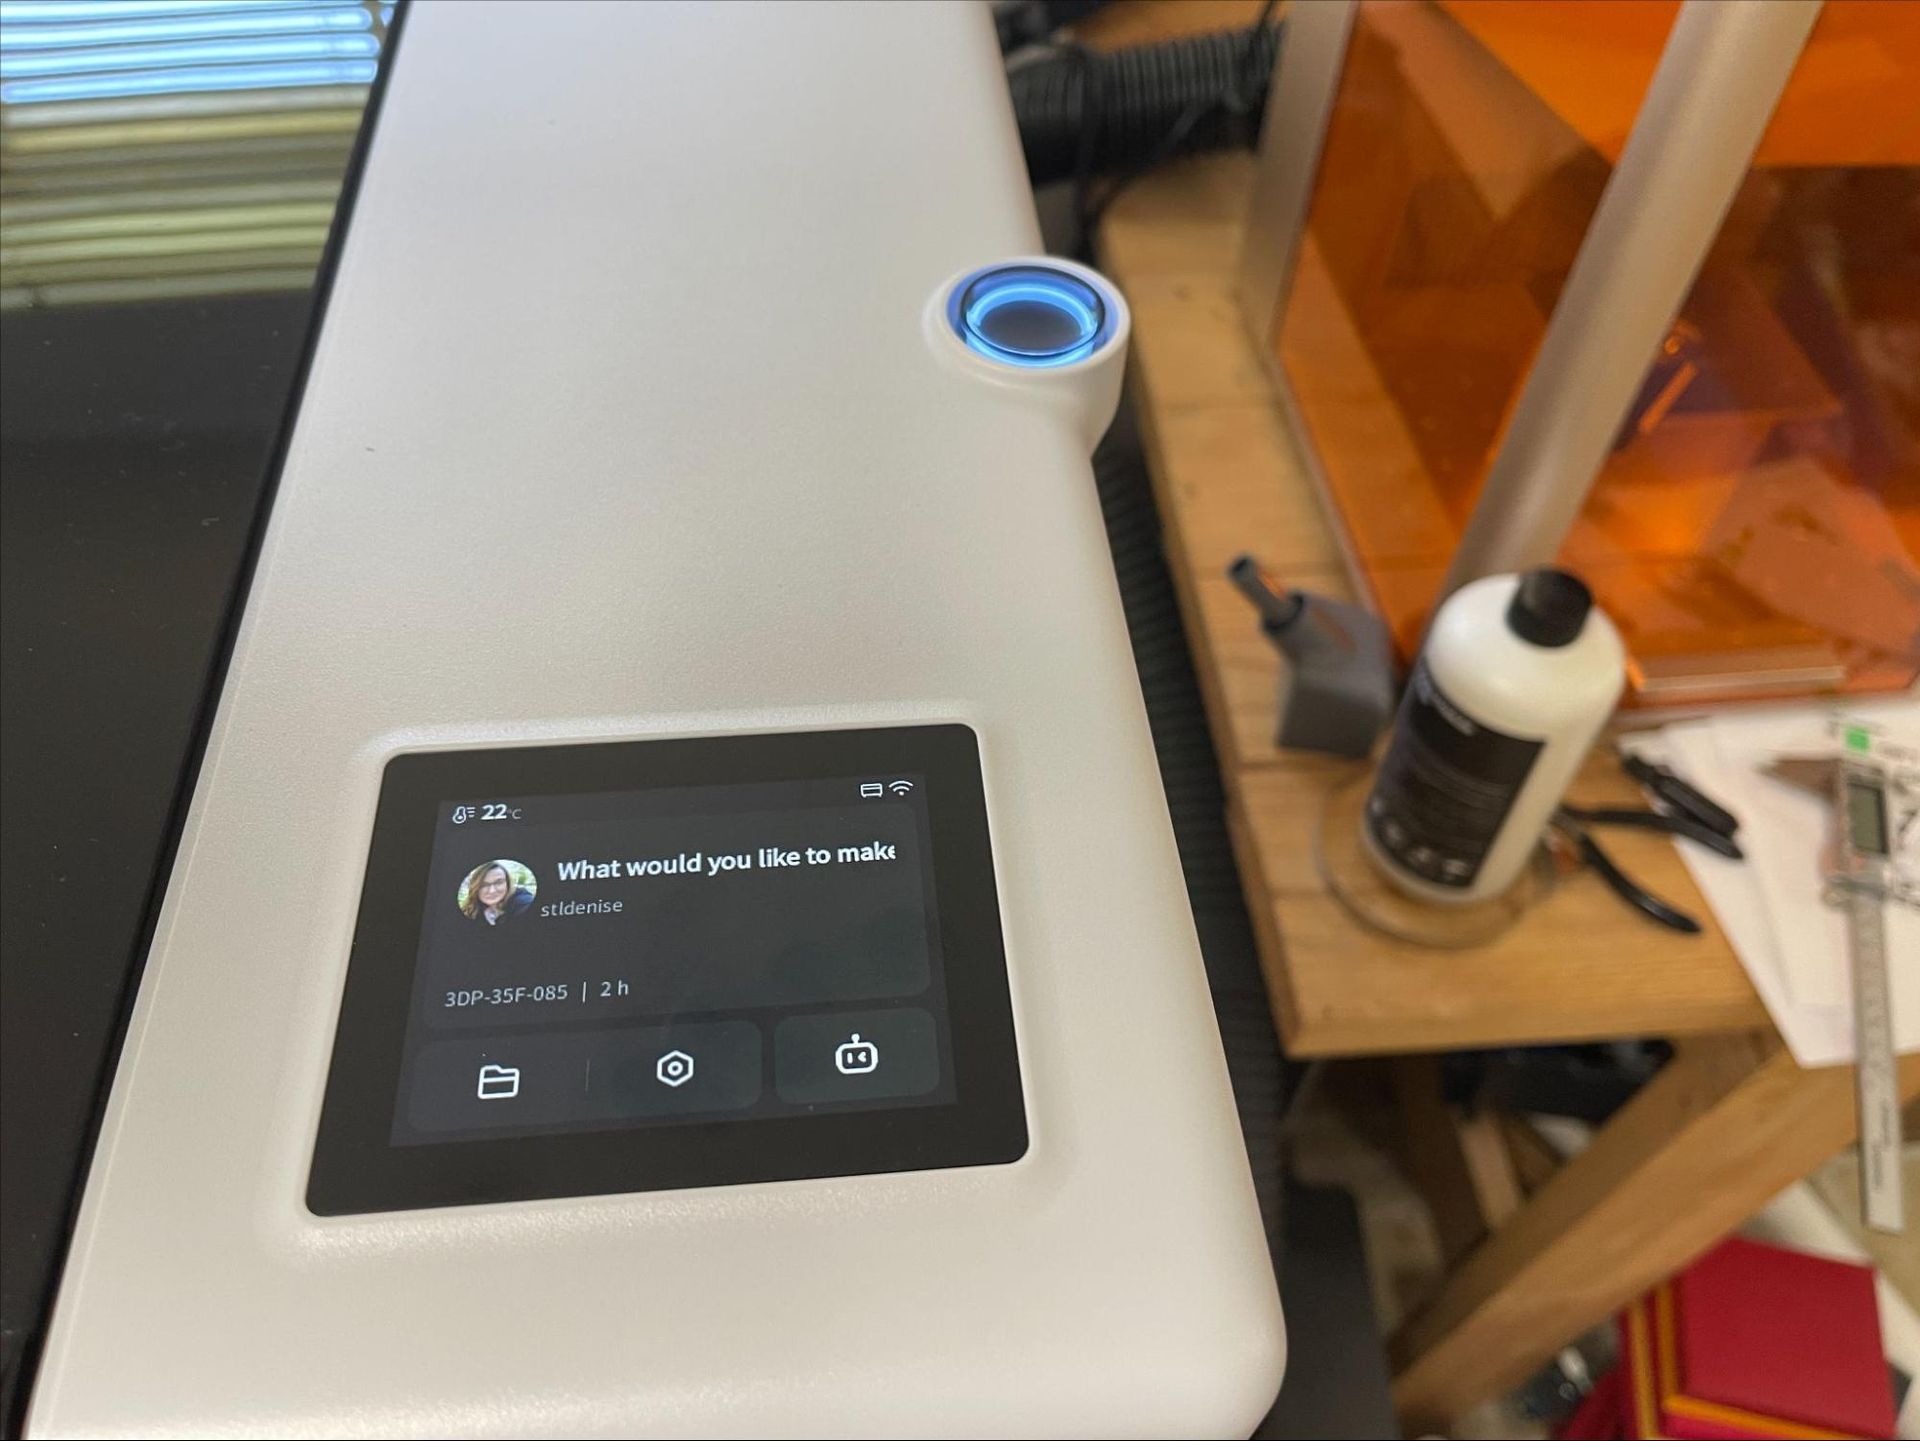
The Bambu Lab R1 is a beast of a machine, but a well-thought-out one. It’s more compact than other CO2 lasers with the same working area, despite this, weighing over 70lbs. It’s not an easy machine to move. Bambu Lab put all of the controls, ports, and the safety key thoughtfully within easy reach at the front of the machine. The color touchscreen and start button are on top of the machine.
(Image credit: Tom's Hardware)
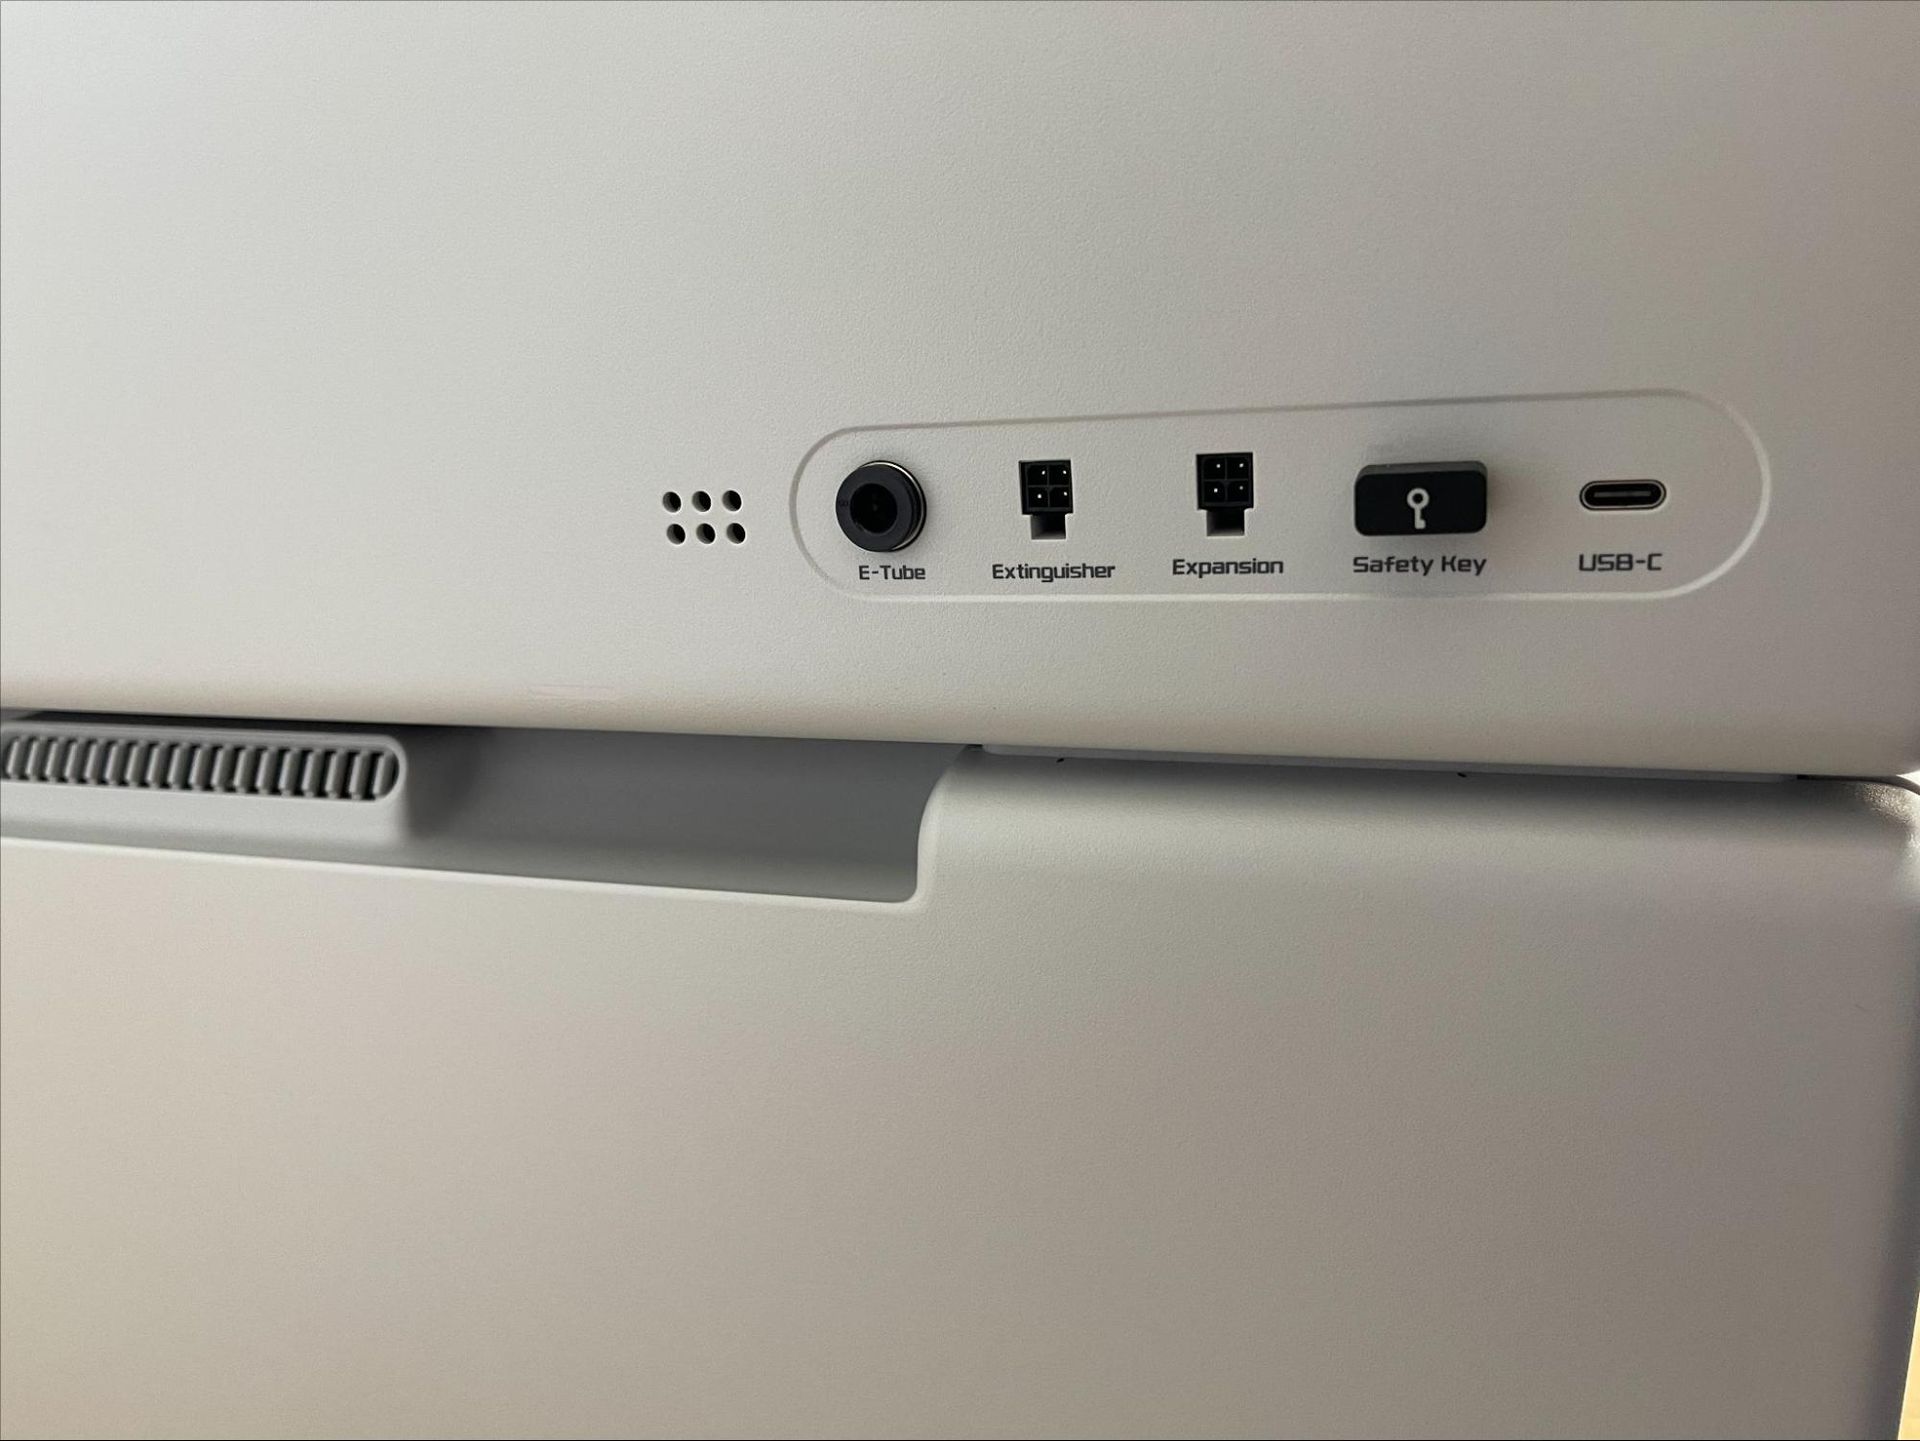
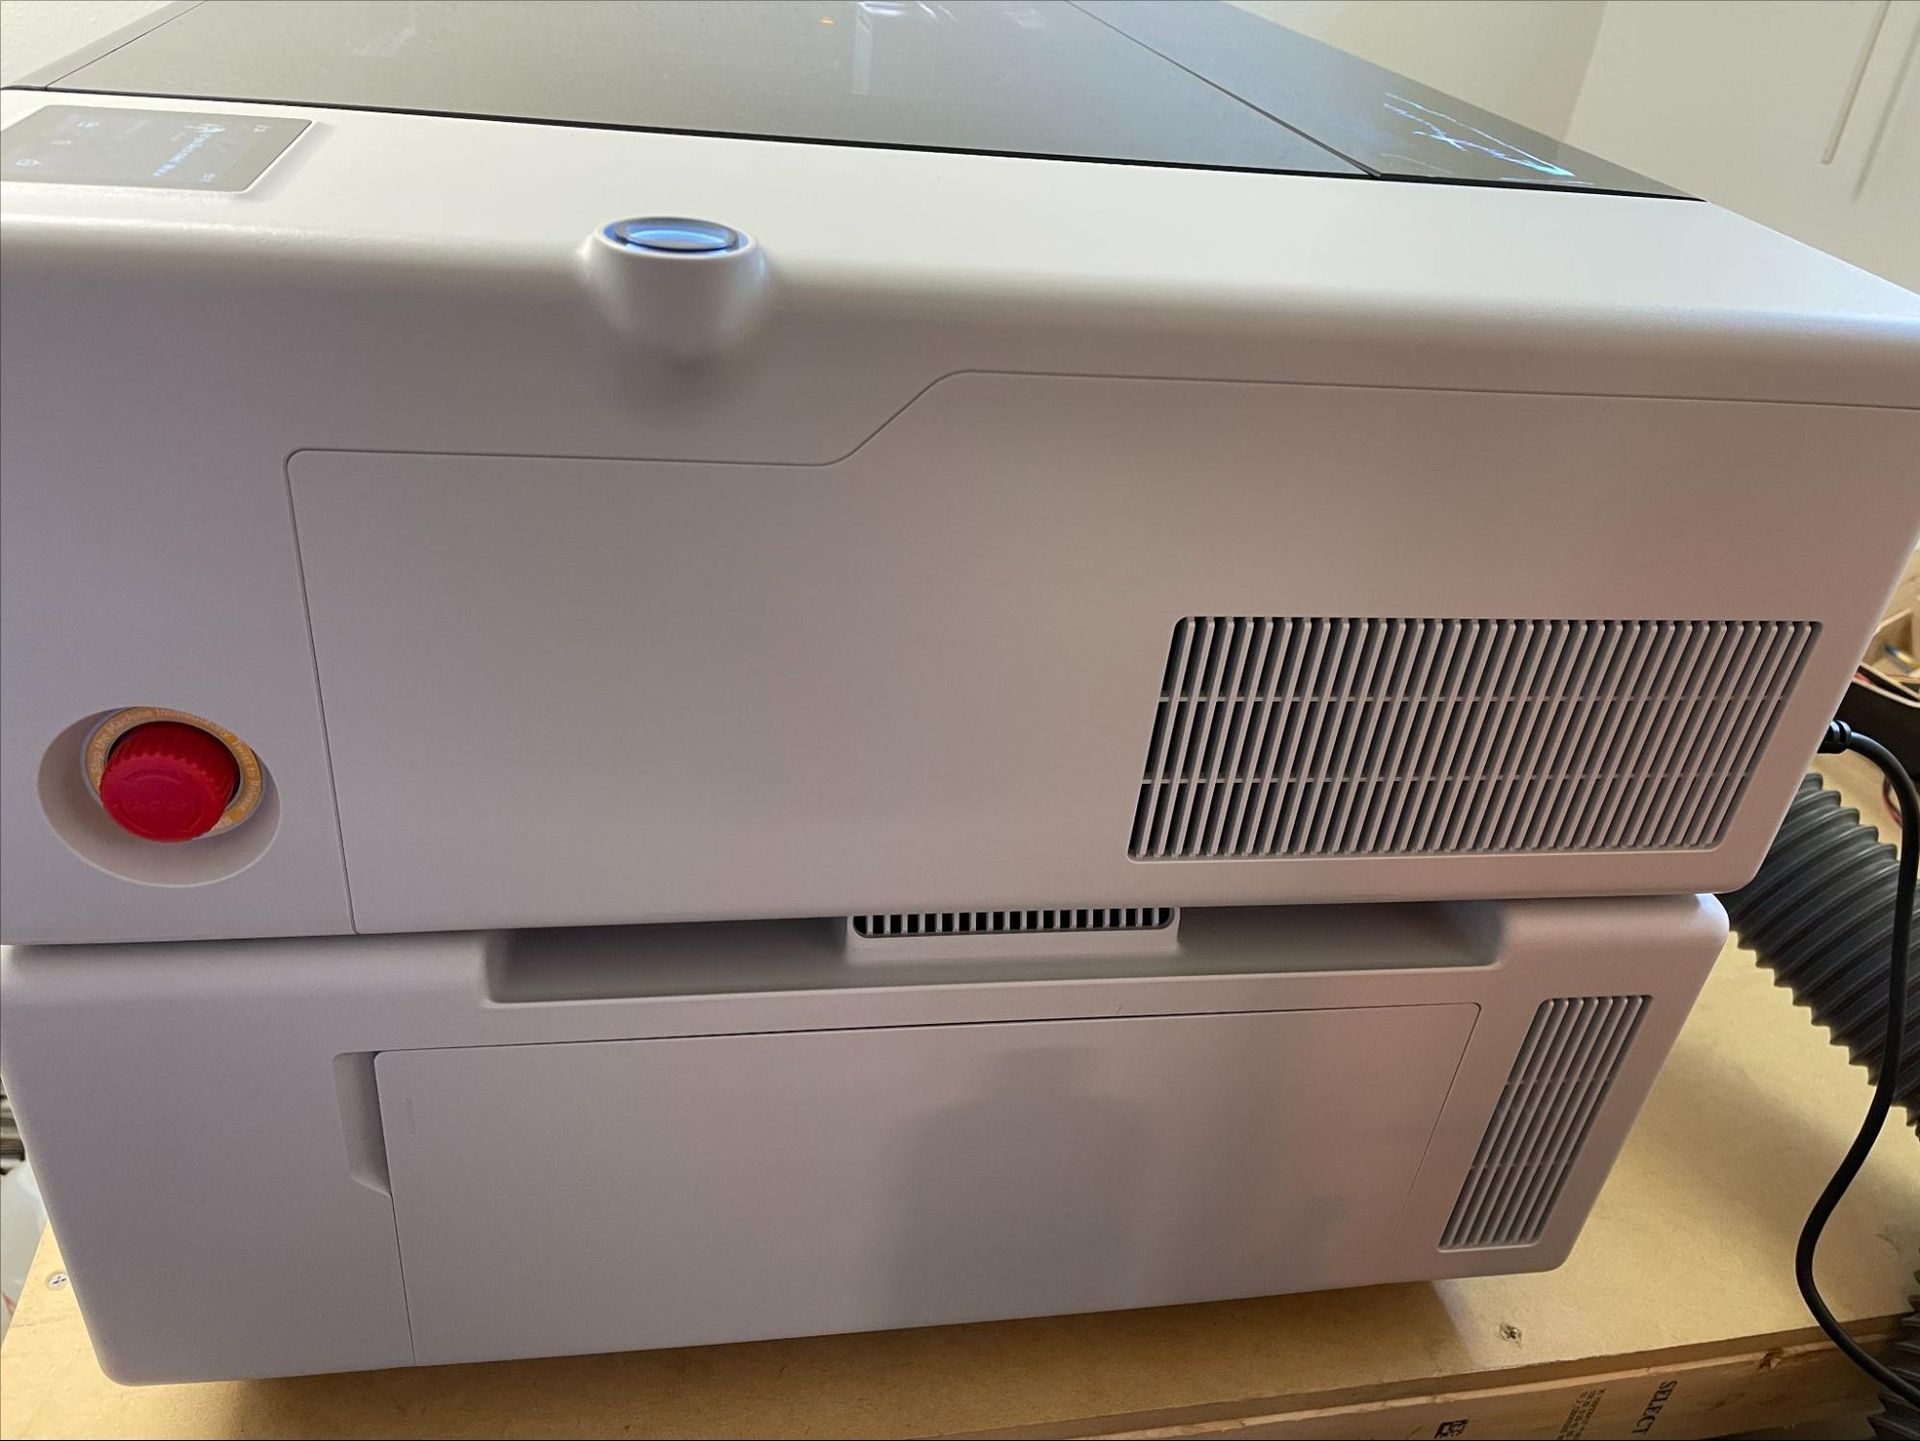
The automatic fire extinguisher ports, USB-C, and safety key are located on the left side of the laser.
(Image credit: Tom's Hardware)
The emergency stop button is located on the right side of the laser.
(Image credit: Tom's Hardware)
Only the power switch, the exhaust fan, and the coolant filling point are located on the rear of the unit.
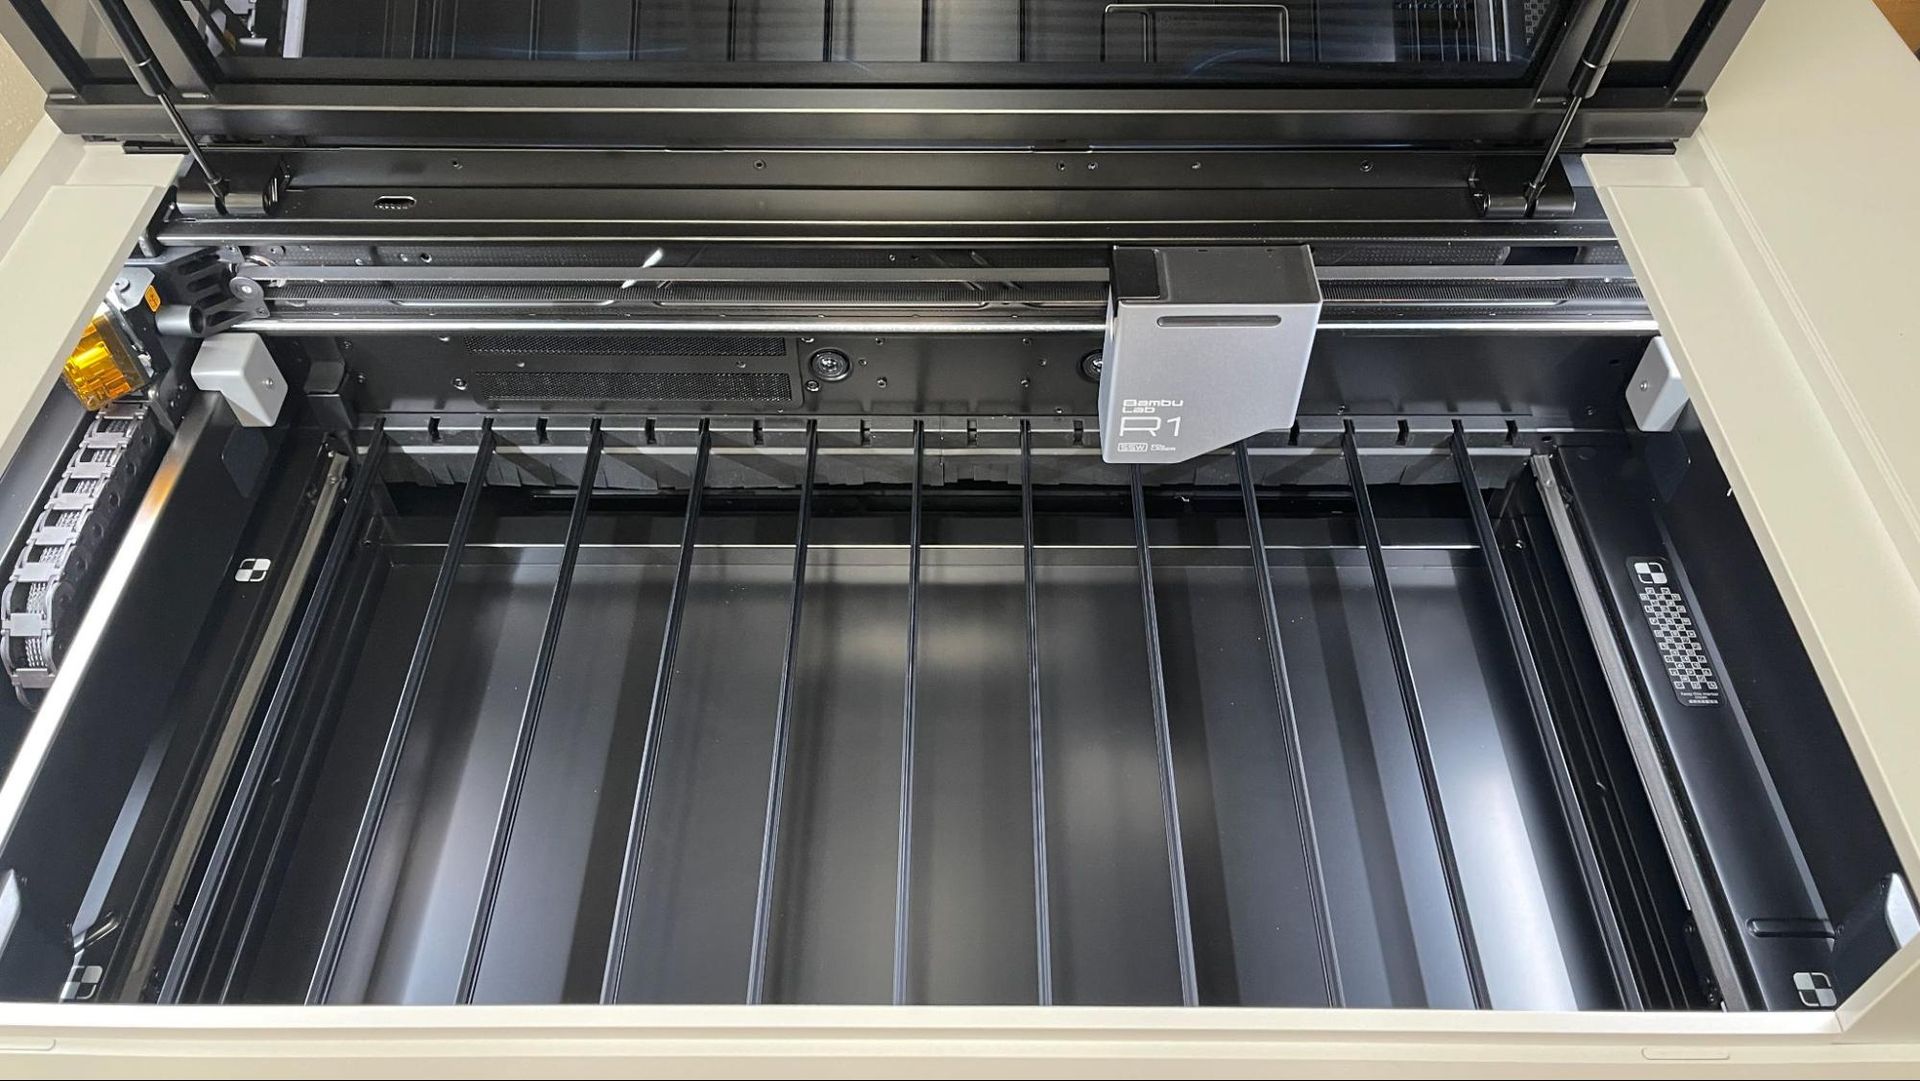
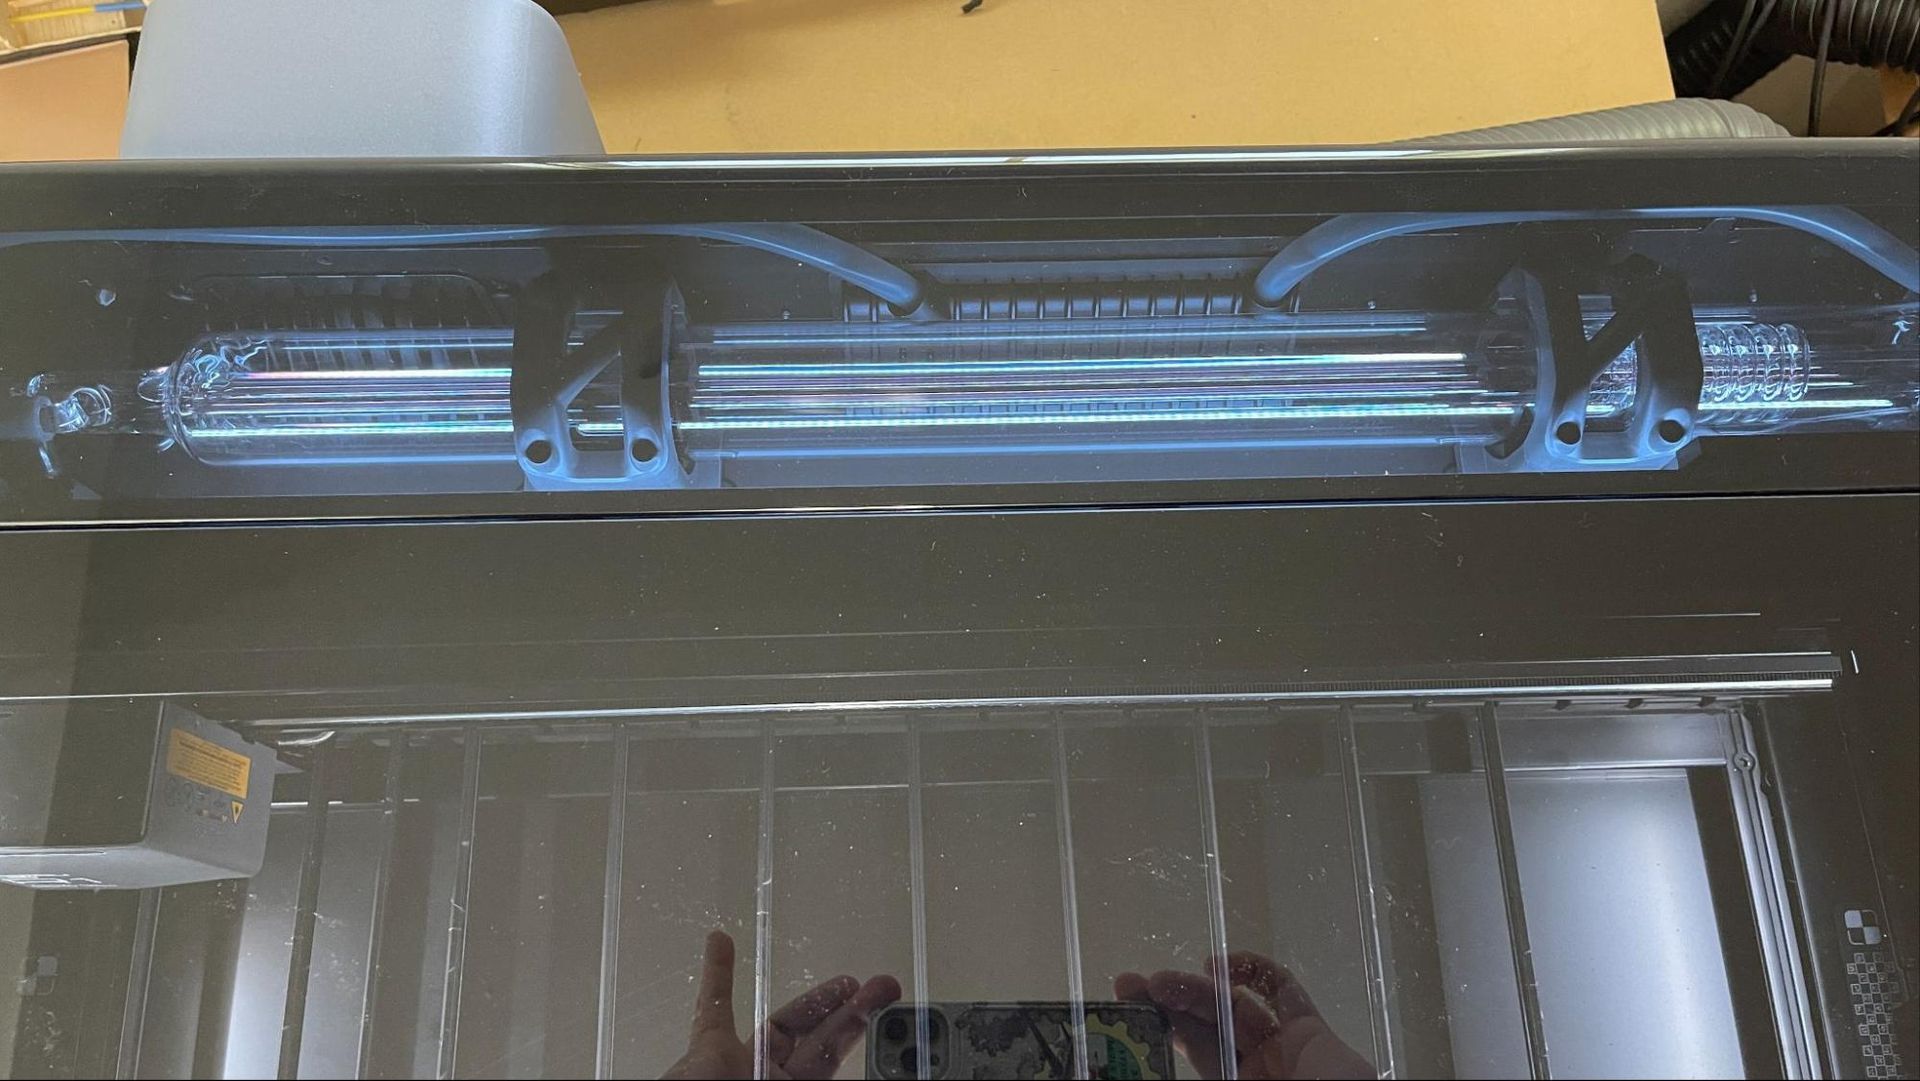
Unlike most other lasers, a CO2 laser has a large, glass, liquid-cooled laser tube at the rear of the unit. Antifreeze is mixed with distilled water for the coolant to prevent the glass tube from freezing should it be kept in a garage, basement or even if you lose power in your house during the winter.
(Image credit: Tom's Hardware)
The laser fires a beam which is directed to the tool head with mirrors.
(Image credit: Tom's Hardware)
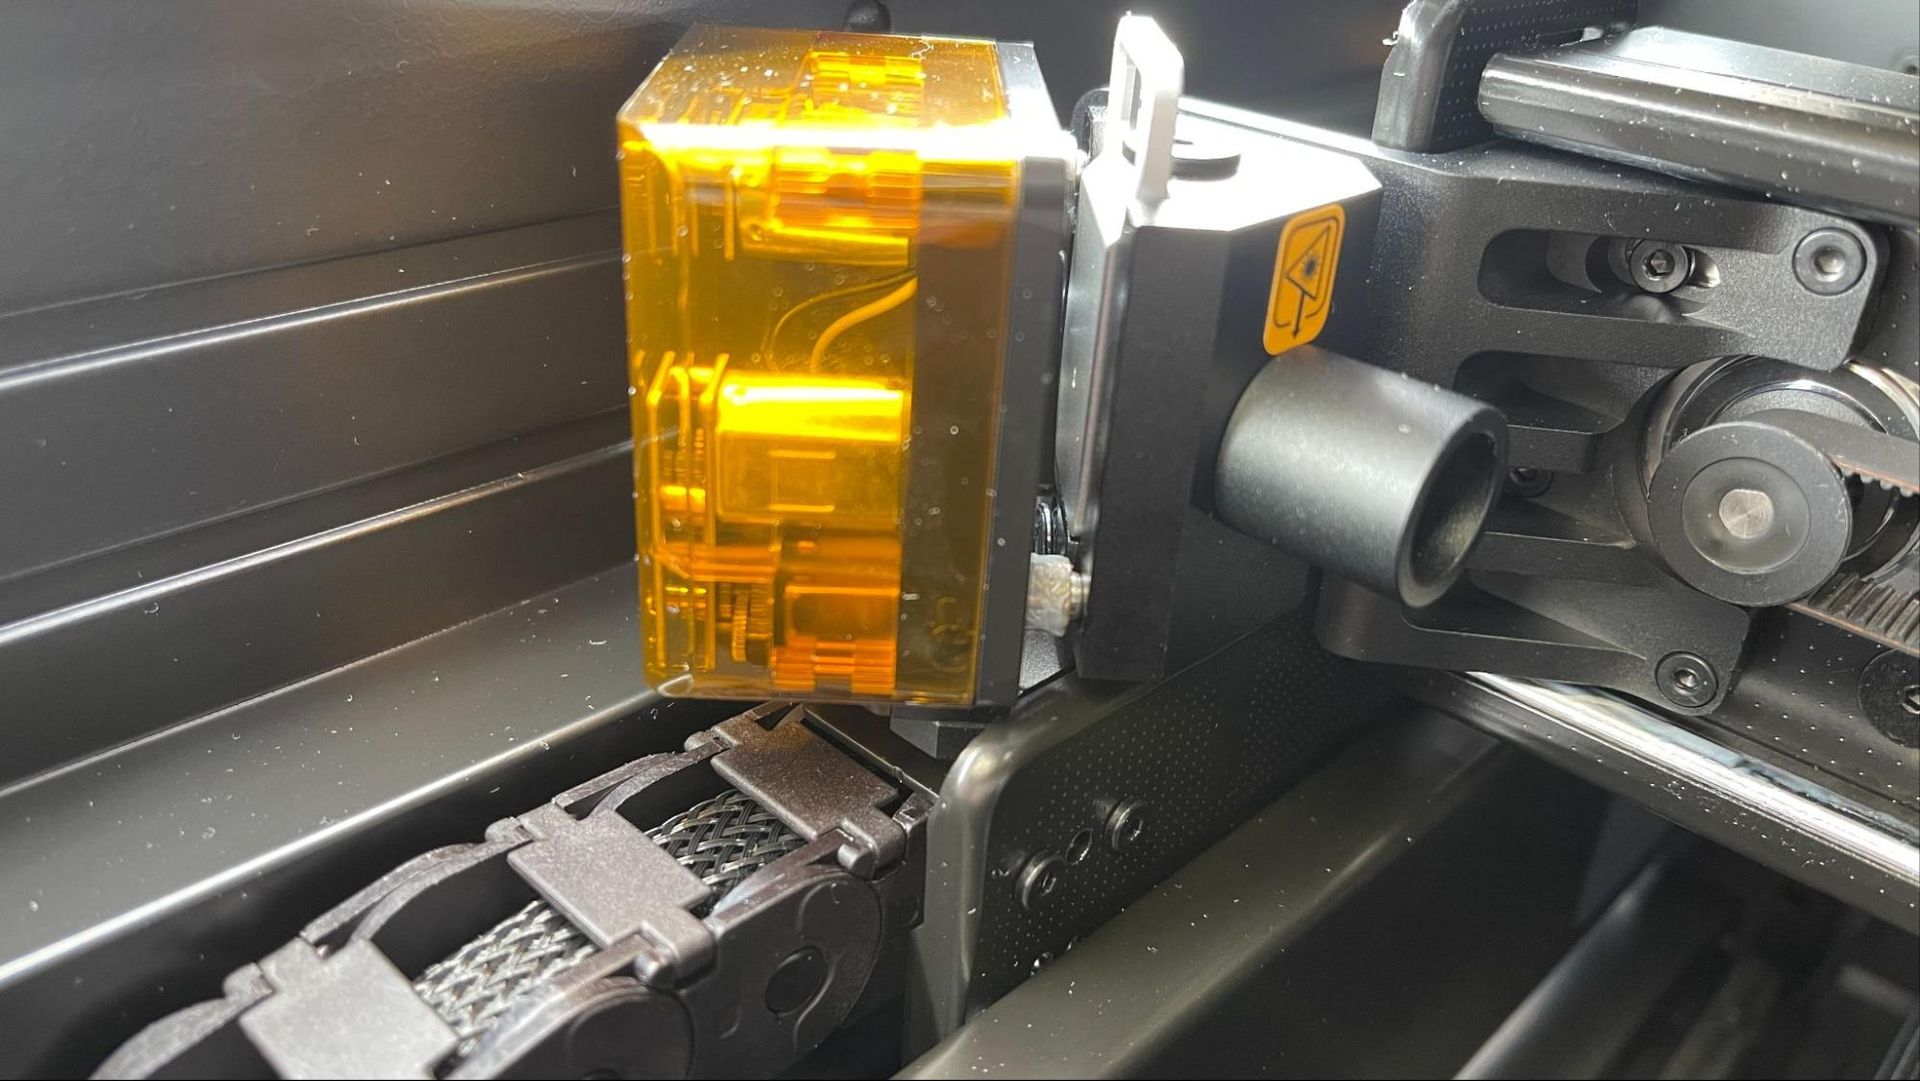
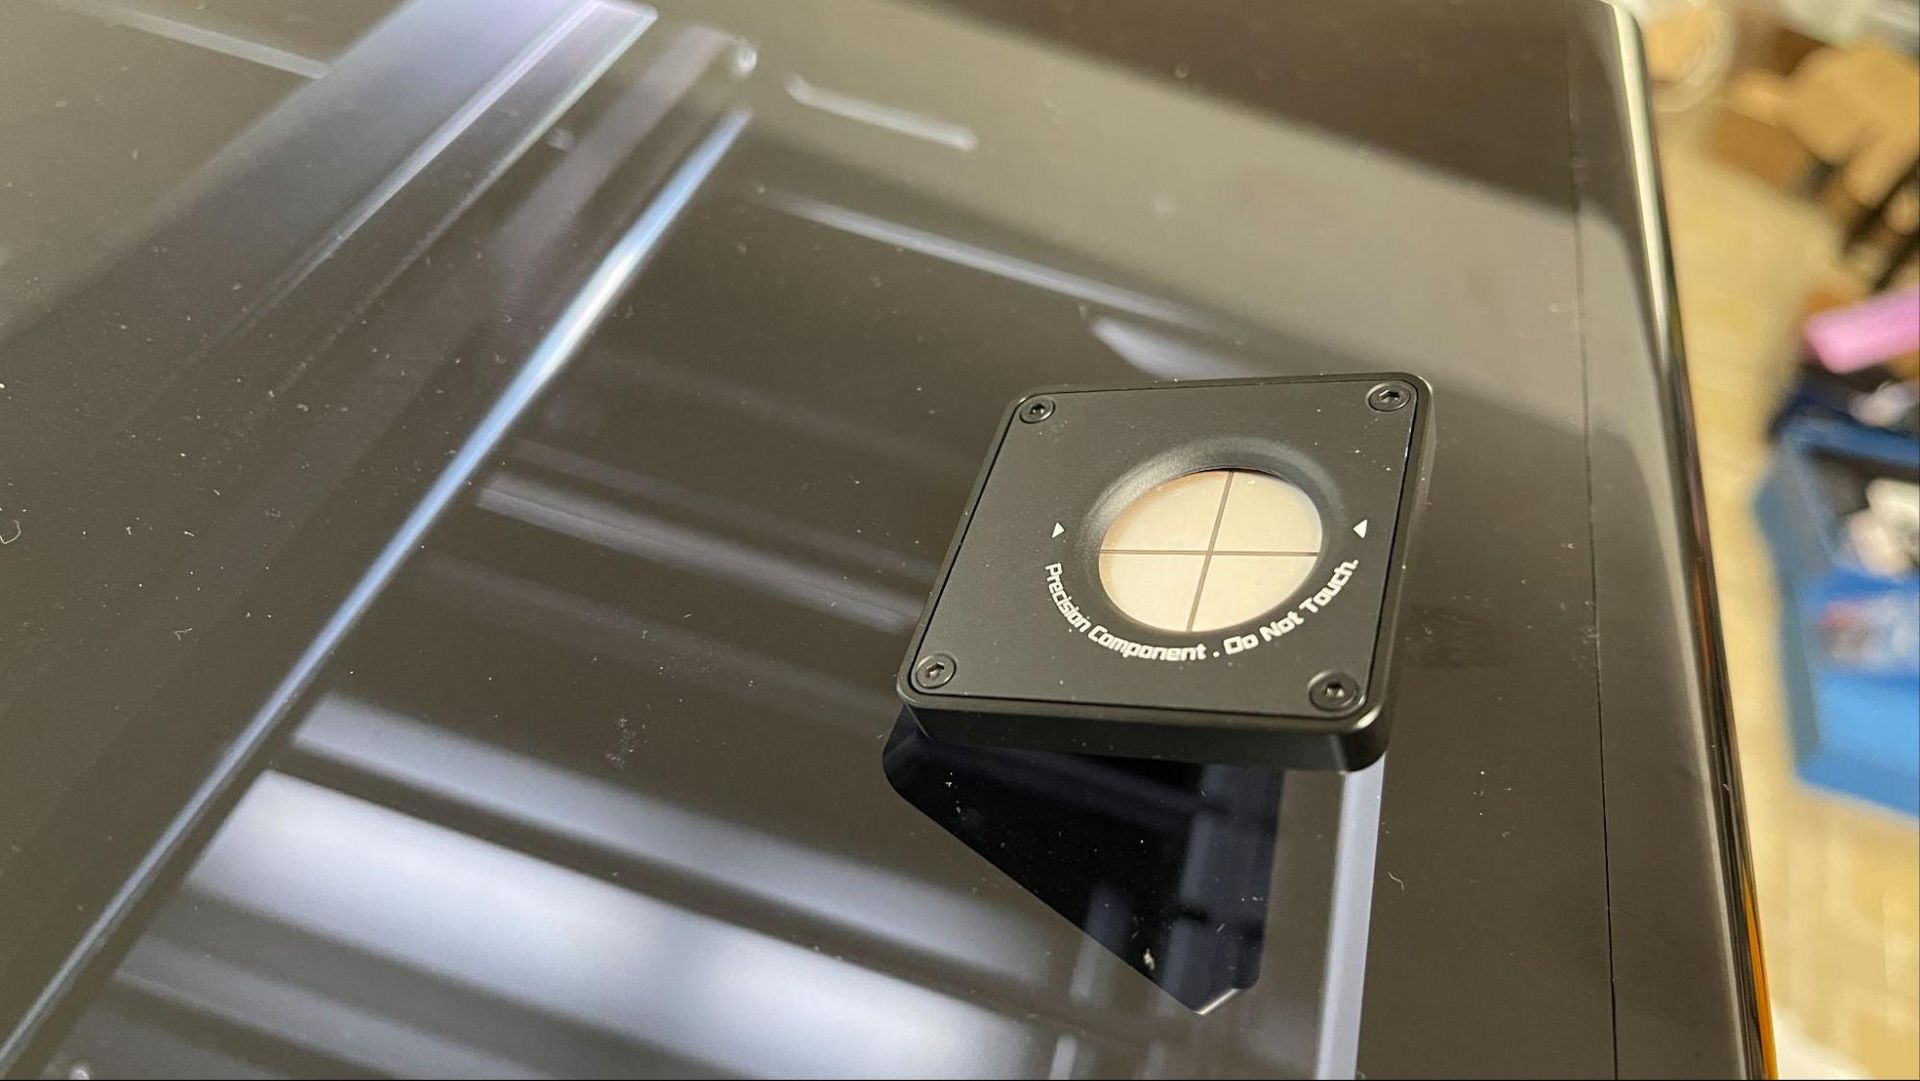
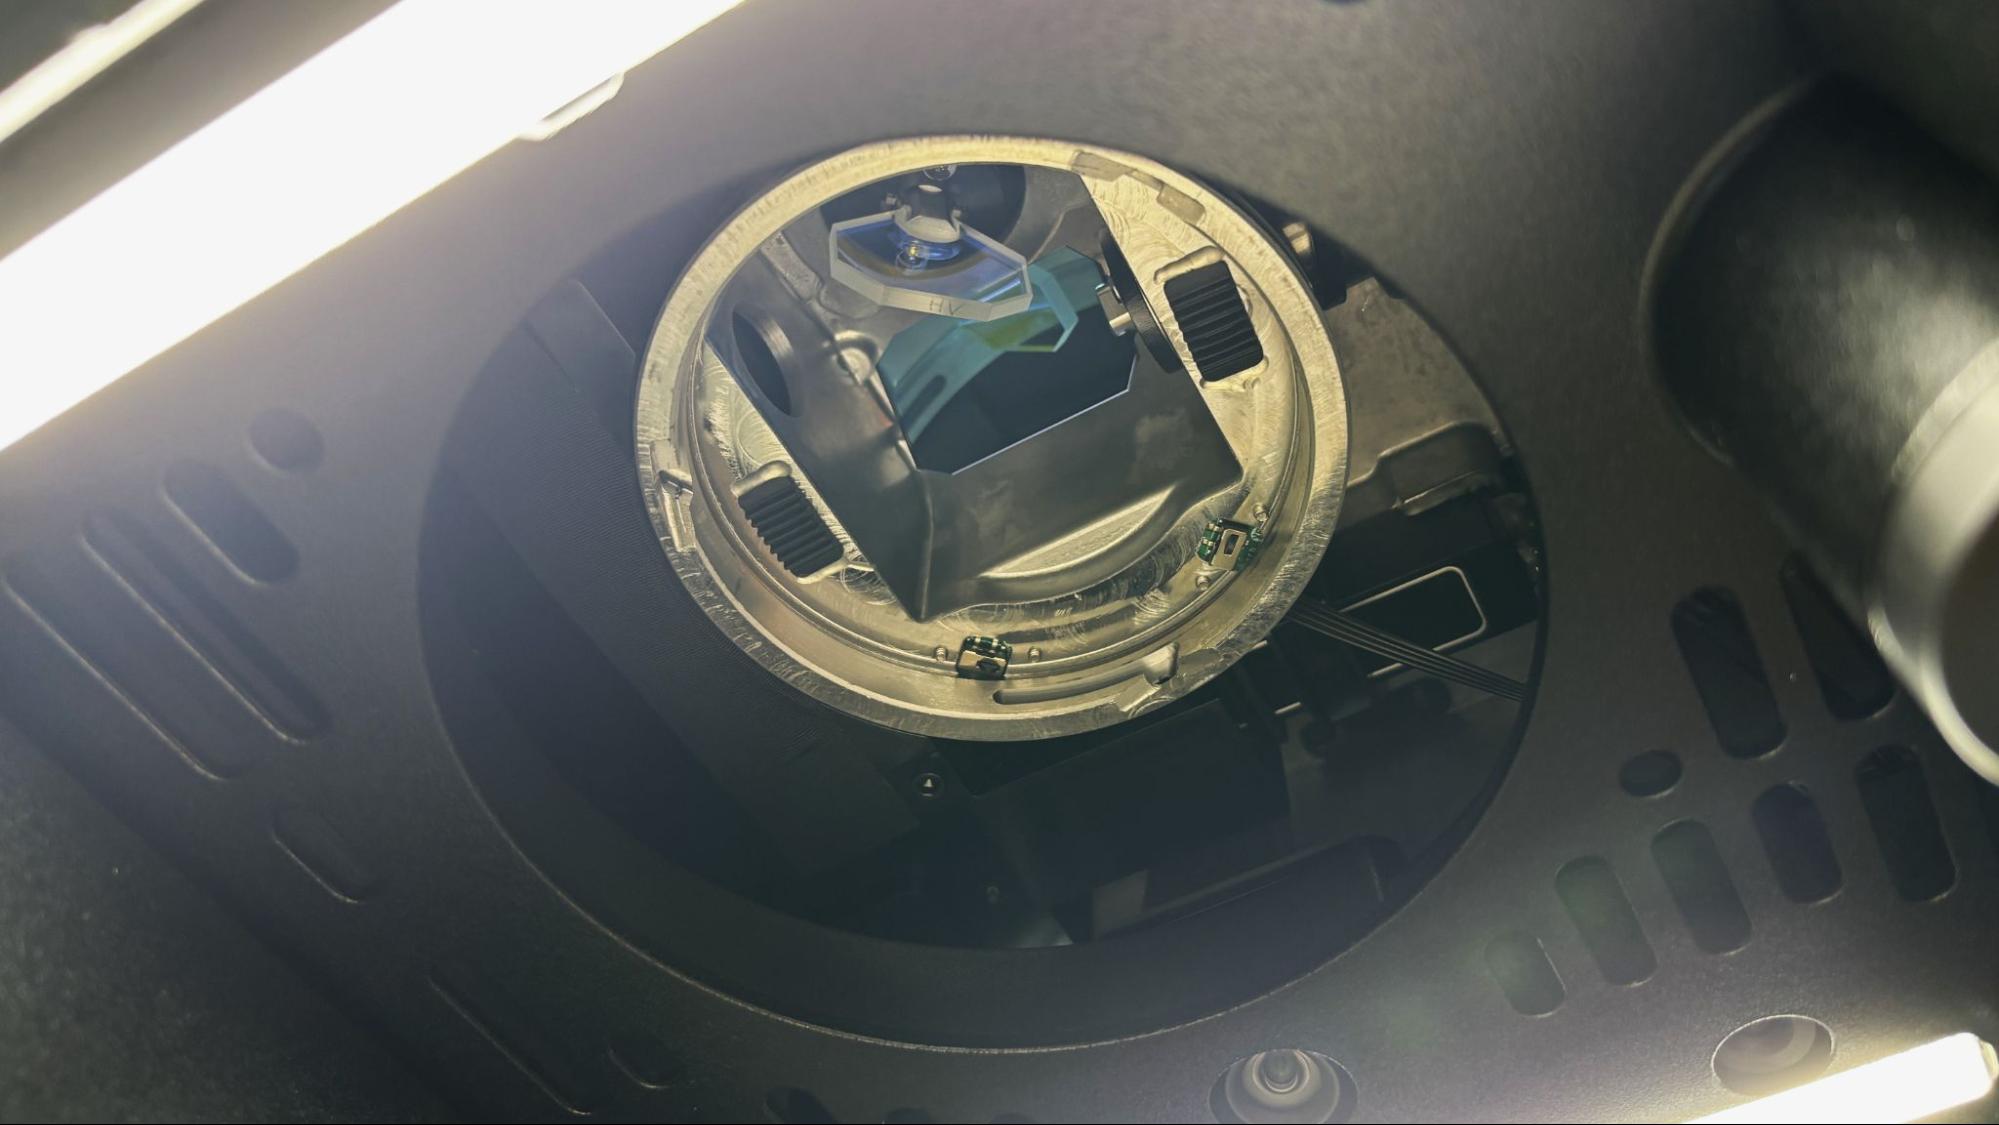
On some lasers, calibrating these mirrors can be a chore. Bambu Lab developed a laser alignment sensor, which clips to the toolhead and allows the laser to align the mirrors itself in just about a minute.
(Image credit: Tom's Hardware)
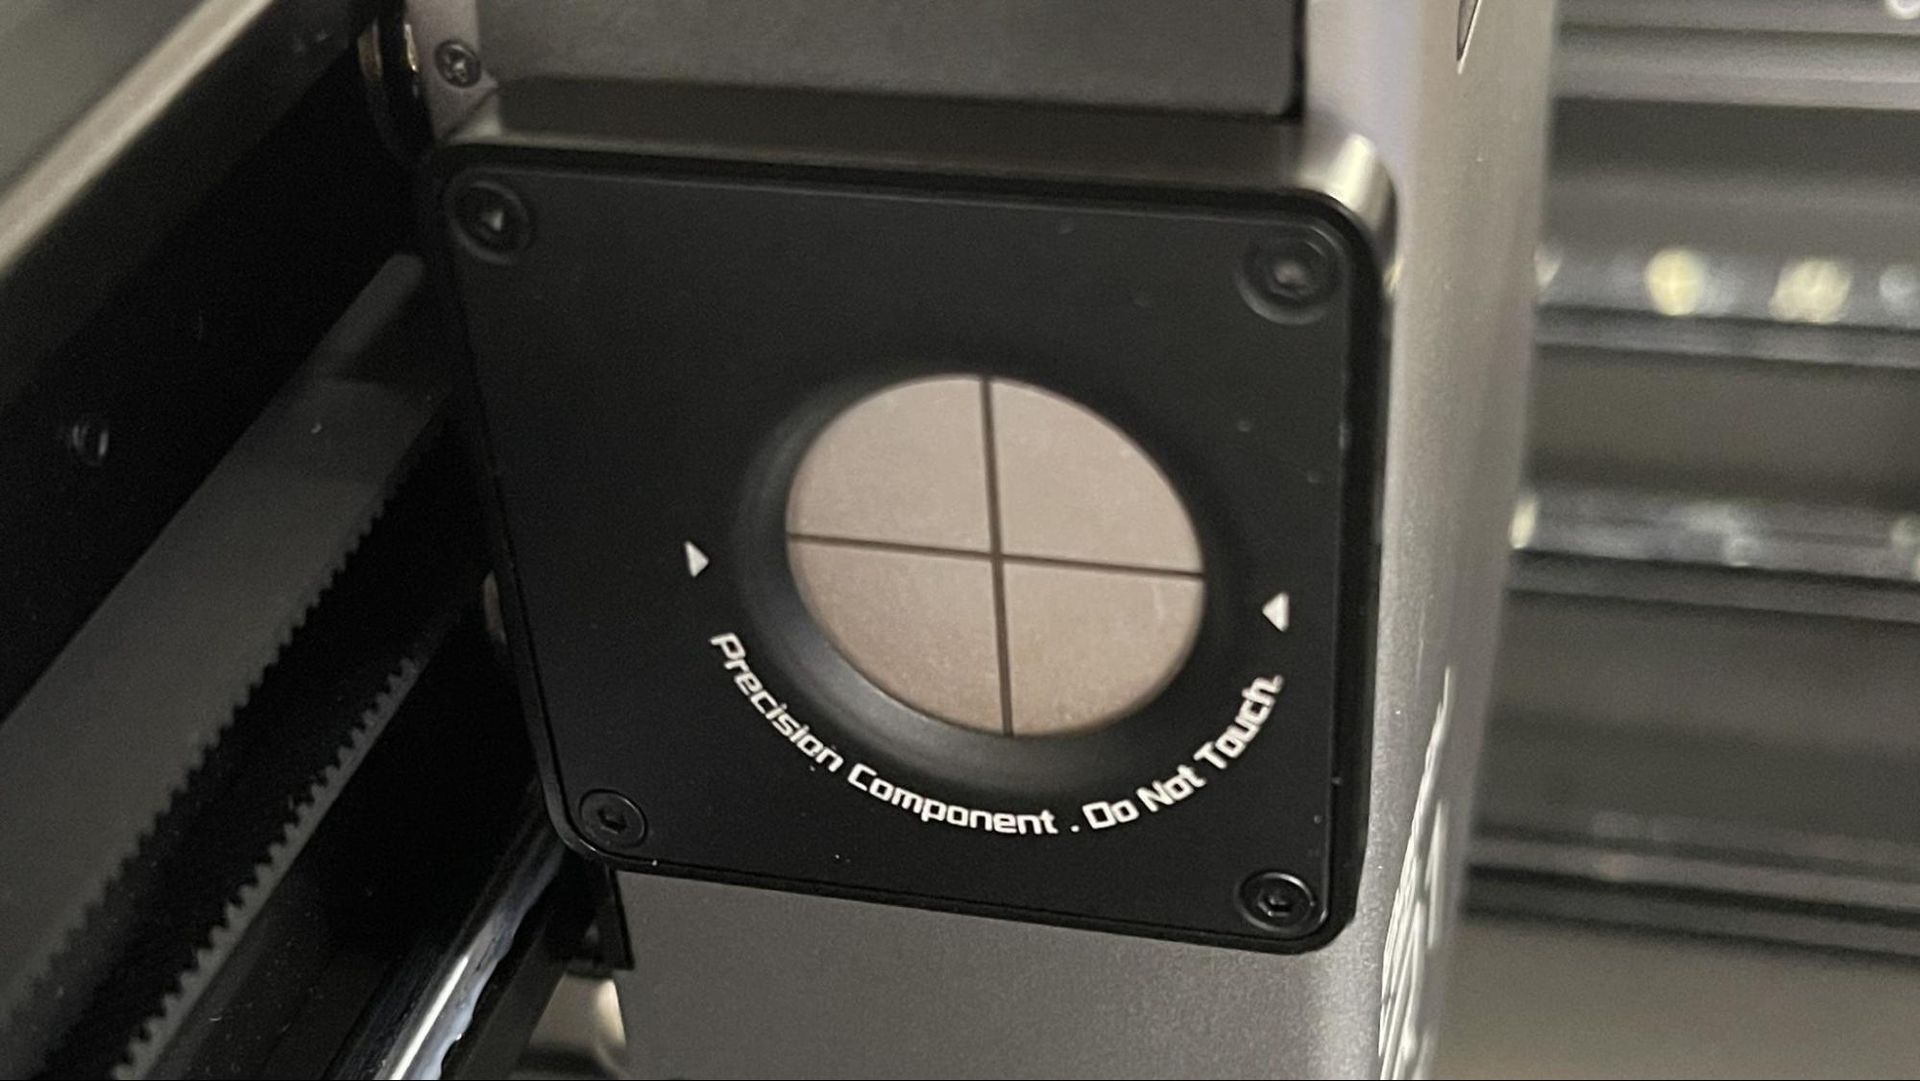
The Bambu Lab R1 has an excellent positioning system. There is a bird's eye camera on the lid of the laser, which requires that the lid be up when measuring. This takes a little getting used to since I reflexively shut the lid of a laser when I walk away from it. There is a camera mounted on the toolhead as well as a distance-measuring laser, instead of a clunky mechanical probe. The R1 tracks the toolhead position with XY encoders. The system worked great out of the box with no camera calibration needed. The camera is listed as having a .2mm positioning accuracy.
The Bambu Lab R1 is rated to cut up to 18mm wood and 20mm acrylic but doing so requires changing the focus lens in the tool head and then doing a five minute vision accuracy calibration. To change lenses, you need to remove two extremely tiny 1.5mm screws from the toolhead cover and four screws from the focus lens. It would be nice if they could develop a quick release for the lens, since as it is, this is not a process I’d want to have to do frequently.
(Image credit: Tom's Hardware)
A built-in air assist works to keep charring down and keep the laser lens clear. It is not adjustable, being either on or off, and it's powerful enough to move lightweight objects if they are not stuck down.
Given its size, the R1 is not likely to be used anywhere other than a shop or workroom, which is great because this thing is loud. The cooling fans in the laser don’t ever stop, and they are pretty loud on their own. When the laser is activated, it sounds like a jet engine spooling up. Between the noise of the laser and the air purification, it’s the loudest laser I’ve reviewed.
Assembling the Bambu Lab R1
(Image credit: Tom's Hardware)
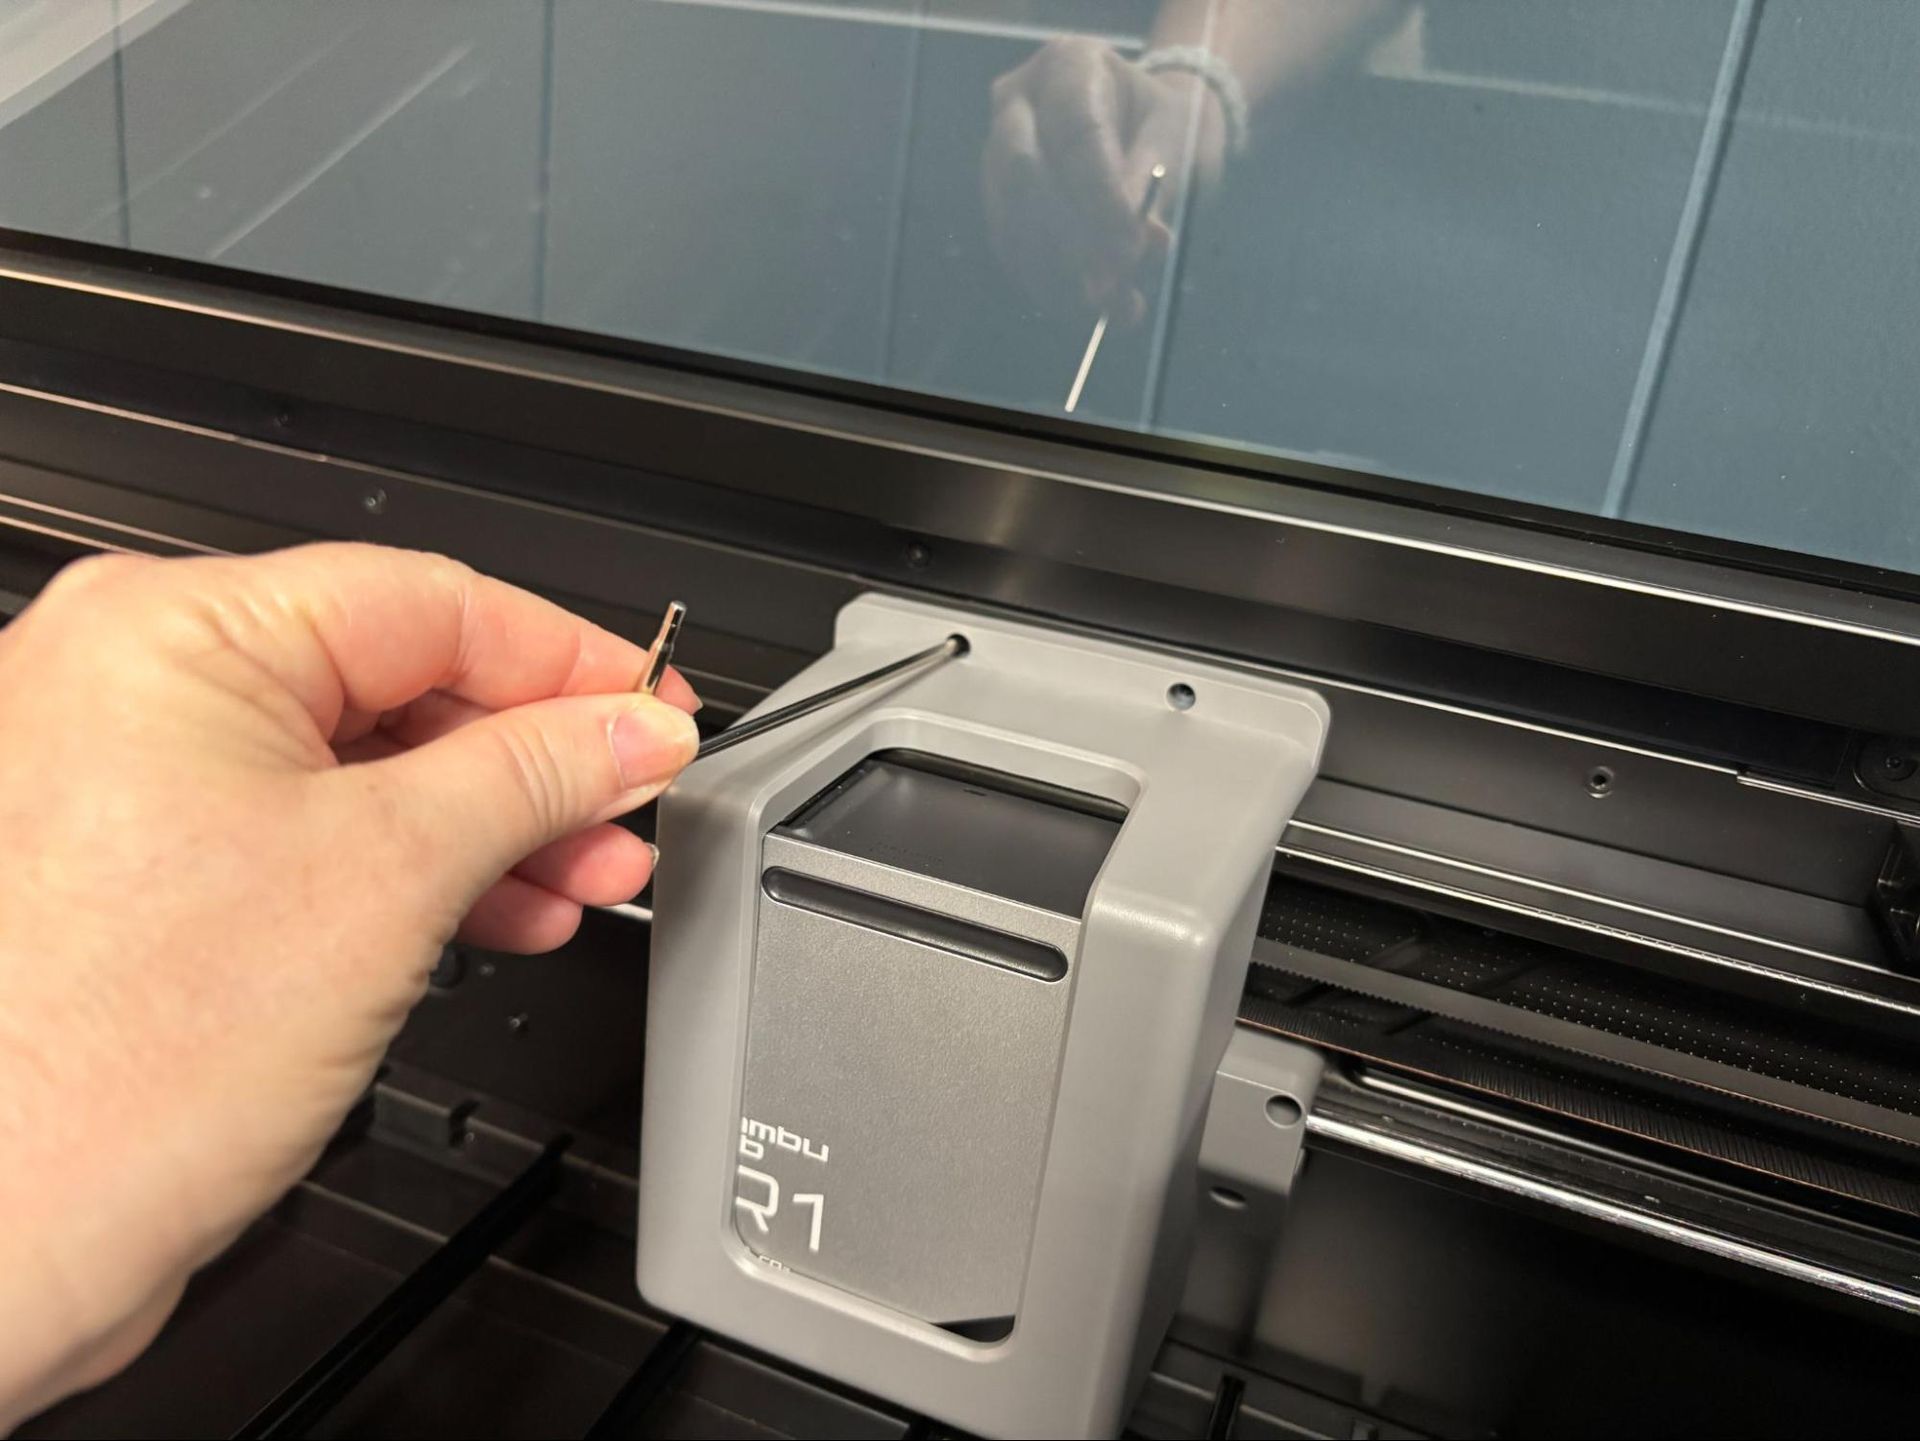
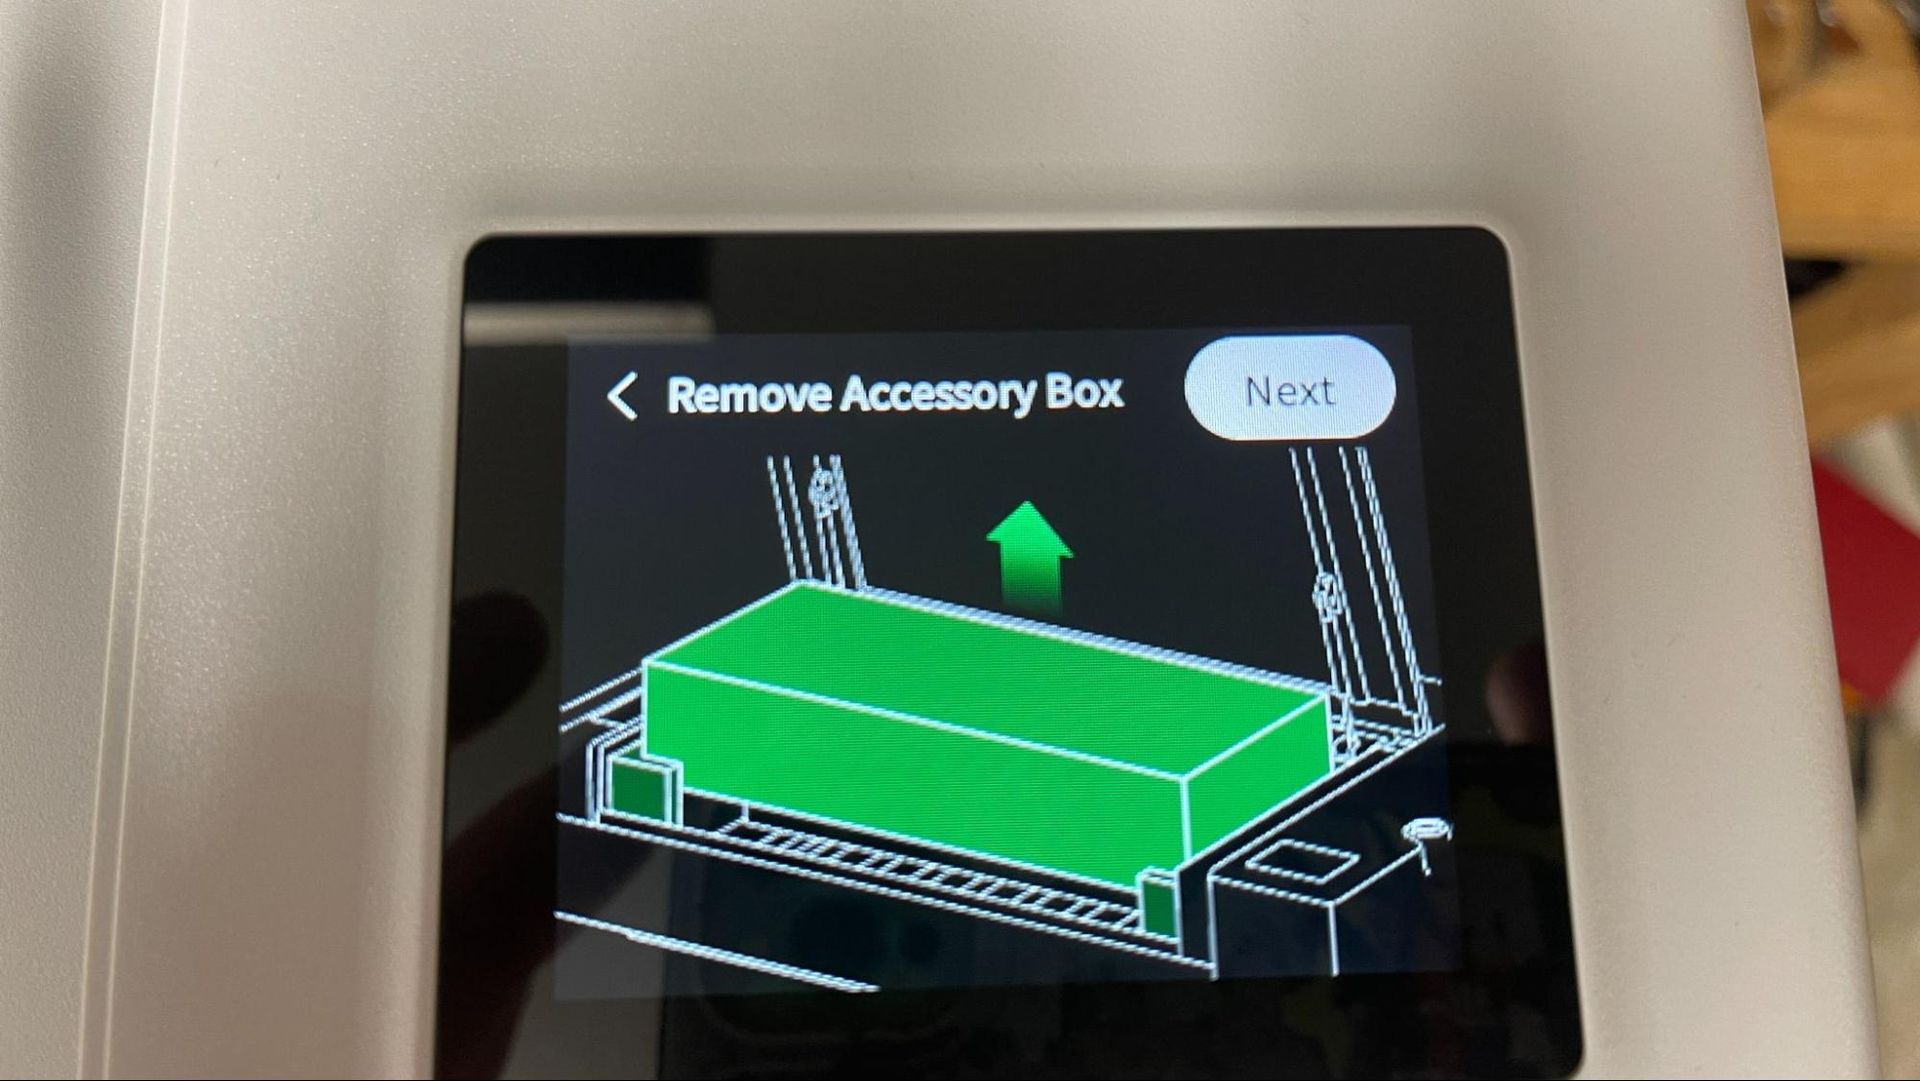
The Bambu Lab R1 is fully assembled out of the box. Setup requires removing the accessory box, removing a cage around the tool head, and removing two stops holding the XY carriage in place for shipping. At initial power up the printer walks you through these steps from the touch screen.
(Image credit: Tom's Hardware)
There is a short calibration routine that automatically calibrates the laser’s mirrors by clipping the laser alignment sensor to the toolhead. In no time at all, you are ready to go.
(Image credit: Tom's Hardware)
The riser base comes in four large assemblies that are screwed together. You need to remove the base plate from the laser before setting it atop the riser. A data cable runs from the laser to the riser base, and requires deft hands to attach. Rubber feet on the bottom of the main laser unit hold it the correct position
The laser is cooled with a mixture of distilled water and antifreeze, which is poured into the rear of the laser with an included funnel. Pay close attention to the instruction booklet when adding coolant. The instructions call for “preparing” 1500ml of distilled water, then adding antifreeze to an indicated level on the rear sight window. But what it means is to pour in the antifreeze, then add as much of the 1500ml of water as needed to hit the correct level. Getting this backward makes a bit of a mess. After mopping up, I added the correct amount of water and coolant to the laser. The coolant must be topped off after turning the laser on, so don’t move the laser into a position where you cannot access the coolant port until you do this.
Safety Precautions for the Bambu Lab R1
(Image credit: Tom's Hardware)
The Bambu Lab R1 is a fully enclosed and safe Class 1 laser by itself. When running with the riser base and conveyor, it moves to a Class 4 laser. Operating a Class 4 laser requires laser-safe glasses that are not provided with the laser. I was not able to see any leakage of laser light through the riser base, but it is unavoidable when running with the conveyor. Laser light can cause severe damage to eyes and skin, and care should be taken to keep small children and pets away while the laser is in use.
The R1 has a number of built-in safety features. There is an equipment key preinstalled on the left side of the laser. When not in use this key can be pulled to prevent unauthorized access. The laser will not operate with the enclosure’s lid up and will quickly pause the job if the lid is raised while in use. If there is a problem with the job, the machine can be stopped from the touch screen, and for major problems, there is a red kill switch on the right side of the machine, which will quickly cut power to the machine completely. The laser has flame sensors which will stop the job if they detect any issues. Bambu Lab provided its optional auto fire-extinguishing system for the review. This unit has a replaceable gas canister and plugs into the left side of the laser.
Even with a good air purifier, some materials should not be burned with a laser due to their chemical makeup. Dallas Maker Space has published a list of safe and hazardous materials to use with their laser. The list of no-nos includes some plastics like PVC, fiberglass, and certain types of foams.
Software for the Bambu Lab R1
(Image credit: Tom's Hardware)
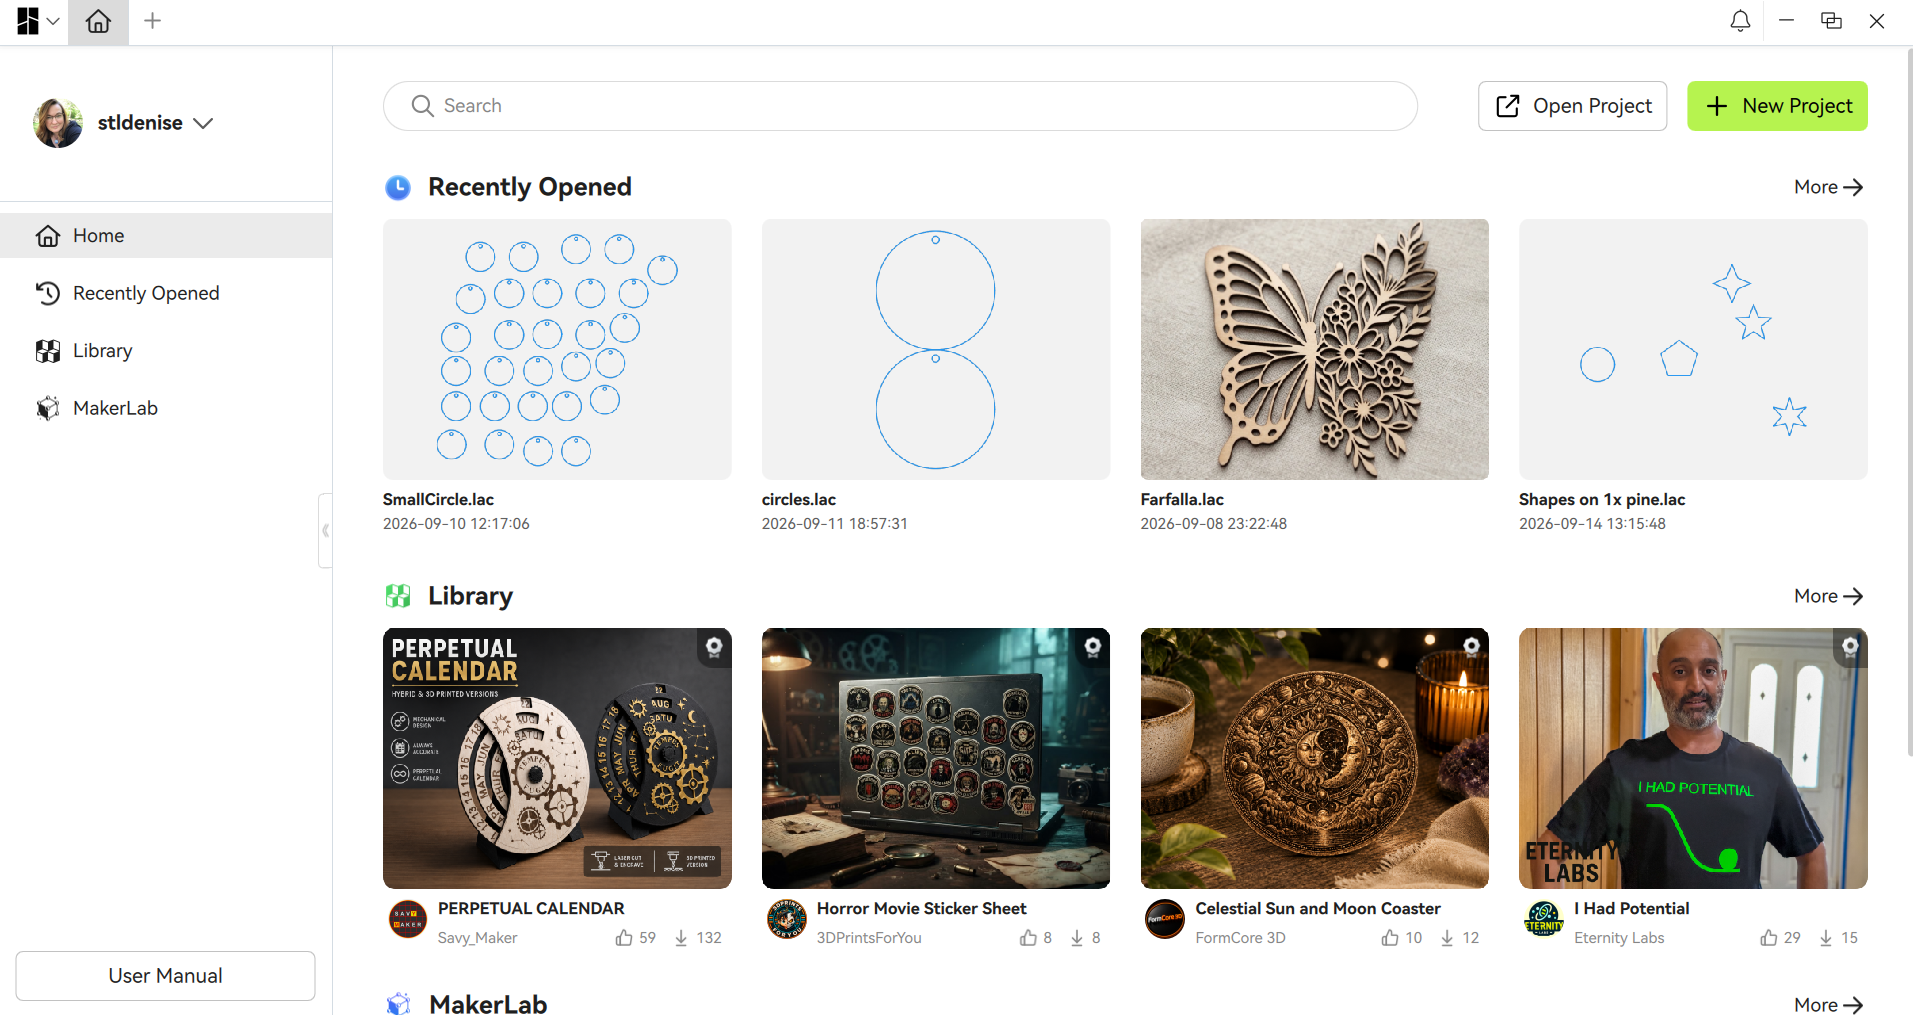
Bambu Suite was developed to run the lasers on the H series and also handle the cutting function on H2 and A2 printers. It might be the easiest to use laser software I’ve seen. The laser is connected to Wi-Fi from the touchscreen, and Bambu Suite connects to it just like a 3D printer. You import whatever you want to cut or engrave, choose the process type, hit Prepare, then select Measure, line up your art with the material, and pick the material you are using. Finally, you press Make and off it goes.
(Image credit: Tom's Hardware)
The only thing that the software doesn’t have is a large list of default materials. The basics are there, but hopefully more will be added over time. As it is, a number of the projects I did required internet searches and guesswork to find material settings that worked.
Makerworld is accessible directly from Bambu Suite, and it has an expanding group of shared laser projects to help you get started.
Engraving / Cutting with the Bambu Lab R1
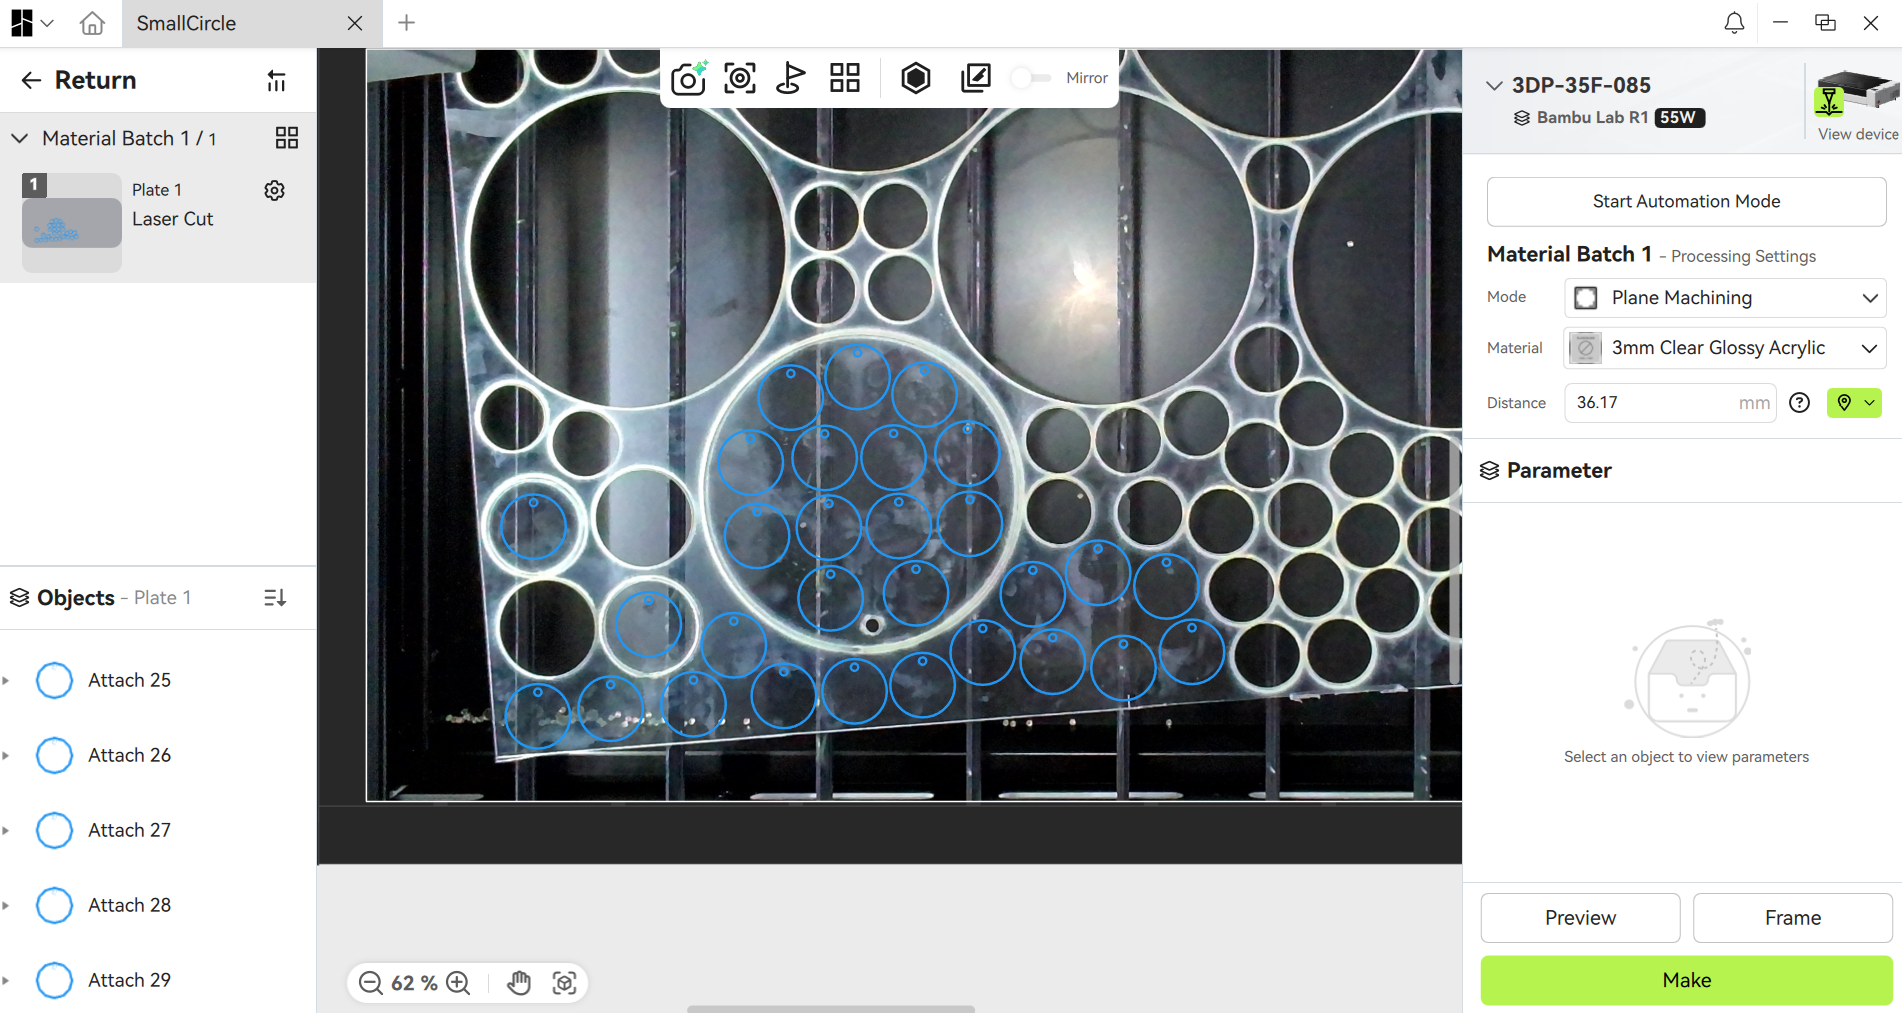
For the first job, we used the test file from Bambu Lab that includes line drawing, engraving, and cutting on 3 mm basswood plywood. The test file did not list the settings, but the overall job took under two minutes to complete and looks really good. The cuts show much less charring than you would see on a diode laser.
(Image credit: Tom's Hardware)
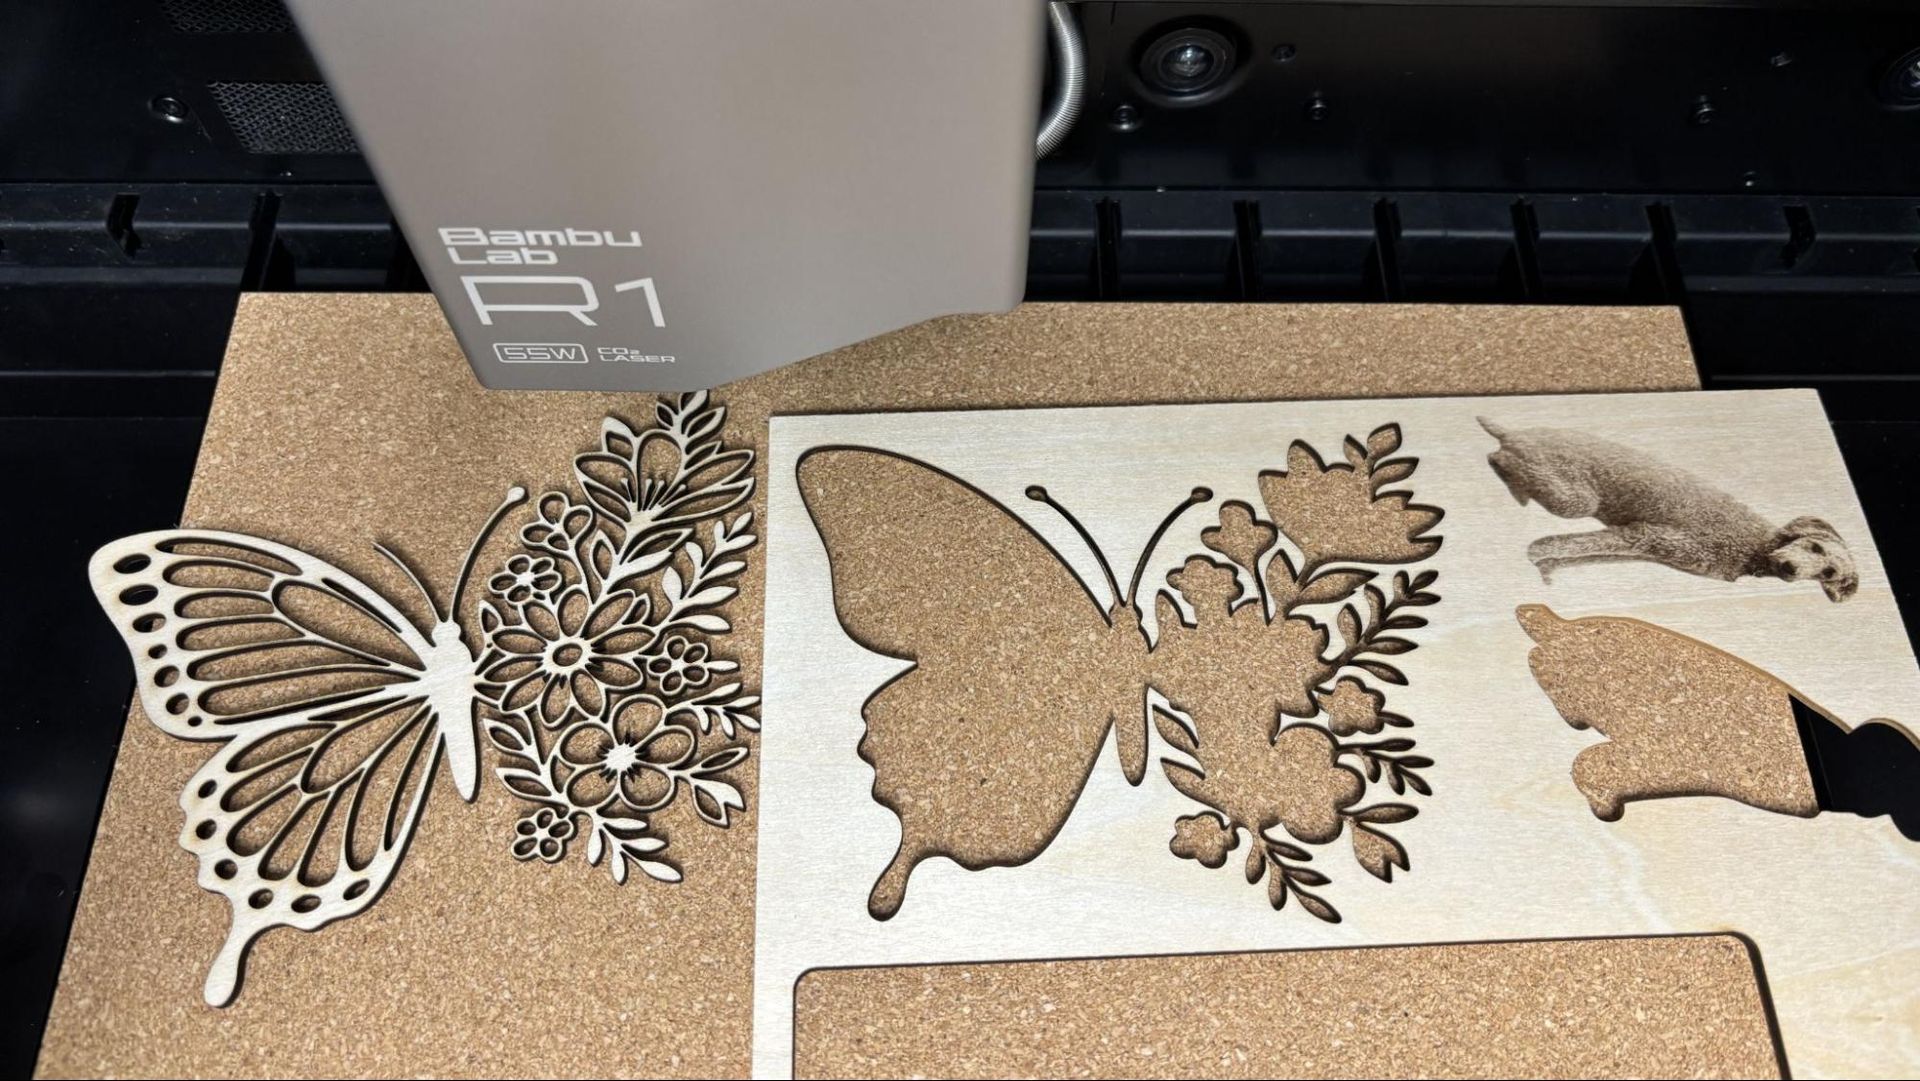
Next, I tried a really intricate butterfly decoration from PabloLab on Makerworld.com. Using the default material settings for 3mm basswood, 75% power at 30 mm/s, the cut was perfect. The butterfly and the interior cuts dropped out of the material with no weeding needed. I should point out I broke off one of her antennae in handling.
(Image credit: Tom's Hardware)
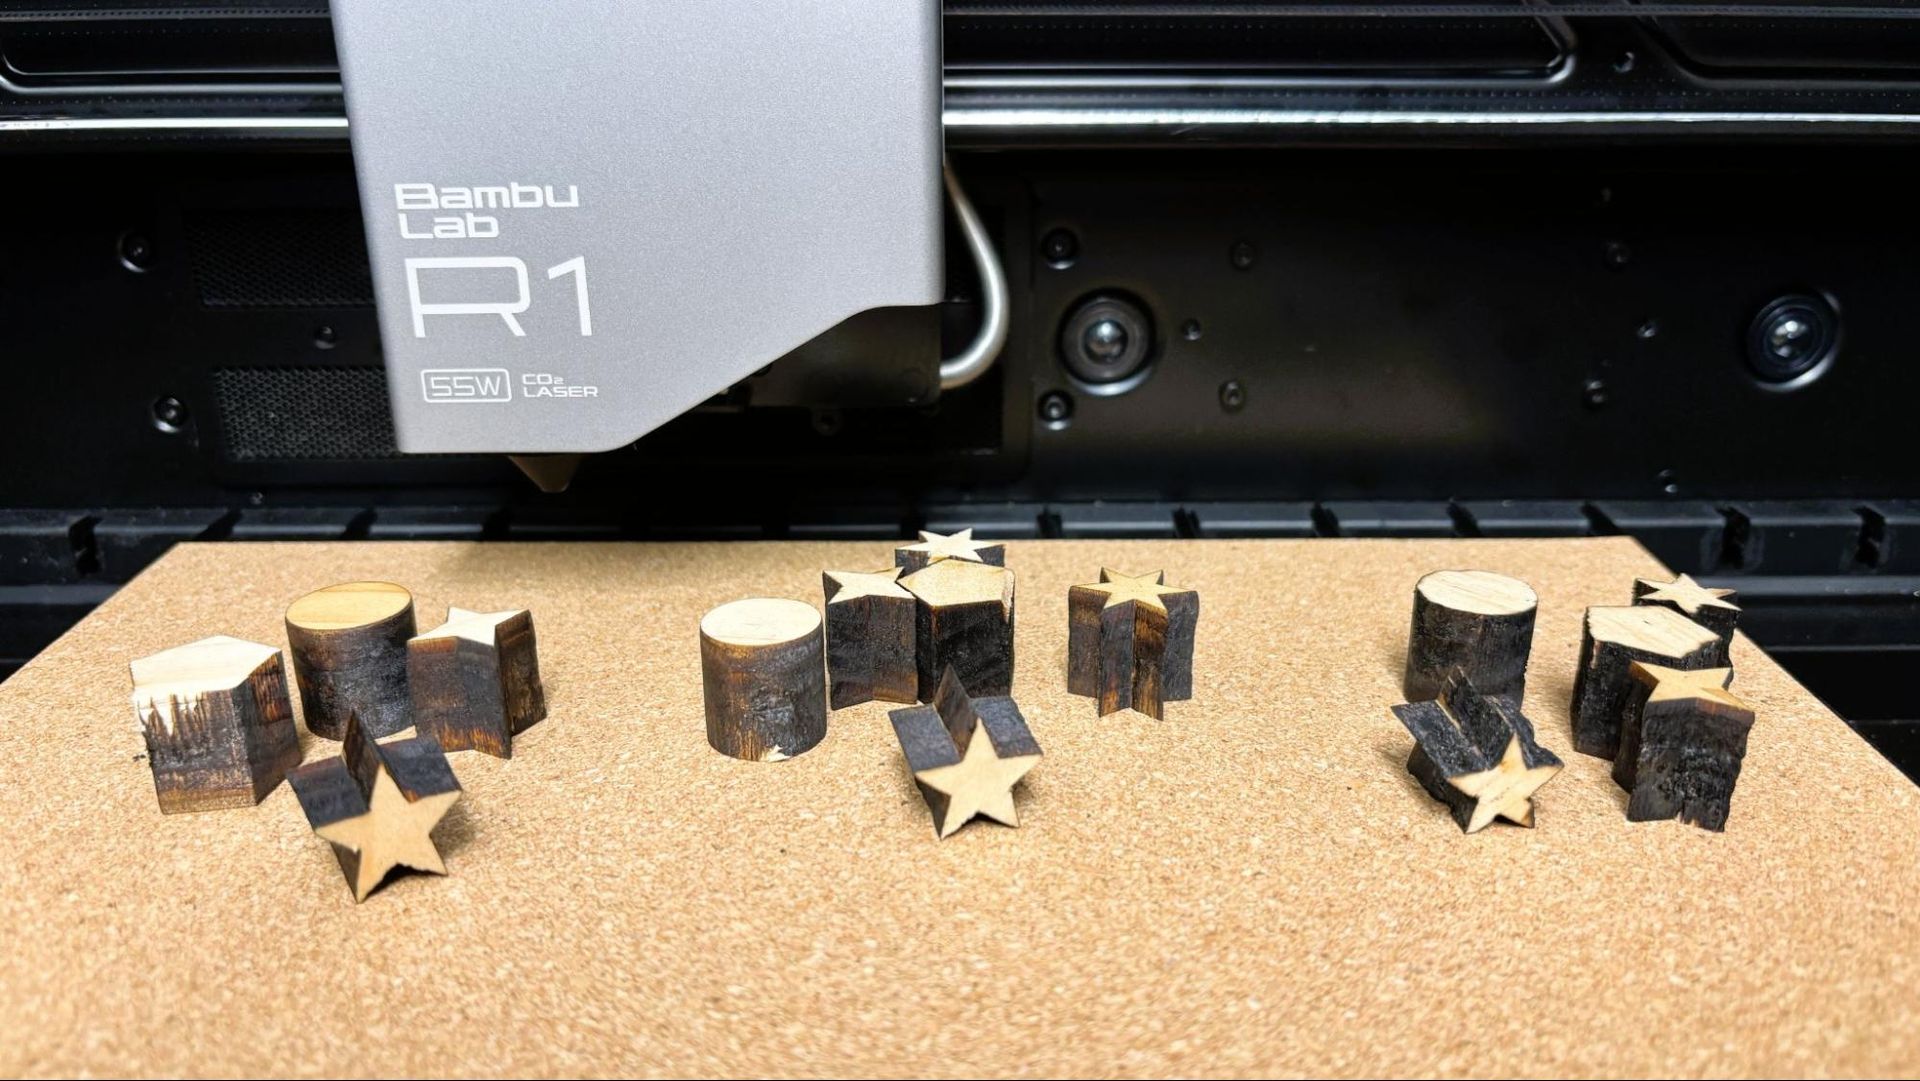
The Bambu Lab R1 is rated to cut up to 18mm black walnut and 20mm acrylic, but the thicker wood requires the optional medium or long focus lenses. I tested cutting on a piece of pine lumber that is 19.5mm thick but is much softer than black walnut. There was no material default for anything thicker than 3mm. The cut on the left used the long focus lens and did the best cut at the lowest power, using 80% power at 10mm/s and 4 passes. The cut in the middle used the medium focus lens at 85% power at 5 mm/s and required 5 passes. The short focus lens really did not totally punch through the bottom of the material. The cuts are charred due to using 100% power at 4 mm/s through multiple tries.
(Image credit: Tom's Hardware)
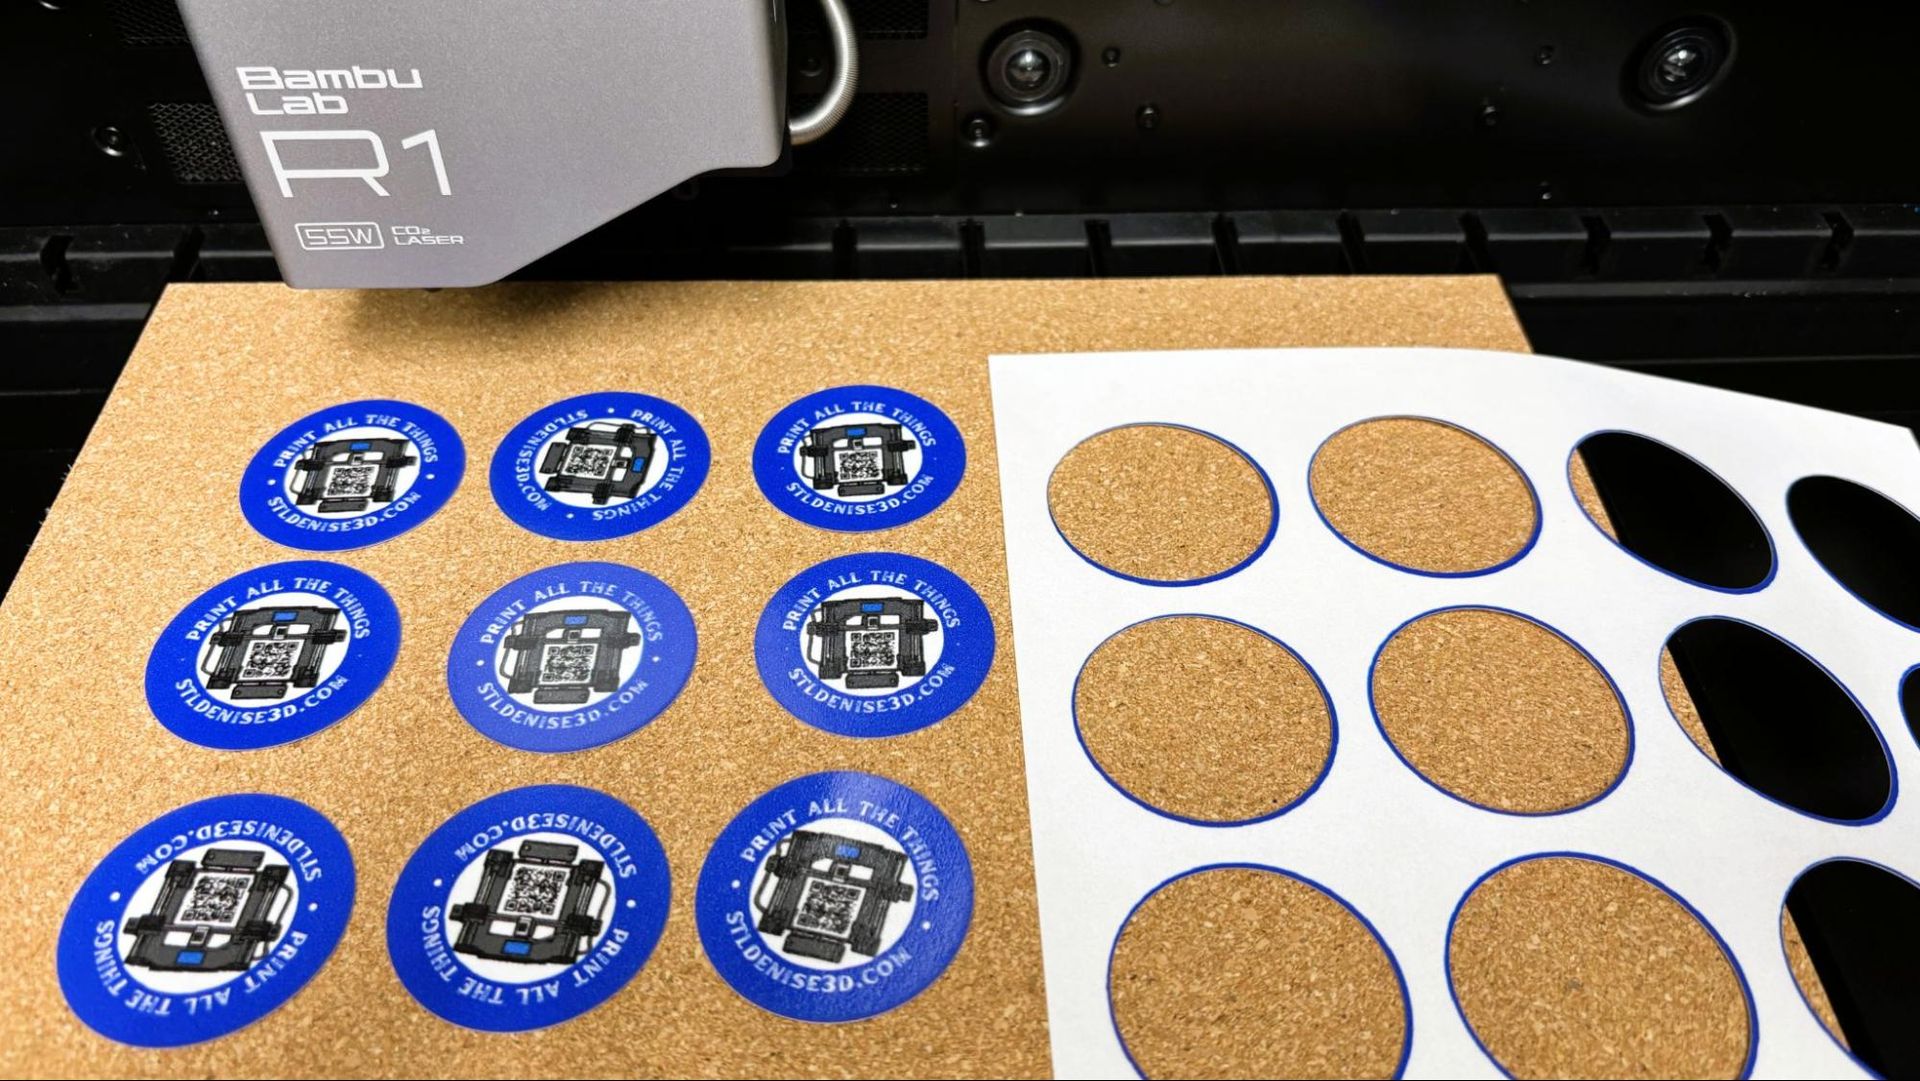
For cutting out stickers out of sheets of sticker paper, we used the material preset for 200g kraft paper, 45% power at 250mm/s. The cuts were perfect and only took a few seconds. With a jig mounted on the cutting plate, the results are repeatable page after page.
(Image credit: Tom's Hardware)
There was no material preset for PETG so with a little trial and error we stepped that down to 65% power at 35mm/s for 2mm PETG and 20% power at 20mm/s for 1mm PETG. With air assist, the results were terrific, with just a very little smoke cloudiness at the edges of the PETG cuts. At these speeds, the cuts all took less than a minute.
Material: PETG (Image credit: Tom's Hardware)
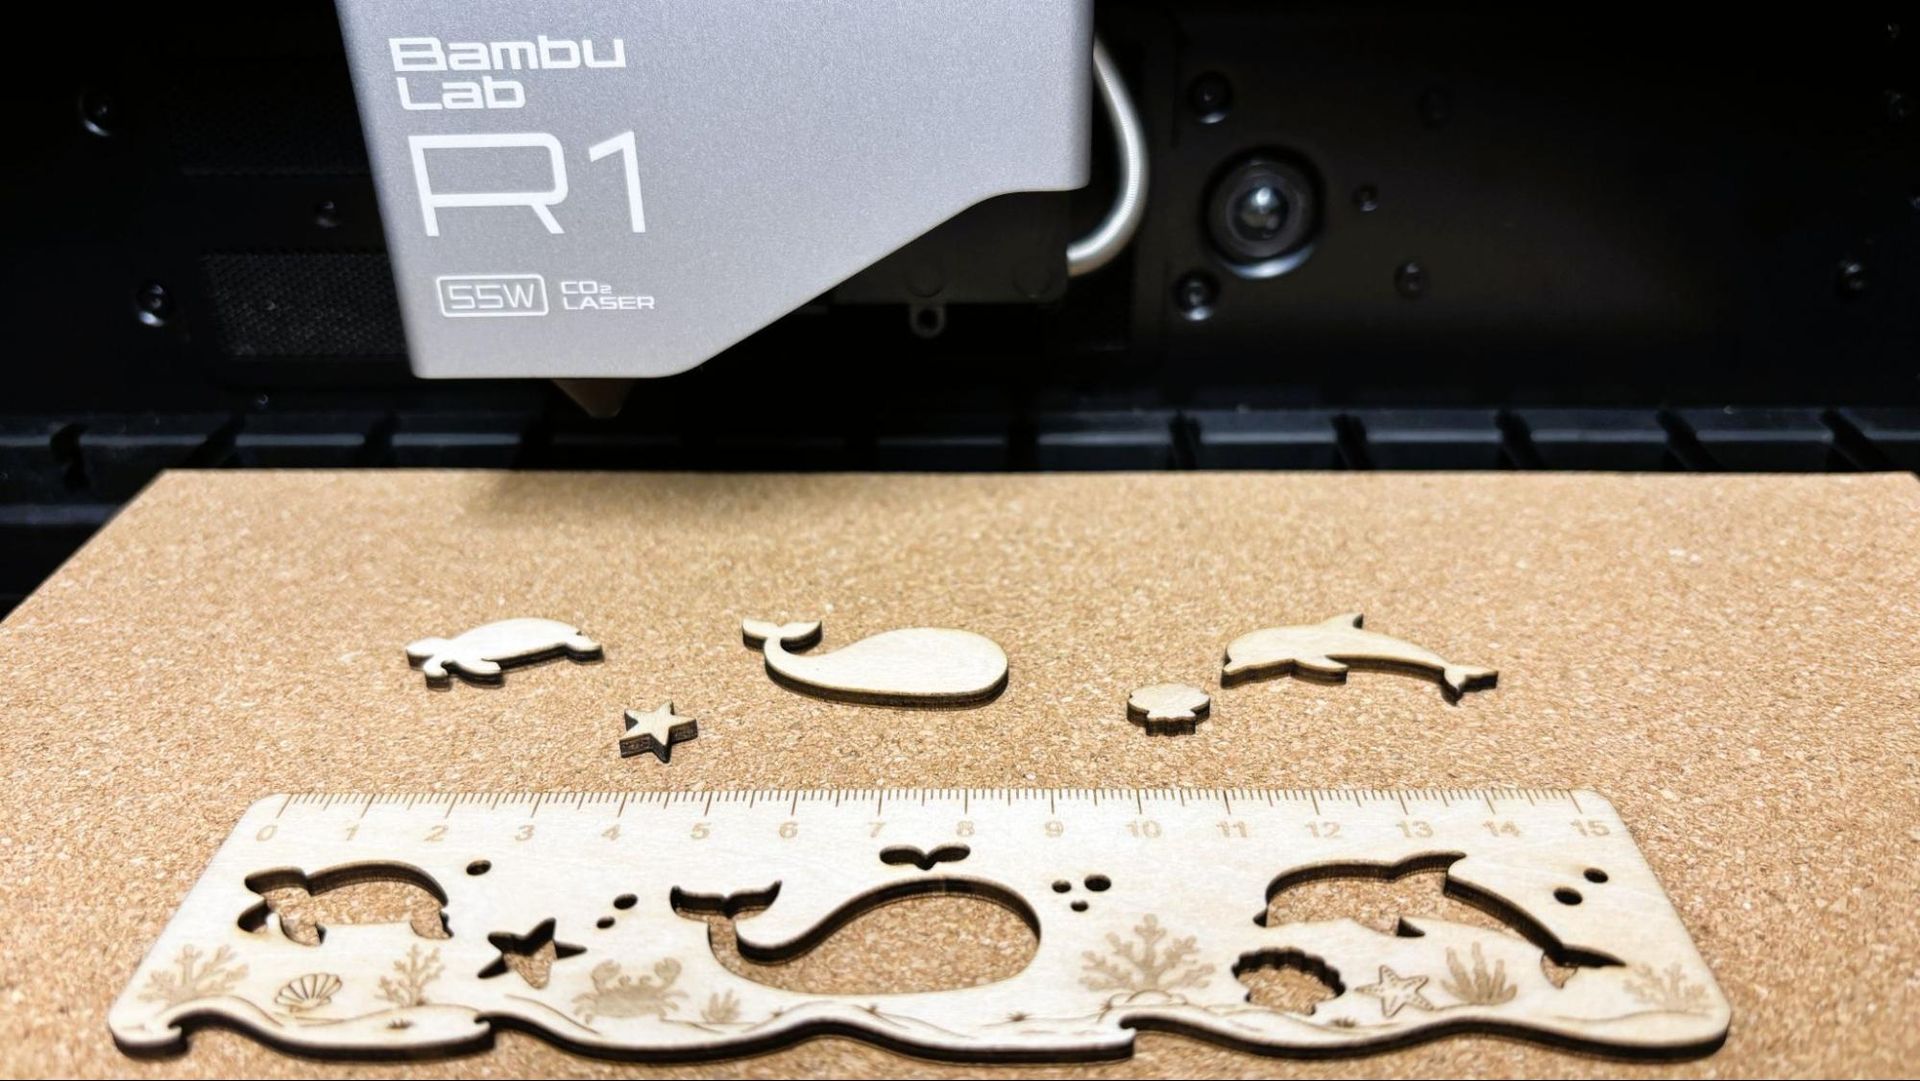
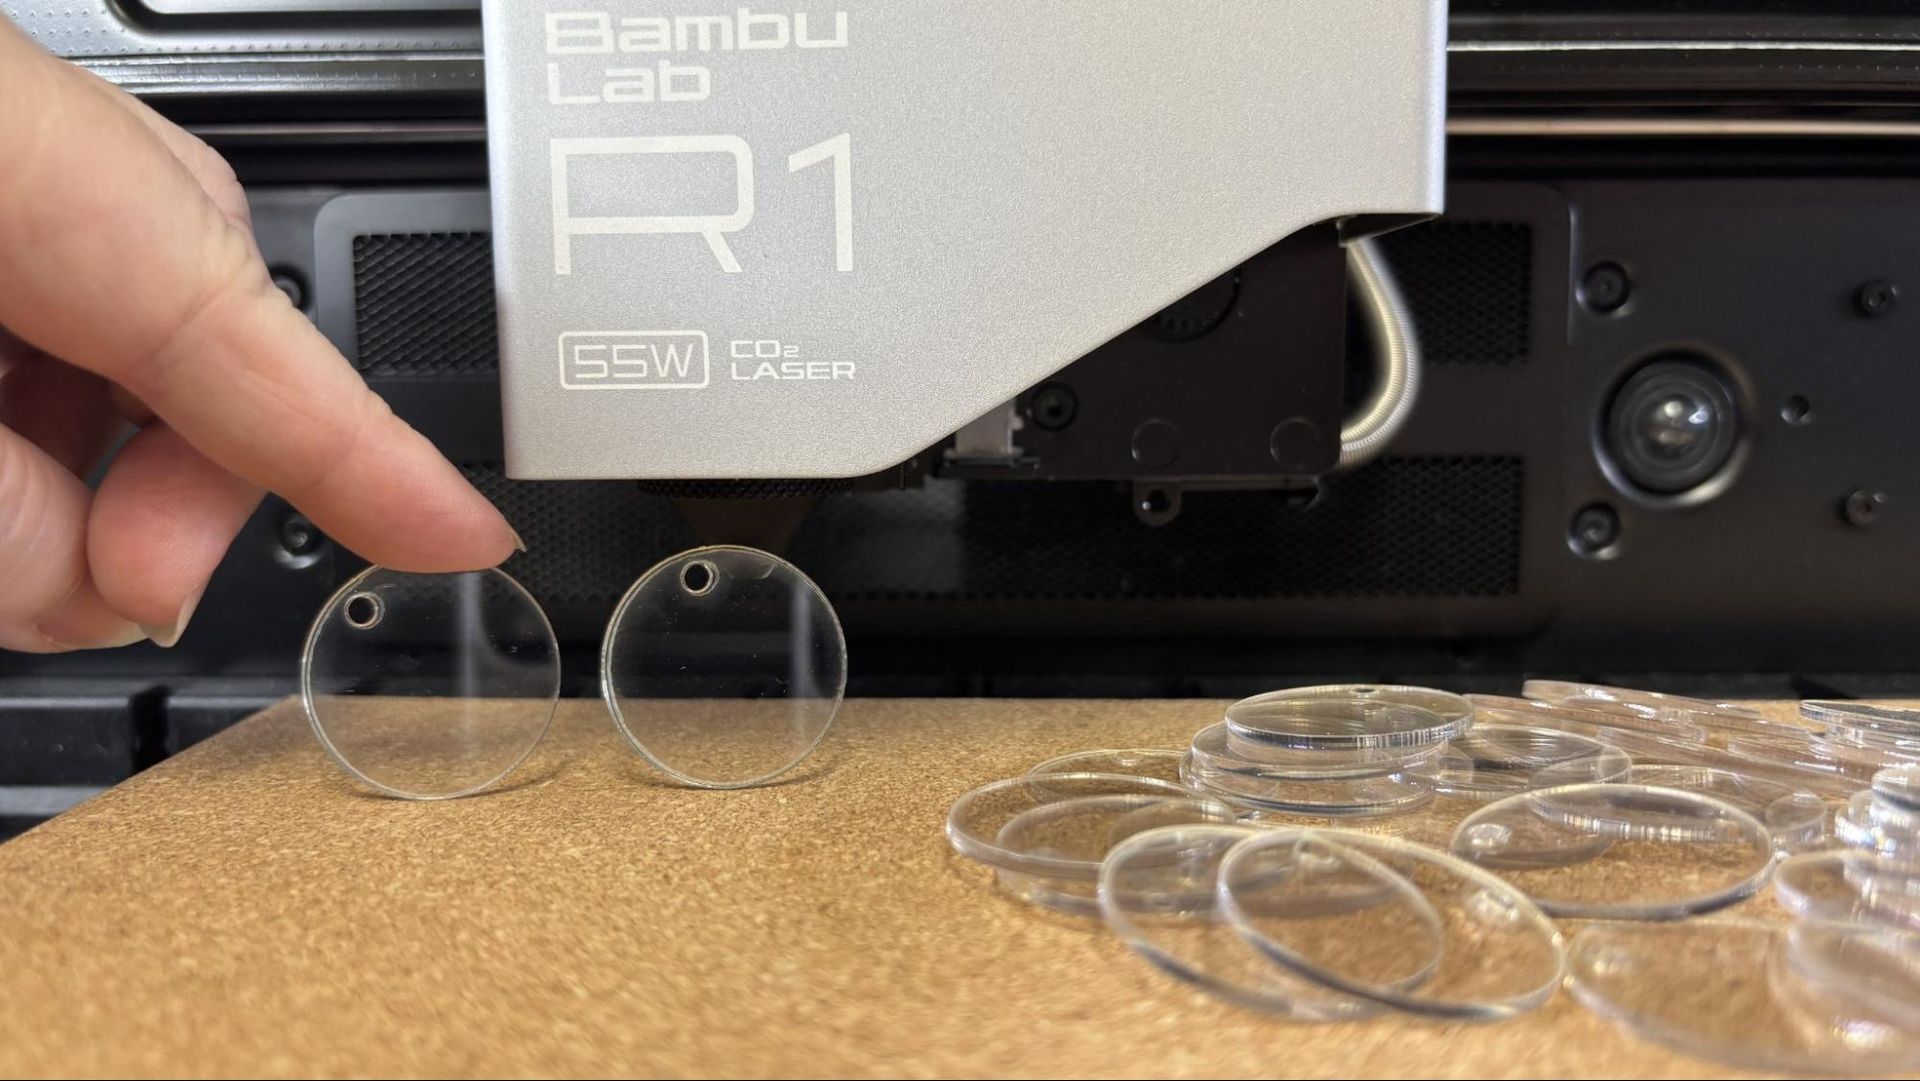
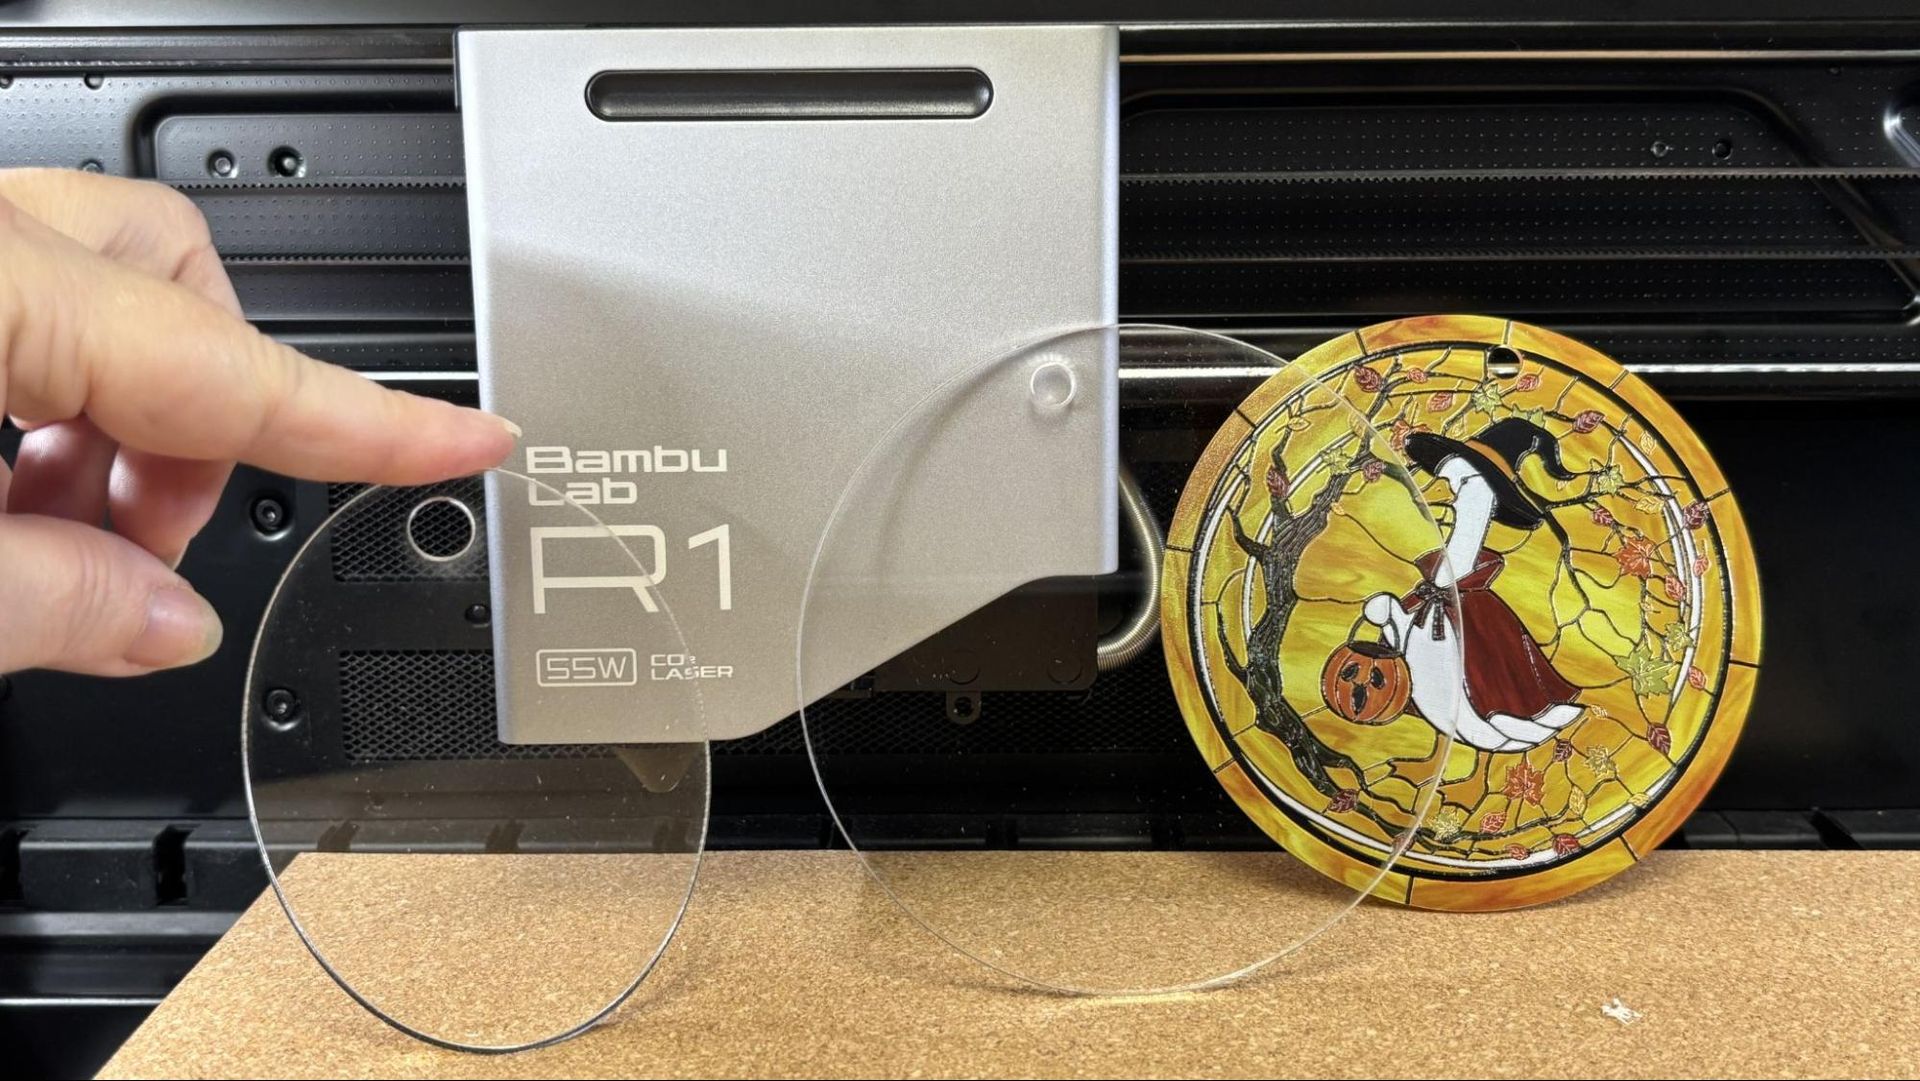
Where most lasers just pass right through clear materials, CO2 lasers run at a high enough frequency to cut and engrave them. Using the shape library in Bambu Suite for the designs, we cut a bunch of blanks for use with our UV printer out of clear PETG sheets and clear acrylic. The material settings in Bambu Suite were perfect for 3mm clear acrylic at 80% power at 10mm/s speed.
Material: Acrylic (Image credit: Tom's Hardware)
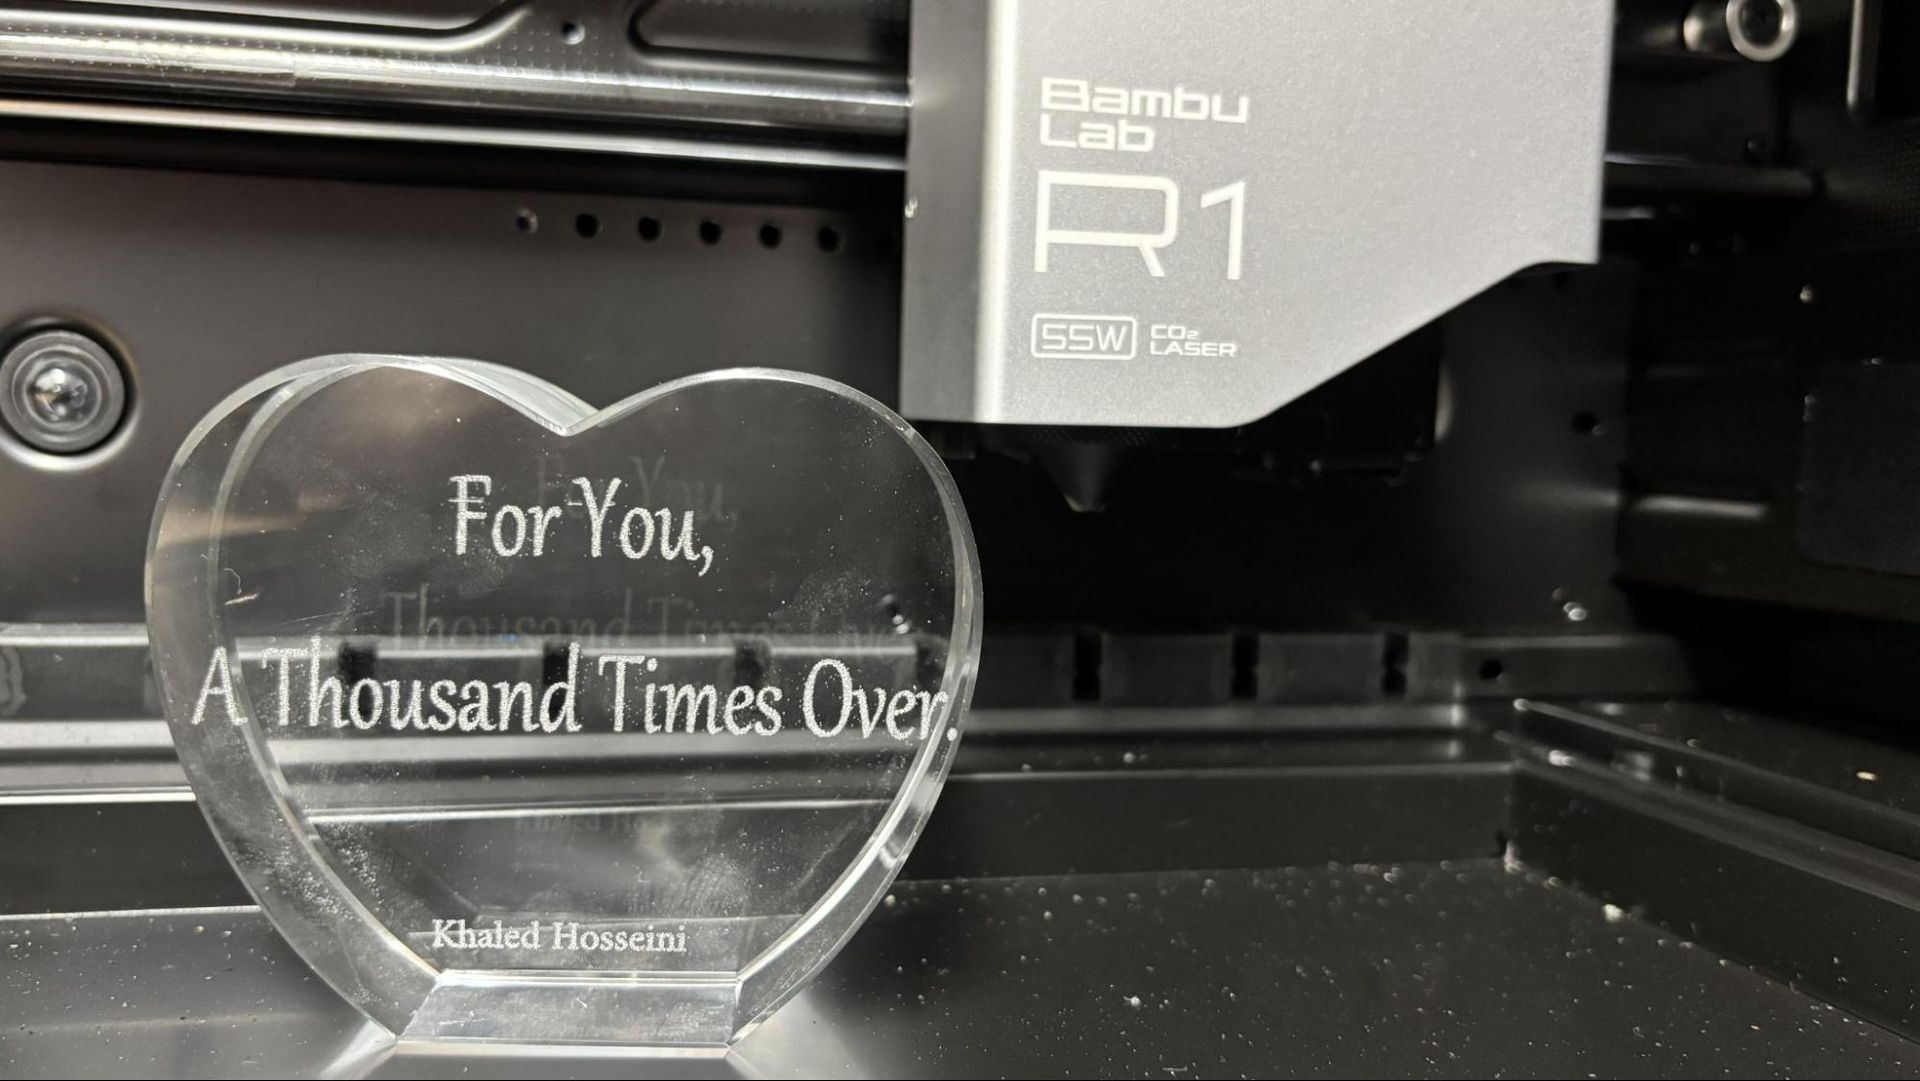
CO2 lasers can also engrave glass with no masking needed, though a thin smear of liquid soap is suggested to keep chipping down. There was no material preset for glass, so a quick internet search led to settings from a competitor’s 55-watt CO2 laser. Using 30% power and 250mm/s, with air assist on, the engraving took just seconds and looks excellent.
(Image credit: Tom's Hardware)
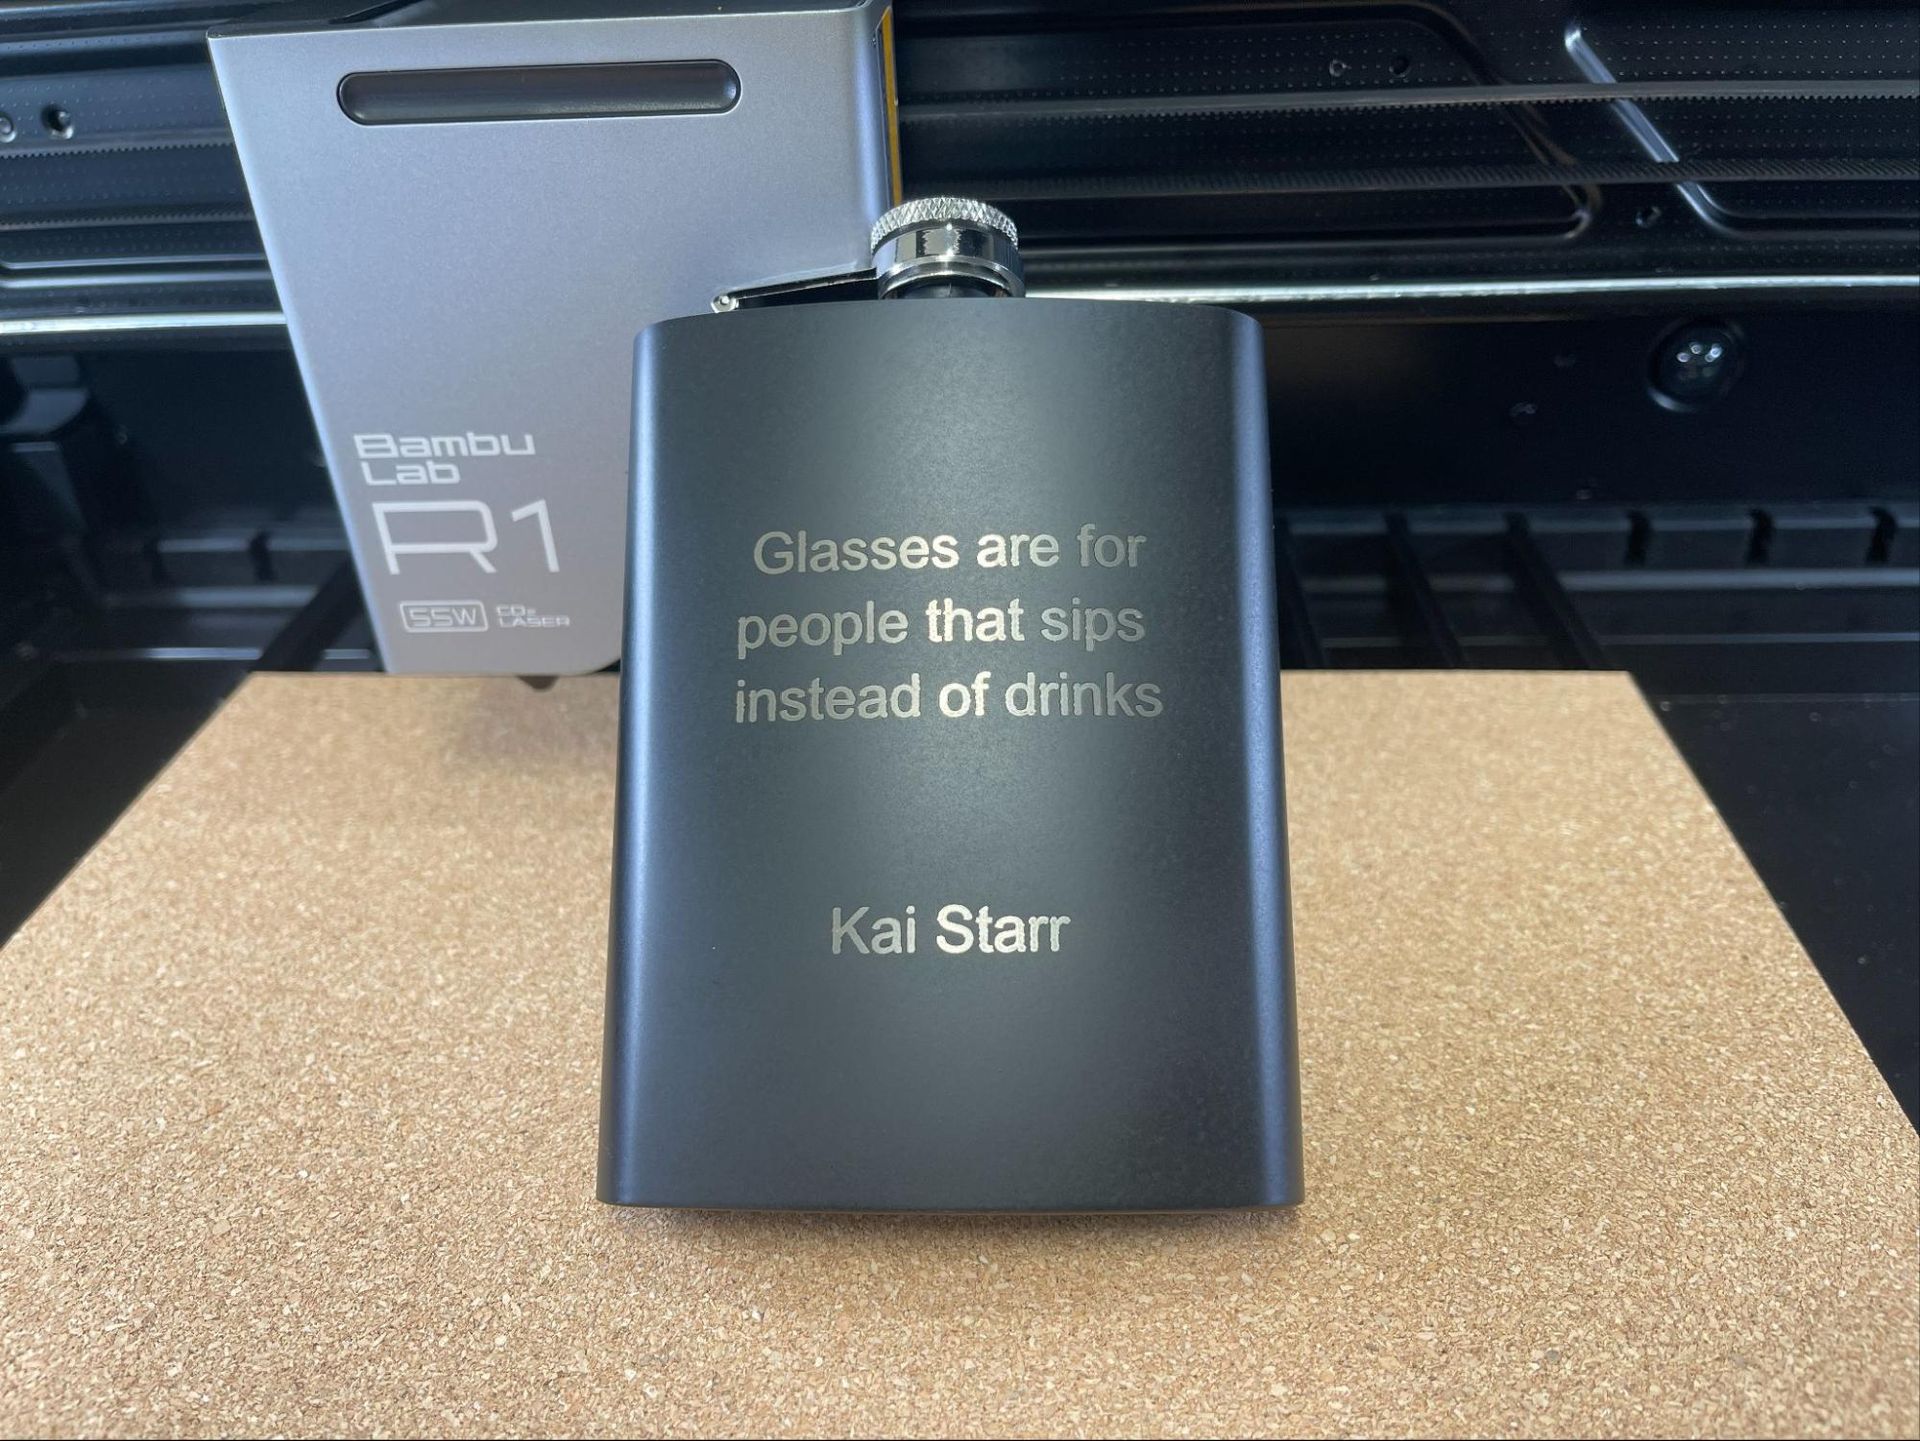
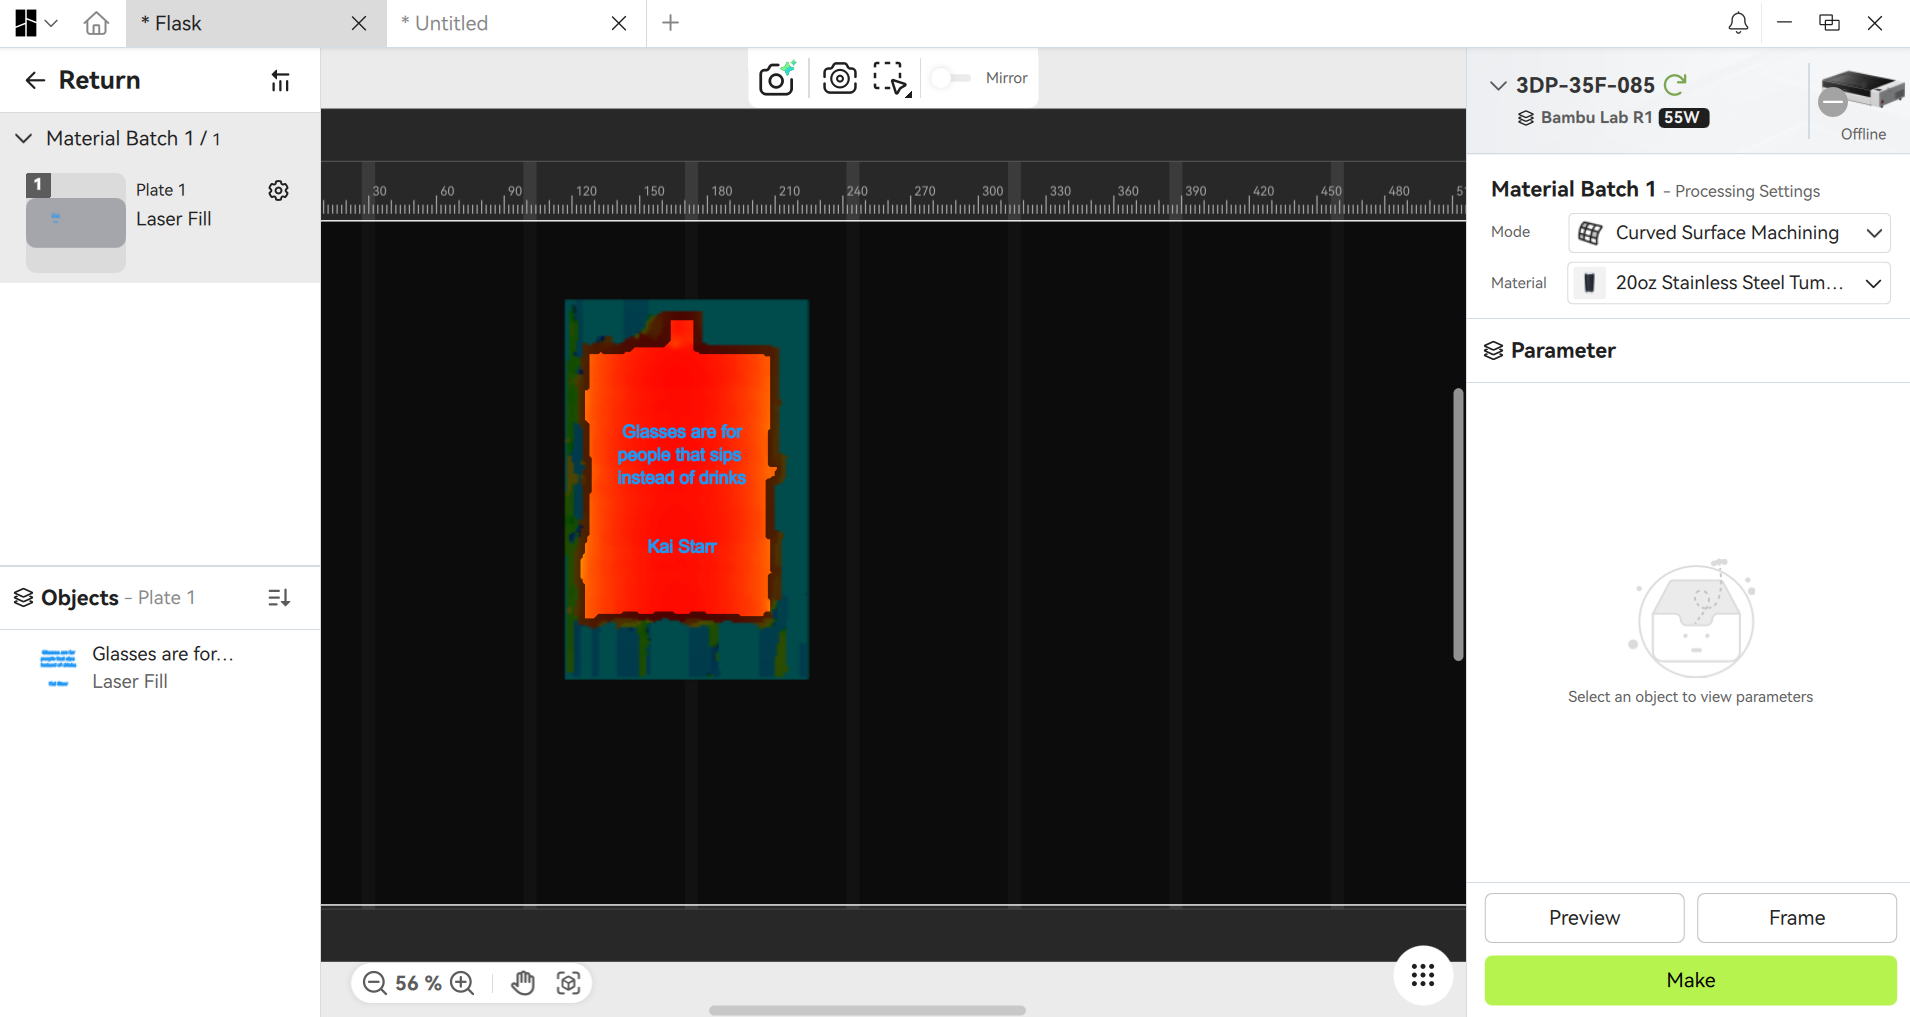
CO2 lasers can’t cut metal, but they do a good job engraving coated metal. The Bambu lab R1has a curved surface machining mode for curved surfaces like this flask and tumblers. The auto measure function creates a 3D map of the material’s surface and shows the engravable area. Using the settings for aluminum business cards, 70% power at 400mm/s, the job took less than a minute and looks sharp and clear.
Tom's HardwareTom's Hardware
Bottom Line
(Image credit: Tom's Hardware)
The Bambu Lab R1 is an impressive step into the laser market. Good hardware with even better software makes the R1 an excellent choice for makers and small businesses needing an easy-to-use CO2 laser. It’s simple enough for a beginner to use, leaving you with more time to focus on making art, not fussing over settings.
Retailing at $2,499, the R1 is more expensive than a hobby-level diode, but a downright bargain compared to the competition. If you’re serious about making cool things or running a small business, the price is worth it.
By combining a 55W CO2, a generous 600 x 300 mm work area, and automated mirror calibration, it delivers high-grade cutting performance through wood, acrylic, and glass with minimal charring. While the manual lens swap process is a minor hassle and the operational noise requires a dedicated workspace or shop environment, its performance outclasses most competitors in its price range.
If you’re not ready to invest in a professional-grade machine, check out the Creality Falcon A1 Pro, a very capable 20W for $1,099. If you’re thinking about engraving glass or handling materials without charring, the xTool F2 Ultra UV is a great “cold” laser that runs for $4,299. If you want to take your laser with you, a portable xTool F1 laser is a heck of a deal at $819.
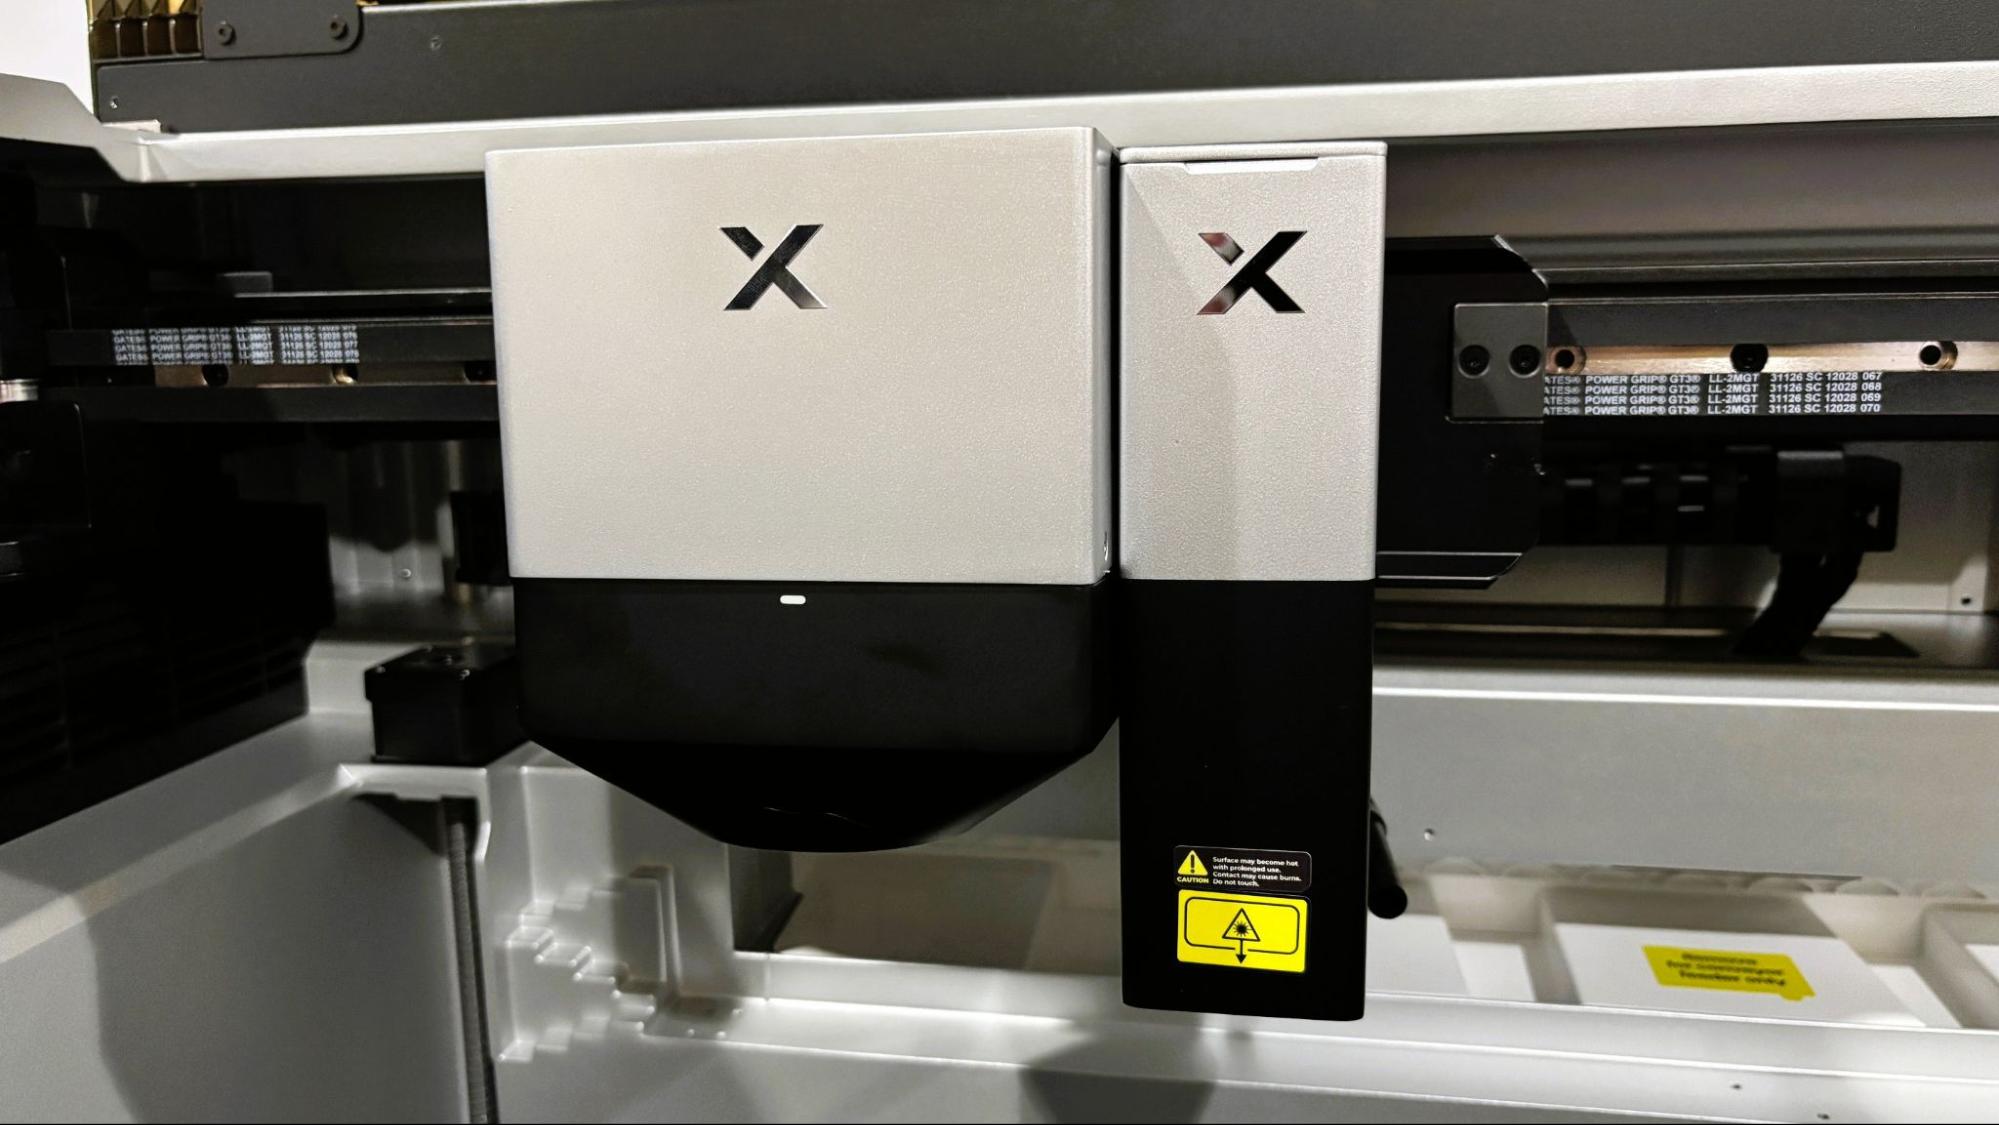
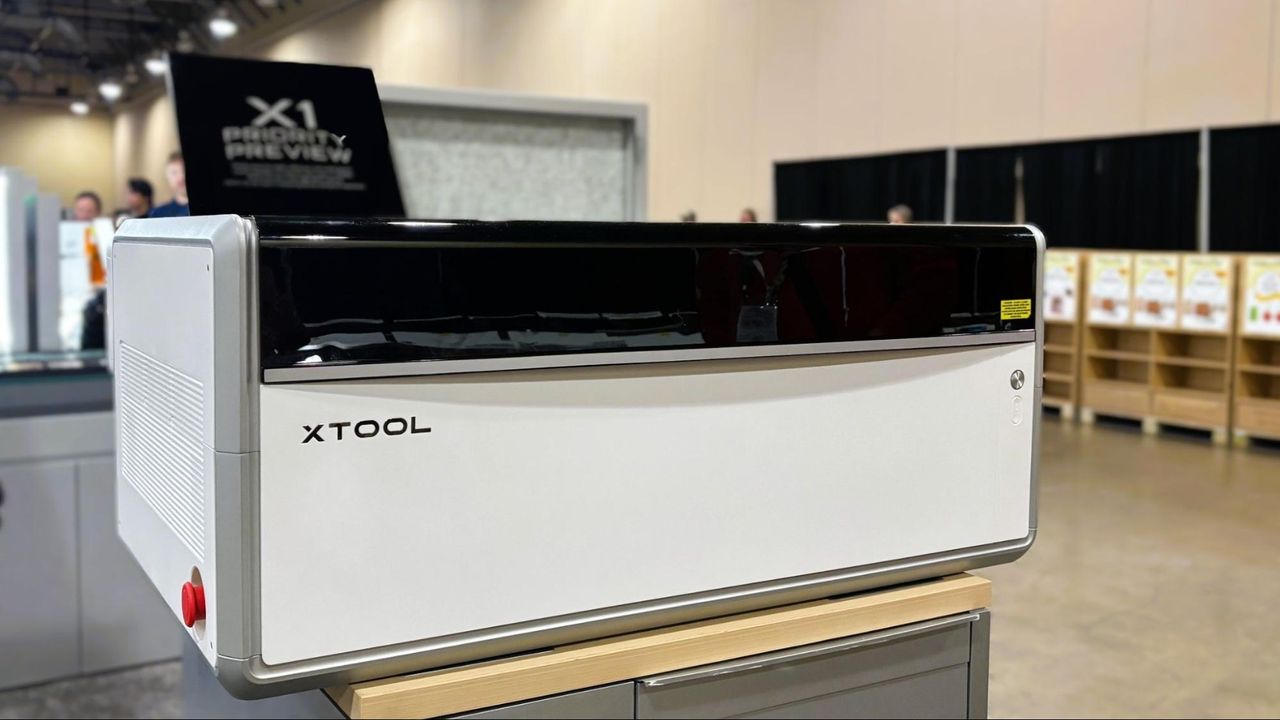
xTool says its new X1 laser will be the last one you’ll ever need. The machine is modular, allowing users to add every style of laser xTool makes to the system: CO2, Diode, UV, Fiber, and MOPA. It will also be xTool’s first flying-galvo unit, combining the large size of a gantry system with the speed of a galvo.
And if that isn’t interesting enough, it's also a dual-head system, meaning the galvo will sit side by side with a CO2 laser. The unit will be able to pick and choose which head to deploy for the job – both if needed.
(Image credit: Tom's Hardware)
The announcement was made at The Next Level Maker Conference in Grapevine, TX. The event is a combination of maker retreat and expo, with a wide variety of classes and motivational talks by experts who have turned maker hobbies into successful businesses.
Disclaimer: xTool provided travel accommodations for this trip. Coverage remains editorially independent.
Previous “all in one” machines have used swappable toolheads, but these have been limited to various powers of diode and IR lasers. The X1 will use a swappable backpack system to provide the different laser frequencies routed to the galvo toolhead. This means the galvo can be a wood-burning diode, a crystal engraving UV, or a metal etching MOPA.
The machine’s default build will be a powerful 55w CO2 laser paired with a 20w diode for the galvo head. No price was mentioned at the reveal, so we’ll have to wait until closer to the laser’s October launch date to learn more.
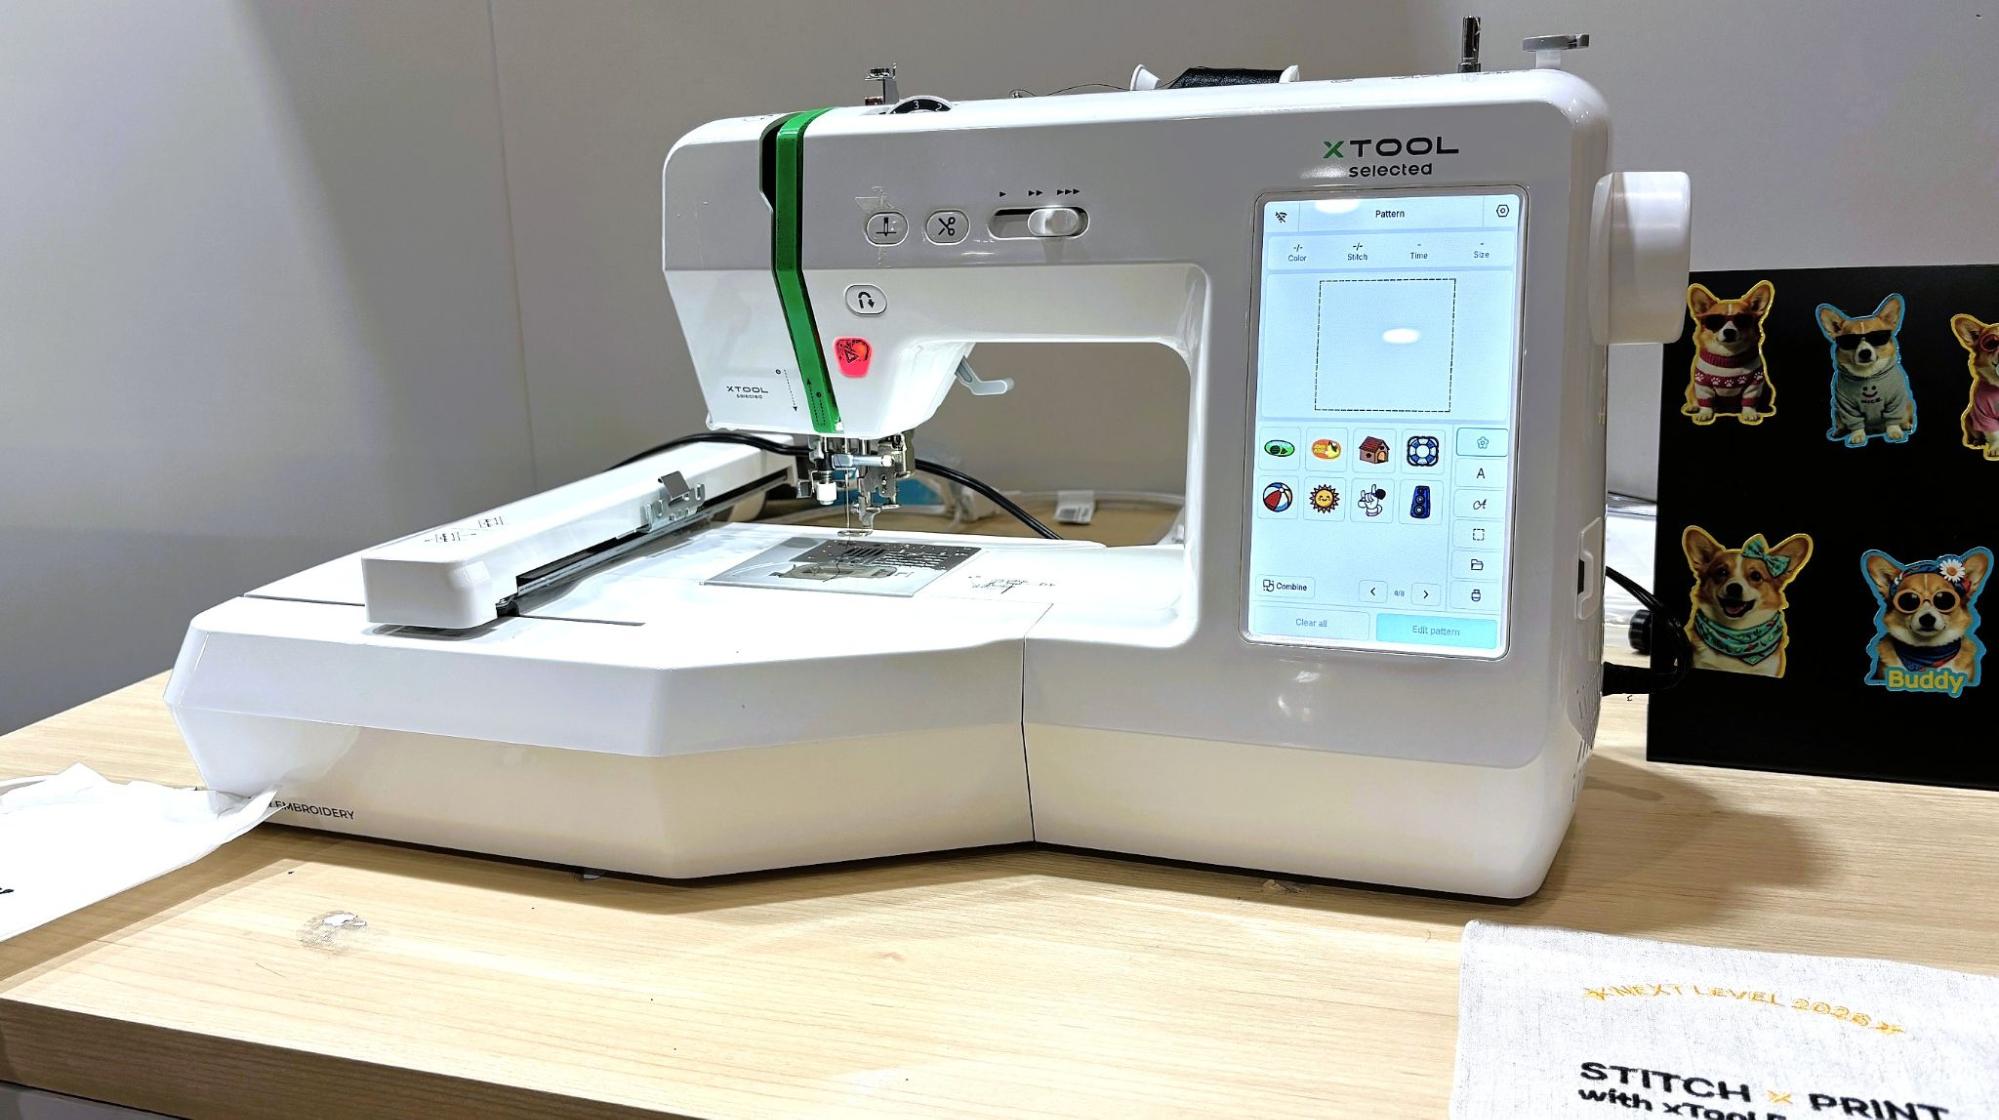
A representative from xTool said the company wanted to embrace all forms of making, and be more than “just” a laser manufacturer. To that end, they announced an upcoming embroidery machine, the SE1. The machine, capable of both normal stitching and single-color embroidery, is presented as an entry point to embroidery for those already within the xTool ecosystem. The machine can be paired with the O1 Omni to paint the threads with DTG color.
(Image credit: Tom's Hardware)
This may seem to be an overly complex way to achieve colorful stitching, until you consider that full-color embroidery is accomplished with multi-needle machines costing thousands of dollars. They are also insanely complex and require high levels of skill to manage and maintain, whereas a single-color embroidery machine can be purchased for way less and operated by a beginner.
The SE1 will also use the xTool design suite, which makes transferring designs between the sewing machine and UV printer fairly straightforward. During the demo, a piece of fabric was stitched on the SE1, removed from the hoop, then placed inside the UV printer to add color. It was finished with a heat press to set the DT ink.
xTool wasn’t the only company presenting at the show. The vendor hall was full of makers turned small business owners, something that xTool actively encourages with its products and ecosystem.
Makerflo
(Image credit: Tom's Hardware)
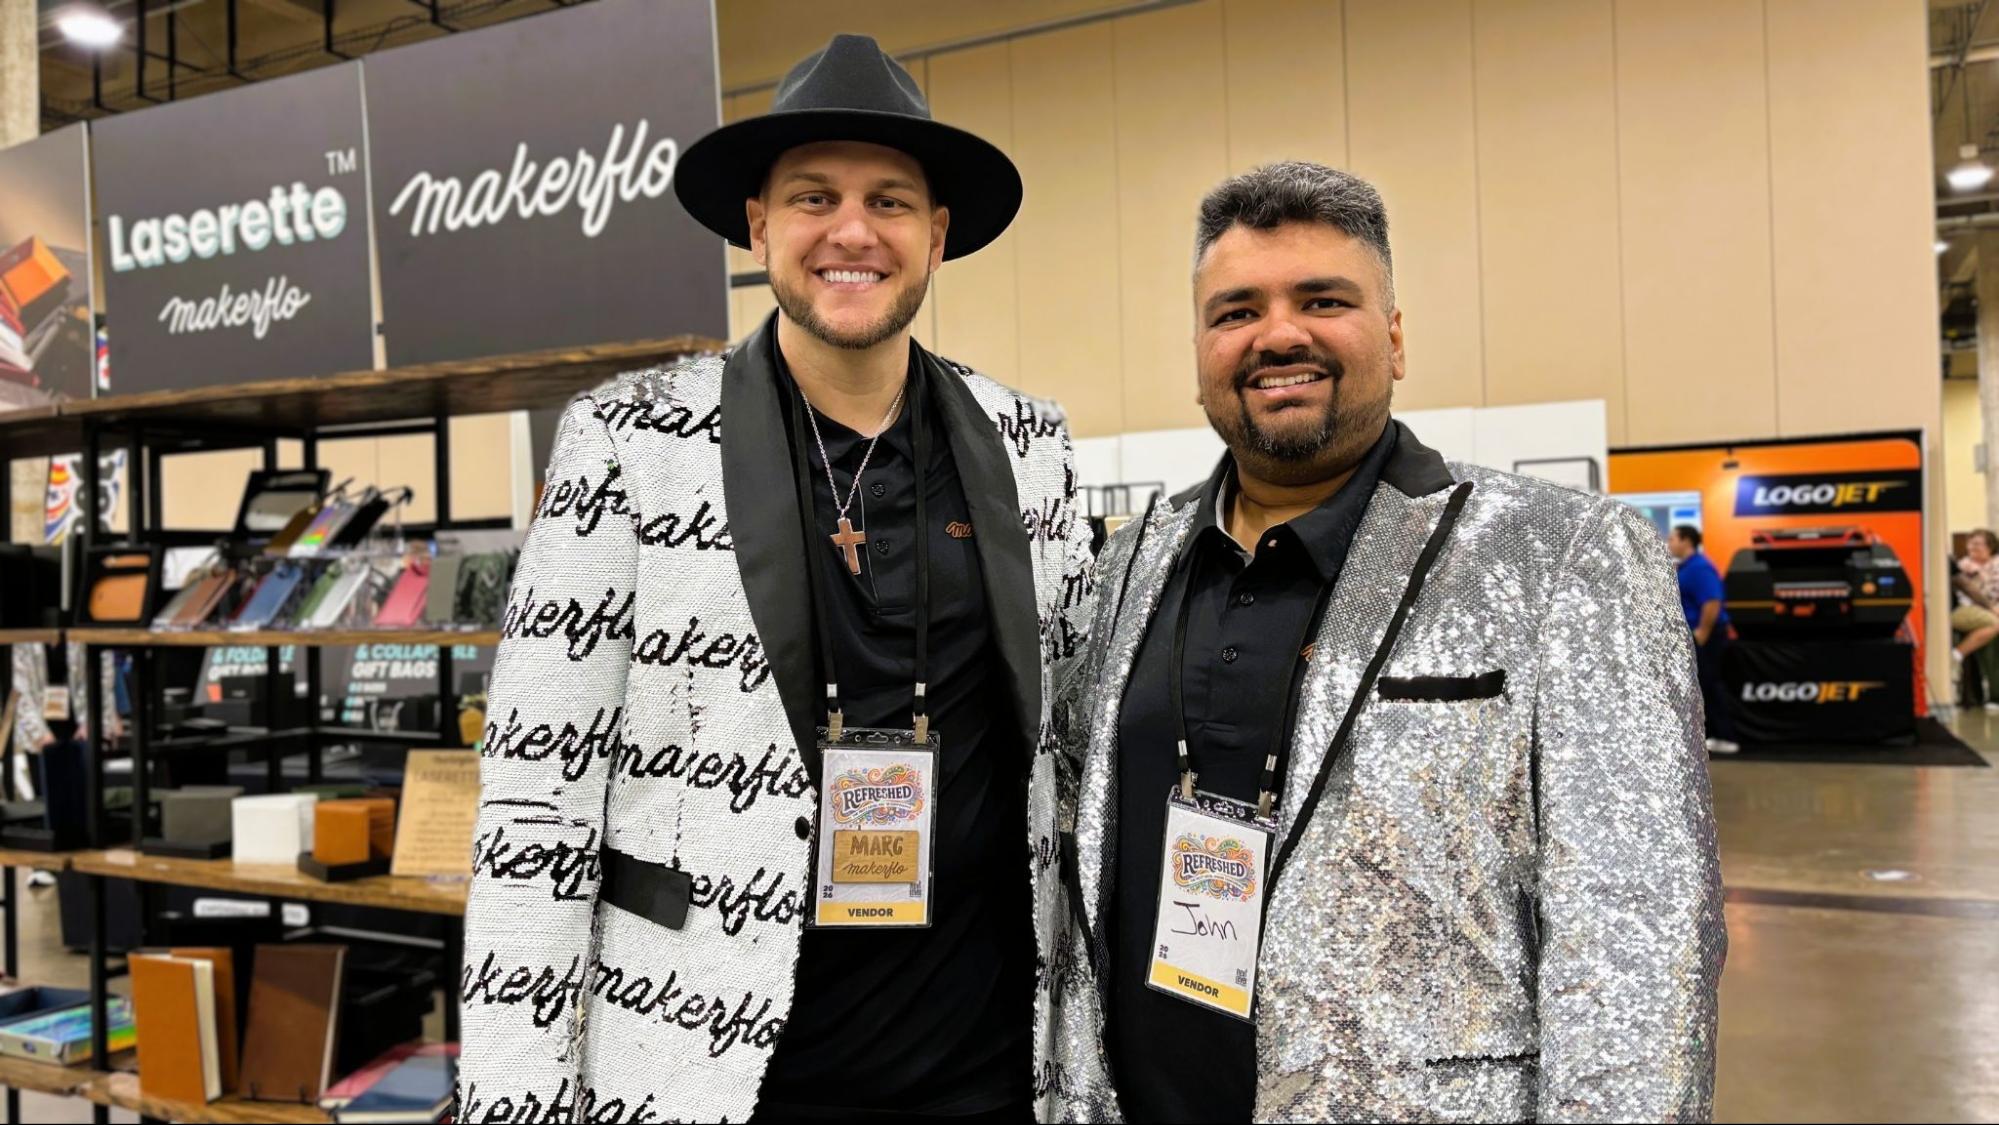
Marc Pendergraft and John Modi started selling laser-cut products right out of college, and now own Makerflo, a wholesaler that provides “the kind of materials we wish we had.” They sell premium laser-ready merchandise that comes with upscale gift packaging. Their booth also has several new items seeking feedback from shoppers. I was impressed with a coaster that consisted of absorbent stone with a laser-ready metal disc embedded in the center.
Marc and John also led several popular breakout sessions on running a successful laser business.
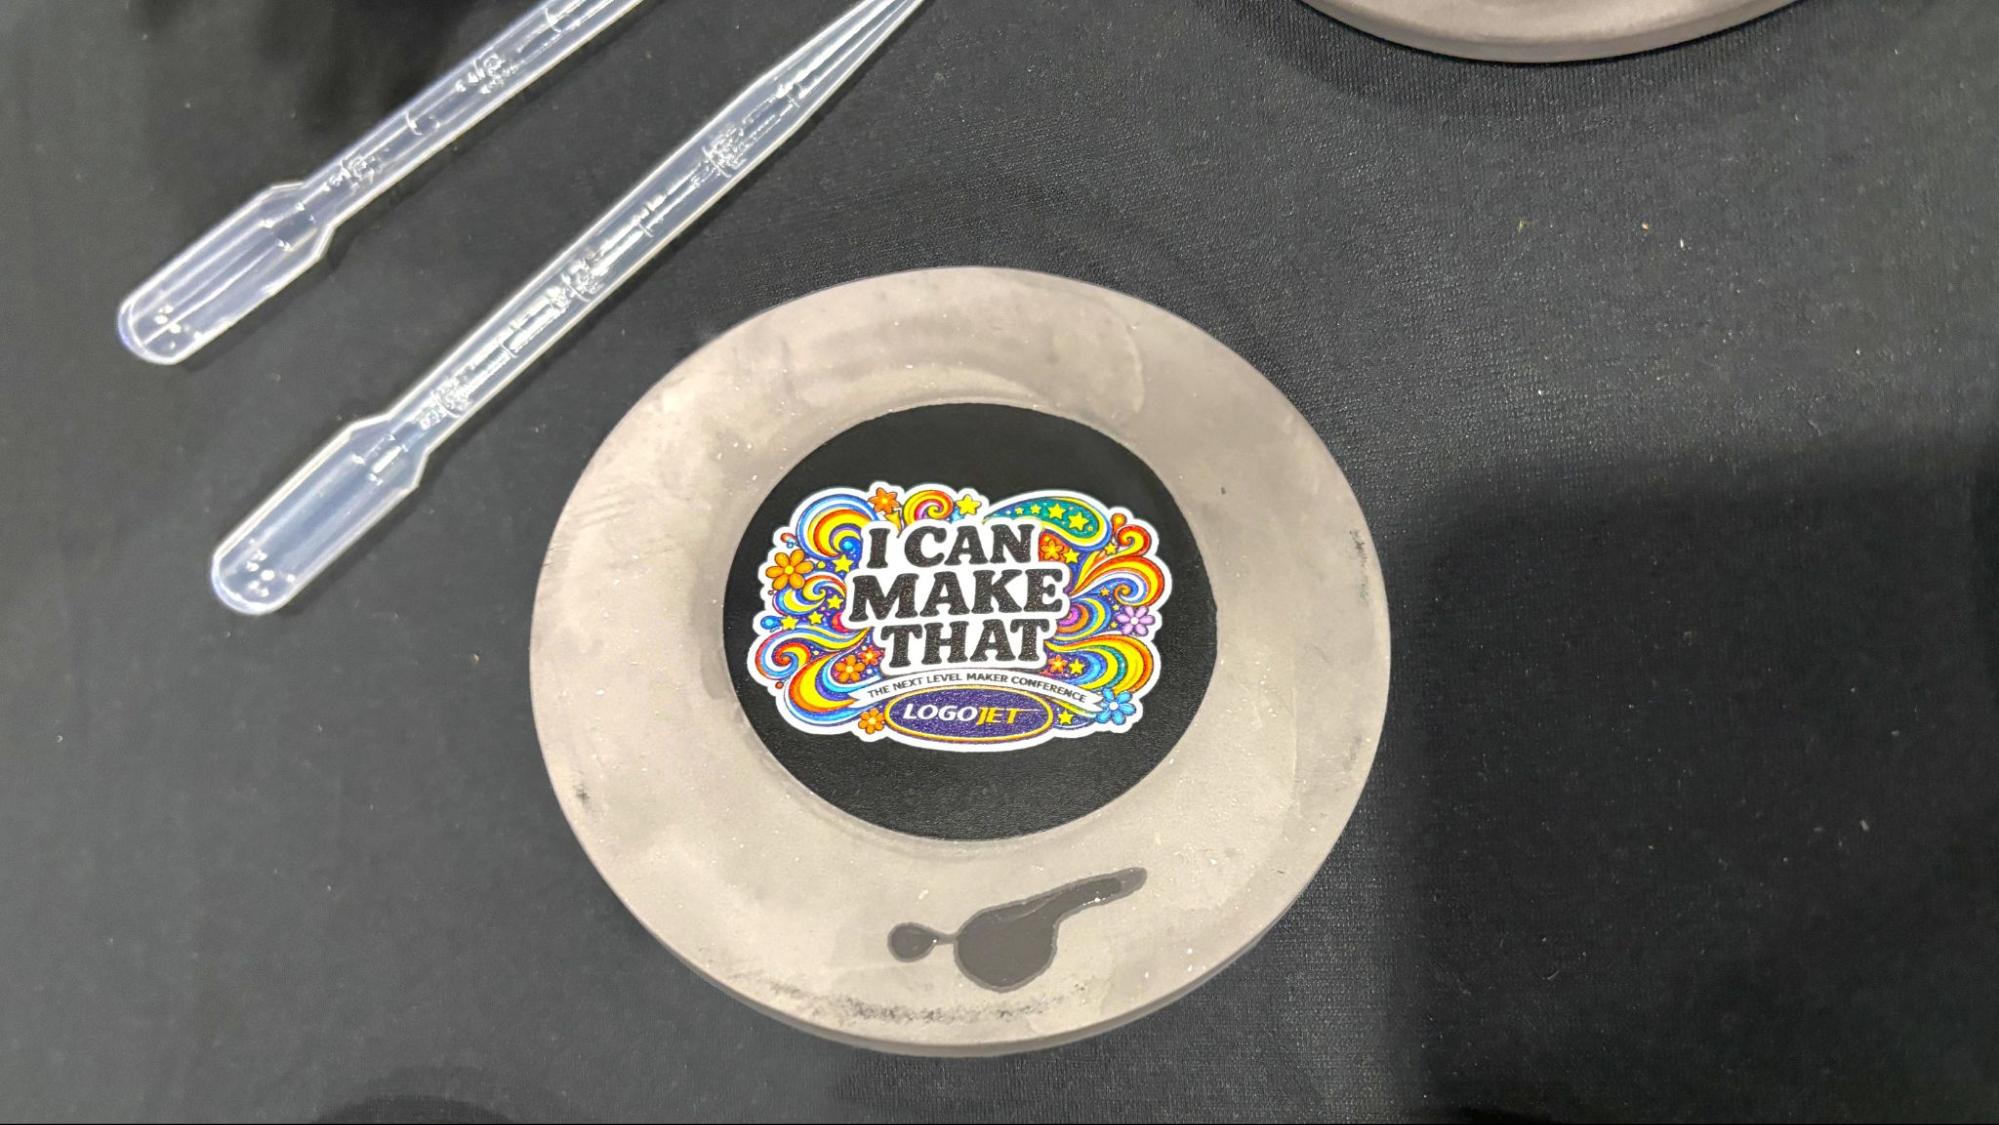
Diatomite stone coaster under going beta testing at Makerflo. (Image credit: Tom's Hardware)
Smokey Hill Designs
(Image credit: Tom's Hardware)
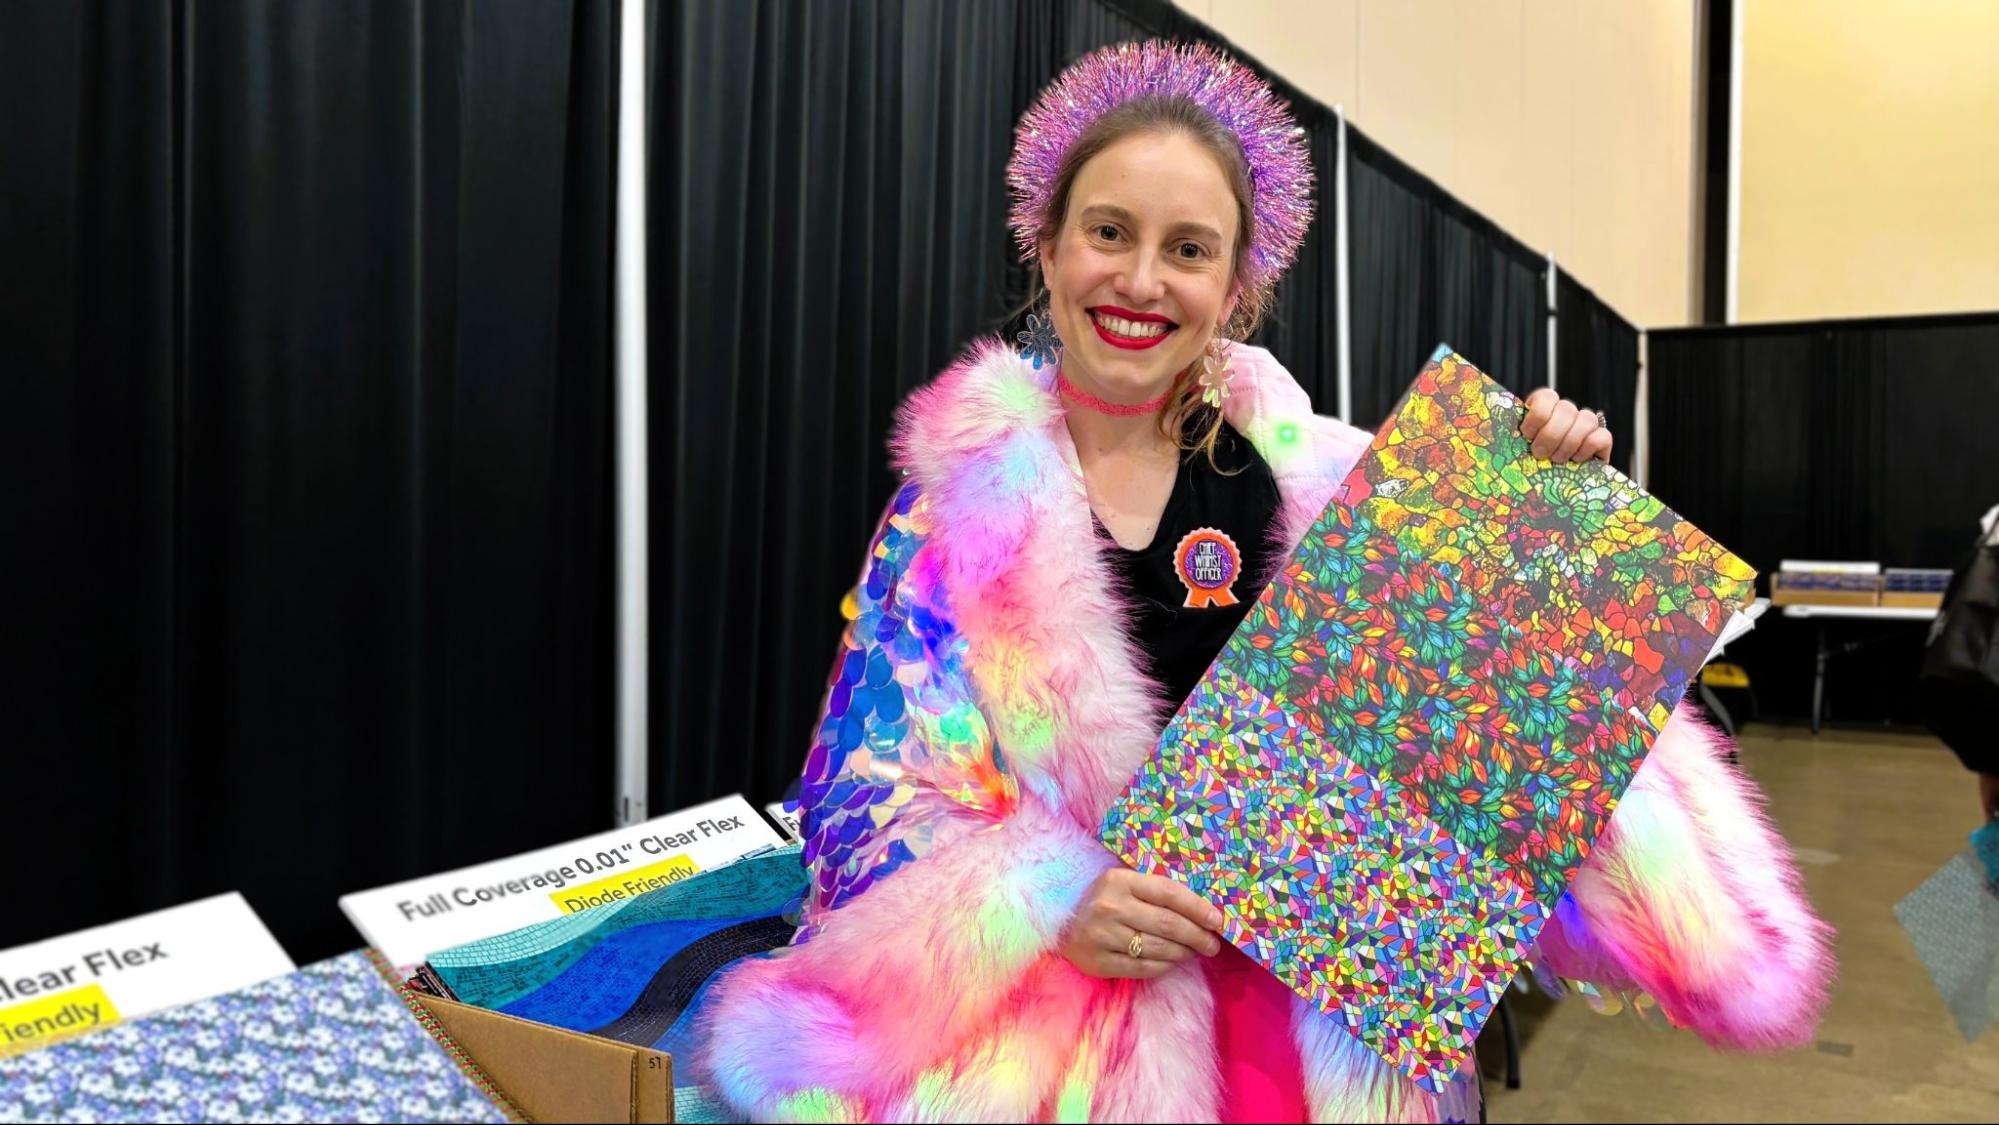
Angela Cruise, owner of Smokey Hill Designs, brought pallets full of high-quality plywood, acrylic, leatherette, and other sparkly laser substrates. Most were custom printed in eye-catching designs using a diode-safe material. Her goal is to use premium materials, like natural wood and pre-finished acrylics, that require less effort to turn into amazing, high-value products. Nearly everything she sells is manufactured in-house at her company’s North Carolina shop and is held to strict quality standards for use in lasers.
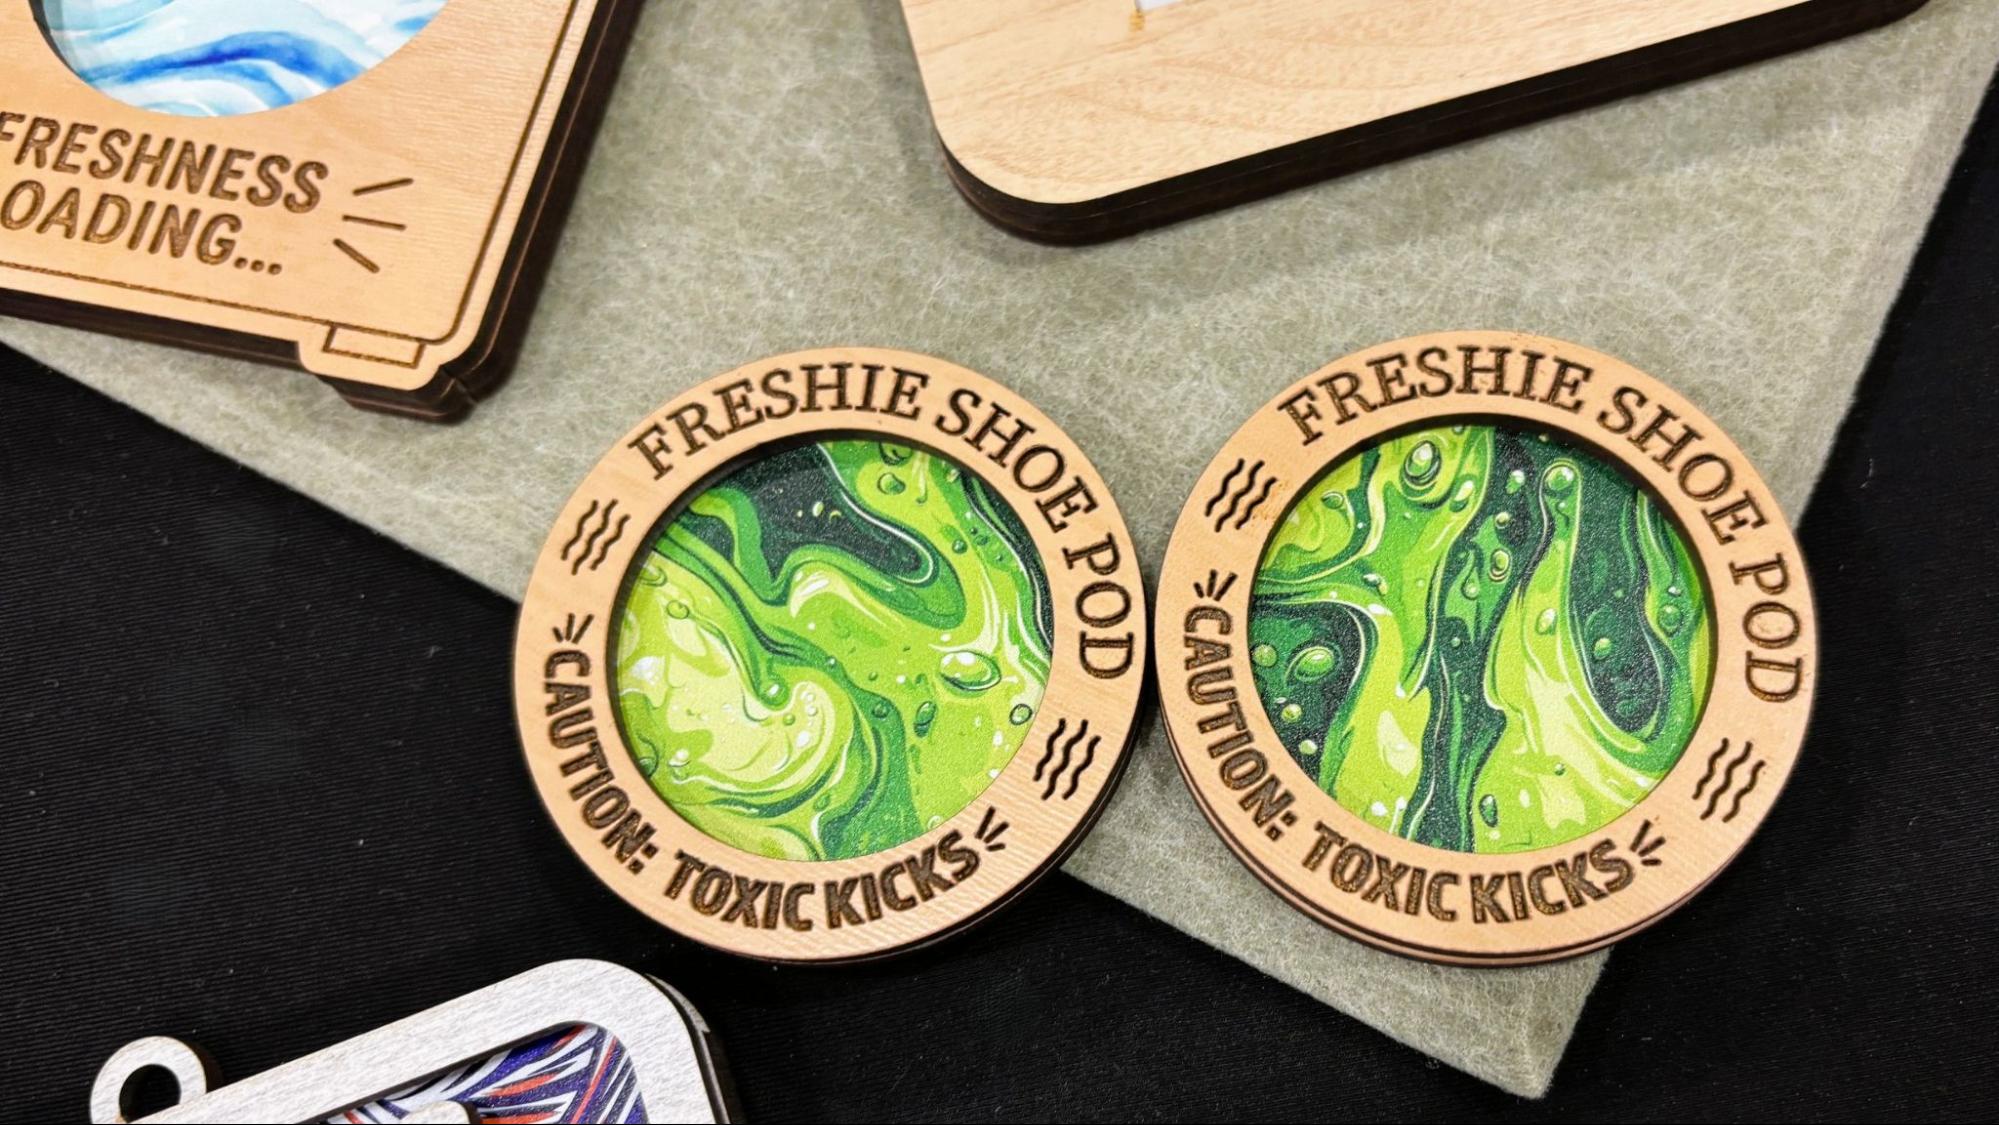
One of the unique materials they had for sale was Freshy Sheets, a thick absorbent material with a colorful printed surface, designed to hold essential oil and act as an air freshener. Naturally, the sheets are designed to be cut in shapes and encased in laser-cut designs.
(Image credit: Tom's Hardware)
BurnForge Software
(Image credit: Tom's Hardware)
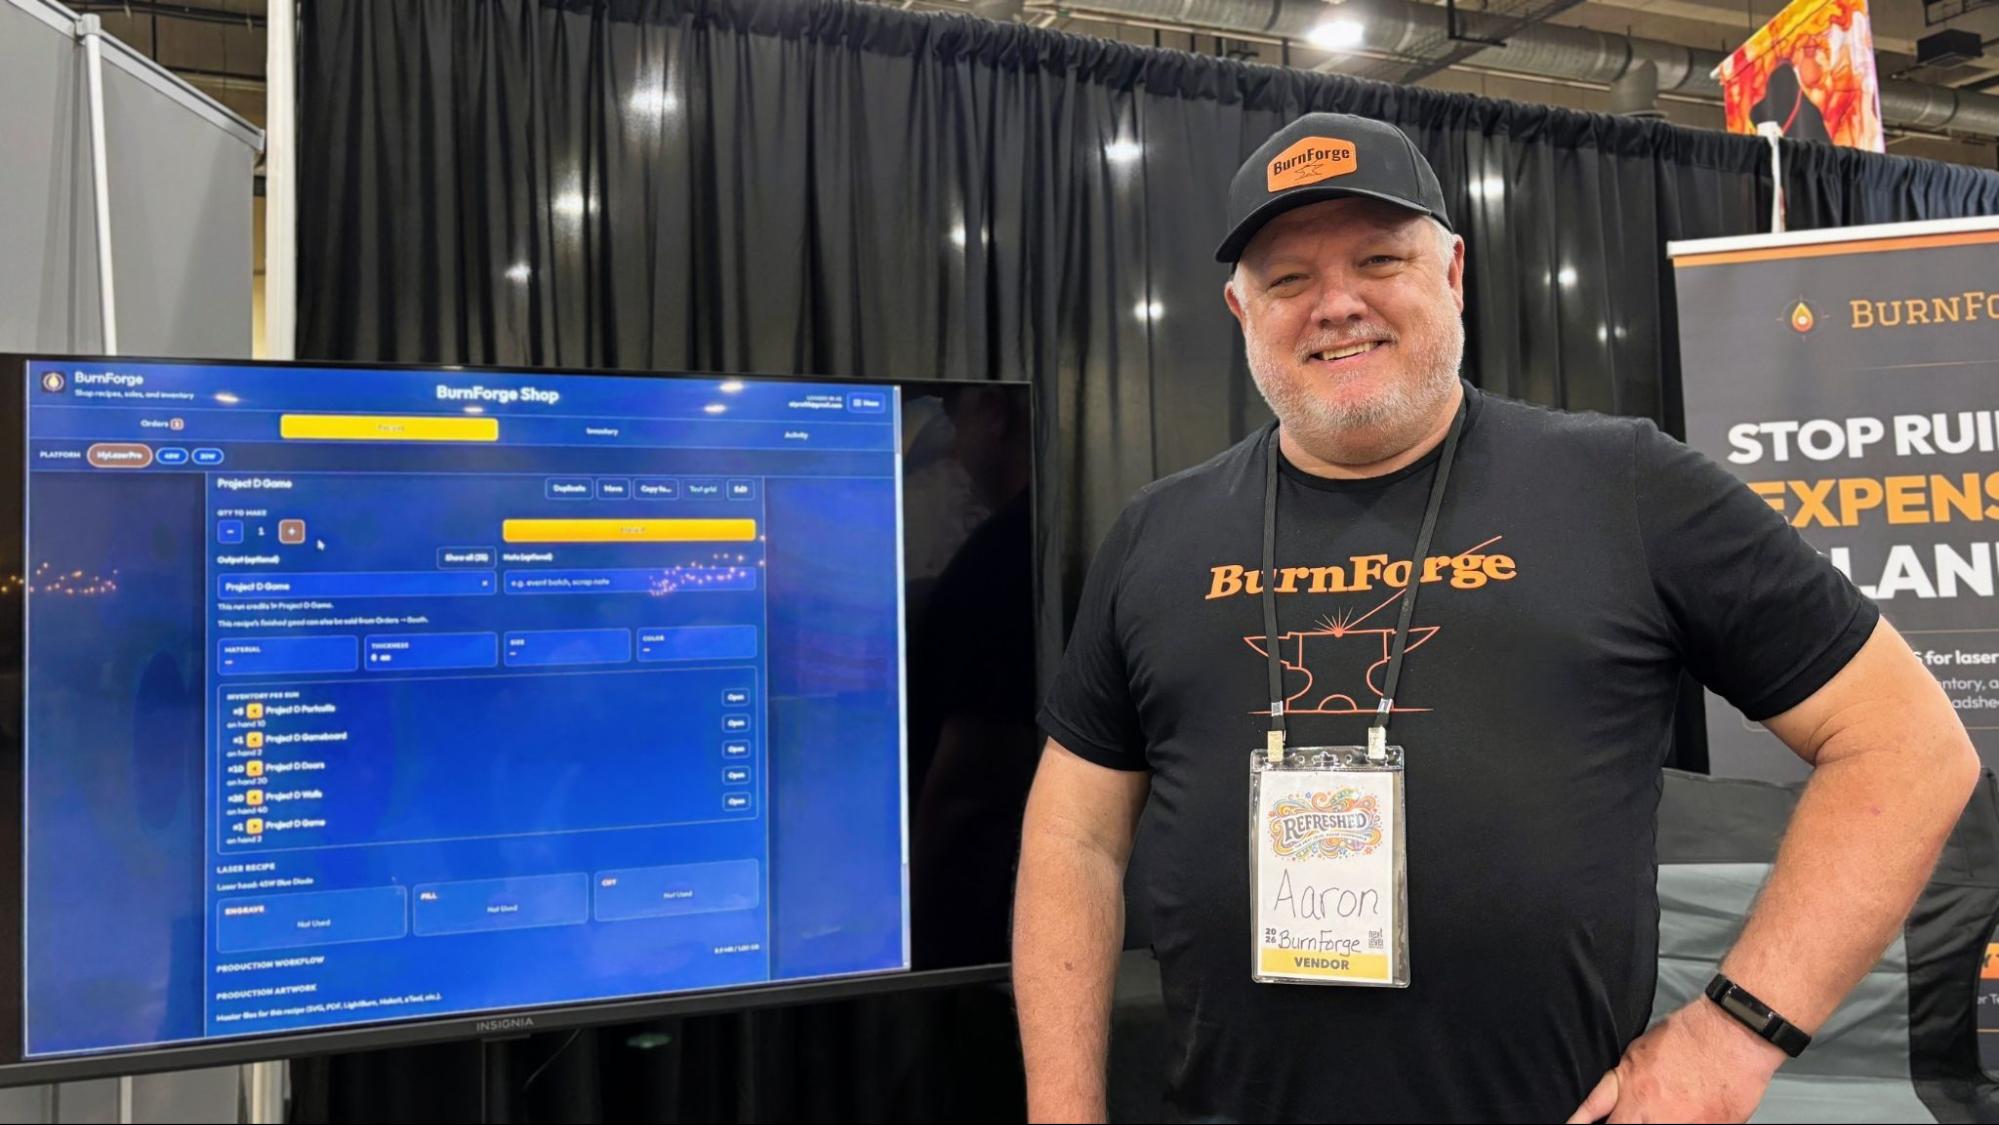
Aaron Pratt created BurnForge, a subscription-based business tracking system for crafters. The app lets makers track customer orders every step of the way so you stop “ruining expensive blanks.” The program helps you remember machine settings and tracks your inventory and orders. He’s offering a 30-day free trial with the code NEXTLEVEL30 for a limited time.
(Image credit: Tom's Hardware)
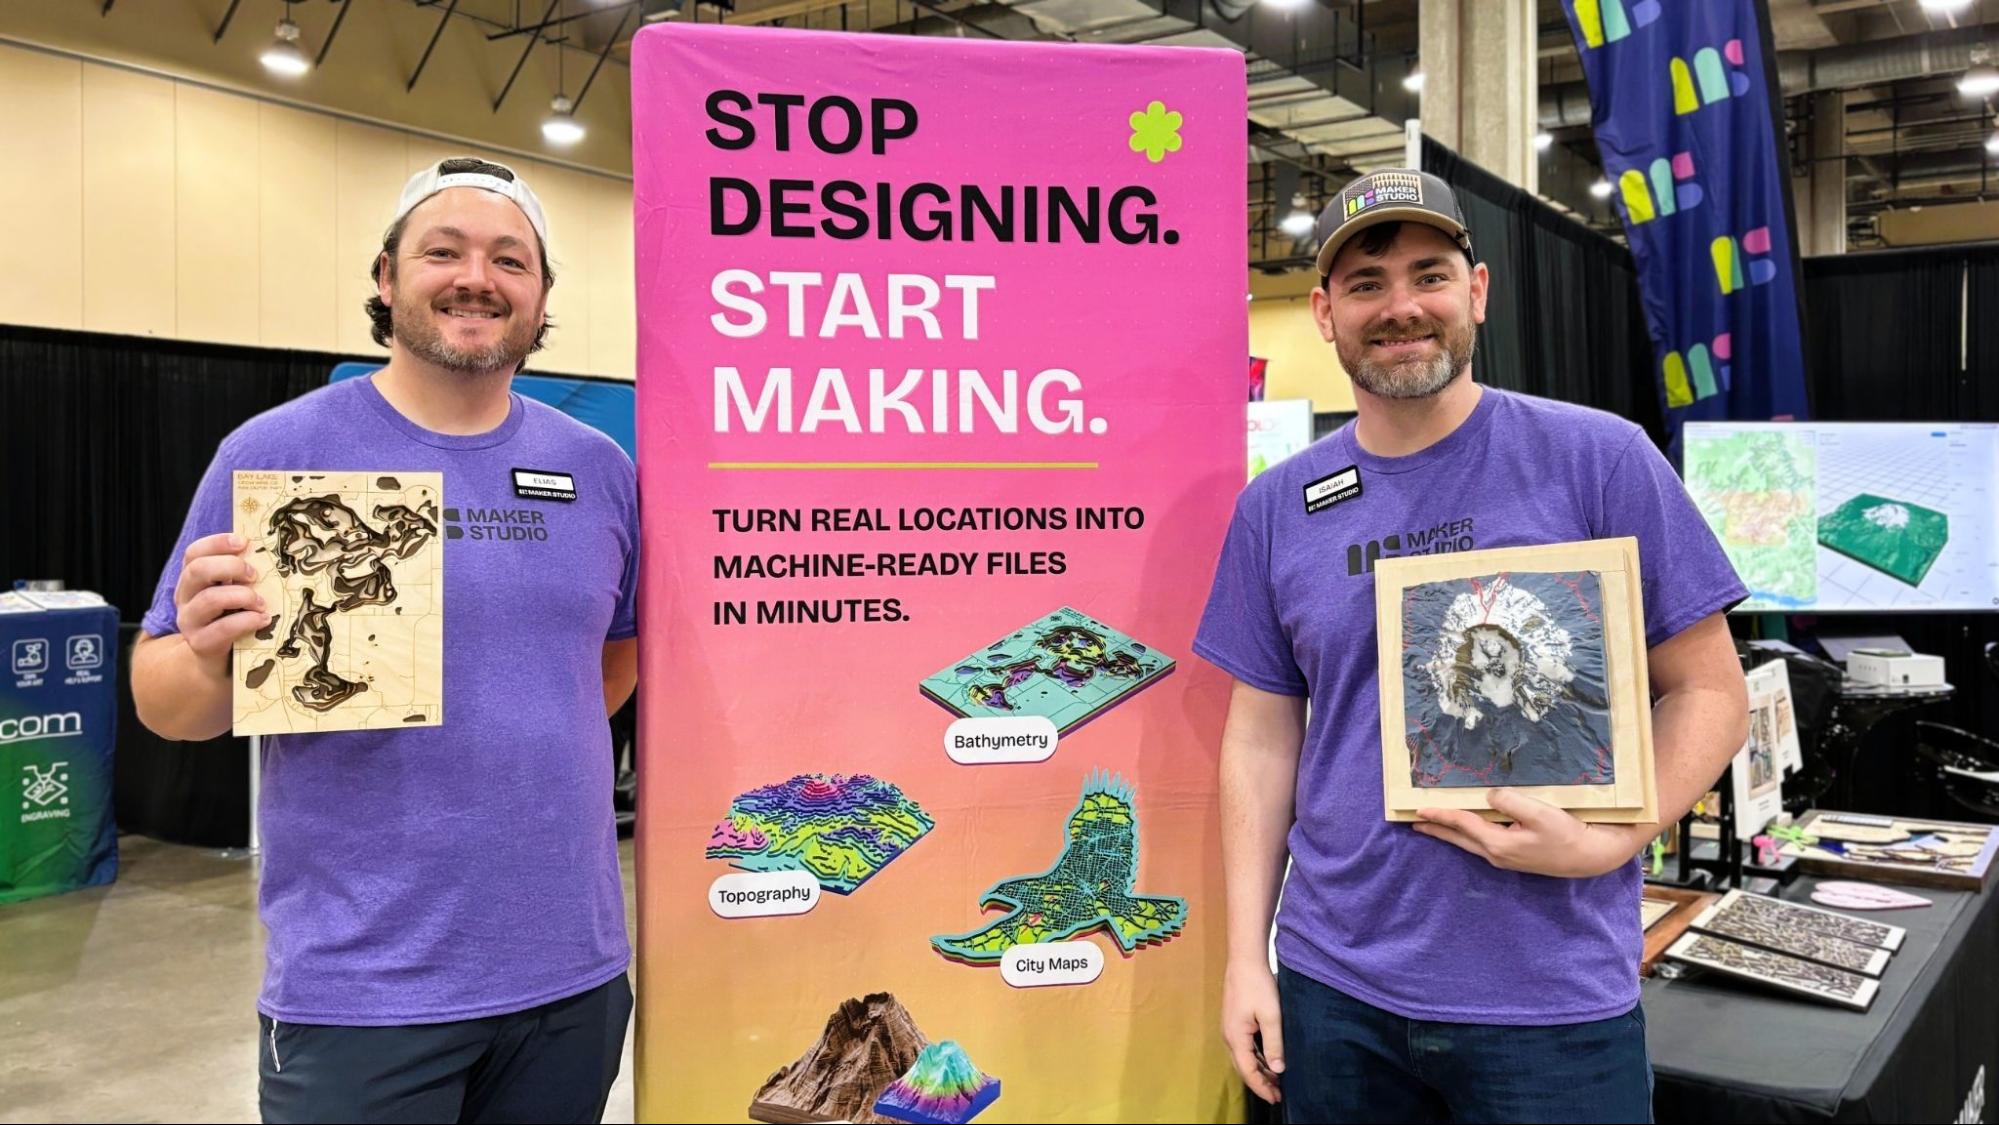
Brothers Elias and Isaiah Grey designed Maker Studio, a suite of apps that create custom maps you can reproduce with a laser cutter, CNC, or 3d printer. The maps come in either a layered style that looks great when laser cut and stacked, or 3D terrain relief maps that can be 3D printed or CNC carved. Their product lets makers easily turn real locations into design files without needing CAD skills.
Maker Studio is a subscription service that will soon include a box maker, a fit sheet for help with packaging, and a tumbler art maker. You can sign up for a 14-day free trial to test out the program before you commit.
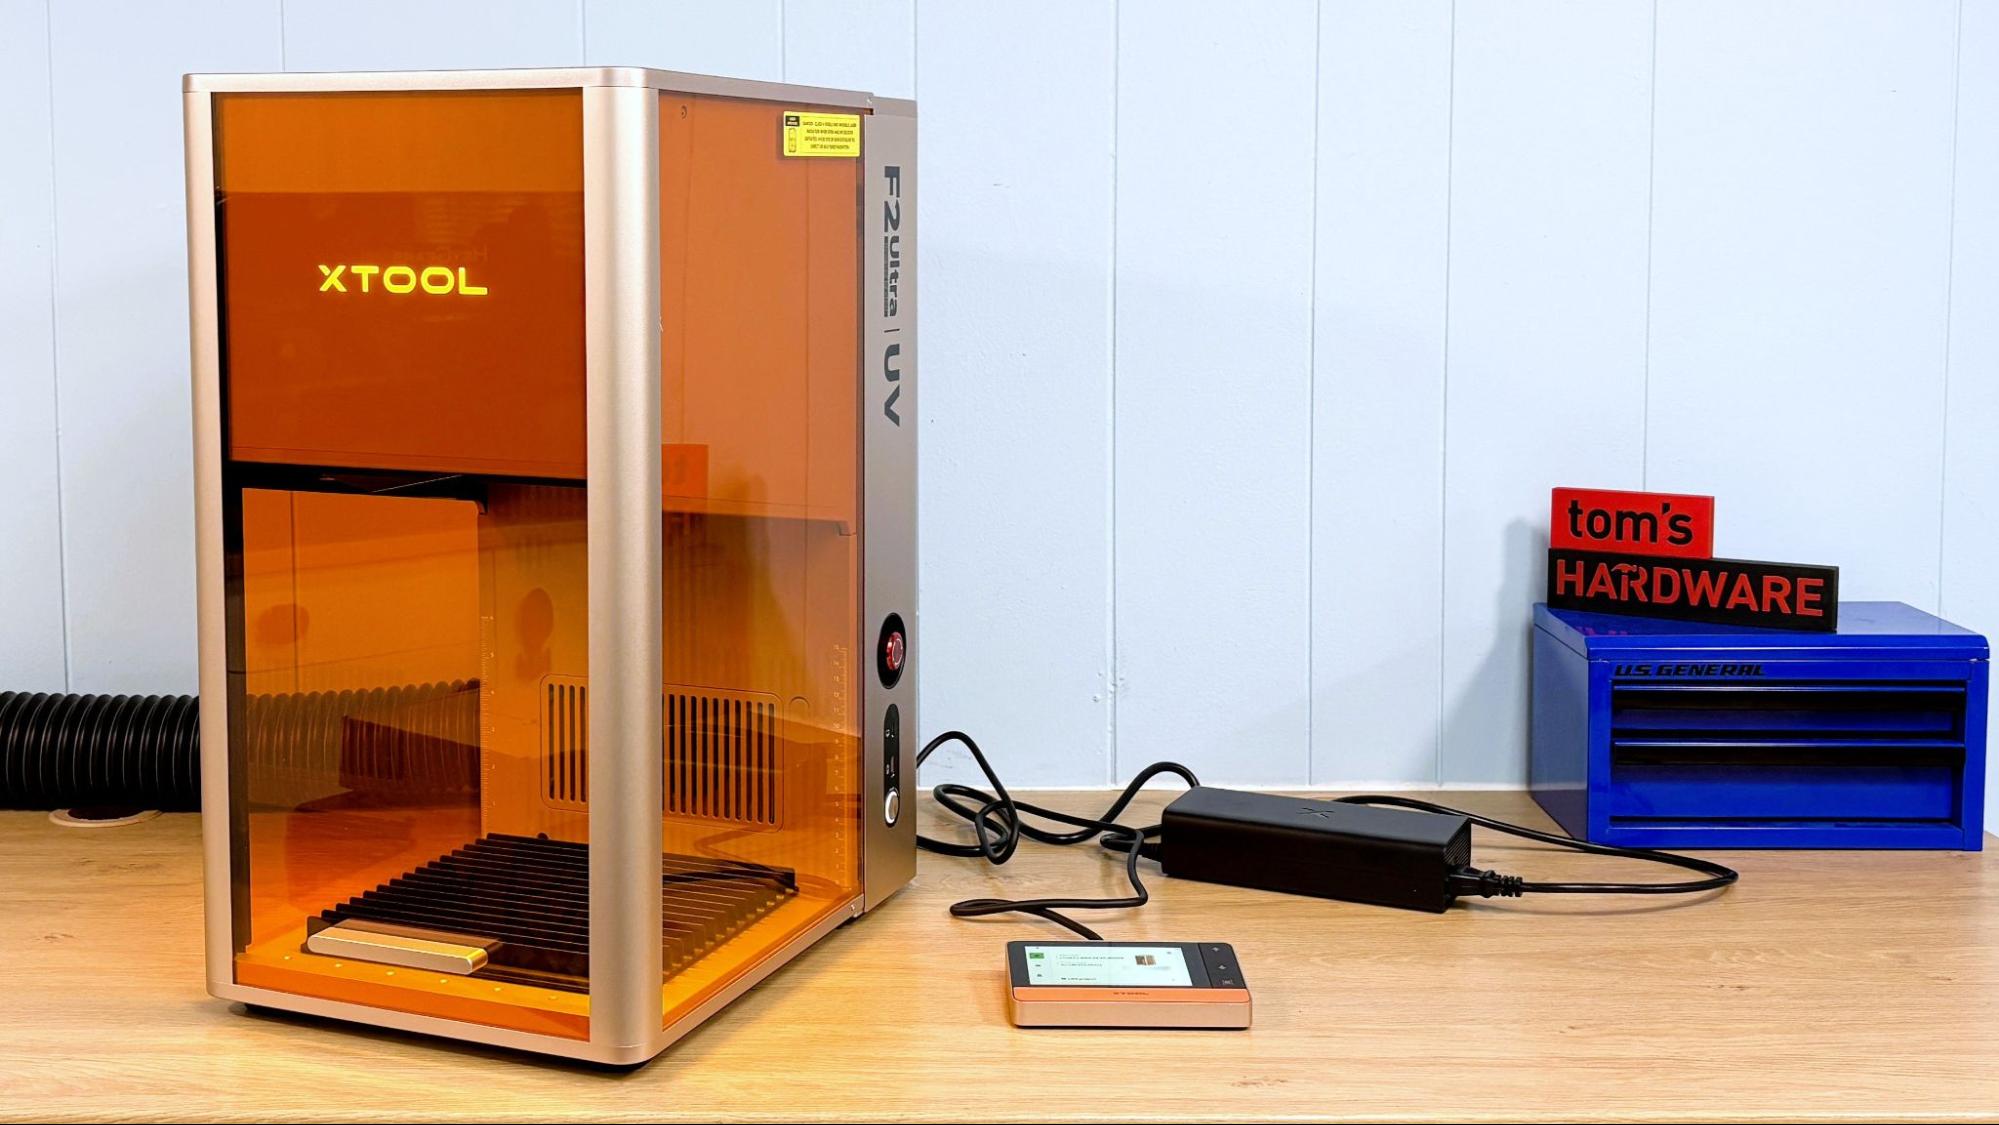
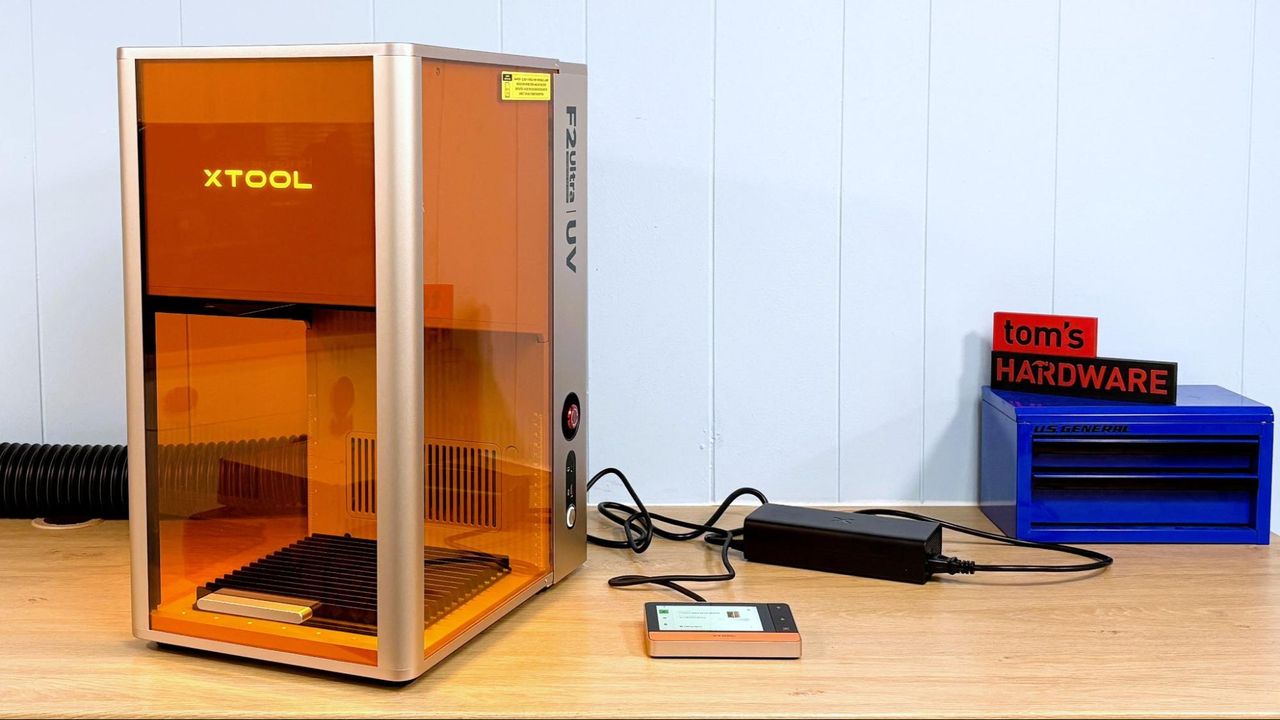
The xTool F2 Ultra UV laser is not your ordinary laser. Normally, lasers mark, engrave, and cut by burning the material. Instead, a UV laser uses a shorter wavelength of light (355 nm) that produces a photochemical reaction that breaks down the material instead of simply setting it on fire. These are called “cold” lasers, but I still wouldn’t put my hand in there.
The UV laser generates extremely clean cuts and engravings in wood and plastic that are simply not possible with other types of lasers. It's also able to etch glass and crystal, and can actually engrave the INSIDE of glass for some fantastic effects.
The F2 Ultra UV is a galvo laser. Instead of moving around on a gantry, the laser is stationary while the beam is directed by galvanometer mirrors. It’s extremely fast and capable of “moving” at 15,000 mm/s. The downfall of many galvo lasers is that they lose focus the farther away from the center point the beam travels. At the edges of the 200 x 200 mm work area, the F2 Ultra UV still does a great job.
The F2 Ultra UV is part of a family of lasers. The F2 is a portable “standard” diode laser, the F1 Ultra has both a diode and a fiber laser for etching metal, and the F2 Ultra is a 60W MOPA with a 40W diode. I wish the UV laser had been given its own class, as this is a confusing cluster of machines.
The retail price for the F2 Ultra UV starts at $4,299. It's pricey, but it can handle everything but metal and is the only laser that can handle crystal. This makes it a good all-around machine for many home and business uses. For that, it’s going on the best laser cutter list for a small business.
Specifications: xTool F2 Ultra UV
Machine Footprint
294 mm x 429 mm x 520 mm (11.57'' × 16.88'' × 20.5'')
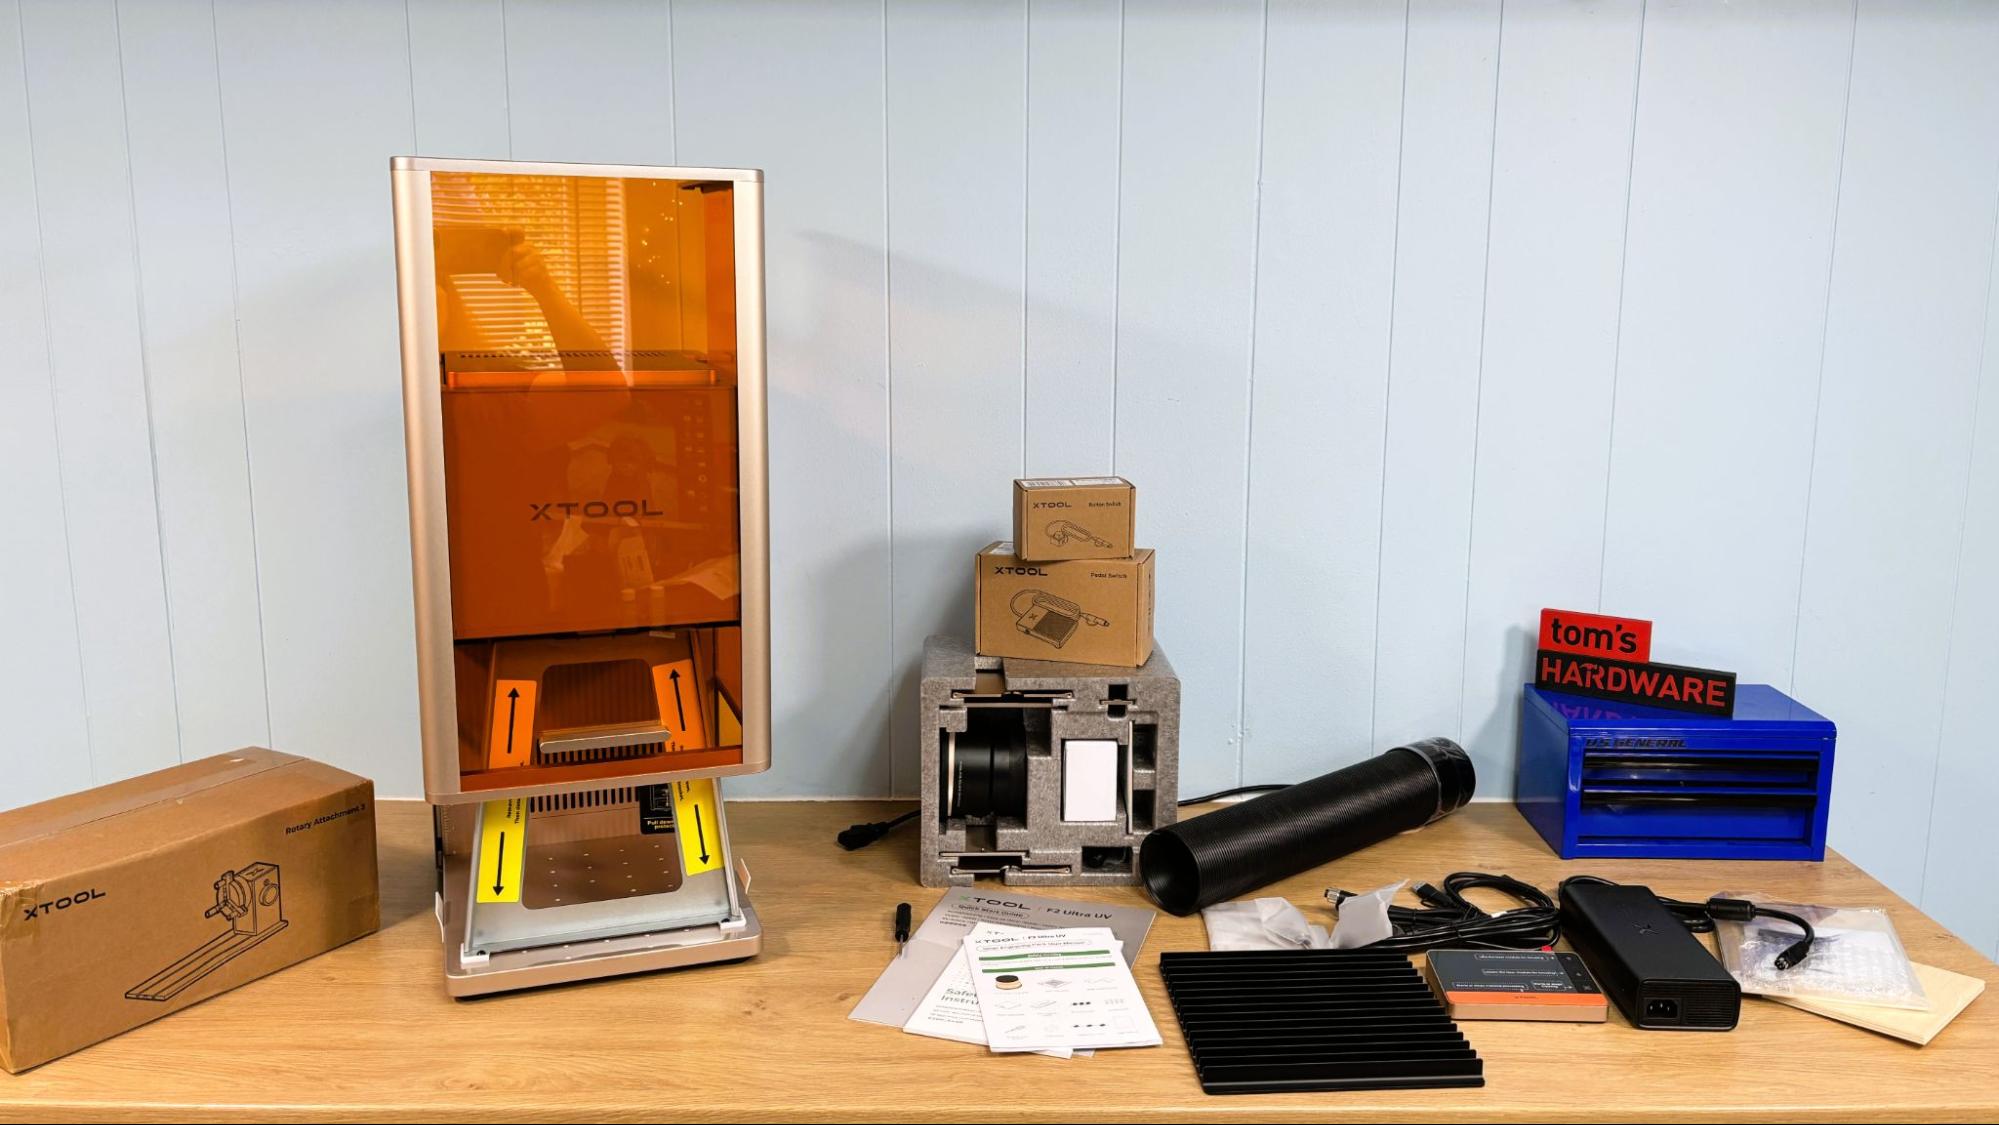
The xTool F2 Ultra comes fully assembled, with the surface engraving lens in place. The inner engraving lens and riser are packed in a reusable foam box. Also included is a slatted cutting plate, corded touch screen, equipment safety key, surface engraving material pack, tool kit, cables, and paper copies of the quick start guide and safety instructions, For the review, we also received the optional button and pedal switches, rotary attachment, the xTool SafetyPro AP2 fume extractor, and a bunch of glass and crystal materials for testing.
Design of the xTool F2 Ultra
(Image credit: Tom's Hardware)
The xTool F2 Ultra UV is a galvo laser with a 355-nanometer wavelength. At this wavelength, the laser marks by way of a cold photochemical process rather than just burning. Unlike a flat bed laser, which has the laser on an XY carriage and moves across the work area, a galvo laser is fixed in place and moved with two galvanometer mirrors. Since these mirrors are small and light, they can be used to move the laser beam extremely fast, up to 15,000 mm/s.
The only downside is that the laser’s work area is roughly cone-shaped, and the beam tends to lose focus the farther it moves from the center. The xTool F2 Ultra UV does an excellent job cutting and engraving throughout the entire 200 x 200 mm work area.
(Image credit: Tom's Hardware)
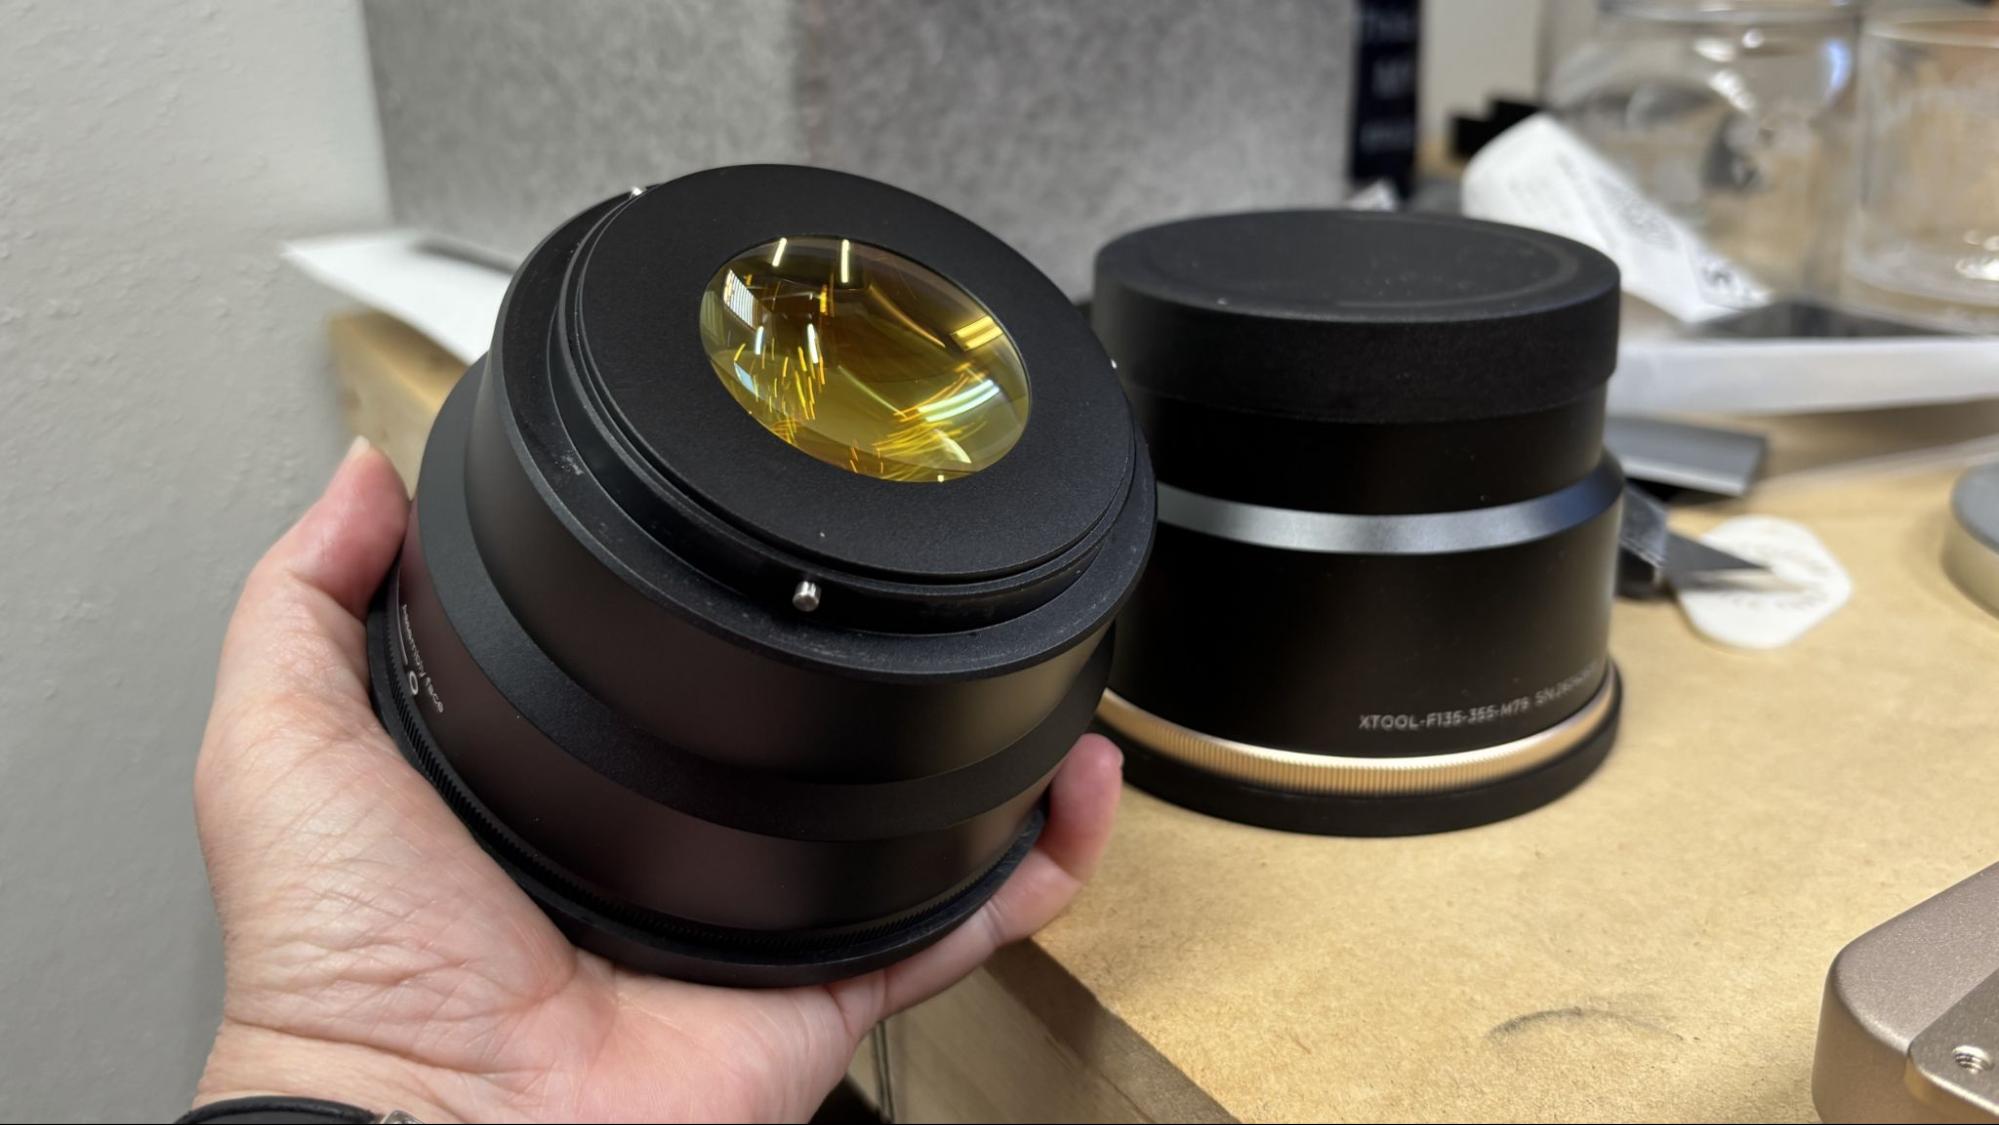
The xTool F2 Ultra UV comes with a lens for surface engraving and cutting and a lens for inner engraving. These attach to the laser with a quarter turn.
(Image credit: Tom's Hardware)
The inner engraving lens requires the installation of the included riser, which is attached to the baseplate of the laser with two thumb screws.
The xTool F2 Ultra UV has a nicely counterbalanced cover which slides down for protection against direct or scattered laser radiation. The laser will not operate without the cover in place, unless this safety feature is disabled in the printer’s software. We only needed to do this while using the optional rotary attachment.
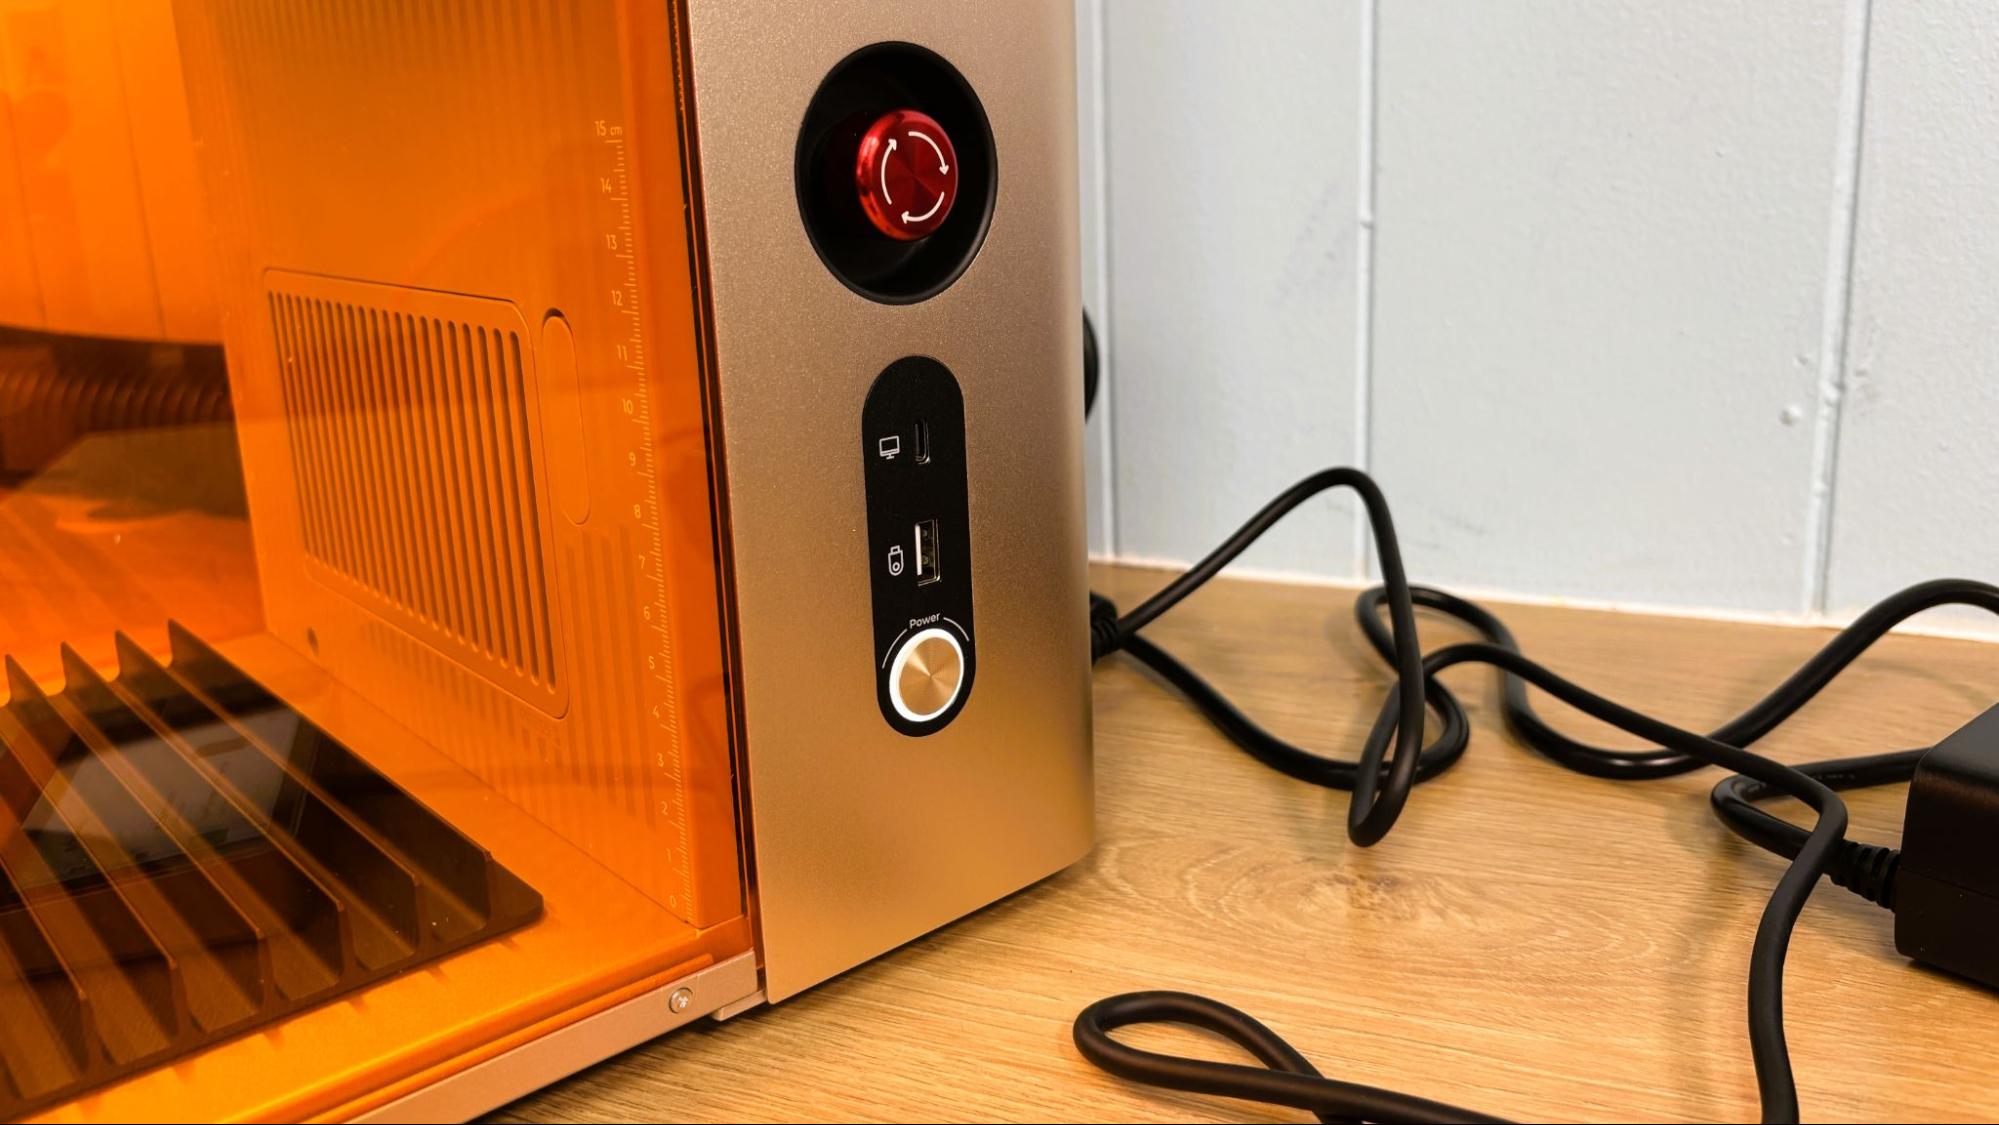
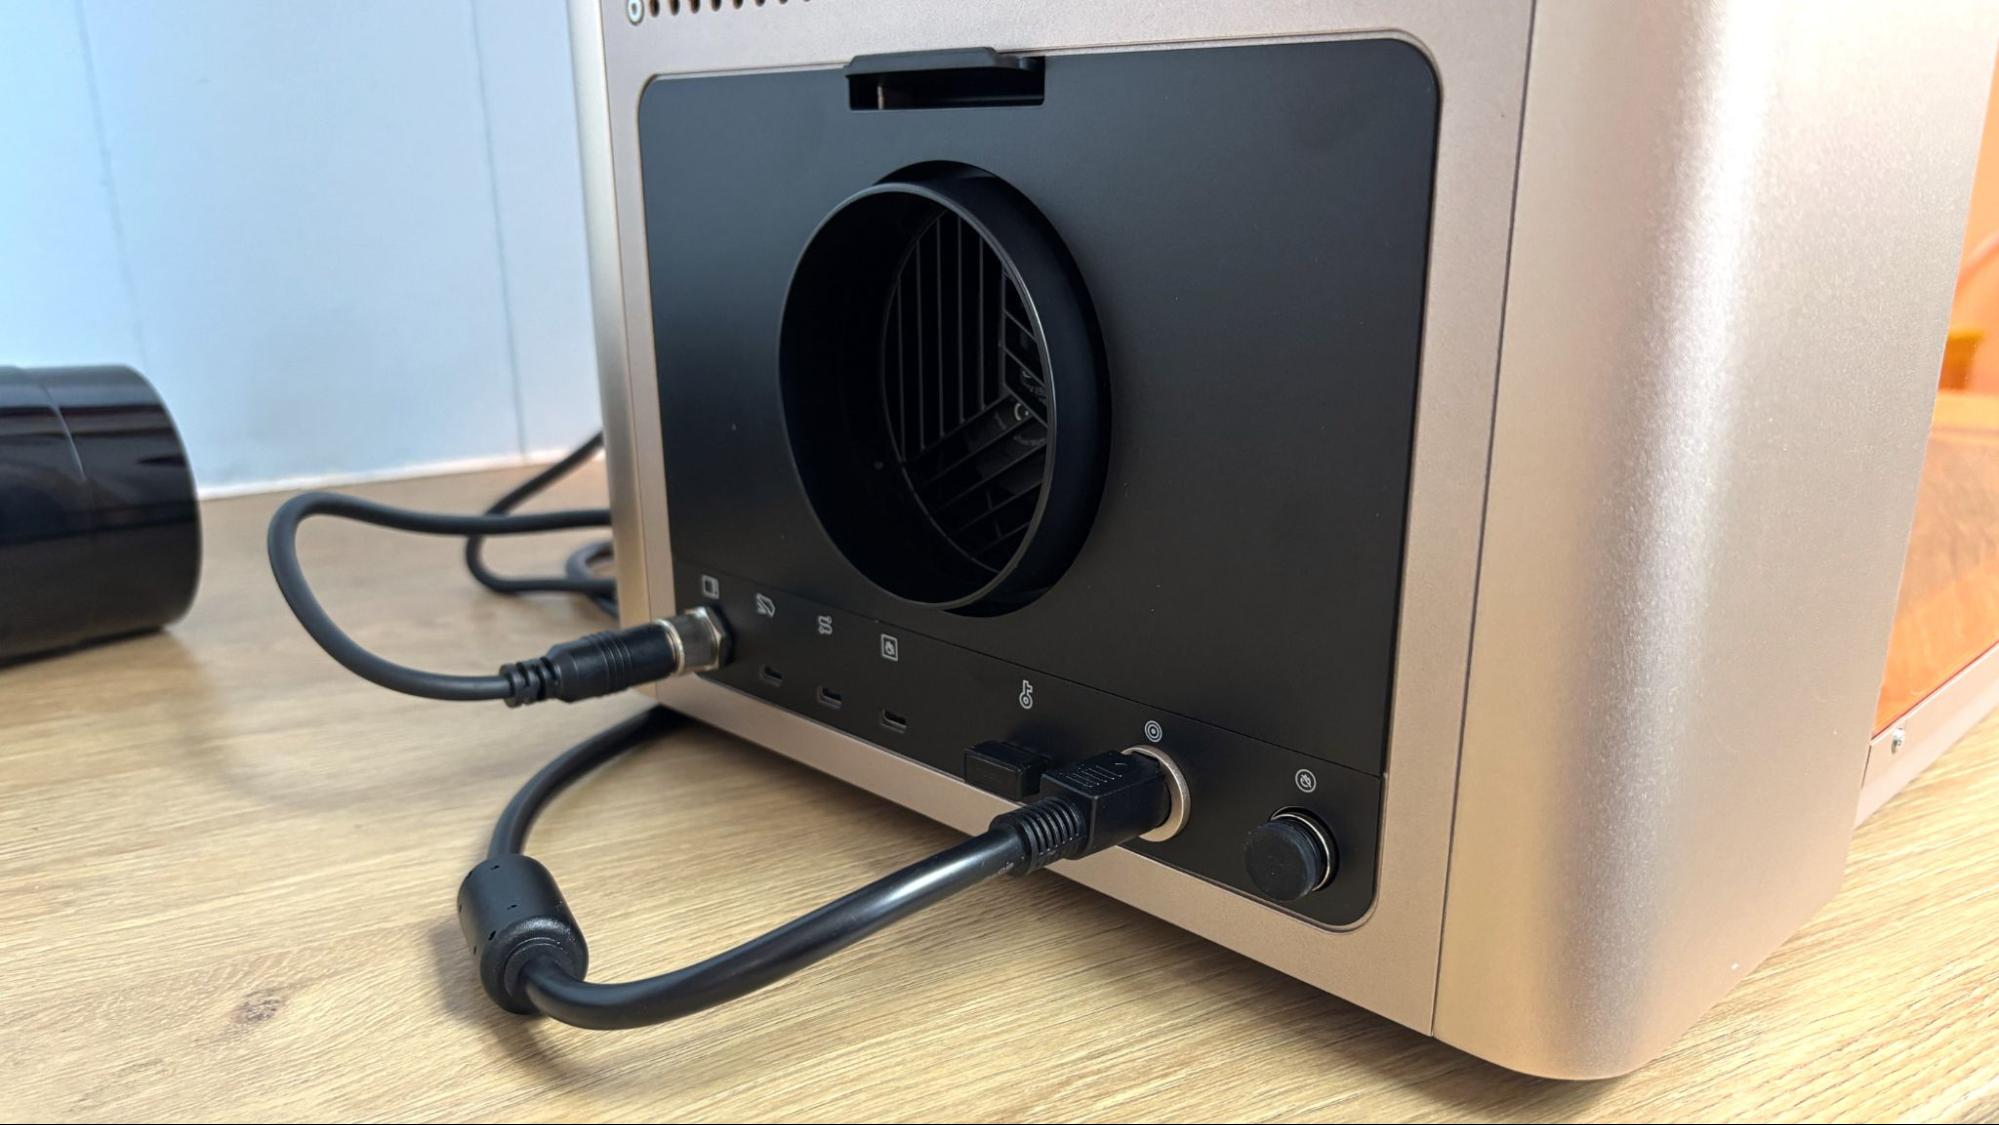
On the right side of the machine, there is a large red emergency stop button, the regular power button, A USB-C port for attaching a PC to the laser, and a USB-A port for moving files to the laser from a USB drive.
(Image credit: Tom's Hardware)
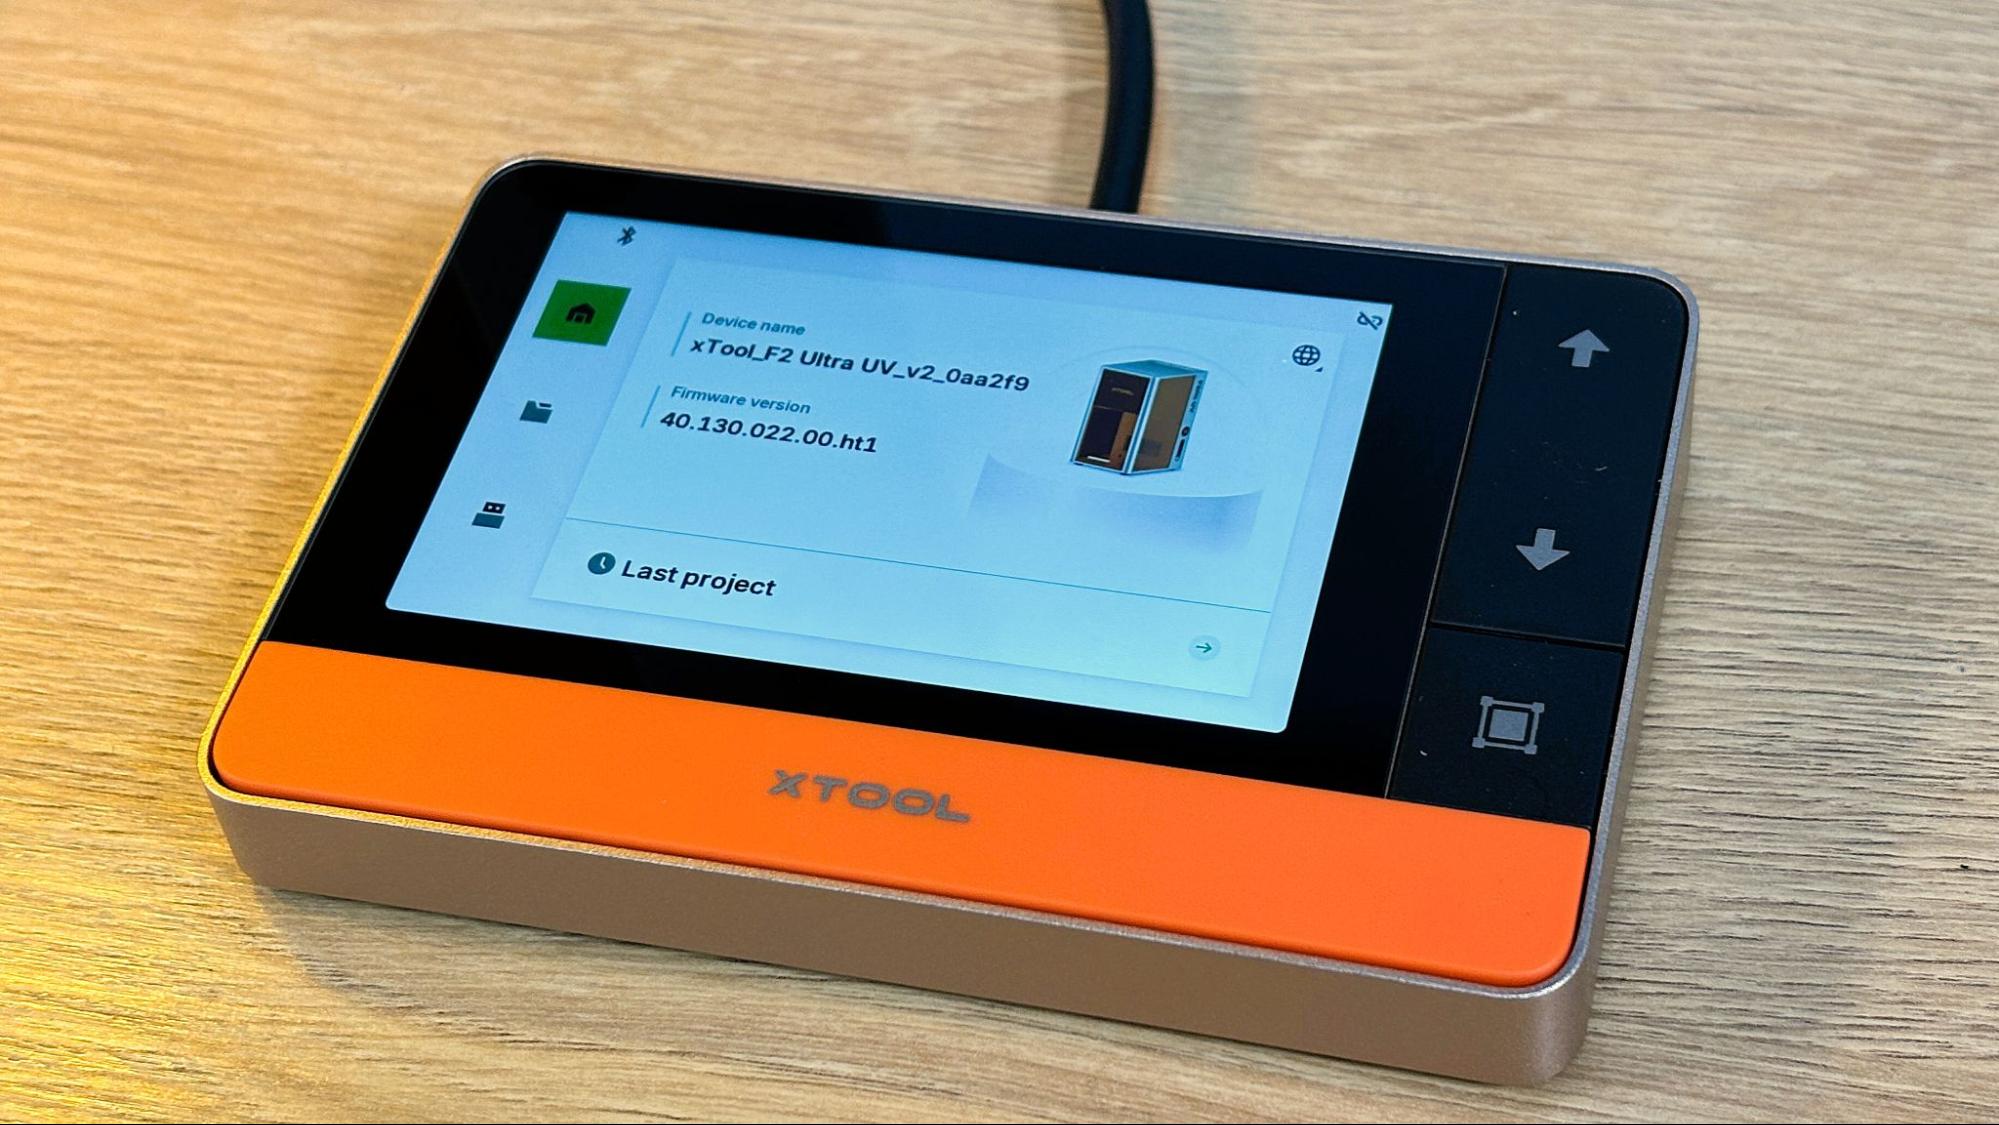
The machine has an excellent corded touch screen which is used to start each print and resume after an alarm or other pause in printing. It shows files available to print from a USB drive and can reprint the last file without the need to resend it. While printing, the screen shows elapsed time and time remaining on the current job.
(Image credit: Tom's Hardware)
The xTool F2 Ultra UV has dual 48 MP cameras for positioning, with an accuracy of .2 mm. For surface engraving, the camera did not require calibration, as the positioning was perfect. After attaching the Inner engraving lens, it’s a good idea to calibrate the Z-Axis, which will also require calibrating the inner engraving work area. Our Z-Axis starting point was pretty far off the mark.
The auto focus function works perfectly on everything except glass. Since the beam goes through the glass, a piece of tape or scrap paper needs to be held to the surface to be lasered, and the focus can be set manually from the touch screen. Once the focus is correct, you can subtract out the thickness of the paper, but that level of precision is not really necessary.
(Image credit: Tom's Hardware)
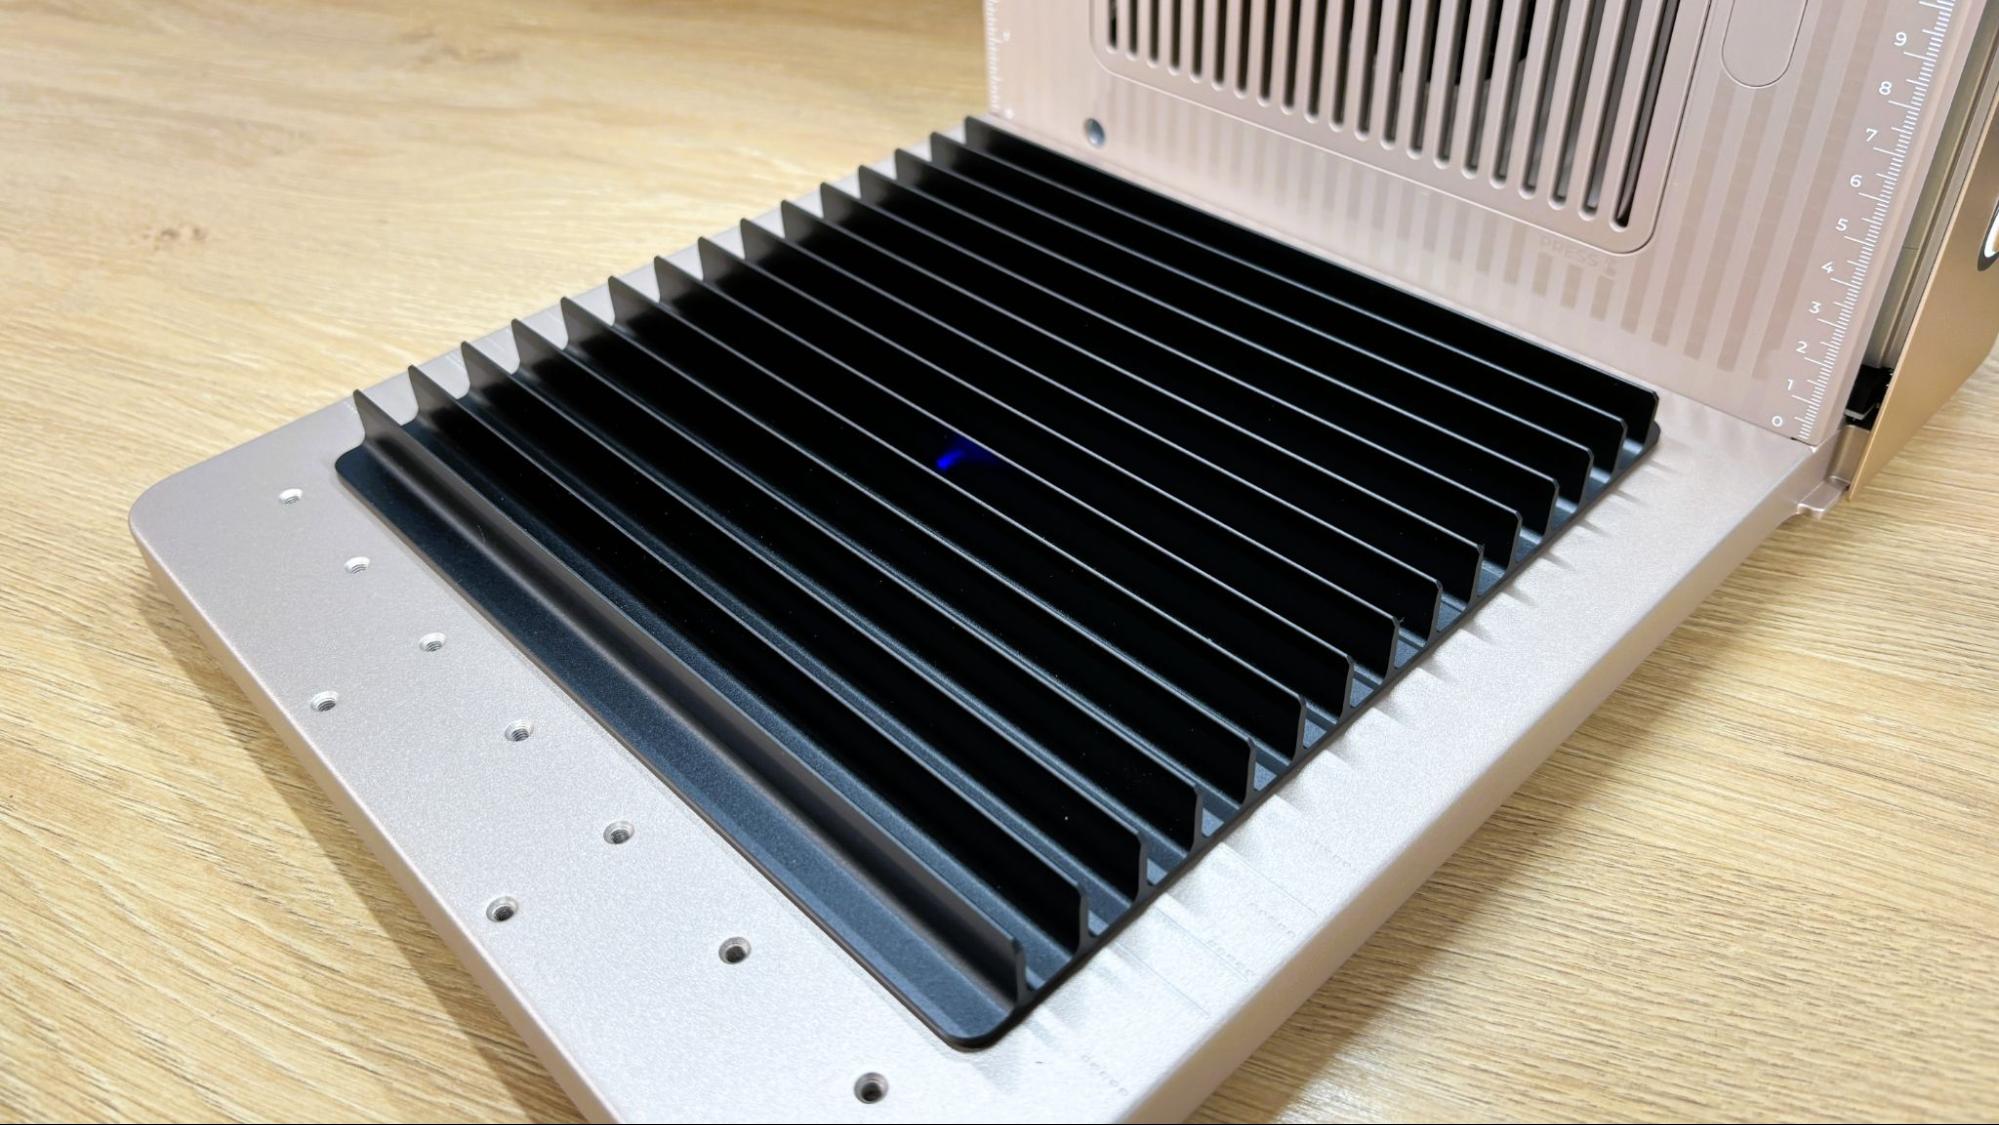
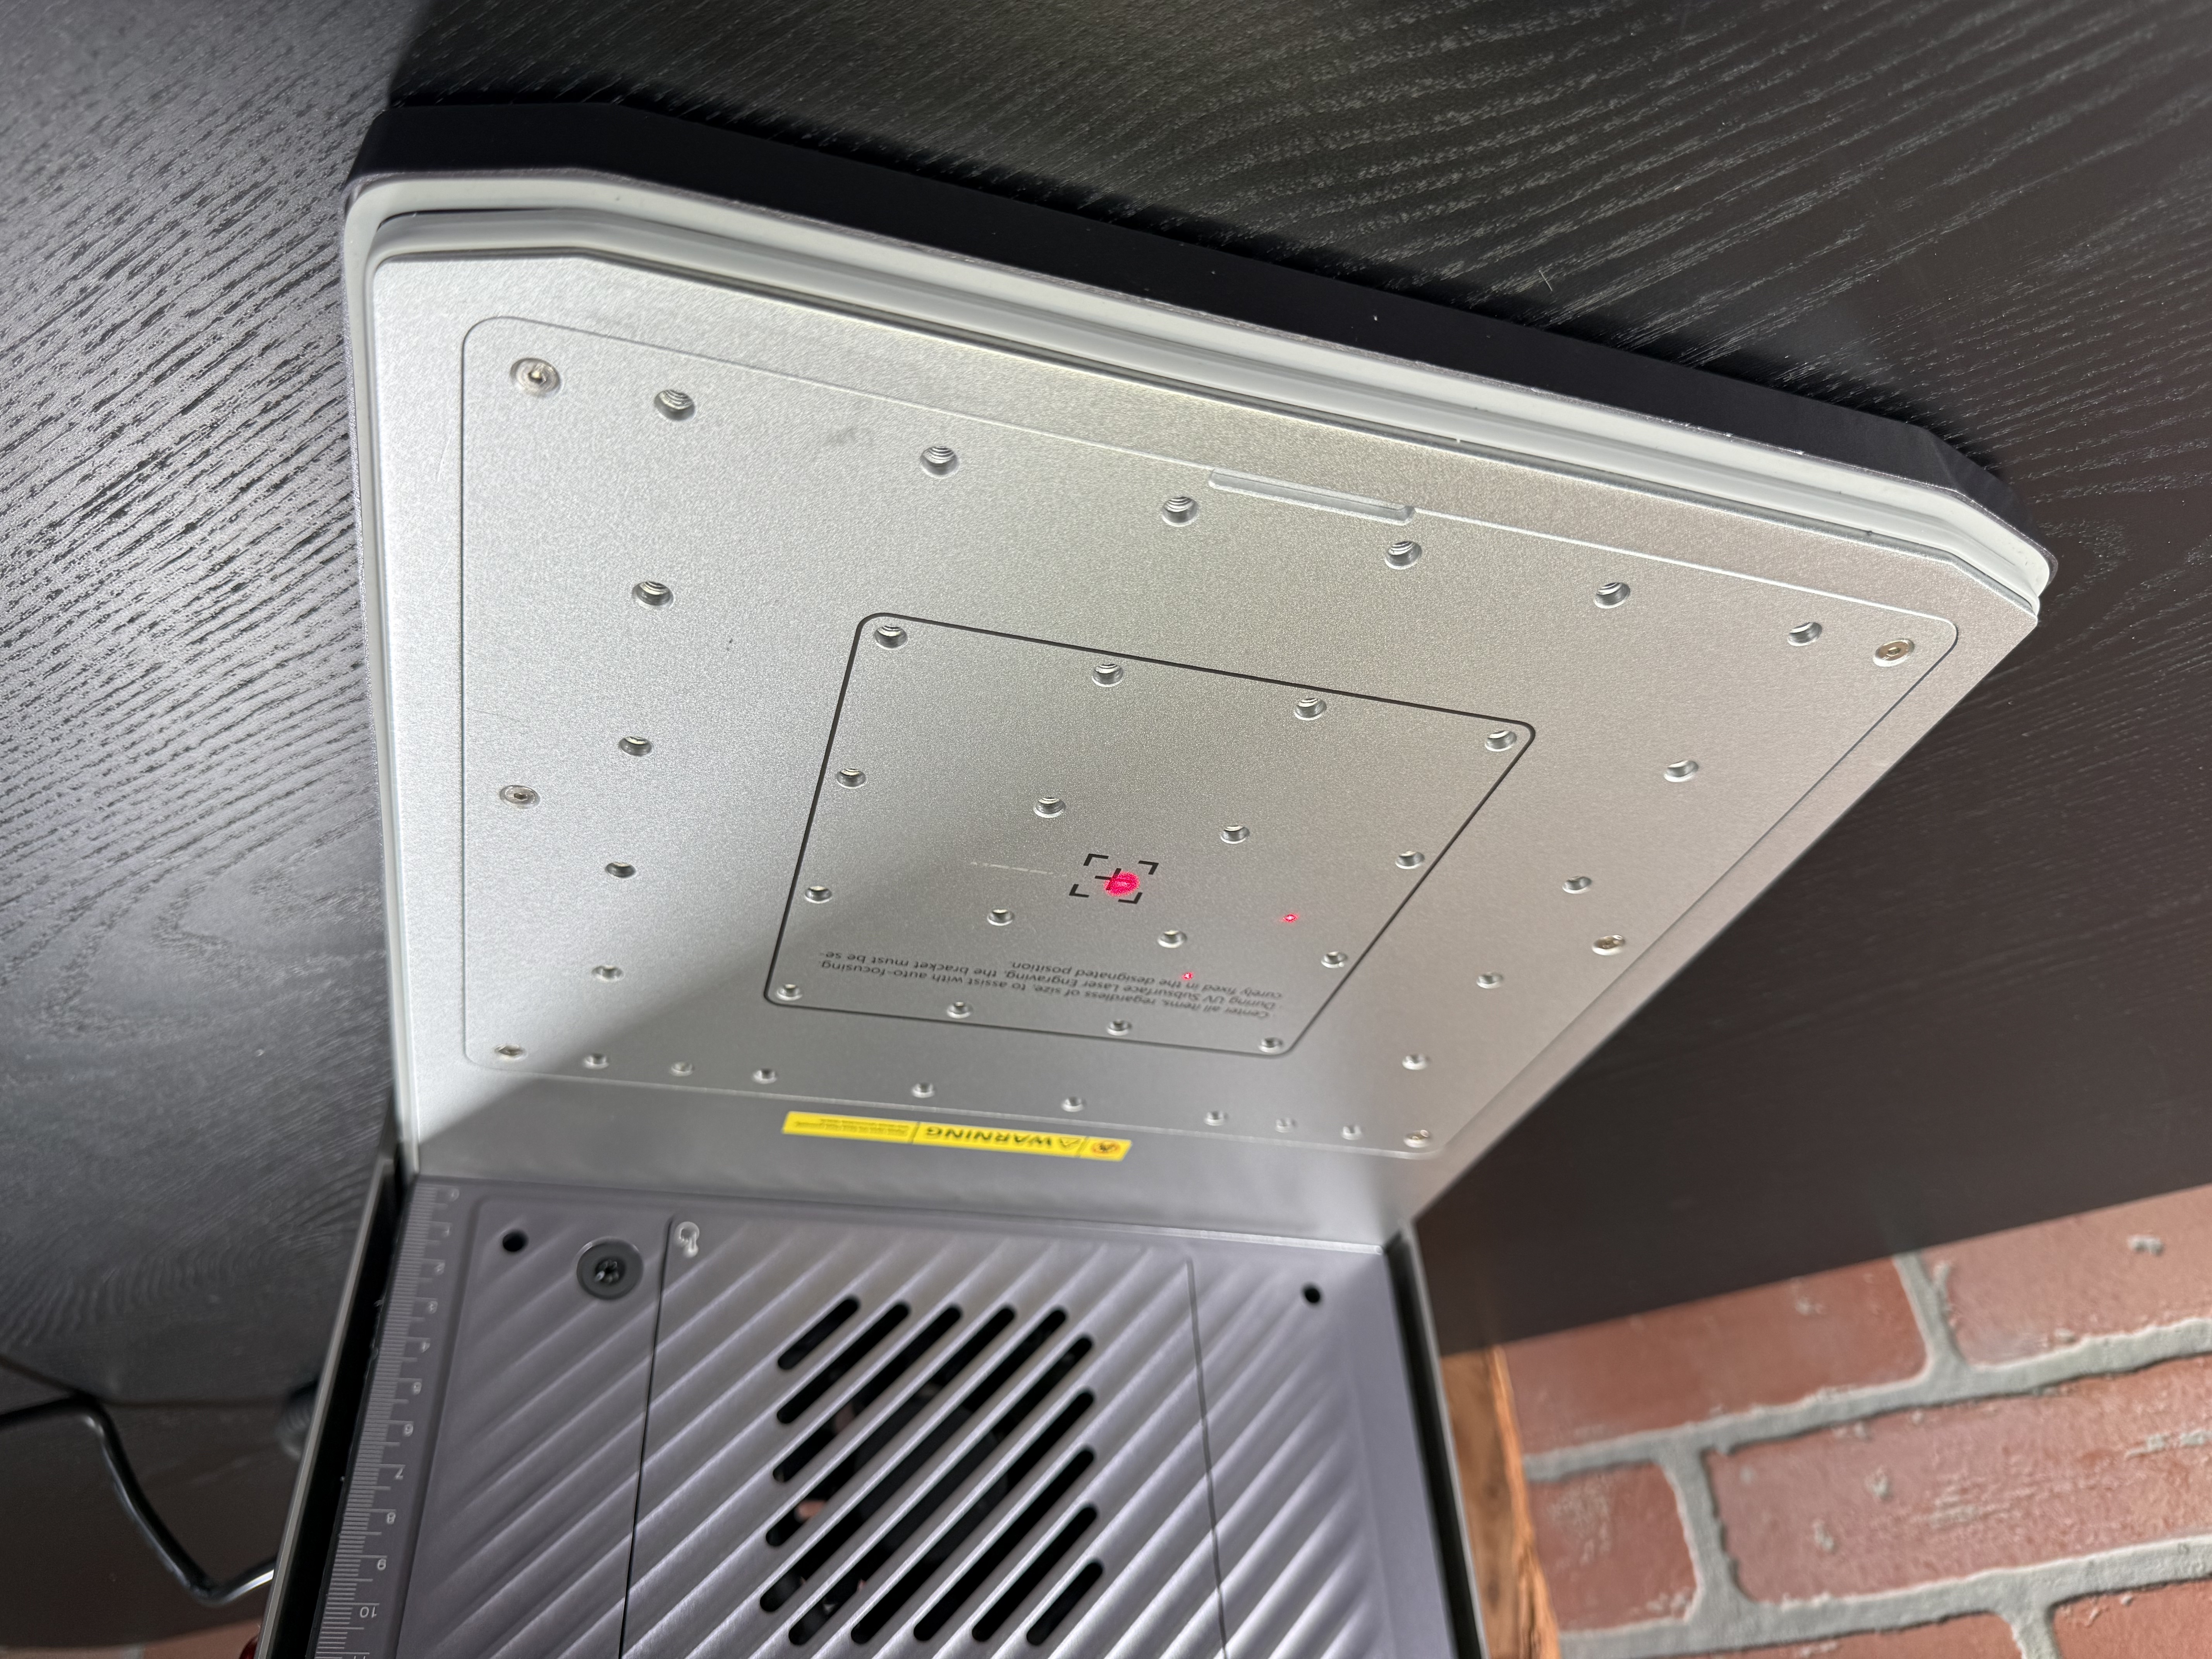
The bottom plate of the laser is anodized aluminum, with threaded holes for positioning jigs and the inner engraving riser. Also included is the black plate for cutting material.
(Image credit: Tom's Hardware)
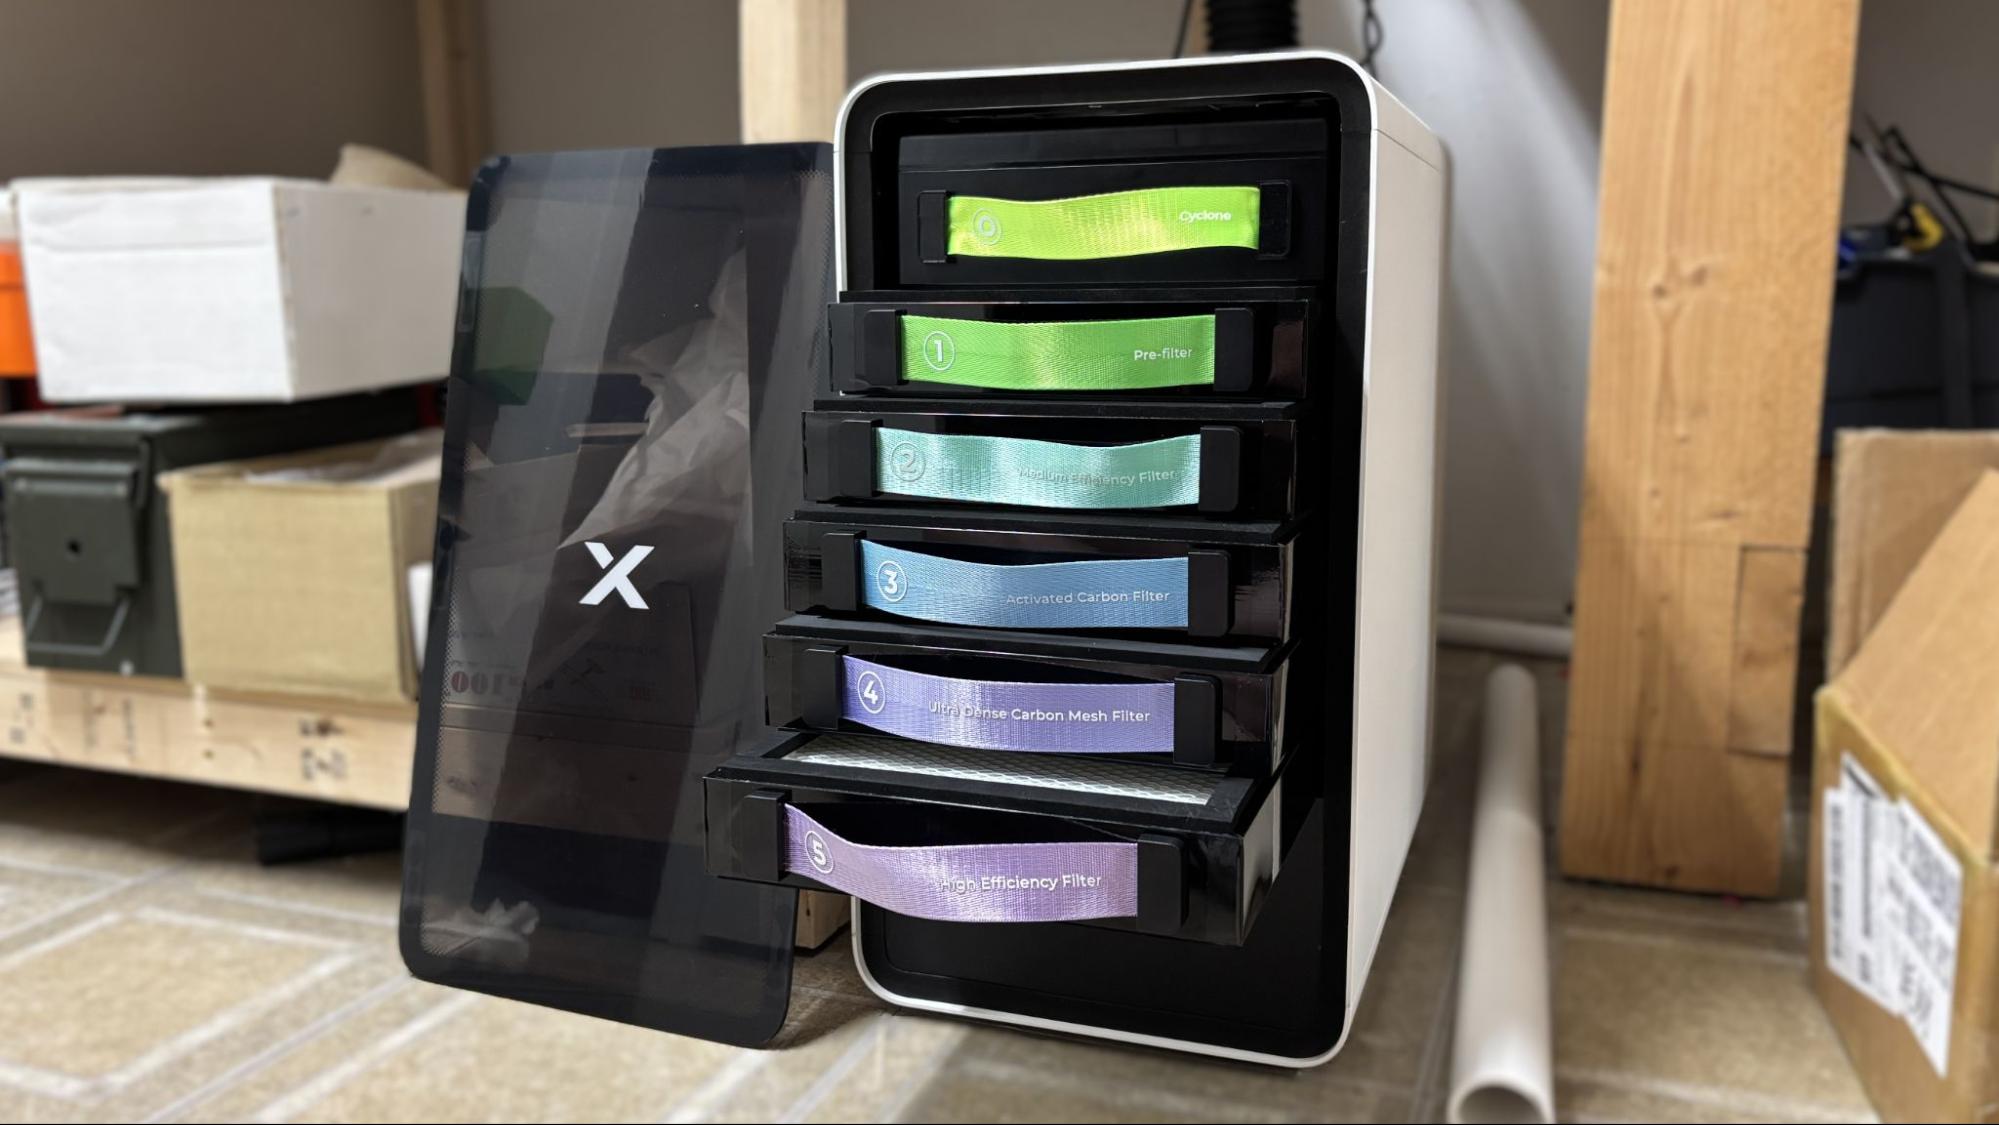
For fume extraction, we received the Safety Pro AP2 air purifier. While the xTool F2 Ultra UV does engrave cooler, it still produces a good deal of smoke when cutting and engraving wood and plastics. Engraving glass doesn’t produce smoke, but it does produce a fine powder of glass, which is mostly sucked into the purifier. The laser has a fan to extract fumes from the chamber, but it must be vented to the outside.
If you aren’t up for installing an exterior vent, the Safety Pro AP2 is a great, though somewhat pricey, choice. It has a six-stage filter that removes every trace of smoke from the air. With the F2 Ultra UV, the Safety Pro AP2 can be set to run automatically when needed, and the filter life cycle is monitored in the xTool App. The filters last between 100 and 600 hours and cost between $20 and $60 presently. The top SuperCyclone filter is cleanable and reusable.
Assembling the xTool F2 Ultra UV
(Image credit: Tom's Hardware)
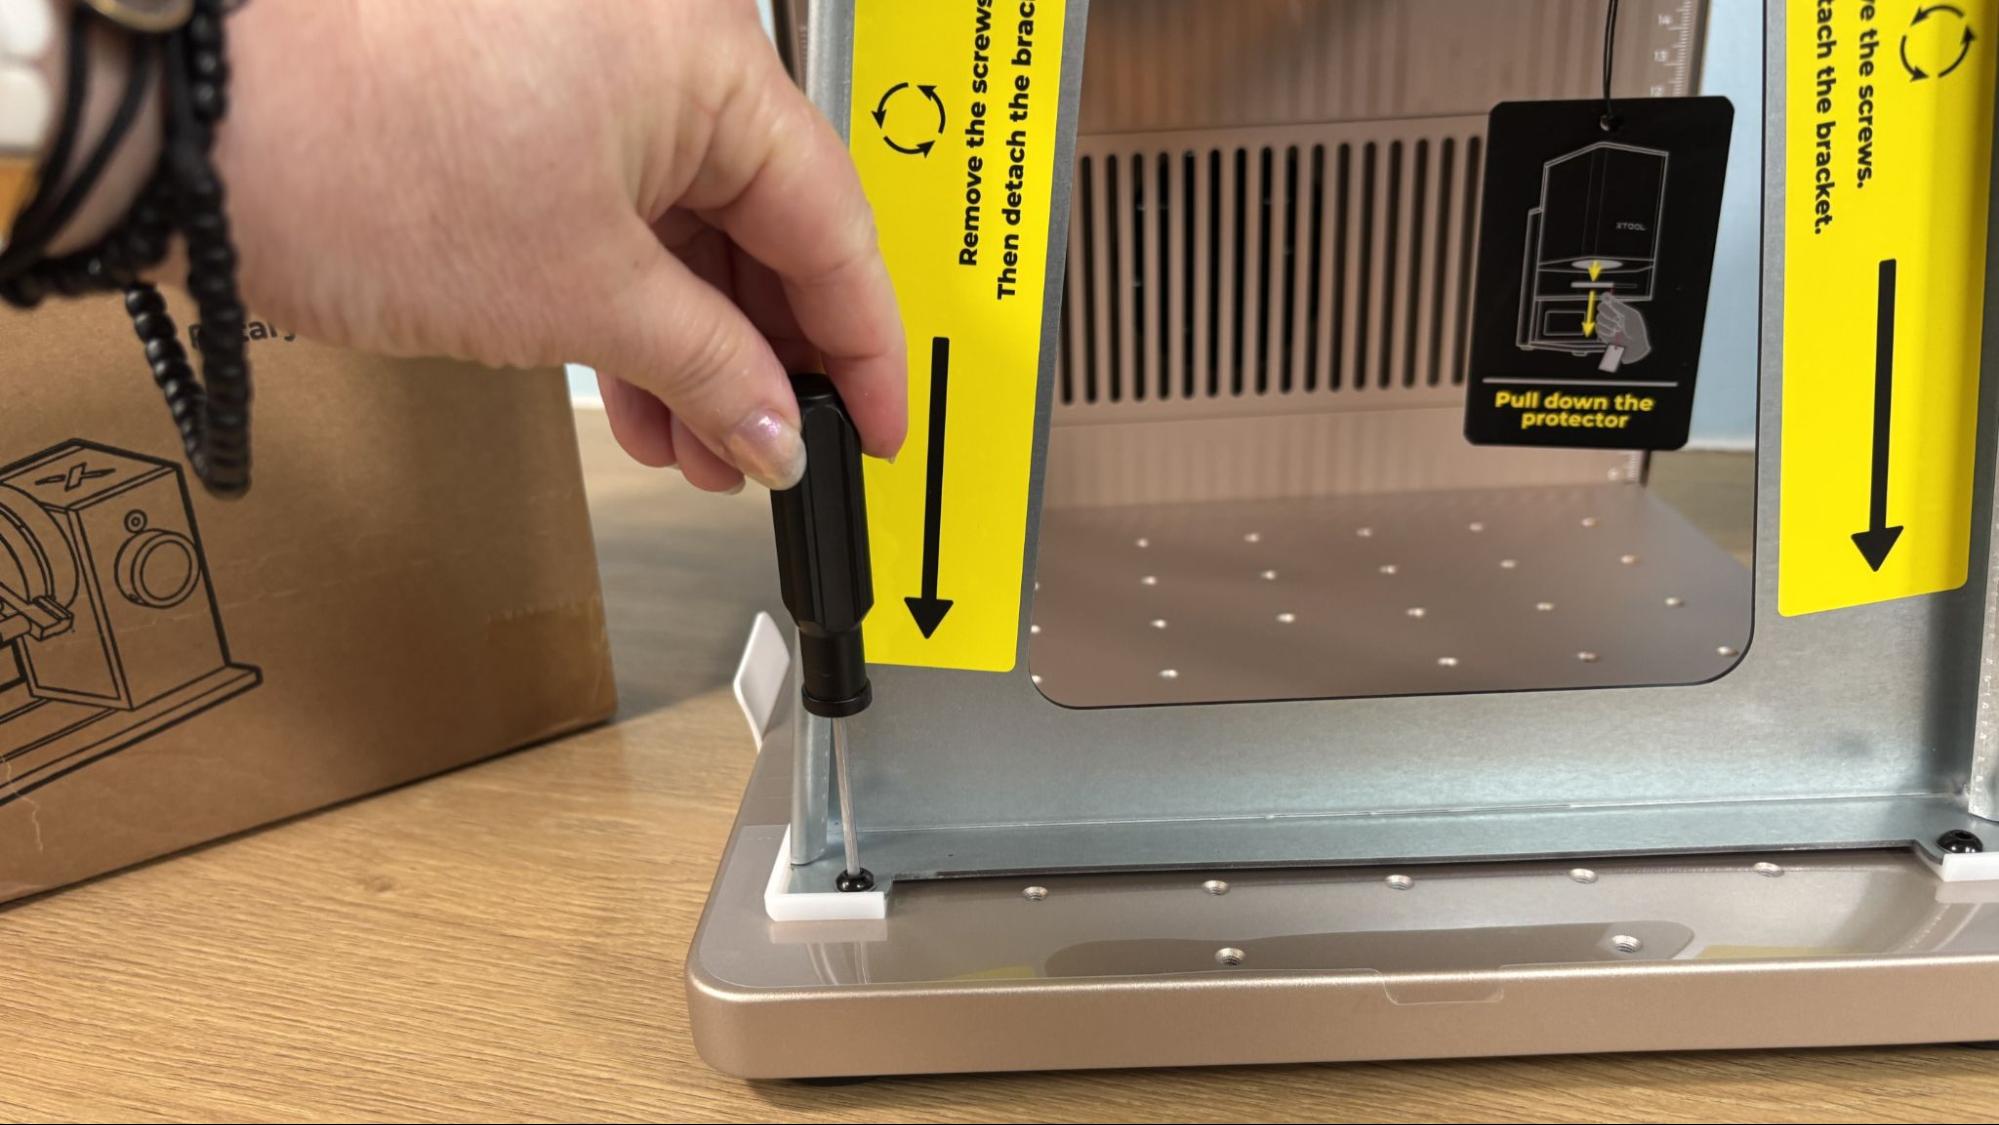
The xTool F2 Ultra UV is fully assembled from the factory with the surface engraving lens installed. Setup requires removing the metal bracket which secures the laser head for shipping.
(Image credit: Tom's Hardware)
The power cord, touch screen, and exhaust hose attach to the rear of the laser, as does the equipment key. With those in place you are ready to go.
Safety Precautions for the xTool F2 Ultra UV
(Image credit: Tom's Hardware)
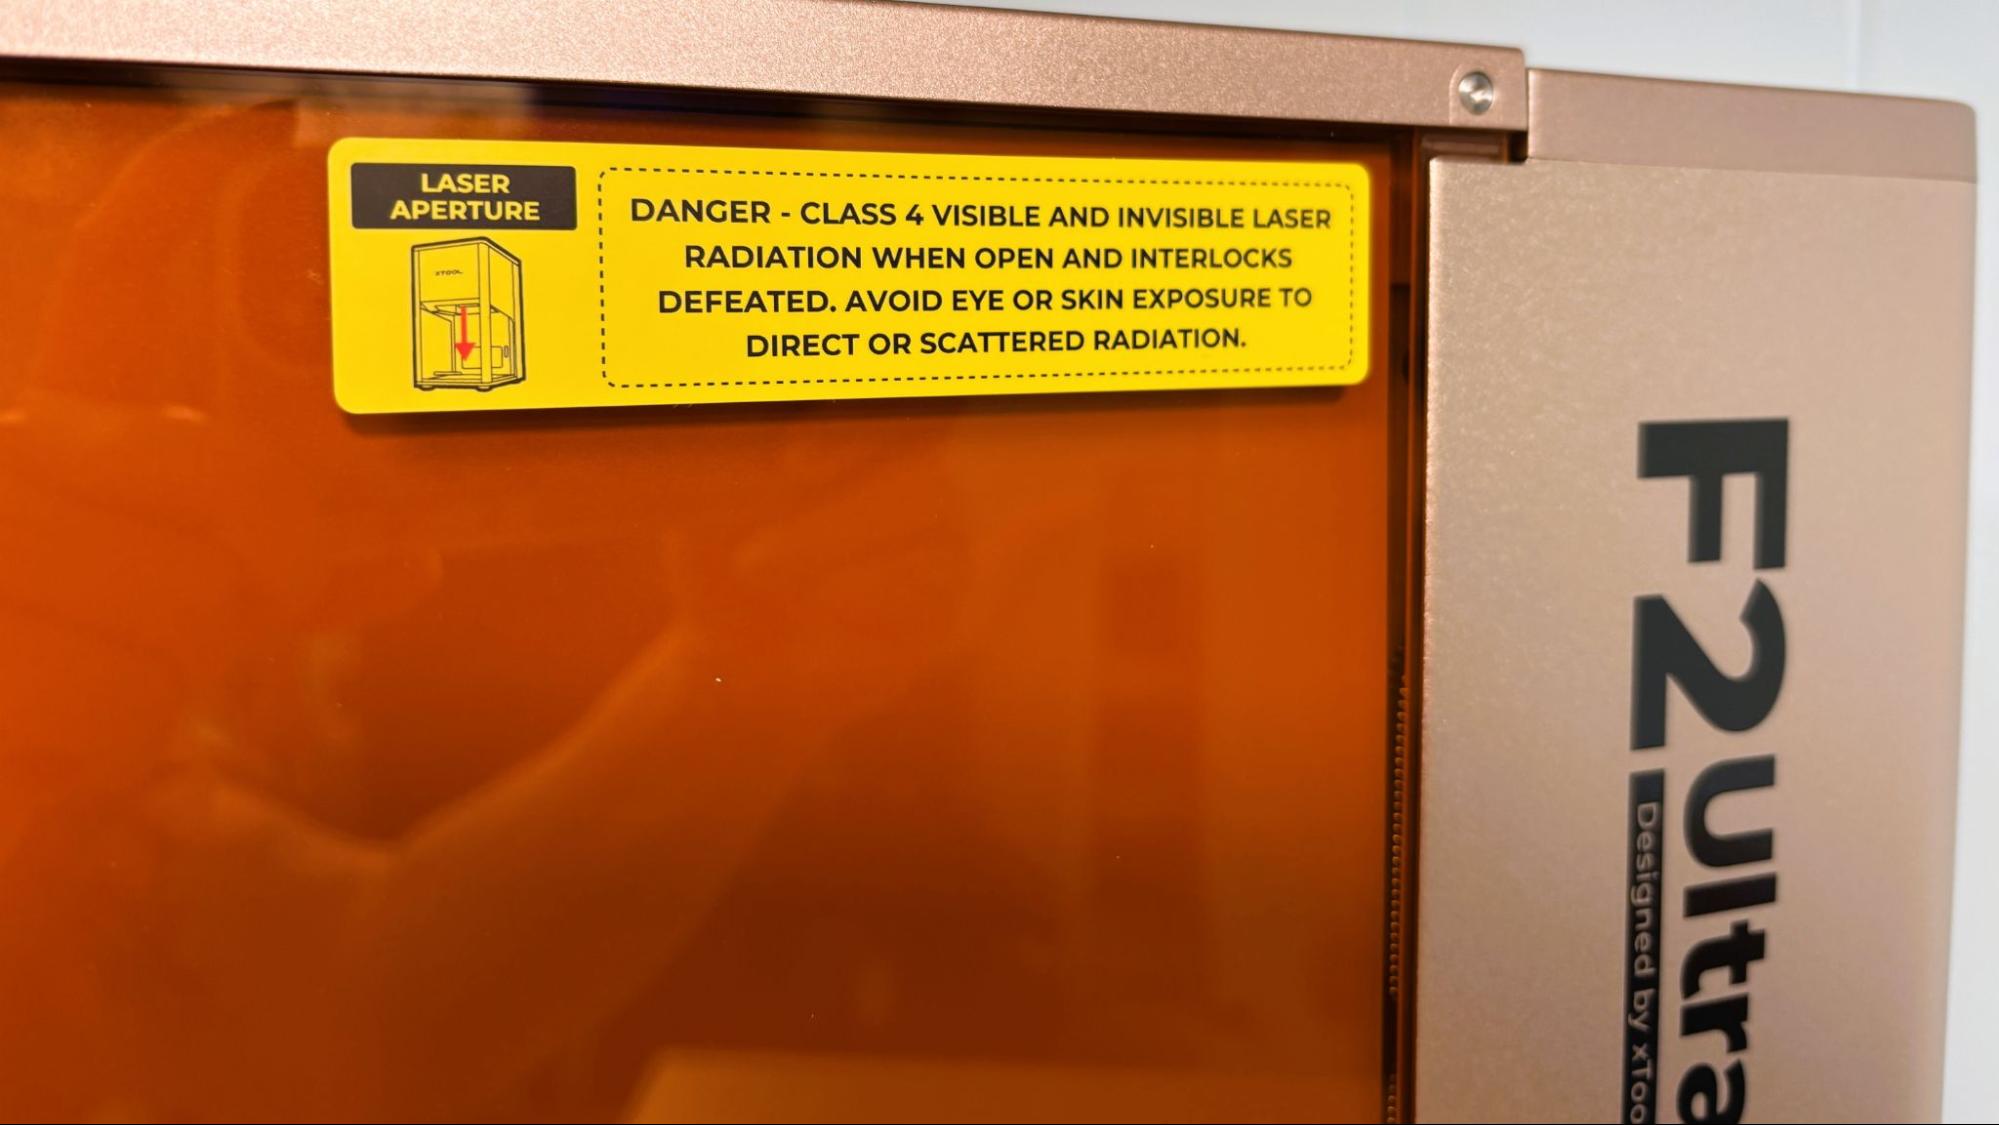
The xTool F2 Ultra UV is a Class 4 laser, which is the highest and most hazardous class of laser. Direct and reflected laser light can cause damage to eyes and burns on skin. The processing of certain materials can produce toxic fumes. Care should be taken when operating this and any laser.
The F2 Ultra UV has an impressive list of safety features to make your experience less hazardous. The enclosure traps both dangerous light and fumes inside it and is set to stop the current process if opened. This safety stop can be overridden in the software, and needs to be for larger jobs and jobs requiring the rotary attachment. The safety will need to be turned back on manually. The machine has a flame sensor which is needed for cutting and engraving wood and plastic. Though the UV laser cuts and engraves cooler than the usual diode and CO2 lasers, it is still possible to cause a fire at higher power levels. If the laser is moved or tilted while in use, it will shut off automatically. As is usual with larger power tools, the xTool F2 Ultra UV has a USB equipment key plugged in the rear of the unit. If little hands are about or if the machine will be idle for a while, this key can be pulled, rendering the laser unable to function. There is also a large red emergency stop button on the side of the machine that can be used to quickly turn the machine off in the event of fire or other immediate issue.
For smoke and other potentially toxic fumes, the xTool F2 Ultra UV has an exhaust fan on the rear of the unit, which needs to be vented to the outside or to a purifier like the Safety Pro AP2. Some materials like PVC and fiberglass should not be burned with a laser due to their chemical makeup. Dallas Maker Space has published a list of safe and hazardous materials to use with their laser.
One necessary safety precaution xTool has stopped providing is safety glasses. They are a good idea if you are operating the laser without the cover in place and are available from xTool on their website.
Software for xTool F2 Ultra UV
(Image credit: Tom's Hardware)
xTool Studio was frustrating when it was first launched and replaced xTool Creative Space. It took some time for all of xTool’s tutorials, material settings, and the maker community as a whole to catch up with the new program. Studio is now what I’ve come to expect and love about xTool. It is the most intuitive and powerful design software I’ve used from any of the major manufactures. It is also simple enough to get good results without being an expert.
(Image credit: Tom's Hardware)
While xTool offers a bunch of free tools to make your projects easier, they also have some excellent tools that cost credits to use. I despise microtransactions in all software. In this case, the credits are not super expensive and can be earned for posting your projects to Atomm, xTool’s file-sharing platform, and for other tasks. There are also currently 3 free uses a month. At best, I can say that there isn’t an annual subscription required to access these tools. They are optional and work well if you don’t have other options for things like removing the background from an image or converting it to a vector.
(Image credit: Tom's Hardware)
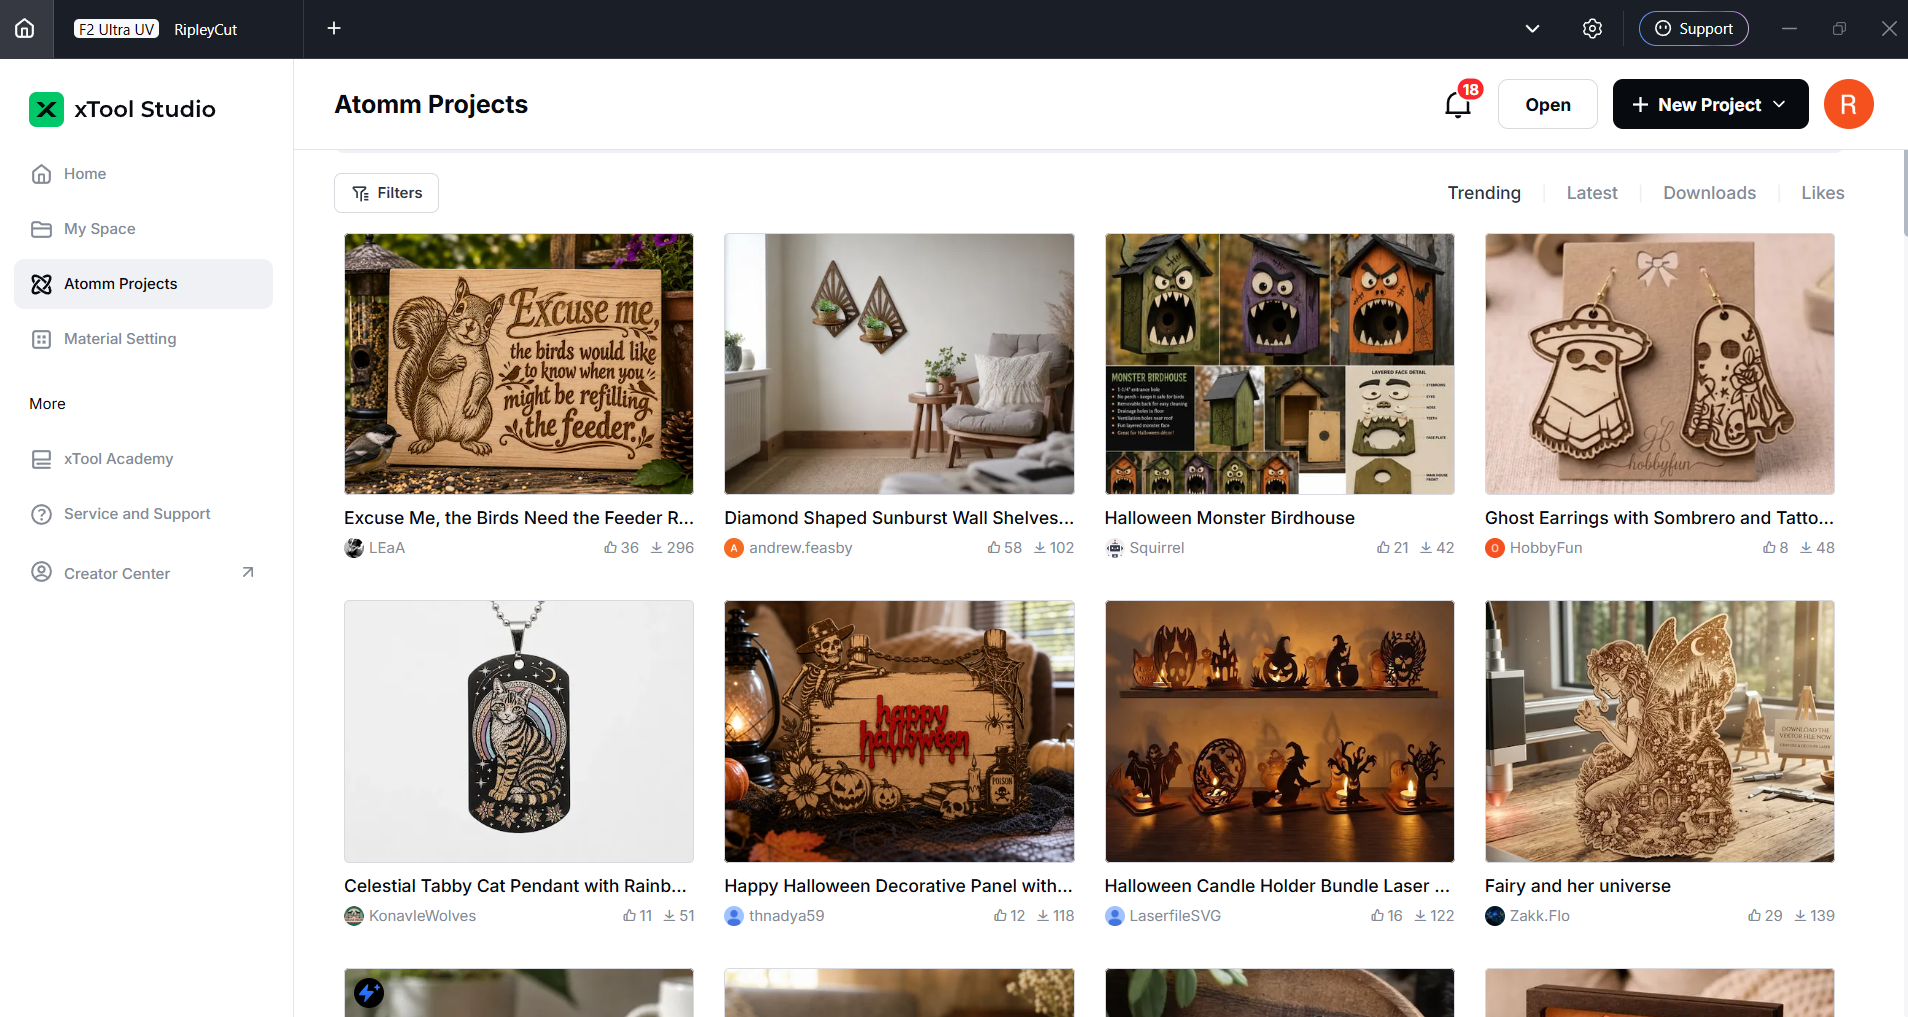
Atomm is available from the home page and offers a ton of projects, mostly free, to give you ideas or just something to create outright. It also has a bunch of tools to create everything from custom key chains to puzzles to boxes.
Engraving / Cutting with the xTool F2 Ultra UV
The xTool F2 Ultra UV is a powerful laser. Five watts doesn't sound like a lot, but it can cut through 15 mm of basswood and 12 mm of acrylic using multiple passes, which is respectable, and it can cut without the usual charring you expect with a diode or CO2 laser.
The UV laser can engrave metal but is really not up to cutting it. For metal cutting, you may want to check out the MOPA-powered F2 Ultra.
xTool has excellent material profiles that cover nearly everything you might want to cut or engrave. They also sell almost everything you might want to engrave, with an eye toward using your F2 Ultra UV as a business.
(Image credit: Tom's Hardware)
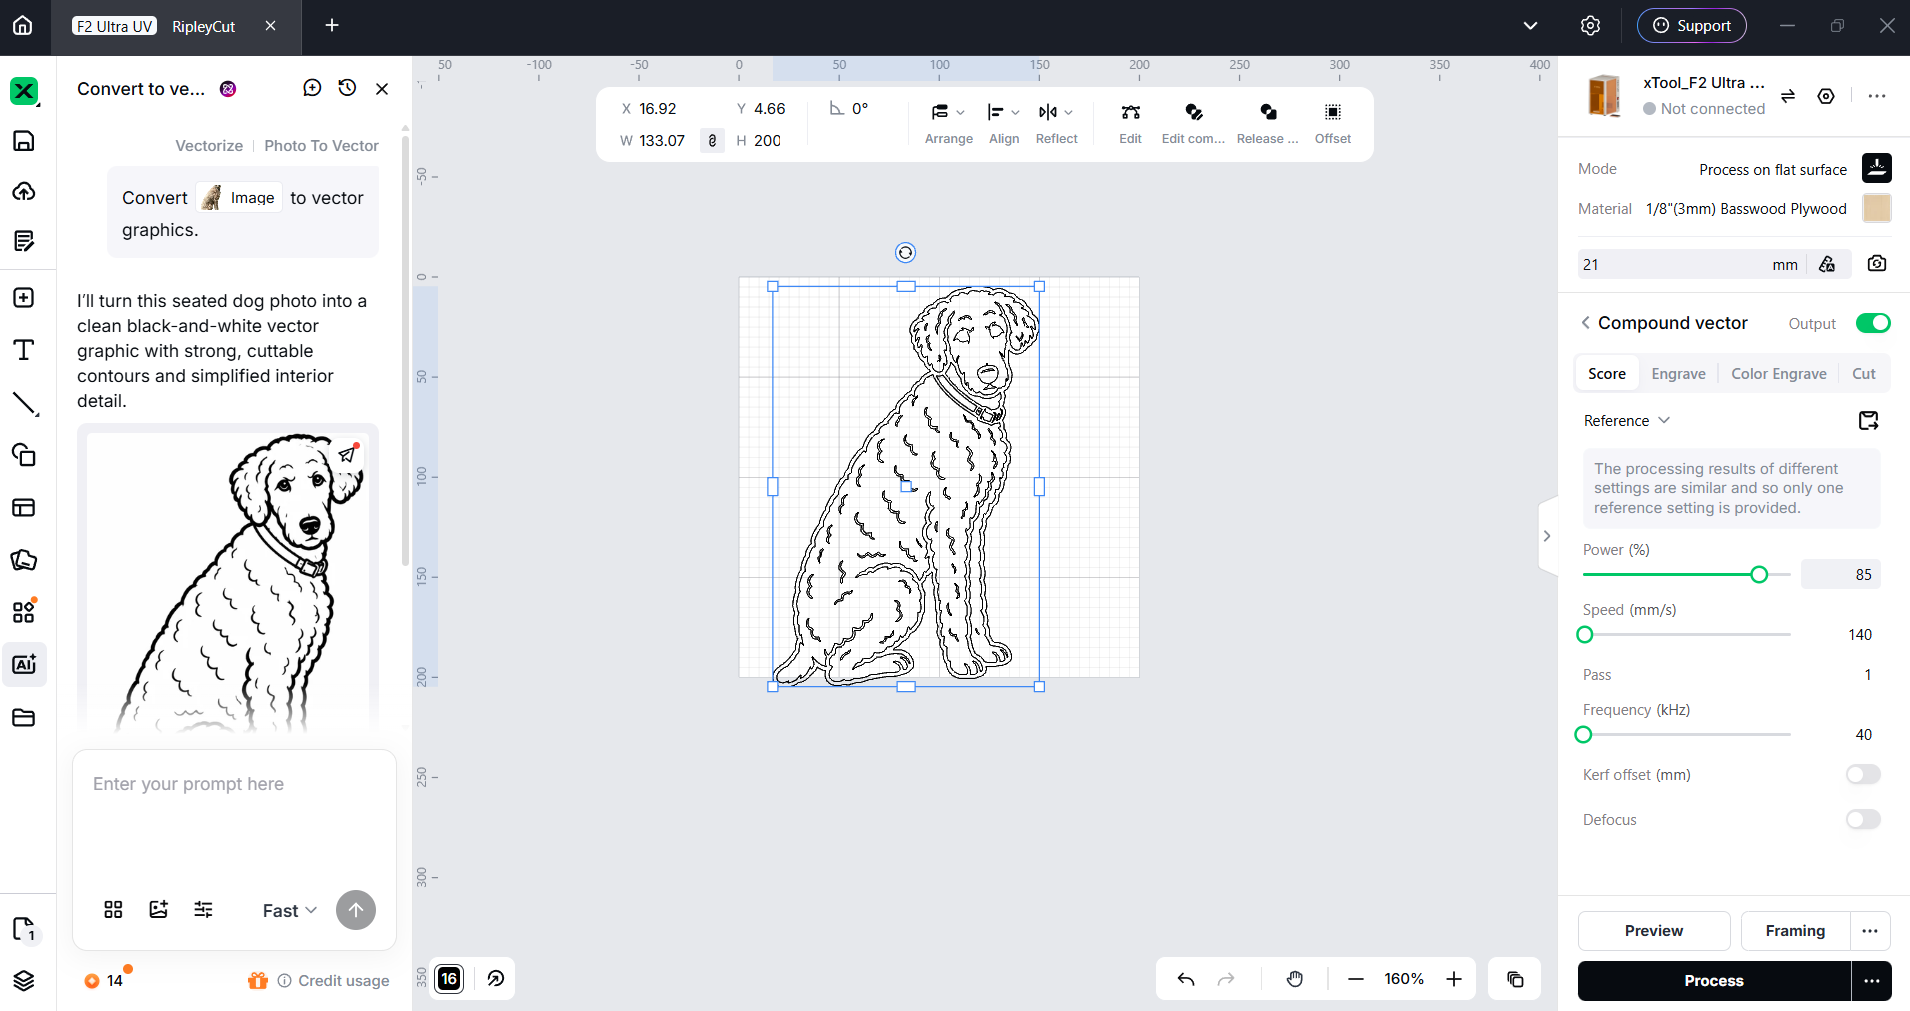
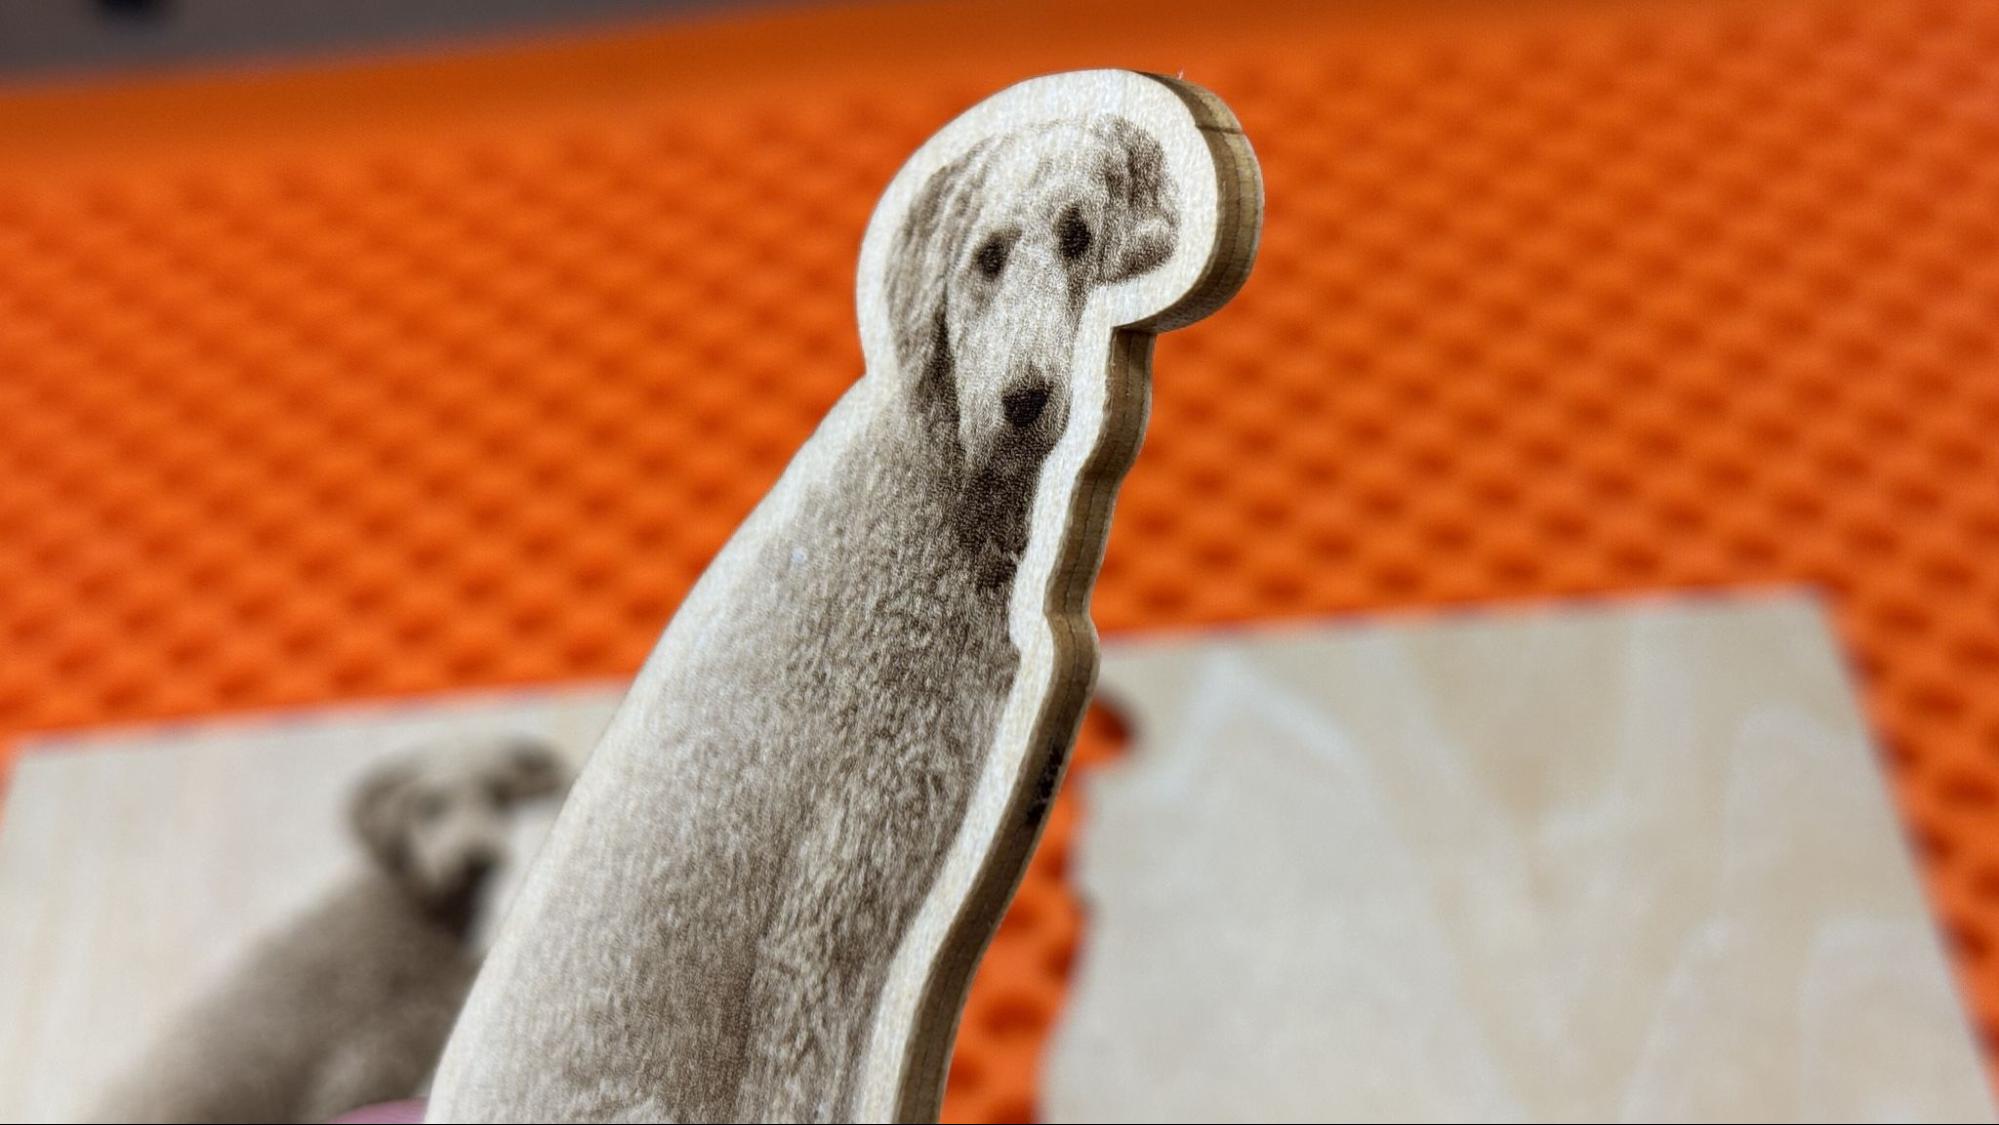
The first test I ran was engraving and cutting out a picture of my dog Ripley. The material is 3mm bass plywood, and I used the default settings. For the engraving, I used 90% power with a dot duration of 800 and using Jarvis mode. For the cut, it was 100% power at 146 mm/s for 44 passes.
To prep the photo I used the AI background remover in xTool Studio which cost 6 credits and sharpened the photo using the free tools. The resulting image is really nice. Using the offset function, I put a cutline around the image and the laser cut it with no charring at all. It might be the cleanest laser cut I’ve ever seen. 44 passes sounds like a lot to cut 3mm plywood but, with the speed of this laser the entire process took only 4 minutes and 28 sec.
(Image credit: Tom's Hardware)
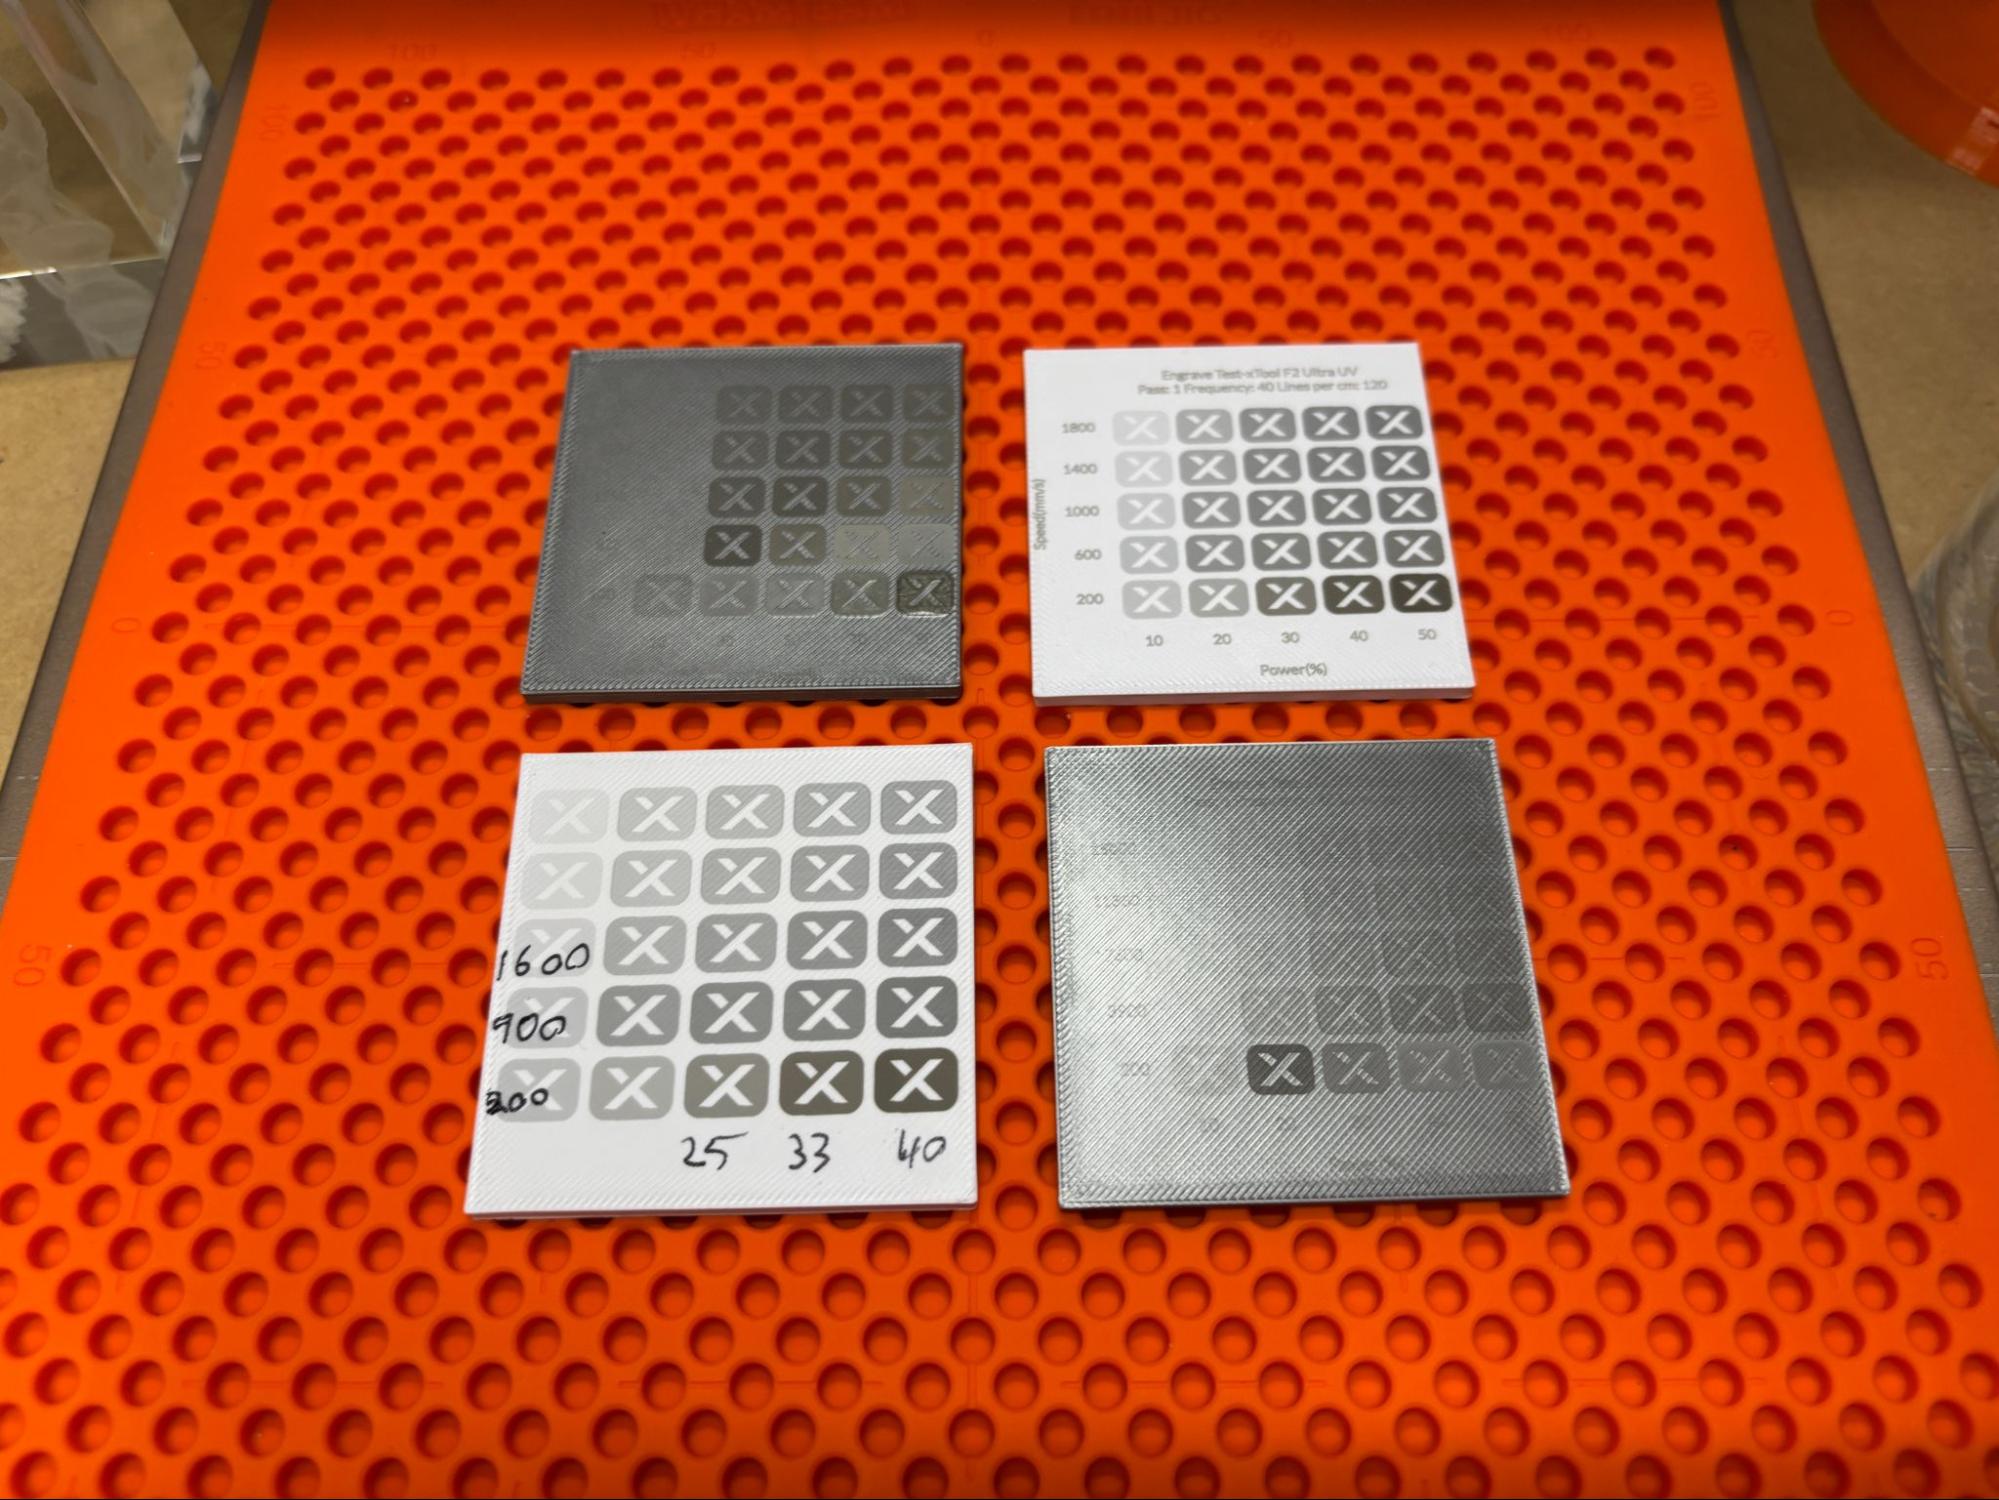
I was intrigued by the F2 Ultra UV’s marking ability on plastic, since it’s much cooler than other lasers. I printed some generic squares to test this out of Bambu Lab silver ABS and Inland white high speed ABS+. Since there is such a wide variety of plastic out there I ran some test arrays using xTool’s black 3D printing ABS material preset as a starting place. The grids were generated by xTool Studio and took only 2 minutes each to print. I learned three things from these tests: It is possible to finely engrave/mark plastic with the F2 Ultra UV. It is also possible to set it on fire. Lastly the Safety Pro AP2 is fantastic at keeping the smell of burning ABS from overwhelming my workshop.
(Image credit: Tom's Hardware)
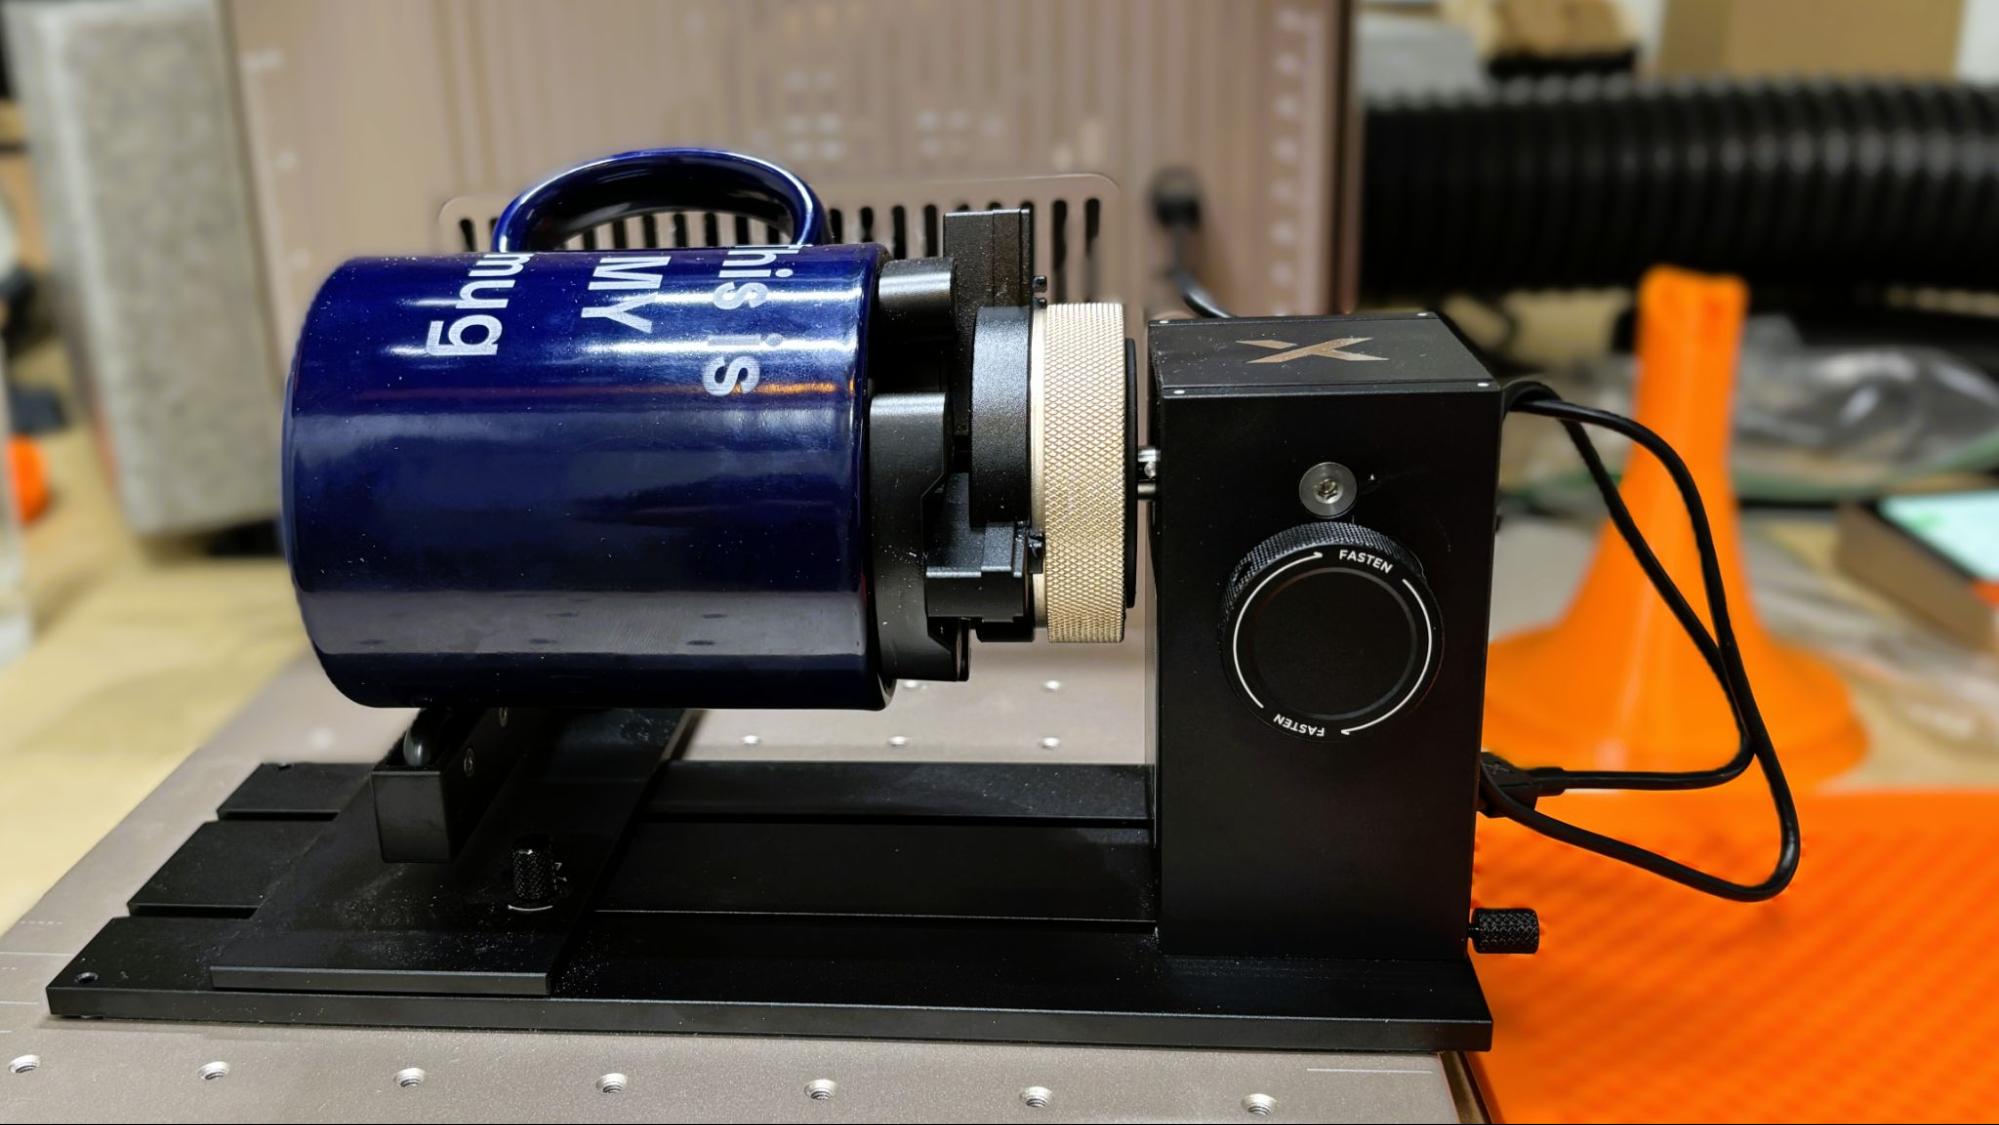
The xTool RA3 rotary attachment can be set to use rollers for cylindrical objects or a chuck to grab onto the inside or outside of items, from rings to tumblers. It works perfectly well; just make sure you choose the correct node since the calculations needed are wildly different.
(Image credit: Tom's Hardware)
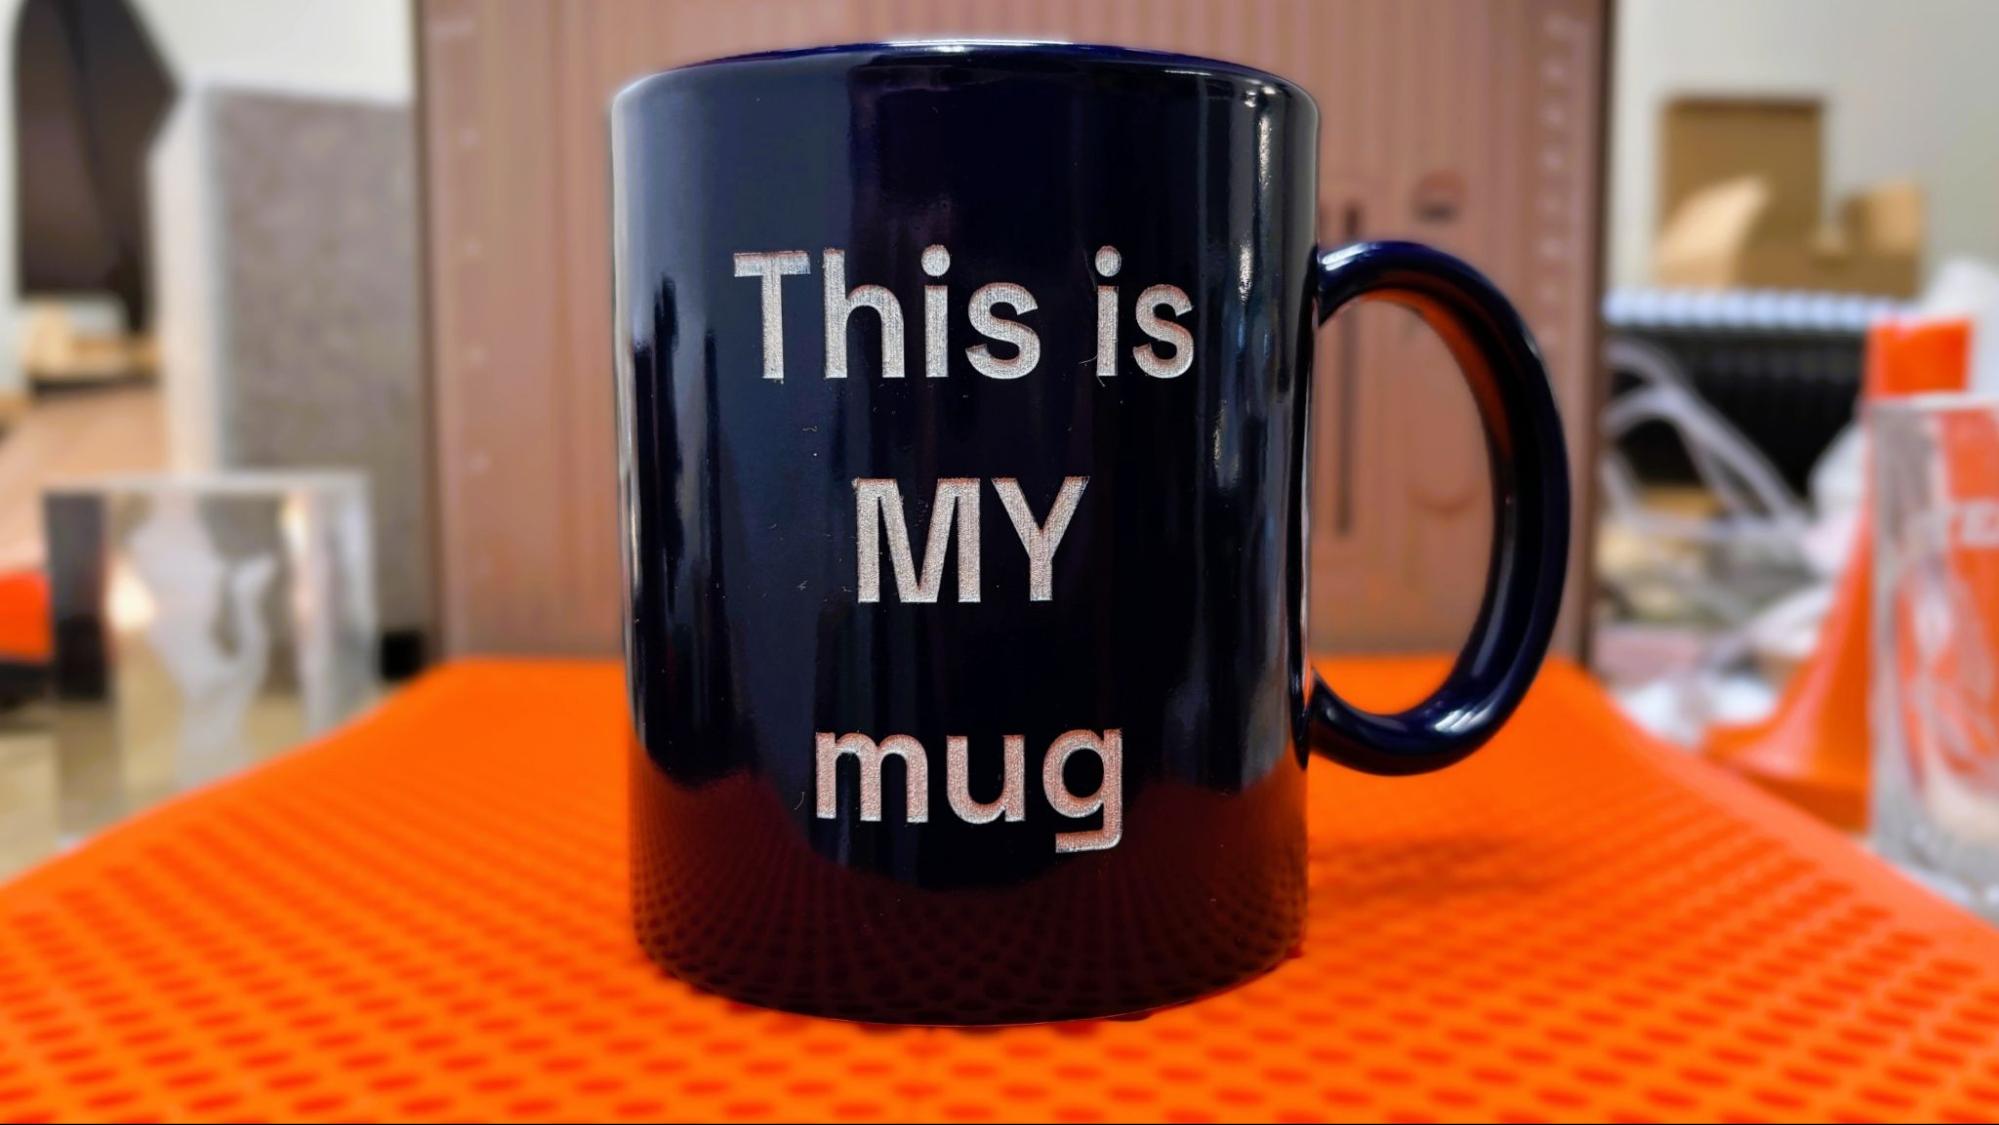
Using the text editor in xTool Studio, I engraved an old coffee mug. Using the white glazed ceramic board material preset, the laser was able to break through the glazing and fairly deep into the ceramic at 100% power at 88 MM/s in 2 passes. It took a while: 40 minutes total. The resulting cut had a nice light blue left over from the glaze. I ran a silver Sharpie permanent marker over the letters to make them pop.
(Image credit: Tom's Hardware)
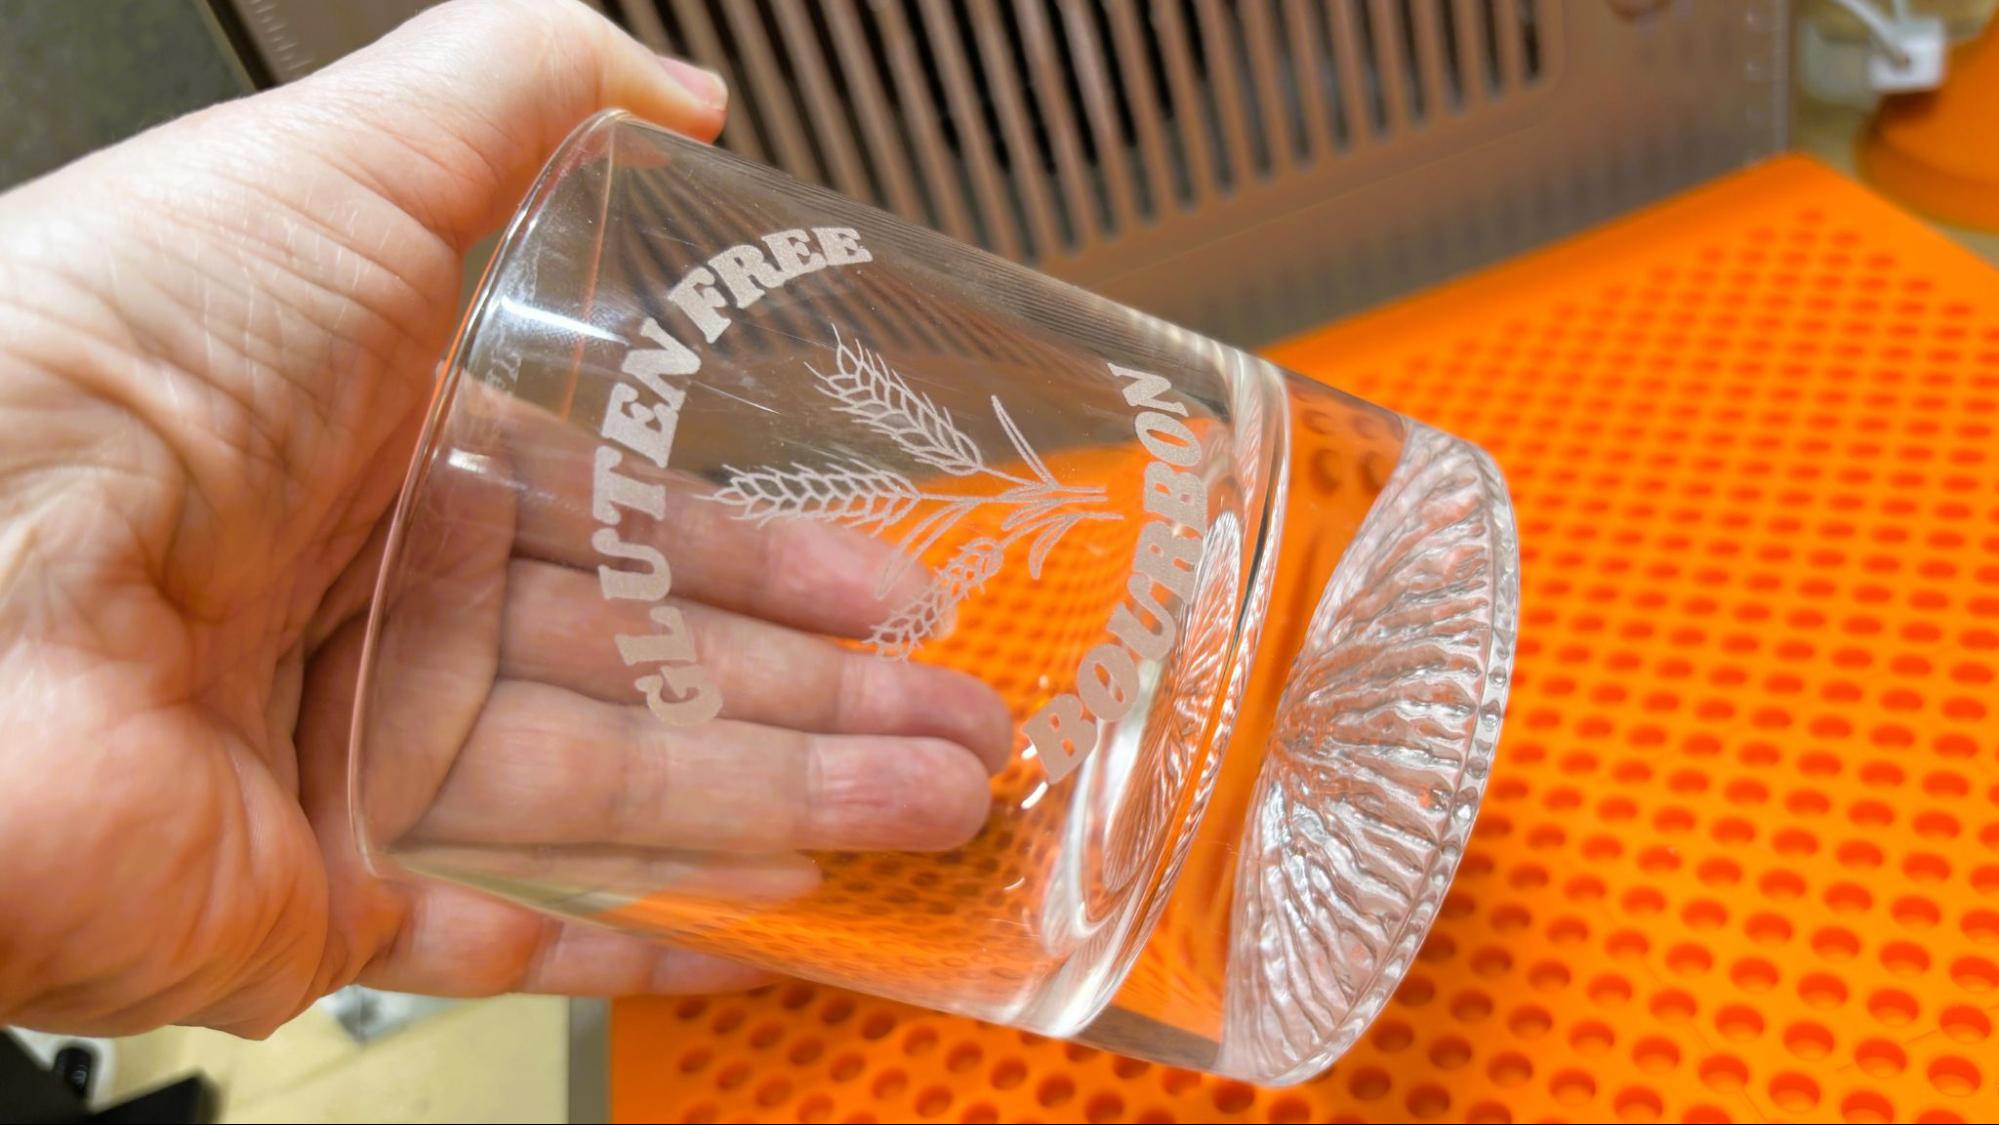
The xTool F2 Ultra UV does an excellent job engraving directly on glass. I used clip art and text from Canva and inverted the image using the free tool in xTool Studio. The image must be inverted to etch correctly on glass. Using 80% with a dot duration of 400 and 1 pass, this took 4 minutes and 15 seconds and looks fantastic. Sadly we were out of bourbon to show it off.
(Image credit: Tom's Hardware)
The switch to the inner engraving lens is mostly painless. Mostly. It’s a little unsettling since the lens is far inside the body of the laser housing, so I was working by feel to make the swap. The riser bolts easily onto the middle of the base with two thumb screws.
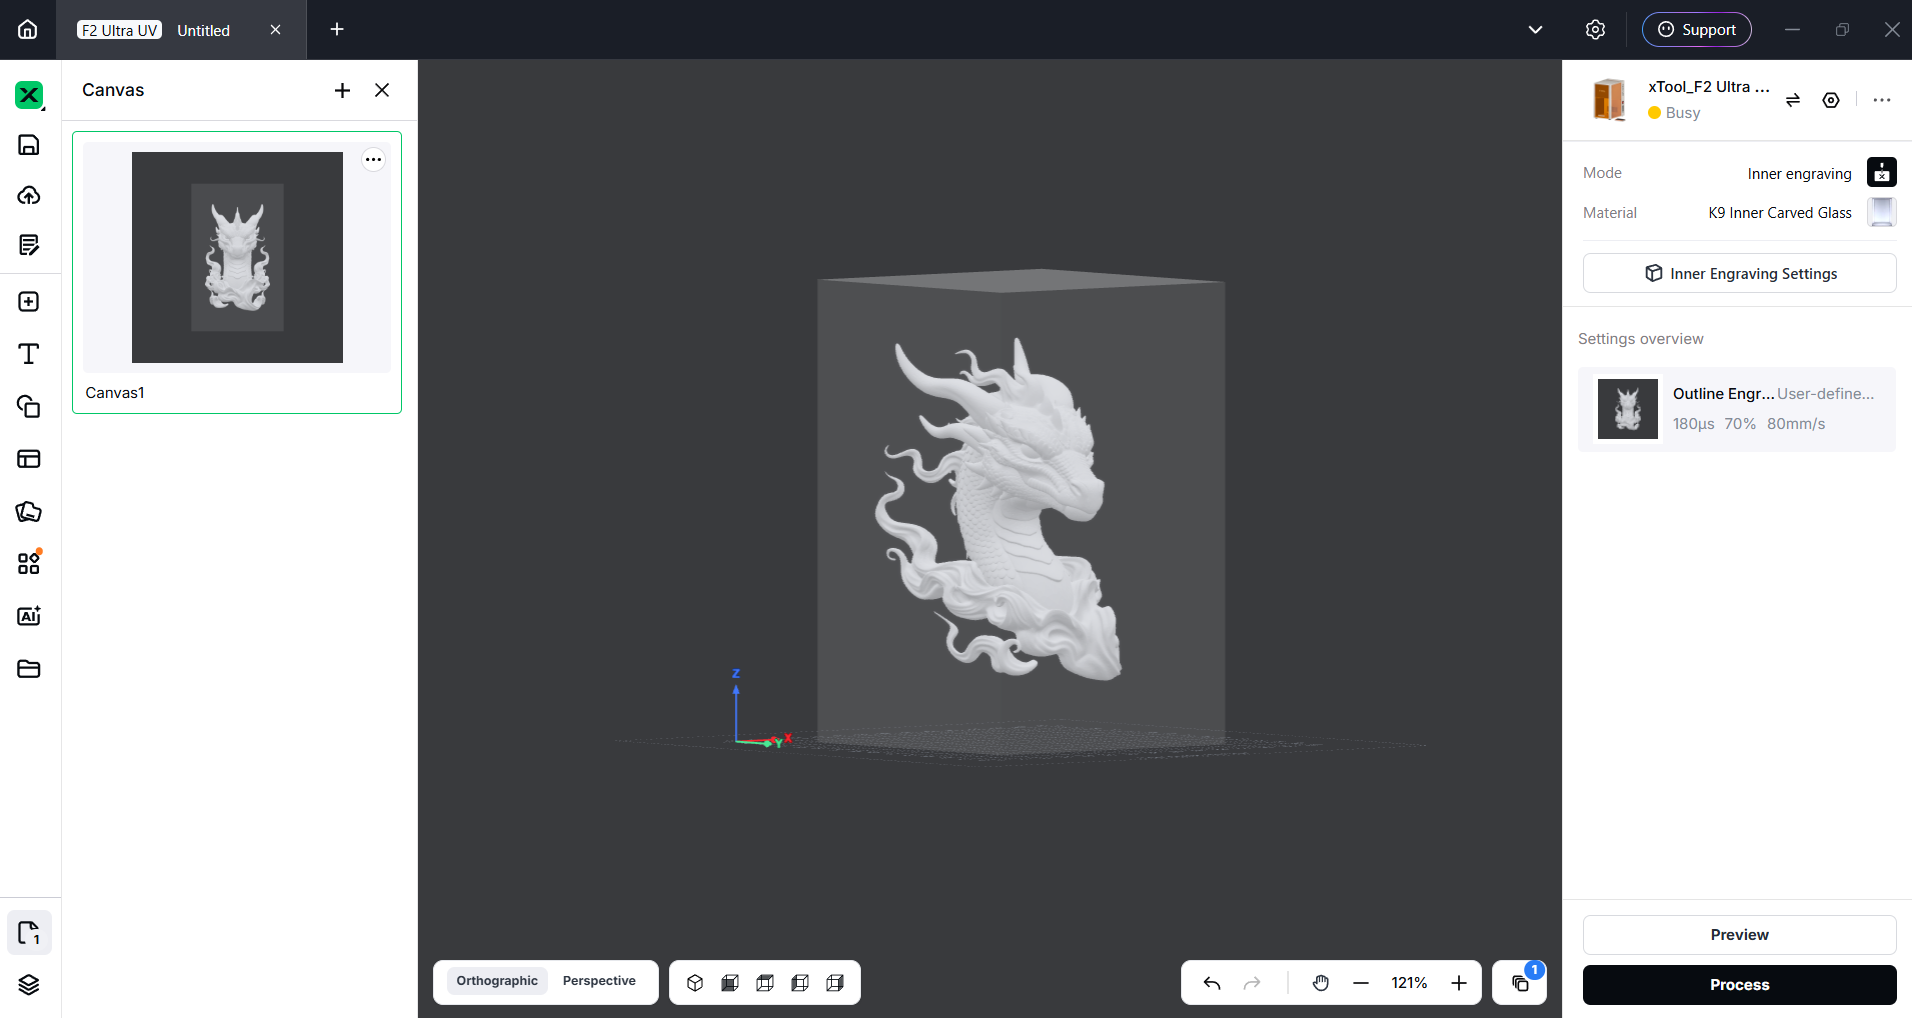
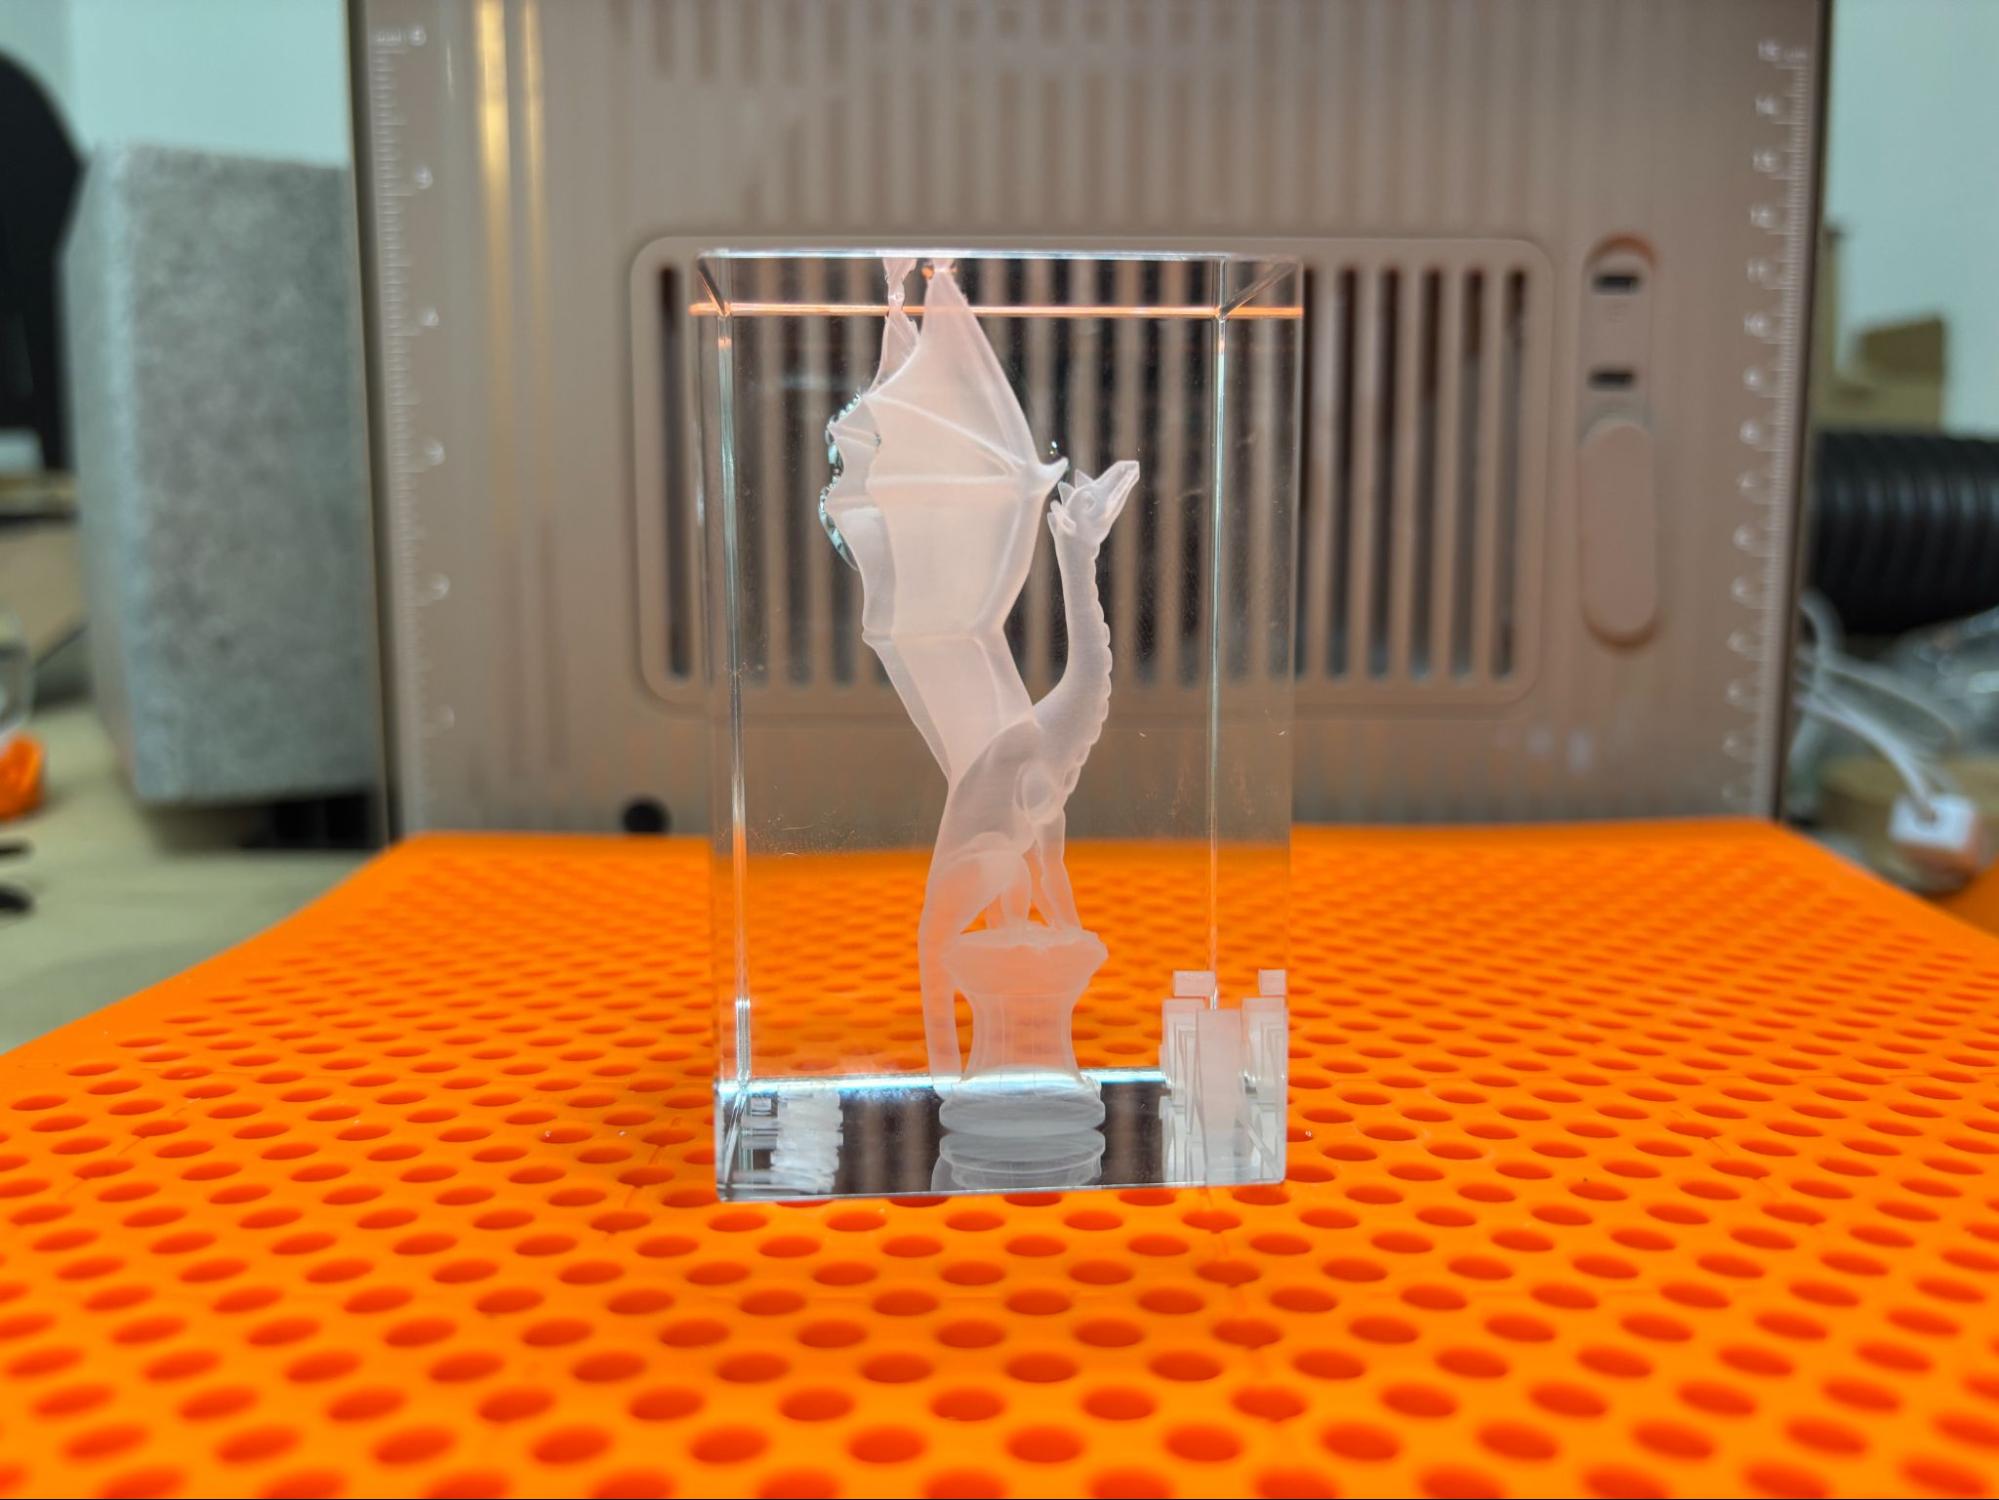
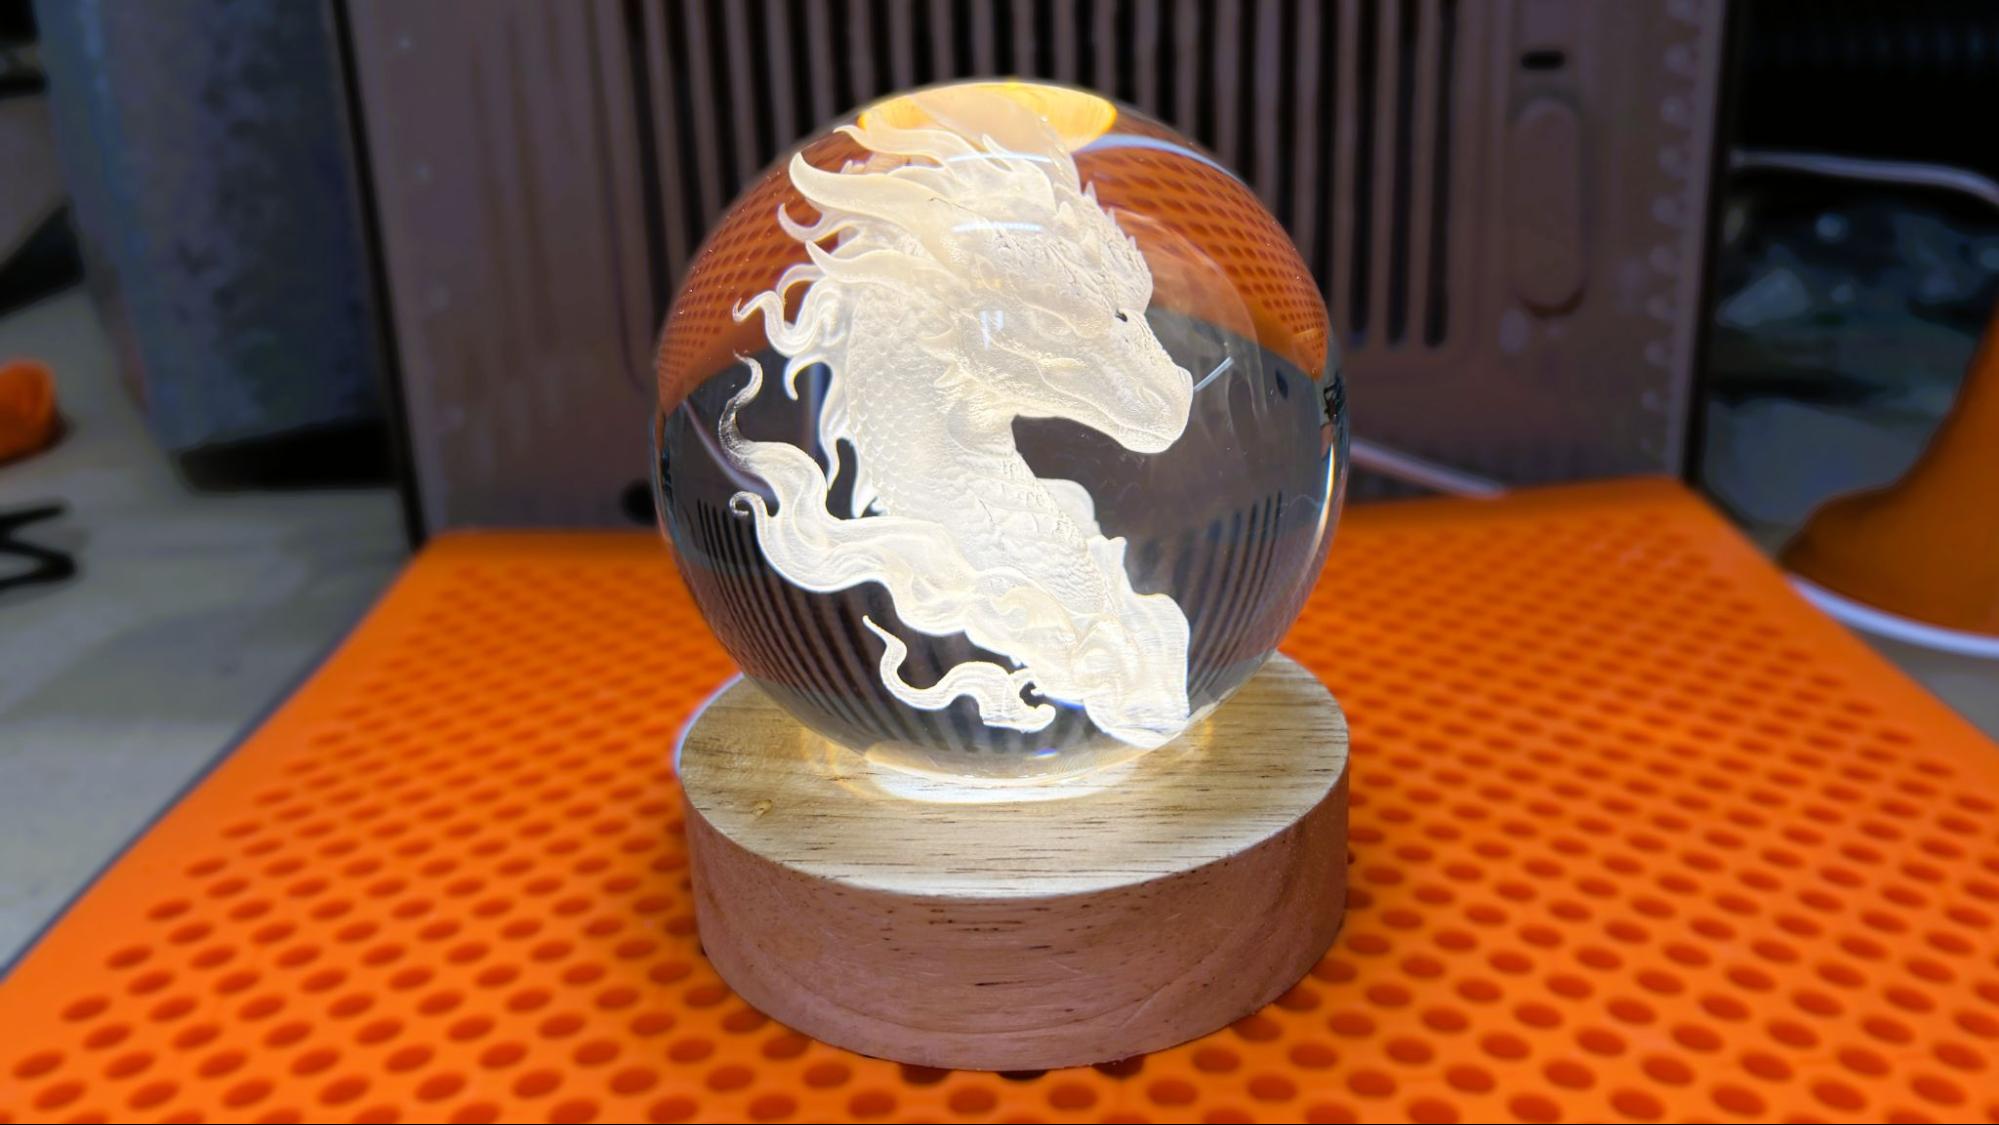
Because inner engraving is three-dimensional, you can use “normal” 3D printing STL files. For the first inner engraving, I chose a classic: Aria the Dragon by Loubie3D.
(Image credit: Tom's Hardware)
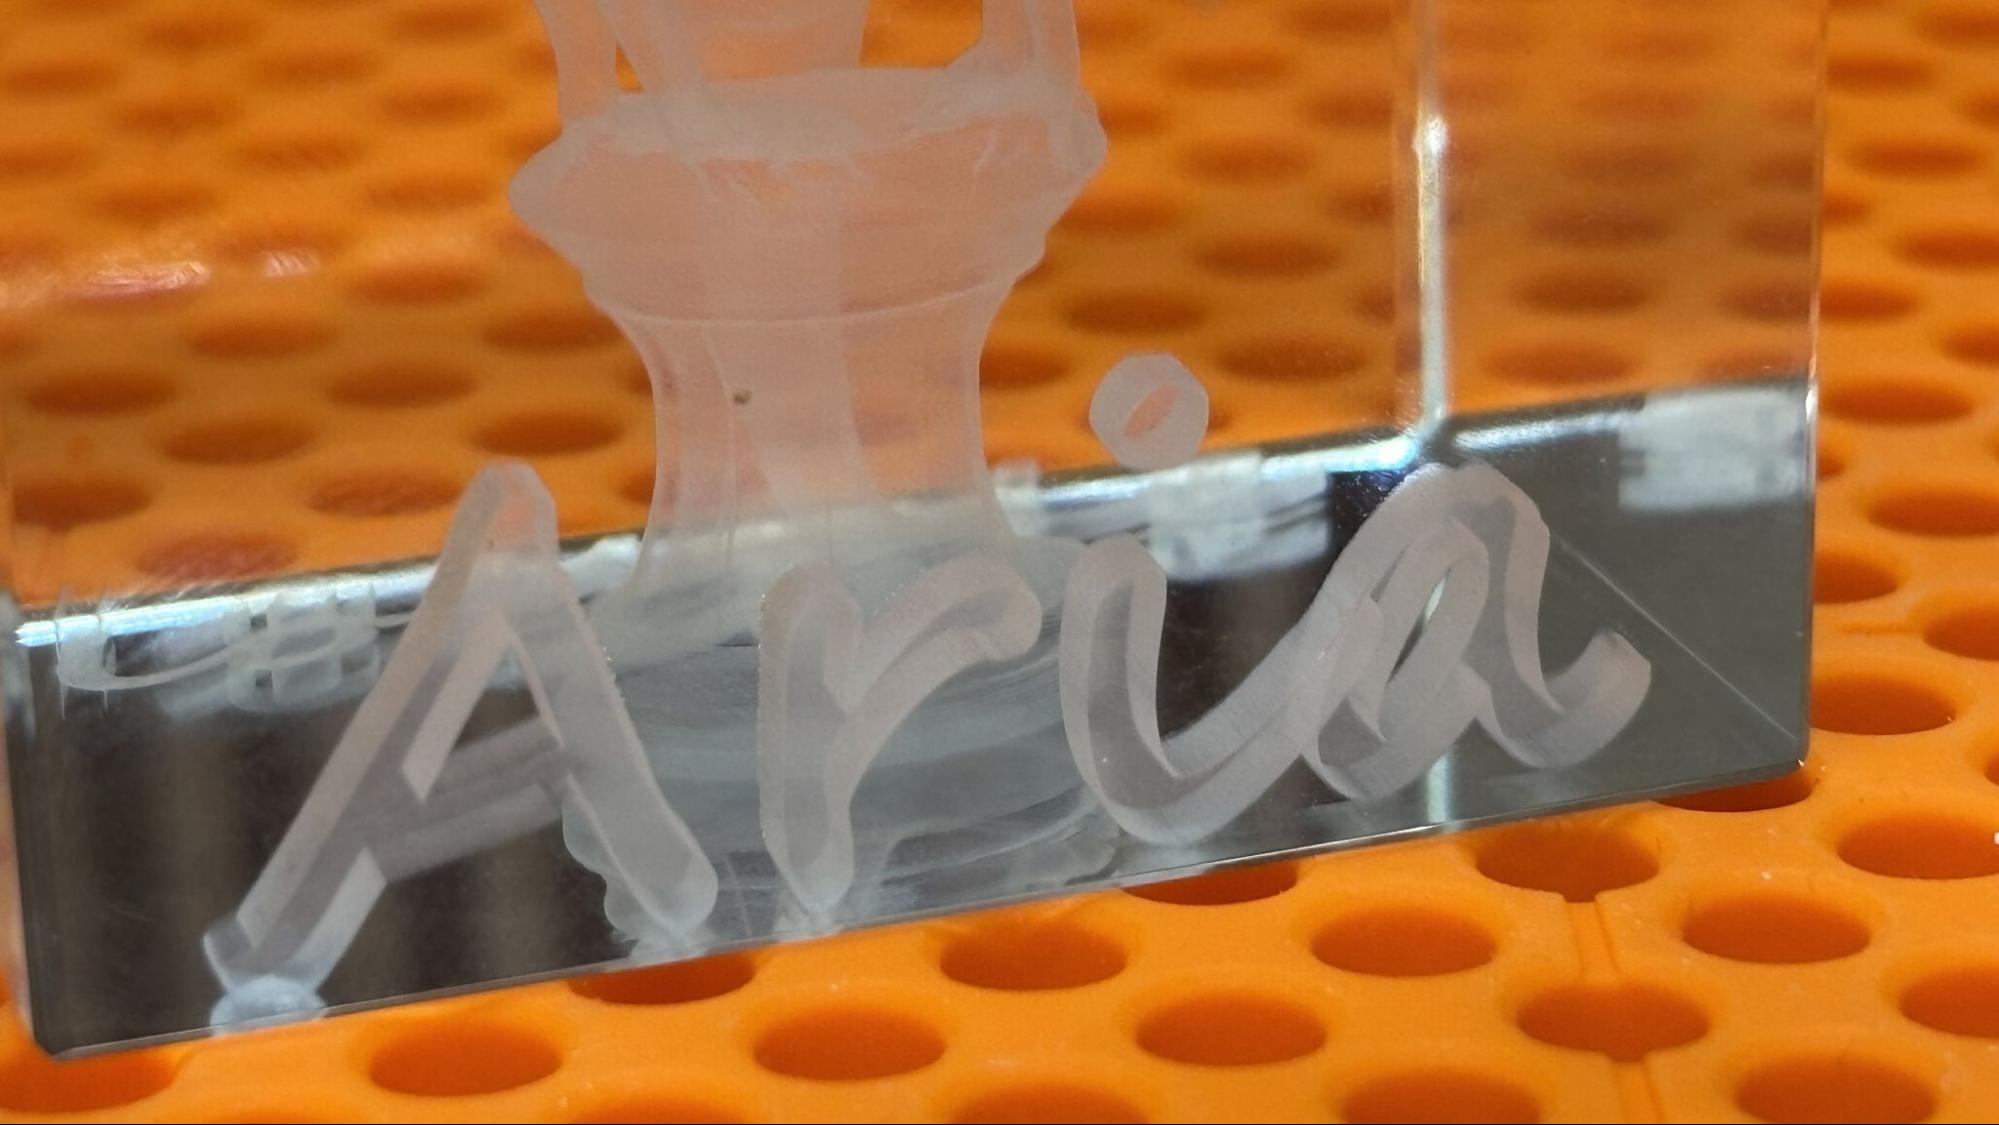
I also added text to the bottom of the engraving. This was when I realized that the Z-axis needed to be calibrated for inner engraving, so now I have Loubie3D etched on the surface of the riser permanently. After calibrating the Z-axis, the inner engraving work area must be calibrated too.
The inner engraving looks like magic and takes quite a bit of time to process. Using the dotting engraving method at 70% power and 200 dot duration, with a .01 layer height and a .02 point spacing, the engraving took 5 hours and 7 minutes. The result, other than the riser being engraved too, was amazing.
(Image credit: Tom's Hardware)
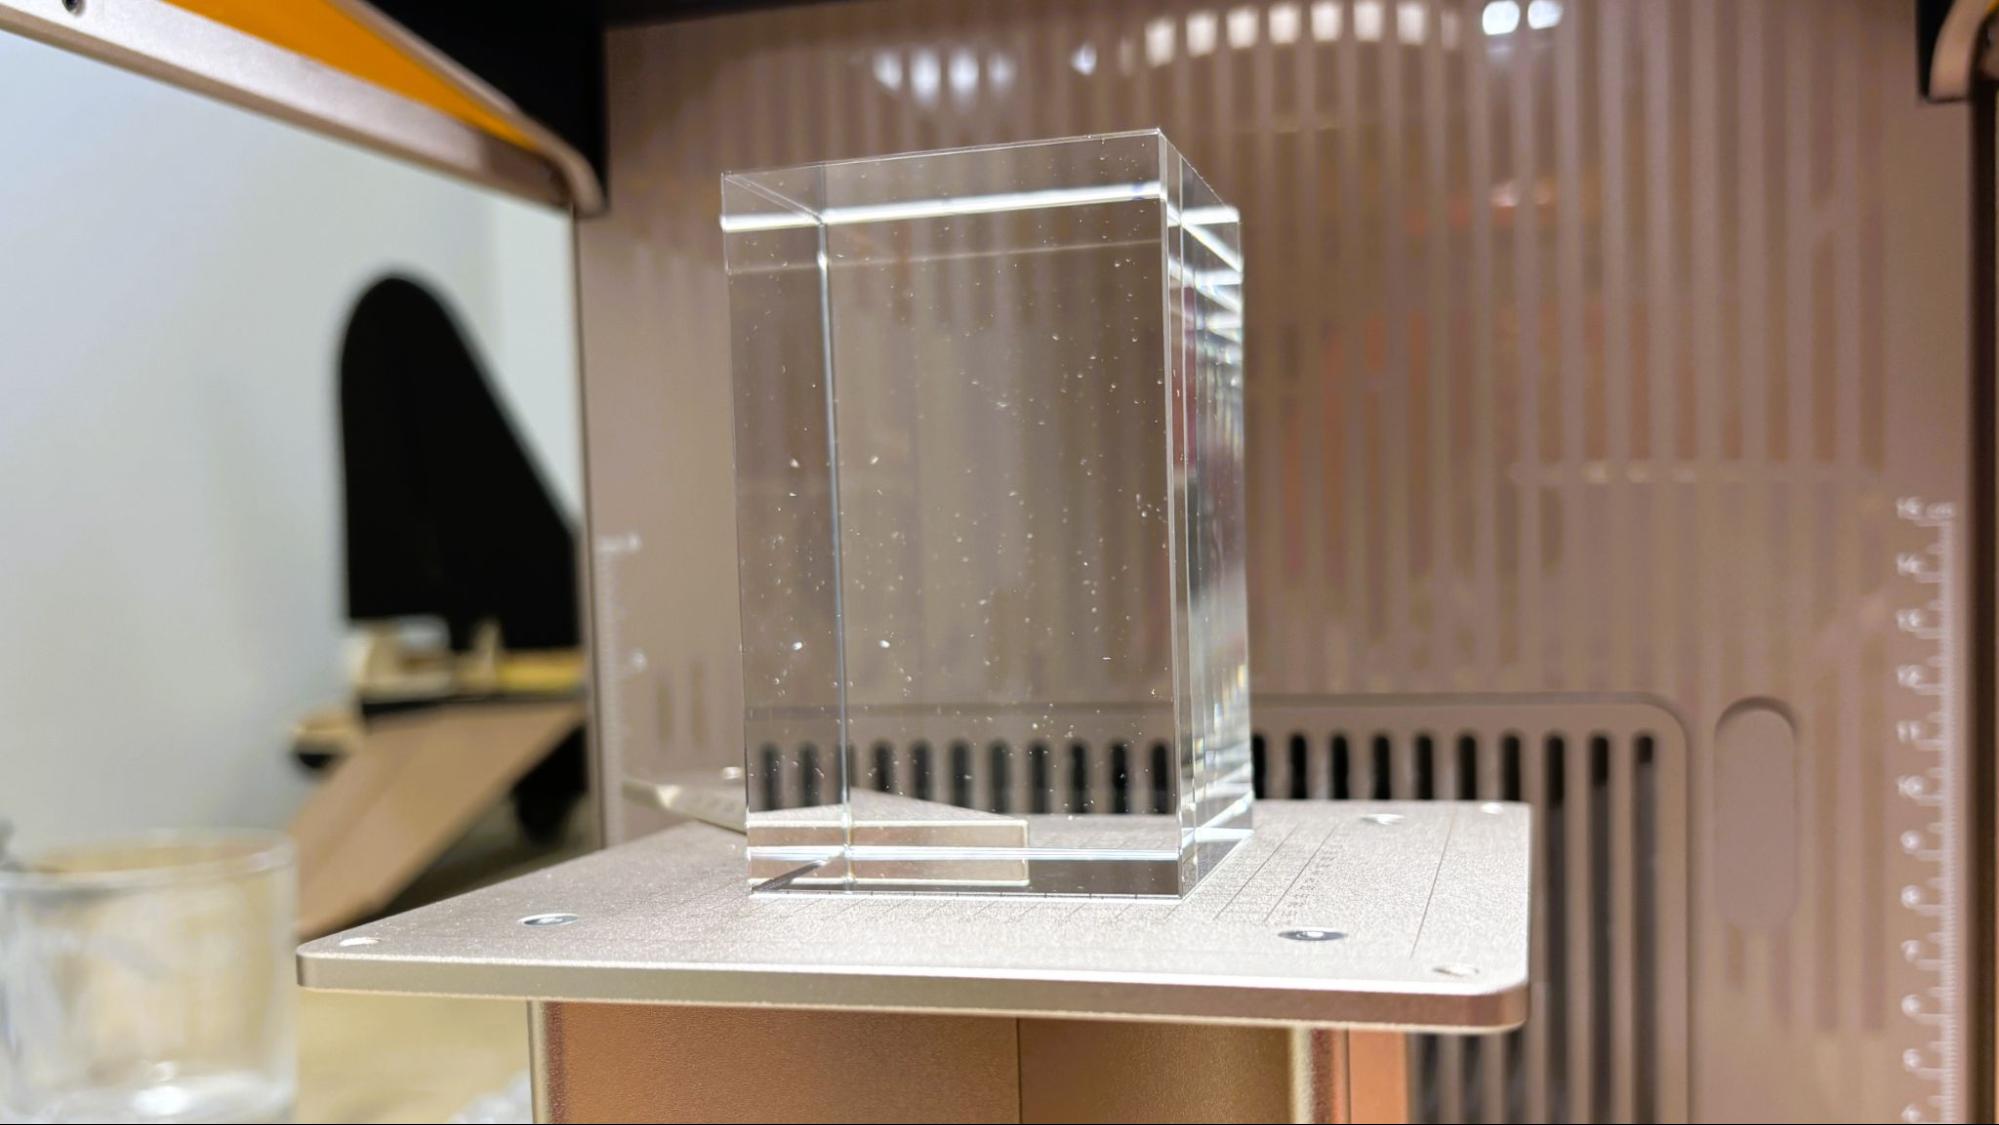
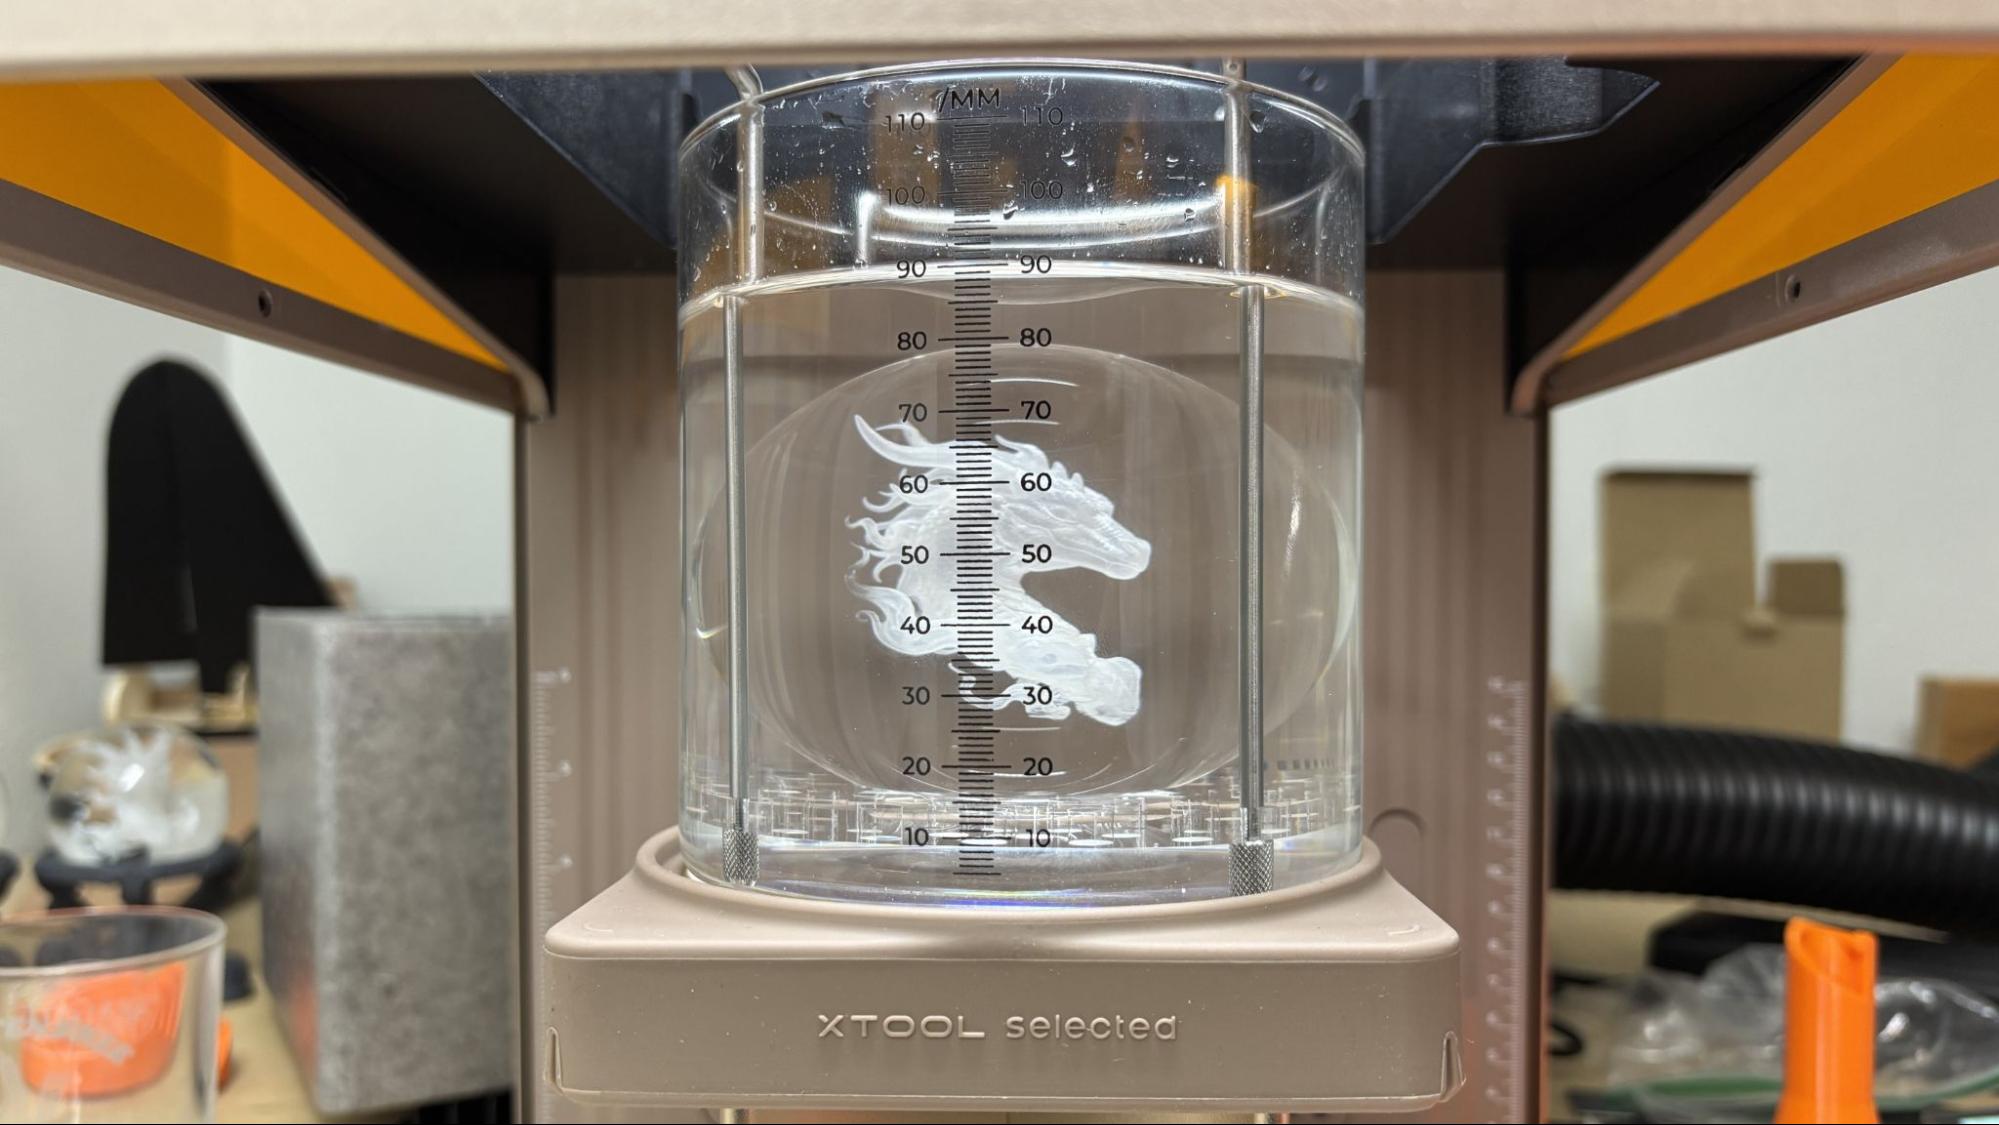
Probably the most impressive thing I’ve ever engraved is this crystal ball. Engraving a crystal ball is more of a production than the other inner engraving, since it requires the ball to be immersed in liquid that is approximately the same refractive index as the crystal. We used mineral oil and initially attempted to use a Pyrex measuring cup to hold everything in place.
(Image credit: Tom's Hardware)
Based on that experience, I highly recommend the xTool kit, which includes the silicone pad to keep things centered and a beaker with easily read measuring lines. It was nearly impossible to center the engraving without this. Even with the xTool kit, it requires a steady hand to avoid slopping oil around.
(Image credit: Tom's Hardware)
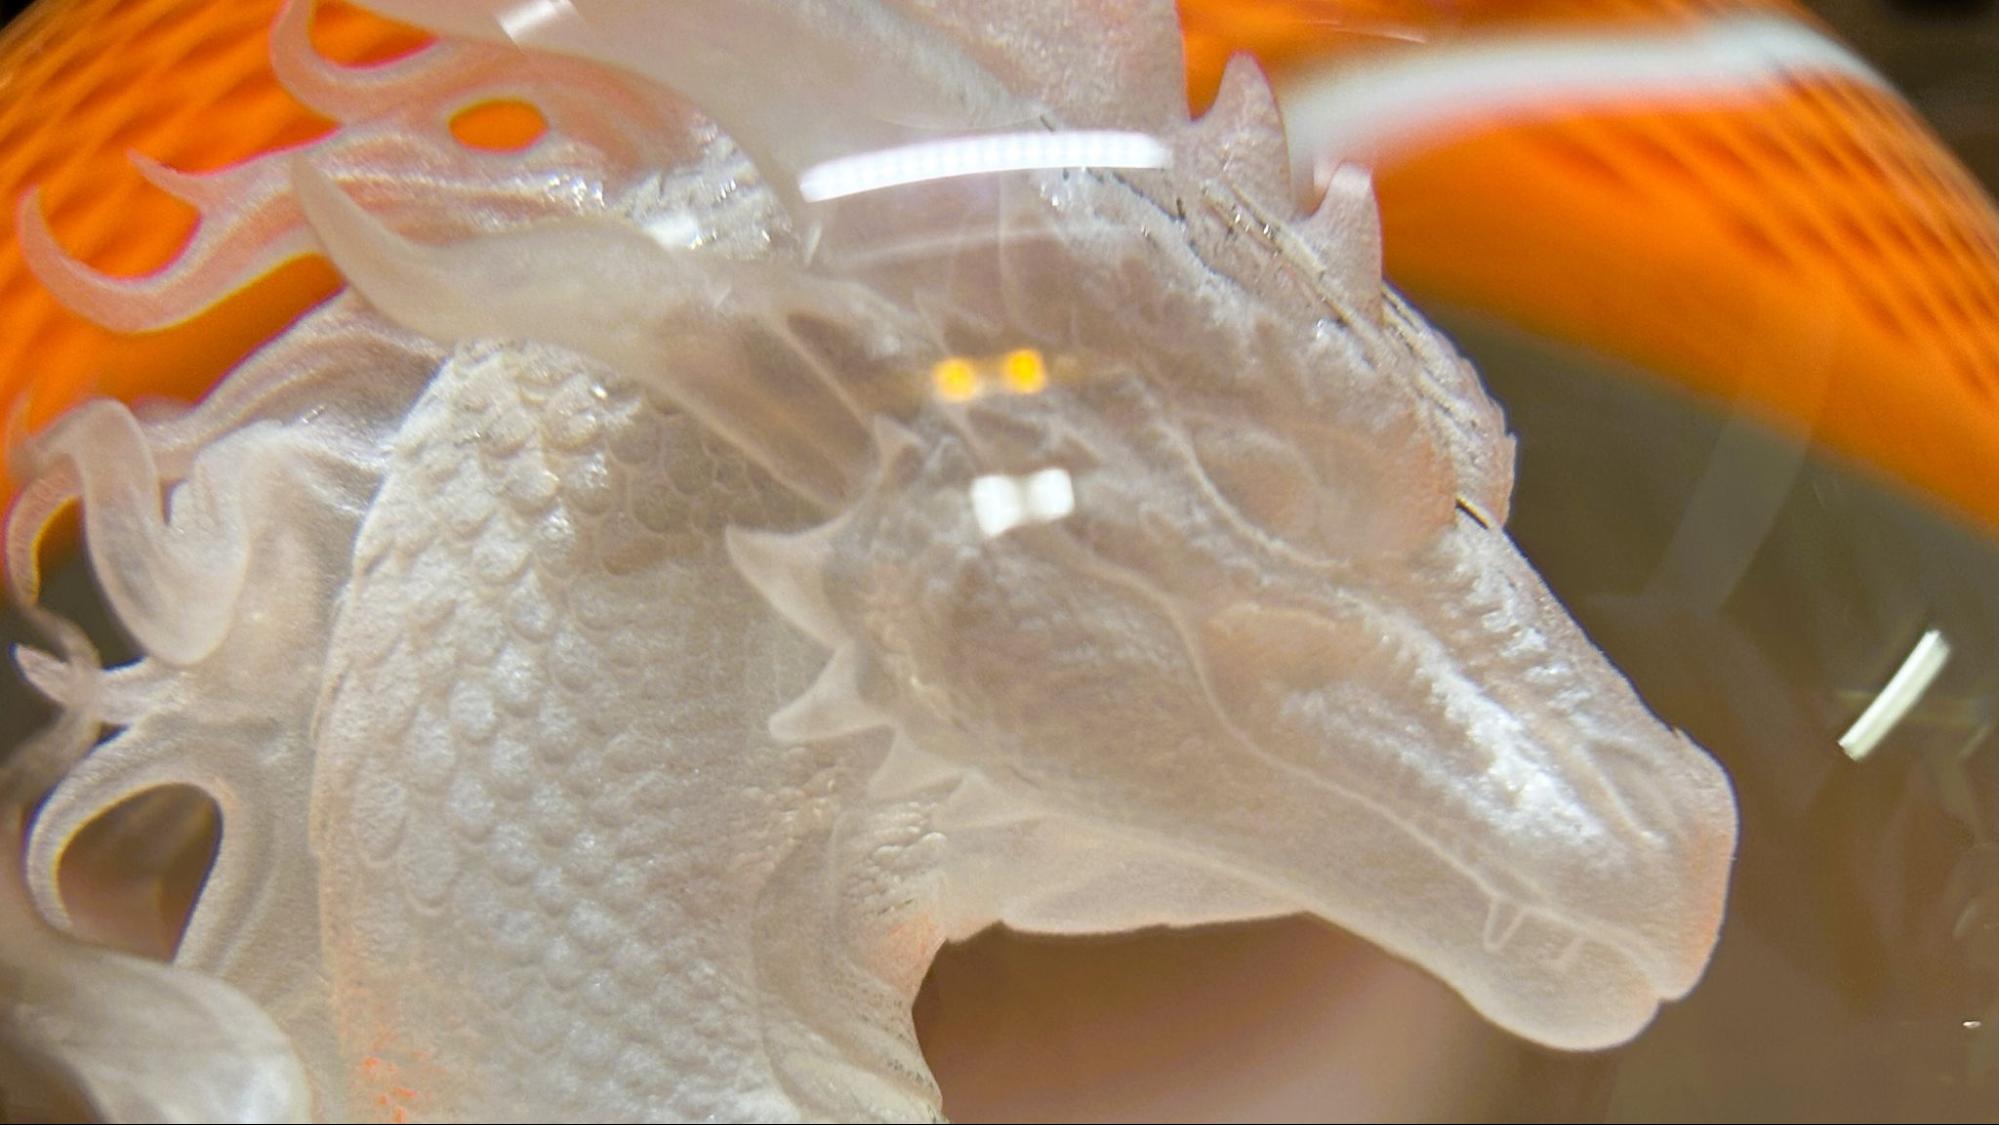
The engraving took 5 hours and 7 minutes at 40% power and a dot duration of 180 with a .04 layer height and a .02 point spacing. The resulting detail is just phenomenal.
Bottom Line
(Image credit: Tom's Hardware)
I feel like I’ve just scratched the surface of what the xTool F2 Ultra UV can do. While it cuts and engraves wood as well as most of the lasers I’ve tested, its ability to engrave glass and plastic is unusual. The inner engraving is just magic, bordering on witchcraft. It does not take a rocket scientist to see the sales potential of items easily crafted with this machine.
Starting at $4,299, the F2 Ultra is a bit of an investment. But it earns its keep by delivering outstanding crystal engravings that no other laser can deliver.
If you’re not ready to make such a sizable investment, the portable xTool F1 laser is still available for $819 and is great for taking to festivals for personalizing merch on the go. If you want to laser large things safely tucked inside an enclosure – including clear acrylic – check out the xTool P2 CO2 laser, which is on sale for $3,399.
The Dr. Semiconductor YouTube channel only has a few videos, but the man is quickly making a name for himself. He's built a semiconductor cleanroom in his backyard and made his own RAM cells there. Matthew Hartensveld (his real name) needs to figure out a way to package (cut and write) the RAM cells, so he figure he might as well use the opportunity to make some free-range, homemade LEDs while he was at it. This latest adventure is part of his open-source Semiconductor.DIY project.
The entire video is fascinating and information-dense, so we suggest you watch it to get the complete picture. Hartensveld started off with gallium nitride atop a sapphire wafer, that he proceeded to break into shards and clean with a solution including deionized water, acetone, and isopropyl. The primary goal was to etch the top layer of the material in order to define pattern contacts. Chlorine gas would be the obvious answer as that's what's used industrially, but it'd be more than a little hazardous in this setting.
The scientist turned his attention to a household item that makes every nerd happy: lasers. He ordered a powerful one from eBay, and moved it into his bathroom so his dog wouldn't look into it. Hartensveld quickly came across the problem that there was basically no information online about using said laser, and after a few attempts he managed to etch some scribbles on the wafer, and then actual patterns. After this, he test-drove the "LED" shard by smooshing some indium on it and using a 9 V battery, and lo and behold, there was blue light.
Doing so left a deposit of metallic gallium atop the pattern, so he came up with a solution to clean that up to leave the etched parts clearly exposed. Using a vacuum chamber with a two-stage pump that sucked out 99.999999% of the air out, he deposited a nickel/silver layer for the positive contact, then a titanium/silver for the N-contact and top metal, using argon plasma as the top gas. Even still, he later regretted not letting the chamber run for a while longer to draw out yet more air, to reduce residual gas.
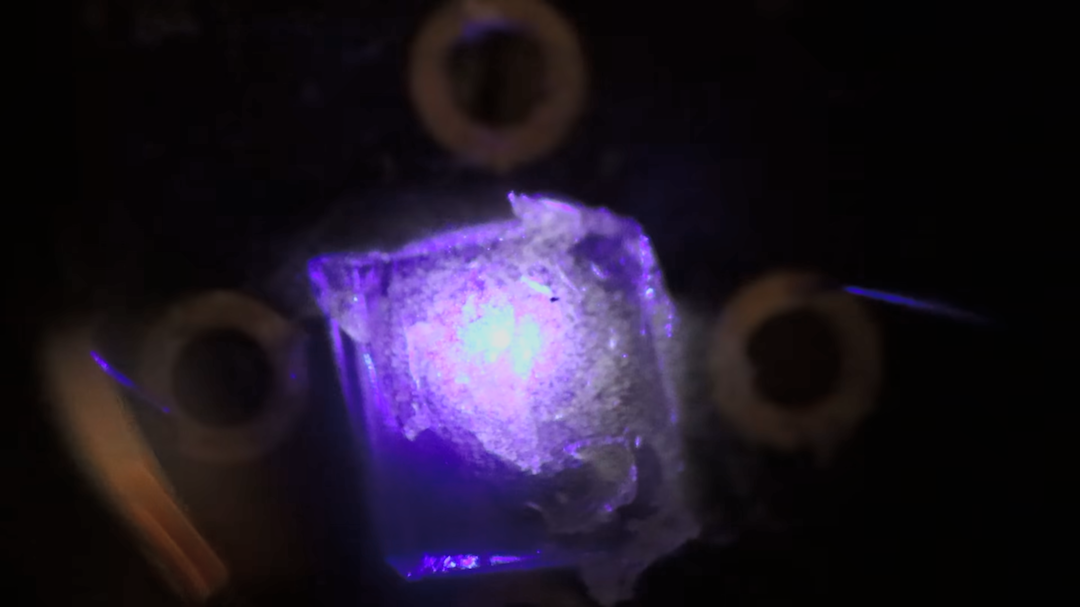
At this point, Hartensveld had a fully working blue LED, though still in a wafer. That's right, blue, the color of LED that was a mystery for decades until a dedicated Japanese engineer figured it out. At any rate, the time came to package these LEDs, meaning cut them out of the wafer, and add physical connections. A table saw with very thin blades didn't really worked out, so in pure scientist fashion, Hartensveld turned once again to the laser, focusing it at a specific point to melt away the sapphire substrate. After an adjustment to make this a multi-passs process, he finally had a full cut.
The madlad still needed to add wire connectors, and after evaluating a few options, settled on indium bumps, the same method and material used in digital cameras. Last but not least, since he already had a blue LED on hand, he added a layer of cerium-doped yttrium aluminum garnet (just bought off Alibaba) to add a yellow filter to end up with an ugly but functional white LED.
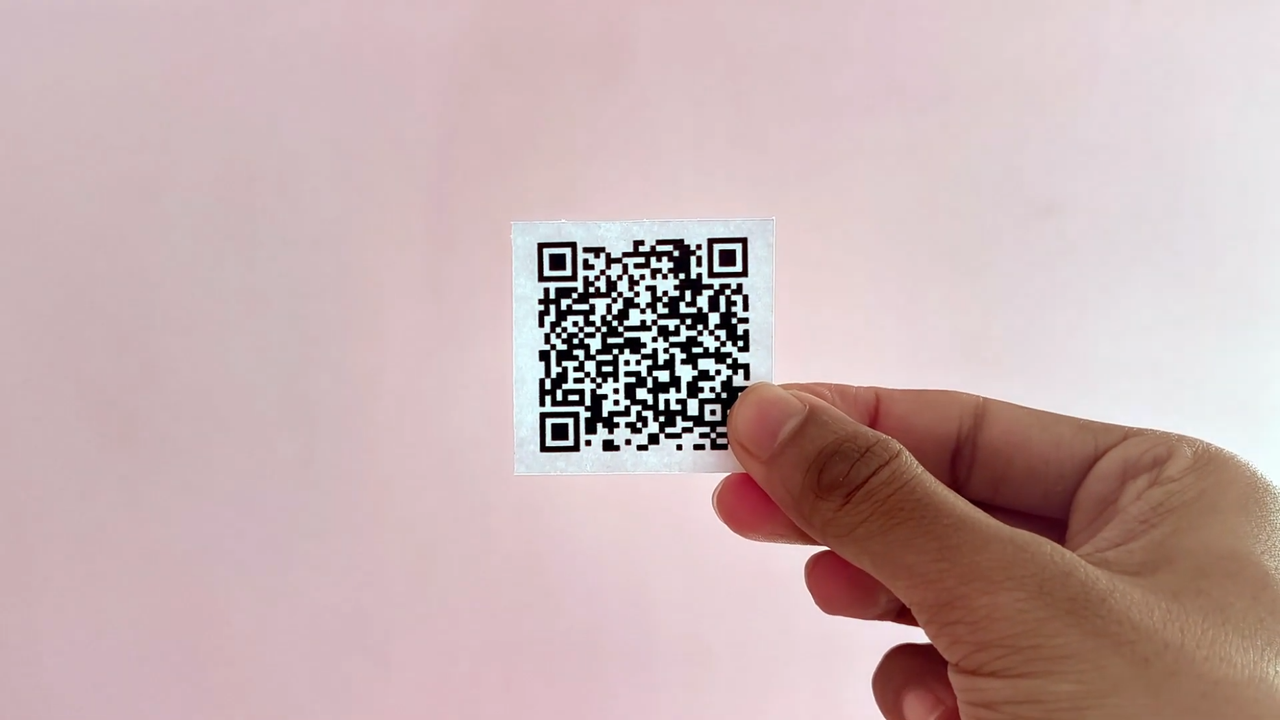
A maker known as Makestreme has printed an entire two-minute song onto a sheet of paper, publishing the full build and source code on Hackster.io. The trick is Meta's EnCodec neural audio codec, which crunched a 2.9MB MP3 down to roughly 21KB of latent tokens, a reduction of about 1,000 times, small enough to split across eight QR codes arranged as a double-sided "paper cassette." The same 21KB file was also beamed between two ESP32 boards over LoRa radio, and by our reading of the published transmitter code, that wireless transfer takes around 90 minutes per song.
One QR code tops out at roughly 3KB of binary data, with Makestreme hitting the practical limit at about 3.3KB, so a 2.9MB MP3 would need close to a thousand of them. Conventional compression can't close that gap because MP3 is itself already lossy, which is where EnCodec comes in.
The open-source codec Meta released in 2022 converts a waveform into discrete tokens that a matching decoder turns back into audio, and at the project's 3 kbps setting, the reconstructed song reportedly held up well. At 1.5 kbps, however, it produced heavily degraded output.
Each of the eight QR codes carries a 1-byte ID plus a chunk of the token stream, four codes per side in a nod to flipping a vinyl record. The generator script uses the lowest error correction level to maximize density, so there's no redundancy to spare: damage one code and the song is gone.
LoRa pairs two ESP32s with REYAX RYLR998 modules on 866 MHz, moving the file in 160-byte packets with an ACK-and-retry protocol. The transmitter sketch hard-codes a 40-second pause after every acknowledged packet, and at roughly 134 packets for a 21KB file, the gaps alone add up to about 90 minutes. That pacing is deliberately conservative for duty-cycle compliance, and it's a far cry from the 190 KB/s another developer hit recently by streaming QR codes between phones at 60 FPS.
Printing software on paper dates back to the Cauzin Softstrip of 1985, a 2D barcode that let magazines publish programs at up to 5,500 bytes per strip and faded once floppy disks got cheap. It left behind strips almost nobody can read today, and Paper Tunes inherits the same dependency: the QR codes store tokens, not audio, so playback requires EnCodec's exact 24 kHz decoder.
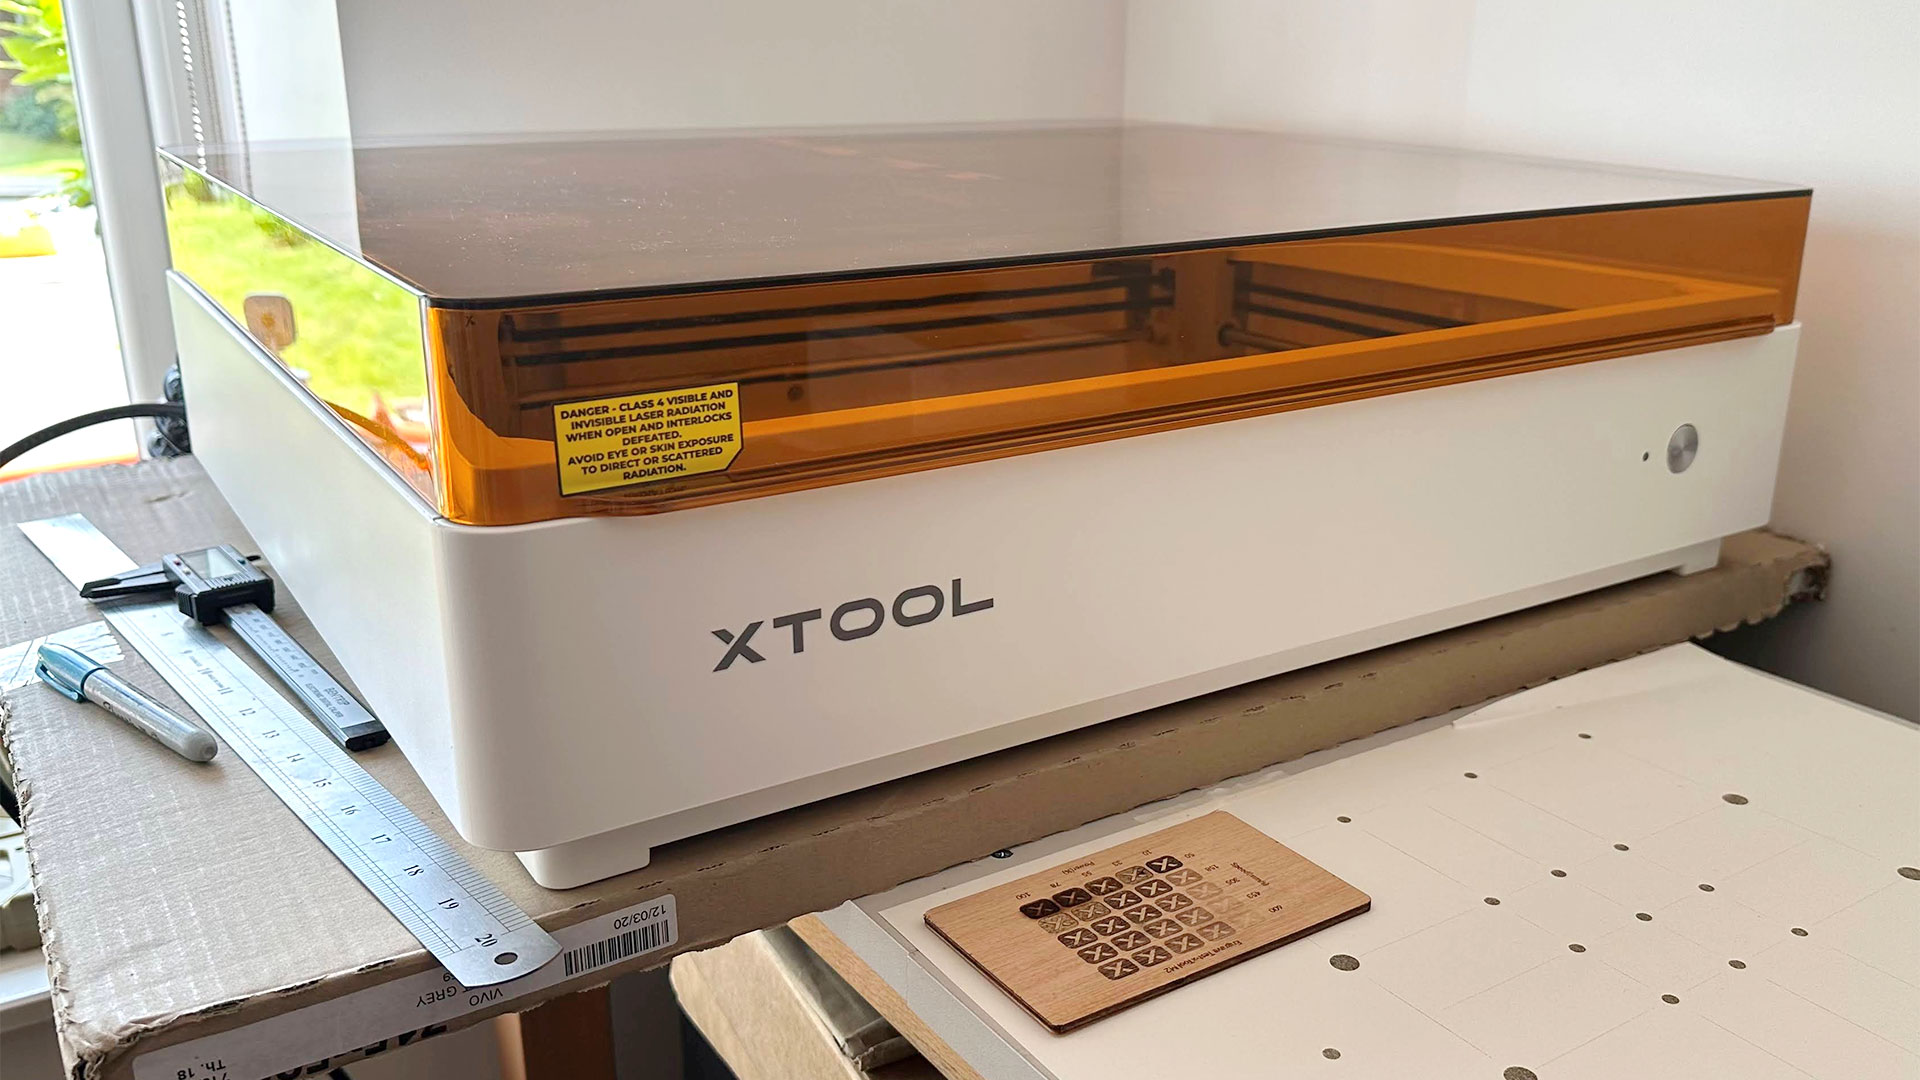
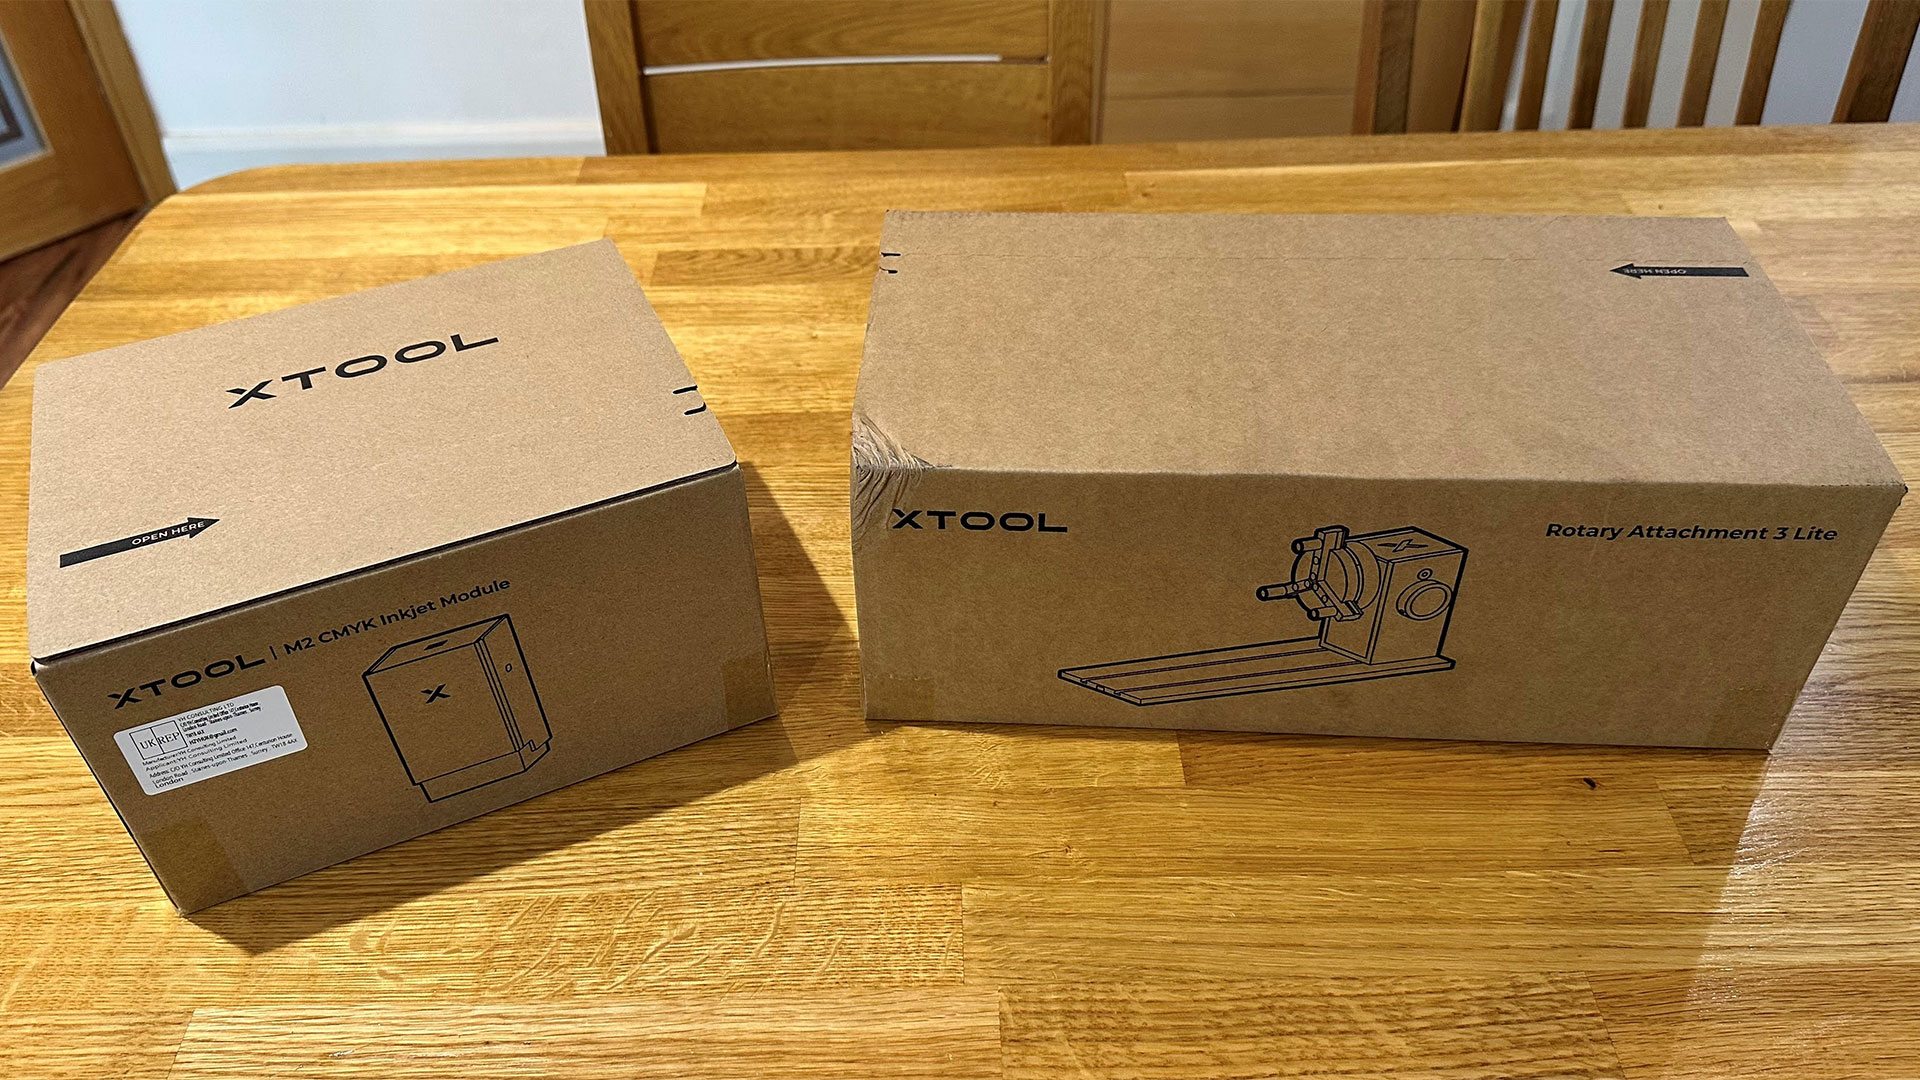
Here’s xTool’s second take on an all-in-one craft tool in a box. It isn’t just an iterative update to the xTool M1 Ultra. The new XTool M2 color craft laser and engraver thoroughly remixes the offering. Specifically, it throws out the previous model’s cutting blade and pen options. To compensate, it comes with a 10W diode, a 20W diode, CMYK, and a 2W IR laser head, “cut, print, engrave” options. Very worthy improvements, such as positioning and monitoring cameras, come as standard this time around. Furthermore, the print head offers CMYK inks instead of the washed-out CMY of yore, and laser air assist is included as standard. xTool’s new M2 also works with the RA3 Lite full wrap rotary accessory.
The xTool M2 10W base model is available for $599. This entry price makes the M2 about half the price of last year’s M1 Ultra. But this 10W ‘Standalone’ bundle includes just the machine and a 10W diode laser head. You’ll have to part with $699 (usually $749) for the 10W ‘Color Print & Cut Bundle’, which includes the CMYK print head and a cartridge. Moving up to $939 (usually $989) gets you the 10W Deluxe Bundle.
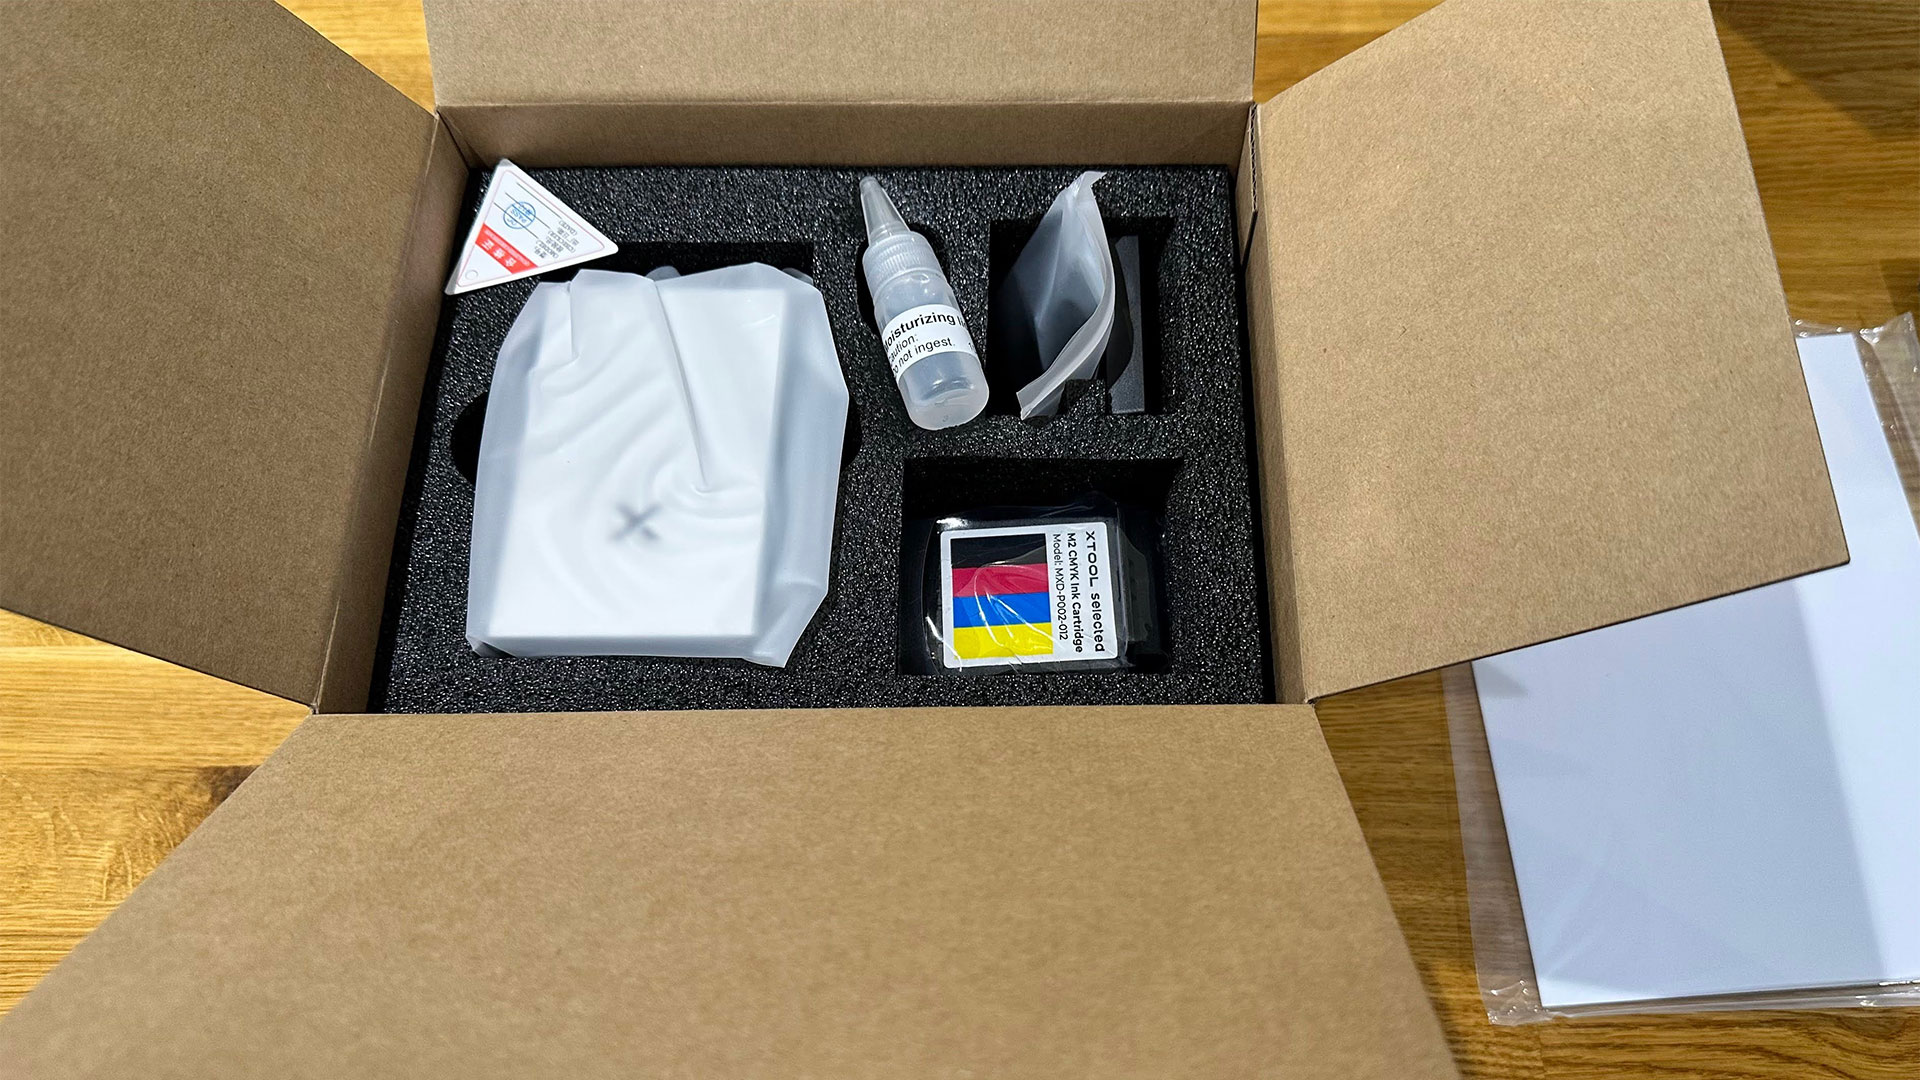
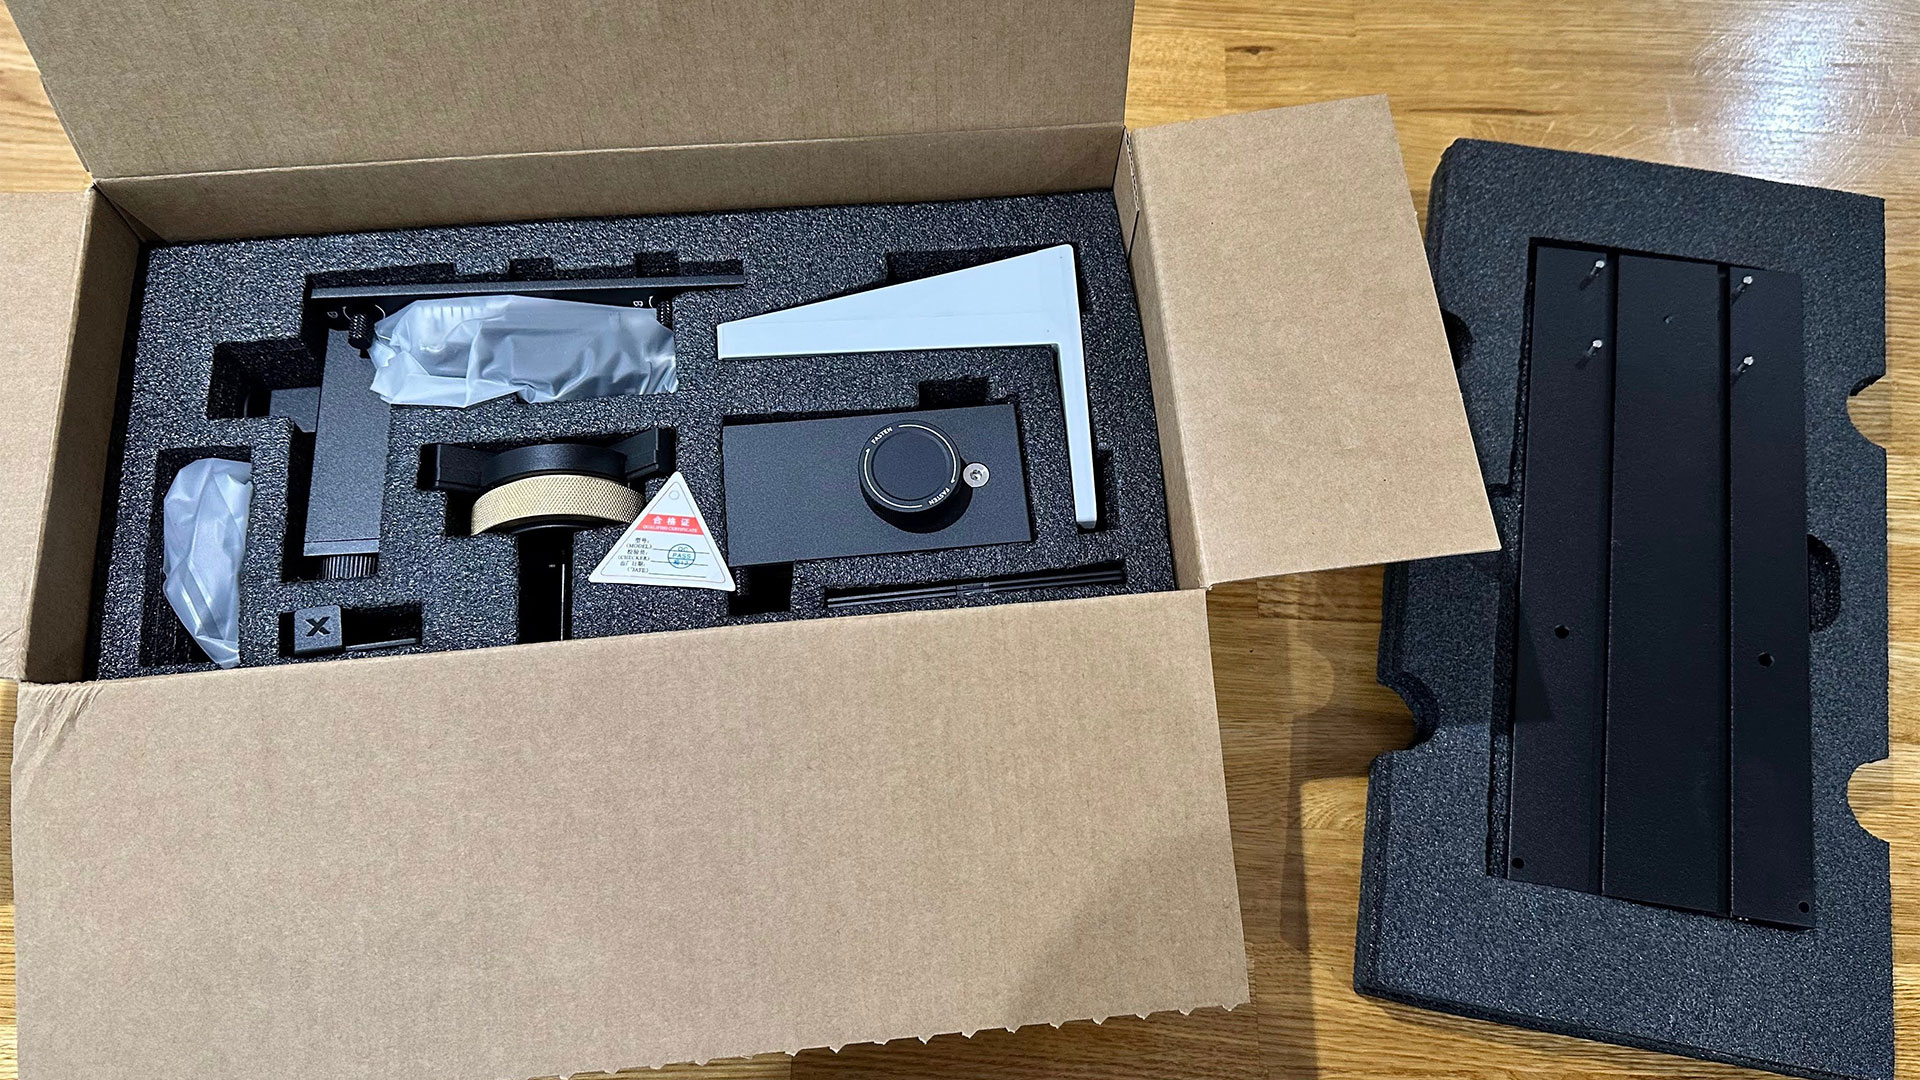
There are also bundles with the 20W diode laser head costing $400 more per tier (Standard, Color Print & Cut, and Deluxe). xTool also sells various print/cut heads separately, and they’re easily magnetically swappable. For example, it lists the M2 CMYK printing module with an ink cartridge for $169, extra cartridges are $99, and the RA3 Lite is $259. We don’t have prices for a 20W diode head (if you wanted to upgrade later), nor the 3W IR laser head that is shown on the promotional pages for the product.
You might prefer the 20W diode laser for faster, deeper cuts. xTool says it raises the max basswood cutting depth from 8mm to 10mm in one pass. For acrylic, it is much better, raising the cutting thickness from 3mm to 8mm in one pass with the 20W diode laser installed.
(Image credit: Tom's Hardware)
The default 10W diode laser supplied will be good enough for cutting and engraving plenty of materials for many crafty users. Officially, the following tabulated materials are cuttable, engravable, and printable.
Paper / Cardstock / Sticker Paper / Wood / Canvas / Fabric / Felt / Leather / Glass
You will see examples of cutting, engraving, and printing on various materials during our test process below.
As mentioned, the newest Color Craft machine from xTool improves on the older and more expensive model by integrating a pair of positioning and monitoring cameras. There’s also a separate camera for fire hazard monitoring and alerts. Another improvement on the original comes via the integration of air assist for the laser. Fan-powered extraction, with corrugated flexible extendable pipe, is another welcome new standard feature. As with the previous model, we have a laser-safe tinted enclosure lid, which should mean your eyes are adequately protected when the machine runs with the lid closed.
Finally, the newest Color Craft laser from xTool now comes with the excellent xTool Studio software we last used alongside the formidable xTool P3. This is a comprehensive package for laser control and output, as well as for guiding you through wizards, generators, apps, and plenty of projects online. Most projects I completed went easily, from photo and/or illustration and layout to output. I did hit a couple of bugs, but more on that later.
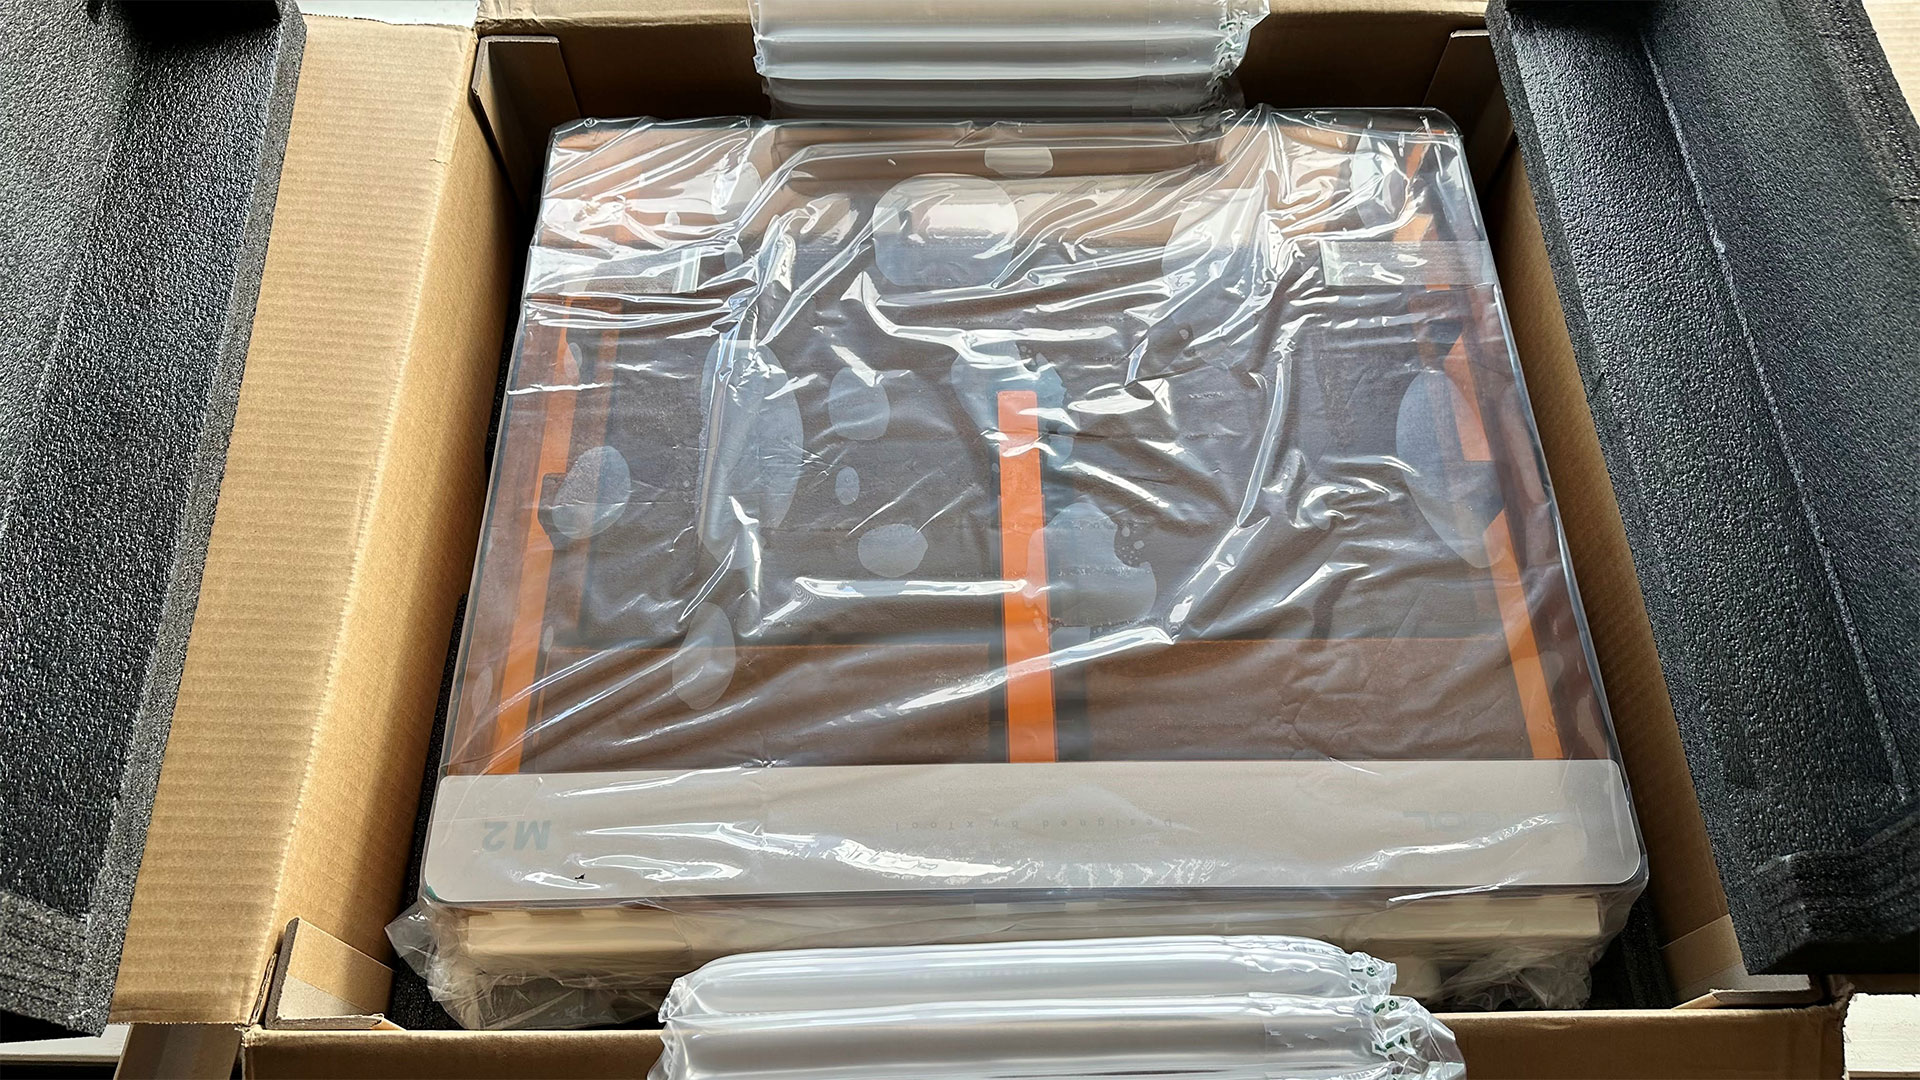
The device was well packed, with everything padded and secured nicely for transportation. Moreover, it won’t be that tricky to get it back in the box as it is a simple shape with no machine assembly required.
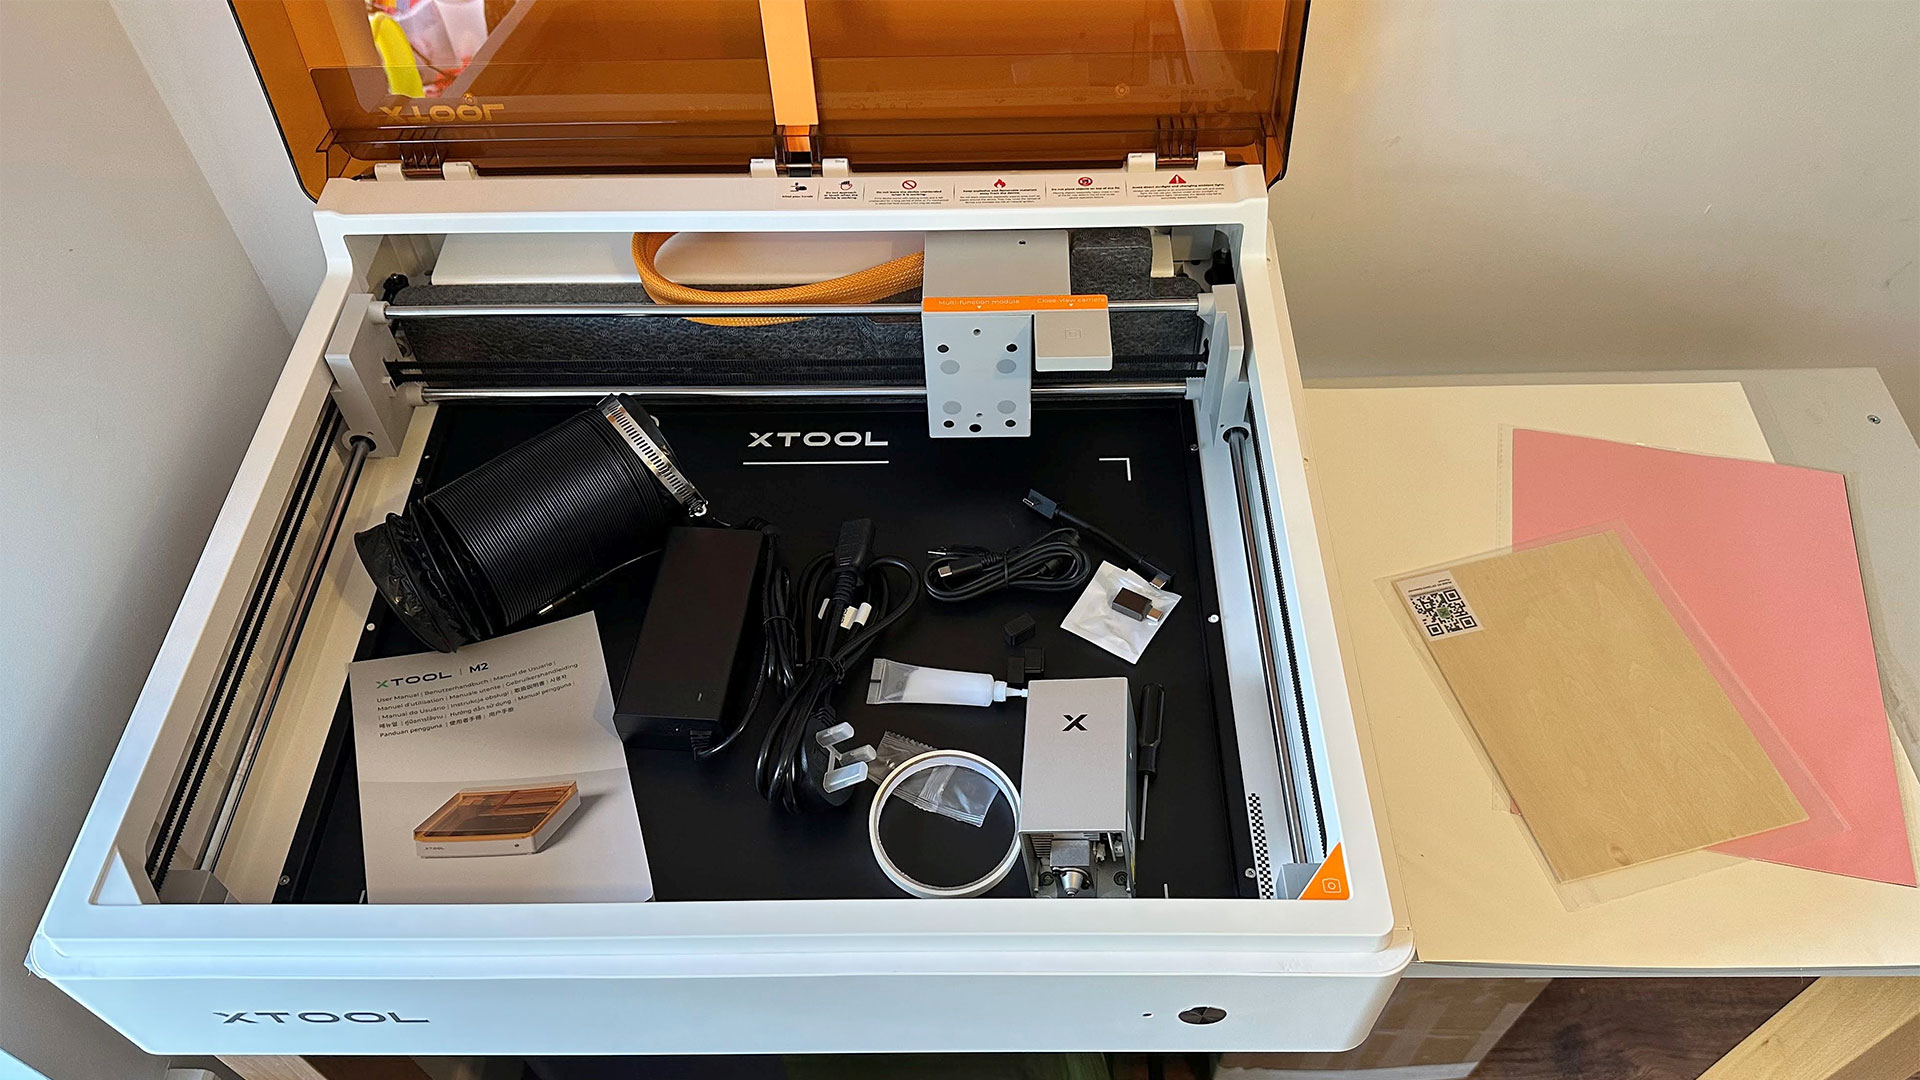
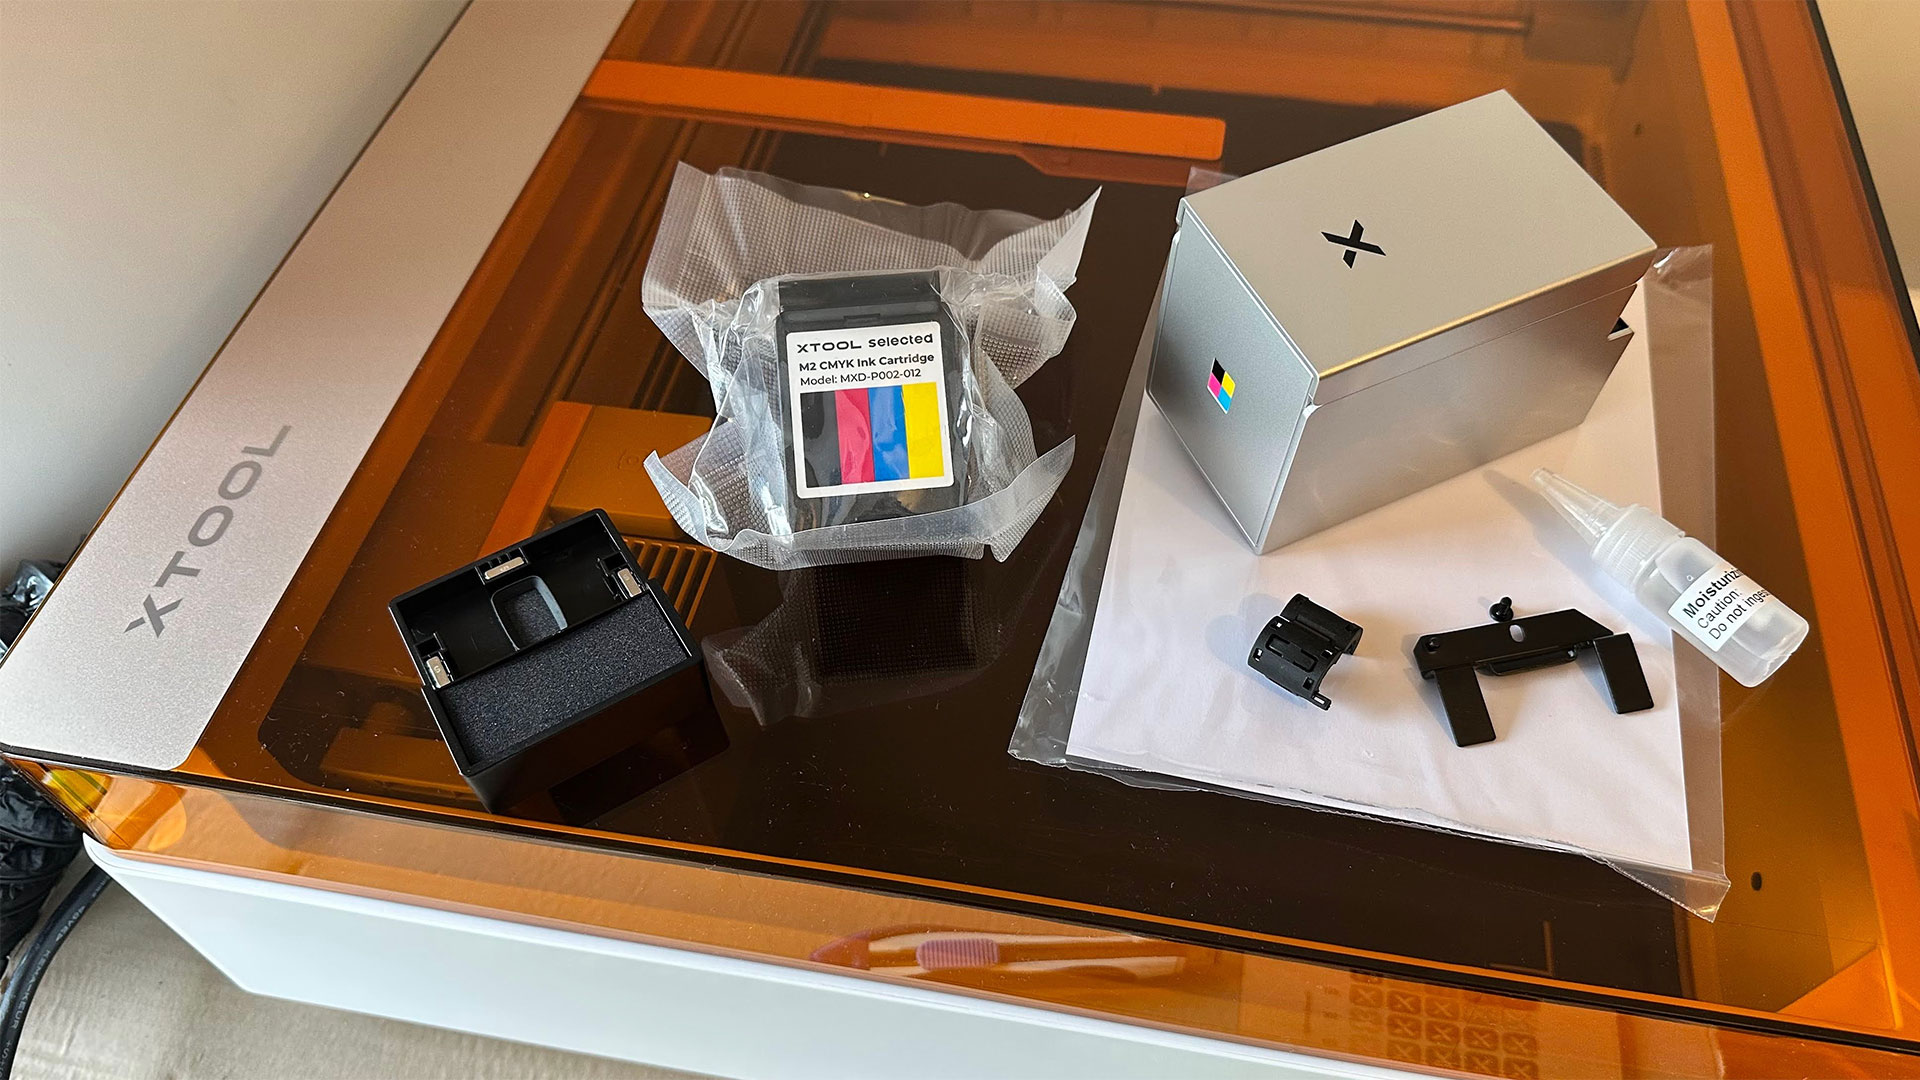
In addition to the desktop laser chassis, we got the 10W diode head, a power brick and IEC cable with region-appropriate plug, a USB cable to connect a computer (need to set up by cable before using Wi-Fi), a short USB cable to connect the accessory head to the magnetic holder on the gantry, some grease for the transport system, a USB-A to –C adaptor, a hex-driver, masking tape, and a few pieces of material for setup, calibration, and test.
We got the 10W Deluxe Bundle (though in several deliveries, not boxed together). We received the print head and cartridge, the rotary tool, and a few more slivers of sample material.
Design of the xTool M2
Tom's HardwareTom's HardwareTom's Hardware
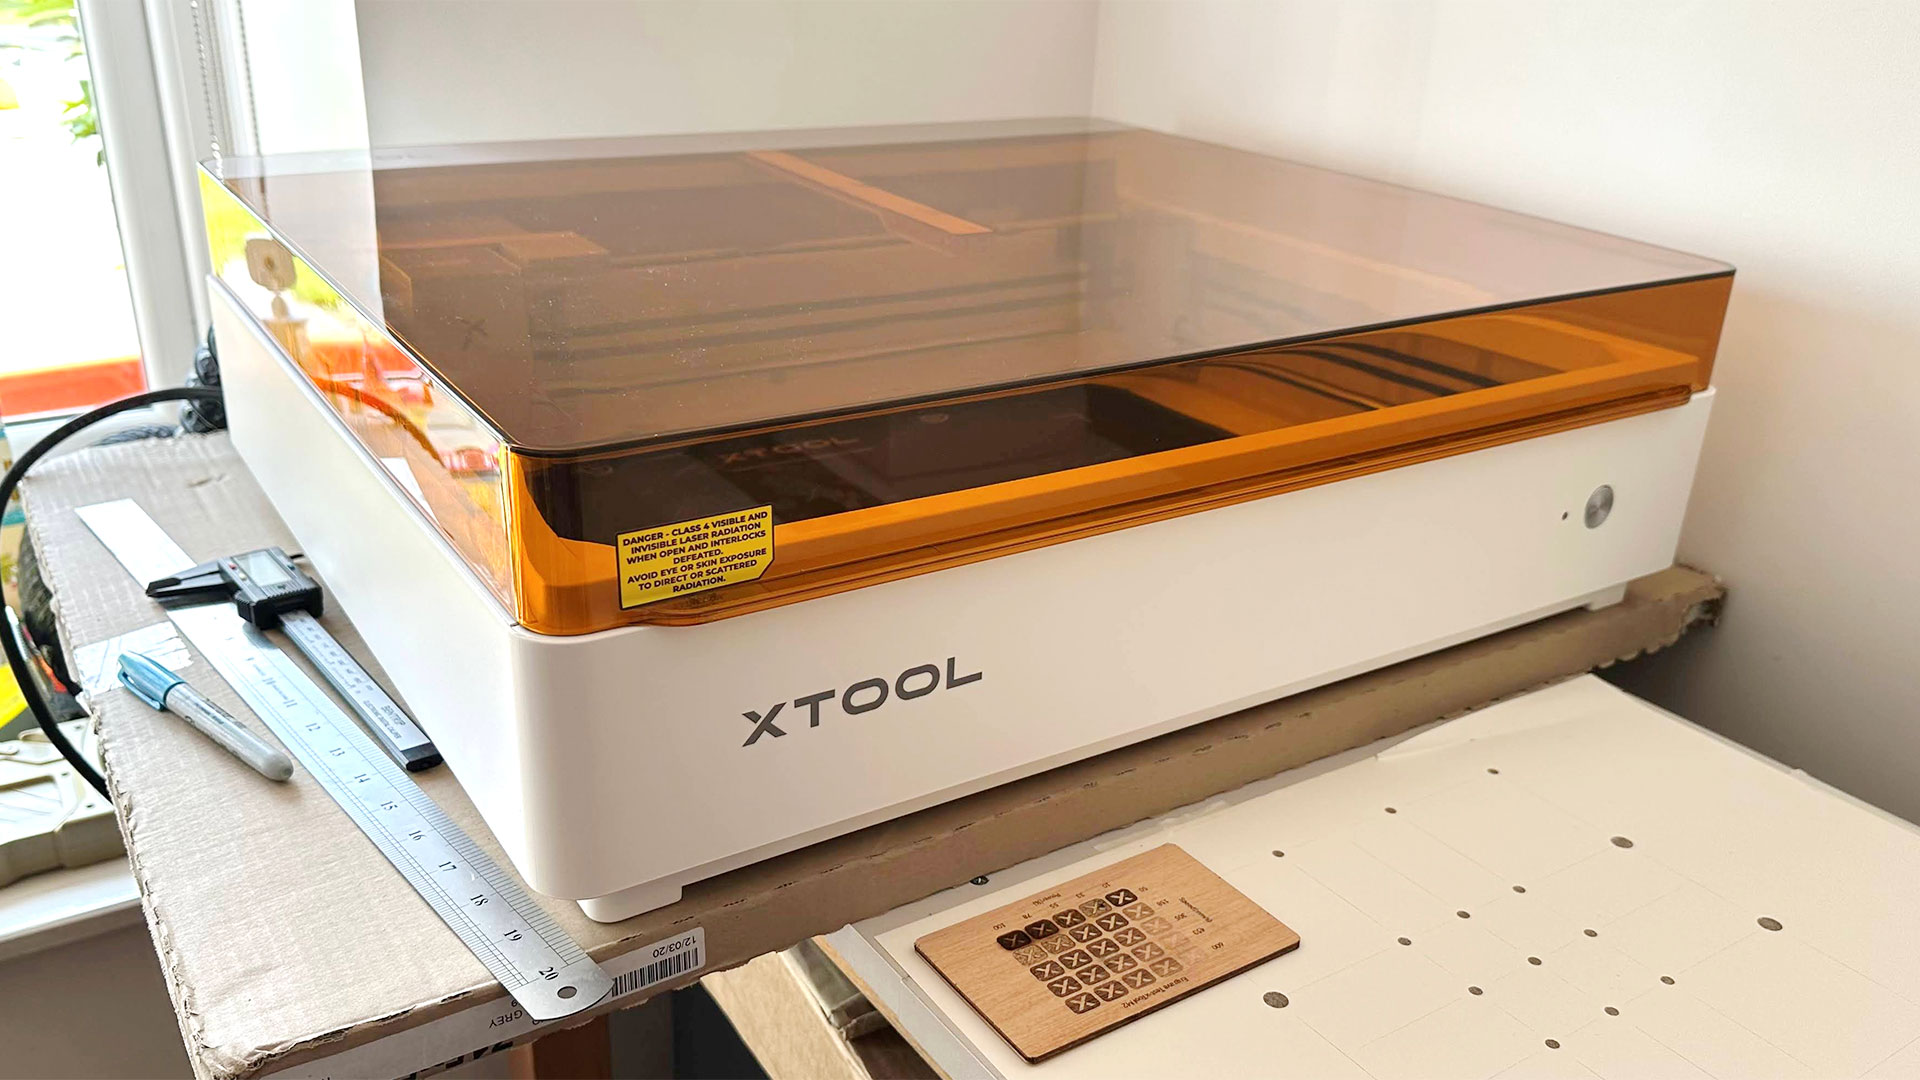
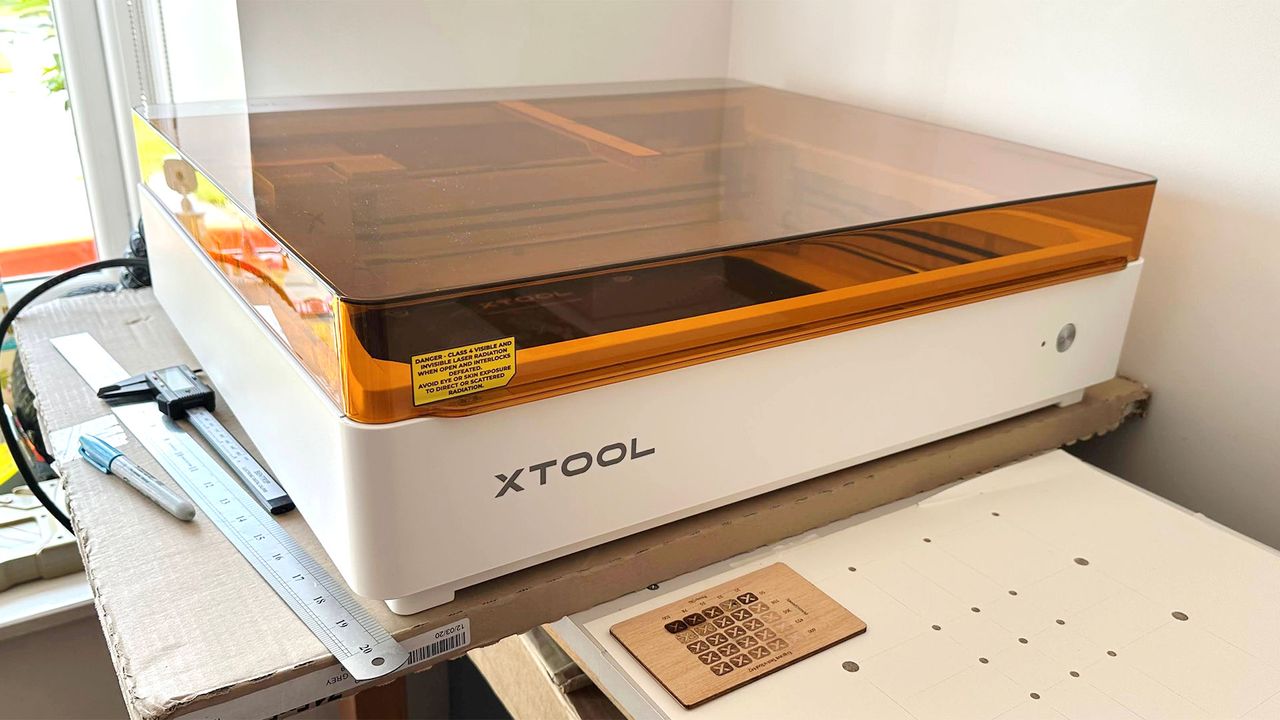
xTool has designed the M2 as a fully enclosed box with a laser-safe orange-tinted acrylic top. The machine only operates with the lid closed.
You open the lid to position your work within the 16.7 x 12.5 inches (425 x 318 mm) lasering area. However, please be aware that for multi-stage color craft projects, where you will want to swap between laser and CMYK print heads, the print area is a smaller 13.7 x 11.8 inches (348 x 300 mm). I didn’t have any size/area mismatch surprises during my projects as the software preview made one aware of the overall working areas available.
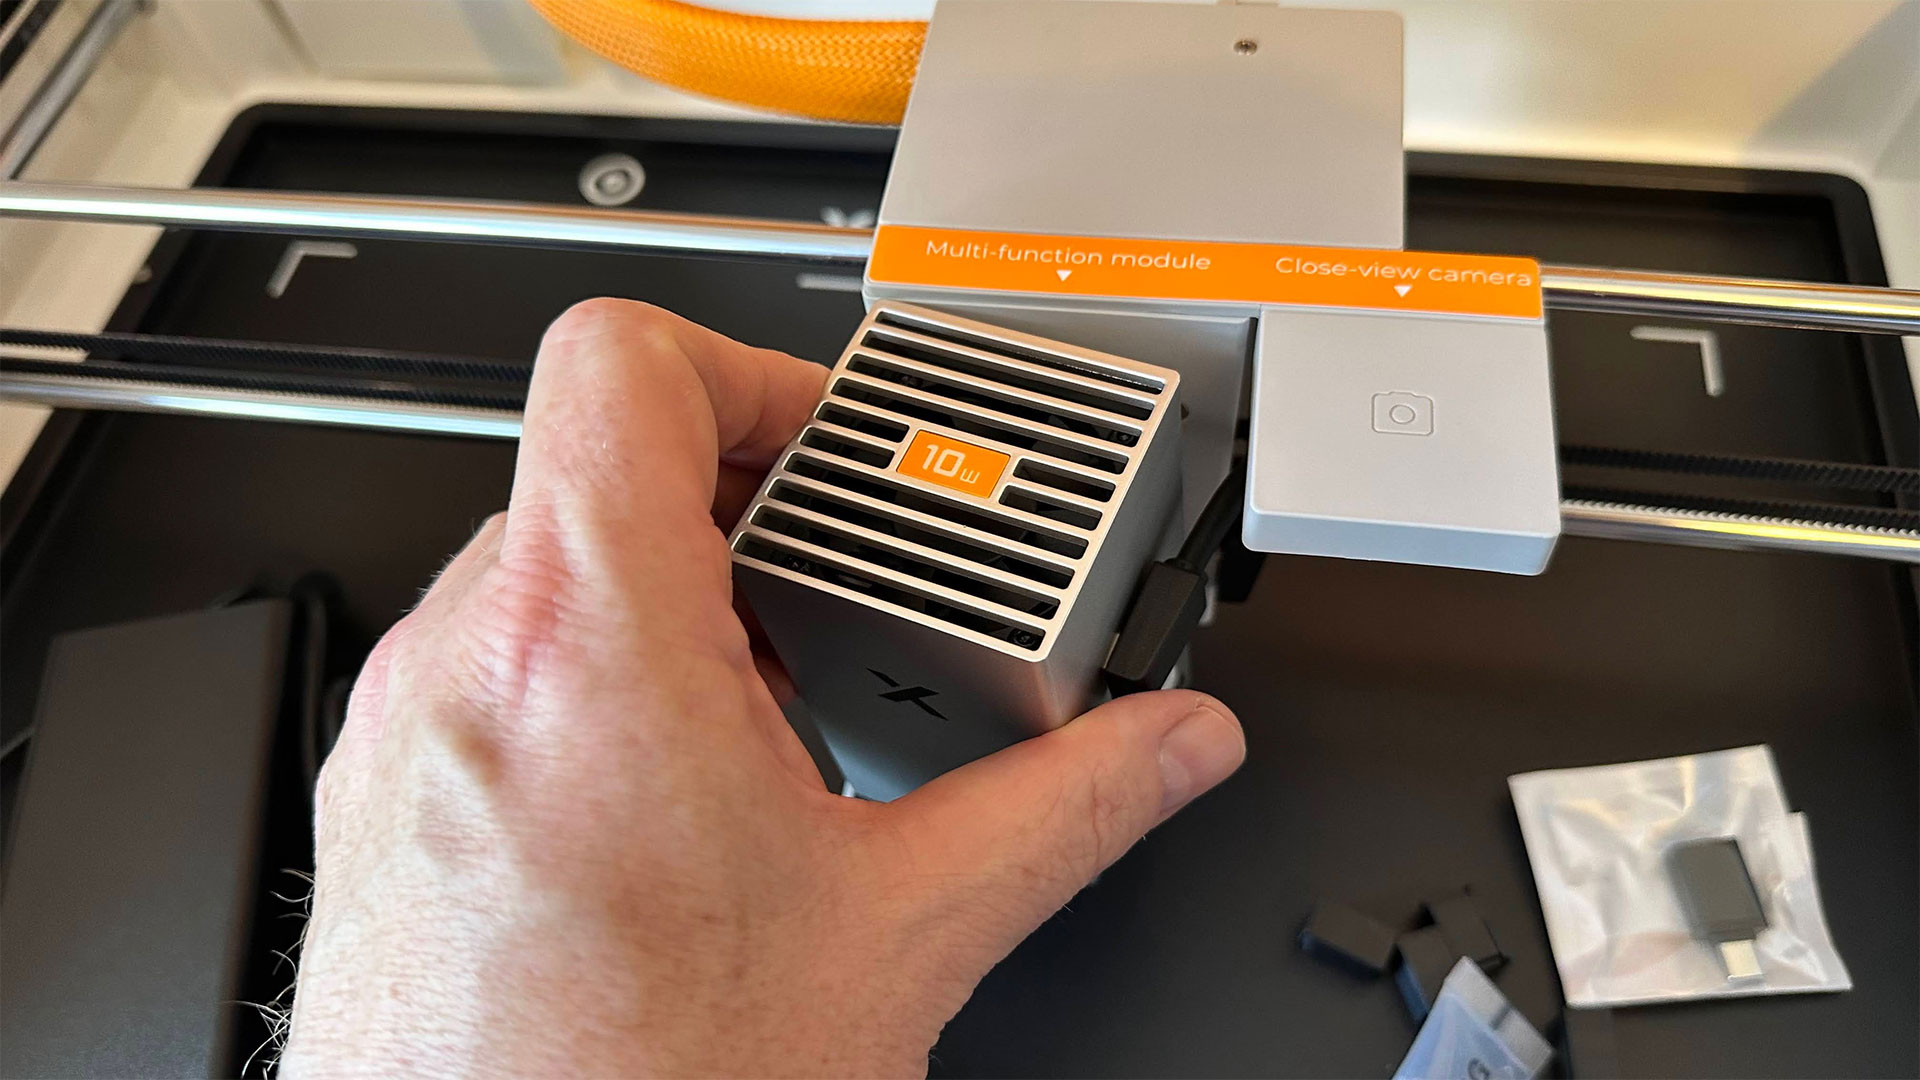
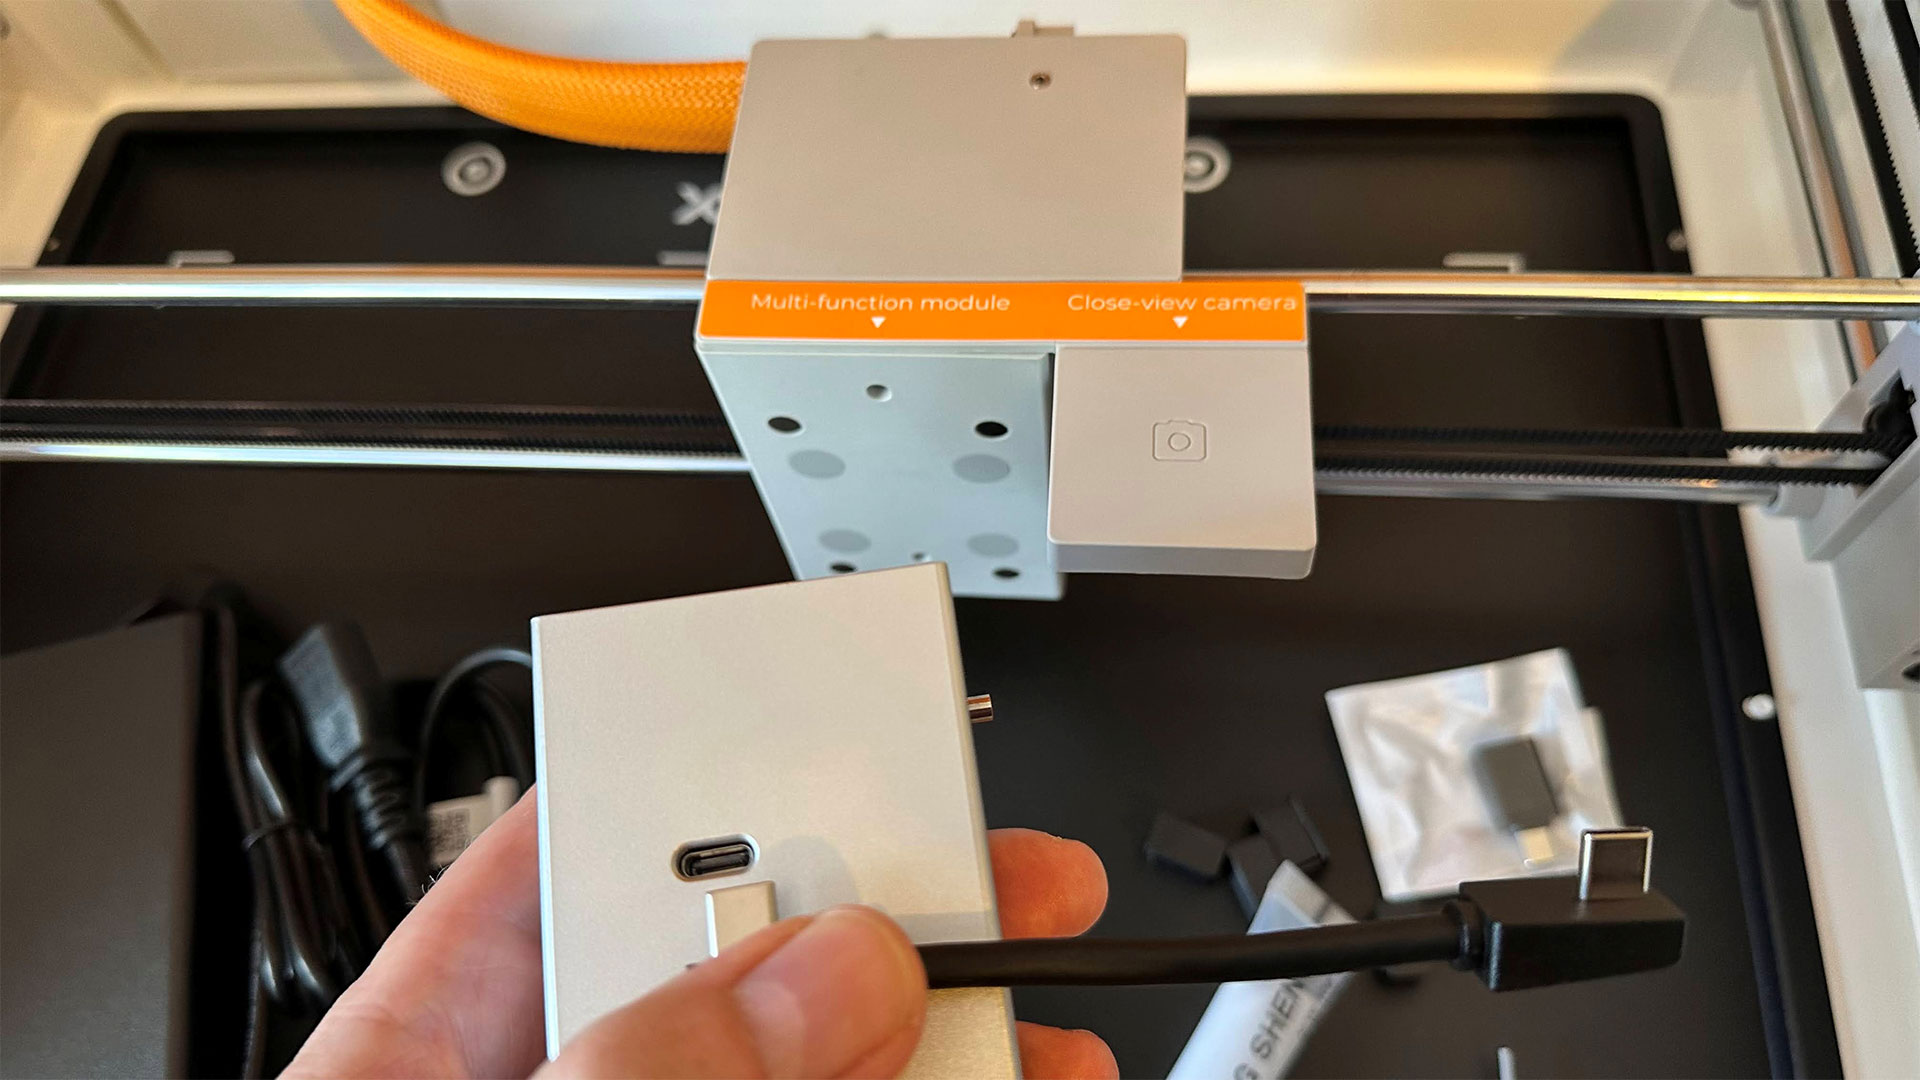
Swapping tool heads is quick and simple. The heads are magnetic, guided accurately and firmly into place by a trio of short metal rods. Then you connect the provided USB-C cable, which is the perfect length for the job. xTool Studio software is smart enough to know what kind of head is installed, and you should switch to it in the midst of multi-step processes.
A big convenient step up from the prior generation is the integration of cameras into the new machine. There’s one camera in the center of the lid to snap the whole of the bed. Meanwhile, the machine’s gantry-attached head also has a camera on one side, and you can use it for closer detail shots and/or monitoring the cutting/printing work. There’s actually a third camera in one corner, but that is devoted to flame detection. A couple of times during testing, that flame detection paused a job I was working on, with a loud beep. However, checking and resuming didn’t seem to have any impact on the finished job’s quality or accuracy.
The cameras also integrate with xTool Studio to focus correctly on the workpiece surface, and to provide auto-material detection. That second feature works best with xTool-supplied materials which come with a QR code so the software knows exactly what the material properties are.
Other good things about the new M2, compared to the predecessor, are the built-in air assist, which can help with clean engraving and deeper cuts, as well as the provision of a new print head with a dedicated black ink tank. The extra black ink should improve the contrast of the print output and make it closer in quality to a decent modern inkjet printer. We will see about that later in the review.
Assembling the xTool M2
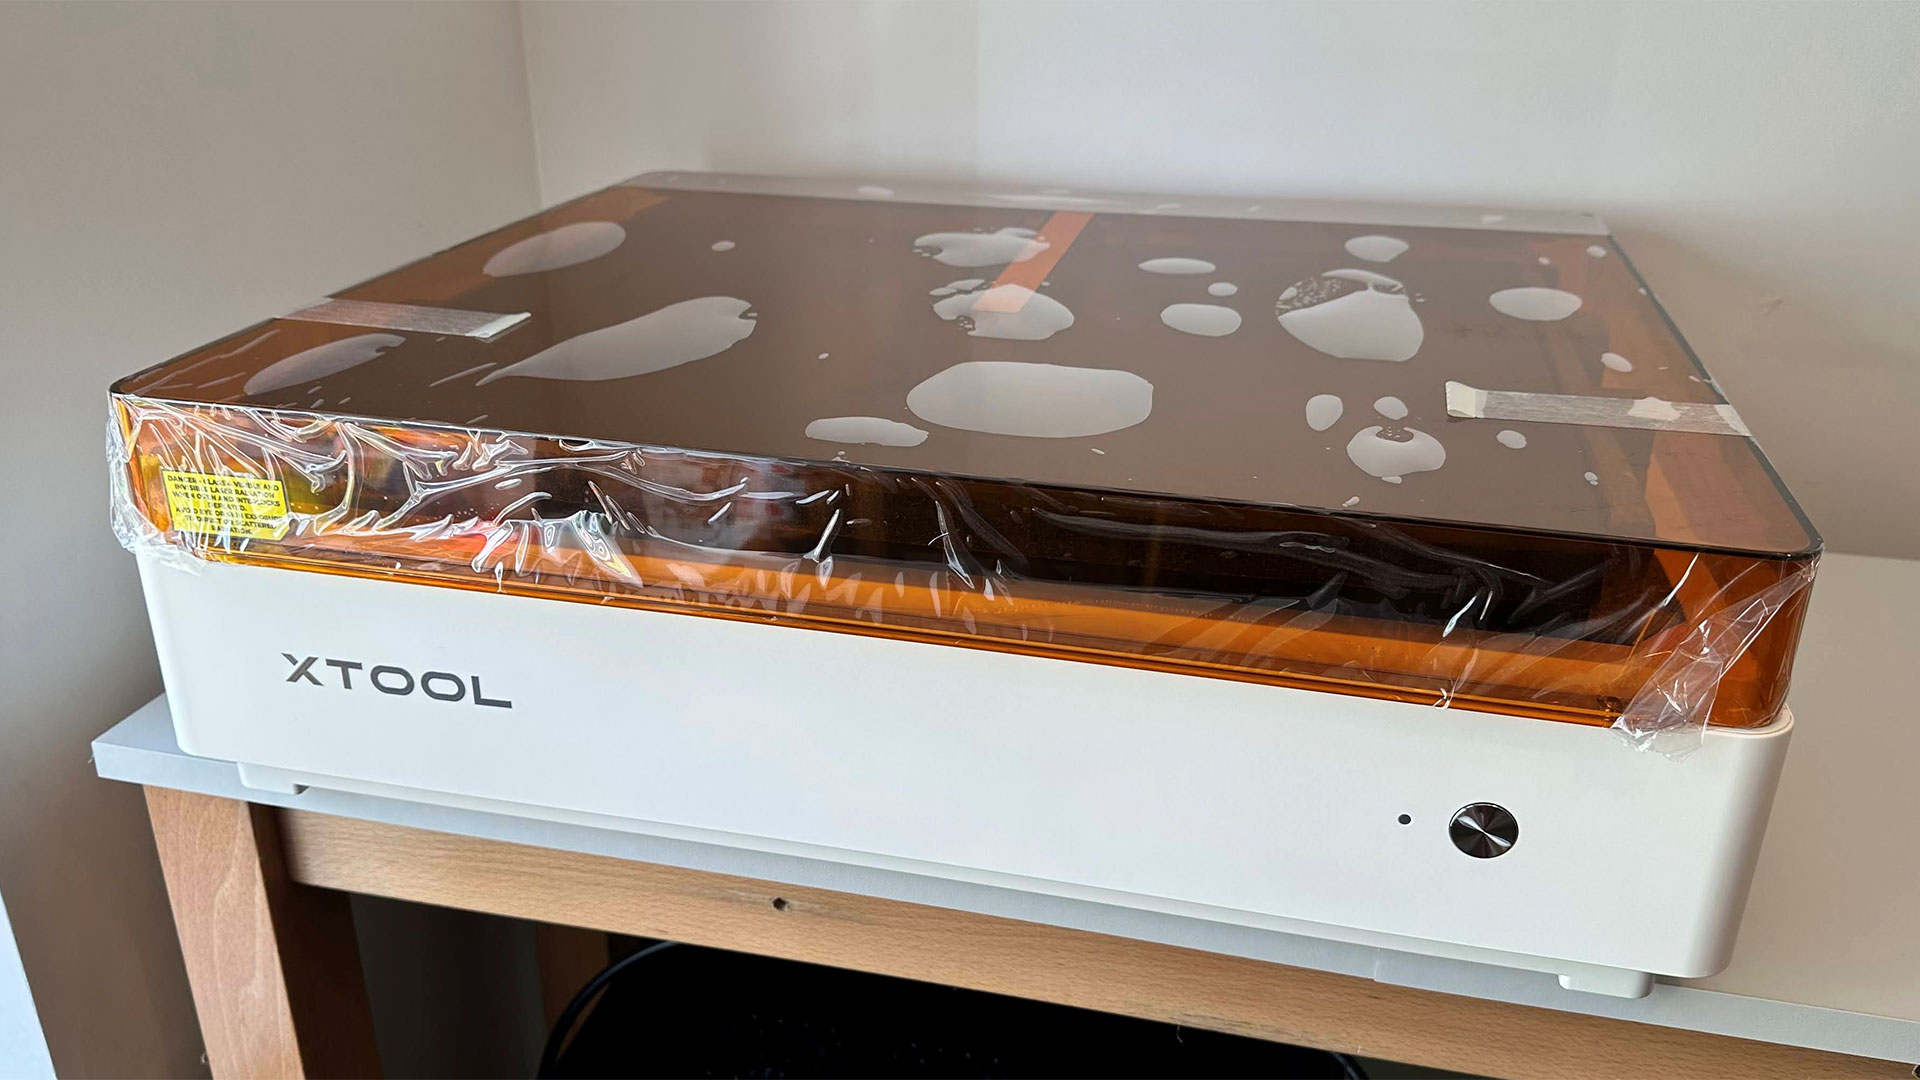
Commissioning the xTool M2 was pleasingly simple. The unit came out of the box fully assembled. All a buyer has to do is carefully take off all the peels and remove strips of tape that hold the lid and other parts in place, and after that, it will be almost ready to go.
Once I got it on the desk, I opened the lid and took out the bits and pieces of xTool supplies to get the machine set up. Everything I needed was here for setup, including USB cables, grease for the gantry movement mechanism, a screwdriver, an exhaust pipe, and various materials that are used during calibration.
With everything plugged in and powered up, and connected to the computer, the xTool Studio software guides you through initial calibration for the magnetically attached head you have installed. As ours came with the 10W diode head in the first package, I calibrated this by following the ‘wizard’ style step-by-step process. It was easy enough to subsequently find the calibration menu again the next day, when the CMYK print module arrived.
(Image credit: Tom's Hardware)
Safety Precautions for the xTool M2
We’ve already mentioned that the M2 claims to be Class 1 safe, with its enclosed design stopping accidental exposure to unhindered Class 4 diode laser light. xTool provides documentation and online guidance that users are encouraged to check out to ensure safe operation. Do not try to override the built-in safety, as the diode laser within could damage eyes and burn skin.
Another safety issue with lasers is addressed with the third camera we mentioned previously. This corner camera monitors smoke and flames, which can flare up when some materials are engraved or cut.
Lasers can also create toxic fumes, depending on what they’re engraving and/or cutting. While you can hook up the xTool M2 to various workshop extraction and filtering equipment, it is good that it comes as standard with a powered fan and flexible extending corrugated exhaust pipe. When I positioned my xTool M2 test unit, it was convenient to shove that corrugated hose out of the window. It worked very well during testing, evacuating smoke made when cutting materials quickly and effectively. The exhaust fan is smartly controlled by xTool Studio, which auto-adjusts speed and duration of operation.
Software for xTool M2
Just like with the xTool P3 and the F2 Ultra, the new xTool M2 color craft laser and engraver is designed to work with the free bundled xTool Studio software. The software looks and works like many other bundled laser software suites for engraving, scoring, and cutting tasks, easily applying multiple output settings across several project layers. The familiar illustration style primitives and type handling might be good enough for creating some projects from scratch, but you can also make use of wizard-like apps to guide you through popular tasks like making arrays and grids, and other repeating designs, as well as more complex projects like boxes and jigsaws.
Traditional software-based graphic creating tools are augmented in xTool Studio with AI-driven generators, custom apps, as well as convenient in-UI access to large online project libraries, notably Atomm.
Of course, the xTool Studio software handles the multi-stage workflows that products like the M2 enable. Making hybrid projects that mix color graphic printing, laser engraving, and cutting was a cinch. The software also works great with accessories you might add to xTool M2 bundles like the rotary accessory, and probably the UV laser head (which we didn't get to test this time).
Engraving / Cutting with the xTool M2
Now comes the fun part. I prepared a number of projects that I thought would adequately test the cutting, engraving, and printing prowess of the new xTool M2 color craft laser and engraver, to give it its full title. I started with the laser-toting fan favorite of a plywood surface engrave test.
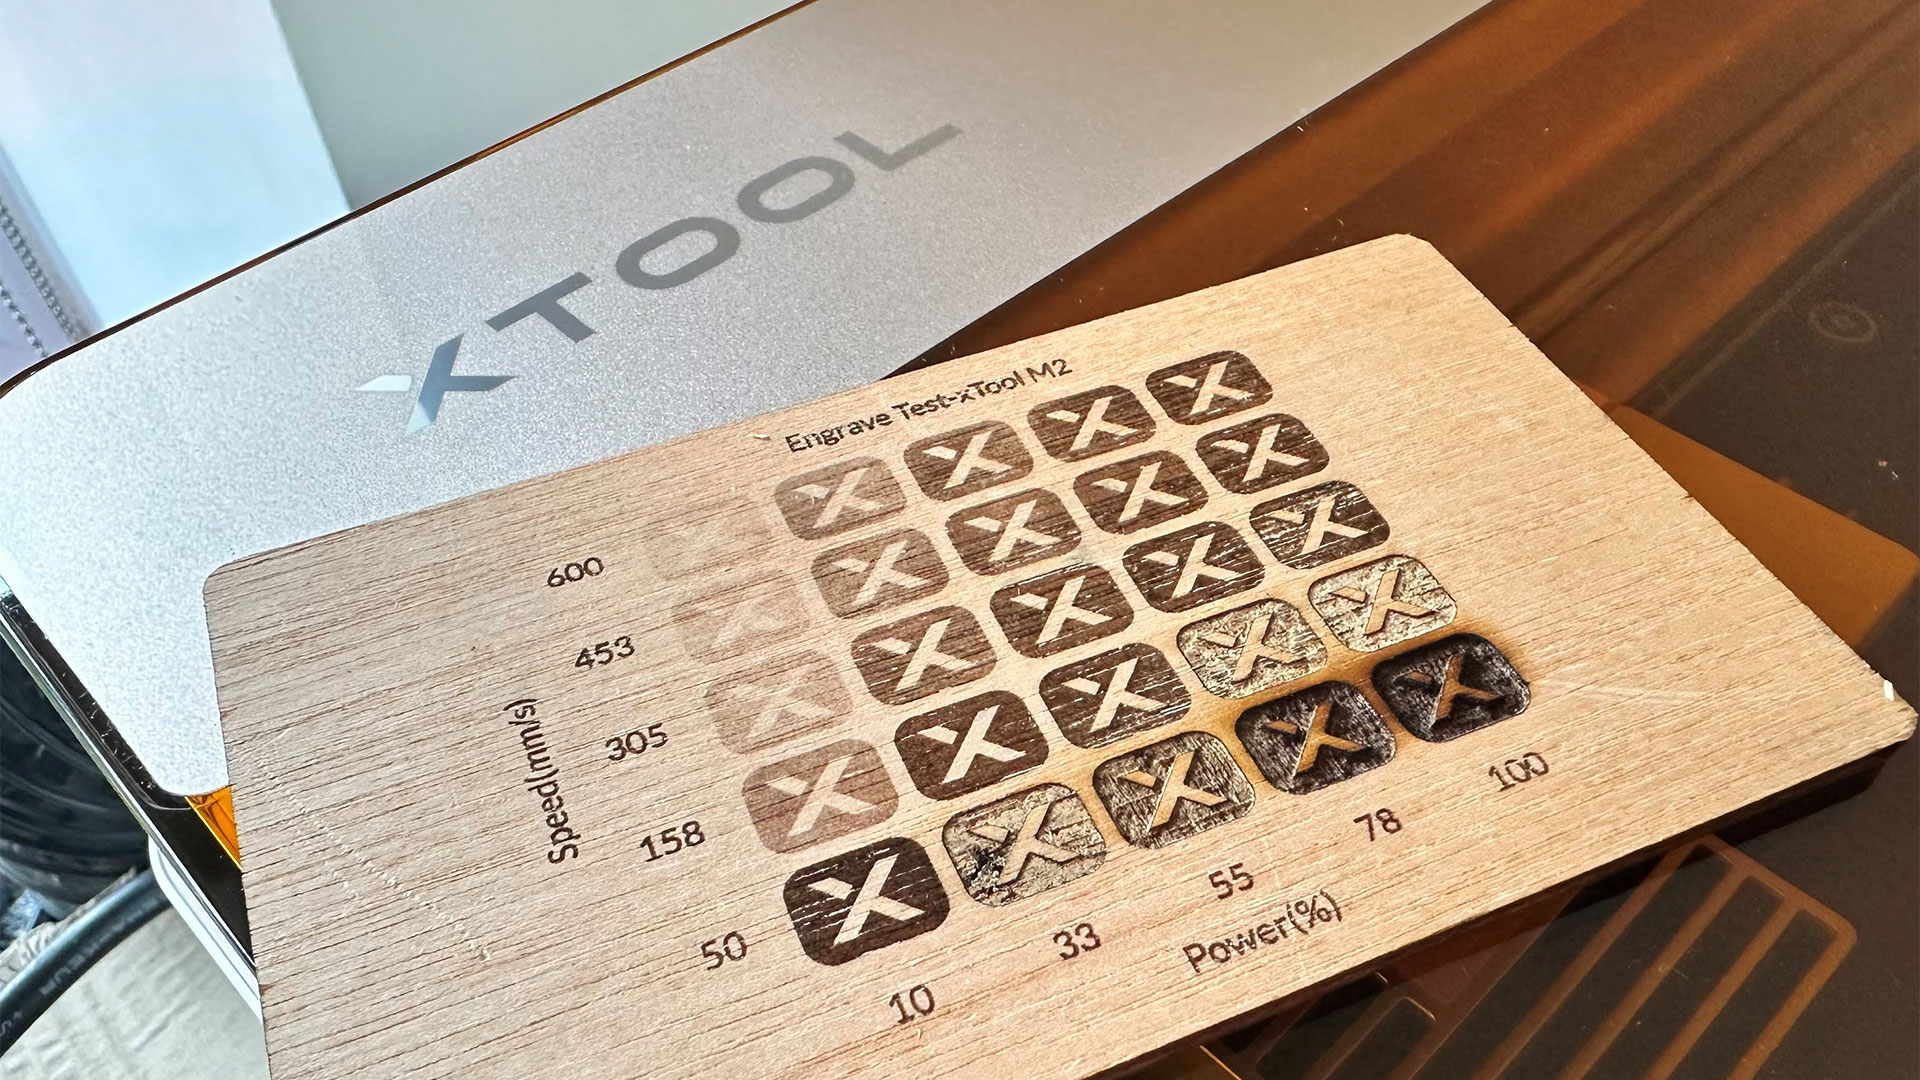
I got a piece of xTool’s 3mm birch ply, which provides a pale and characterless wood surface for engraving detail and is pretty quick to cut cleanly, even with a 10W diode laser. The first job on the M2 was to output the usual variable speed and power engraving test grid. This provides a good visual light-to-dark shading guide for any later pale wood projects. There are quite a few usable shades here, even at the fastest speed of up to 600 mm/s. The xTool M1 Ultra was limited to 300 mm/s at best.
(Image credit: Tom's Hardware)
xTool Studio made setting up the test grid easy with a click-and-go generator. However, my first burn seemed to use the same settings for every ‘X’ so I had to select and type in the appropriate values for each segment and output it again. Thus the generator wasn’t much of a labor saver. Hopefully this bug will be fixed in due course.
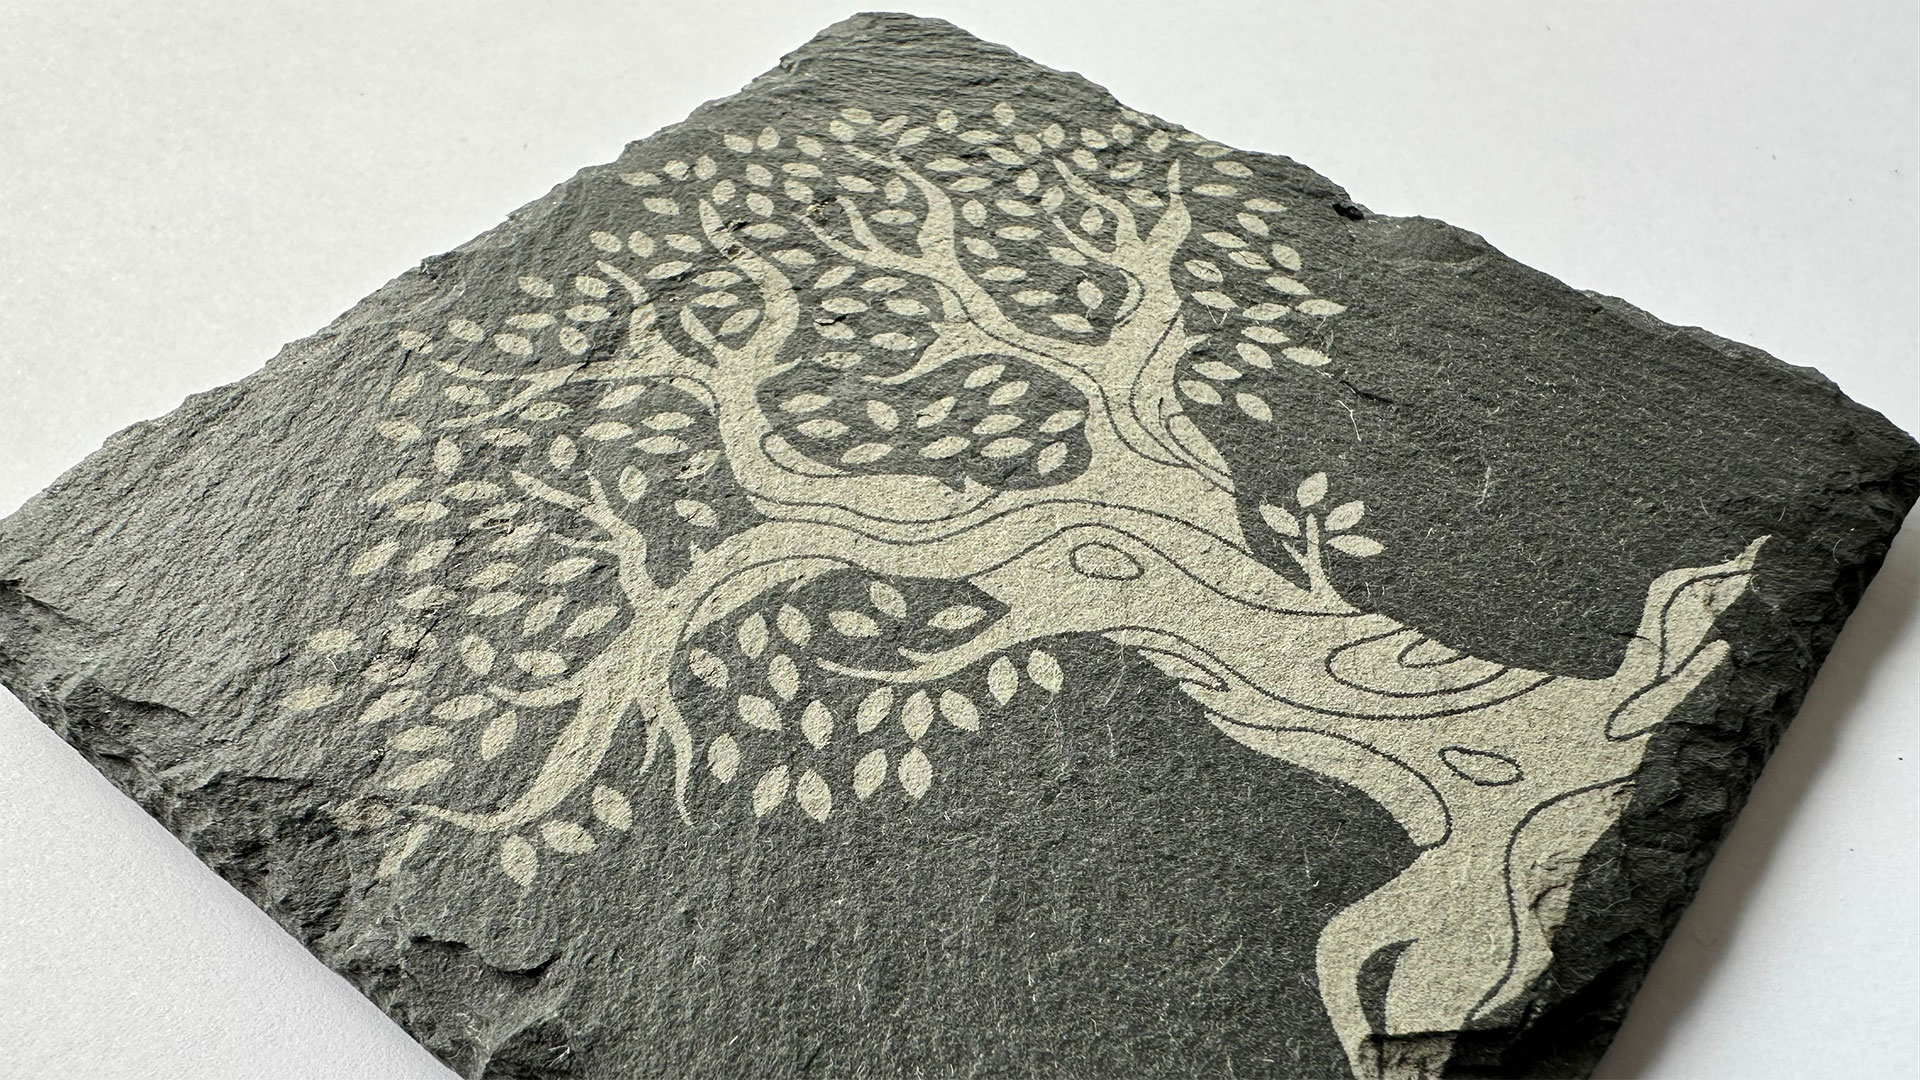
I stuck with pure laser output for my first tests. I’ll do CMYK printing and hybrid jobs later. So the next thing I did was try a simple line art engrave onto a slate coaster. You can see the result of this in the images - a stylized silhouette of a tree on stone. The output is very pleasing, and it worked like this first shot using the xTool M2’s rock coaster engraving preset. I didn’t do any special surface preparation or finishing. I just cleaned the slate with a brush before setting off the M2 engrave process.
(Image credit: Tom's Hardware)
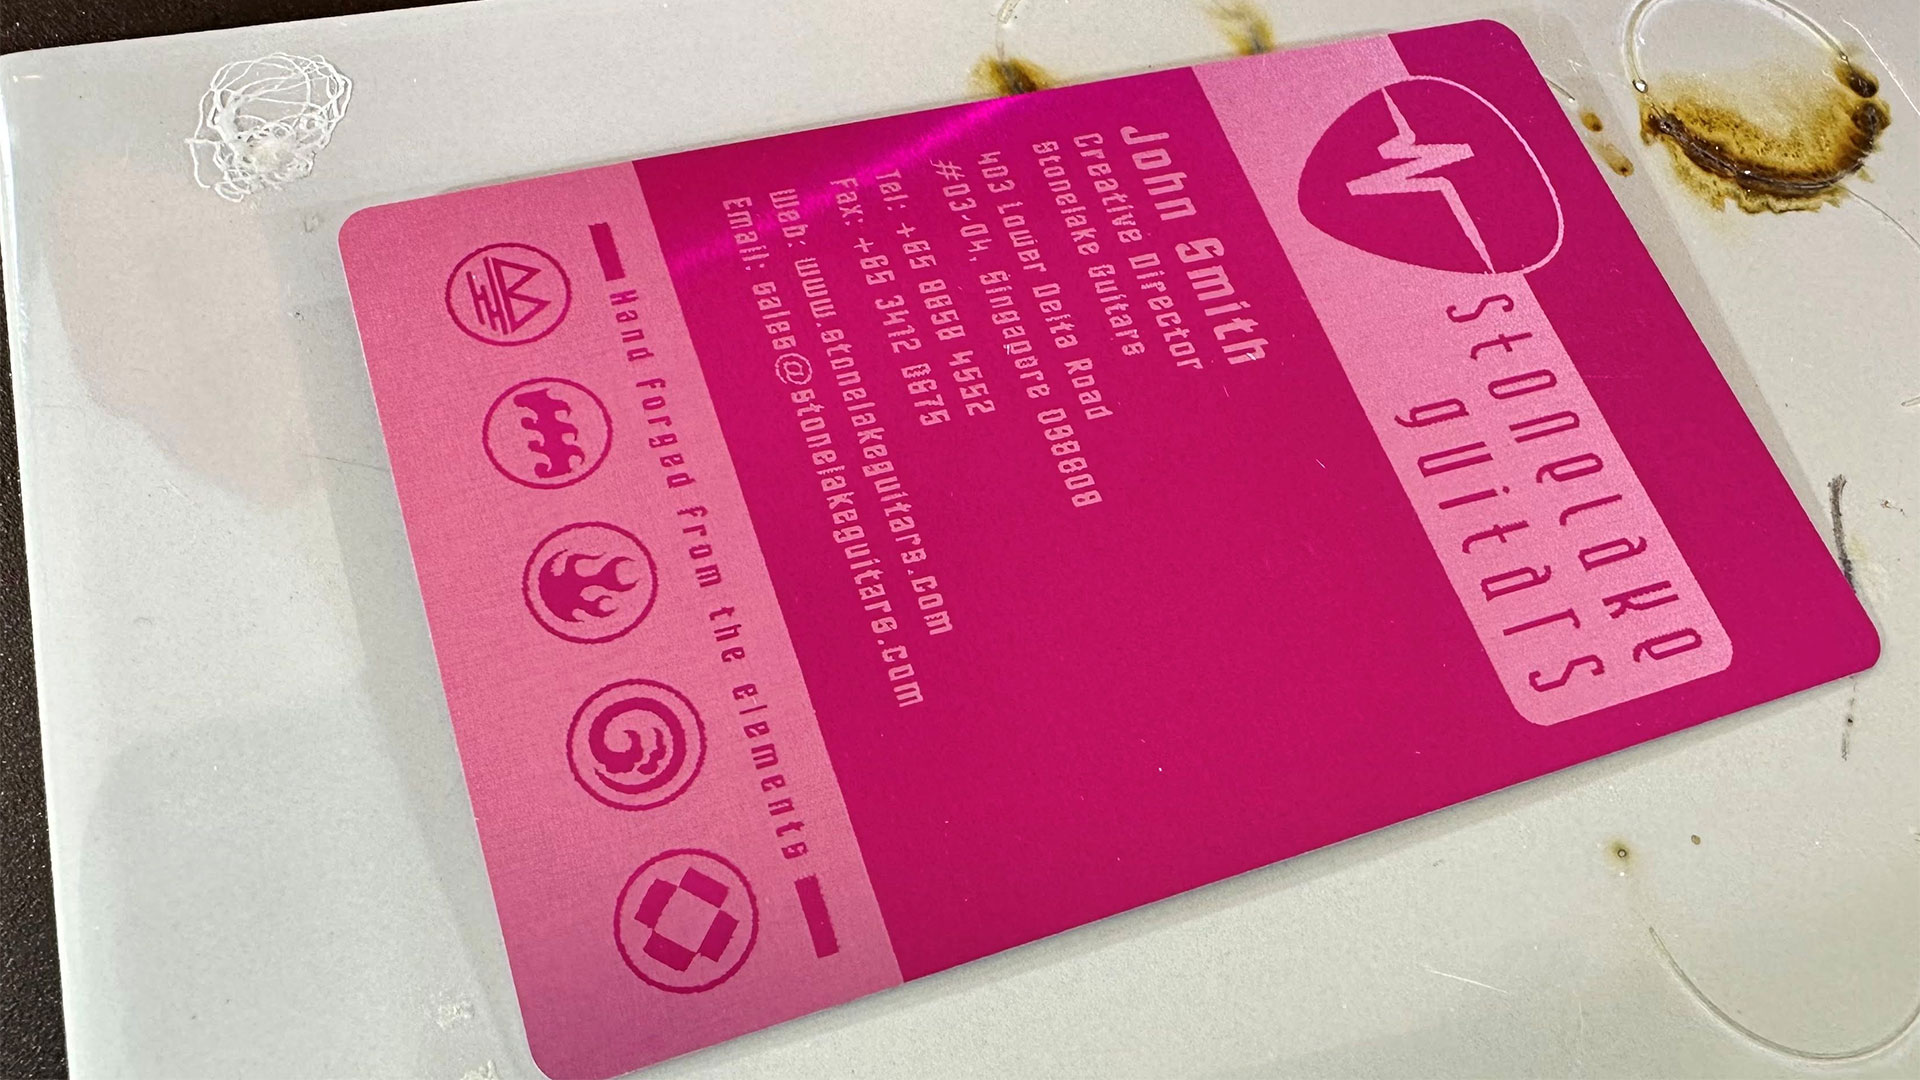
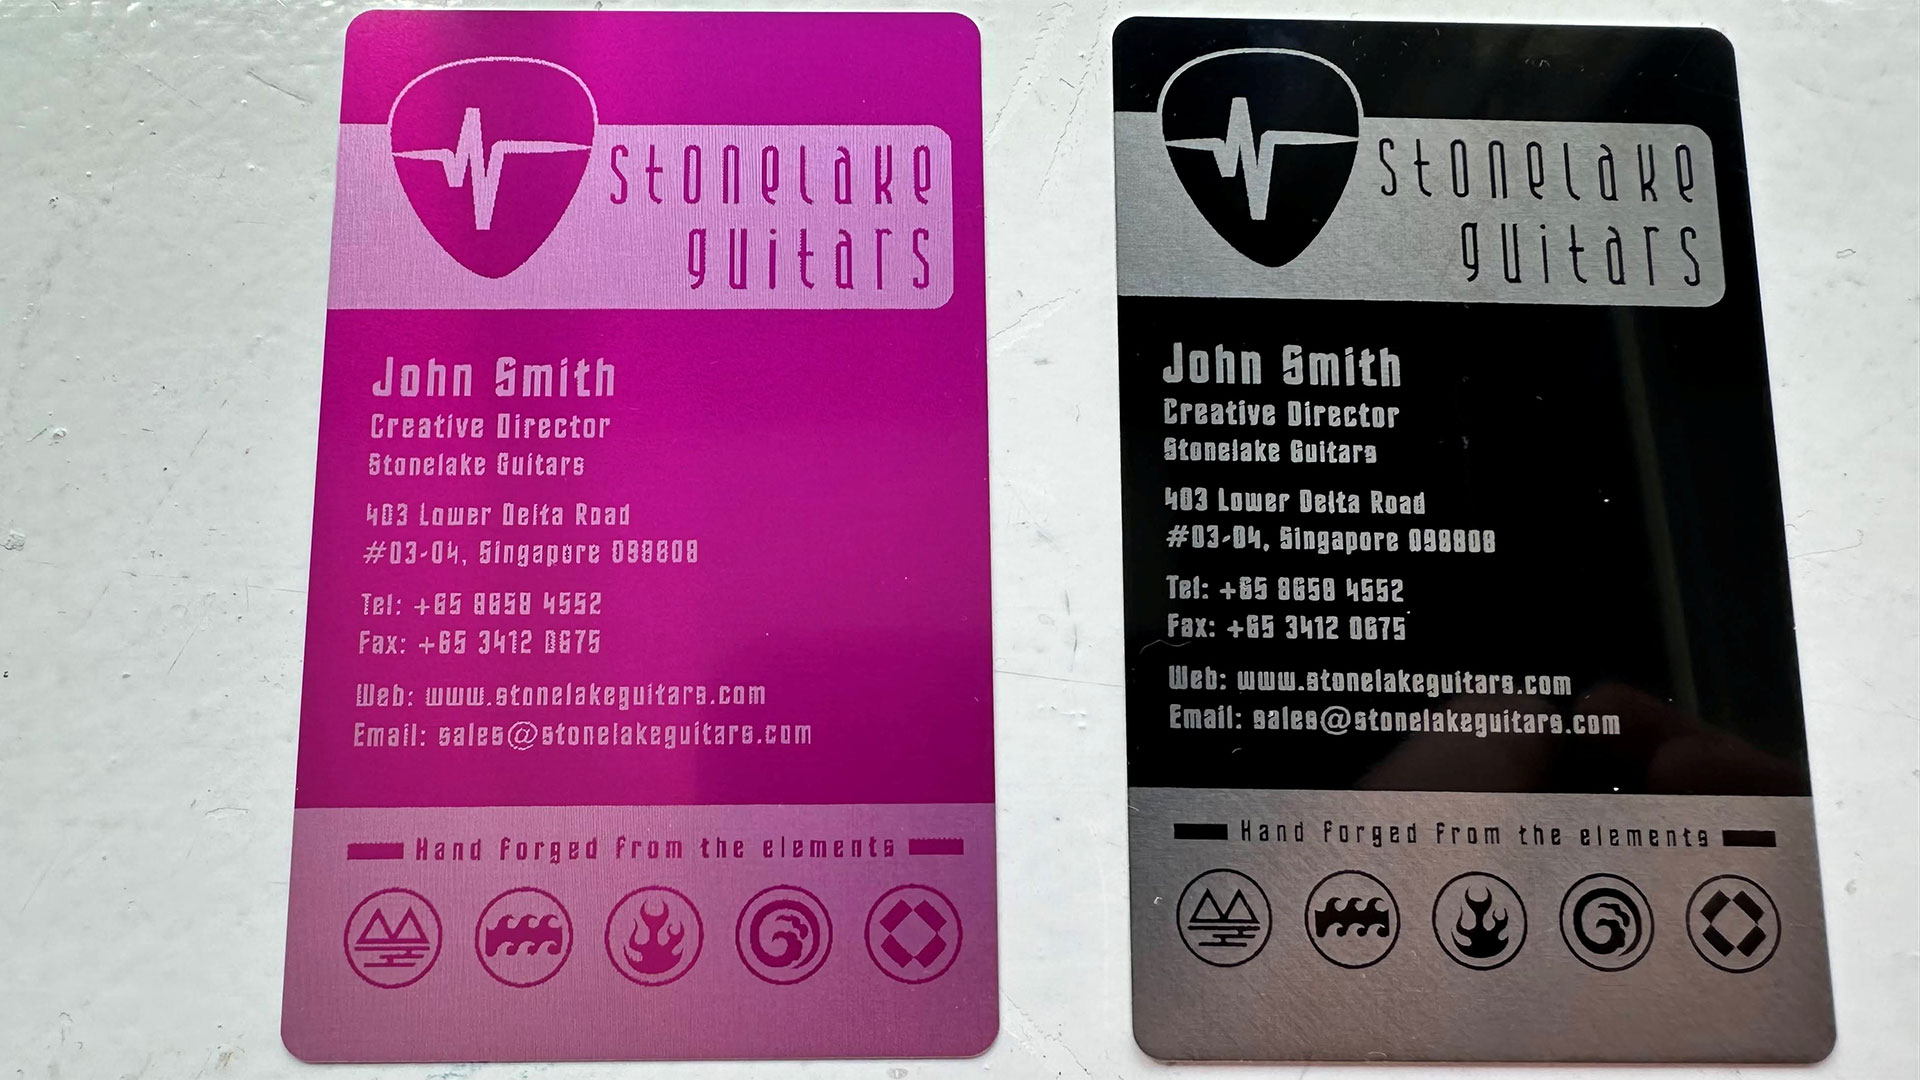
Next up, I got out my painted aluminum business card blanks. The red one you see in the images was created with the xTool M2. It looks nice and sharp at first glance. Only when you zoom in to high-res images can you see a slight resolution advantage on the black card, which was engraved when I tested the xTool P3 CO2 laser. The red card has slight jaggies under scrutiny.
From the xTool M2Tom's HardwarexTool M2 aluminum business card (left) P3 (right)Tom's Hardware
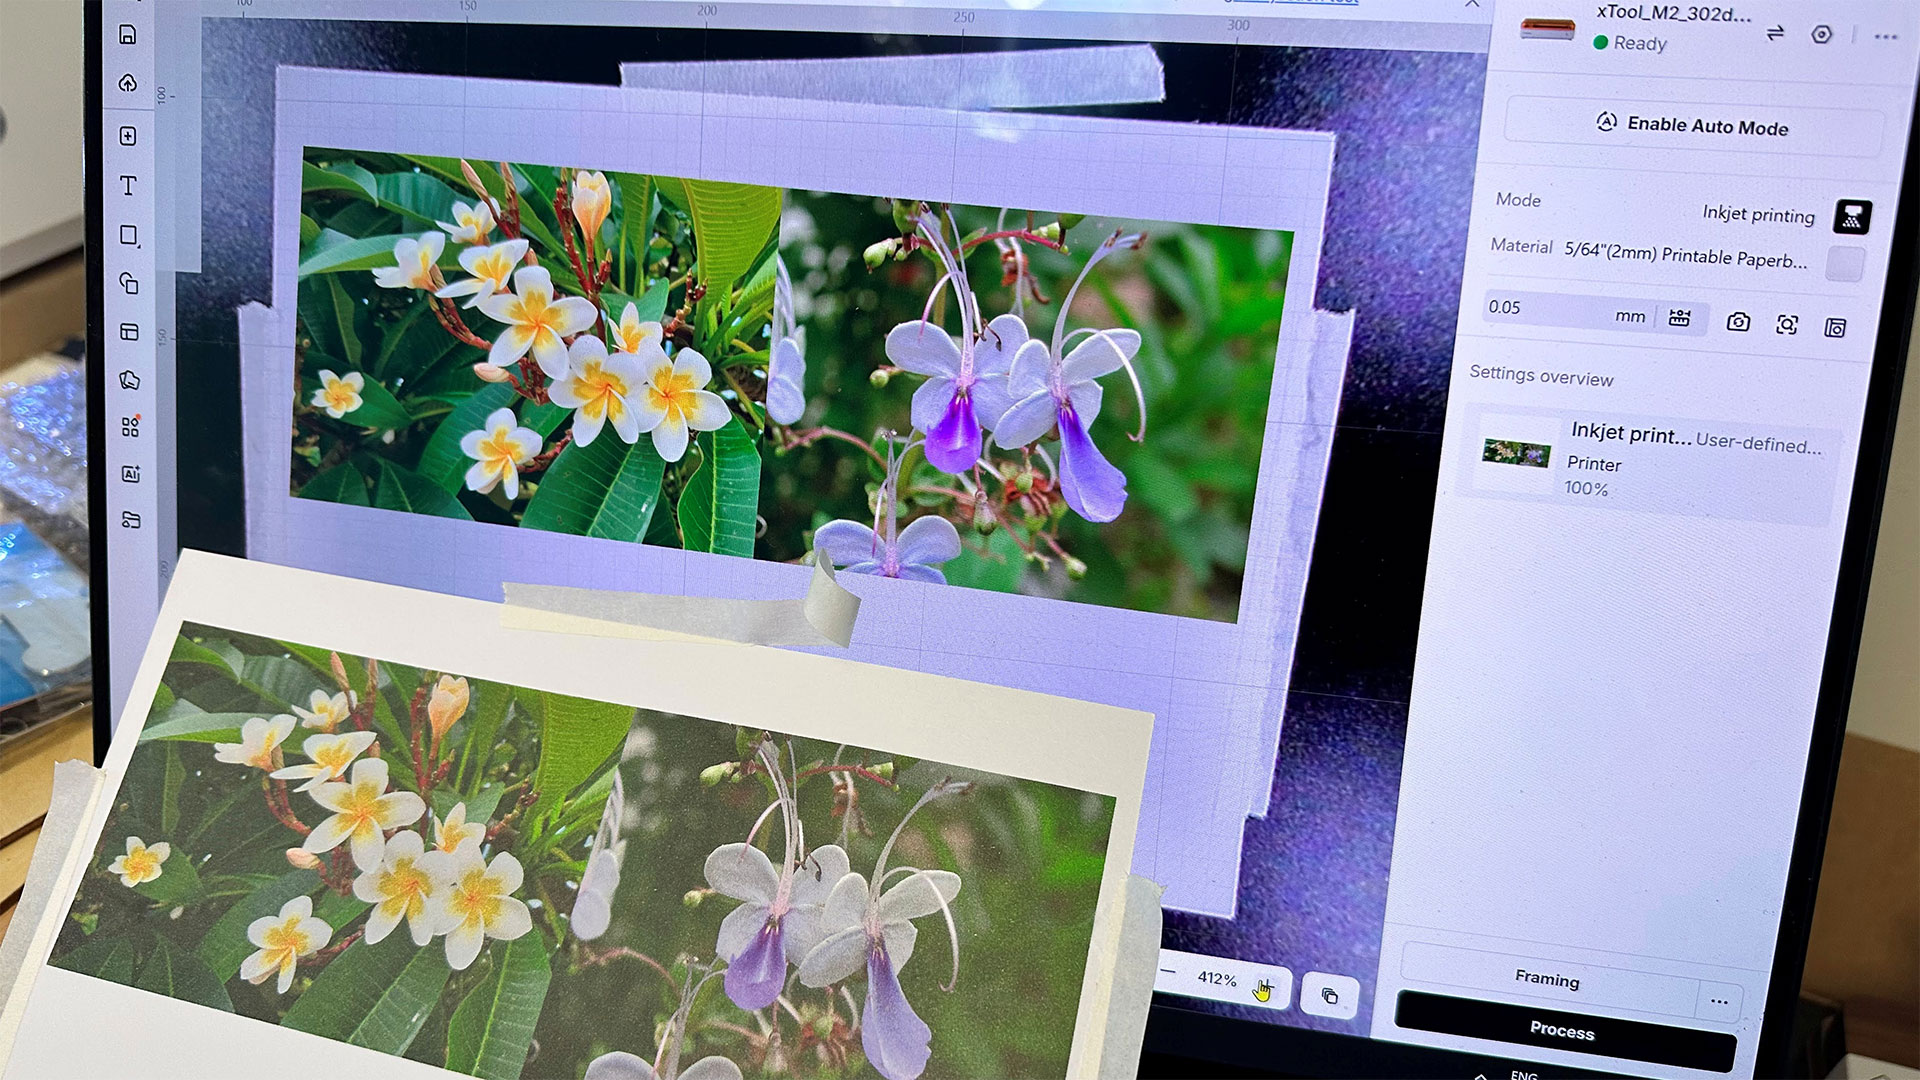
Satisfied with the engraving so far, I felt it would be good to look more closely at the new CMYK print capabilities. Using art paper supplied by xTool, I printed a colorful flower picture, which you can see positioned in my photo next to the same image on my laptop’s lovely OLED screen. The printed output lacks contrast and pop in comparison, but to be fair to xTool, I hadn’t used special (glossy finish and high-white) photo paper, which would squeeze the best print quality from this kind of inkjet printer module.
(Image credit: Tom's Hardware)
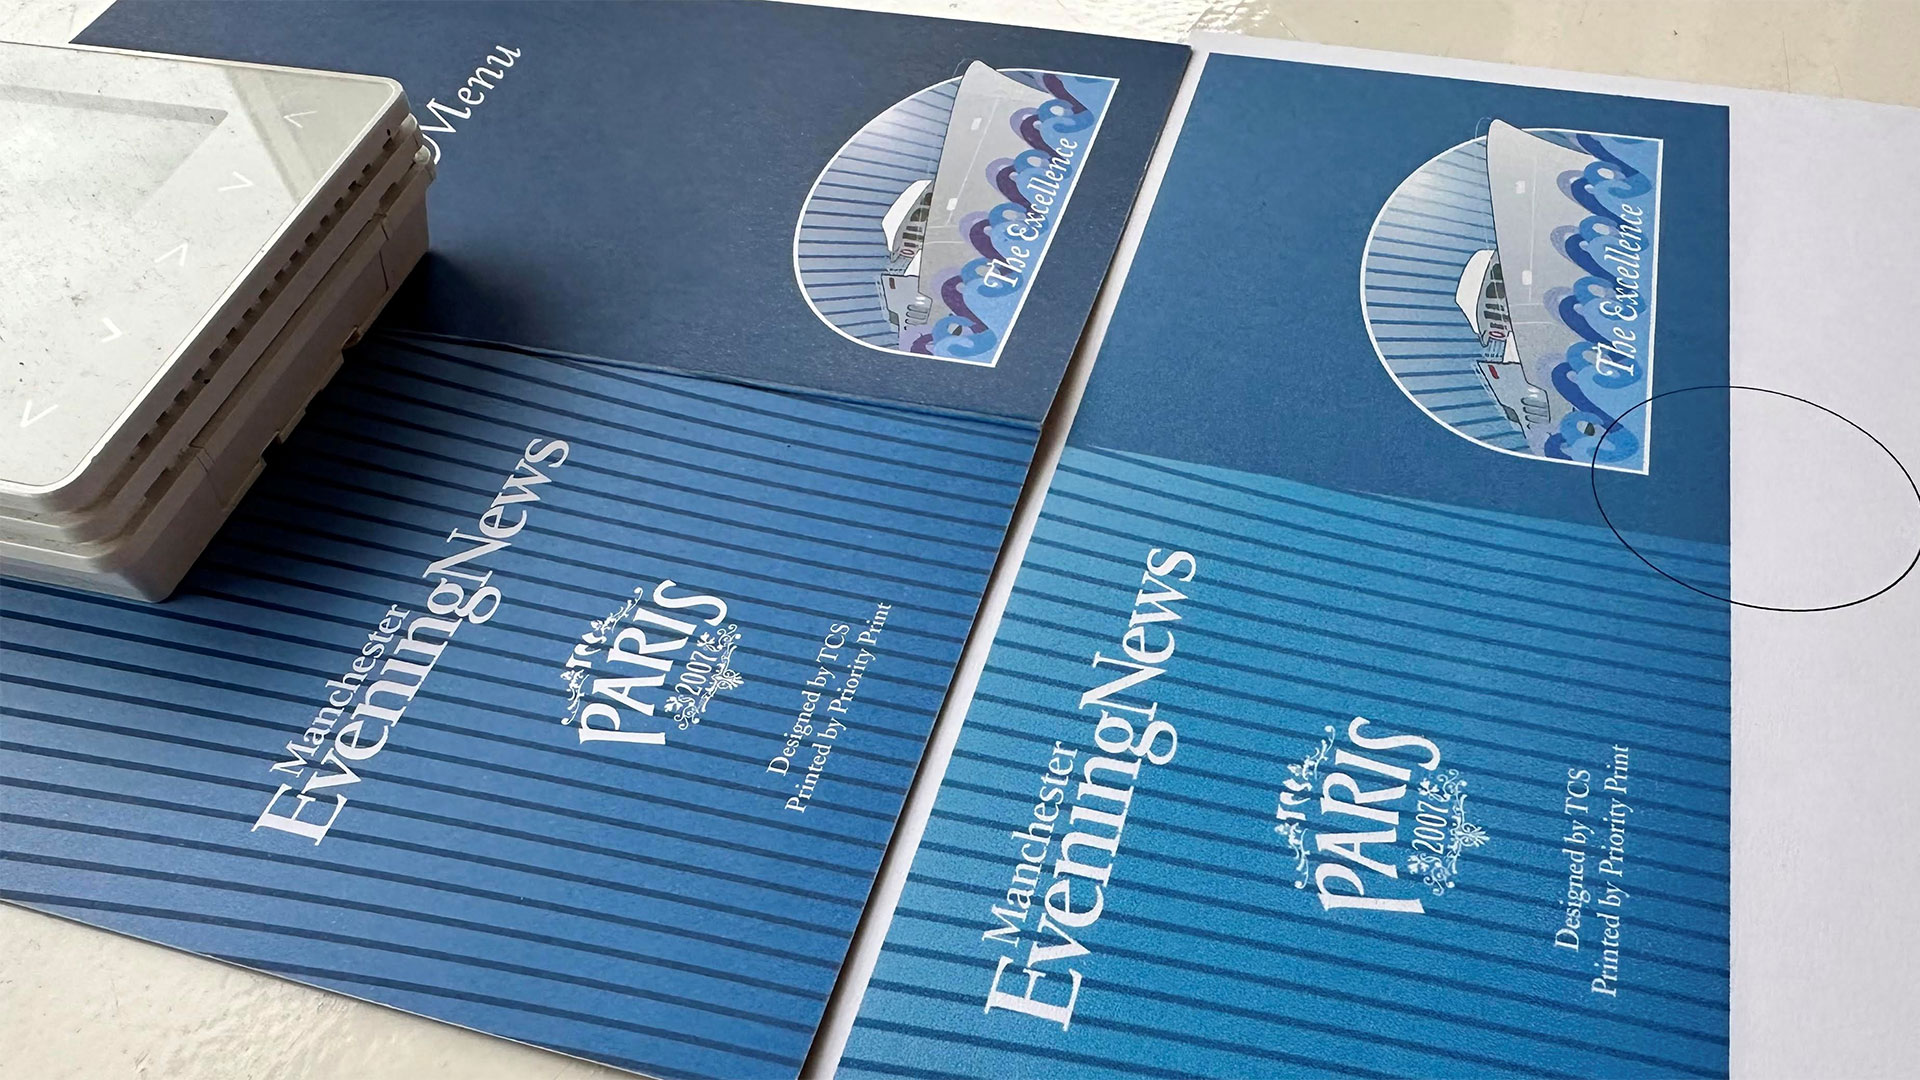
What about comparing the xTool CMYK output to a professional lithographic print I had produced a few years back (2007!)? You can see my original illustrated menu was printed on a nice heavy card stock by commercial firm Priority Print. I’d actually say that the xTool’s output is just as nice, but would benefit from being a bit darker/denser. Both prints came from the same PDF file. Apologies for the black circle on the xTool M2’s printout, that’s from a calibration I did earlier.
(Image credit: Tom's Hardware)
With two comparison prints produced so far, if I were a perfectionist I’d be tempted to adjust the levels of the xTool print output to be a bit darker and up the contrast.
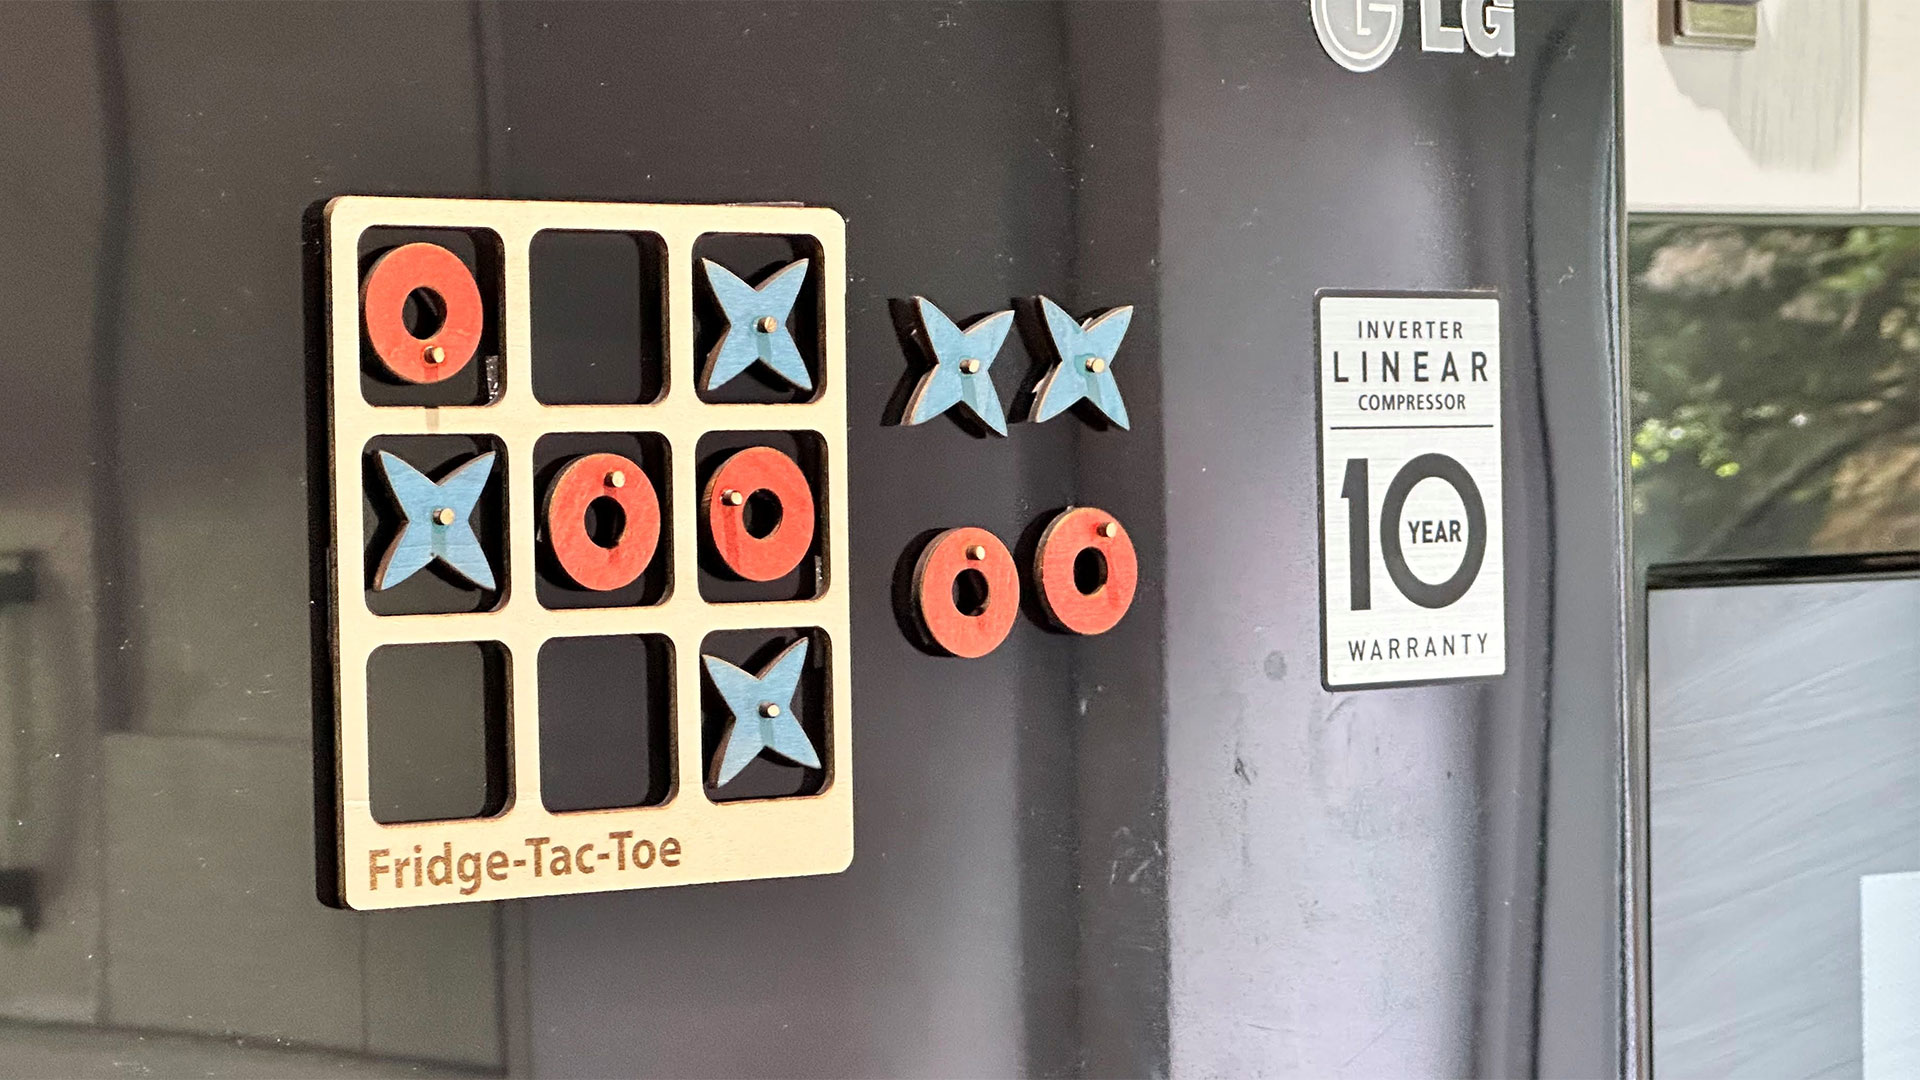
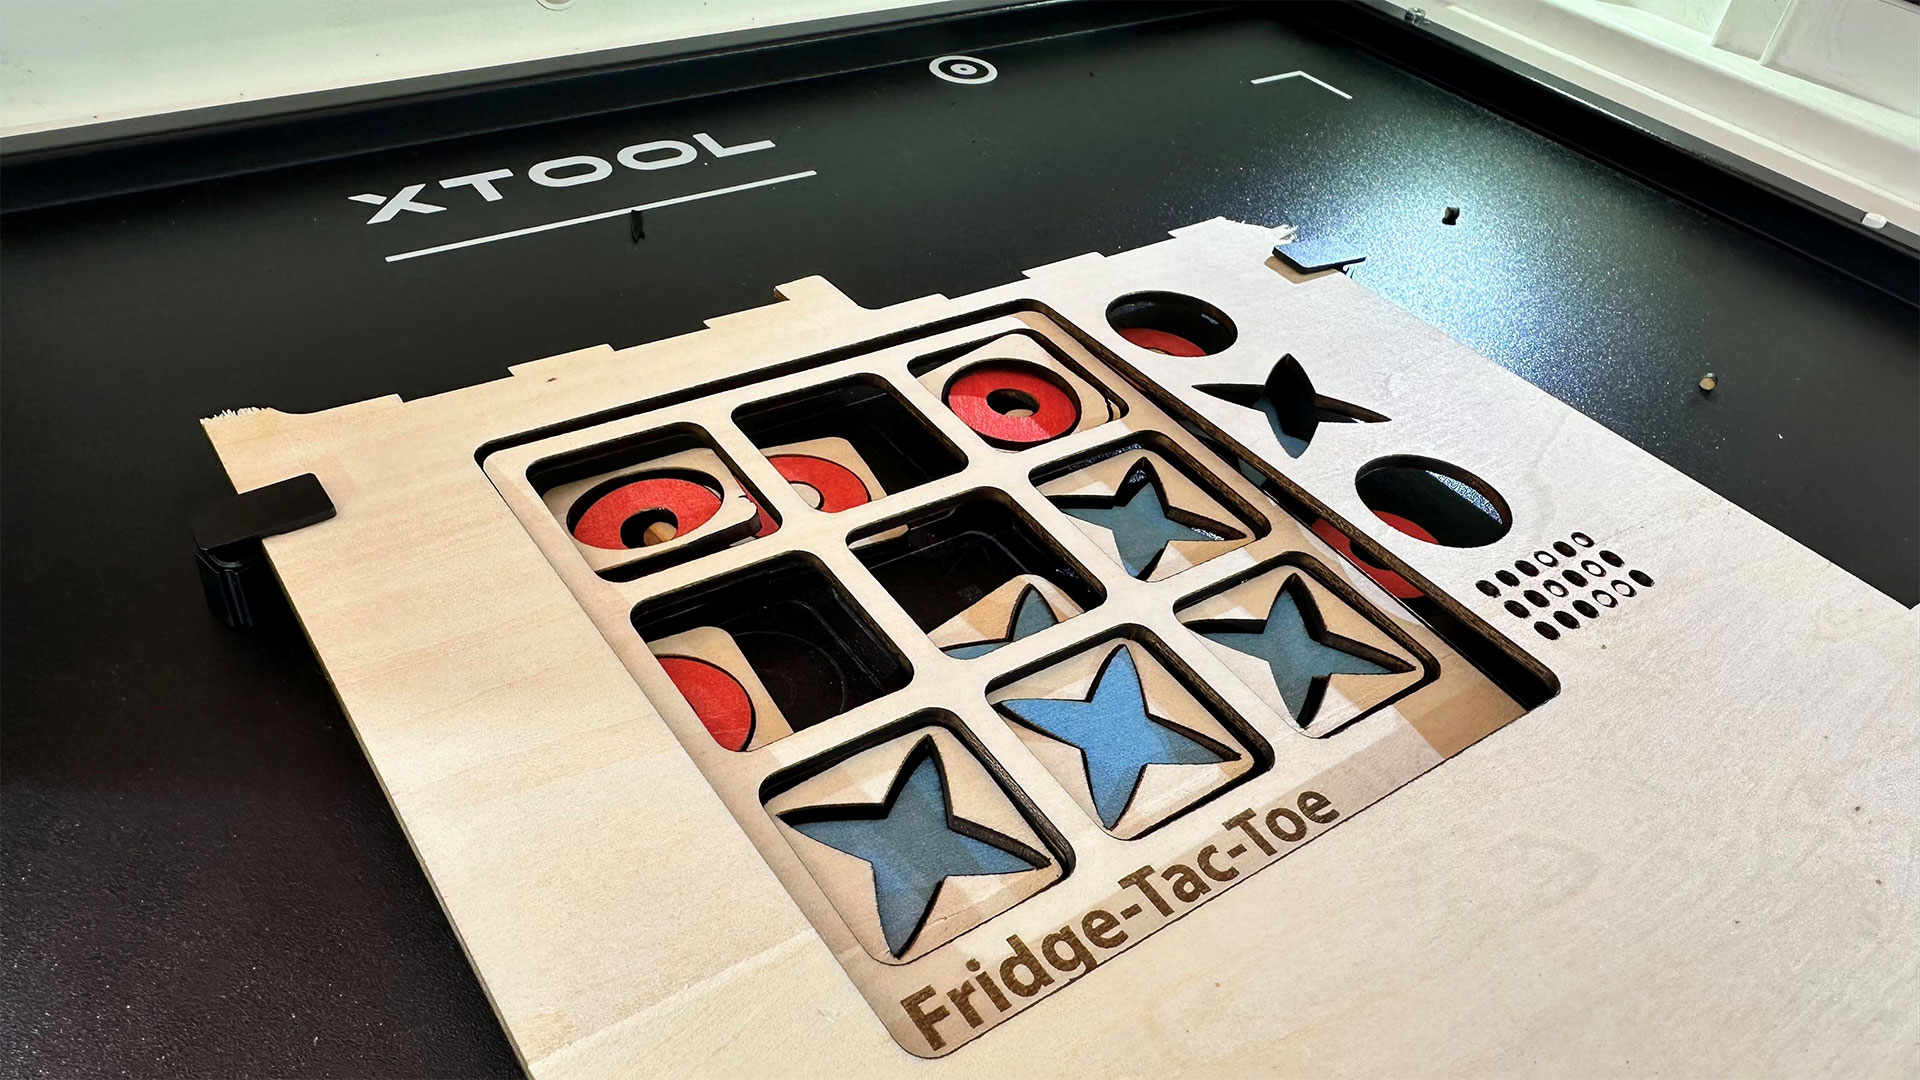
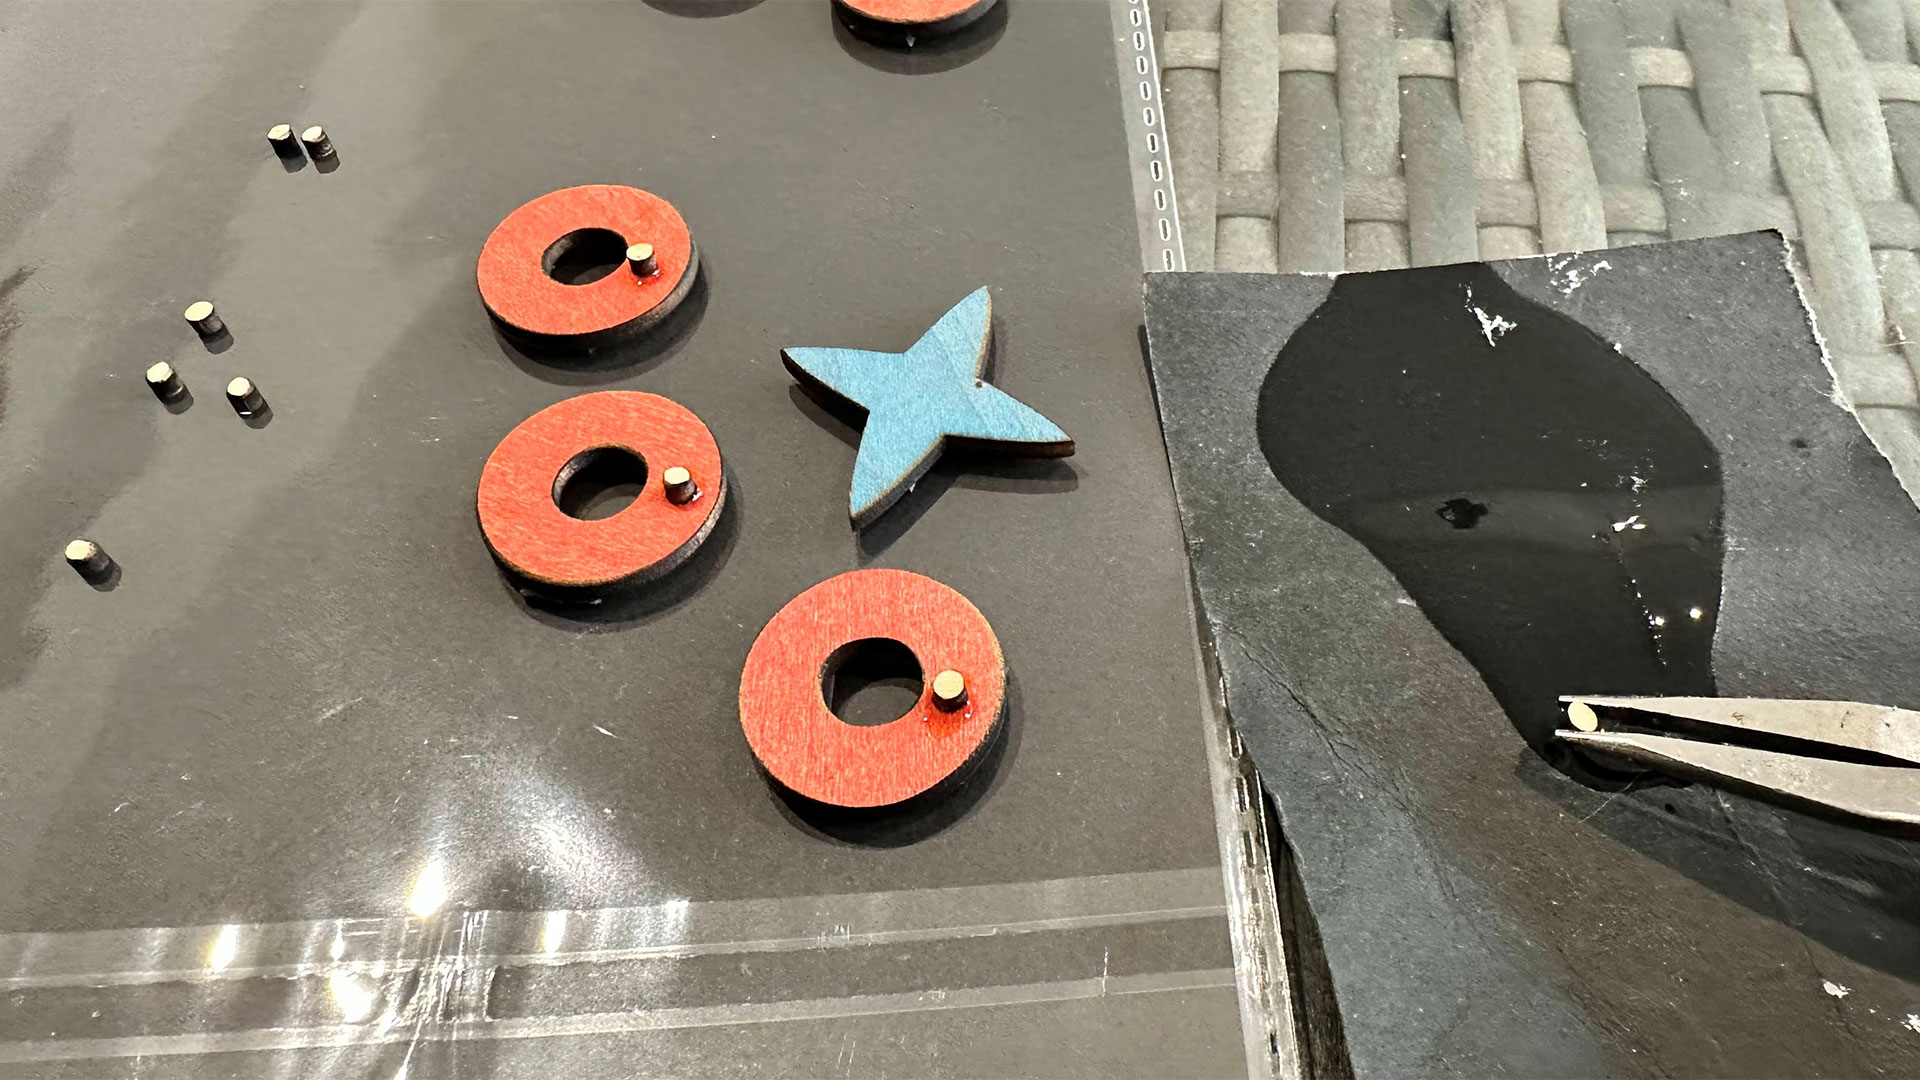
Now let’s use some of the hybrid output ability of the xTool M2. I saw a project in the xTool Studio library with a wood version of tic tac toe (noughts & crosses) but thought it looked a bit basic, so I fired up Illustrator to make a nicer stylized version, which I dubbed Fridge Tac Toe. I intended to add magnetic pads to the cutout shapes and board and make the game fridge-friendly.
Tom's HardwareTom's HardwareTom's Hardware
The M2 outputs the color sections with its CMYK head. It then asked me to change to the laser head, and proceeded to cut the shapes, followed by the board. There were a couple of processing wrinkles, but I salvaged the project without issues. Specifically, the laser cut around the inner rounded rectangles twice, and that action accidentally lasered some pieces that had already dropped onto the bed. I’m not sure if it was my source file at issue, the settings, or a software bug. Thankfully, I had decided to cut some spare O's and X's.
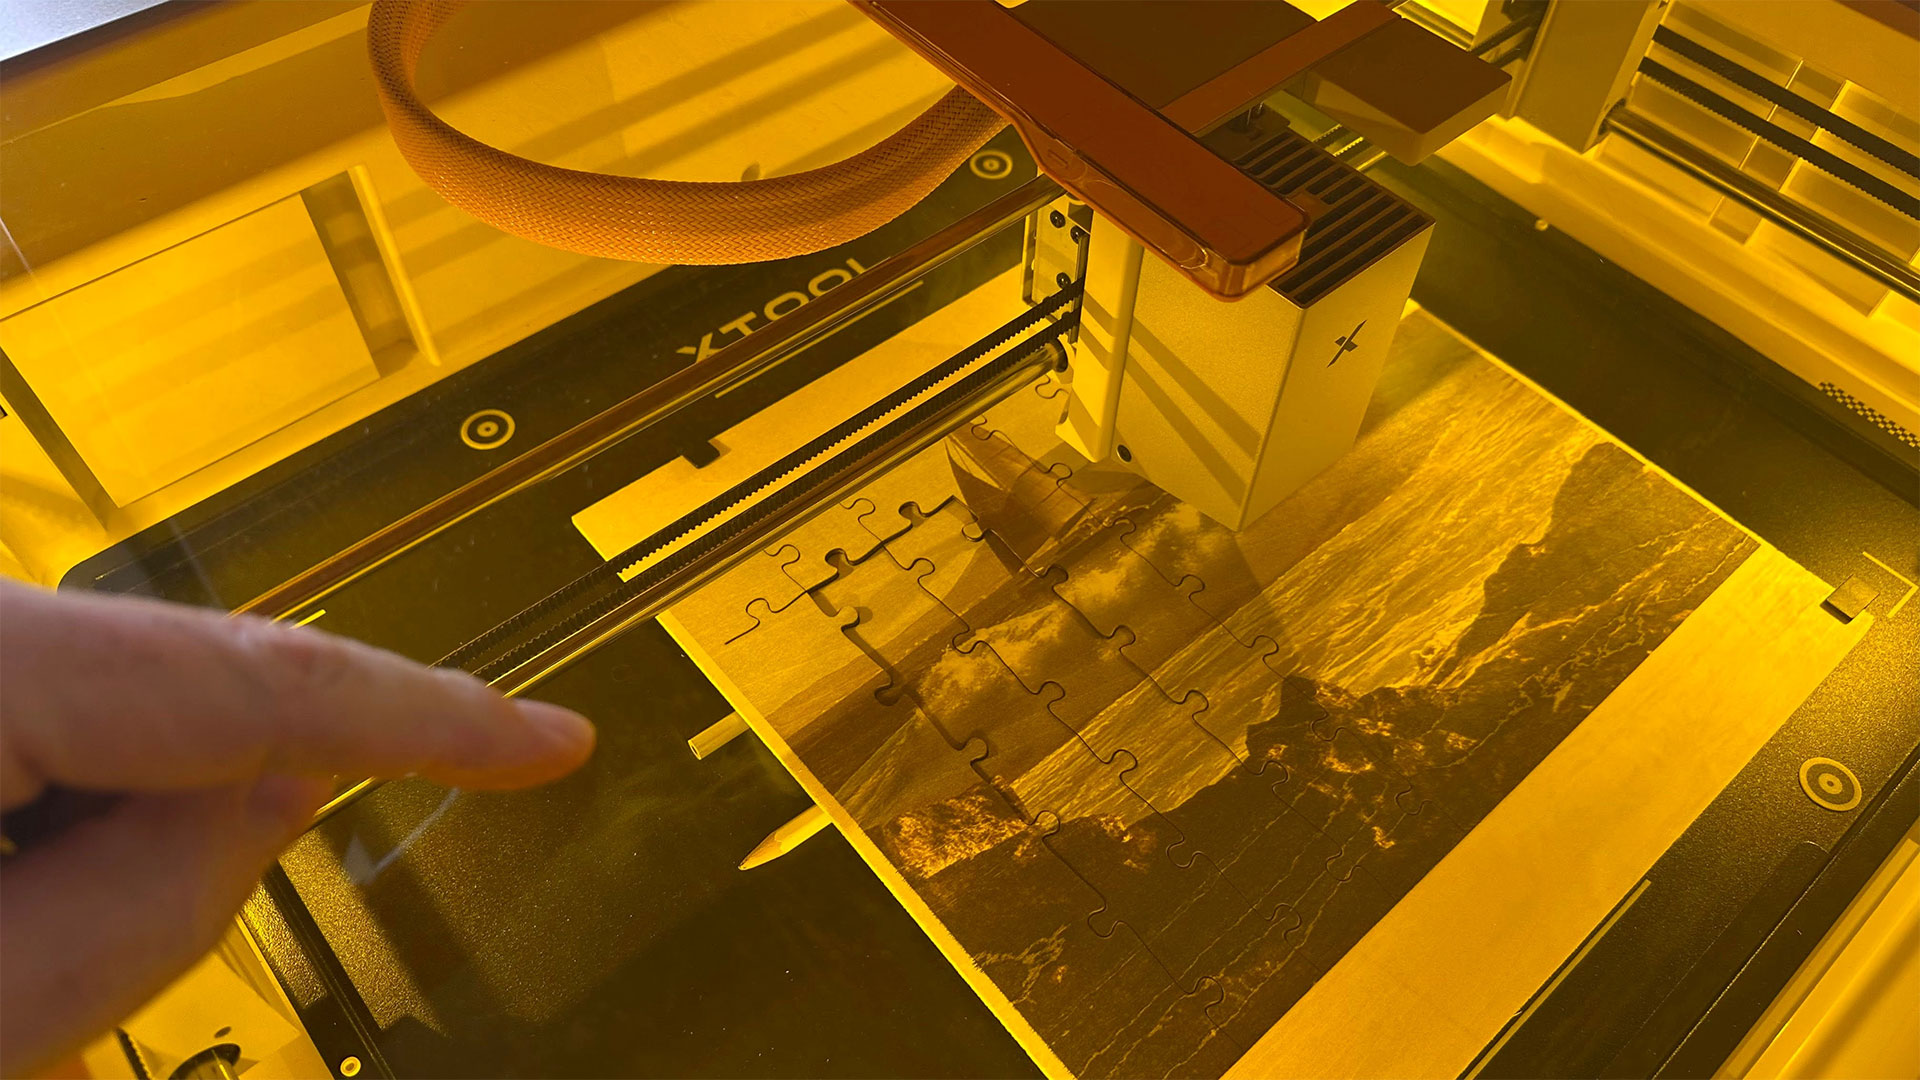
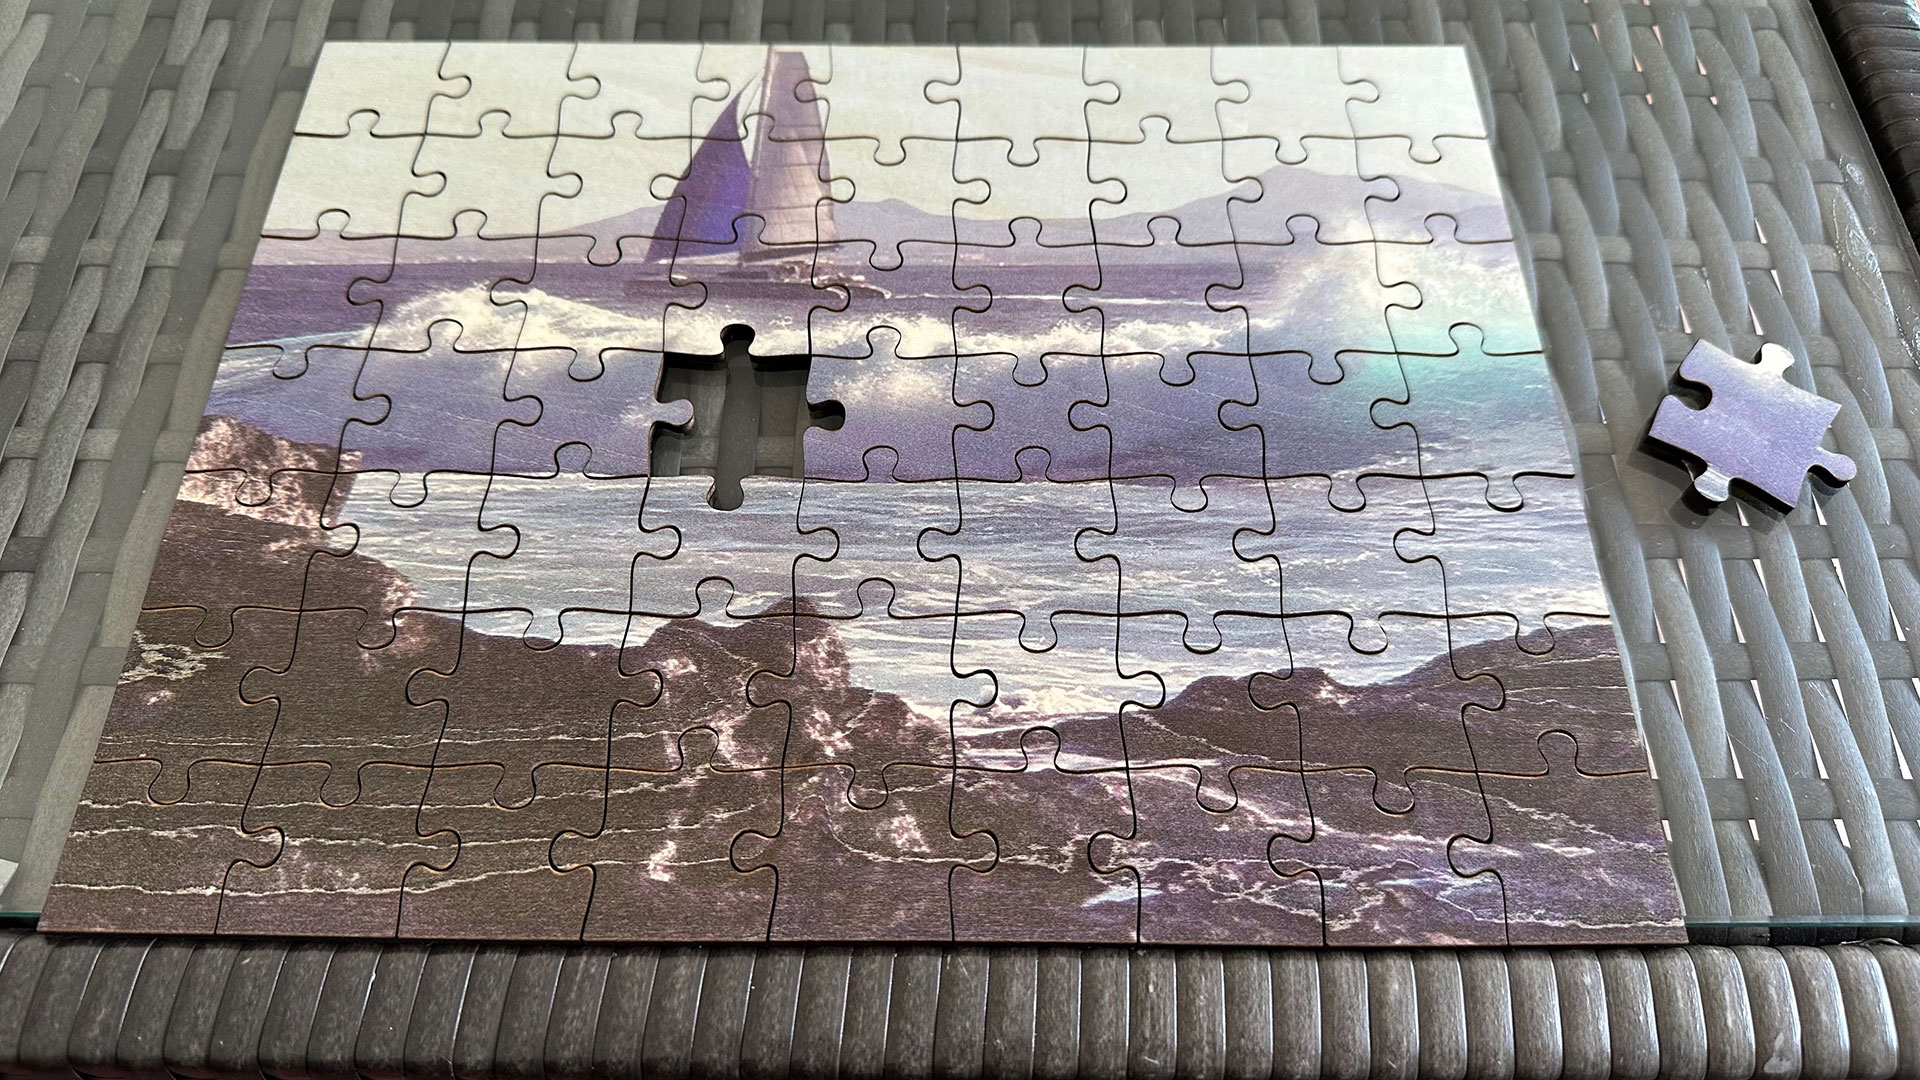
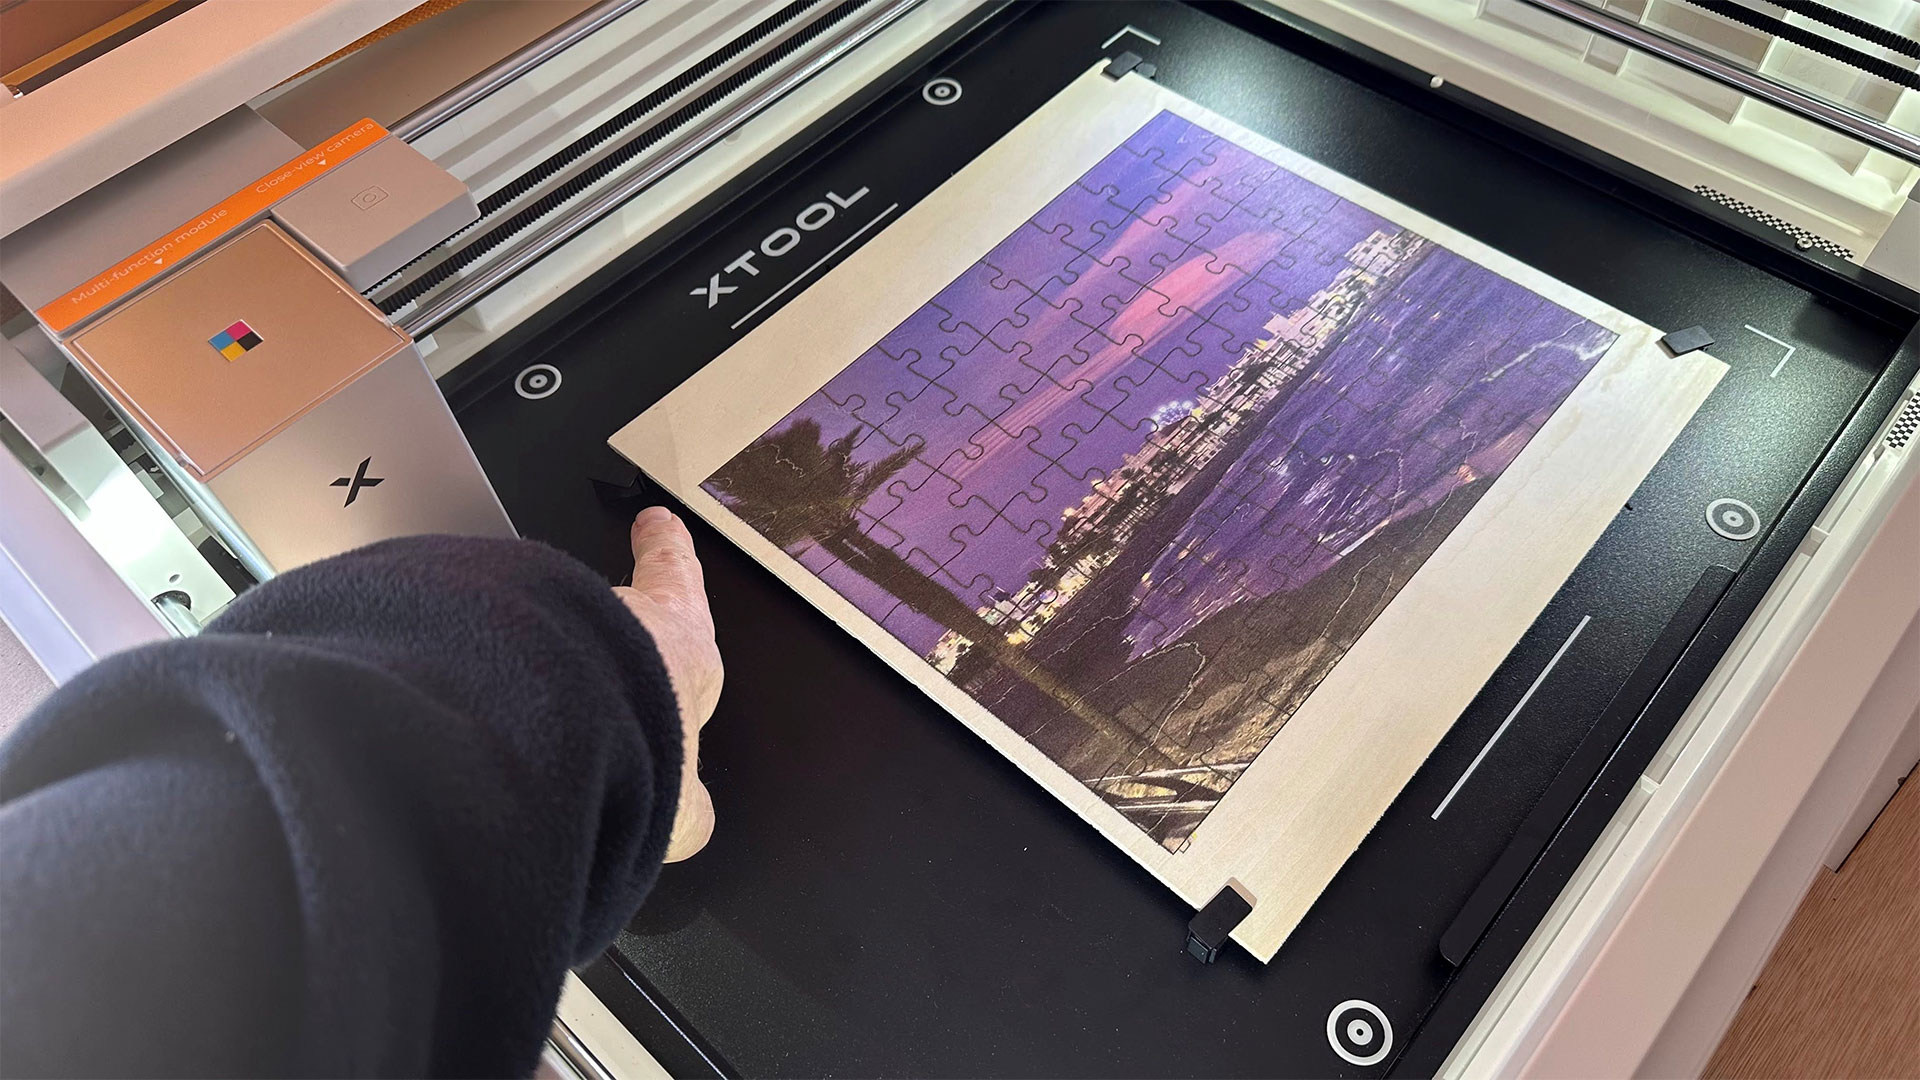
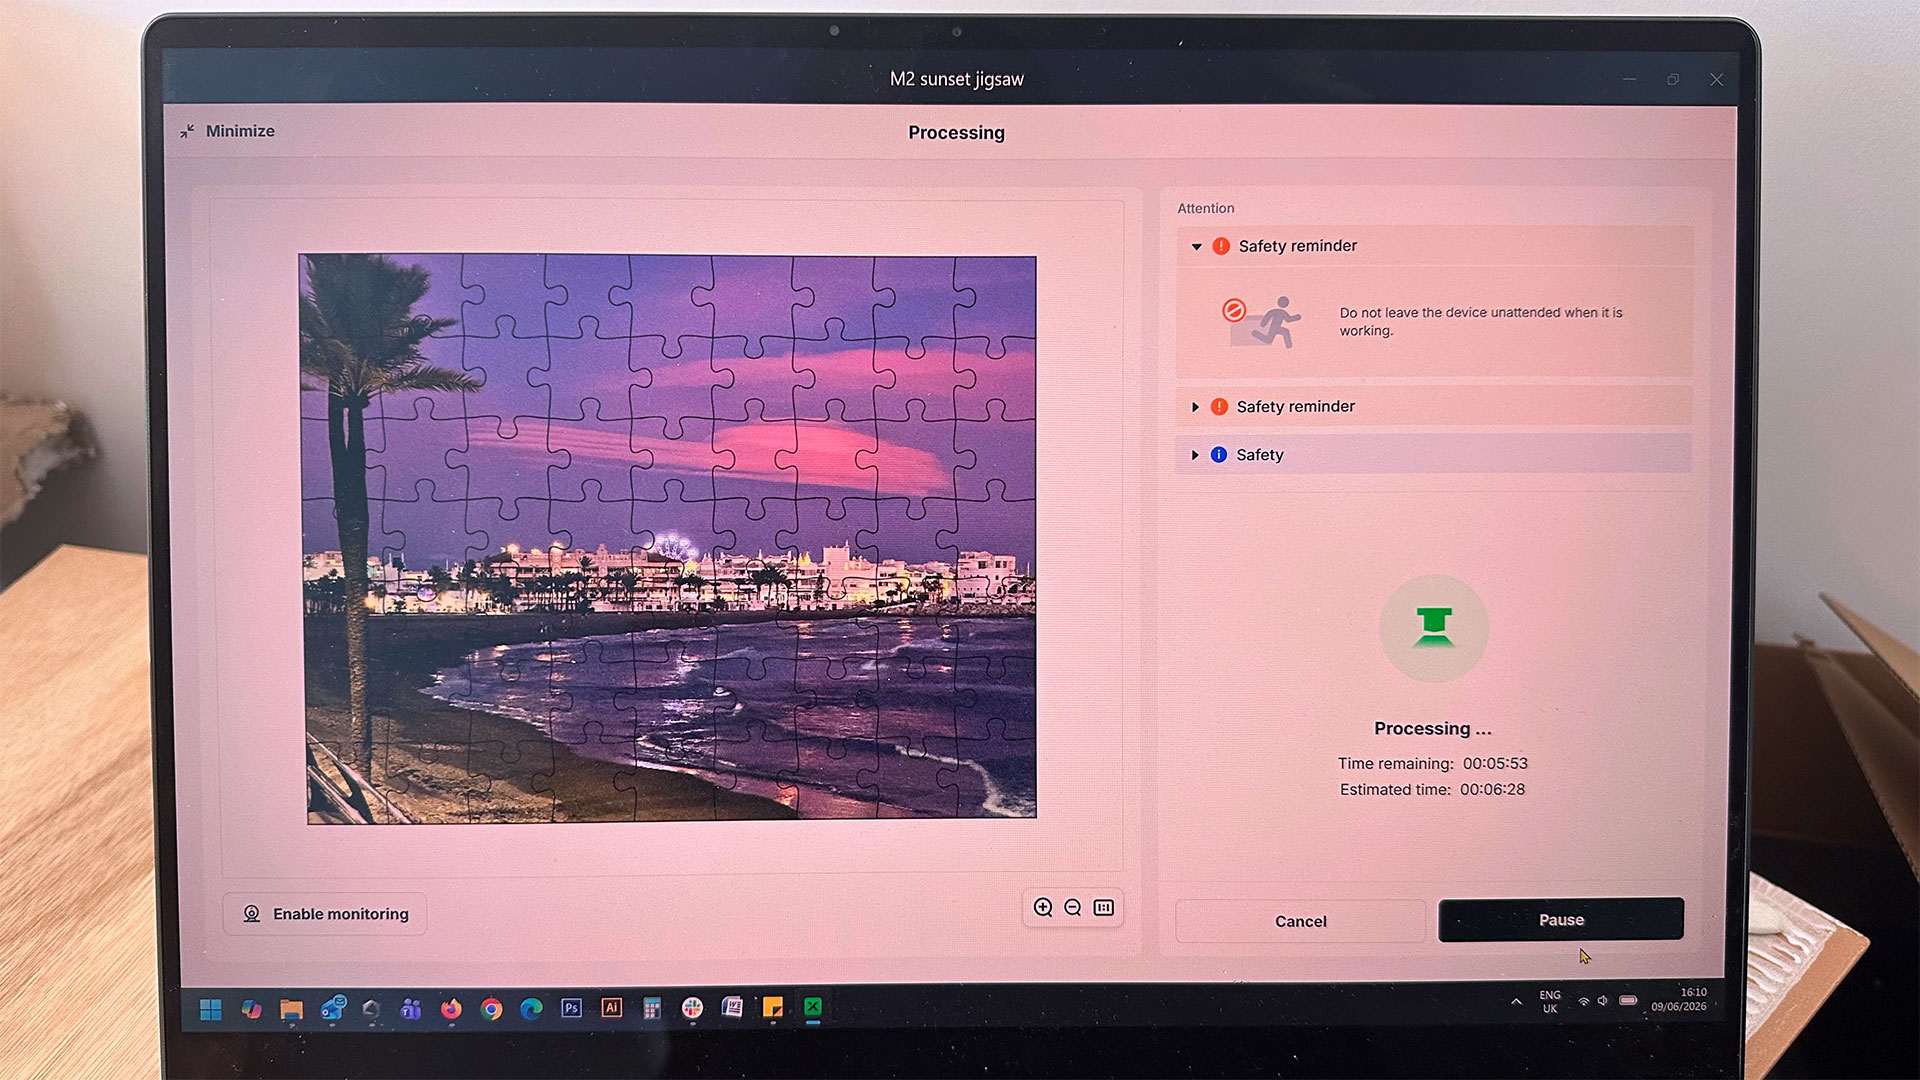
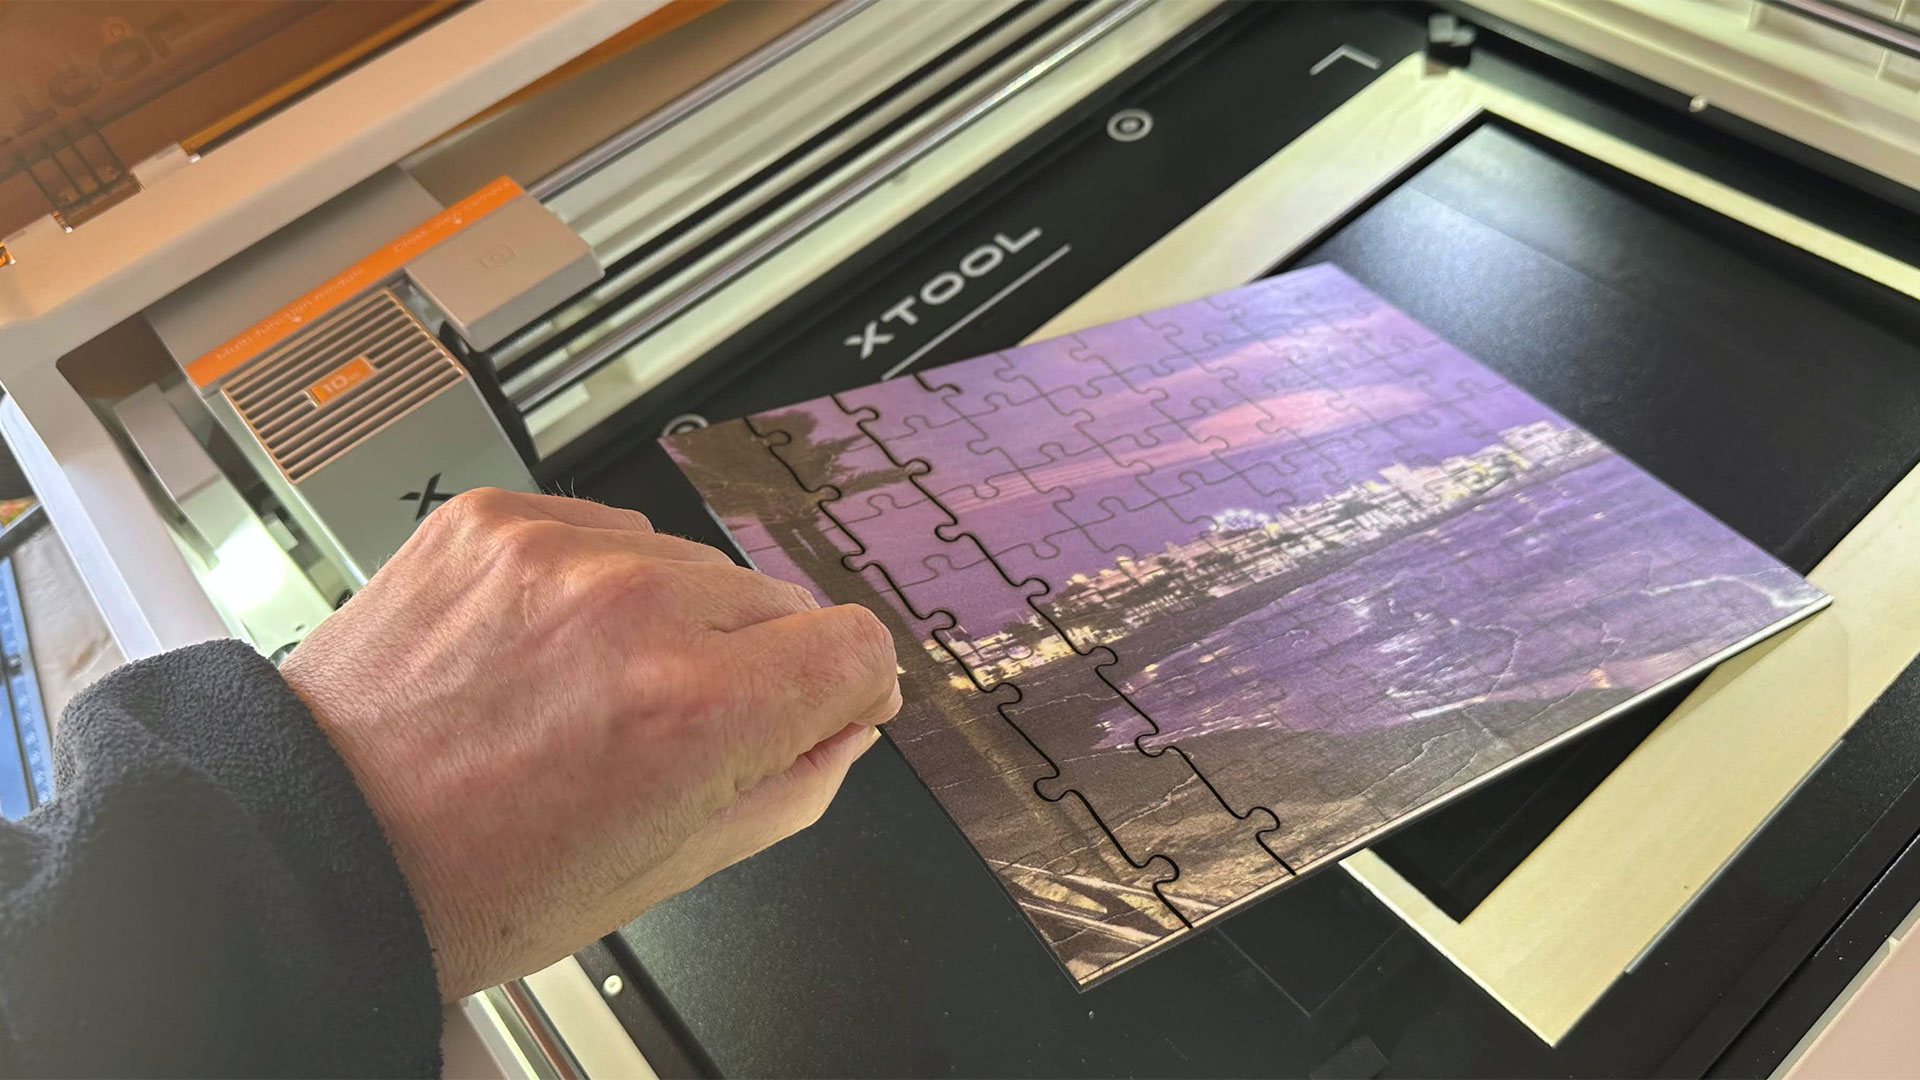
Slightly more ambitious, I decided to make a jigsaw from one of my favorite holiday photos. The xTool software generated this for me once fed an image. All I had to do, I thought, was make sure to position it carefully within the common area where printing and lasering can be achieved.
As you can see from my jigsaw-making gallery, the first attempt wasted a sheet of plywood and plenty of ink. For some reason with this first attempt, the jigsaw lines were printed on top of the image – not necessary. Also, the run order ruined the project. The machine cut the outer frame of the jigsaw first. This caused the center (what would have become the jigsaw pieces) to fall immediately down onto the metal bed, which is about 6 or 7 mm lower than the standoffs that had been holding the wood sheet up. Thus the laser wasn’t focused to cut, and even if it had been capable of cutting, we’d get a lot of burn on the back of the piece due to a lack of air gap under the work.
After aborting the beach photo jigsaw, I picked another holiday photo featuring a yacht and ran the jigsaw generator again. This time I edited the resulting project work on the xTool Studio canvas. I selected the outer frame cut and made sure it would be the last action of the laser by putting it on its own last-in-order layer. This ensured the layers would be processed in the following order: photo print, jigsaw pieces cut, jigsaw pieces outer frame cut. This worked nicely, with a very handsome and accurately cut working jigsaw at the end. Using a ‘honeycomb’ cutting bed would have been better for this style of job.
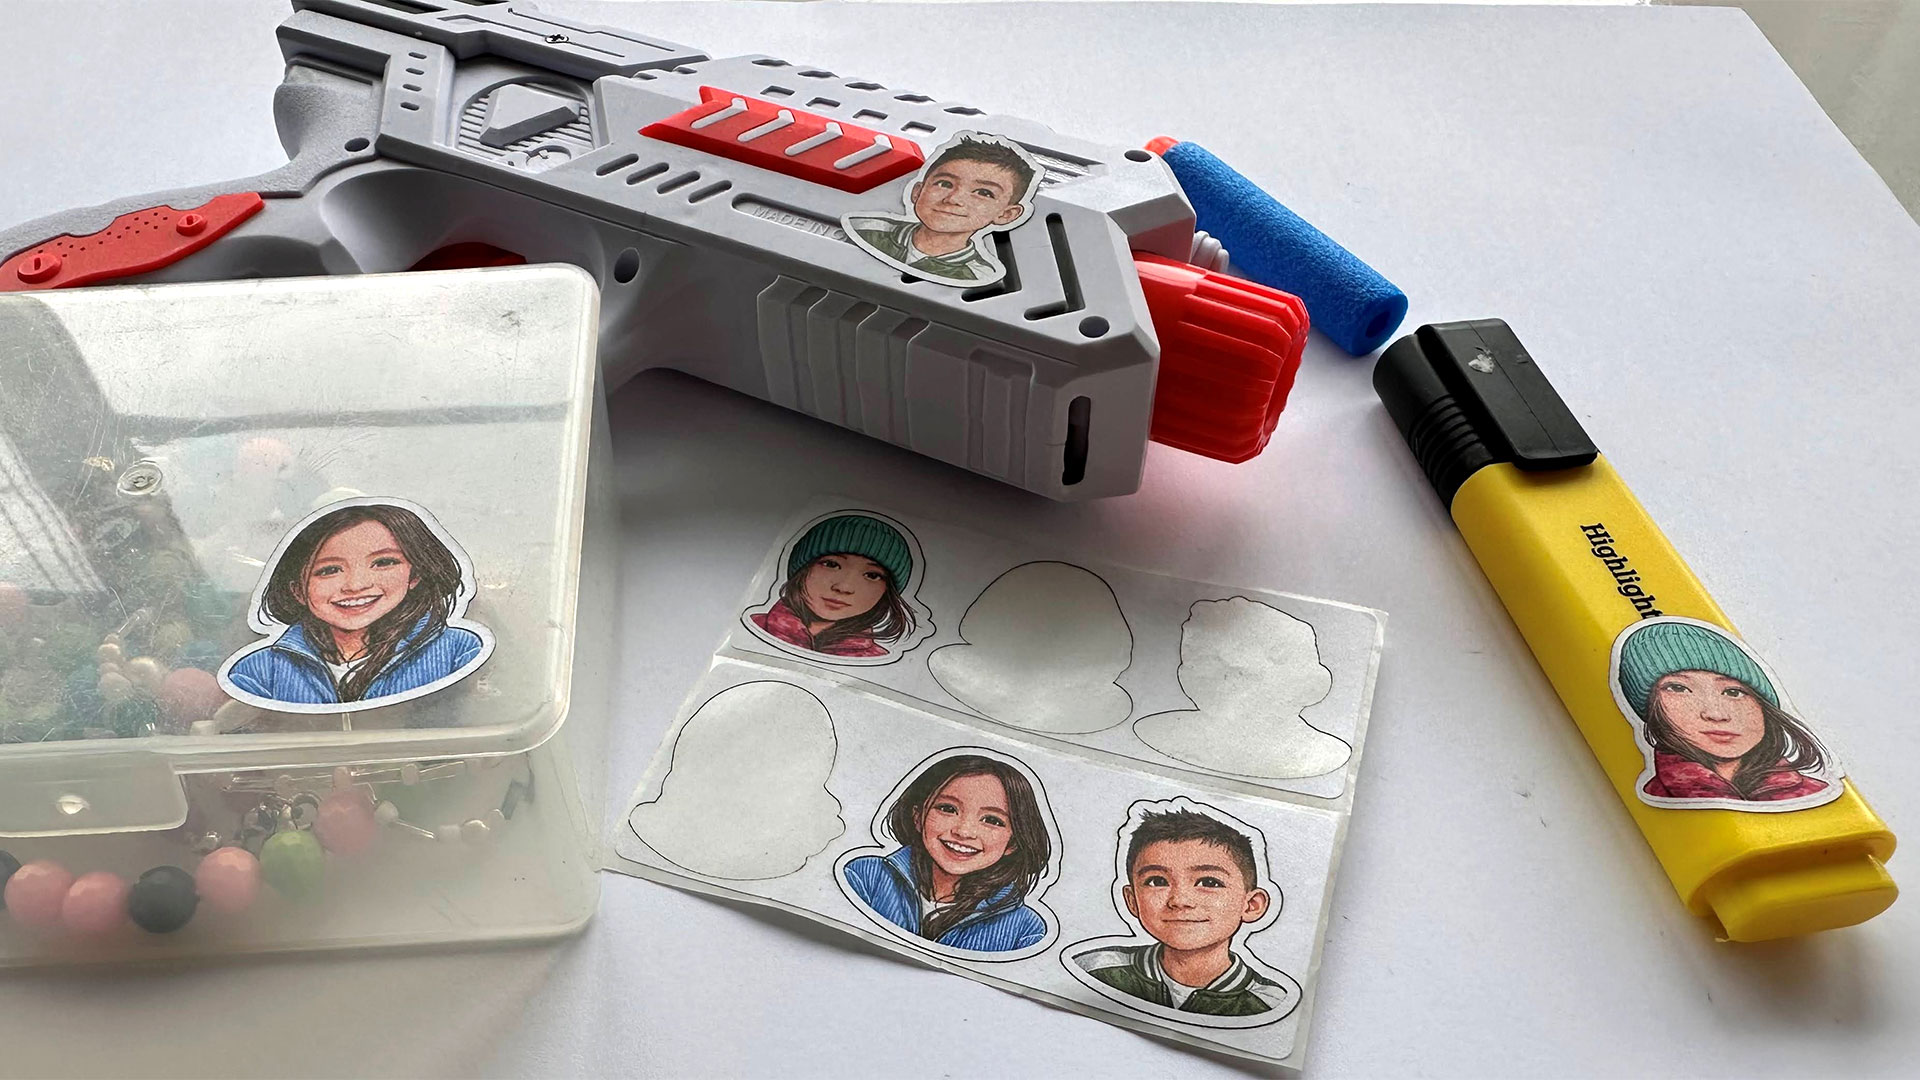
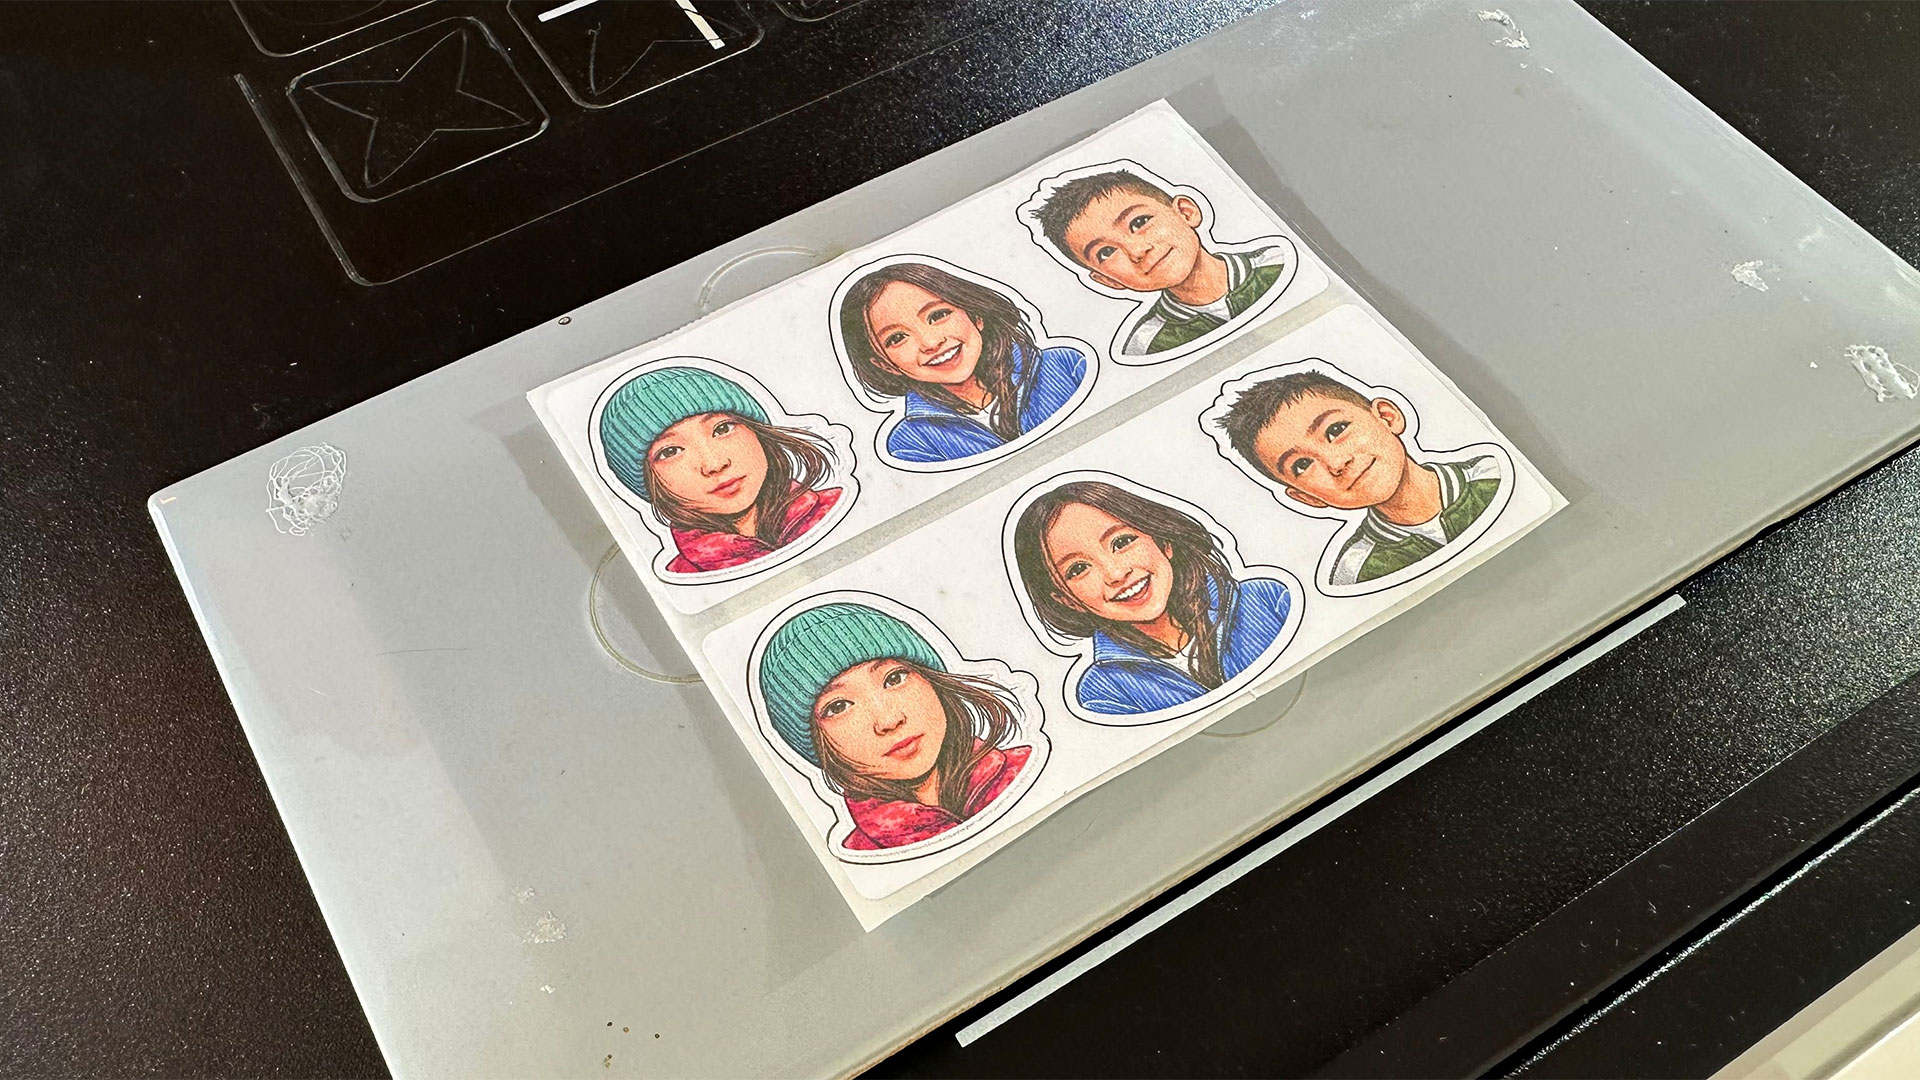
Another hybrid job I output was some stickers for the grandkids. These cartoon illustration versions of photos were generated by an AI tool, and I used the xTool Studio to generate offset cutting forms to match each one.
I couldn’t find a preset for this kind of sticker cut out in the xTool software. That was a surprise, as I saw lots of stickers in promotional material. Anyway, printing looked great, and my guestimated laser cutting using one pass at 15% power and 15mm/s speed was perfect. It cut the stickers cleanly without cutting the backing material.
Tom's HardwareTom's Hardware
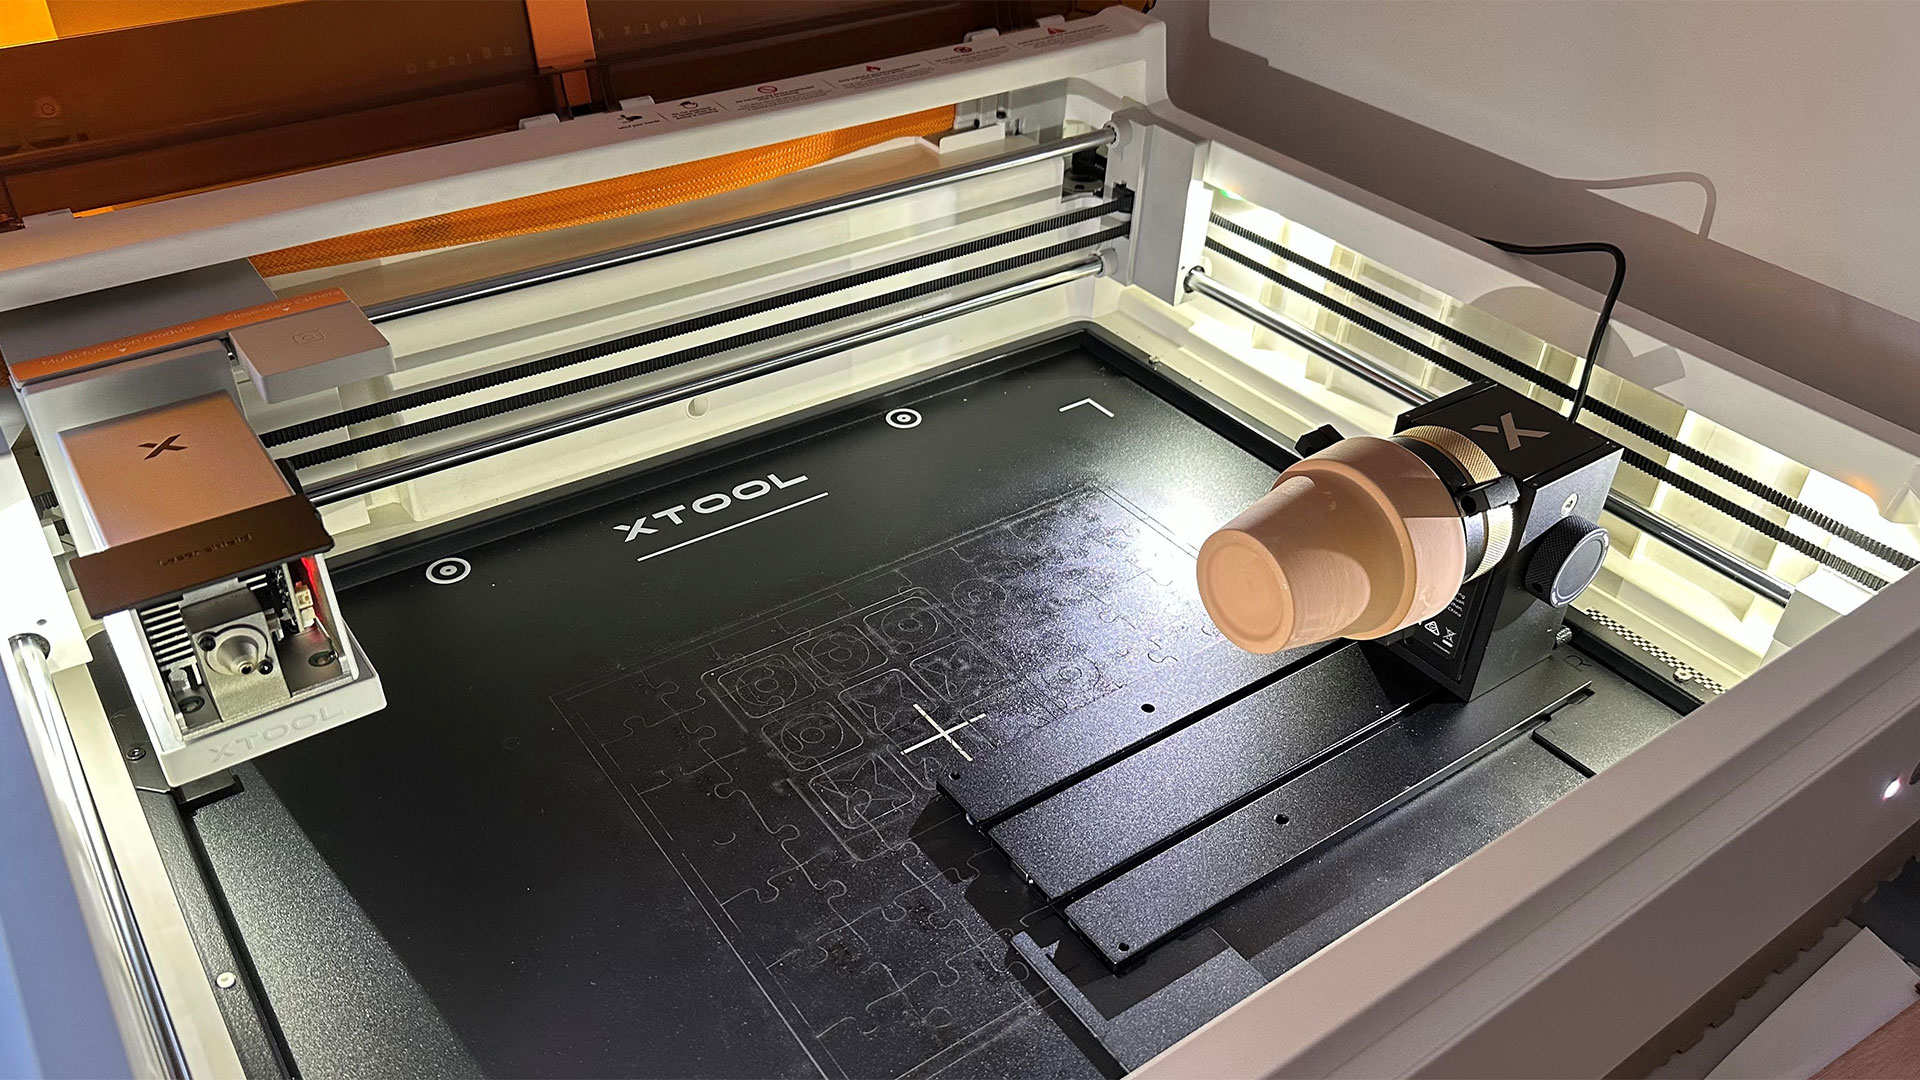
My final project made use of the supplied RA3 Lite rotary accessory. It was a bit fiddly to install and it meant fixing a different magnetic head adapter to change the orientation of the printer / laser (see images). Also, the xTool M2’s camera positioning functions stopped being useful when in this mode.
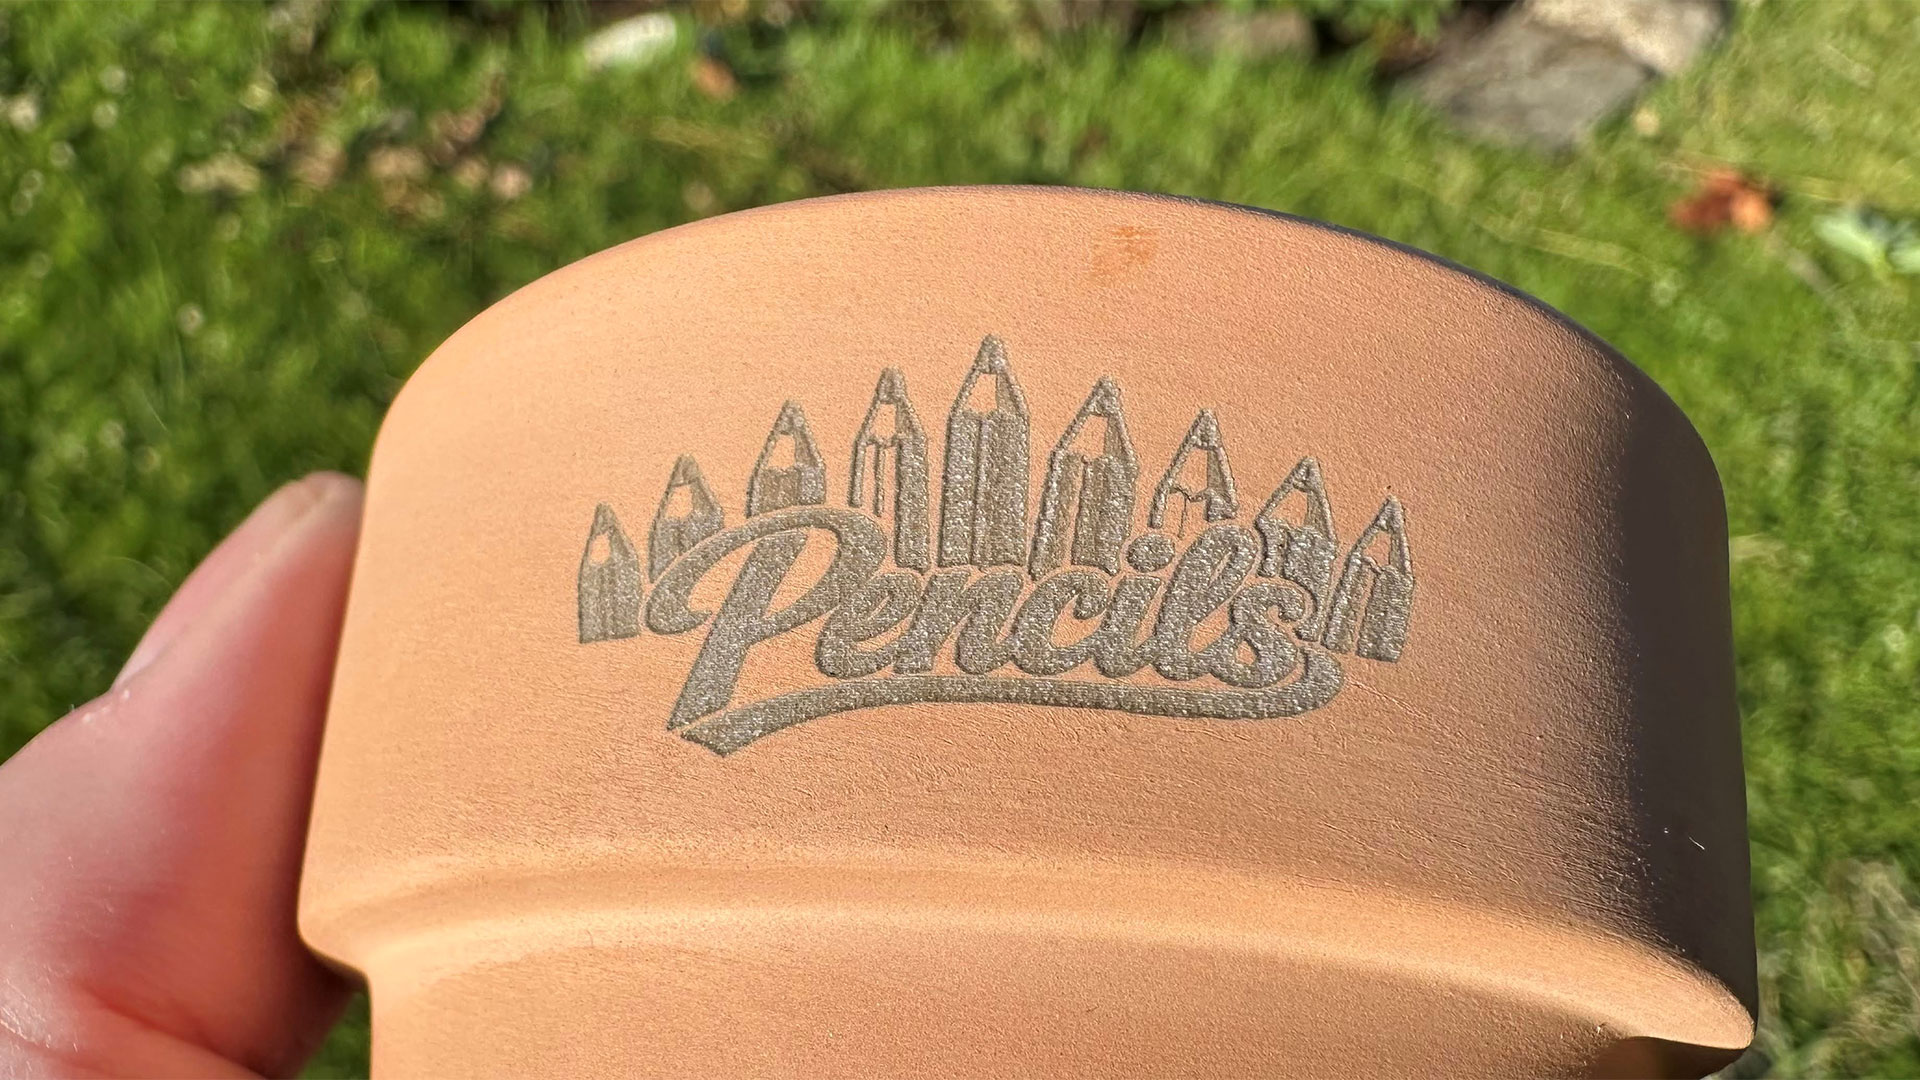
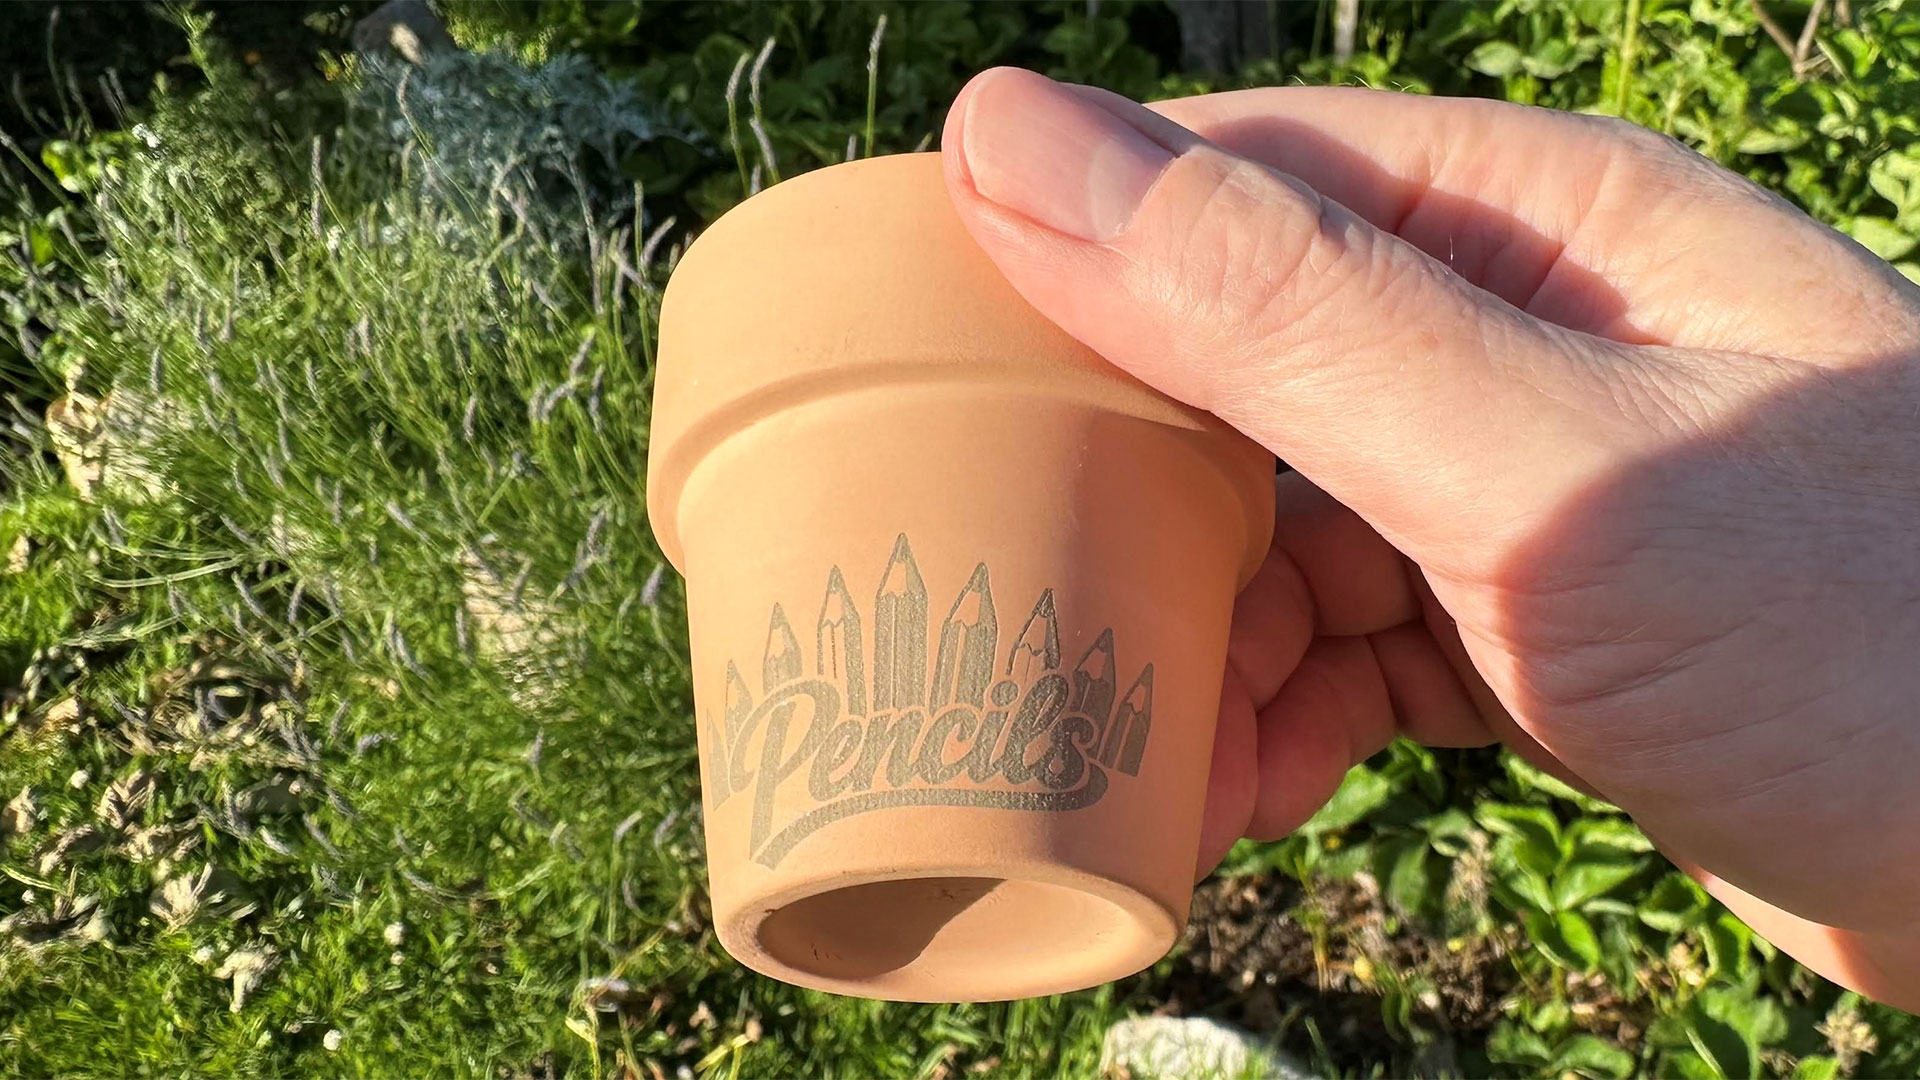
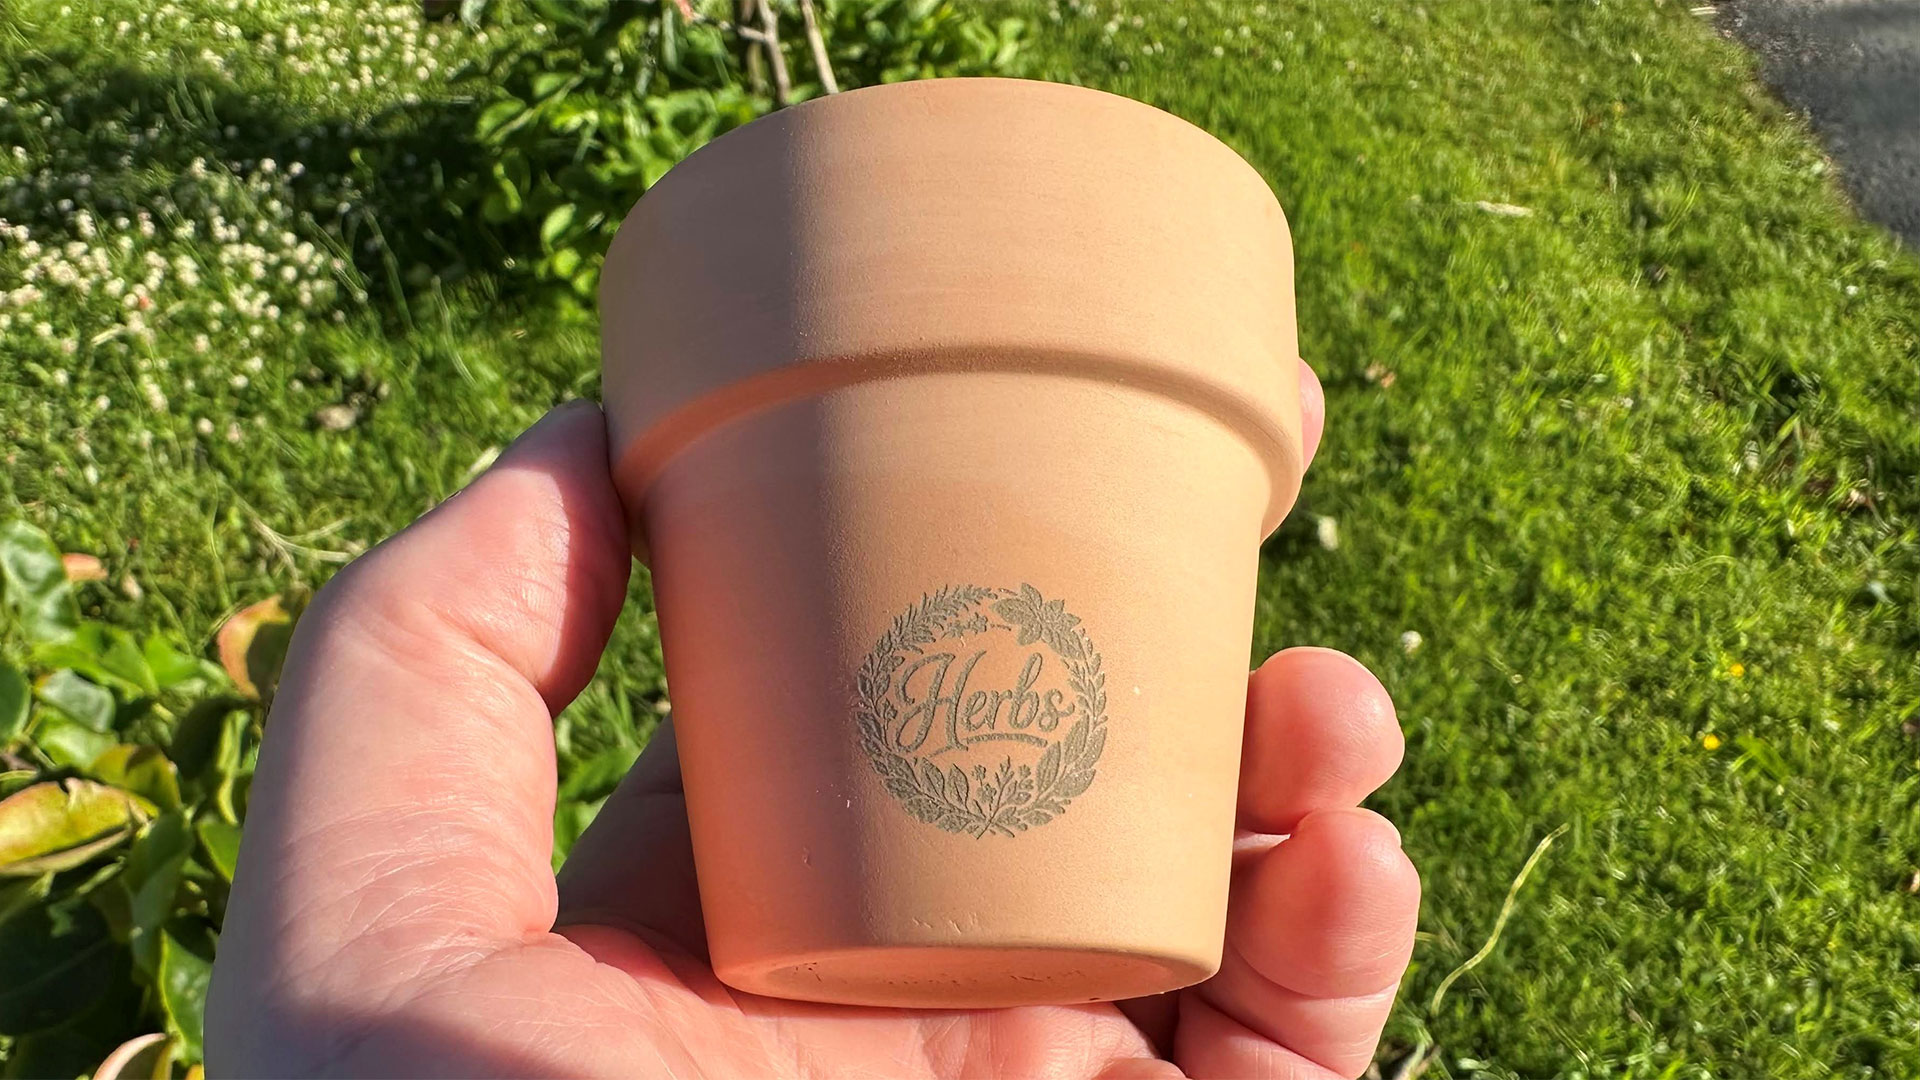
I planned to engrave some terracotta plant pots, one for pencils, one for herbs. So, I prepared some line art logos for this labeling purpose, and then imported them into xTool Studio. There I selected the rotary output option for the M2, and followed the steps to measure the usable (engravable) surface and its slope / profile.
Multiple grip adaptors are provided with the RA3 Lite rotary chuck, so I could turn the work around and then engrave the plant pot rim. That was an important technique to get used to, because you can’t engrave close up to the chuck. I think the user-addressable zone of the work in the chuck starts about an inch away from the chuck jaws, probably to prevent head/chuck jaw collisions.
Finally, I got some pretty nice results with the laser engraving of terracotta, so I’m pleased with the handsome textured finish which you can see in my gallery.
Bottom Line
I found the xTool M2 to be a great one-stop shop for craft projects. Most of the ideas I had for cool things to make went from ideation to finished output with very little friction from the machine or bundled software. Lots and lots more projects using a far wider range of materials (check the above chart) are possible. Moreover, xTool Studio’s built-in generators, AI, and integration with project libraries via Atomm make it easy to get more inspiration even if you don’t paint, illustrate, or DIY design.
From looking at the print samples from the M1 Ultra, I’m certain the CMYK output from the M2 is much better and more usable for hobbyists. If you were to do a lot of print work, or something like a production run, I think it would be worthwhile tweaking to optimize contrast, though. Remember it is inkjet, too, so the print surface makes a lot of difference, and you may have to lacquer the surface after printing to make it moderately splash-proof.
(Image credit: Tom's Hardware)
The entry-level pricing of $599 looks like a good move from xTool. Adding $150 for the CMYK head and a cartridge doesn’t seem exorbitant – until you realize ink refills are $99. This so-called ‘Color Print and Cut Bundle’ makes the most sense to get the best of the xTool M2’s most attractive features from day one.
While the 10W (default) and 20W diode laser heads are very flexible across use cases and materials, those with a particular interest in metal projects (and some plastic types) might like to add the 3W IR laser head. I’ve heard that’s an extra $499, though, so you’d really have to have a few important projects in mind to pay almost the same price as the M2 laser alone.
The xTool M2 deserves a place in our list of the Best Laser Cutters and Engravers. However, if the added flexibility of this all-in-one print and cut machine isn’t something that tempts you, there may be better choices. For example, our recommended xTool S1 with a 40W diode laser head can get things done quicker and cut deeper for not a lot more than the M2 20W.
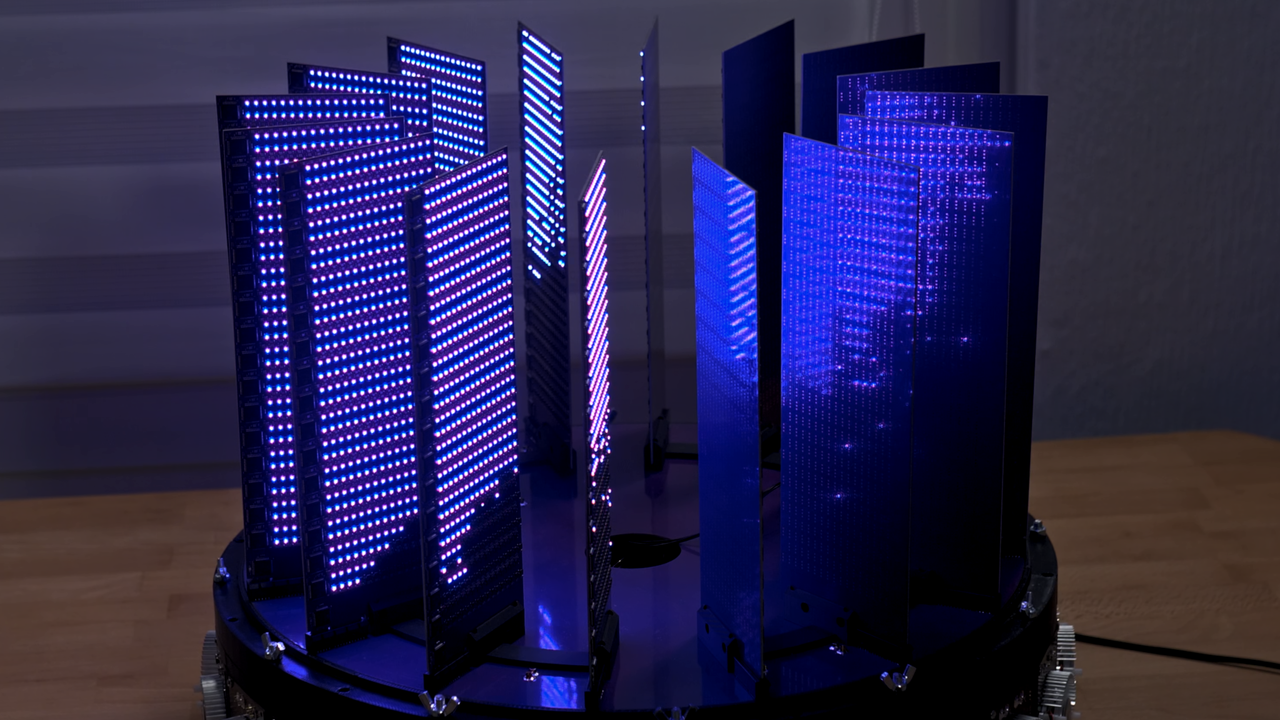
Save for the occasional deal, GPU prices are so high these days that they might even get you wondering if you couldn't just roll your own. As it happens, renowned hardware hacker Matthias Balwierz (more commonly known as Bitluni) elected to do precisely that, enlisting the help of a total sum of 8,192 RISC-V microcontrollers (MCUs) for this enterprise.
He originally planned to create a display of some sort, but after careful consideration regarding costs and difficulty, he elected to solder an RGB LED directly to each microcontroller chip, effectively turning his GPU into a GPU-and-monitor combo, if we're getting technical. Going for a 1920x1080 resolution would require over two million chips, so Balwierz aimed for a final-project resolution of 320x200 with 64,000 chips — familiar figures to anyone who played games in the DOS days.
Balwierz opted to make boards with 16x32 "pixels" each, in a circular arrangement reminiscent of the Cray-1 supercomputer, though with far more blinkenlights. His option to directly solder each light onto each MCU was borne out of budgetary restrictions, as the addressable-RGB variant would also prove too expensive.
For this initial stage of the project, Balwierzstuck with "only" 8,192 chips, though he made plans for the whole shebang. Perhaps the most impressive figure is the power draw, at a total of 2,161 W, or around 655 amps at 3.3 V. Each MCU only draws 10 mA, a figure that looks innocent enough until you do the actual math. To feed power into the beast, he enlisted the help of a Corsair WS3000 ATX power supply unit along with custom-designed converters to go from 12 V to 3.3 V at high current.
As for the chips themselves, they're QingKe CH570 RISC-V units, each with a 32-bit RISC-V CPU with a limited instruction set, running at up to 100 MHz. The diminutive chip contains an impressive amount of hardware, including a USB controller, a 2.4 GHz transceiver, and Bluetooth 5.0 LE support. Each of these set Balweirz back $0.13, once again a measly looking figure that will add up to well over $8,000 in chips alone for the final 320x200 array. Each set of 32 MCUs is controlled by a beefier CH32V unit.
As habitual, Balwierz custom-designed every single PCB, power delivery circuit, interface board, and testing board himself. This is apparently the first time he's designed a six-layer PCB, and he actually ran up against design limits of the JCLPCB service. He originally planned for the whole project to use immersion cooling, but decided against that for the time being due to environmental and cost concerns, though he did spec out the appropriate acrylic container for it.
Balwierz goes over each chapter of the process in detail in his video, and one of the most clever bits is how he made a 3D-printed three-prong fork-like tool to program each MCU. He then took said tool and attached it to the 3D printer's carriage, and used a Python script issuing direct G-code to the printer to precisely aim it at each MCU in the board.
It'll take a while before this is a functional CPU that can threat Nvidia, but we're looking forward to seeing Doom displayed on it. Also, it's kind of funny how one guy in a lab designed a better power delivery mechanism than the firm's 12V-2x6 connector... using just parts from AliExpress.
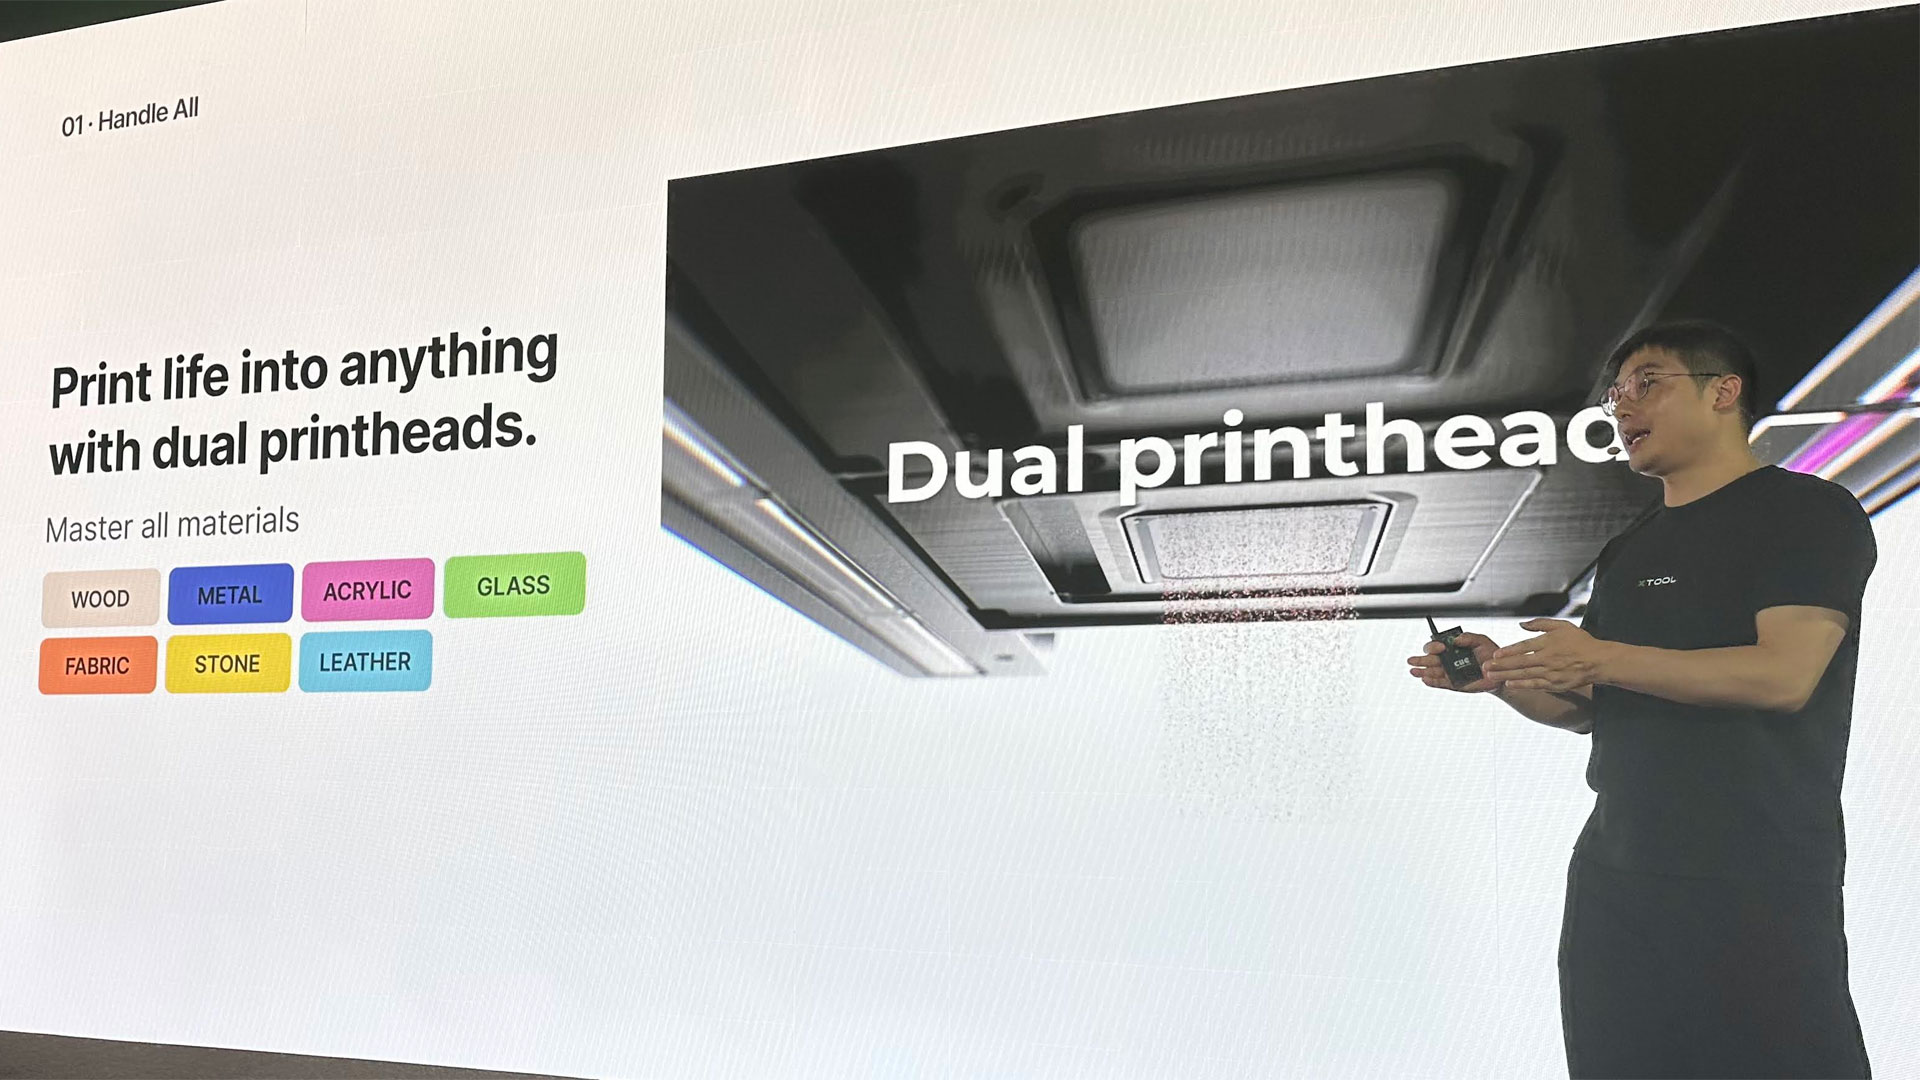
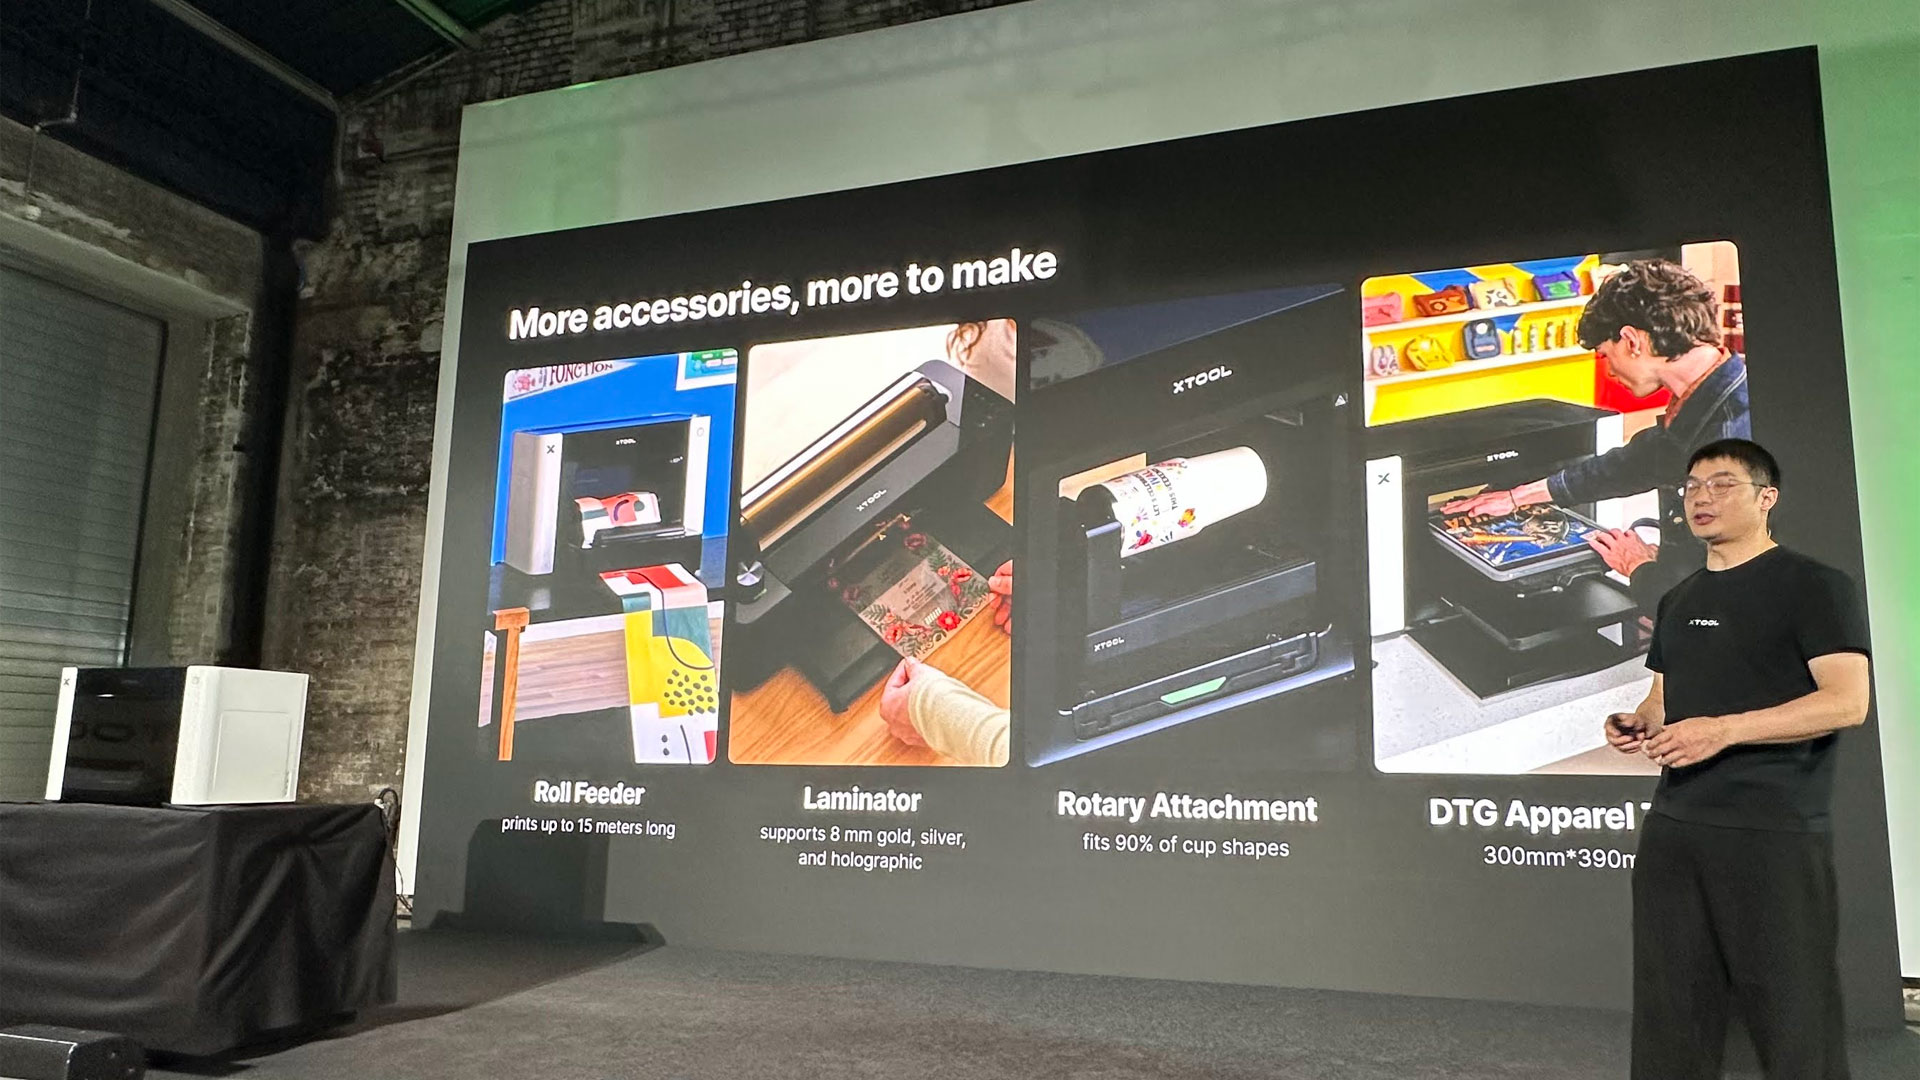
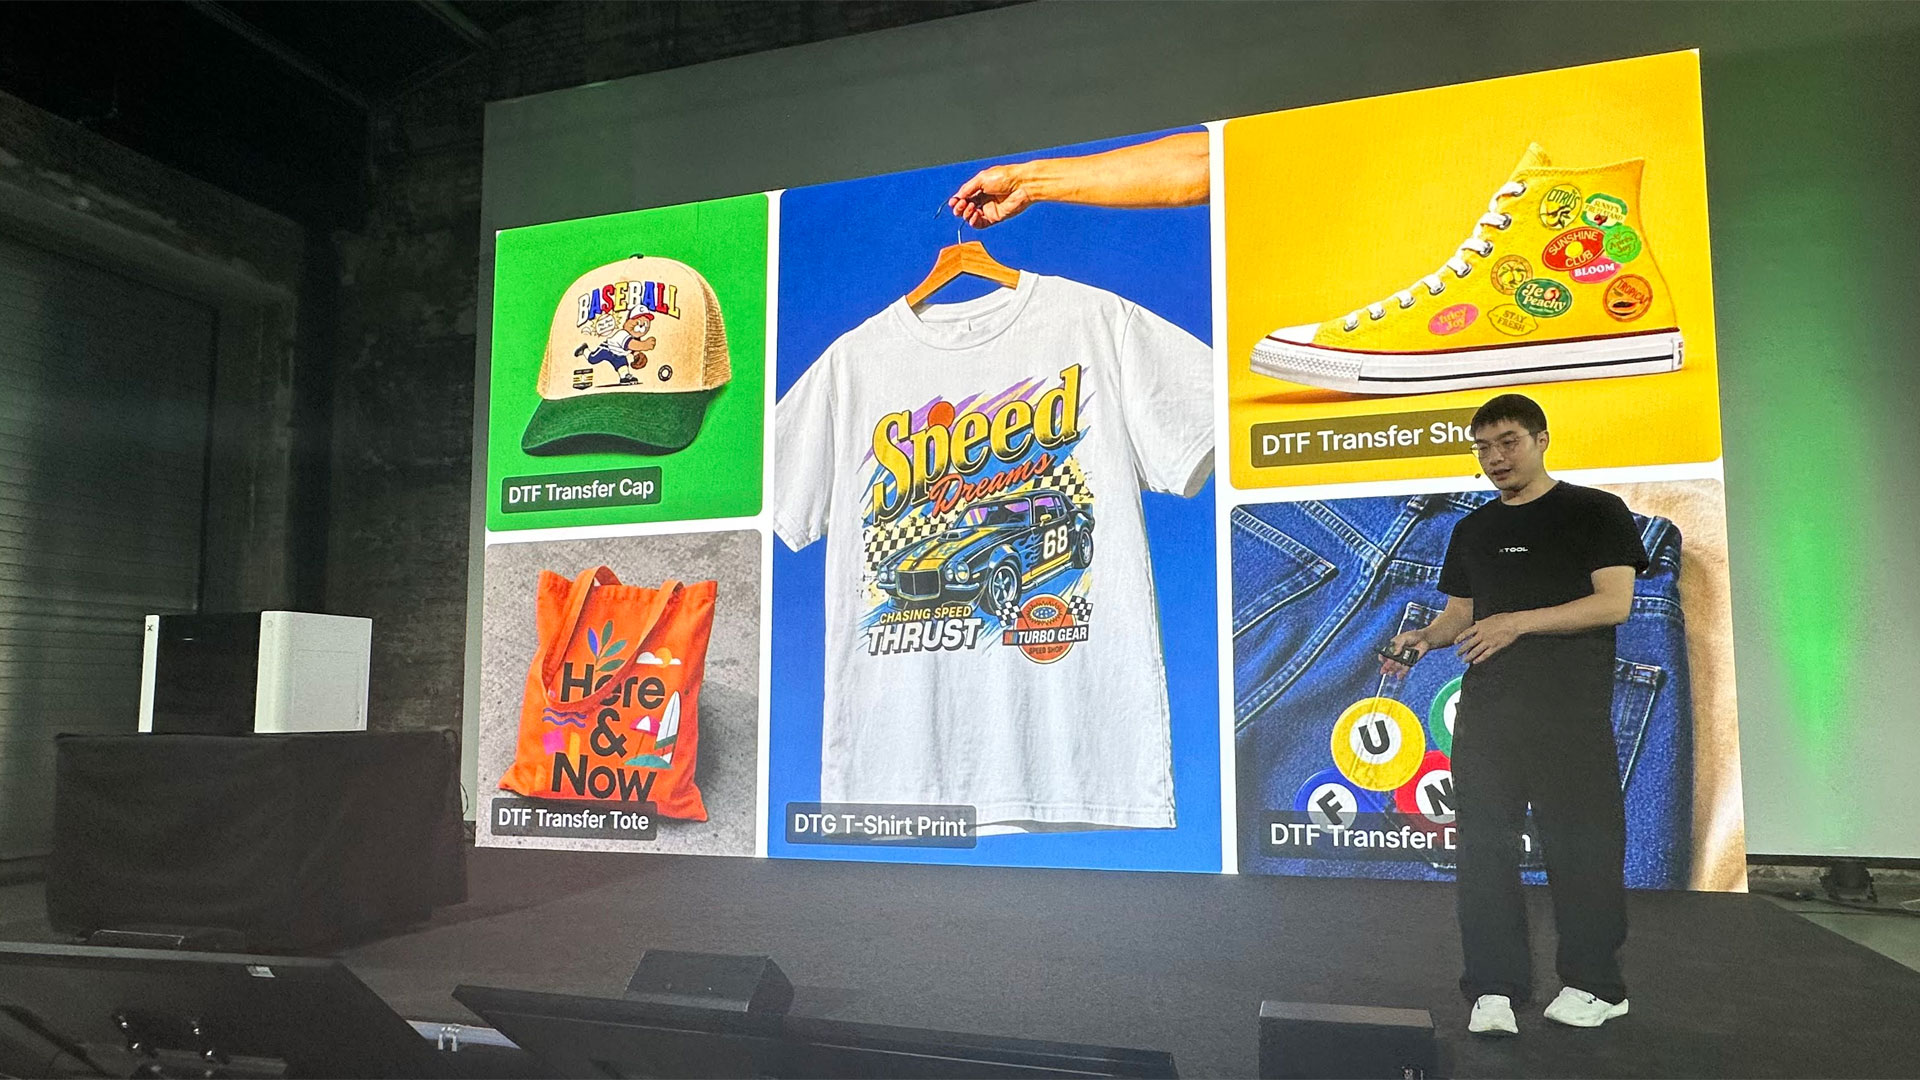
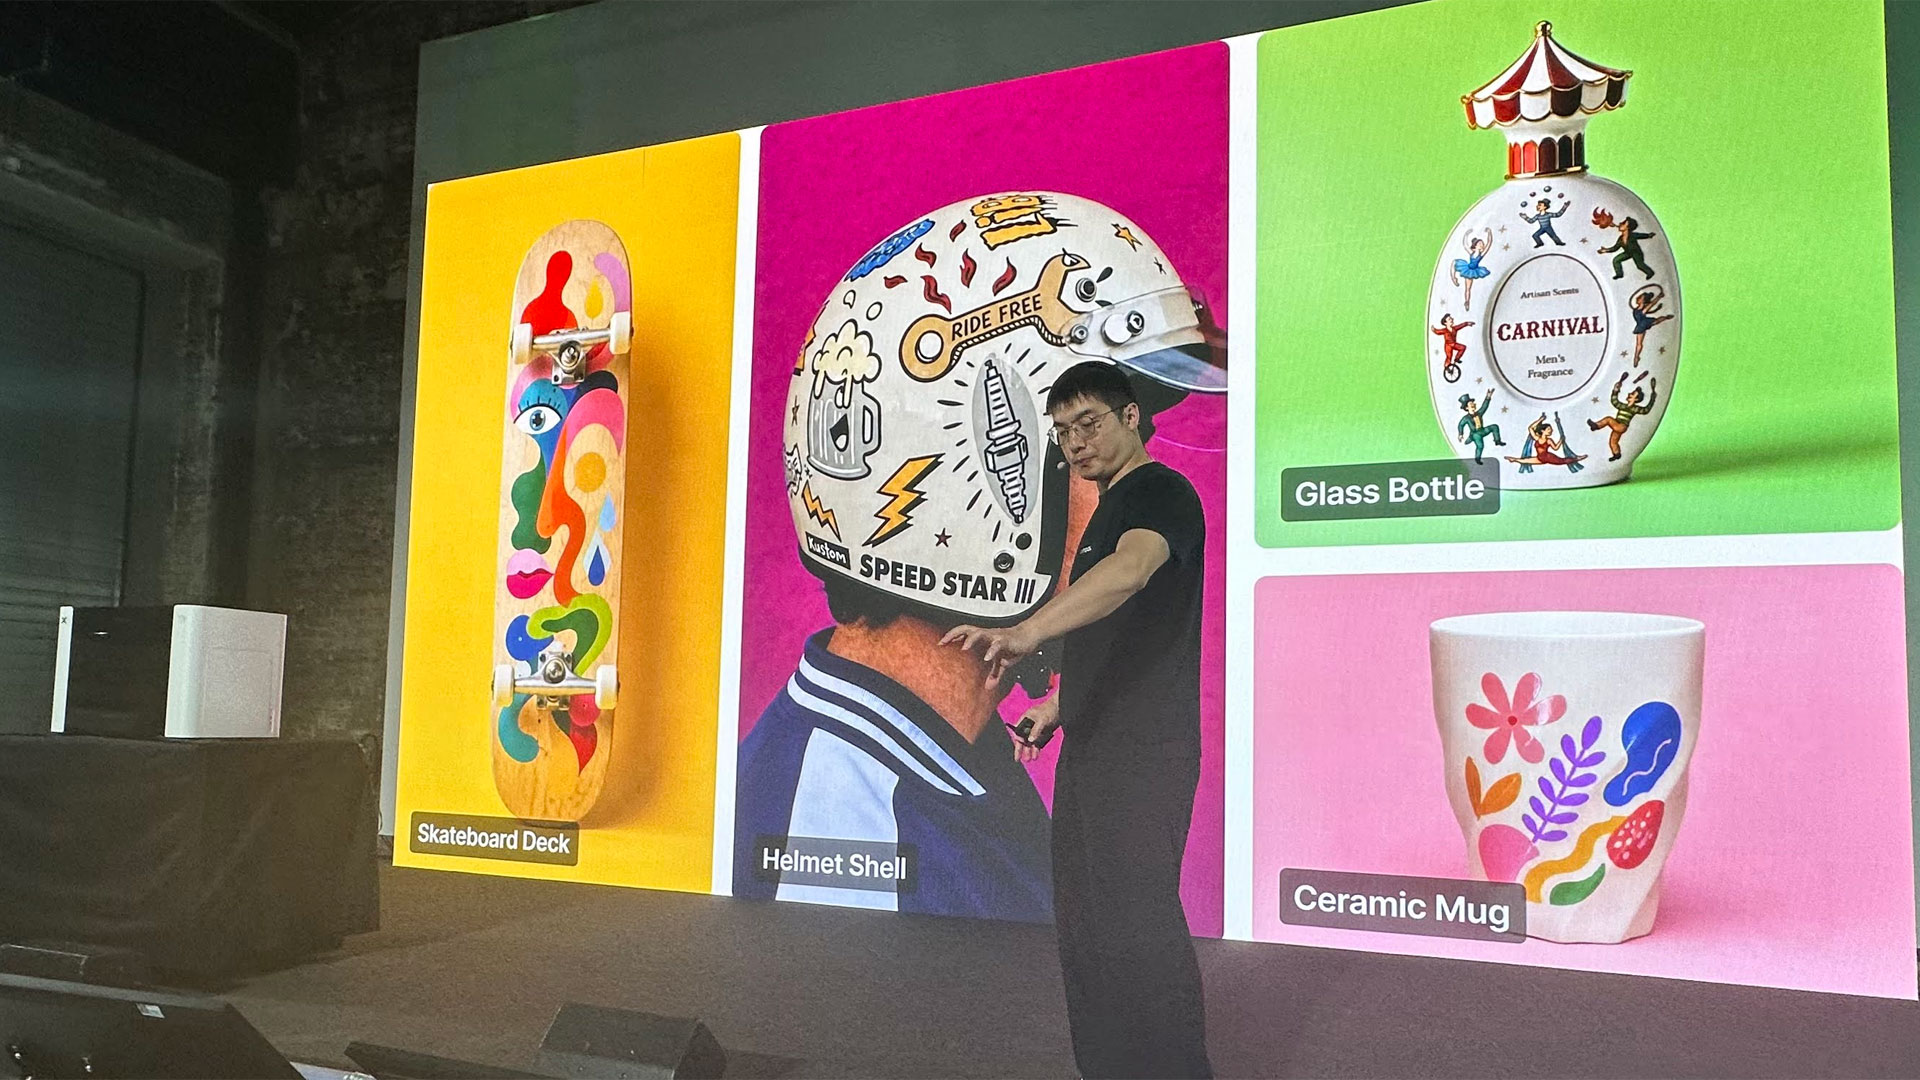
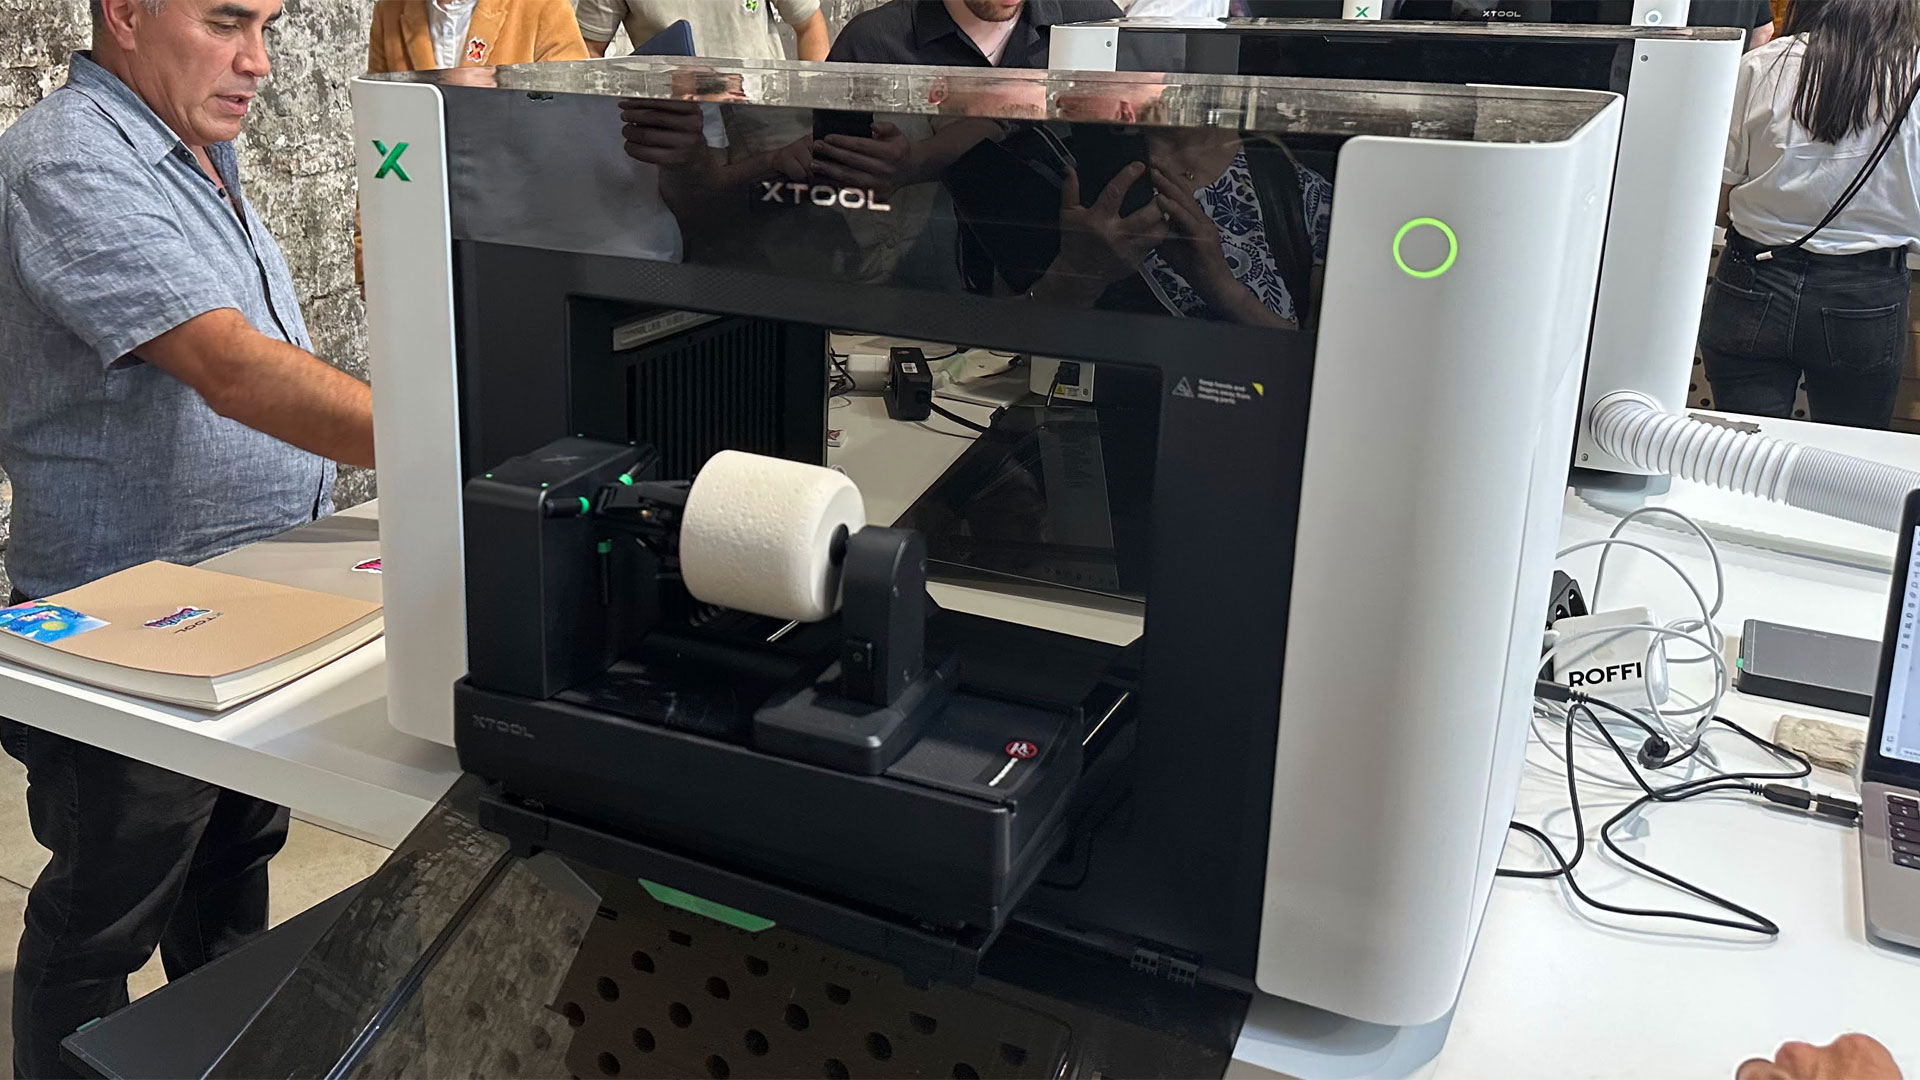
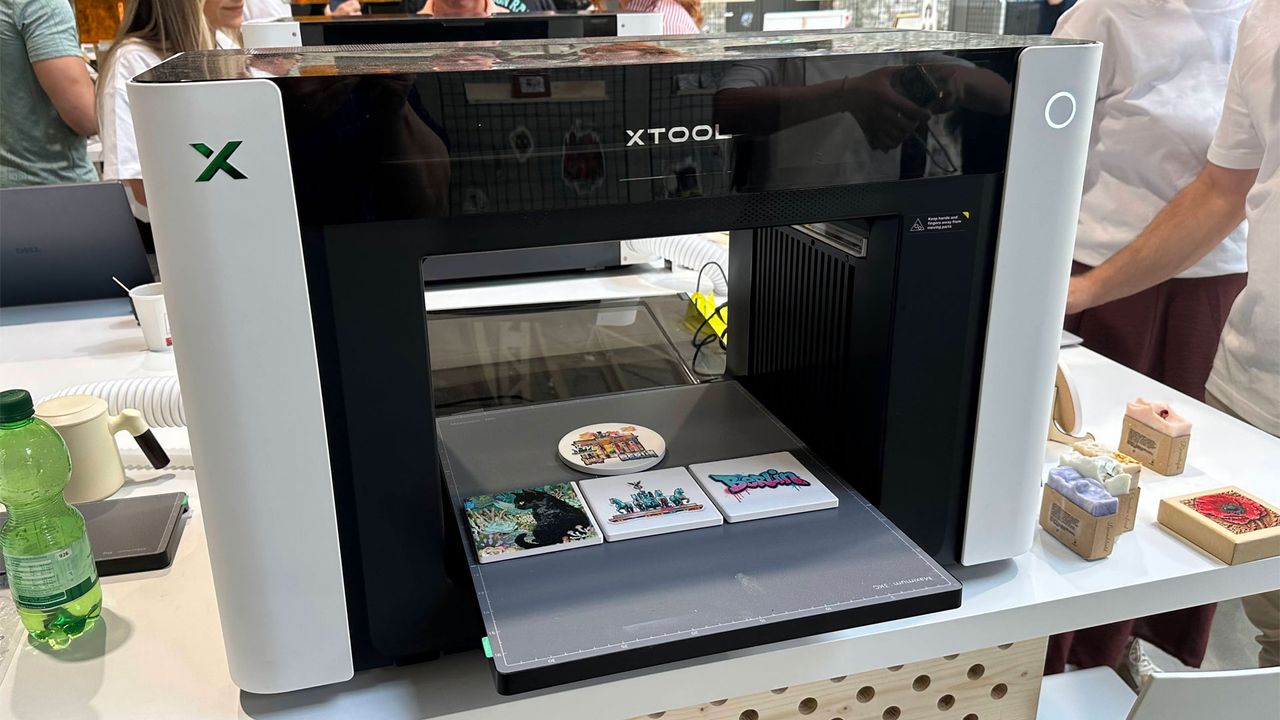
xTool launched its 01 Omni Printer today at a special event in Berlin that we attended. The digital-to-physical hardware firm claims this device is the “world’s first 4-in-1 printer,” and said it was ready for makers who want to “print it all.”
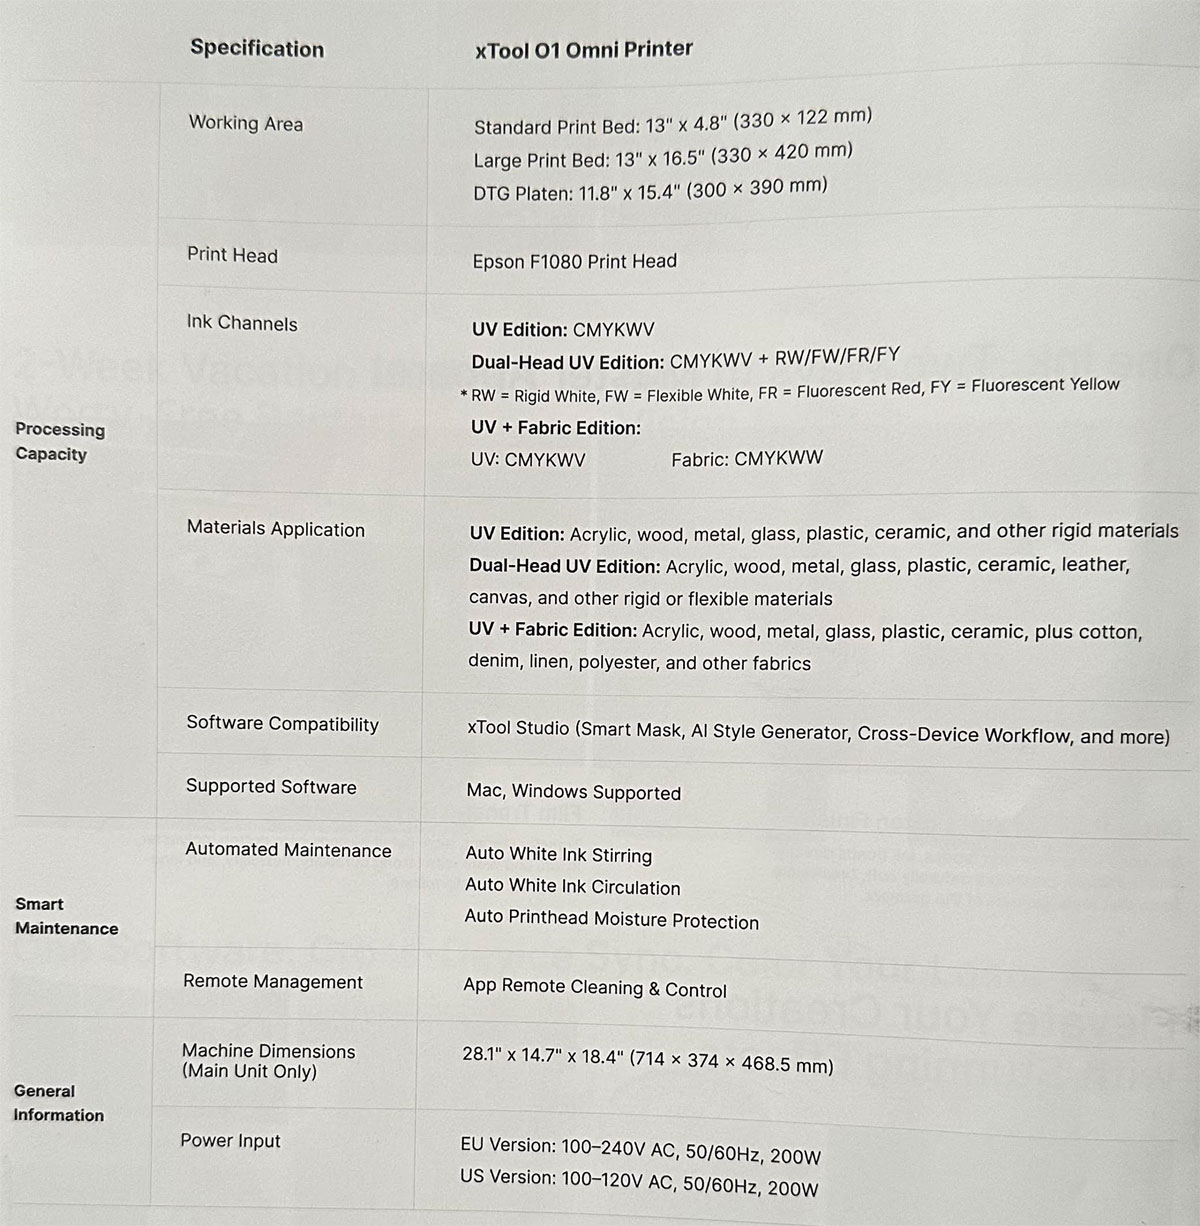
So, what are the four things this device can replace, exactly? It “natively combines UV, DTG (direct-to-garment), DTF (direct-to-film) and UV DTF technologies within a single desktop ecosystem,” says xTool. Pricing starts from $1,699 for the single UV edition, rising to $2,699 for the Dual UV edition, and peaks at $2,799 for the UV and DT Fabric Edition.
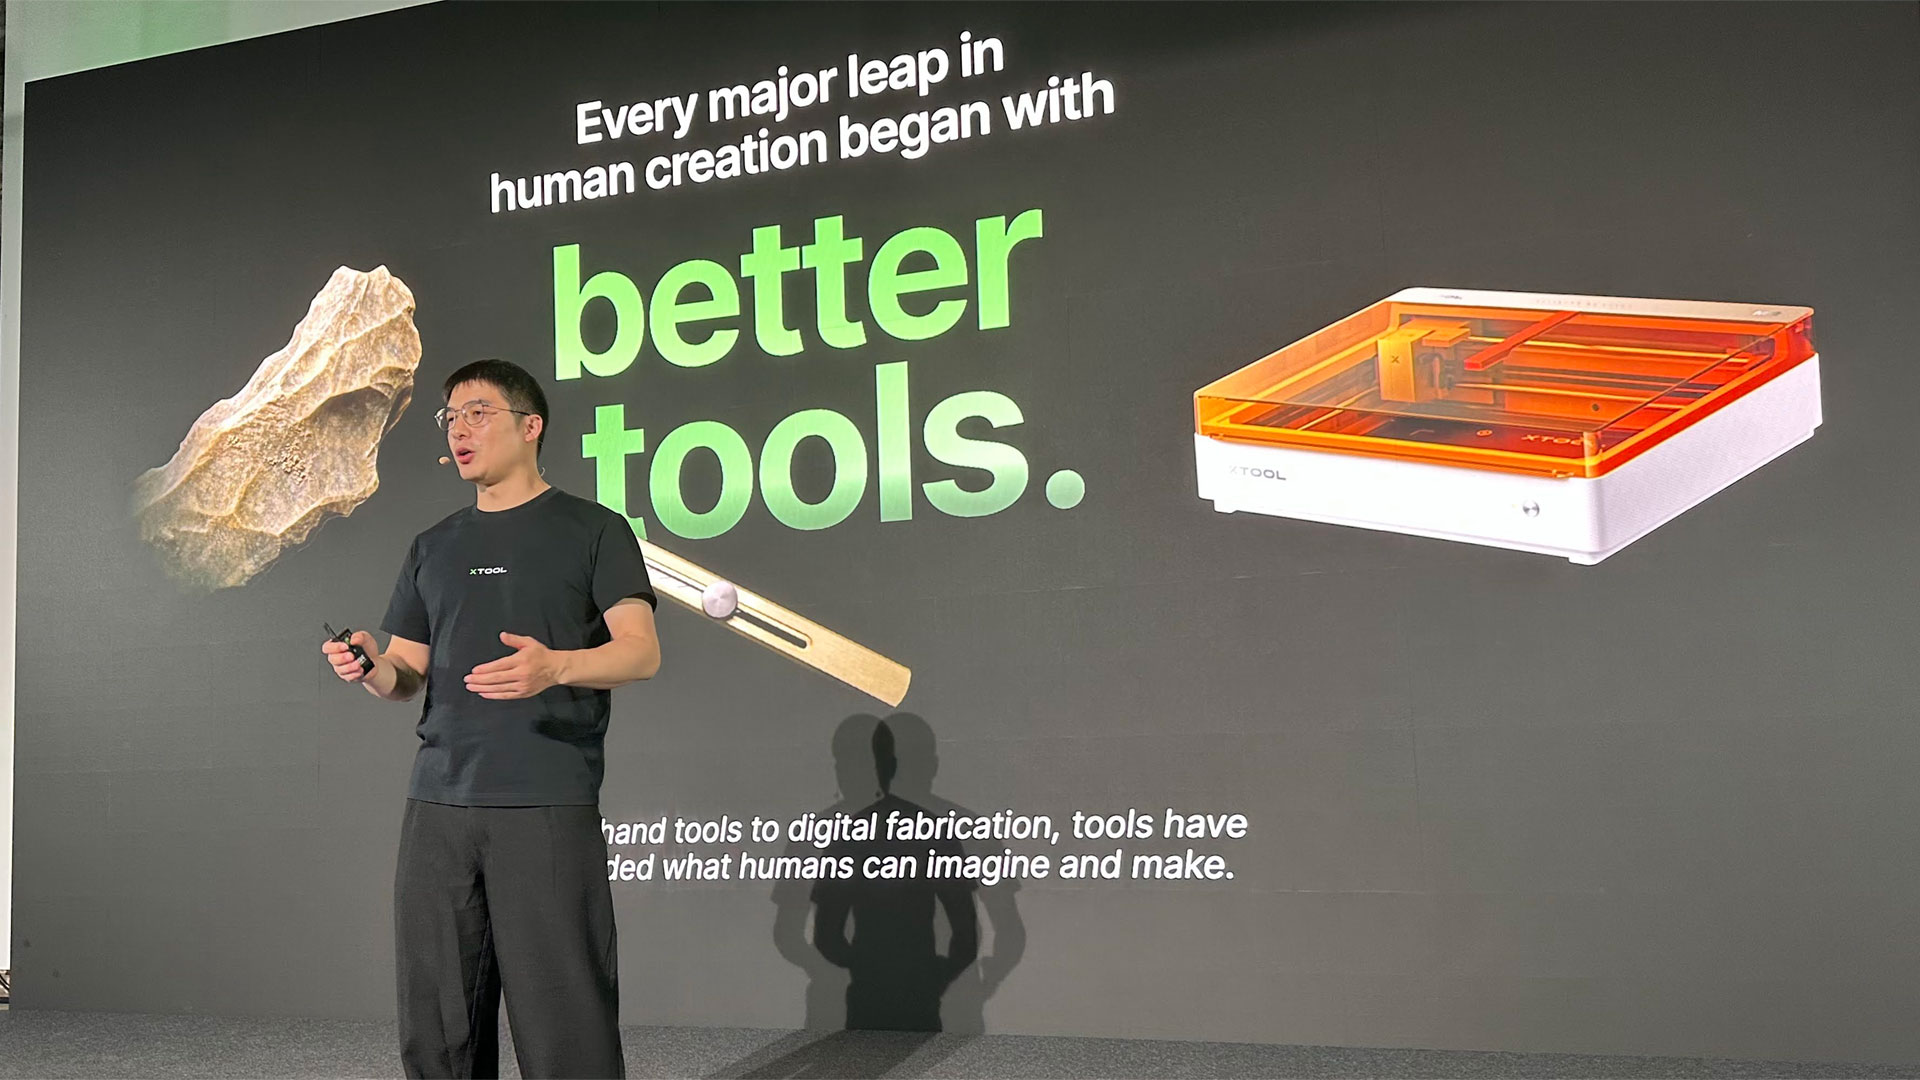
At the launch presentation, xTool CEO Jason Wang introduced his firm as a business established 10 years ago to build better digital tools for makers. Wang reckons xTool has now established itself as the No. 1 laser cutter maker and is leveraging the knowledge and software it has developed to expand into other tools, which will be valuable to makers.
Last year, xTool took its first steps into the printing market with a laser DTF, as well as the versatile but flawed M1 Ultra. This year, it has improved features and capabilities with the new M2 color craft laser (review soon) and today’s announcement, the 01 Omni Printer.
Tom's HardwareTom's HardwareTom's Hardware
Both of the newest xTool products use the firm’s excellent xTool Studio software, which makes tackling a blank canvas very easy with its access to a cornucopia of online ideas and templates from xTool / Atomm and the associated community. Then there are built-in AI generators for logos, designs, illustrations, whole projects, and more.
After the presentation, I saw this software handle a single job between xTool machines. The workflow printed some bright glossy designs on the new 01 Omni Printer, then the powerful P3 laser accepted the work as input to accurately cut them all out. I also saw one computer handling multiple 01 Omni machines.
(Image credit: Tom's Hardware)
Why get a 4-in-1 UV printer?
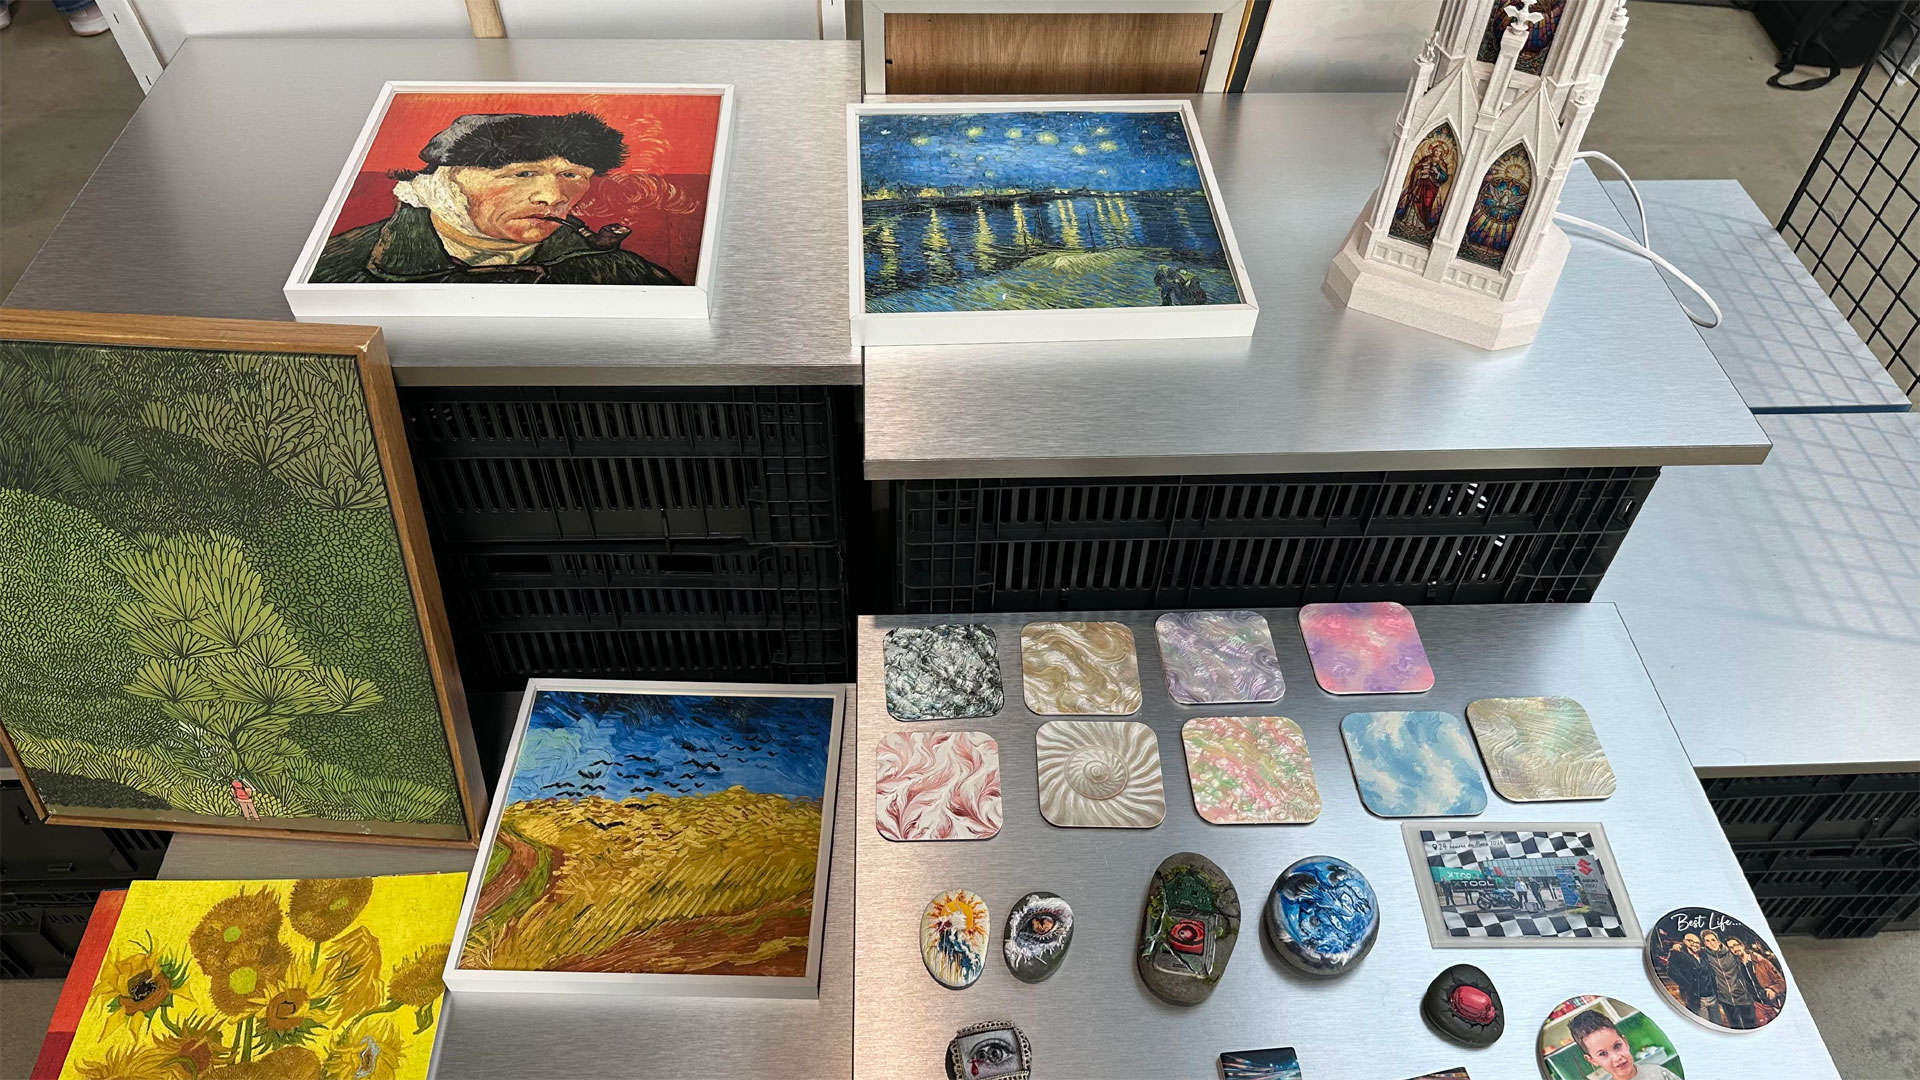
The attraction of the 01 Omni Printer is the humongous range of materials you can print on with good results. Suitable mediums include wood, acrylic, glass, and metal, as well as customizing garments directly or producing complex UV DTF transfers. But, in practice, the system “can print on virtually any imaginable surface.”
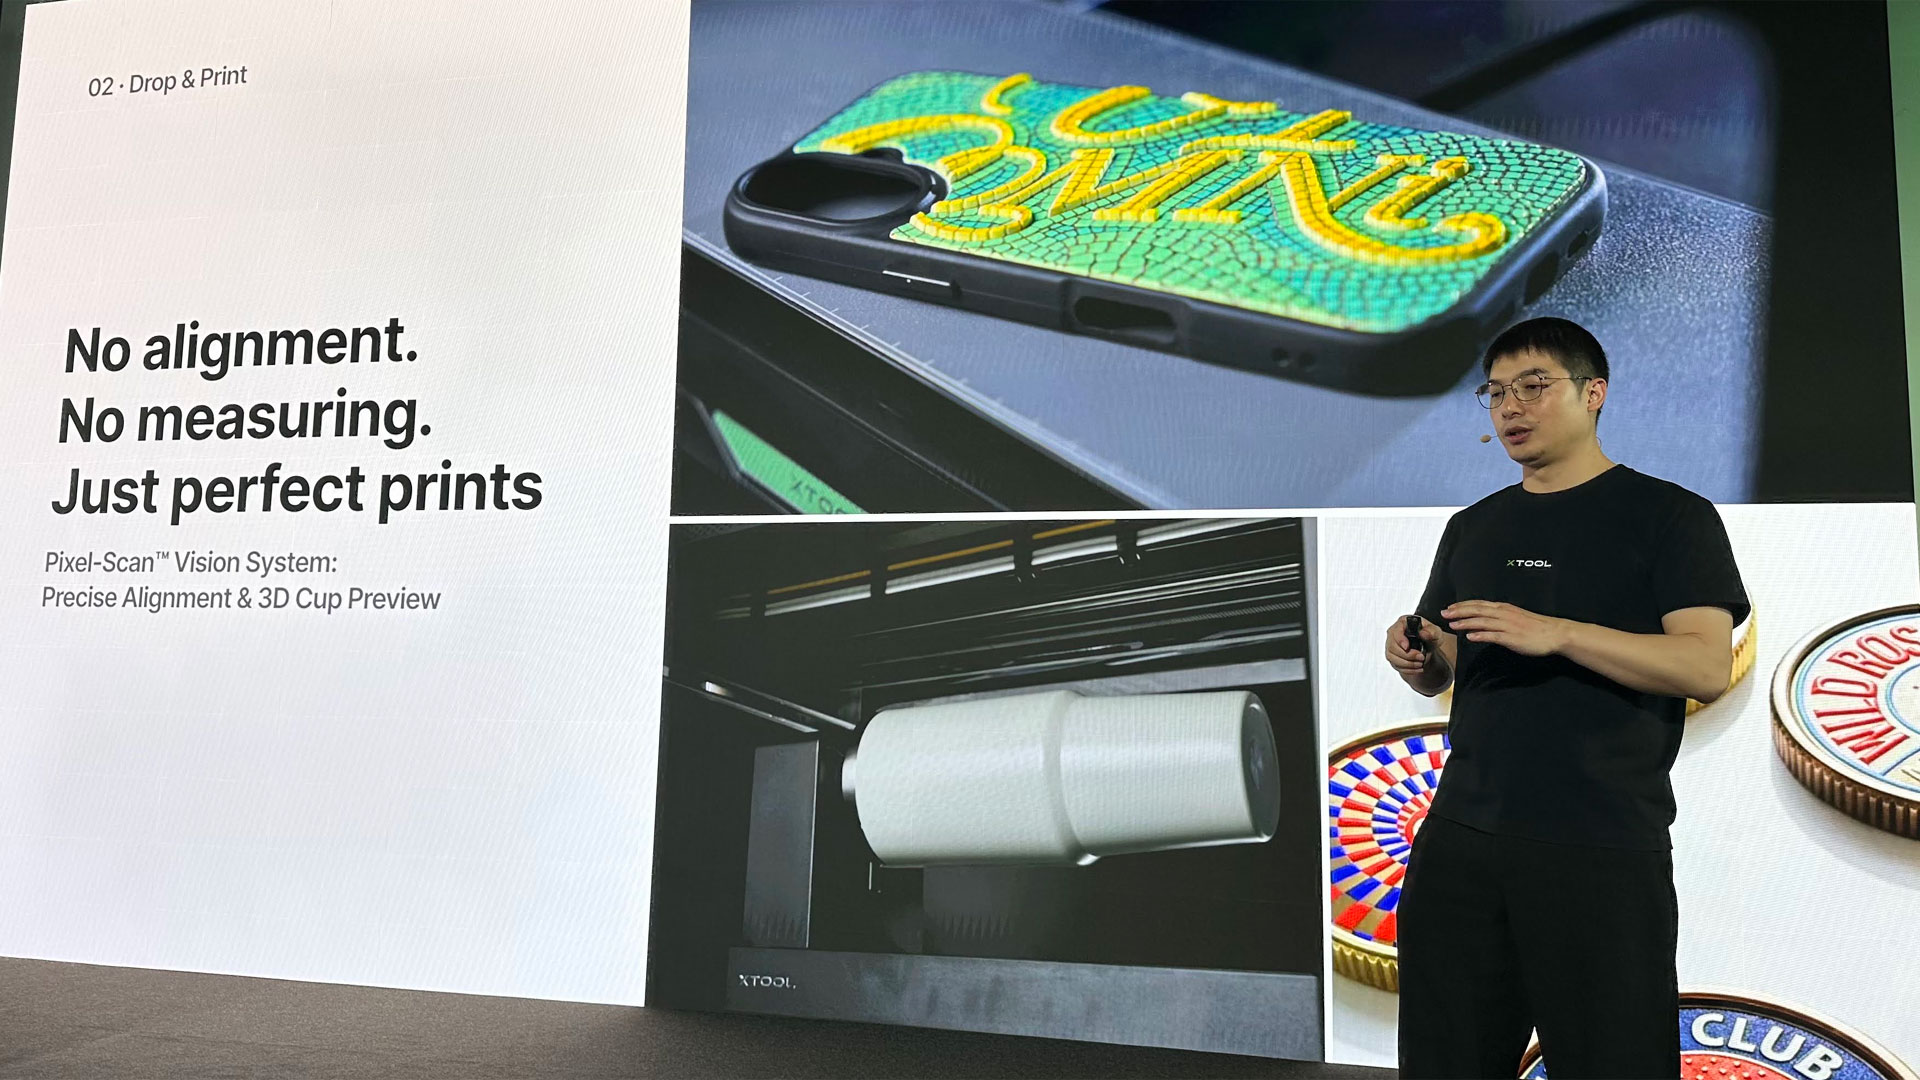
One of the appeals of UV printing is that it can build up quite a strong texture. I think some firms have referred to the process as 2.5D printing, as it can output artwork that has up to 5mm of relief - that's a deep textural quality. This kind of work can use up a lot of the base white ink, but one of the makers told me xTool's ink was about a third the cost of that sold for the EufyMake UV printing device. This could be a serious draw for makers if it stays relatively affordable. Moreover, xTool asserts that its UV inks/curing don't smell so bad. On the day, I didn't notice the presence of any bad ink smells.
Tom's HardwareTom's HardwareTom's Hardware
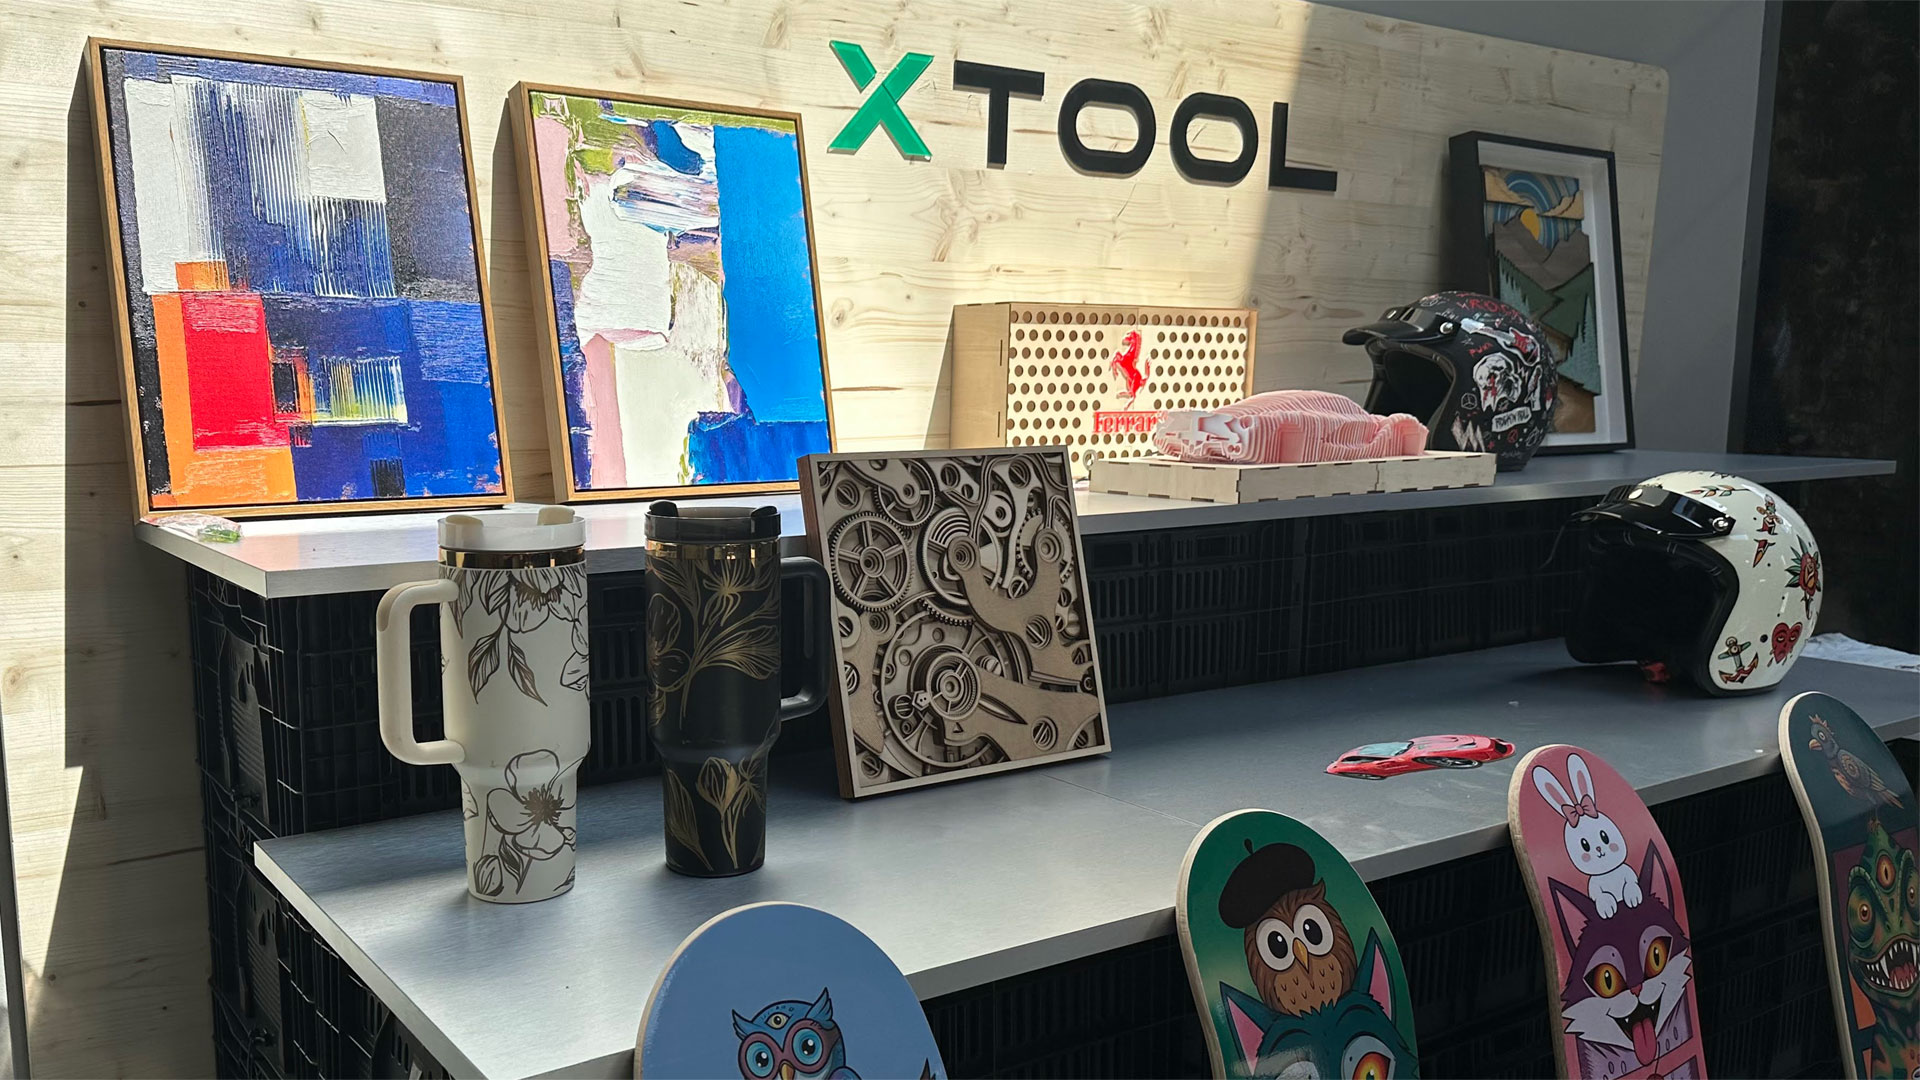
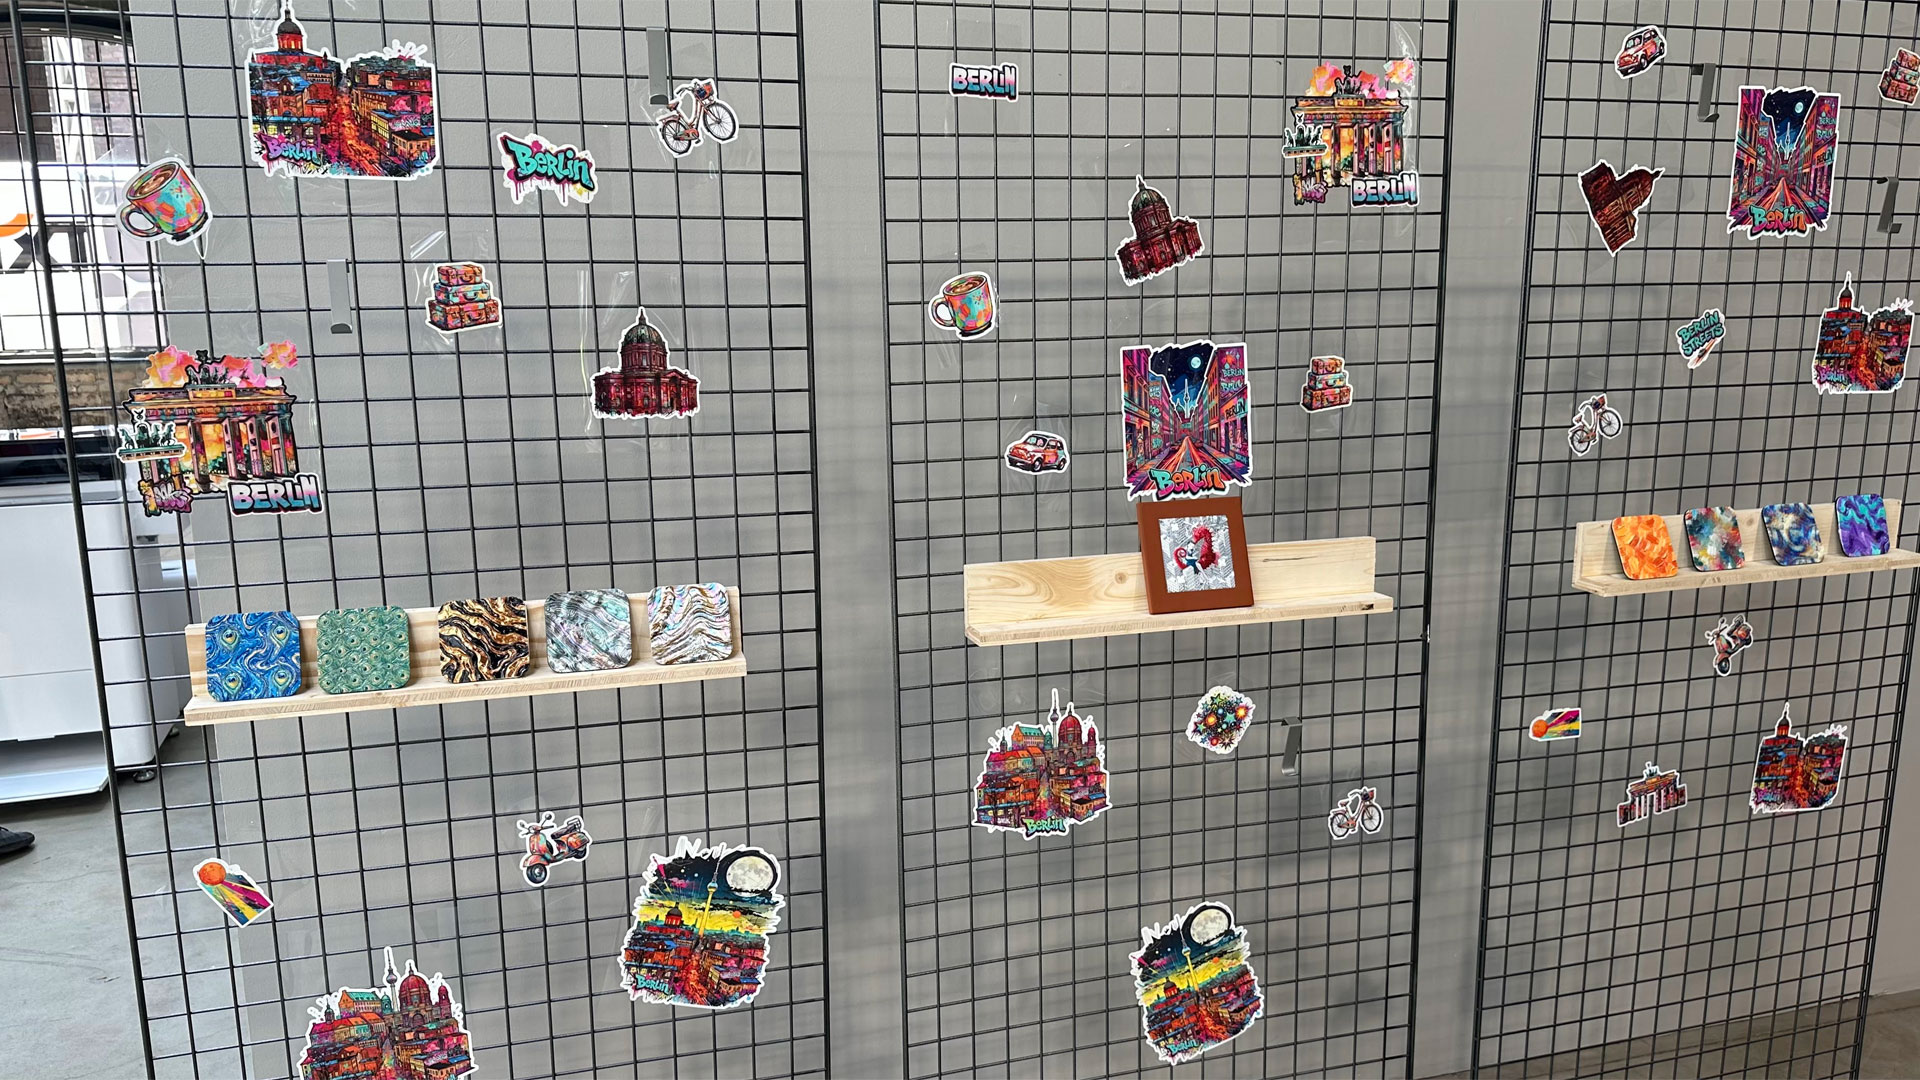
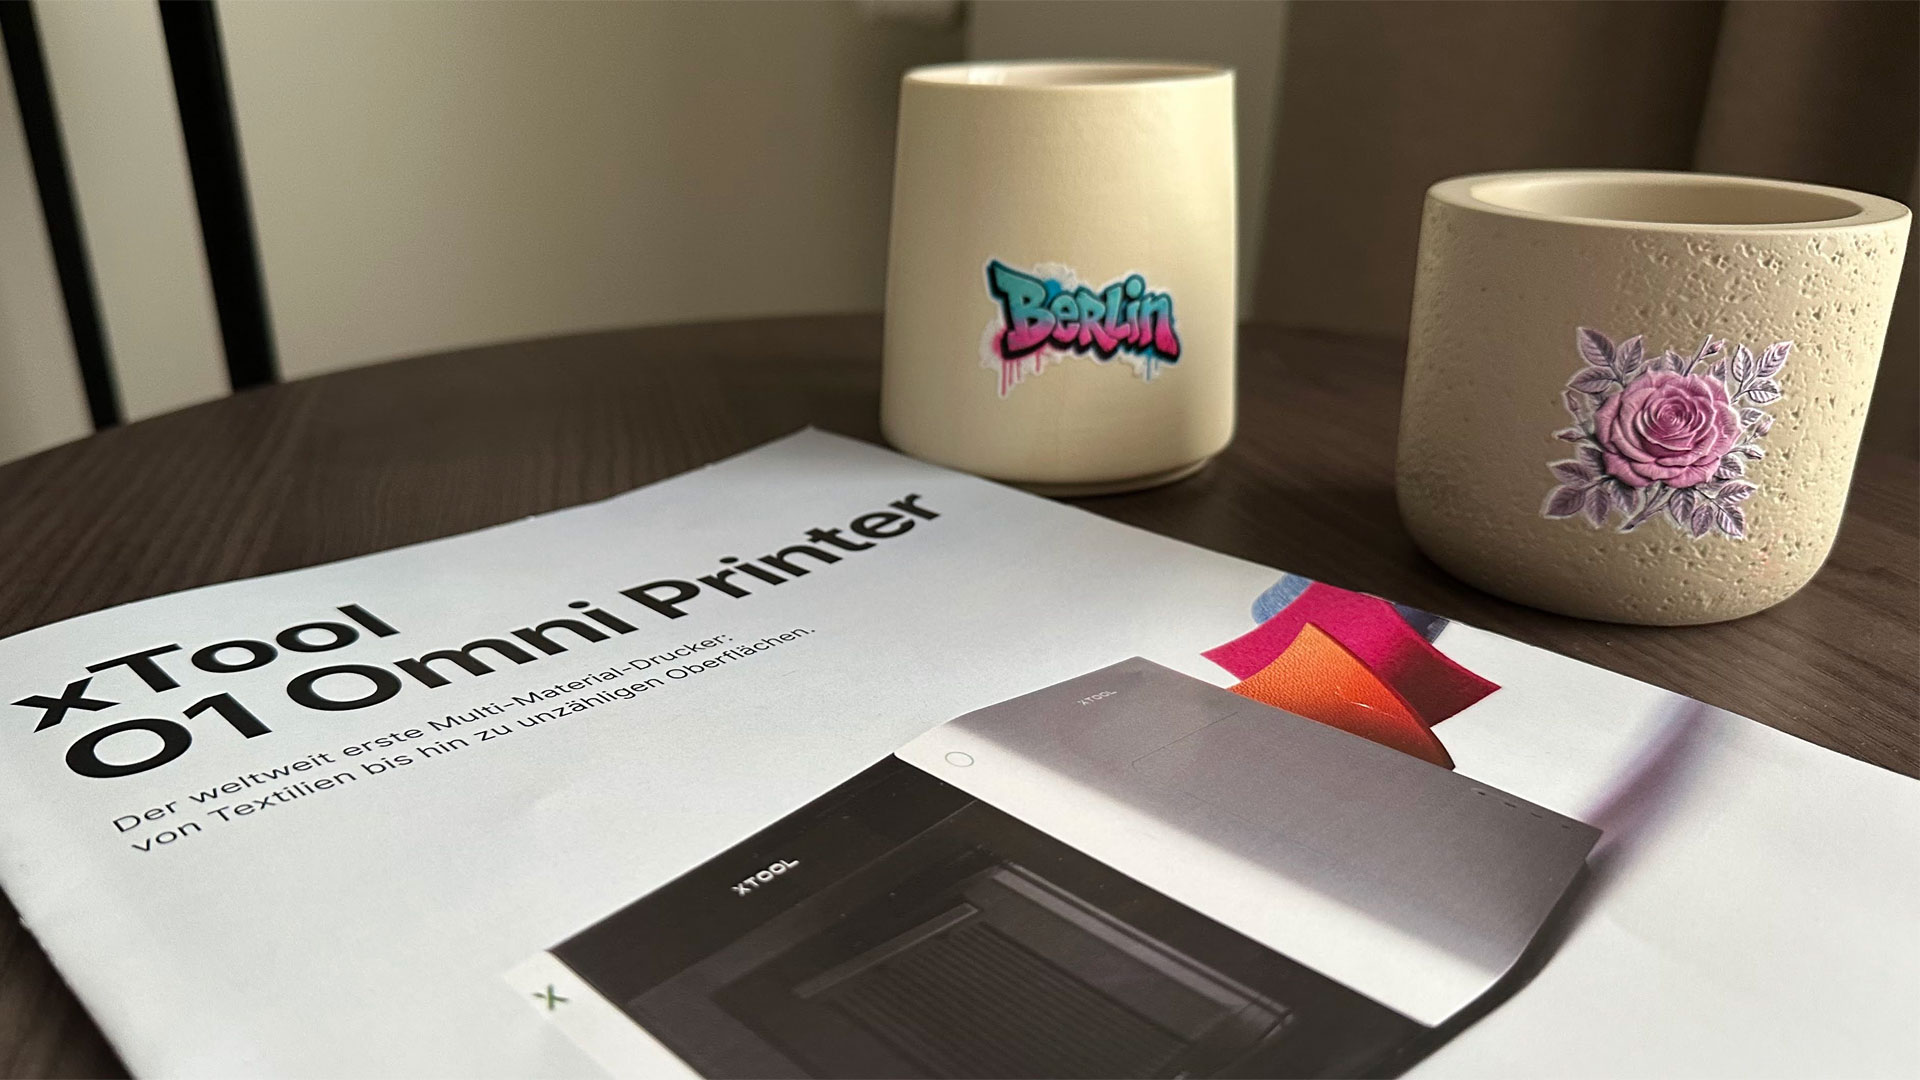
There were expert artists and makers at the event, showcasing a variety of projects pre- and post-show. I received a nicely printed cup and a candle from some of the kind makers in attendance. The cup was branded with some Berlin artwork as a memento, and the candle an xTool Studio (AI) generated floral motif. Both of these were produced using a rotary tool that the 01 Omni Printer can load.
Outputting each of these projects takes around 15 minutes, with the current firmware/software. For both these jobs, a few minutes were taken up by the machine scanning the 3D shape of the item on the rotary tool ahead of the print process. Then several white coats were required to build a good foundation for the final color layers. I'm not sure if these had a varnish applied. So, as well as CMY and K inks, the 01 Omni had tanks for white and varnish. Yes, it’s a CMYKWV process. The cup should be dishwasher safe, but we will see.
Tom's HardwareTom's Hardware
The makers in the demo hall were still pretty inexperienced with the xTool 01 Omni, of course. I’d say there were still teething troubles with the fresh hardware and its software integration. For example, I noticed a few false starts getting some jobs to output, and I heard that there had been a few issues with the print head and work colliding.
Both makers and xTool seem well aware of early wrinkles, so it's likely that the early kinks will get worked out. When asked about output times, some makers said that updates were coming to the 01 Omni Printer, which are expected to give it an extra shot of speed. Such considerations are very important for folks who are buying hardware like this to propel a business. With the considerable investment needed for this hardware, we recommend reading or watching a good third-party review. Review updates can also be important to make sure any early issues in day-zero coverage are tackled.
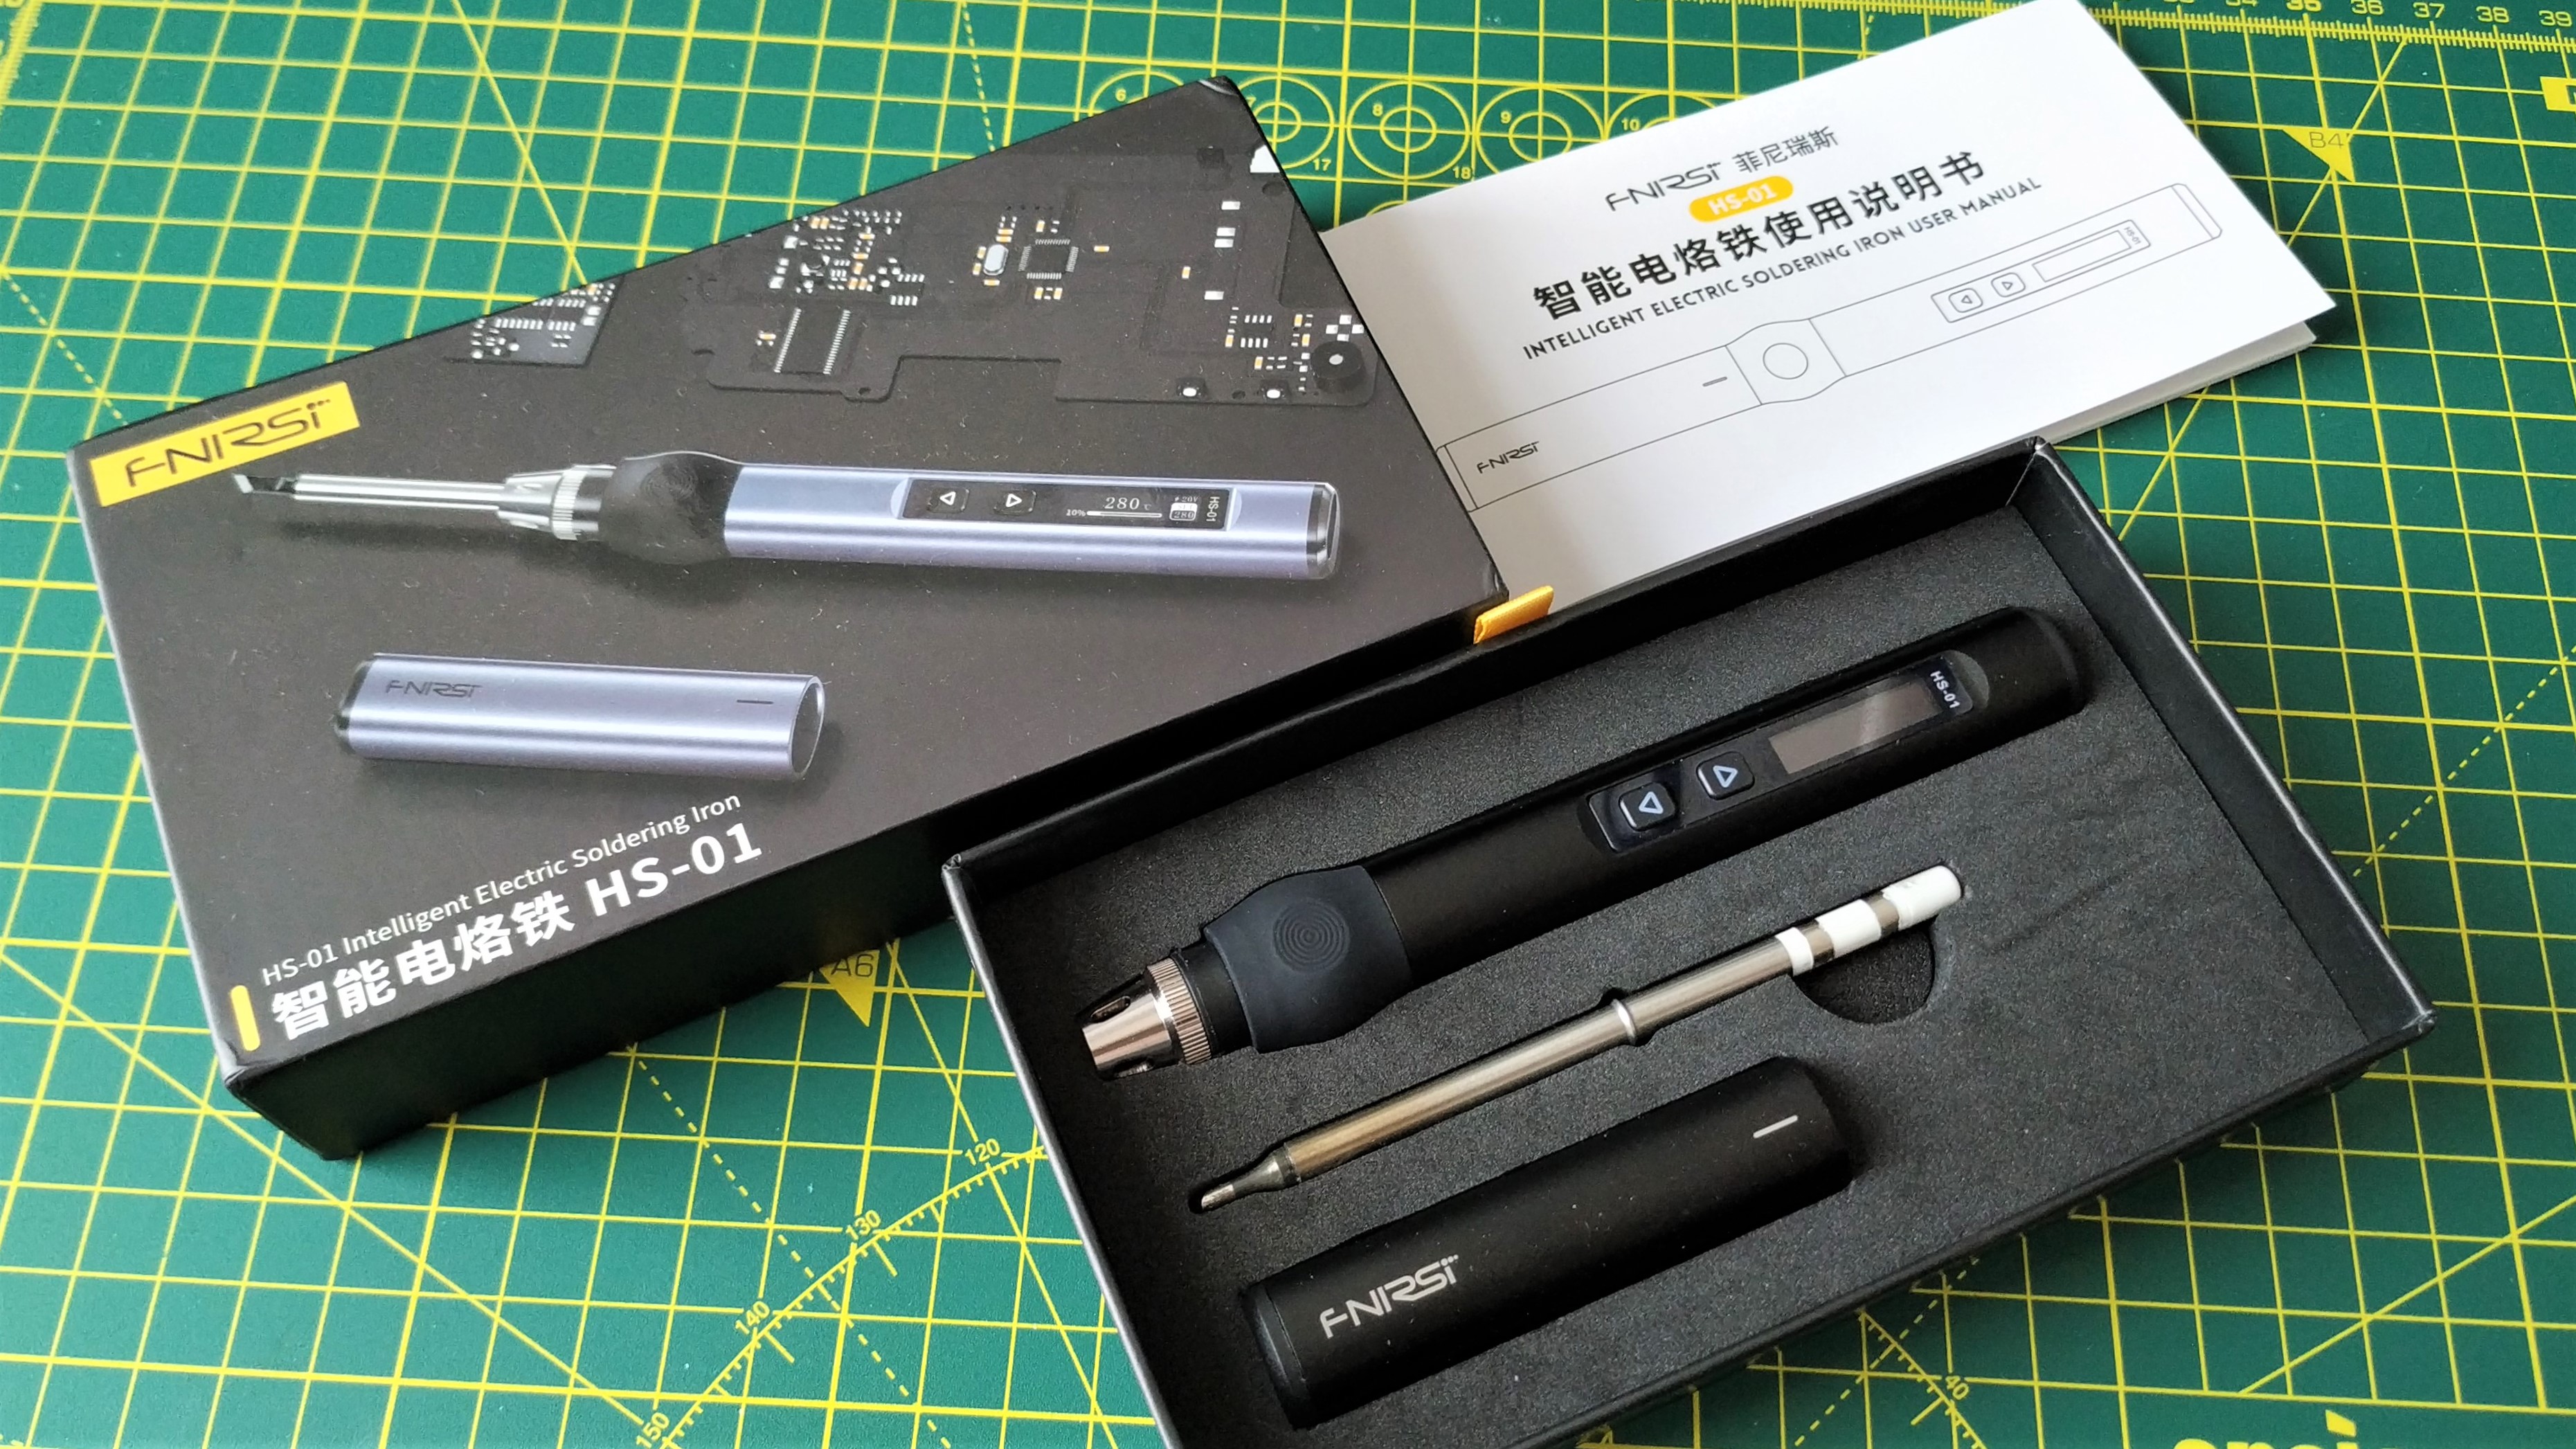
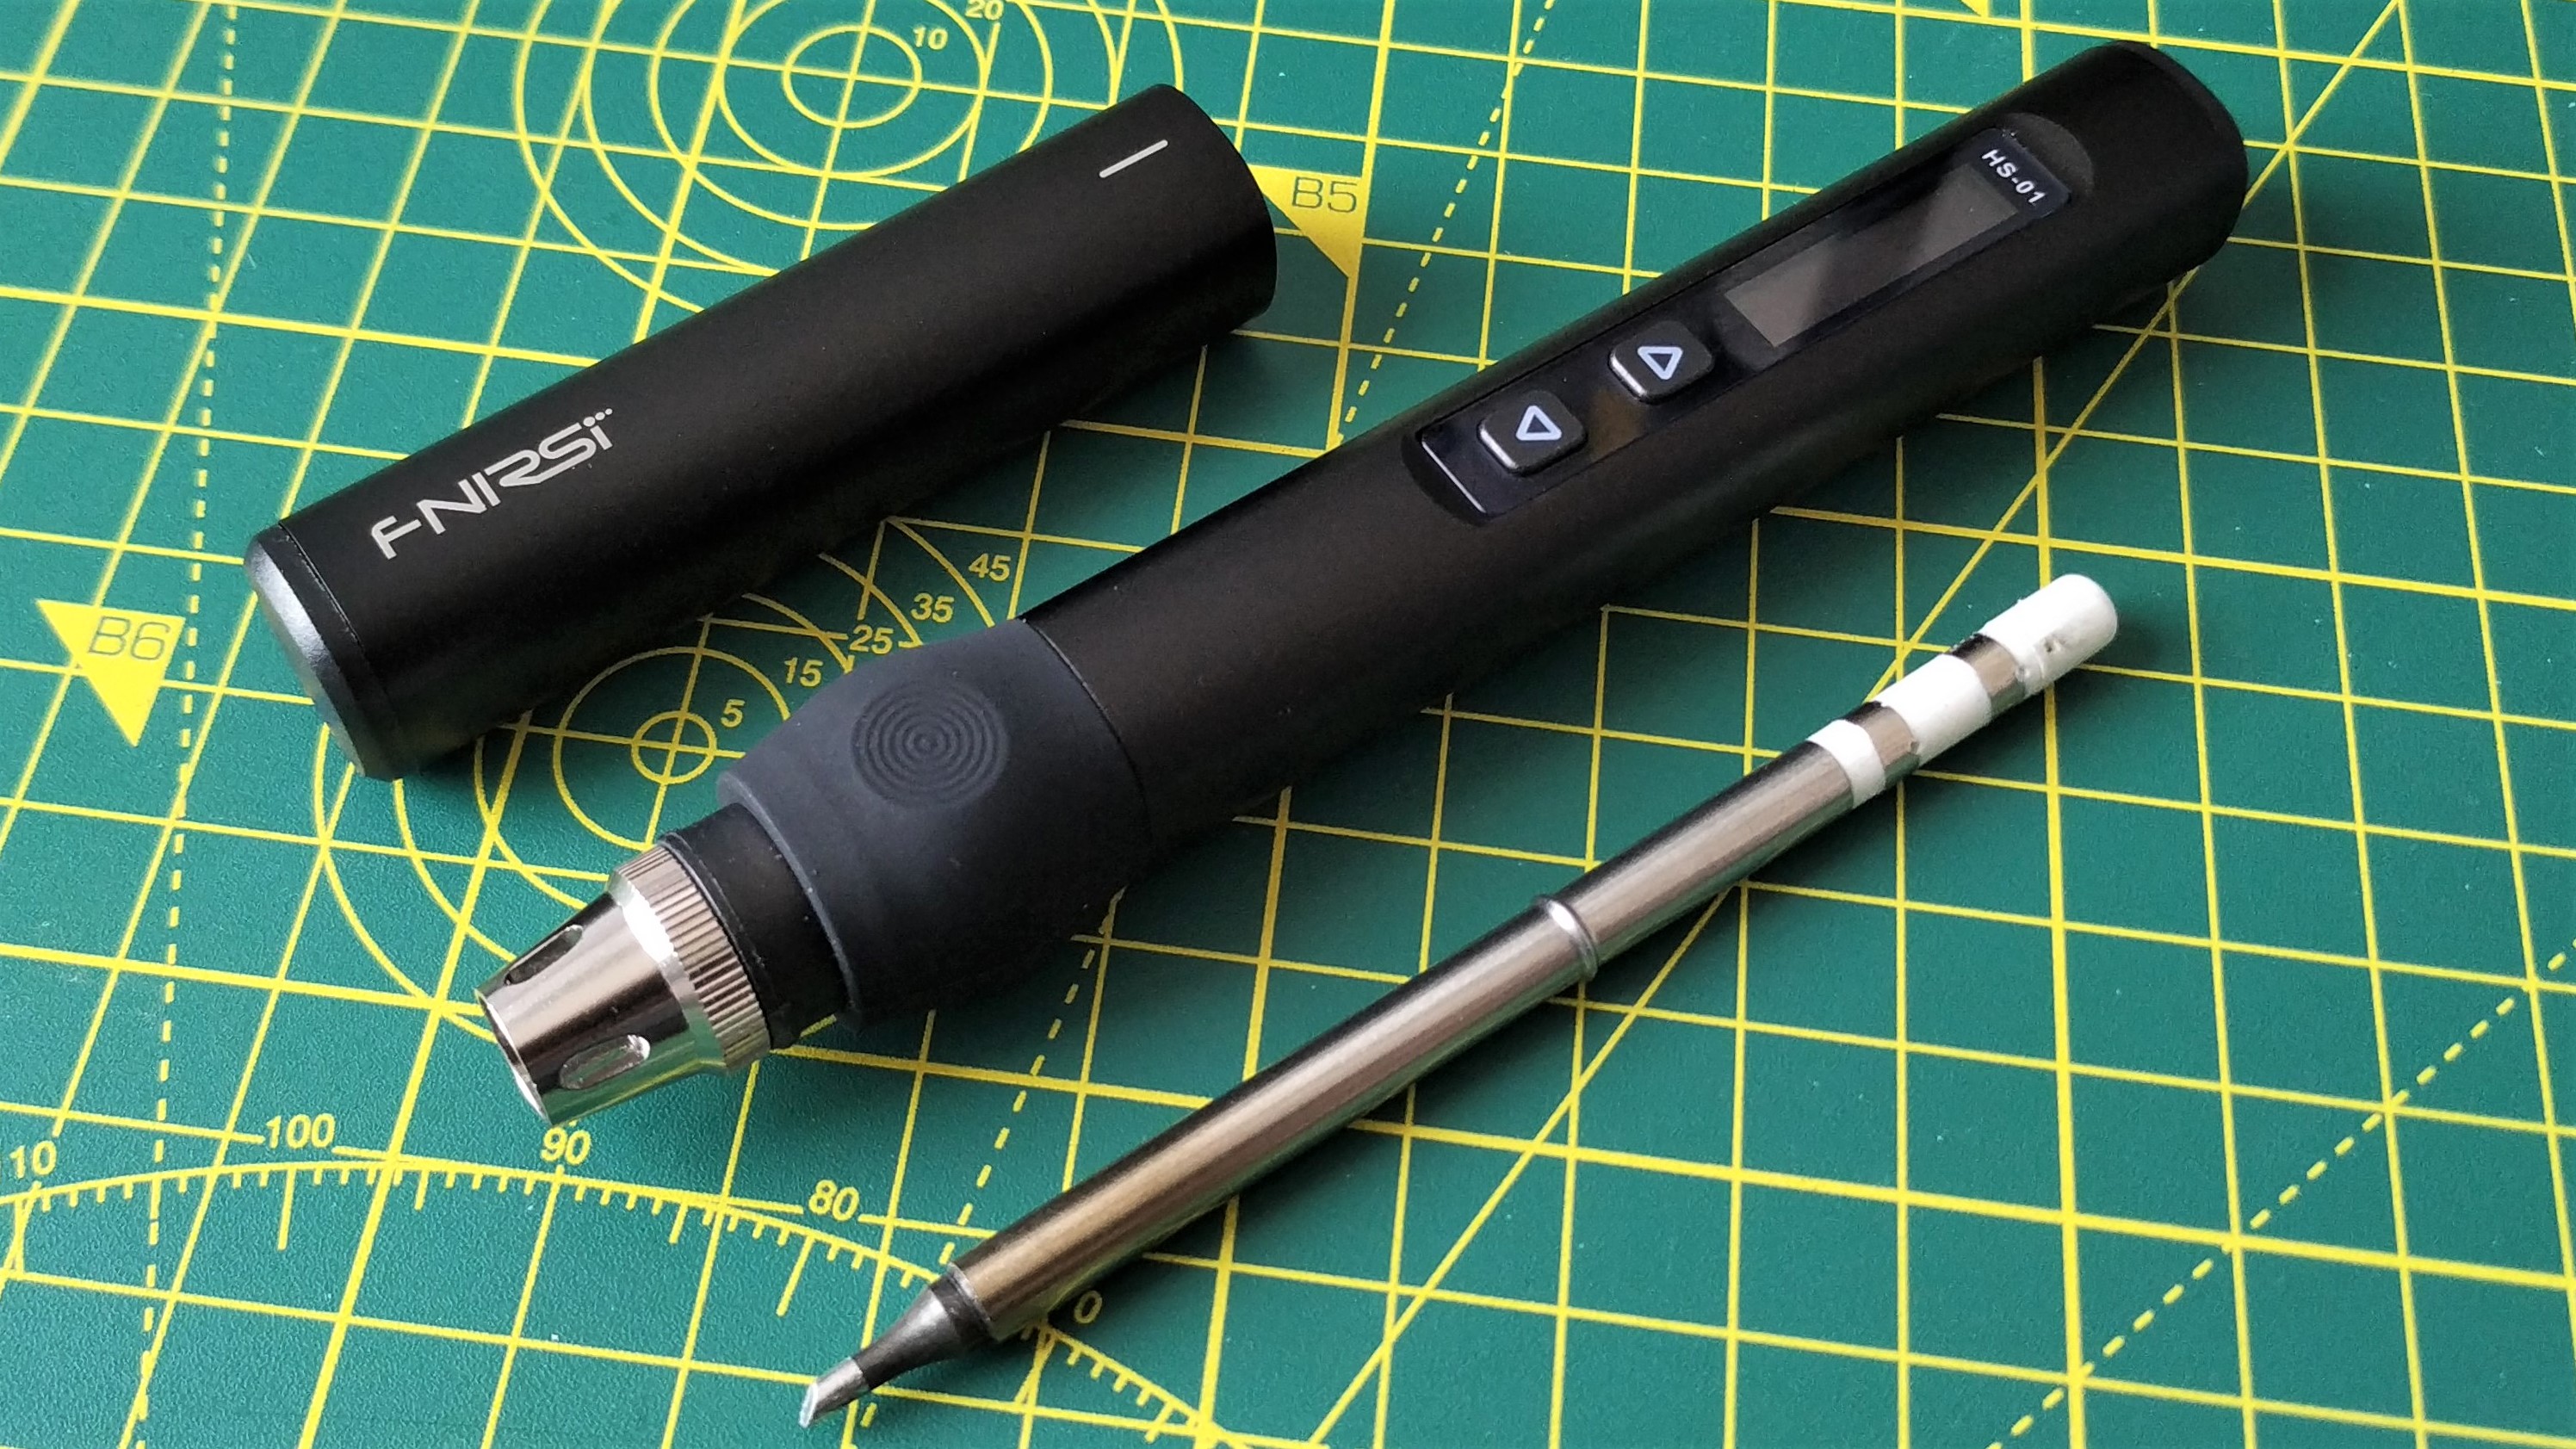
Soldering is a skill that every hobbyist should master. It doesn't matter whether you're taking your first steps or you're a seasoned pro, because you're going to need an essential bit of kit: a soldering iron.
Luckily, we've put together a good selection of soldering iron deals that are on sale during Amazon Prime Day this week. This is the perfect chance to grab the bull by the horns and upgrade with an iron that will last you through plenty of hefty projects. We've also got recommendations for solder, as well as kit to keep your workbench safe from fumes and heat.
Take your soldering with you with the Fnirsi HS-01
(Image credit: Tom's Hardware)
The Fnirsi HS-01 is a great soldering iron for anyone who travels or who needs a soldering iron on the go, as our review makes clear.
It's USB-C with an included power supply, or you can use it with a power bank capable of 65W output. It's good for easy soldering, eliminating the need to search for a DC jack or outlet. The flexibility of both a DC and USB-C jack is nice to have, although with so many USB-C PD power banks on sale now, it's a luxury, not a necessity.
The Fnirsi HS-01 is a great soldering iron and well worth the money for those who solder in workshops or in the field.View Deal
This kit comes with the soldering iron, but there's also a 96W power supply, a high-quality USB-C cable, a stand, and a selection of soldering iron tips for precision soldering, along with larger tips for when you need to lay down the heat.
Controlling the Fnirsi HS-01 is all about the buttons, which let you control the temperature, as well as navigate the built-in OLED screen. Set your temperature, and the HS-01 will get up to the target temperature in seconds. It's also designed to let you switch holding positions if you're right or left-handed.
Hunker down for a long day of soldering with the Yihua 995D+
Every serious soldering hobbyist needs a desktop soldering station with hot air rework to take things to the next level. The Yihua 995D+ hot air rework station delivers just that, and it's a solid soldering station that will get the job done.
A great selection of soldering tips, a large LCD screen, clear controls and a bonus hot air rework wand make the Yihua 995D+ the best option for those who solder for a living.View Deal
The Yihua 995D+ can reach temperatures of 480 °C (896 °F), which gives more than enough heat to solder and reflow even the heaviest solder joint. This soldering station has excellent thermal properties, letting you start soldering speaker wire with ease.
The stand is compatible with right and left-handed users, as it's separated from the main station, so you'll have free access to the soldering iron while reducing the number of cables trailing across your workbench. It has three preset channels to let you switch between jobs quickly, and it feels great to handle, thanks to a non-slip coating and flexible silicone cord to stop any melting accidents. You've also got a good number of tips, from precision tips to heavy tips for large projects.
The hot air gun has a similar cable for protection and is easy to handle. You'll need to select the correct controls before using the central knob to handle temperature and airflow. After that, it's easy to control both.
The Yihua 995D+ is an excellent soldering station for both beginners and pros alike. It gets the job done, looks good, and keeps more cash in your pocket.
Don't need hot air but need a desktop soldering station? The Yihua 939D+ is for you.
If all you need is a reliable and compact desktop soldering station, then the Yihua 939D+ is a good option. This compact soldering station comes with a temperature range of 392°F to 896°F (200°C to 480°C) and ships with a selection of soldering tips to cover many different use cases, from precision to bulky solder joints.
A solid and dependable soldering station that reduces the cost by omitting hot air rework functionality. This is a soldering station that I could personally use all day, everyday!View Deal
It comes with 75W of power, making it suitable for heavier solders like speaker cables. Use the dial to control your settings and the LED display will update accordingly.
Helping hands for successful soldering
Soldering can be a tricky task to complete, and an extra pair of hands is always welcome. Luckily, you don't need a pair of human hands to get the job done, as this helping hands tool can substitute perfectly.
Soldering veterans will know the less-than-glossy metal armature and magnifying glass combos that are available, but this set of helping hands is a little bit different. It comes as a magnetic base, clips, and posts that help to grip your circuit boards as you solder.
With five alligator clips and six posts designed to hold your PCB firmly to the magnetic base, your hands are free to concentrate on soldering up your next project.View Deal
Measuring 11.41 x 7.08 inches (29 x 18 cm), this magnetic helping hands kit is sturdy for holding your PCBs while giving you a choice as to how it holds them. The five flexible alligator clips are used to clamp and hold circuit boards a little nearer to the user. The flexibility of the armatures means that both sides of the PCB can be seen, remaining accessible for soldering either way.
If you need more rigidity, the six posts are used to clamp to the edge of the board you're soldering, which is useful if you're soldering just one side. This is ideal for a maker with plenty of tasks on his sheet.
Keep soldering on, with lead-free and leaded solder.
You'll want lead-free solder if you're planning on soldering. It's the gold standard, it's safer, and it avoids the environmental issues that come with traditional leaded solder.
Lead-free solder is the gold standard these days. Any modern electronics will have components soldered using lead-free solder. It's safer than traditional leaded, and avoids the environmental issues, such as lead leakage during bad disposal. It's the safest option if you're planning on making anything you go on to sell, too.
Lead-free solder is better for the environment, and it means you can build and sell products that are made using it.
A mix of 97% tin, 0.3% silver and 0.7% copper, this 0.5mm diameter solder has a flux rosin core so it flows neatly around your solder joints.View Deal
That said, there's still a case for leaded solder, especially if you're using it for yourself (and you take precautions).
The solder below is worth considering if you need it. It's a mix of 63% tin to 37% lead, which is a decent mix, and should produce good solder joints.
Lead solder is still great for personal use, and this 0.8mm rosin core 63/38 tin / lead mix will melt great and produce shiny and reliable solder joints.View Deal
Keep your workbench safe from hot soldering irons
Every maker is going to have a workbench that has seen one or two accidents. If you want to avoid any permanent damage, you'll want to pick up one of these sillicone soldering mats.
This silicone repair mat will keep your workbench free from scratches and soldering iron burns. The included magnetic pads and screw organizer will make sure every screw goes back in at the end.View Deal
Silicone soldering mats are an essential buy for a hobbyist. They'll keep the heat from your soldering iron away from the workbench, and often have extra positions to keep screws in one place and to stop magnetics from falling off your bench.
Good for taking apart a laptop, for instance. It'll keep your screws safe, the bench burn-free, and it'll help you from scratching the chassis, too. When you're done, you can just roll it up and put it away.
Stay safe soldering with a fume extractor
Lead-free or not, you're going to see fumes when you're soldering. It isn't a great idea to breathe these in, so a fume extractor can help you to improve the air quality around you as you work.
Keep your lungs healthy by removing the flux fumes and solder smoke from the air. This tiltable solder fume extractor works from up to five inches away and pulls the offensive fumes through an activated carbon filter to keep the air fresh. You get extra filters in the boxView Deal
Extractors work, as you'd expect, by using a fan to suck smoke and fumes from the air, directly into an activated carbon filter, with clean air passing through the back of it. This extractor uses a high-speed fan to do it, keeping high suction from up to five inches away: plenty of space for you to solder in comfort.
This extractor comes with four rubber feet, so it won't move around, and the locking tilt mechanism helps you point it to the right places as you work. It also has fenders on both sides of the fan to stop any breezes from moving fumes away from the unit, as it keeps you safe.
The Creality Falcon T1 is a galvanometer laser engraver that can swap between different laser modules for specific applications. With diode and fiber lasers for general engraving, a UV laser for creating 3D shapes in crystal, and a MOPA laser for adding color, the Falcon T1 is well-equipped on paper for most engraving tasks. The 175 x 175 mm engraving area and optional conveyor belt allow users to engrave small objects one at a time or in a large batch, and the optional rotary attachment can be used for tumblers, rings, and other cylindrical objects.
The Falcon T1 is at the higher end of Creality’s Falcon line of laser engravers, with the base model equipped with the 20W diode laser listed at $2,249 and the additional modules ranging between $989 and $3,059 each. As of the writing of this review, buying the Falcon T1 with the 20W diode laser module and adding all the additional modules would add up to $9,895 without any accessories such as the air filter, conveyor belt, or rotary attachment.
Creality shipped the Falcon T1 with three laser modules for testing: the 40W diode, the 20W fiber, and the 5W UV. The MOPA laser was not available, and I wasn’t able to use it during testing. Creality indicated the UV module will have a retail launch in late July or early August, with the MOPA laser launching approximately one month after the UV module. This staggered rollout makes the Falcon T1 a risky day-one purchase if either the UV or MOPA module is critical to your workflow. The Falcon T1 has clear potential, but the overall experience I had during testing was that of a beta tester.
I ran into software issues, waited for parts to be delivered, and even had to schedule a 10 PM video call with Creality’s China-based support team due to the lack of US-based technical support. This level of support may be acceptable on a lower-cost hobby machine, but it’s harder to overlook considering a fully loaded Falcon T1 can cost over five figures.
Specifications of Creality Falcon T1
Machine Footprint
18.27 x 12.28 x 19.80 inches (464mm x 312mm x 503mm)
Engraving Size
6.89 x 6.89 inches (175mm x 175mm)
Laser Type
Diode
Diode
Fiber
UV
MOPA
Laser Power
20W
40W
20W
5W
60W
Laser Spot Size
0.12 mm x 0.14 mm
0.14 mm x 0.18 mm
0.05 mm
0.014 mm
0.05 mm
Laser Wavelength
445 nm +/- 15 nm
445 nm +/- 15 nm
1064 nm +/- 5 nm
355 nm +/- 2 nm
1064 nm +/- 5 nm
Positioning Accuracy
+/- 0.01 mm
Max Working Speed
10000 mm/s
Enclosure
Integrated
Cutting Platform
Removable
Air Filter
Optional
Connectivity
USB-C, Wi-Fi
Release Date
May 29, 2026
MSRP
$2,499
$2,999
$2,699
not yet available
$4,999
Creality Falcon T1: Included in the box
(Image credit: Tom's Hardware)
The Creality Falcon T1 includes more accessories than can fit in a single picture, including calibration boards, USB adapters, a brush, locking fixtures for the laser table, and much more. In addition to the included accessories, Creality also sent over the optional conveyor belt and rotary attachment kits, both application-specific extras that enhance the functionality of the machine.
(Image credit: Tom's Hardware)
The packaging is what you would expect from a laser that retails at $2,249, with foam blocks and hook-and-loop straps securing the laser during shipping. Aside from sliding in the laser module (more on that later), there is virtually no assembly required other than plugging in the display and power supply. The Falcon T1 is ready to go right out of the box and doesn’t require advanced calibration or a lengthy setup.
Design of the Creality Falcon T1
(Image credit: Tom's Hardware)
The Creality Falcon T1 is a more refined product that stands out in the otherwise generally hobbyist-focused line of Creality Falcon laser engravers. The translucent black cover looks like something you’d find on a piece of lab equipment, and the handle on the front makes it easy to lift without touching the glossy surface. The tall aspect ratio of the Falcon T1 is also a departure from the otherwise flat laser engravers you’d typically see from Creality, and the square 175 x 175 mm engraving area is also an indication that this isn’t a typical diode laser cutter.
Tom's HardwareTom's Hardware
Creality heavily promotes the Falcon T1’s “5-in-1” functionality, which refers to the swappable modules that can be inserted and removed to change the type of laser. These include a 20W blue diode laser, a 40W blue diode laser, a 20W fiber laser, a 5W UV laser, and a 60W MOPA (Master Oscillator Power Amplifier) laser. These all have specific applications and are designed to be easily swapped by the end user.
Tom's HardwareTom's Hardware
There is an emergency stop (E-stop) button on the side of the Falcon T1 as well as an arcade-style button which is used to fully extend the laser tower to replace modules. I tested the E-stop and found that it immediately cut power to the unit and required a manual reset to turn back on. Above the E-stop is the LCD screen, which offers basic controls, history, and network information. Additional ports for power, rotary and conveyor accessories, and the exhaust vent are all on the back of the unit.
Tom's HardwareTom's Hardware
The design of the screen feels like an afterthought: the cable comes out from the left side of the unit which makes it awkward to hold with one hand and it’s sideways when mounted to the magnetic standoff on the engraver. Having the interface be vertical or putting the cord on the top of the unit would solve this, but with the current setup I found myself accidentally pressing buttons when I went to grab the LCD. After connecting to Wi-Fi, I used my laptop to start and monitor builds so the LCD didn’t see much use.
(Image credit: Tom's Hardware)
The Falcon T1 has an engraving area of 175 x 175 mm, which is in line with other galvo lasers like the WeCreat Lumos and the xTool F2 Ultra but smaller than most gantry-driven lasers. The engraving area has threaded inserts that allow workholding fixtures to be screwed in, something that’s critical when making very fine engravings where the object must be held still. The exhaust fan sits in the rear of the unit and did a good job during testing of pulling smoke and odor through the fan and into the air purifier unit.
(Image credit: Tom's Hardware)
The Falcon T1 is capable of focusing the laser automatically with no manual calibration required, a useful addition that when combined with the integrated camera means setting up a build can be as simple as only a few clicks. The automatic calibration only takes a few seconds, and the workspace in the Falcon Design Space software will display material inside the machine to assist with laying out builds.
(Image credit: Tom's Hardware)
Unlike a gantry-driven laser like the WeCreat Vision Pro, the galvanometer system of the Falcon T1 means the laser beam always originates from the top center of the chamber, and as a result it creates angled cuts due to the conical shape of the laser work area. This means that cuts become progressively more angled as you move further away from the center of the chamber, something to consider if making an assembly or a design that has any interlocking parts.
Safety Features of the Creality Falcon T1
(Image credit: Tom's Hardware)
Like all lasers, the Creality Falcon T1 can be dangerous if misused or left unattended. Flammable material can ignite during cutting, and engraving produces dust and smoke that can quickly fill a room. When operated with the lid closed the Falcon T1 is a Class 1 laser, which means the user is shielded from the laser during operation. There is a large E-stop on the side of the Falcon T1 which will immediately deactivate the unit when pressed, an important addition for any high-powered laser.
Opening the lid during operation will throw an error, and the interlock will immediately stop the laser and display a warning in the Falcon Design Space. Using the conveyor belt or rotary engraver requires disabling the lid interlock, something that users should take very seriously. The risks of using an unshielded laser are much higher than when the lid is closed, so goggles and ventilation should be used when the lid is opened.
Smoke Purifier for the Creality Falcon T1
Tom's HardwareTom's Hardware
The Creality Falcon AP1 Mini is a small desktop air purifier that is a good match for the Creality Falcon T1, and the 174 m³/h airflow is more than enough to pull smoke and dust from the unit during operation. Other air purifiers like the WeCreat Fume Extractor offer much higher airflow volume for laser cutters like the WeCreat Vista and WeCreat Vision, which are designed to cut through thick sheets of material and generate lots of smoke.
(Image credit: Tom's Hardware)
The Falcon AP1 Mini is a good match for the Falcon T1, and I didn’t notice any smoke leaking from the enclosure during engraving jobs. If you’re planning on using the Falcon T1 primarily for engraving on metal, wood, and doing some 3D engraving, the AP1 Mini will be a great fit. If you are more interested in using the Falcon T1 for cutting through plywood, acrylic, or other material, you may want to consider a unit that provides more airflow.
Software for Creality Falcon T1
(Image credit: Tom's Hardware)
Creality offers the first-party Falcon Design Space software for the Falcon T1 as well as advertising compatibility with LightBurn, another popular laser engraver software. Falcon Design Space offers control over the laser speed and power while also giving users editing tools for vector graphics. I’ve had good experiences with Falcon Design Space in the past and the current version of the software (v1.9.3) keeps all the good stuff while also adding in a new set of generative AI-enabled tools.
(Image credit: Tom's Hardware)
Between the modular laser attachments and the additional accessories, the Falcon T1 offers a total of eight different modes for processing a build. Without any accessories attached, the standard three modes are flat surface engraving (a typical laser engraver experience), 3D relief (designed for deeper cuts on material), and color engraving for the MOPA laser. Each mode offers a slightly different experience in the software, and the included video tutorials are well-made and easy to follow.
(Image credit: Tom's Hardware)
The software includes a mix of functional tools and creative ones, with the ability to generate 3D depth maps, pictures from generative AI prompts and filters, and general editing tools. Like with many generative AI tools, the output from these tools can vary wildly from surprisingly good to shockingly bad, and the overall experience will heavily depend on the user, inputs, and level of post-processing. I was impressed with the “3D Cutting” tool, which is similar to the Autodesk Slicer software that converts a 3D model into a series of parts for assembly, like a Benchy made of plywood.
(Image credit: Tom's Hardware)
Falcon Design Space also allows users to search through a repository of models and import them directly into the canvas, making it easy to find templates or starter projects for beginners. This is a fun way for new users to see what’s possible with a laser engraver, and the ability to modify or customize them lowers the barrier to entry.
Tom's HardwareTom's Hardware
One of my favorite functional tools in Falcon Design Space is the Material Test Array, which allows users to quickly create a matrix that shows the impact of adjusting the speed and power of a laser and how they influence the quality and properties of the engraved material. Using the 40W diode laser and the recommended settings, I engraved a sheet of basswood plywood and was able to easily see the impact of adjusting the parameters as well as selecting a configuration that worked for me.
Engraving / Cutting with the Creality Falcon T1
(Image credit: Tom's Hardware)
The 40W diode laser module was the most approachable for me to use as an initial test, so I loaded it in and set up a simple engraving / cutting job. Using the Benchy T-Shirt design by InfernoMoon, I used the 40W diode laser to engrave the design on some 3mm basswood plywood and also cut it out of the sheet. Adding layers in Falcon Design Space is simple and intuitive, so it was easy to set up the job so the engraving would be done before cutting the part out of the material.
Tom's HardwareTom's Hardware
At 800 mm/s, the coaster build was completed in just 1 minute and 44 seconds. Seeing the rapid movement of the galvo laser on the engraving is impressive, and compared to gantry-based lasers like Creality Falcon A1 Pro it’s no contest when it comes to speed. Based on the results of my initial material test array, I wound up making two versions: one at 800 mm/s and one at 650 mm/s, both of which looked good to me.
(Image credit: Tom's Hardware)
Switching to the 20W fiber laser, I engraved the JR-East Suica penguin logo on a dog tag to put on my luggage, and this was the moment that the galvo laser clicked for me. The software went from “Sending Job” to “Completed” in a total of three seconds, of which the laser was only activated for about one. I thought for sure that there was an issue with the design, but to my surprise, the engraving had taken only a single second to complete.
(Image credit: Tom's Hardware)
The default speed of 5,000 mm/s is blisteringly fast, and the engraving quality doesn’t suffer at all from this rapid movement of the galvo-driven laser beam. This is one of the most compelling features of the Falcon T1: the ability to make high-quality engravings on metal surfaces in only a few seconds with absolutely no prep work required. The 20W fiber laser is also capable of deeper engravings on metal, stone, and other materials, but the quick engraving is a very compelling feature.
(Image credit: Tom's Hardware)
Using the Falcon Design Space default settings, I engraved a dual-layer PU patch for a two-year work anniversary, which took just under 5 minutes. This dual-layer material looks great after a single pass, and the text is clear and legible against the darker top layer. The overall speed of the galvo system is a refreshing change from the lower-cost gantry-driven diode lasers, which operate at a fraction of the speed.
3D Engraving on Slate with the 20W Fiber Laser
(Image credit: Tom's Hardware)
The Creality Falcon T1 offers a 3D Relief mode that can create models typically associated with subtractive manufacturing, such as CNC milling. This mode will engrave thousands of layers away from an object to create a model with a deep relief that has a 3D shape. The Falcon Design Suite software has an integrated tool that allows users to upload an image and convert it to a depth map suitable for an engraving. Using one of the provided images, I went through the process to create a stone coaster with a 3D relief using the 20W fiber laser.
(Image credit: Tom's Hardware)
Once the image has been prepared, the 3D Relief Editor mode gives users more granular control over the engraving. The direction of the relief (emboss vs. deboss), the shape of the frame, and image adjustments are all fast and responsive, and the 3D preview mode instantly updates to show the impact of these changes. This was a surprisingly simple process, and I wound up using the default settings for my first 3D relief.
(Image credit: Tom's Hardware)
In 3D Relief mode, the Processing Preview in Falcon Design Space will look familiar to anyone who has used a 3D printer, with a series of contours on each layer stacked vertically to form the final model. This preview shows the path of the laser on each layer as well as an estimated processing time. For the 3D relief on this slate coaster, the original estimate was 1:53:30 but the final processing time wound up being 2:35:41.
Tom's HardwareTom's Hardware
The 3D relief looked incredible, and even the finest detail resolved on the slate coaster. Doing a deep engraving on a slate coaster creates a lot of dust, so I ran the AP1 Mini at max speed for this job. Even with the purifier running at the maximum setting, there was still quite a bit of dust to clean up inside the Falcon T1.
3D Engraving in Crystal with the 5W UV Laser
Tom's HardwareTom's Hardware
Creality has advertised the AI features of the Falcon Design Space heavily, but using them is a bit of a mixed bag. Using a headshot of myself with a clean background as a prompt, the resulting 3D model had me inexplicably in a toga and generally looked unimpressive. However, it did create a watertight 3D model, which is what’s required for the UV laser to engrave into a crystal. When using Falcon Design Space, I was only able to scale the model in increments of 10% (for example: 1.0, 0.8, 1.5), which was a frustrating experience when trying to align the model with the crystal. Using the special UV engraving mode in the software, I prepared the build and then set the Falcon T1 up for crystal engraving.
(Image credit: Tom's Hardware)
Installing the UV laser module is a bit more complicated than switching between the fiber and diode modules. Most of the Falcon T1 documentation is on a publicly accessible wiki, but the calibration for the UV module is spread across three Word documents that total an eyebrow-raising 57 pages. This calibration documentation is helpful, but much of it was watermarked with a stamp from around the day I had requested it, which made it appear unfinished and rushed. Considering the price of the UV module (over $2,000), I would have expected this calibration documentation to be a bit more presentable.
(Image credit: Tom's Hardware)
Switching from the fiber laser module to the UV module involves replacing the module, replacing the field lens with the F-Theta field lens, calibrating the laser, and calibrating the F-Theta field lens. Creality sent two lenses for the UV module: one for internal 3D engravings and one for flat engravings. The process to switch out the parts and calibrate took about 30 minutes and required two sheets of calibration paper to be used, something to consider if you plan on swapping between modes frequently.
(Image credit: Tom's Hardware)
Overall, the crystal looked as expected and would be perfect for presenting to a sales manager who just surpassed a quarterly quota. The engraving time was accurate (about 12 minutes), and the default settings worked well. I had some issues with alignment, and the model was positioned much lower in the volume than I was expecting based on the layout in Falcon Design Space. Engraving other objects had the same issue, which made me wish for a way to generate a 3D bounding box to visualize where the engraving will land in the crystal.
Conveyor Belt / Rotary Attachment Engraving with the Creality Falcon T1
(Image credit: Tom's Hardware)
Creality offers a conveyor belt attachment for the Falcon T1 which can be used for engraving parts longer than 175mm or batch engraving many small parts sequentially. The $459 optional accessory attaches to the work area using a few bolts and connects directly to the T1 for communication and power. When using the conveyor belt, the lid needs to be kept slightly open which can allow smoke and light to escape. With the lid open, the Falcon T1 should be treated as an exposed Class 4 laser system, so safety goggles, ventilation, and general caution should be exercised when using the conveyor belt.
Tom's HardwareTom's Hardware
Falcon Design Space has a specific workflow for the conveyor belt that involves selecting a design, aligning it on a workpiece, and then entering batch processing mode. I recently purchased a set of bookshelves for my wife’s ever-growing collection of books, and creating genre plaques for the shelves was a perfect batch-processing test. The batch processing mode has a few restrictions: only one design can be engraved, only one material profile per job, and settings can’t change between parts.
Tom's HardwareTom's Hardware
Each of the bookshelf plaques took about 23 seconds to engrave with the 20W fiber laser in a single pass at the default speed of 5,000 mm/s and 100% power. After each part was completed, the conveyor belt would advance a few inches, pause, and take a picture, and then scan for another part to engrave. As the parts completed, they would roll off the edge of the conveyor and hit the table with a satisfying click sound. My only criticism of the belt is the symmetrical design: having a shorter edge to the right of the unit would allow for more belt area for parts to process on the left of the unit without impacting the cost or size of the accessory.
(Image credit: Tom's Hardware)
Creality also sent a rotary attachment for the Falcon T1, but pricing and a launch date had not been announced as of this review. The optional rotary accessory includes two modes: chuck and roller. The chuck rotary uses an adjustable chuck mechanism for engraving things like rings, mugs, and other objects that are gripped from the inside or outside. The roller mode is for cylindrical objects, and has an adjustable width for accommodating various size objects.
(Image credit: Tom's Hardware)
During testing, I was not able to get the Falcon T1 to recognize the chuck rotary and always got the same error message when trying to connect. The motor used for the chuck and roller mode is the same, so this was an unusual problem and Creality was not able to fix it for this review. Creality does not have US-based support for this engraver, so I had to schedule a call with their China-based technical team at 10 PM. The issue was not resolved on the call, and Creality wasn’t able to fix it despite updating the software and spending several days on back-and-forth troubleshooting. For a small business that has a backlog of orders, this lack of urgent support is going to be a critical issue.
Bottom Line
(Image credit: Tom's Hardware)
The Creality Falcon T1 has clear potential to be an “all-in-one” laser for prosumer workshops, but seeing messages like “Oops… Calibration Completed” on the LCD gave me the impression that I was beta-testing a nearly-finished piece of hardware instead of a retail-ready prosumer manufacturing tool. The 175 x 175 mm engraving area of the Falcon T1 didn’t feel cramped at all while I was using it, and the high-speed galvo system meant most 2D engravings were completed in under a few minutes when using the 40W diode or 20W fiber laser.
The Falcon T1 is an impressive machine, but it suffers from an incomplete and confusing product rollout. Originally announced at CES 2026, the Falcon T1 is becoming available for order as of the writing of this review (May 2026), with the UV and MOPA modules following a staggered rollout instead of launching alongside the Falcon T1. Creality claimed the unit sent to me was a production unit, but the lack of a shipping date for additional modules, issues with customer support, and limited accessories available on the site are going to be a concern to serious power users who will rely on Creality for support.
The modular nature of the Falcon T1 lends itself to users who have varying interests or entrepreneurs with flexible business needs. I’ve frequently seen kiosks in shopping malls that engrave crystals with an image while you wait, and wondered about the commercial viability of the business model due to the high cost of the industrial laser required. The prosumer Falcon T1 is a laser that is capable of making these engravings without being locked into that single application, and can easily pivot to engraving dog tags, slate coasters, and other small products.
The Falcon T1 is not a cheap laser: buying the unit, all accessories, and starter materials can easily exceed $10,000. If you want a fast galvo laser to start making products today, the 20W fiber and 40W diode lasers are impressive and should serve that need well. If your decision hinges on the UV or MOPA modules, the Falcon T1 may be a laser engraver worth watching instead of buying immediately.
If you’re looking for a laser to get started with making custom products, the less expensive WeCreat Lumos offers a similar galvo laser setup but has a smaller volume and less powerful laser. The xTool F2 Ultra (one of the best laser engravers) offers a similar experience and has a MOPA laser for color engraving, something Creality advertises for the Falcon T1 but has yet to ship.
A security researcher has added another dimension to smart lightbulbs by using them to store a library of banned books, creating what they describe as a “cyberpunk digital dead drop.” Rick Osgood wrote about the idea behind the Banned Book Library on his personal blog, alongside a retelling of the process to create a working prototype. Meanwhile, all the code is open source and available via Codeberg. So, anyone interested can acquire some ESP32-powered smart lightbulbs and distribute stealthy banned book libraries of their own.
Osgood notes that he was pondering making smart lightbulbs more useful. As someone “interested in infosec, open-source software, making things, breaking things,” he found inspiration in Ben Brown’s short story of anti-corporate tech resistance, called ‘Library.’ After that lightbulb moment, Osgood knew he wanted to make a small, inexpensive, cyberpunk‑style digital dead drop, designed for resilience and stealth – by reprogramming smart lightbulbs.
The security researcher chose a Tasmota‑flashed ESP32C3 smart bulb as the starting point for the stealth library project. As this device only has 4MB on board in total for everything, including the OS, and not much spare capacity left over, Osgood spent a considerable amount of time and effort wrangling with adding a microSD reader. However, this expansion effort proved fruitless, and thus he decided to live with the total capacity 4MB limit for the sake of sanity, convenience, and stealth.
Once Osgood accepted the 4MB storage limitation, a key task was to expand the existing ~320KB of free space for the filesystem as much as possible. After some optimizations and tuning, he managed to reserve about half of the total storage space available for banned books. We also assume some kind of text compression is used to make the best use of the limited capacity.
Thus, the current working prototype runs some custom ESP32 firmware, broadcasts an open Wi-Fi network, and hosts a server, with about half of the total capacity of the smart lightbulb left over. That means the all-important LittleFS library partition can be stuffed with almost 2MB of banned books. Osgood's example files use a selection of old public domain titles, presented in a CSS contents page. However, those who set up the lightbulbs will of course want to add their own digital tomes. Guidance for this, and for updating admin settings, and more is provided on the linked blog and Codeberg pages.
The Banned Book Library supports OTA updates. It is also worth mentioning that no cloud services are required, and no sensitive credentials need to be saved on the device. Please remember that modifying your smart lightbulb firmware could ‘brick’ it, so follow the linked guides at your own risk. Finally, also be careful carrying your banned book-stuffed smart lightbulbs when traveling internationally.
A device that 'looks like a normal USB cable' but packs in an ESP32-S3 microcontroller, micro SD card storage, and Wi-Fi capabilities has enjoyed great success on Kickstarter.
With record numbers of bear attacks on humans, Japan has been increasingly turning to high-tech solutions like the Monster Wolf robot. But production can't keep up with demand.
Nvidia is apparently discontinuing some older embedded platforms earlier than anticipated, but this is mostly about market reality finally catching up, not abrupt discontinuation.
 登录
登录