阅读视图

发现新文章,点击刷新页面。
✇Tomshardware

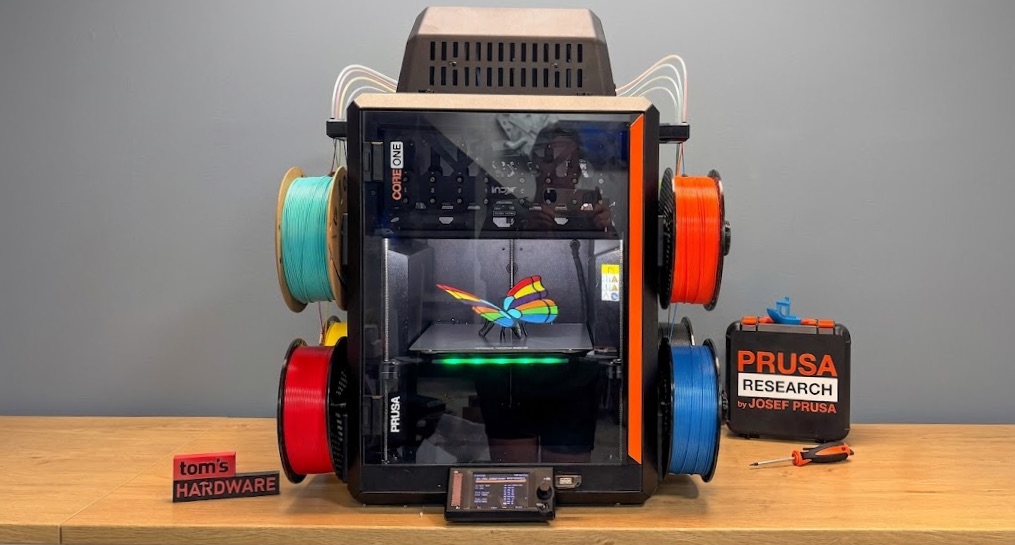
Prusa CORE One+ INDX review: Time for a 'Tool' change

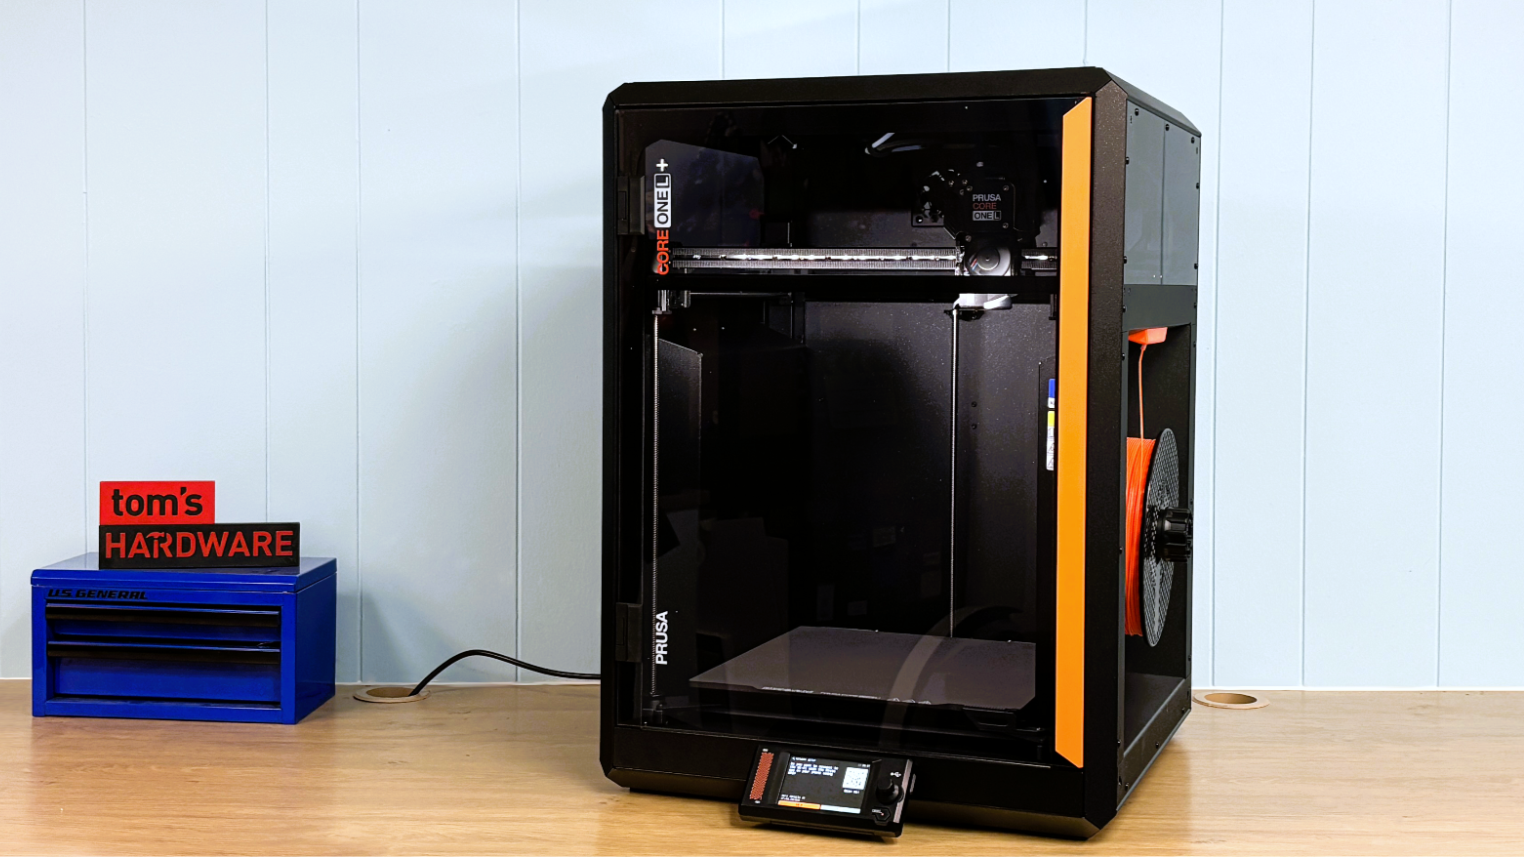
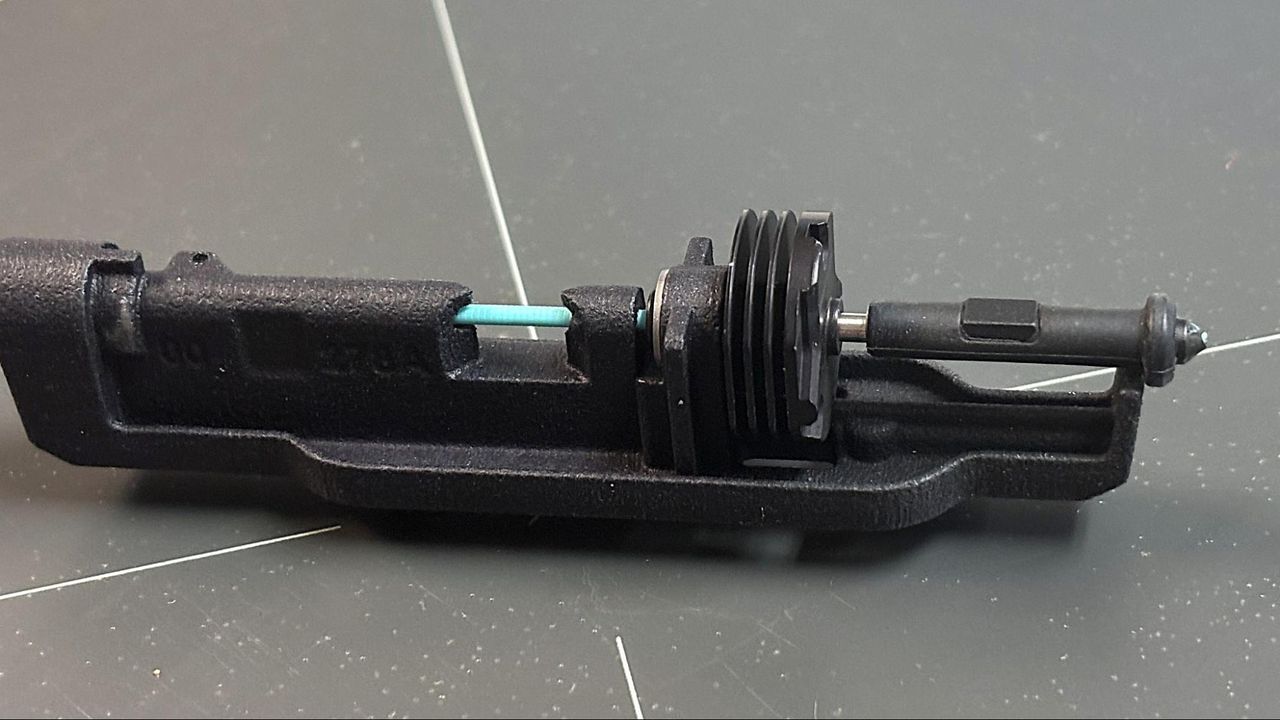
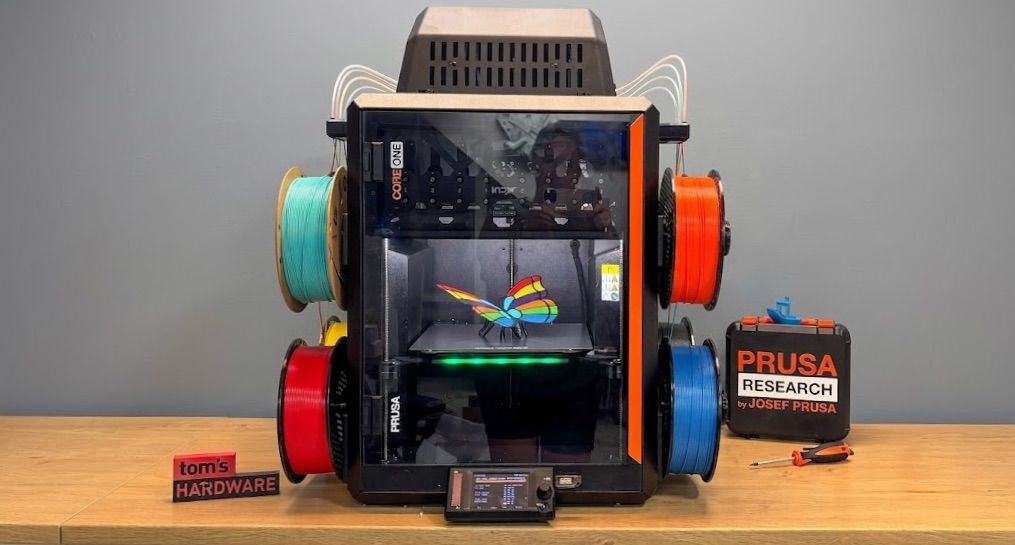
The Prusa INDX is a revolutionary new toolchanger capable of printing up to eight colors of various materials. INDX stands for Induction Dynamic Extruder, with each slim toolhead having no moving parts, just a nozzle and filament path. The extruder, or “smart head,” does all the work.

INDX is a collaborative project between Prusa Research and Bondtech. Prusa makes the platform, in this case a CORE One+ Gen 2, while Bondtech produces the toolhead system. The two companies have a long history of working together, going back to 2017’s MK3 bedslinger. The INDX can also be purchased separately on Bondtech’s site as a DIY kit to be mounted on any open-source 3D printer you feel like modding.

There are definite advantages of going with the Prusa INDX. You can buy it ready to roll, premounted on CORE One that’s ready to print ten minutes after removing it from the box. Even purchasing it as a kit from Prusa removes a lot of hassle and headache, as the kit is custom-fitted to CORE One, with all the wiring, programming, and whatnot done for you.

Sorting through the website to figure out what combination of kit and printer you need is the hardest part of the INDX experience. If you already have a CORE One, prices start at $749 for a four-color INDX “conversion” kit. Prusa optimistically says the kit takes 5 to 6 hours to install, but it took me the better part of a weekend to disassemble my machine and rebuild it as an INDX when I tested out the early Founder’s Edition.

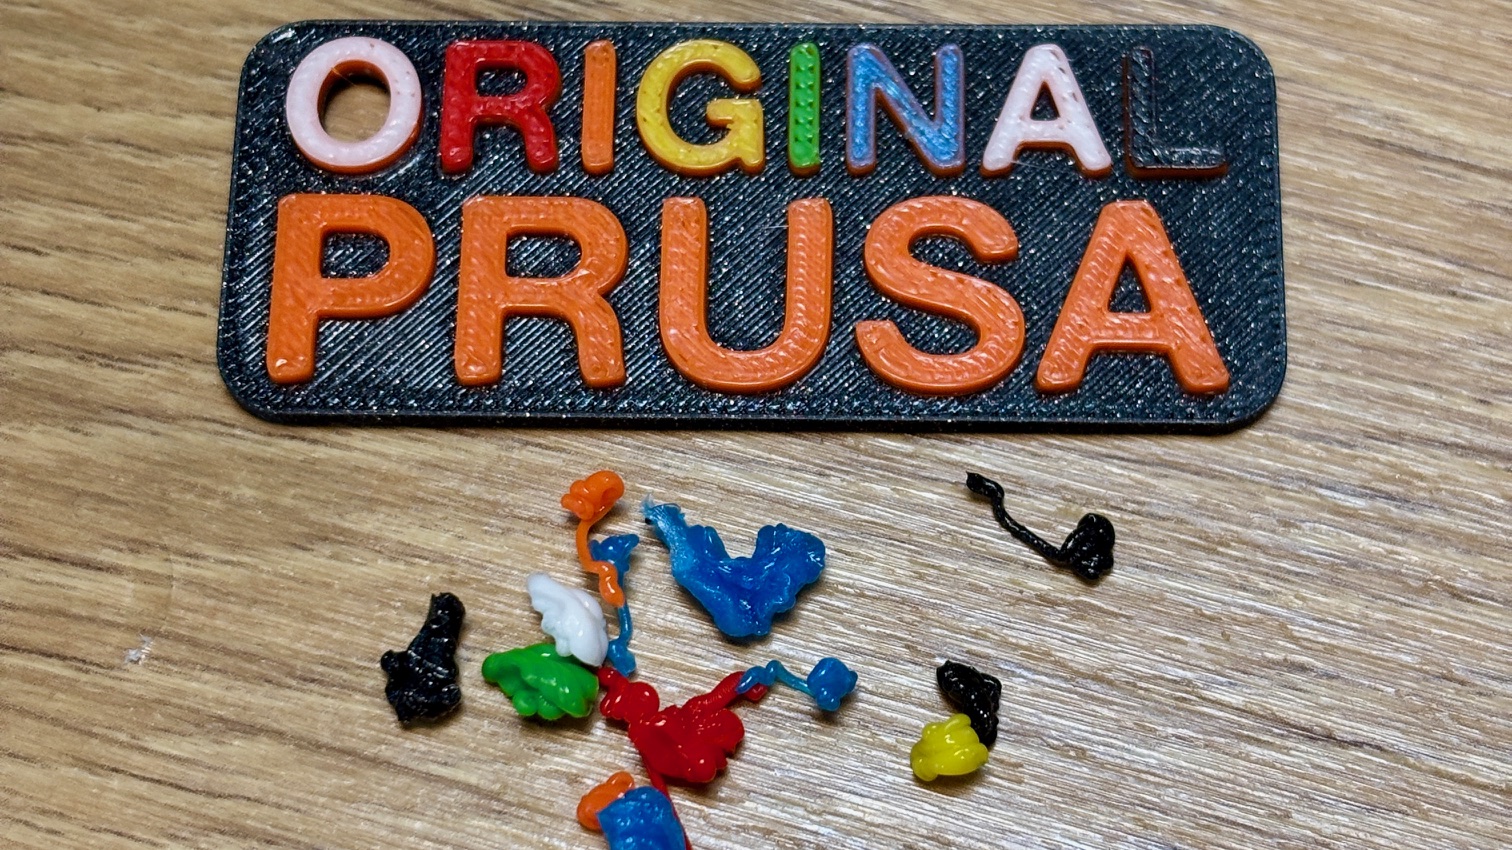
The Prusa INDX is the first multicolor 3D printer to ditch the prime tower, making it practically waste-free. While all toolchangers can seriously cut down on wasted material by virtue of having a nozzle for each color, they still need to “prime” the nozzles before printing. This priming creates a tower of wasted material. Prusa has circumvented the prime tower with a new wiper mechanism that quickly shoots out a tiny blob of filament that’s about 13 milligrams in size – smaller than a grain of rice.

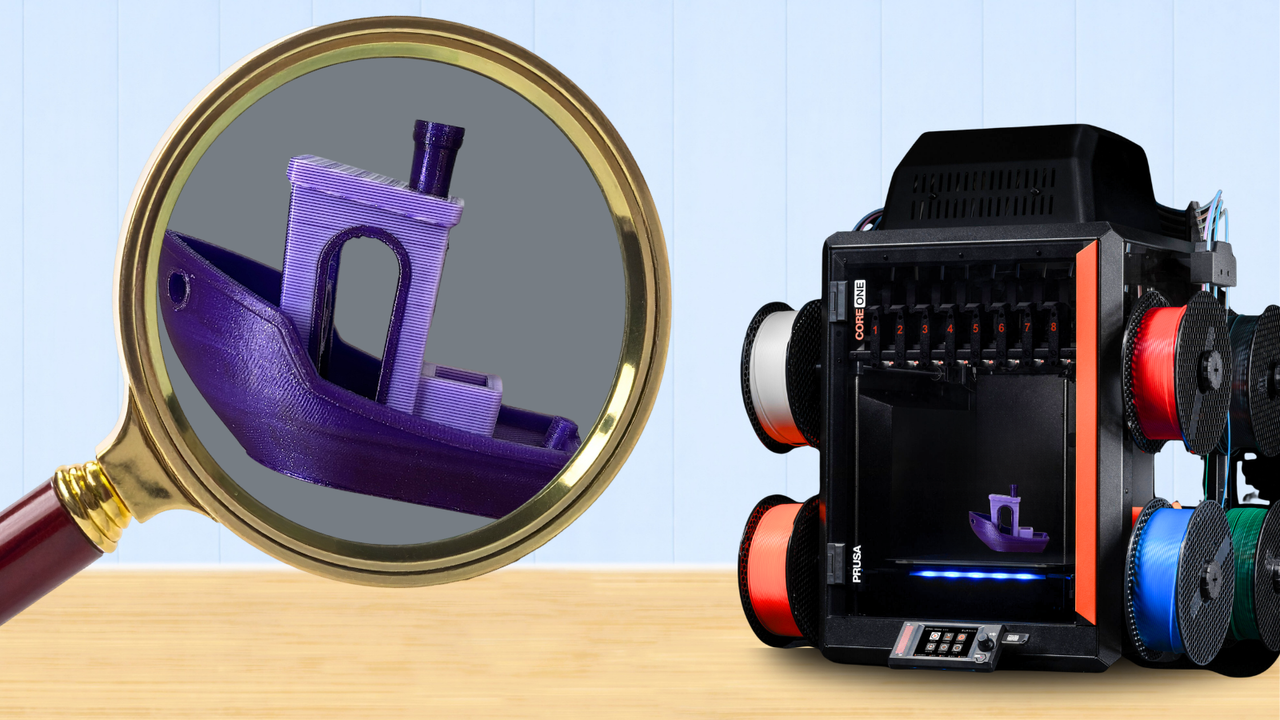
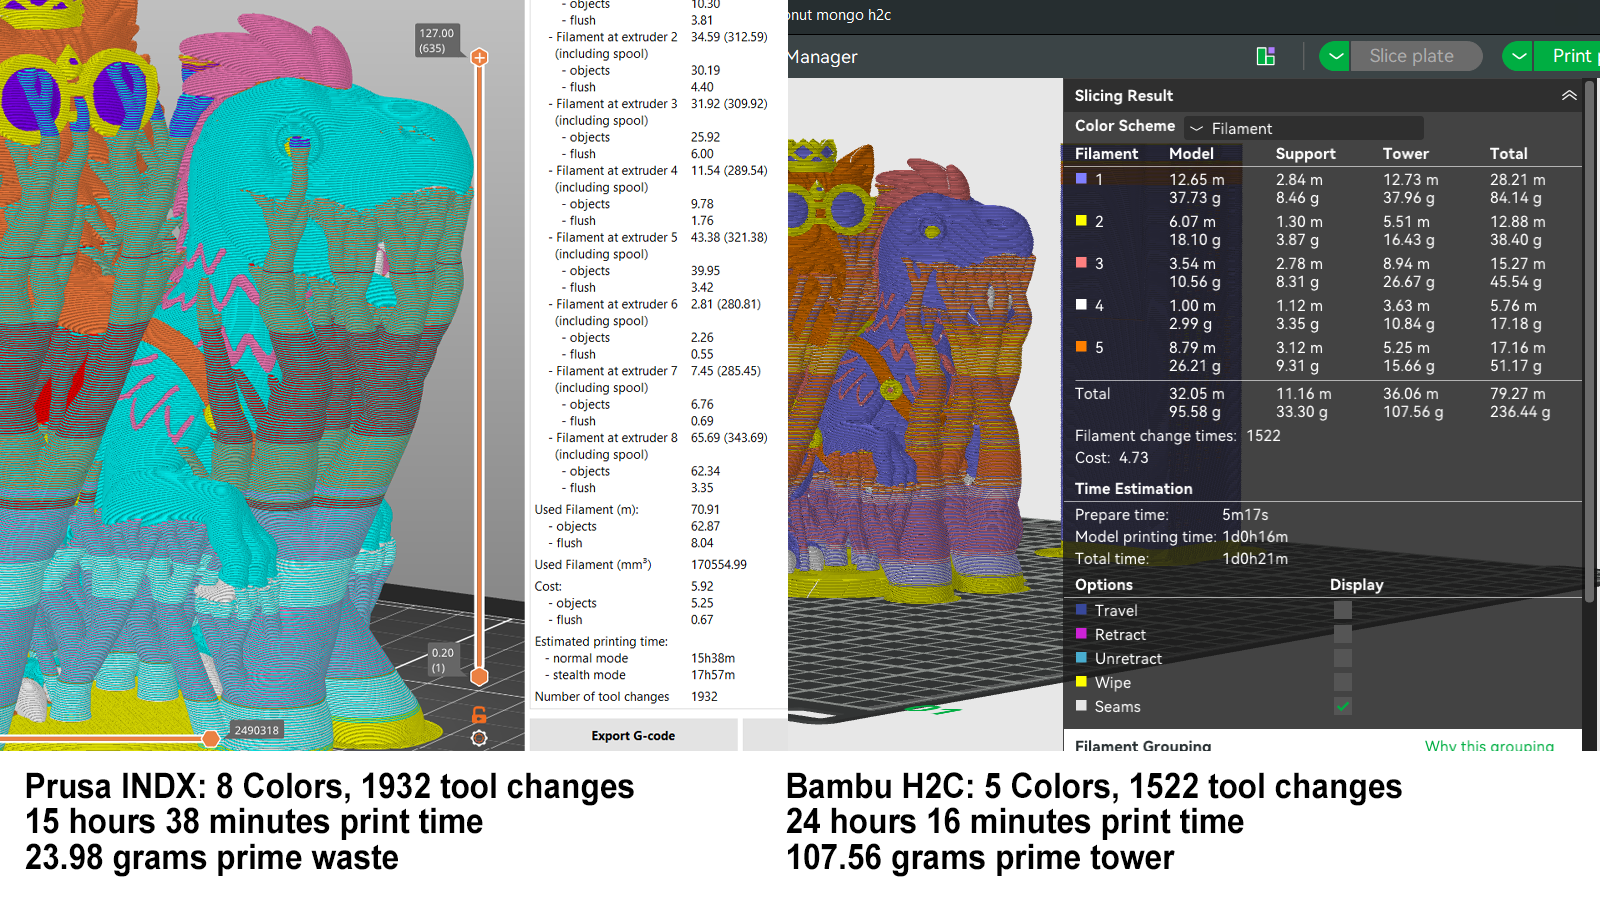
In my testing, I found the Prusa INDX was faster and less wasteful than any other toolchanger in the workshop. I ran the same model with similar settings on both the Prusa INDX and the Bambu Lab H2C, the closest machine to a toolchanger that Bambu currently has in production. The INDX was able to run it nearly nine hours faster, with 83.58 grams less wasted material (not counting supports) and 3 more colors.
Prusa CORE One+ INDX

(Image credit: Tom's Hardware)

The CORE One+ INDX starts at $1,699 for a DIY kit with four toolheads and goes up to $2,119 for an assembled 3D printer with eight toolheads, plus a Buddy Cam and Advanced filtration. If you already have the printer, the conversion kit is $749 for four toolheads and $999 for eight. There is no pricing for individual toolheads at the moment, but you can start with four toolheads and later add more. Individual tools are currently $45 on the Bondtech website.

The Prusa CORE One+ INDX lives up to its reputation and is one of the best 3D printers we’ve tested to date.

Specifications

Prusa CORE One+ INDX

Prusa CORE One

Prusa CORE One L

Prusa CORE One L+

Build Volume

248 x 205 x 270 mm (9.76 x 8.07 x 10.6in)

250 x 210 x 270 mm (9.84 x 8.3 x 10.6 in)

300 x 300 x 330 mm (11.8 x 11.8 x 12.99 in)

300 x 300 x 330 mm (11.81 x 11.81 x 12.99 in)

Material

PLA/PETG/TPU/ABS/ASA /PC (up to 300 degrees)

PLA/PETG/TPU/ABS/ASA /PC (up to 300 degrees)

PLA/PETG/TPU/ABS/ASA /PC (up to 290 degrees)

PLA/PETG/Flex/PVA,ABS/ASA/PA/PC (up to 290C degrees)

Extruder Type

Direct drive

Direct drive

Direct drive

Direct drive

Nozzle

.4mm (Highflow, Surface hardened steel)

.4mm (Highflow CHT)

.4mm (Highflow CHT & Hardened Steel)

.4mm (Brass CHT Installed, Abrasive Resistant Included)

Build Platform

Satin Powder Coated, spring steel flex plate (heated)

PEI spring steel flex plate

PEI spring steel flex plate

Double-sided PEI flex plate

Bed Leveling

Automatic + Load Cell

Automatic

Fully automatic

Automatic, Loadcell

Filament Runout Sensor

Yes

Yes

Yes

Yes

Connectivity

USB, LAN, Wi-Fi, App

USB, LAN, Wi-Fi, App

USB, LAN, Wi-Fi, App

LAN, WiFi, USB Flash Drive

Interface

Color touch screen with knob

Color touch screen with knob

3.5-inch color screen touch screen with additional knob

Color touch screen

Machine Footprint

630 x 471x 690 mm 24.8 x 18.5 x 27.1 in) with Spoolholders & Top Hat

415 x 444 x 555 mm (16.3 x 17.5 x 21.8 in)

469×521×635 mm (18.5×20.5×25 in)

469 x 521x 635 mm (18.5 × 20.5 × 25 in)

Machine Weight

24 KG (52.9 lbs)

22.5 KG (49.6 lbs)

21.9 KG (48.28 lbs)

21.9 KG (48.21 lbs)

MSRP

$1,699 (4 Toolheads)
$2,119 (8 Toolheads)

$1,199

$1,999

Starts at $1,999

Release Date

April 23. 2026

November 19, 2024

November 19, 2025

August 2026

Prusa CORE One+ INDX: Included in the Box
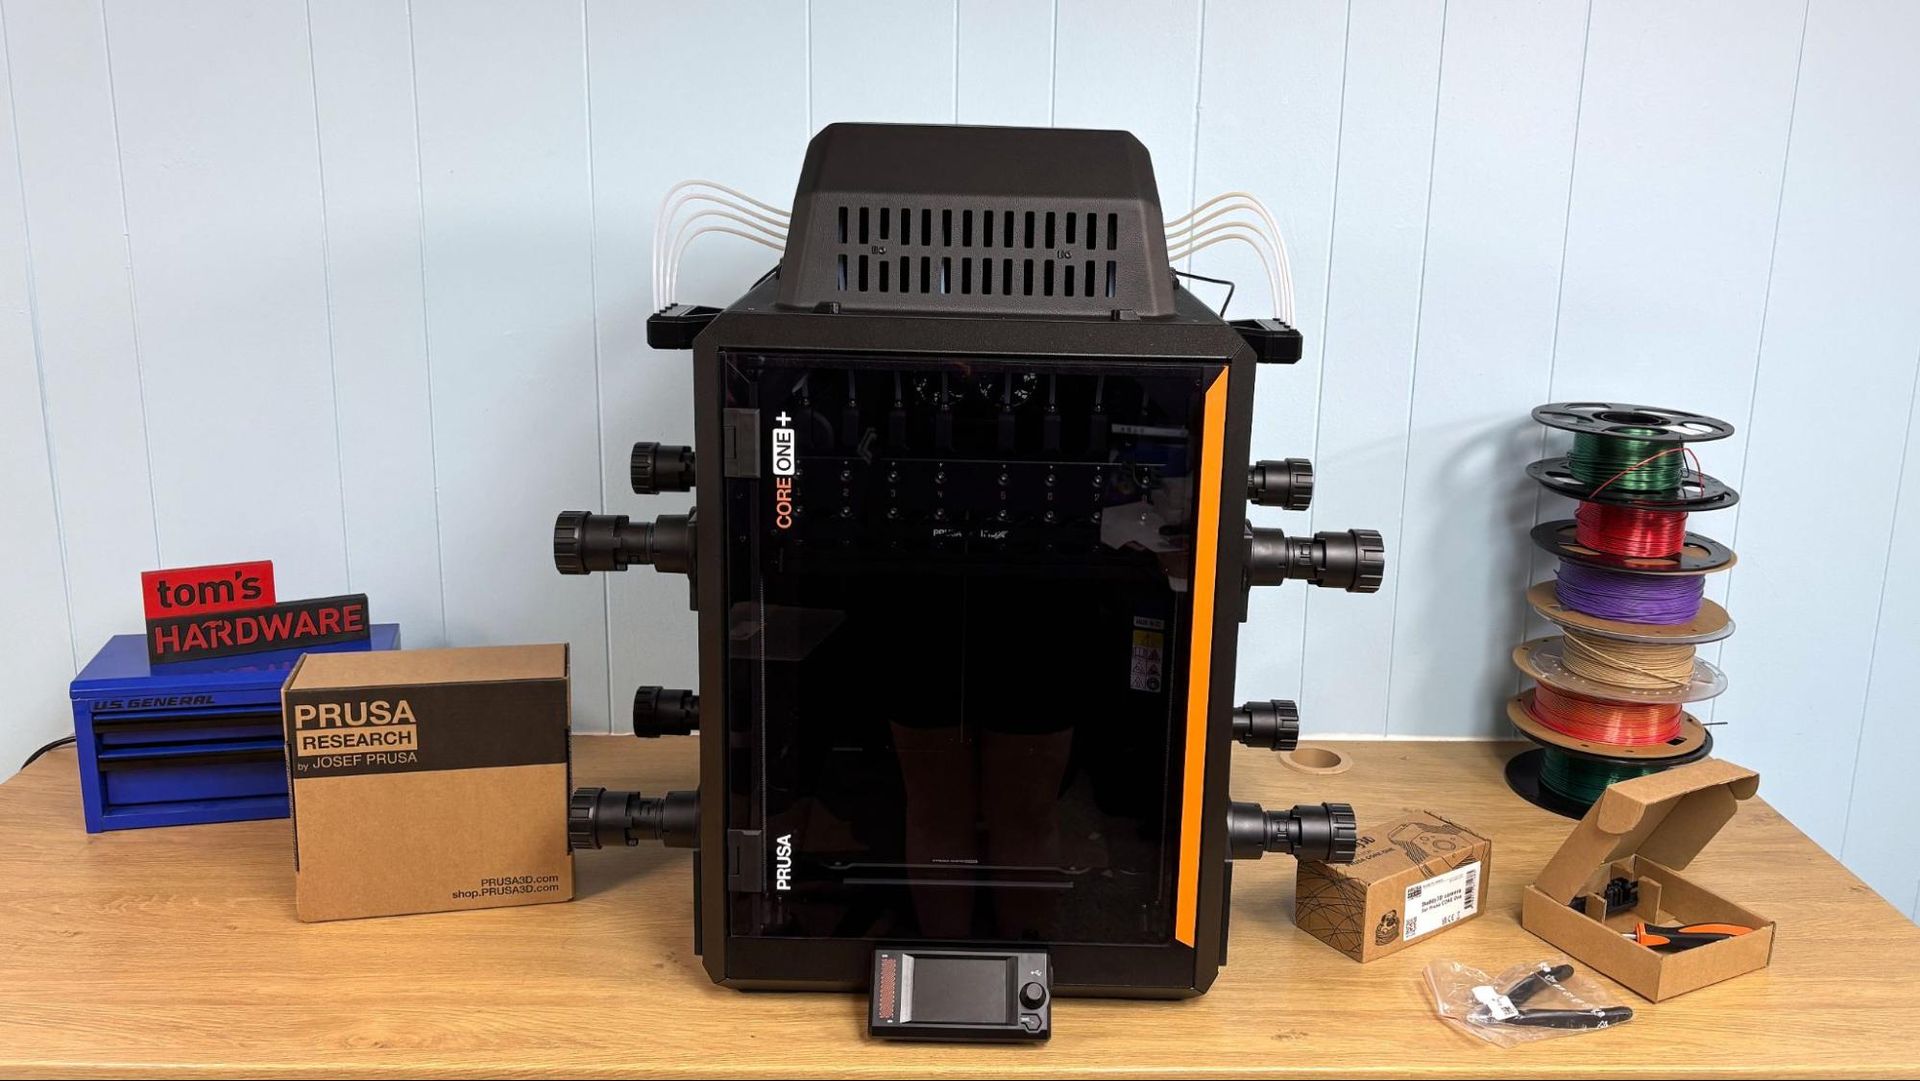
Prusa CORE One+ INDX

(Image credit: Tom's Hardware)

The Prusa CORE One+ INDX we received was pre-assembled and included eight toolheads. It only needed to be unpacked, have its screen mounted, then snap on the spool holders and Bowden tubes. Besides tools, the printer comes with a full spool of Galaxy Black Prusament PLA, a USB Stick, a handbook on 3D printing with your new machine, and a bag of Gummy Bears. The USB stick contains several models, while PrusaSlicer is available for free download from the website.

We also received a Buddy Camera and several boxes of filament to perform the review.

Design of the Prusa CORE One+ INDX
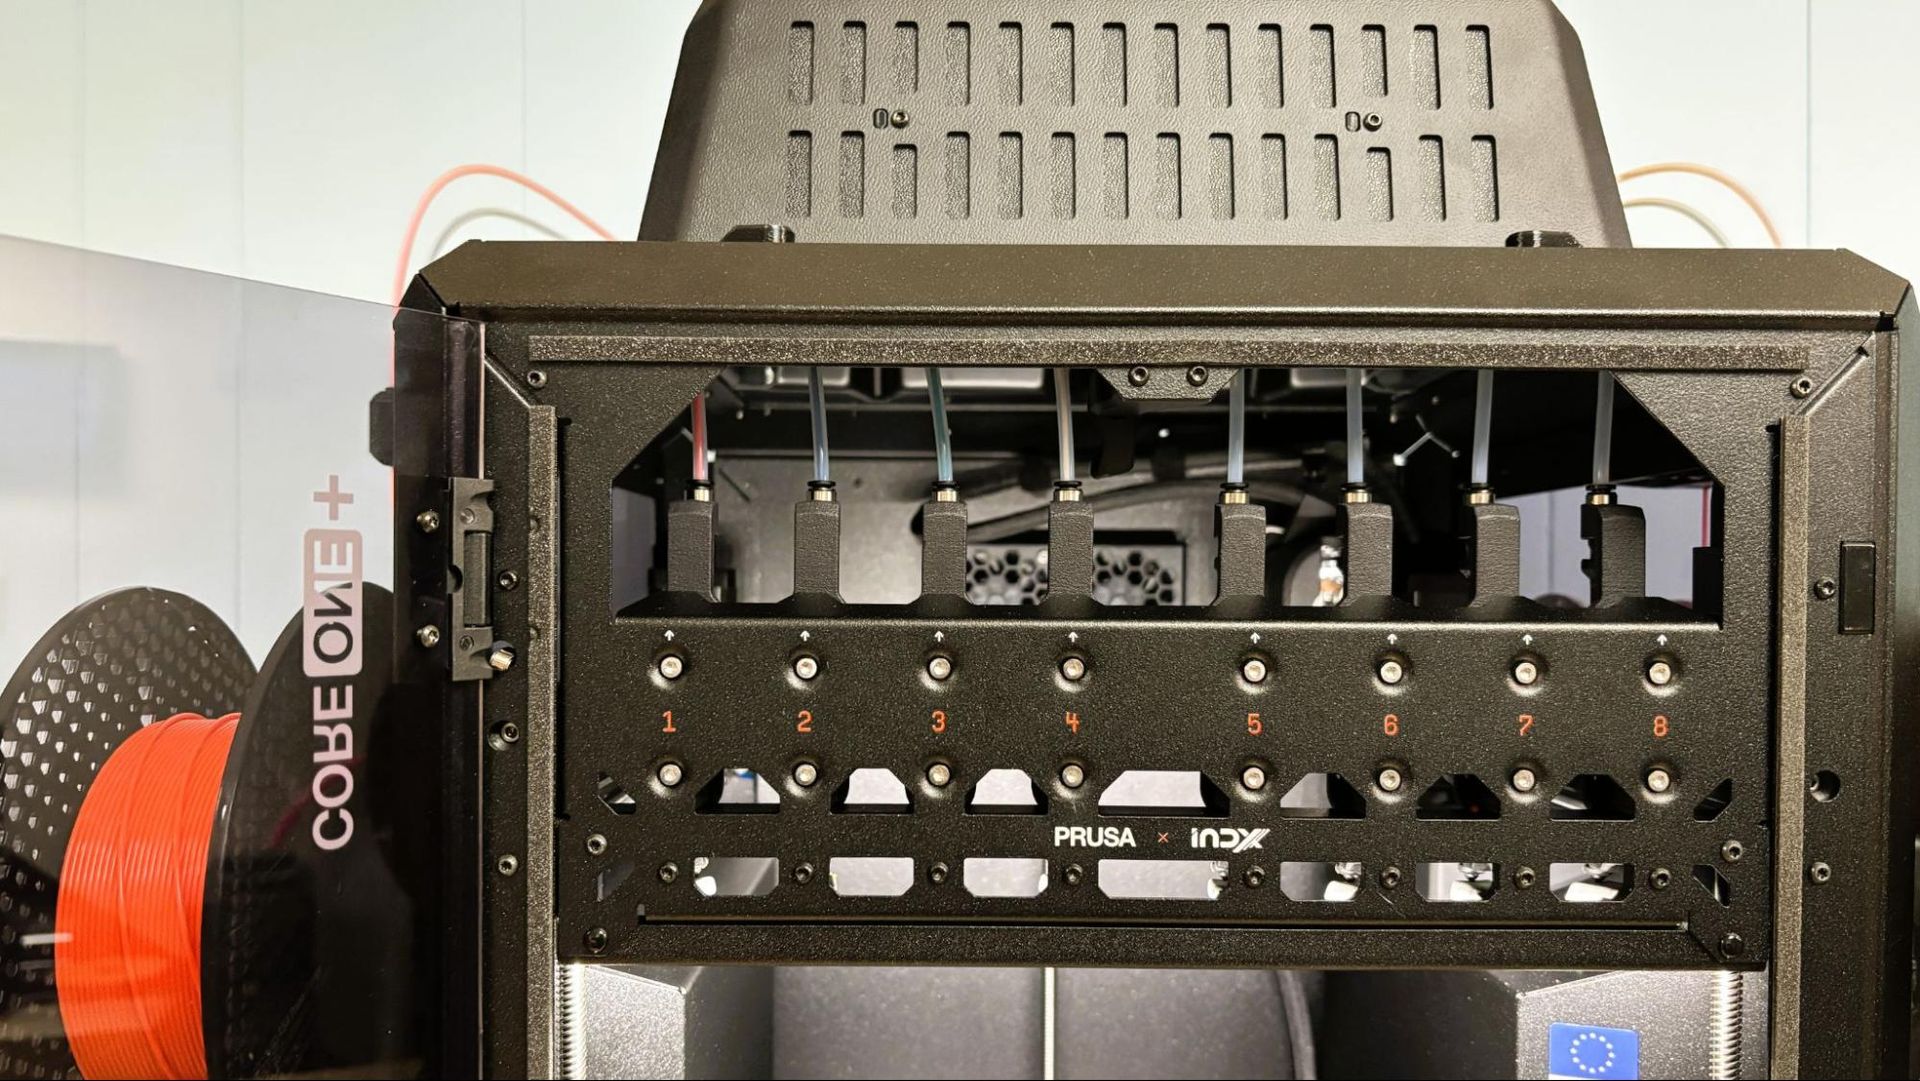
Prusa CORE One+ INDX

(Image credit: Tom's Hardware)

The CORE One+ INDX is a Core XY 3D printer converted into a toolchanger. It has a slim, steel exoskeleton with indents on either side. The right side holds a 3D-printed waste container on the outside for the tiny bits of filament the machine drops from the wiper system inside the chamber. We’re unsure if this mod is a permanent feature or an apology bonus for being unable to deliver fully hardened steel nozzles at launch.

Like the original CORE One, the door and upper parts of the side panels are translucent black polymer. The top panel is now replaced by a “top hat” to give the multitude of Bowden tubes room to work. Since the shell is made of folded steel, it’s not exactly airtight, but so far we haven’t had any trouble printing ASA or ABS in the machine.

The exoskeleton is an interesting concept. It provides a strong, stiff frame for the printer while also minimizing materials and avoiding that cheap plastic feel that plagues many other designs. The indented sides do more than slim down the printer’s silhouette; they reduce the interior space of the printer, allowing the chamber to be sufficiently heated (when needed) by only the heater bed.

Like every other Prusa printer before it, several of the CORE One+ parts are 3D printed with PC Blend Carbon Fiber, though more pieces are moving to in-house injection molding. Most of the machine is manufactured at the main factory in Prague, though printers assembled in the United States will have some parts printed locally in Delaware.

The CORE One+ has a door that can be flipped to open on either side. And thankfully, that door can remain closed at all times thanks to an active cooling system and automatic top vent.

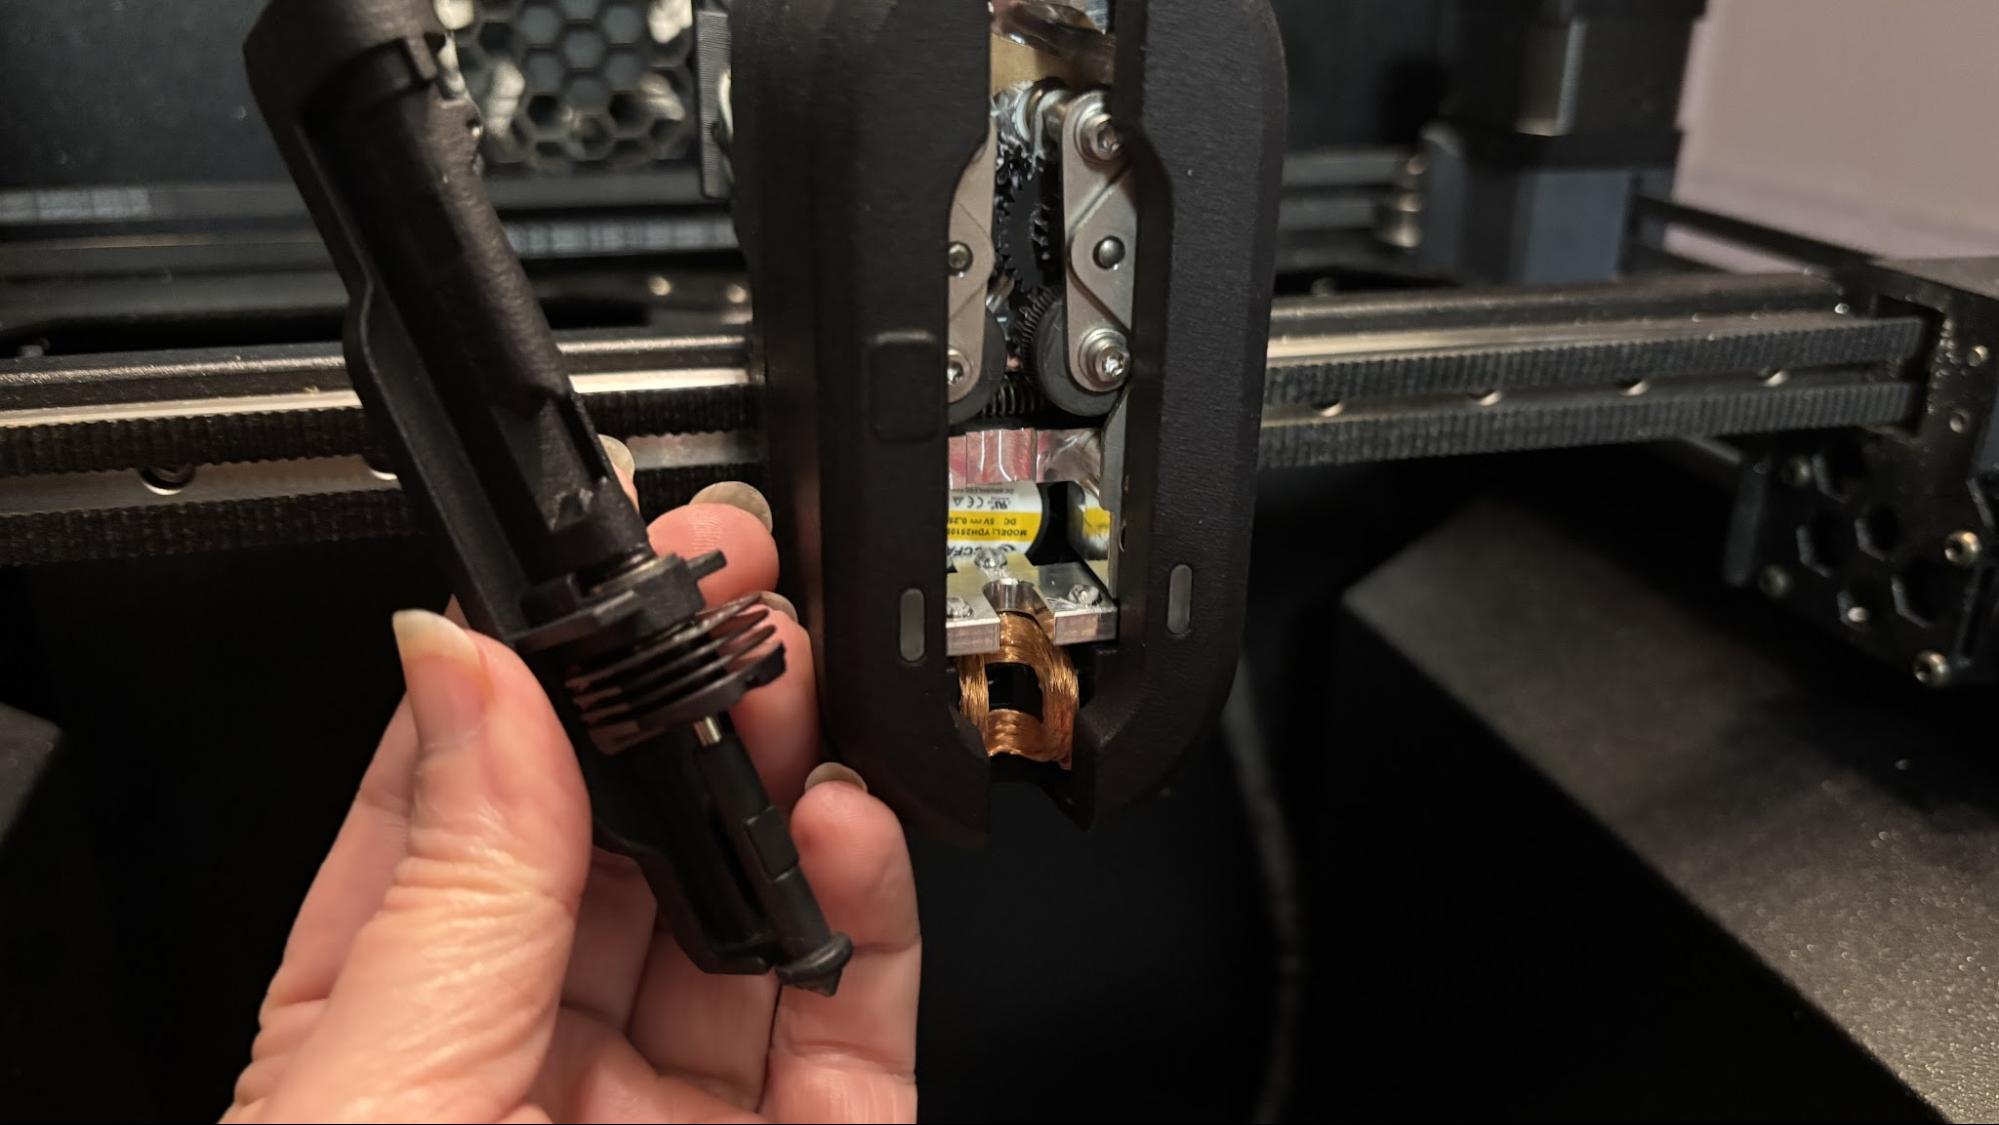
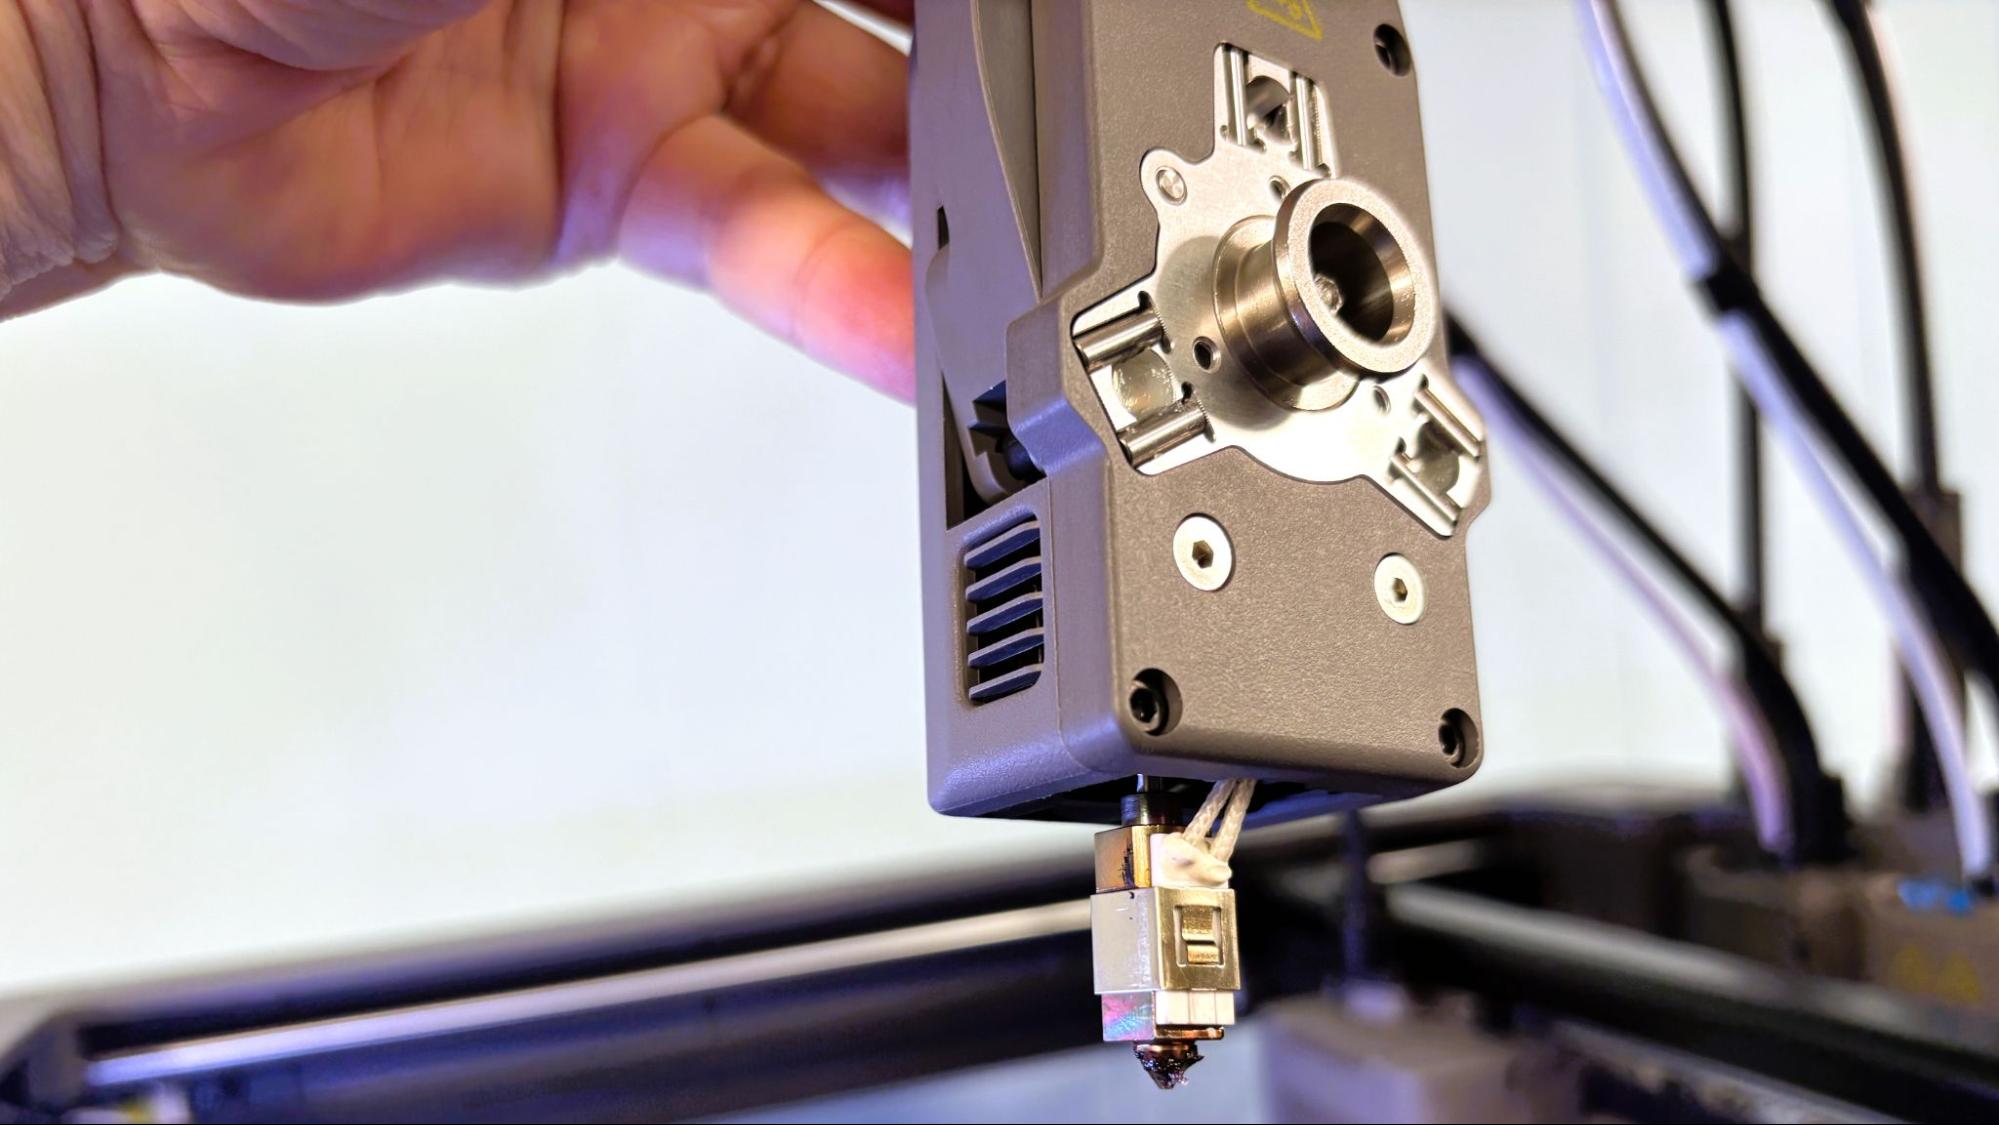
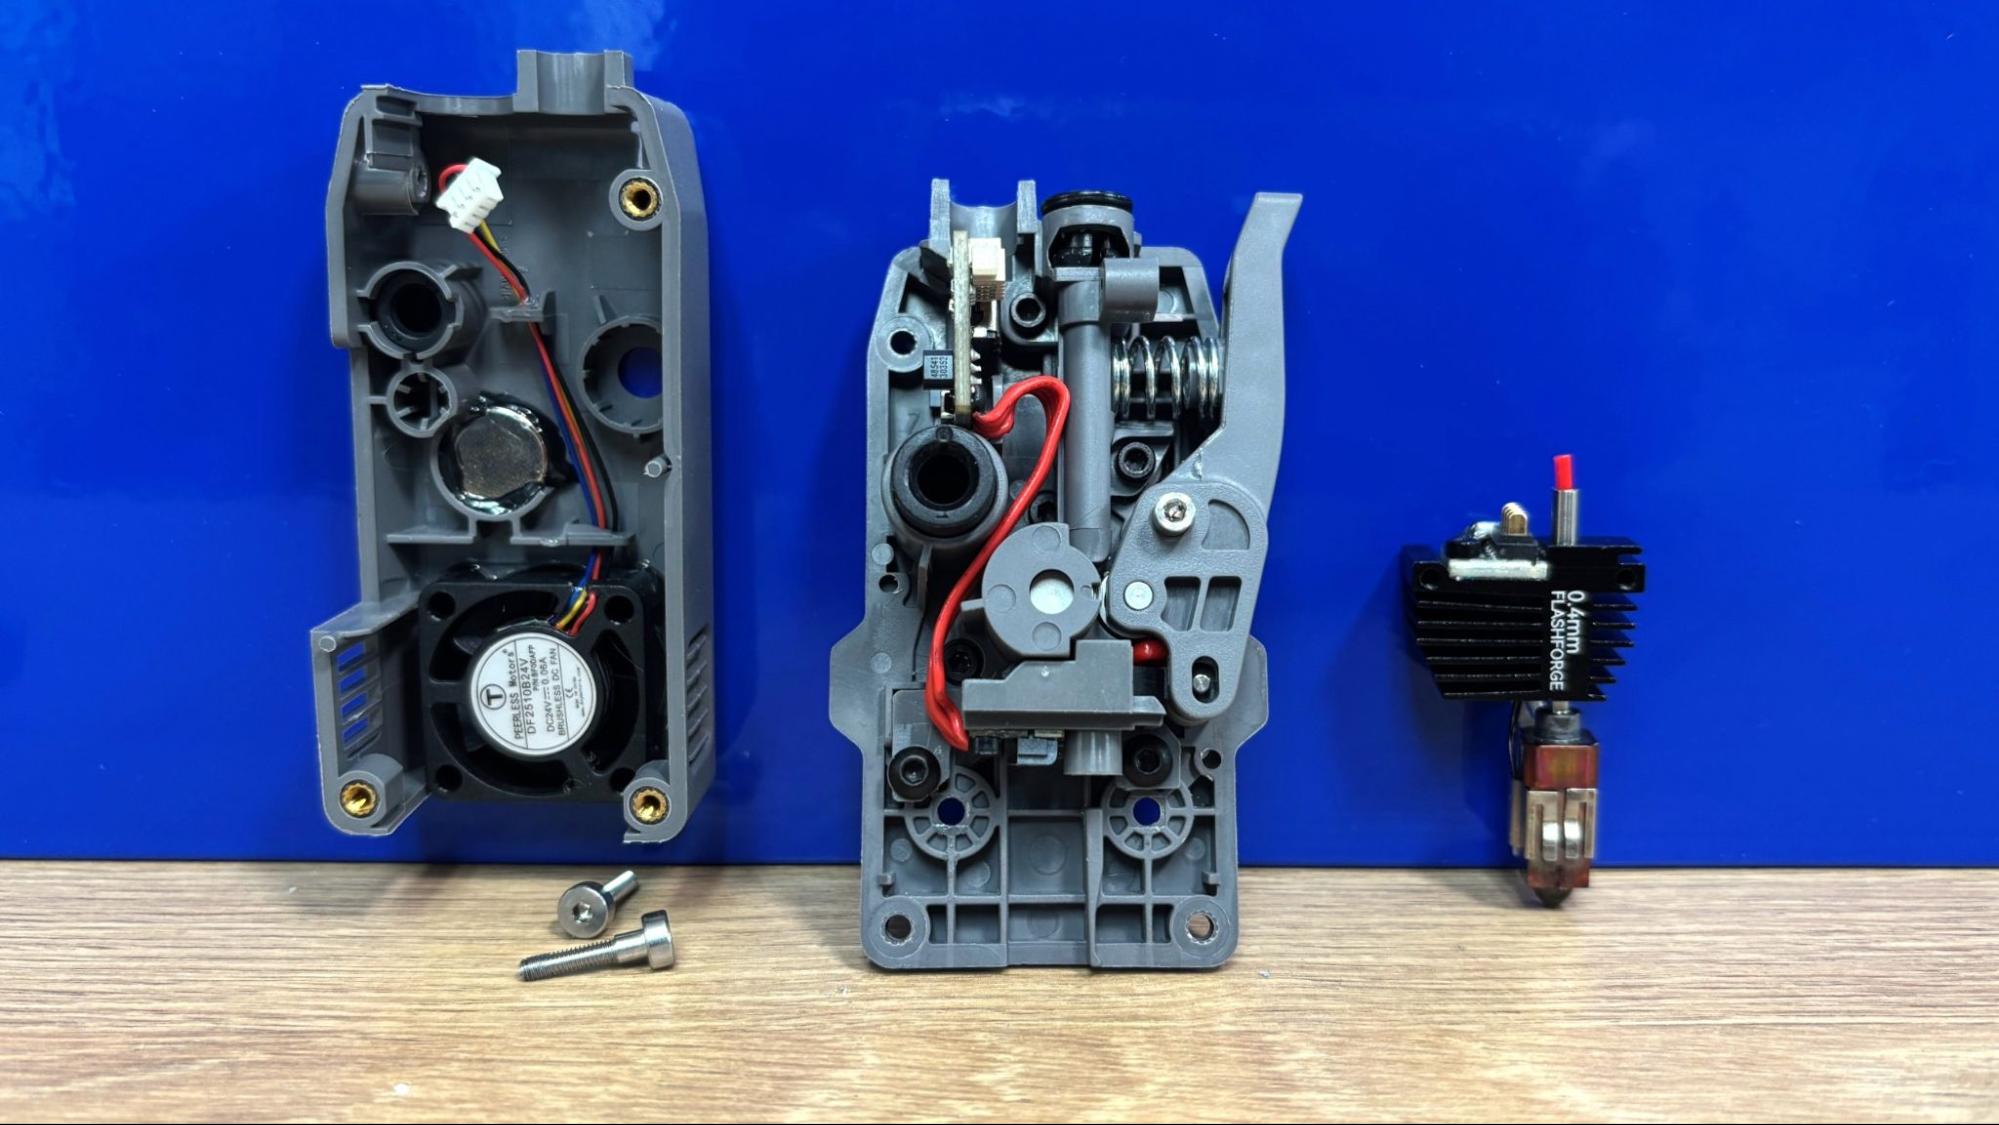
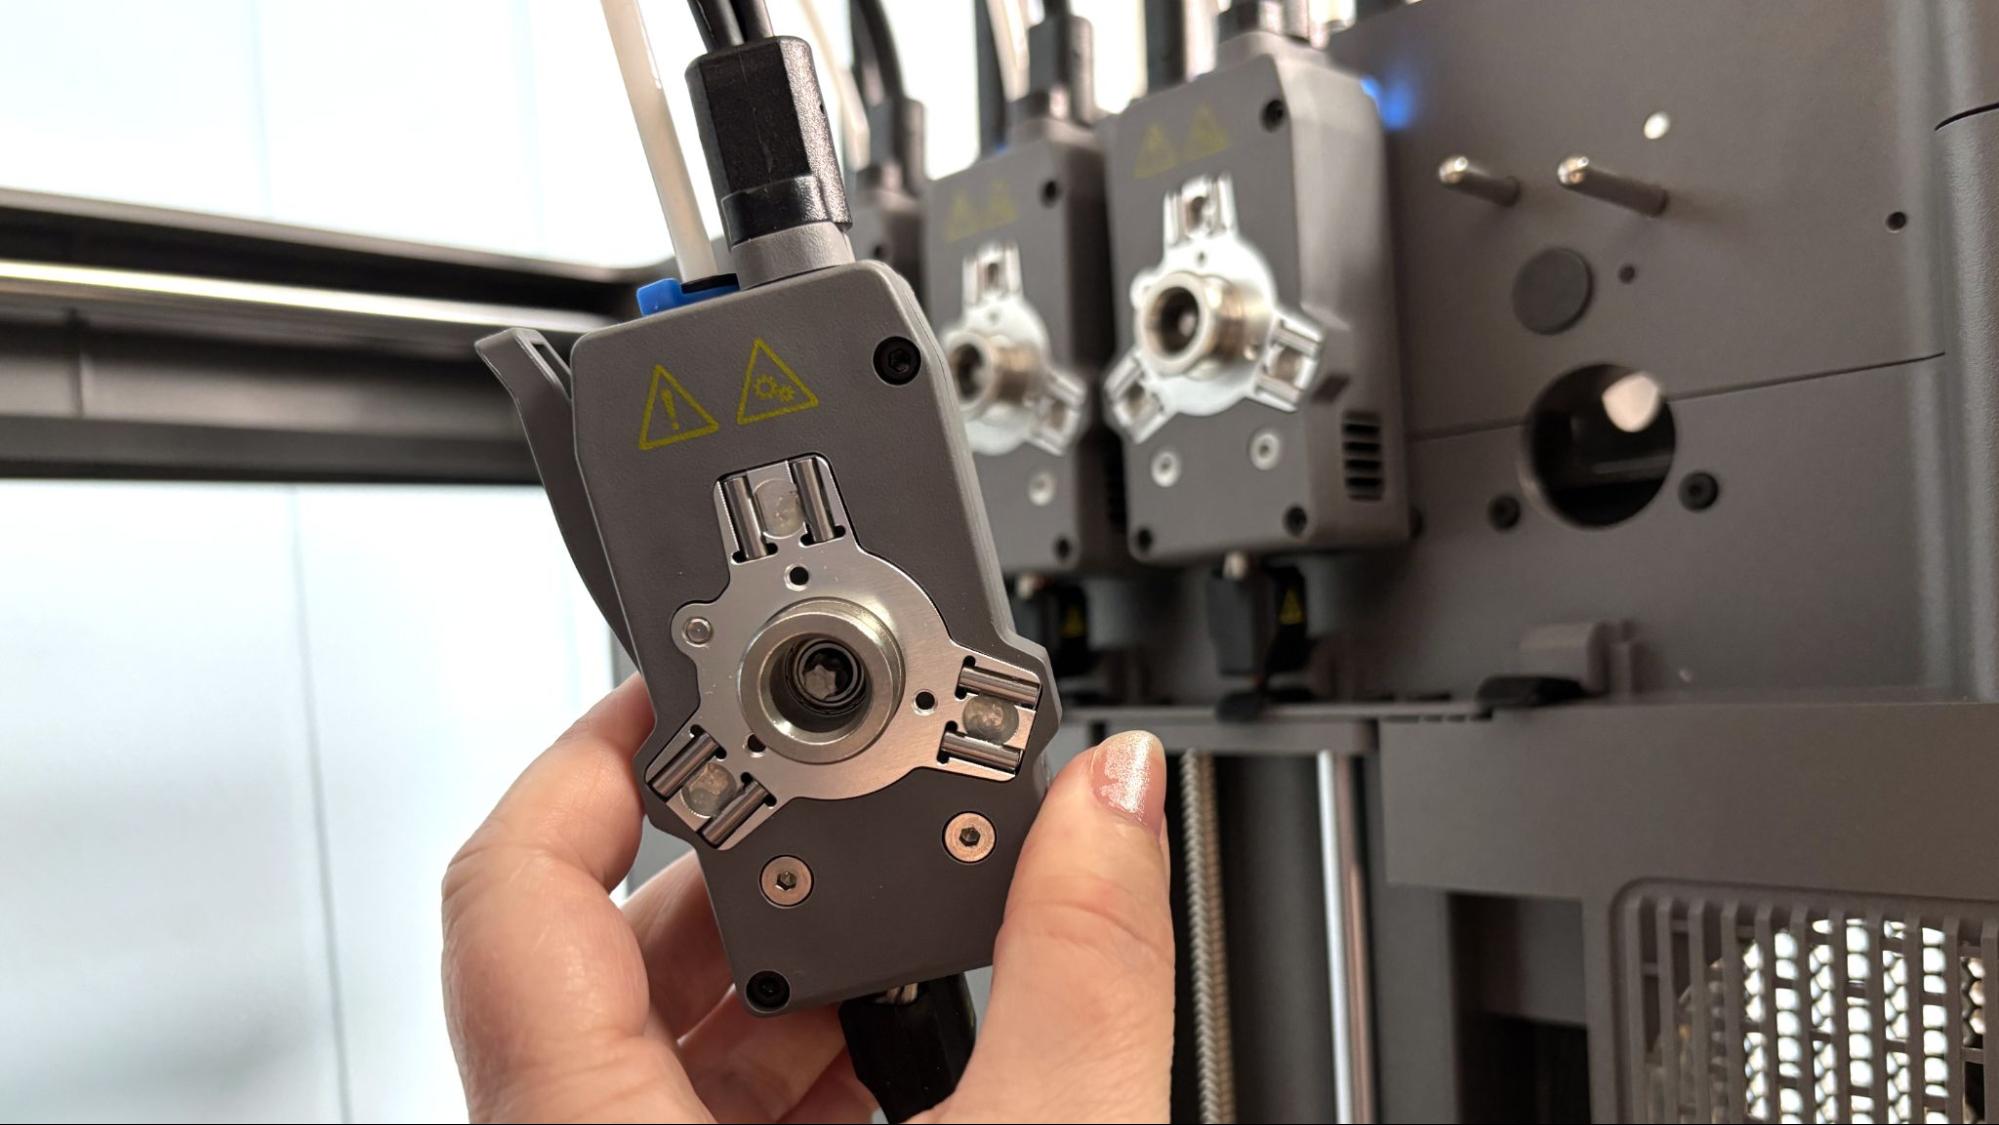
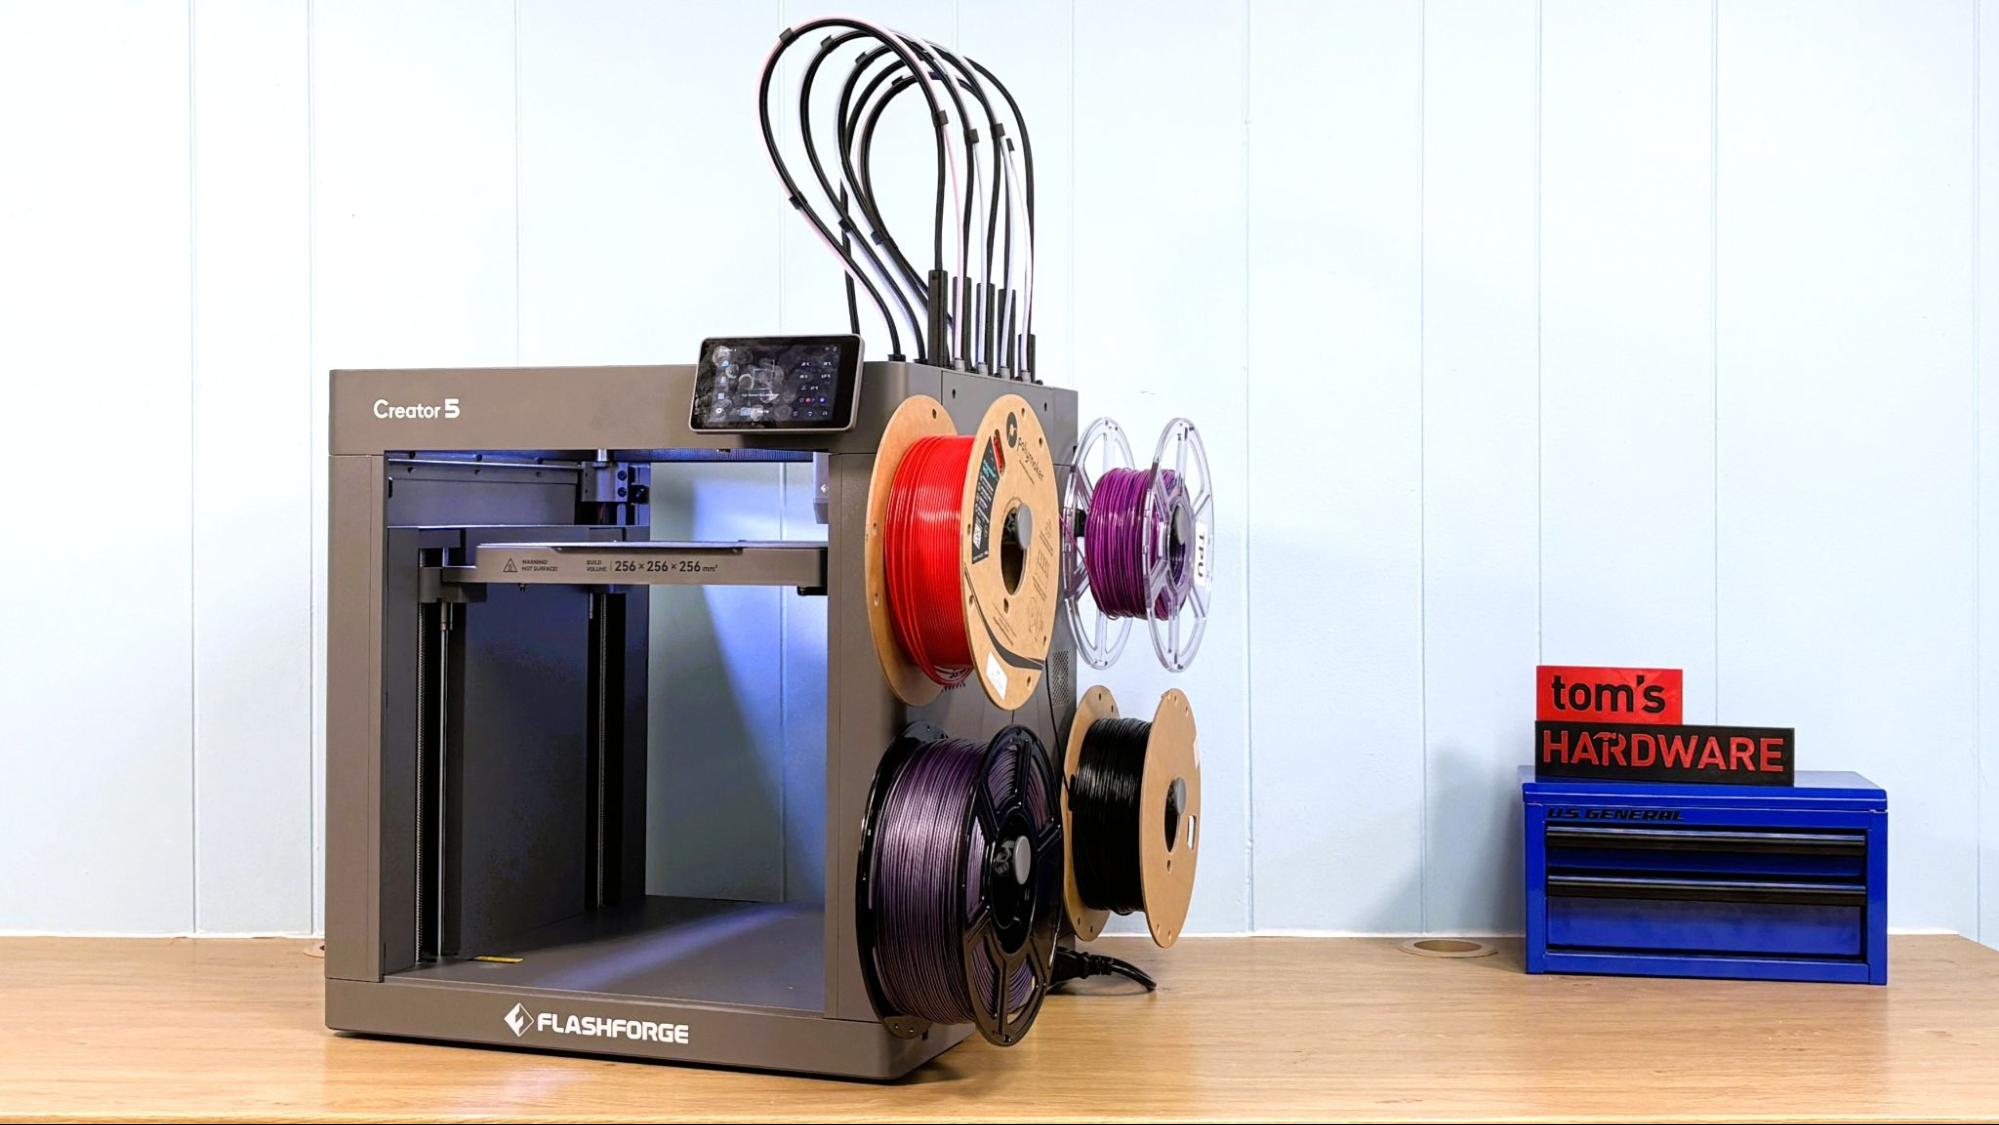
The INDX ditches the Nextruder extruder for the Bondtech induction-heated toolhead. The toolhead looks way too exposed out of necessity, as it picks up the passive nozzles by simply ramming itself onto the rack and grabbing the toolhead with magnets. The motion system is extremely accurate, and I had no problems with it during testing. You can see the copper coils of the induction heating system very plainly.
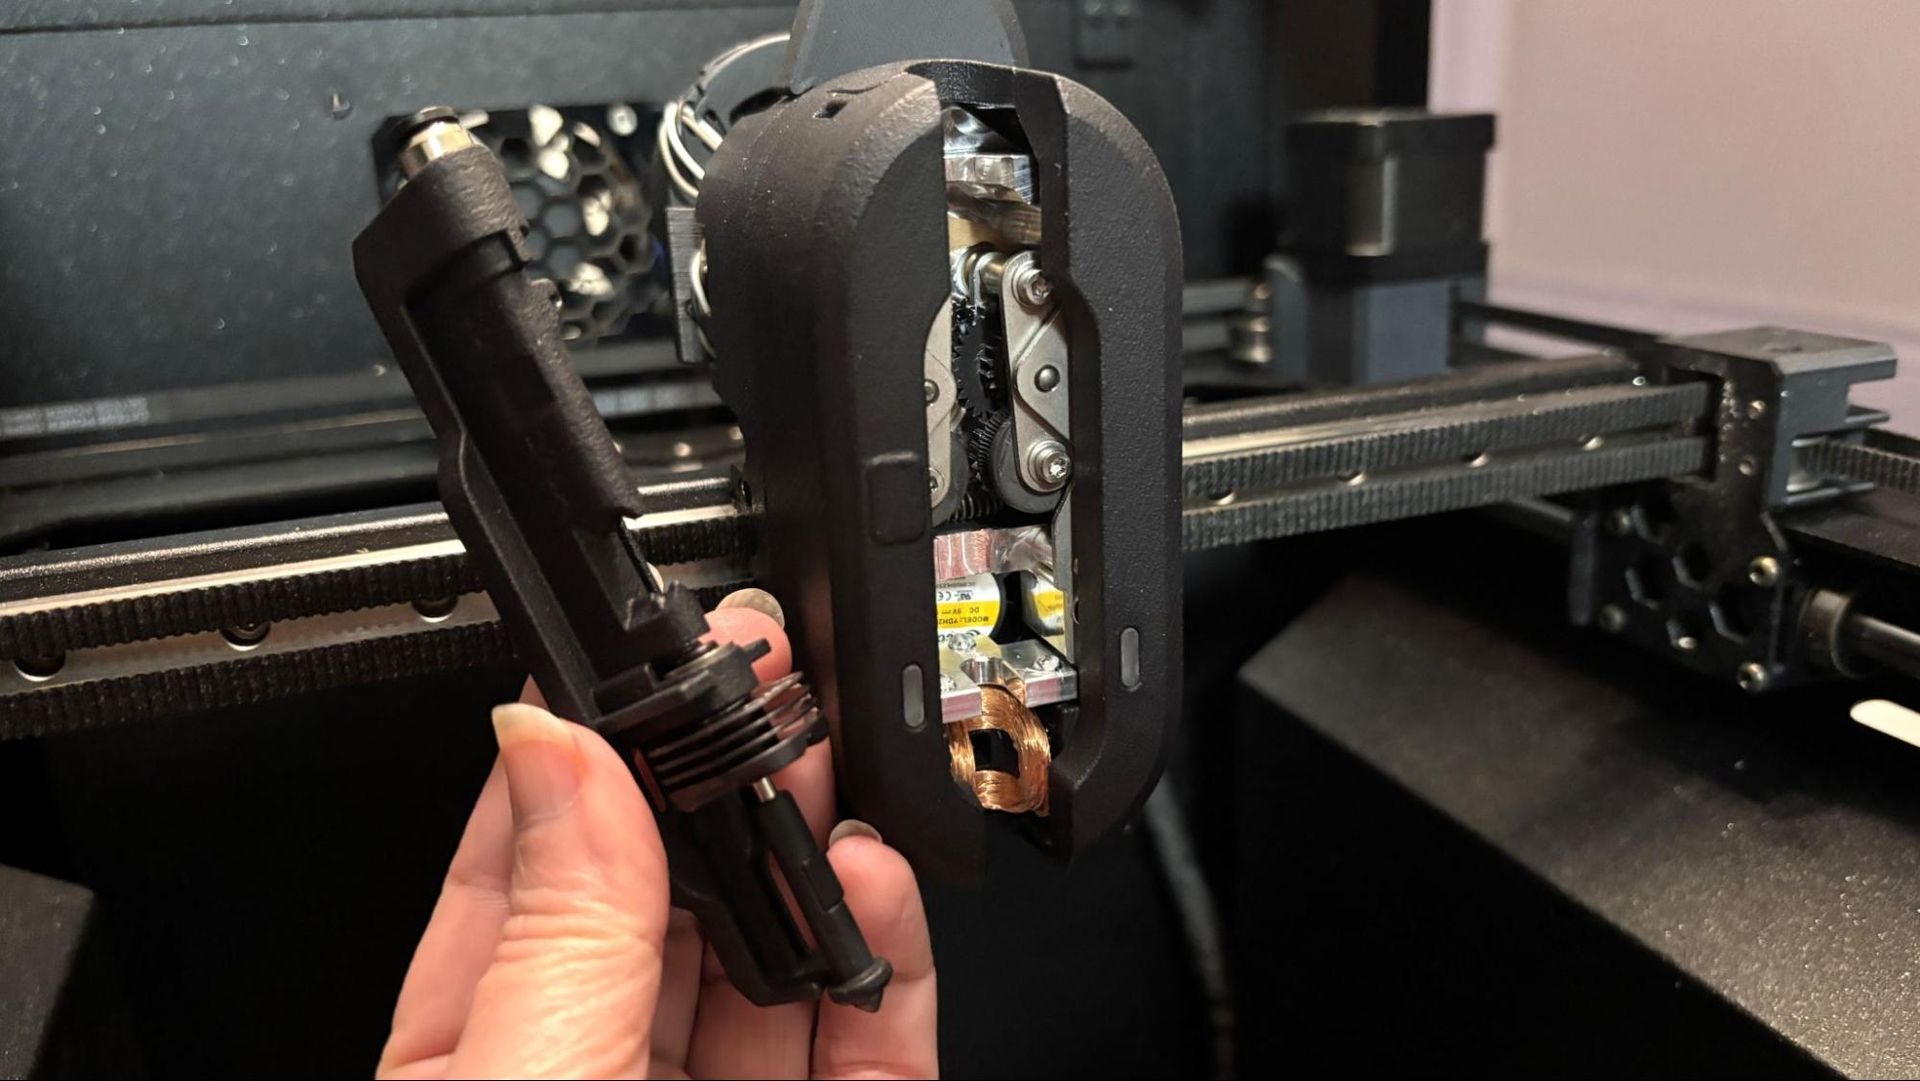
Prusa CORE One+ INDX

(Image credit: Tom's Hardware)

Unlike the Prusa XL, the toolheads mount on a rack in the front of the chamber. They take up very little space, but you will lose 15 mm of Y and 2 mm of X on the build plate compared to the CORE One+.

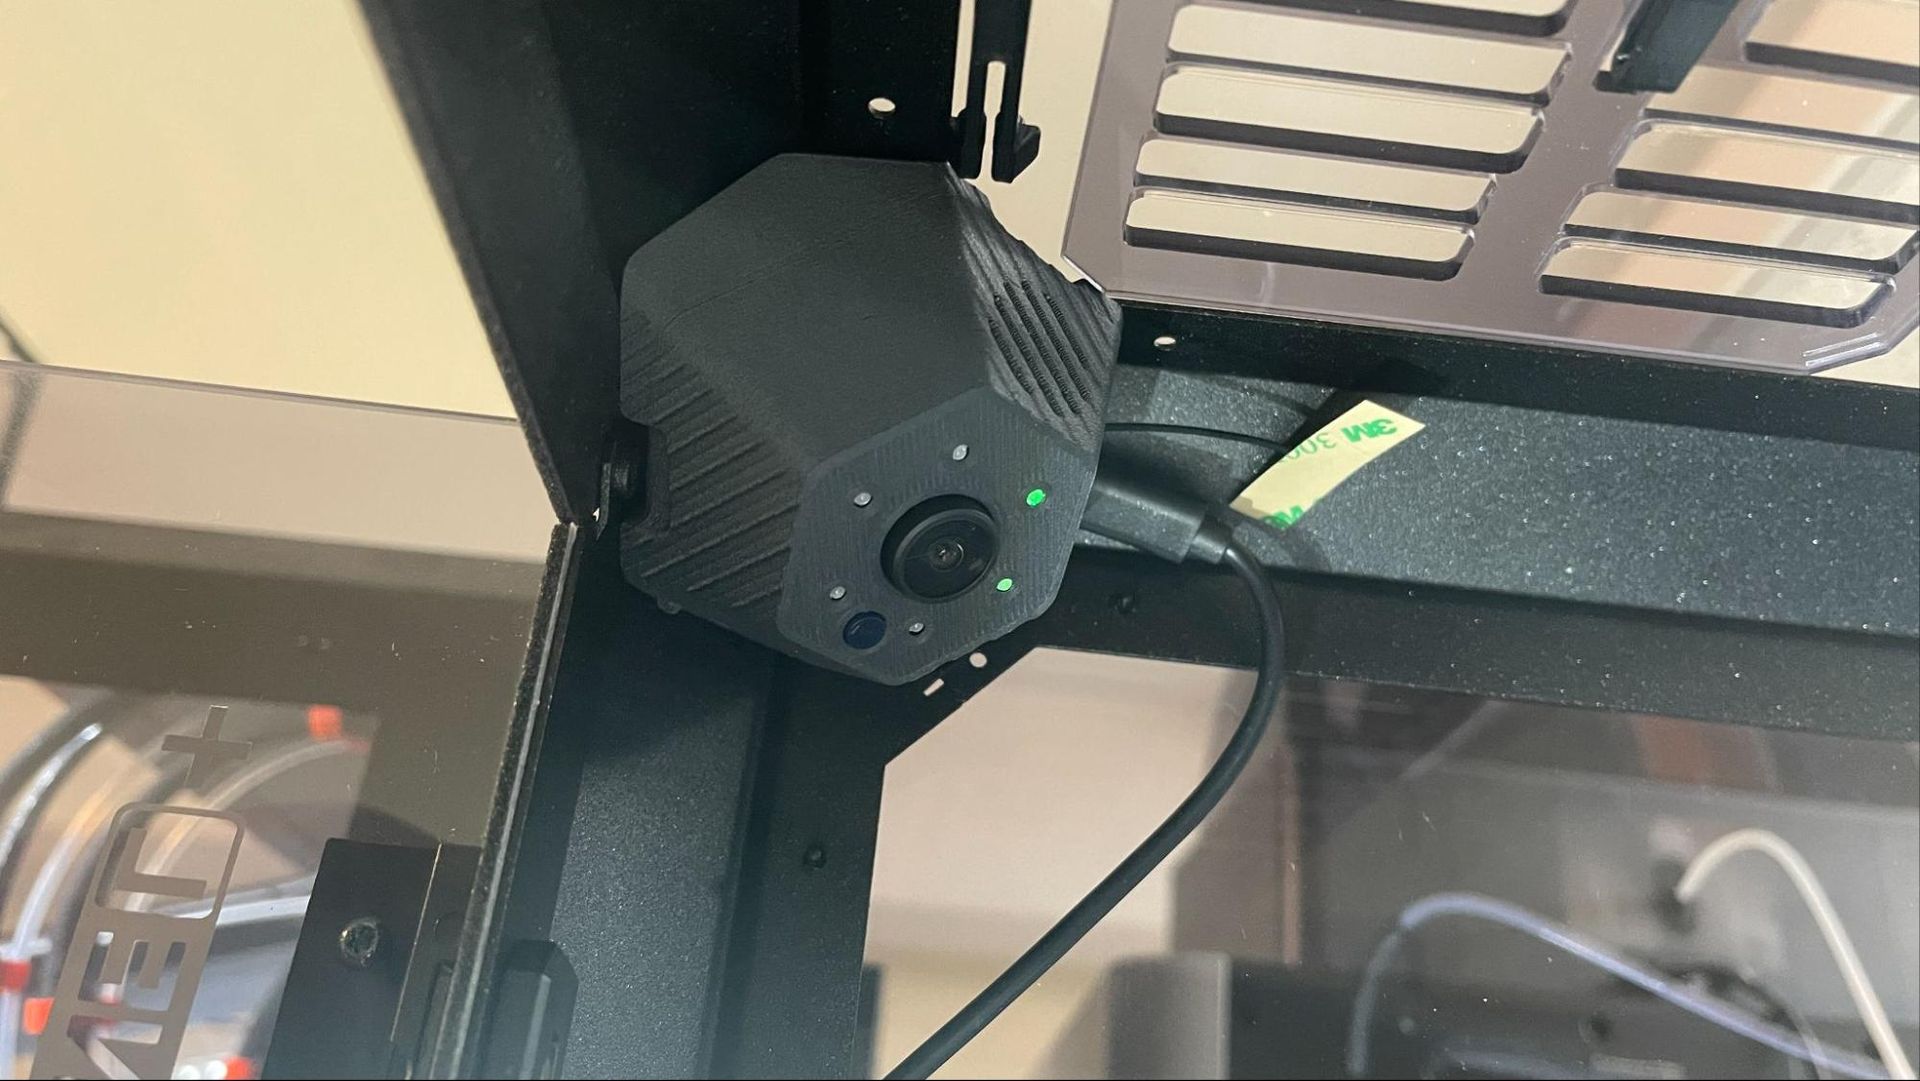
The rack does make seeing inside the printer a bit of a challenge, but the optional Buddy Cam has a clear view from the inside.
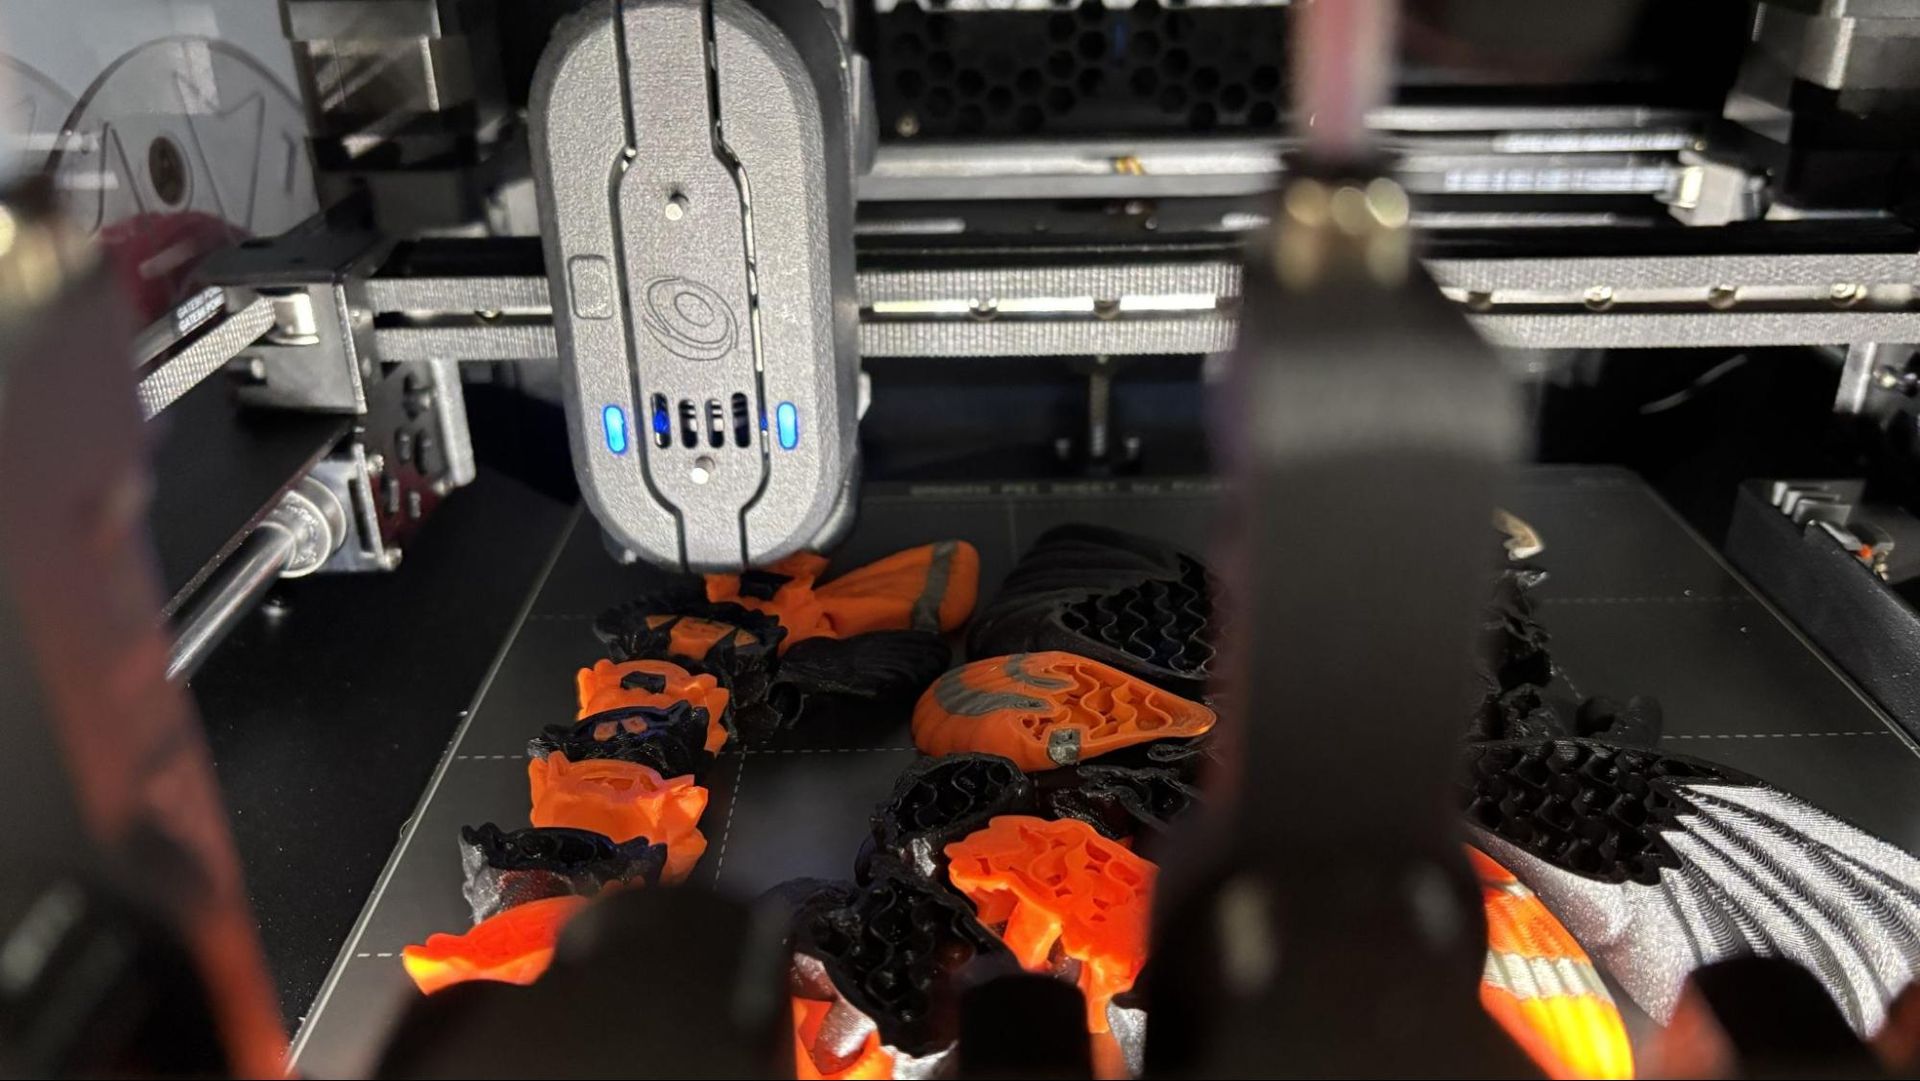
Prusa CORE One+ INDX

(Image credit: Tom's Hardware)

The wiper is located to the side, on top of the indent. In the Founder’s Edition, the wiper dumped into a small removable cup clamped to the side panel. Our review unit has a hole drilled into it to dump into a large exterior container, which is a huge improvement.
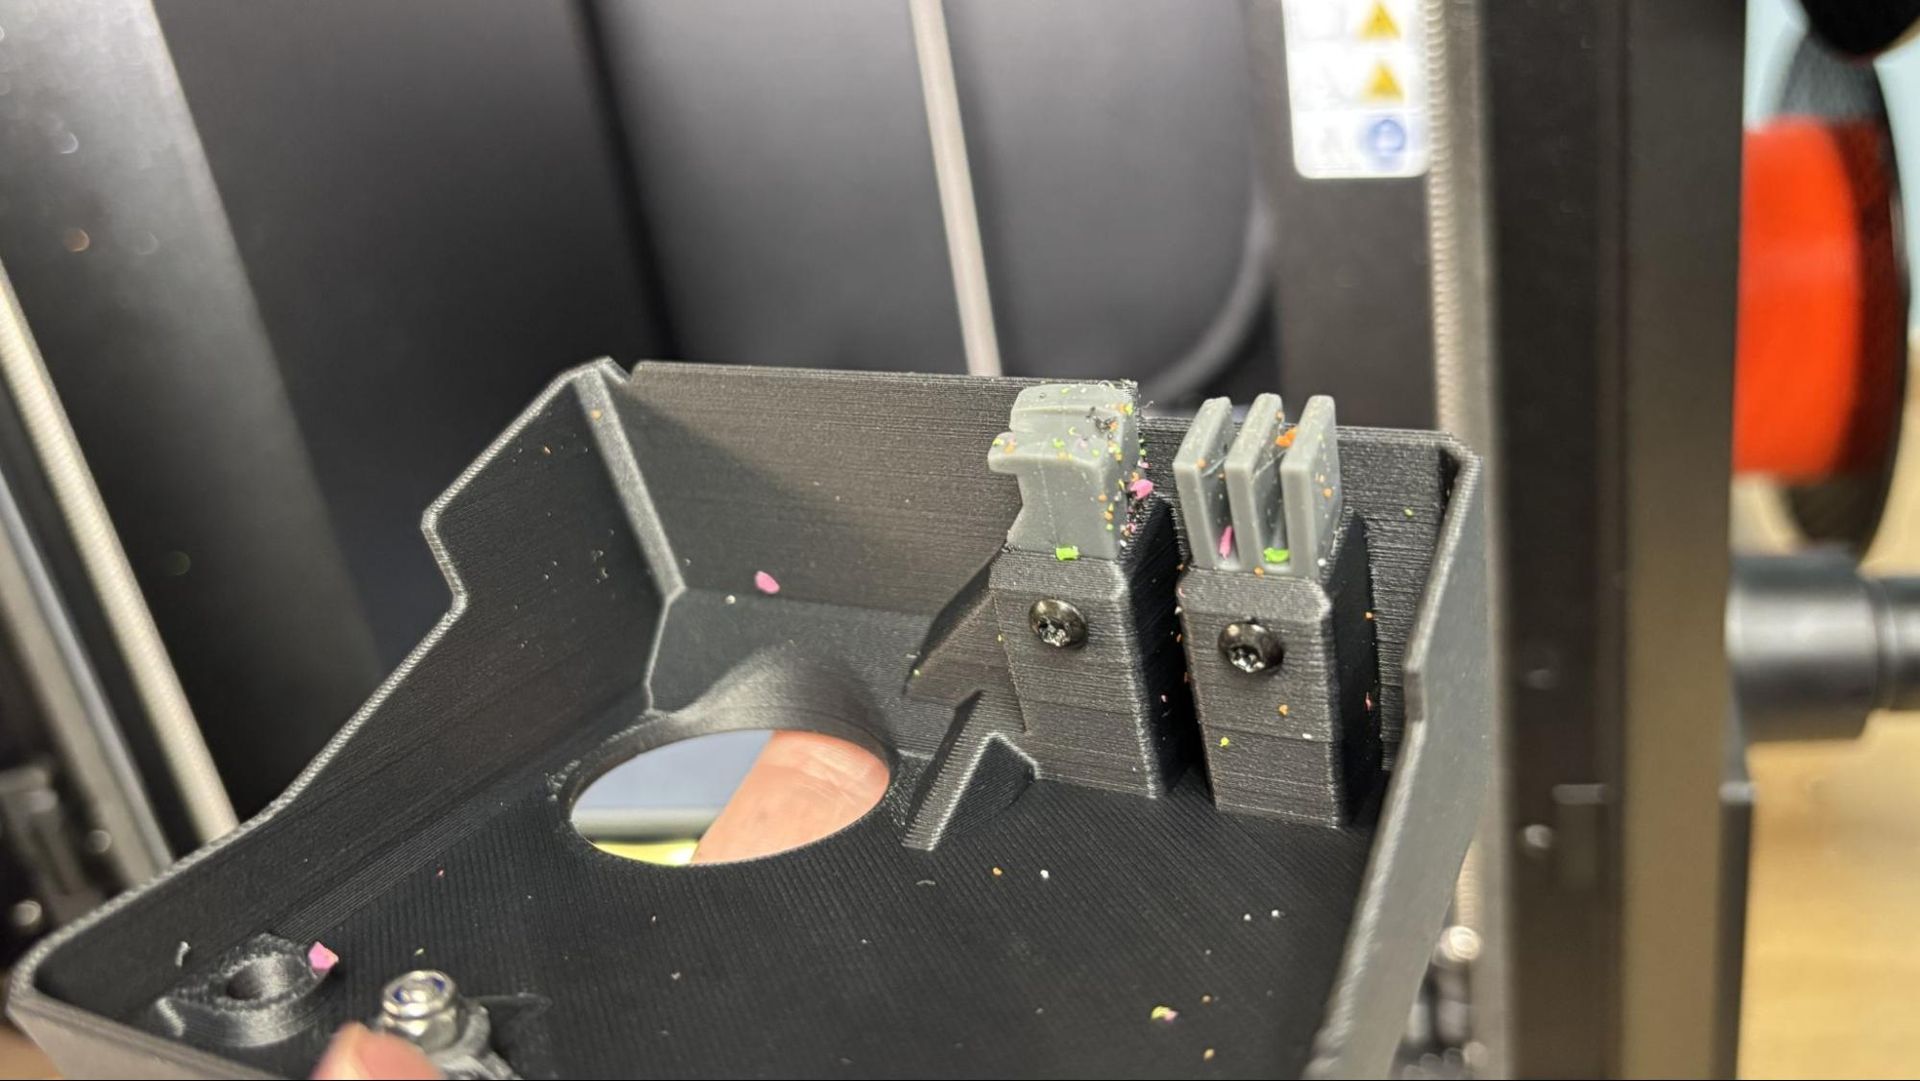
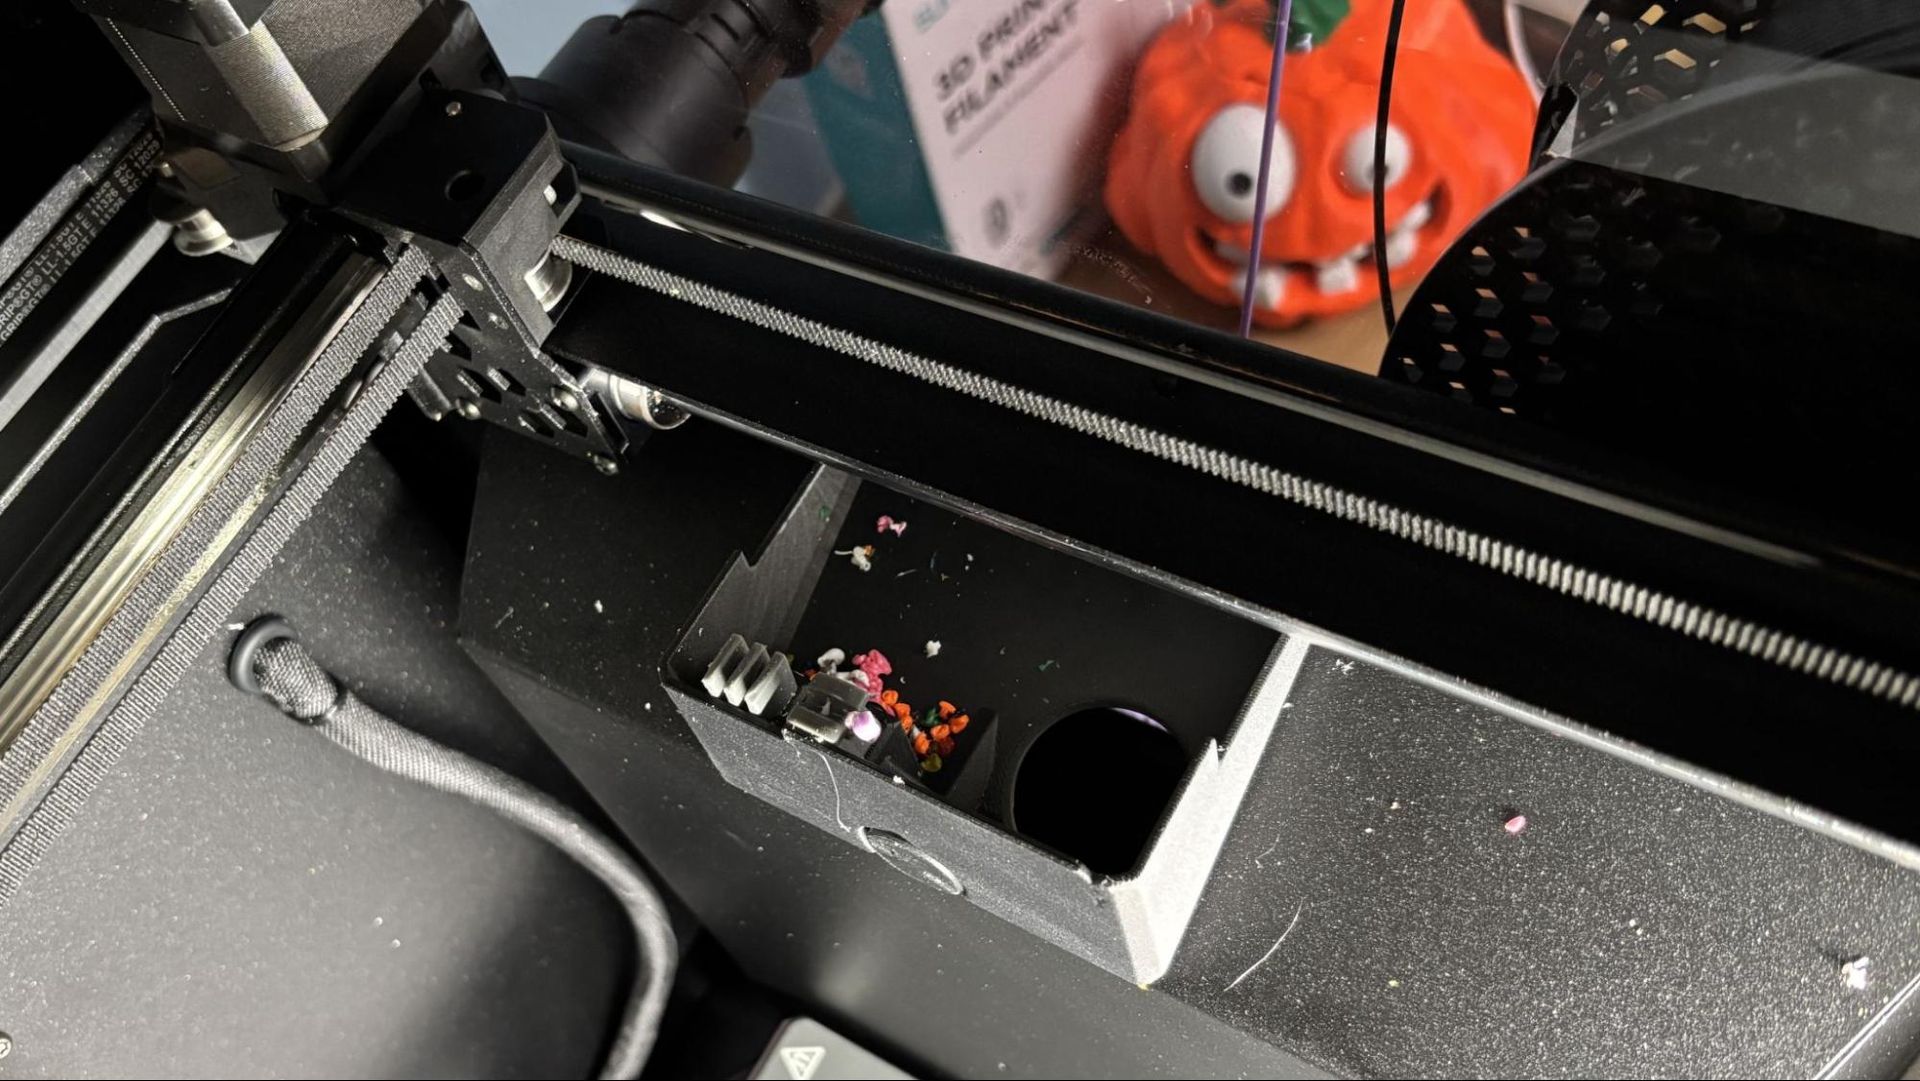
Prusa CORE One+ INDX
Tom's Hardware
Prusa CORE One+ INDX
Tom's Hardware
Prusa CORE One+ INDX
Tom's Hardware

Anyone who’s had to calibrate an XL will rejoice at the new automatic tool offset calibration system. A calibration sensor sits in the front corner of the machine, and you don’t need to do a thing but keep it clean.
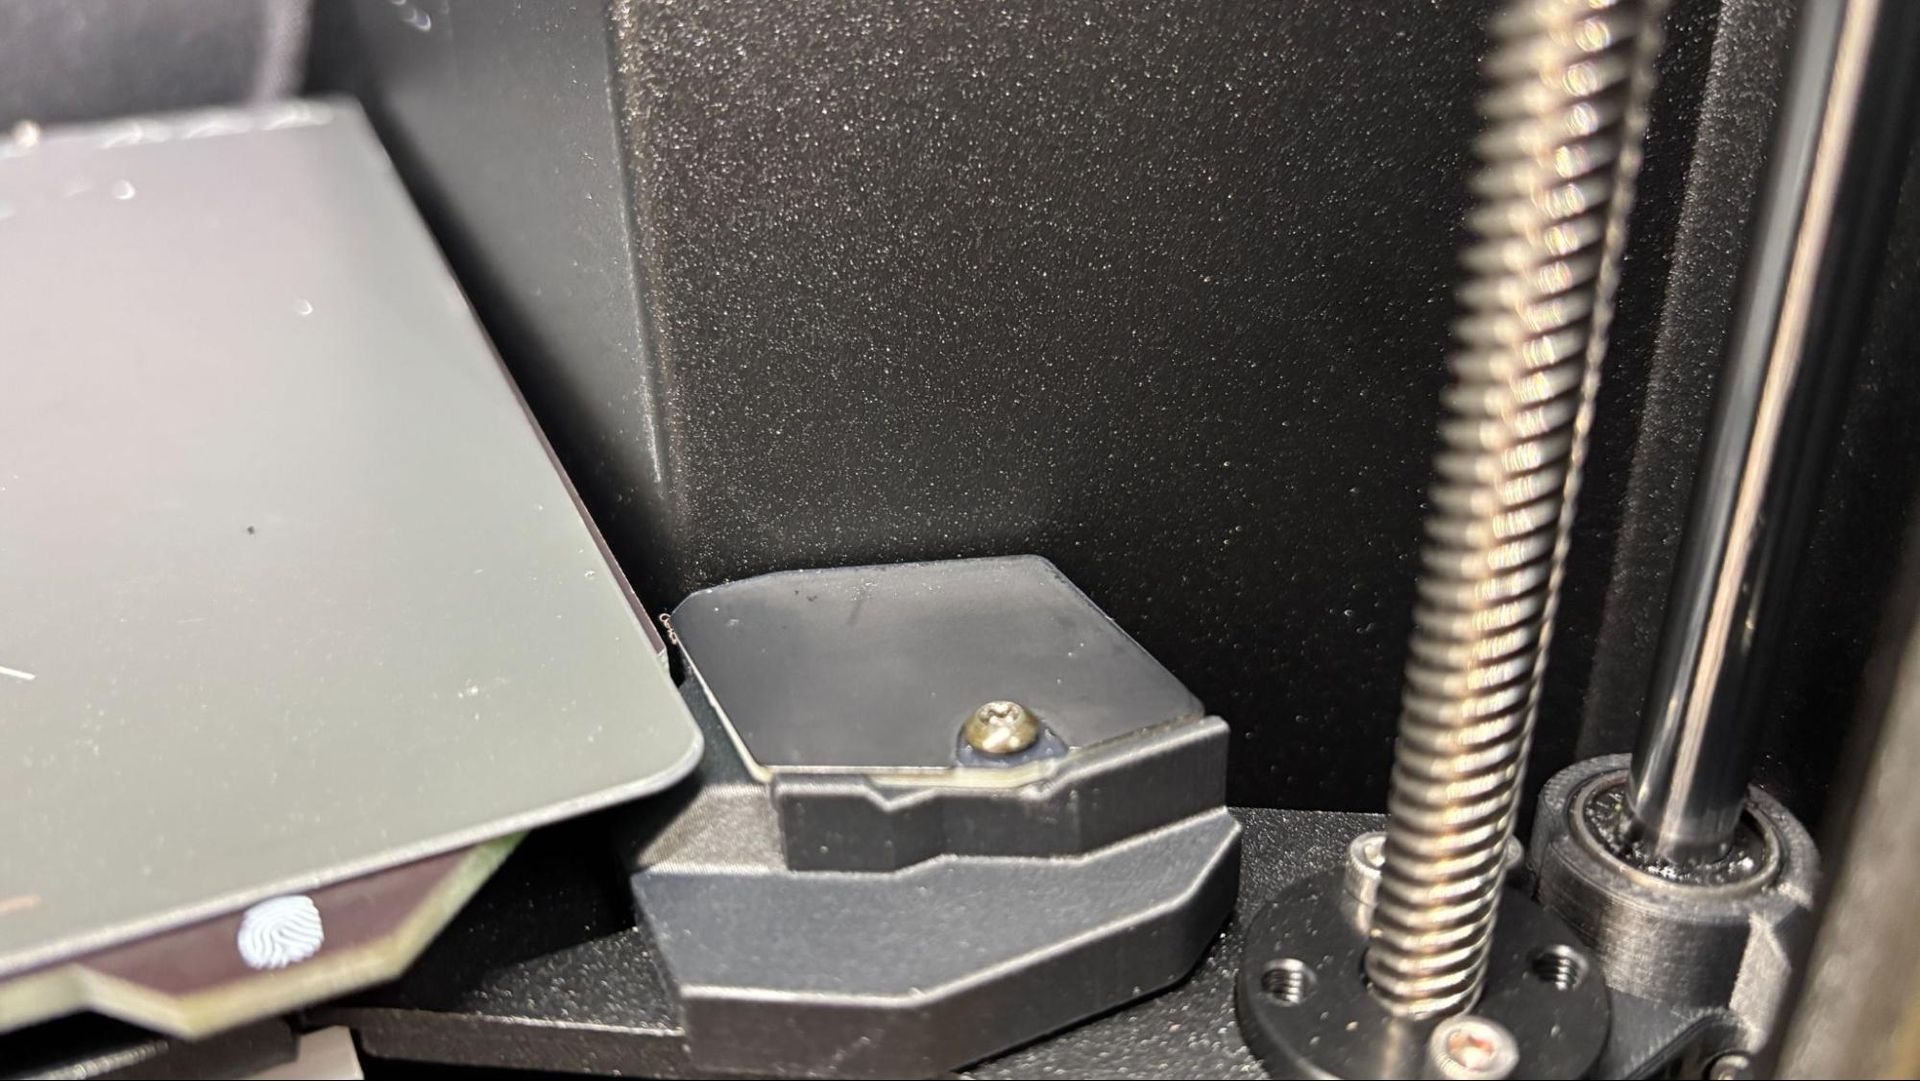
Prusa CORE One+ INDX

(Image credit: Tom's Hardware)

The CORE One+ has active chamber temperature control, which is NOT the same as chamber heating. Instead, the machine’s interior geometry is optimized to capture heat thrown from the bed to heat the chamber up to 55C. A fan and smart ventilation system likewise keep the chamber cool enough for PLA even with the door closed.

Assembling the Prusa CORE One+ INDX
Prusa CORE One+ INDX

(Image credit: Tom's Hardware)

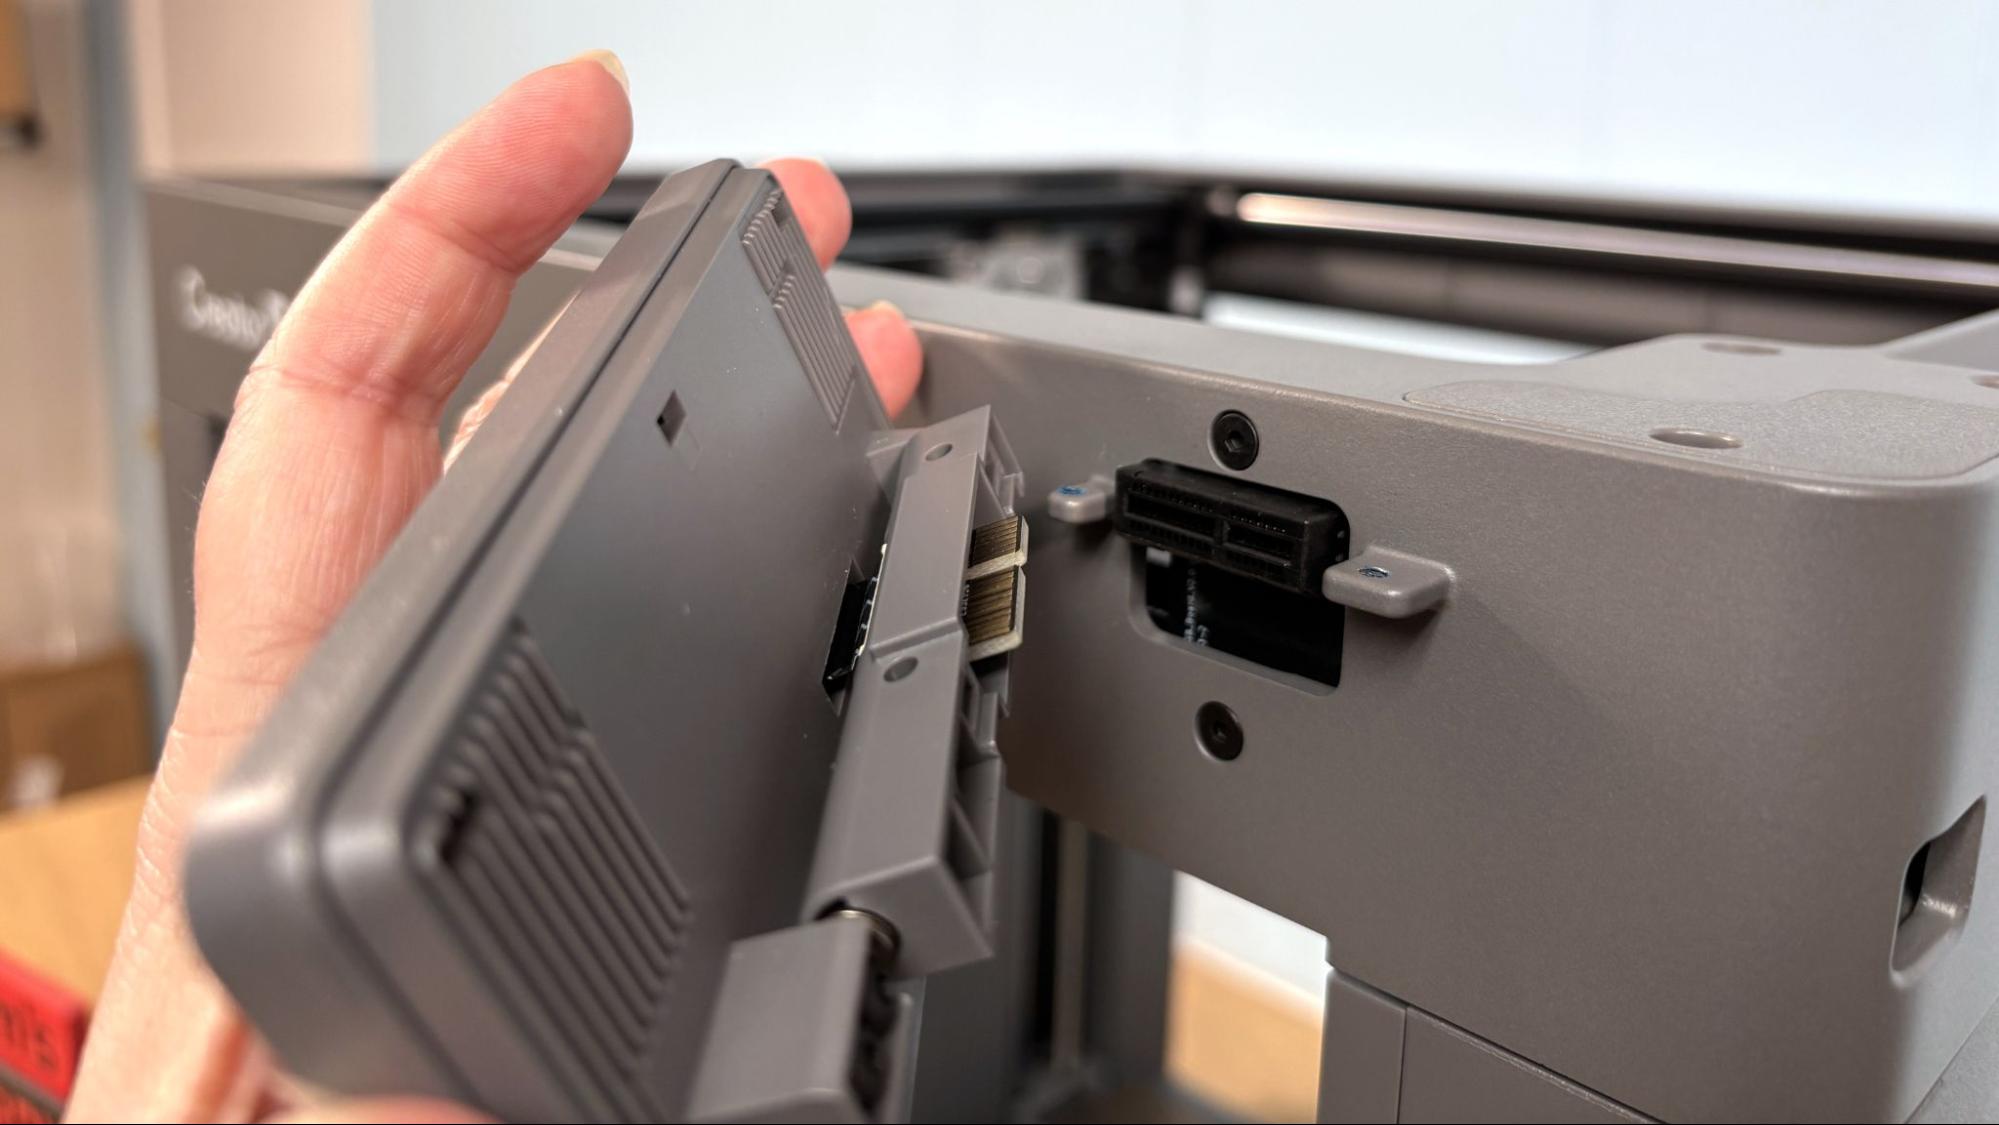
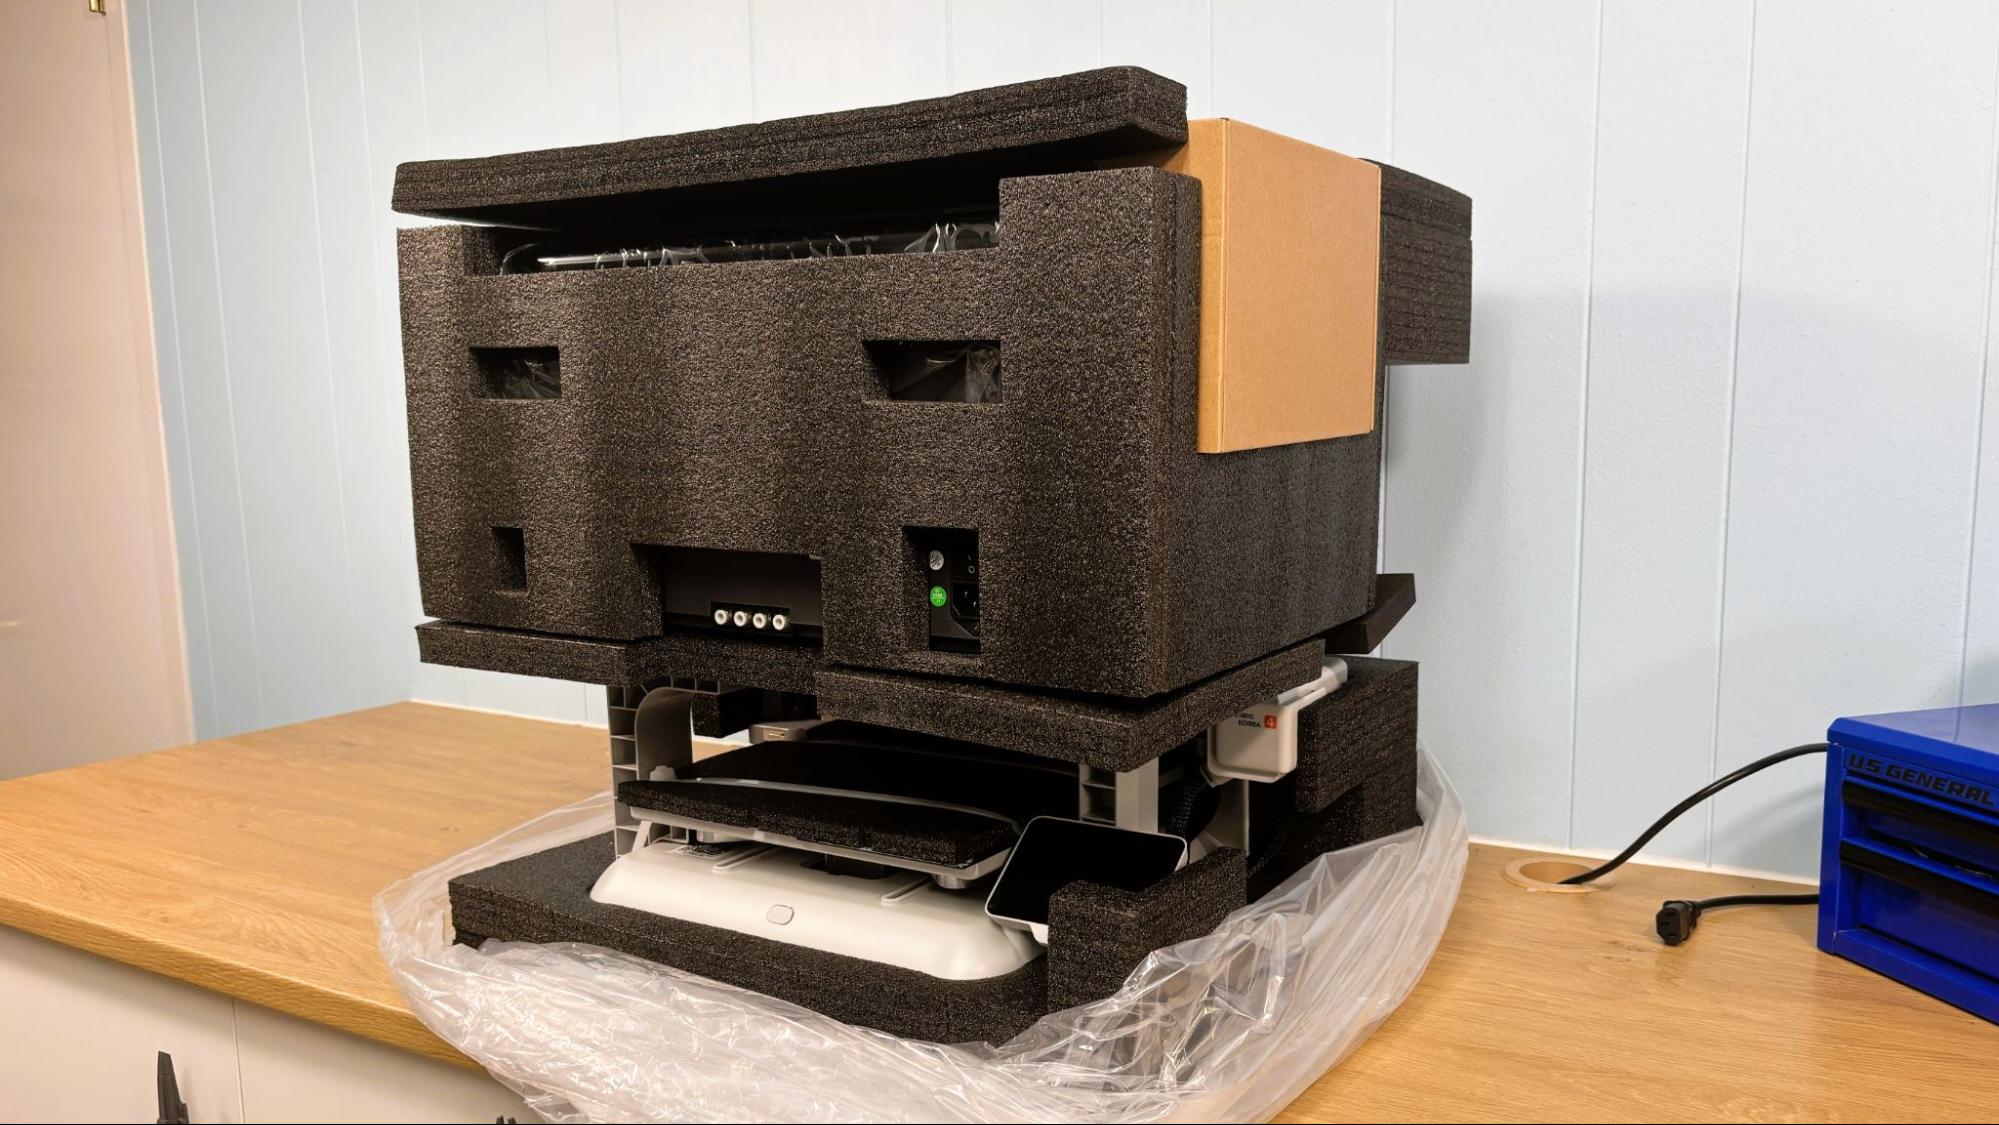
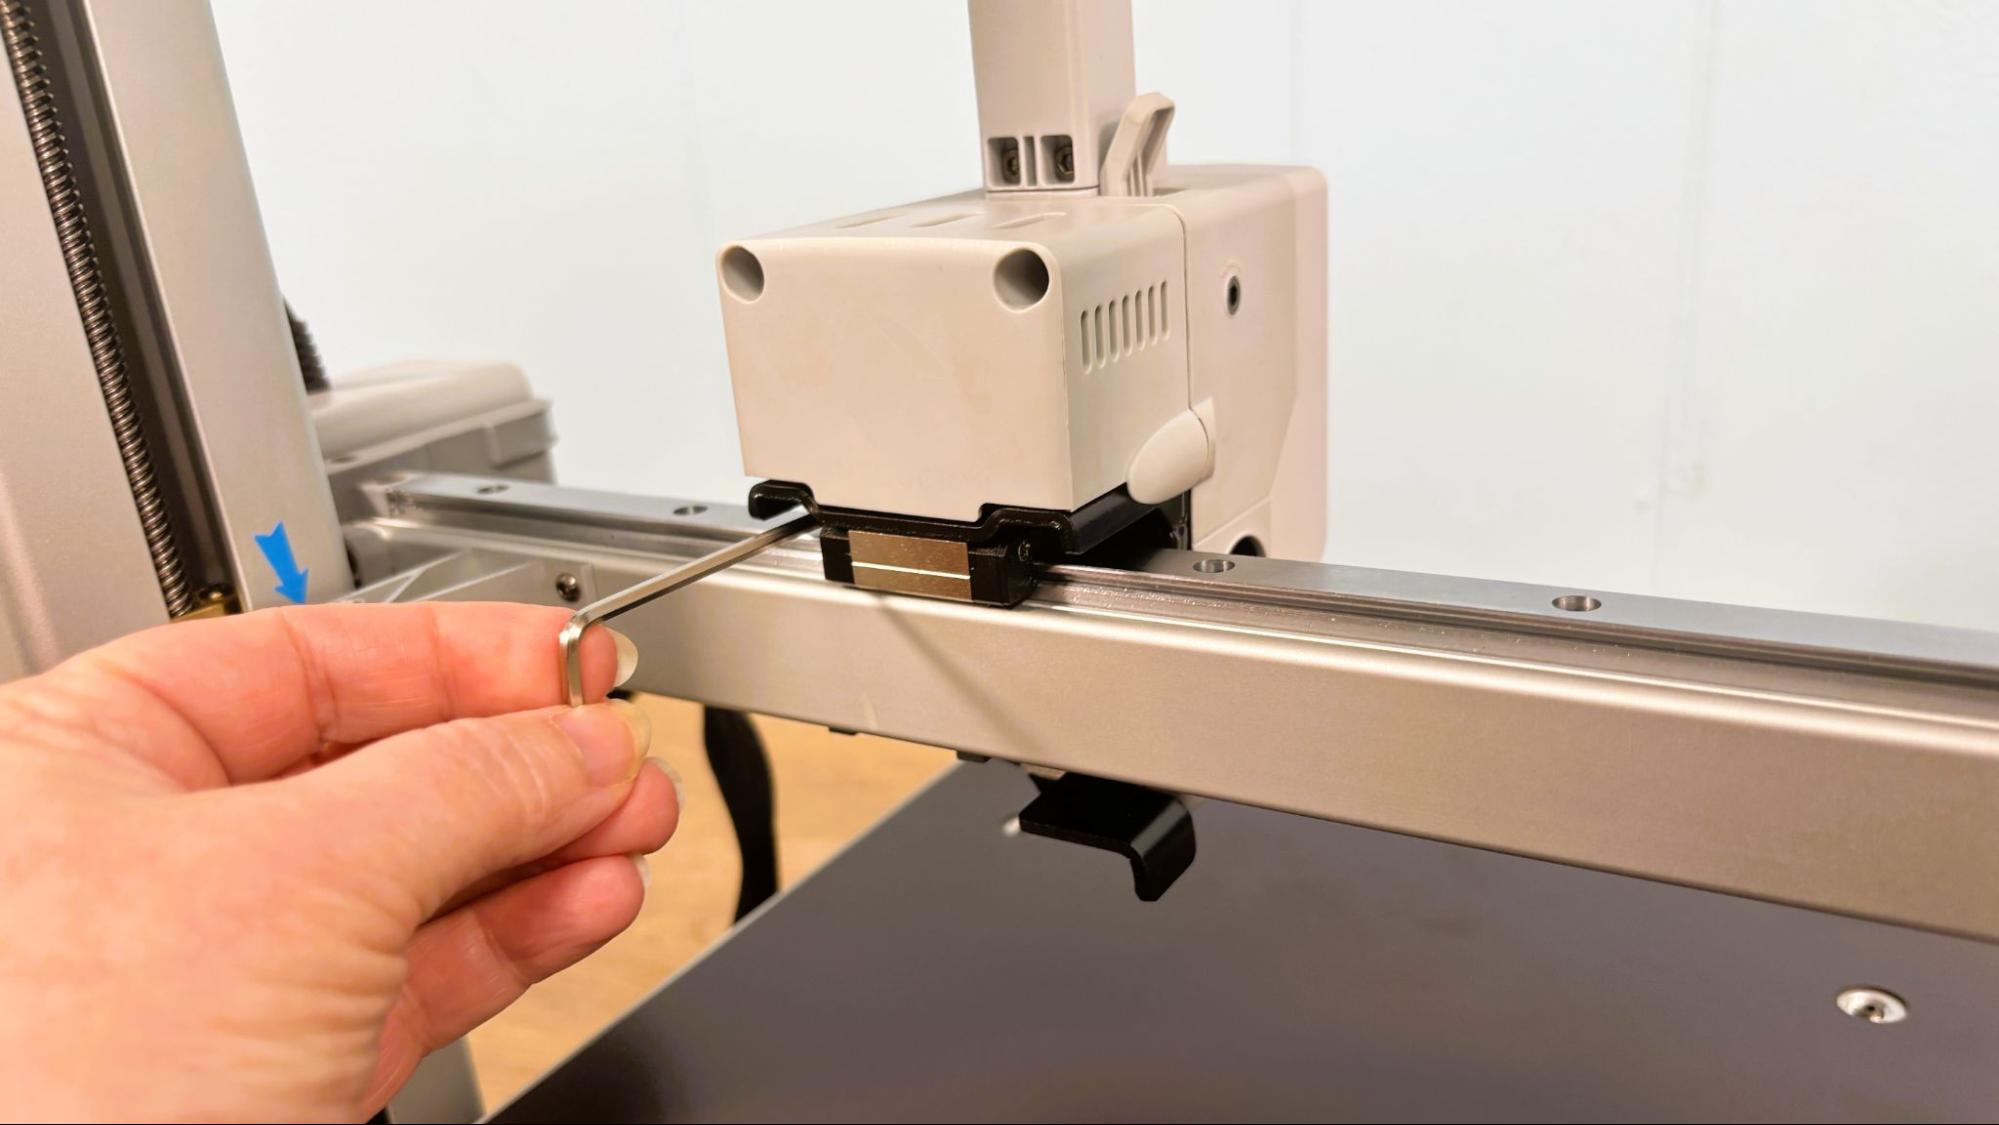
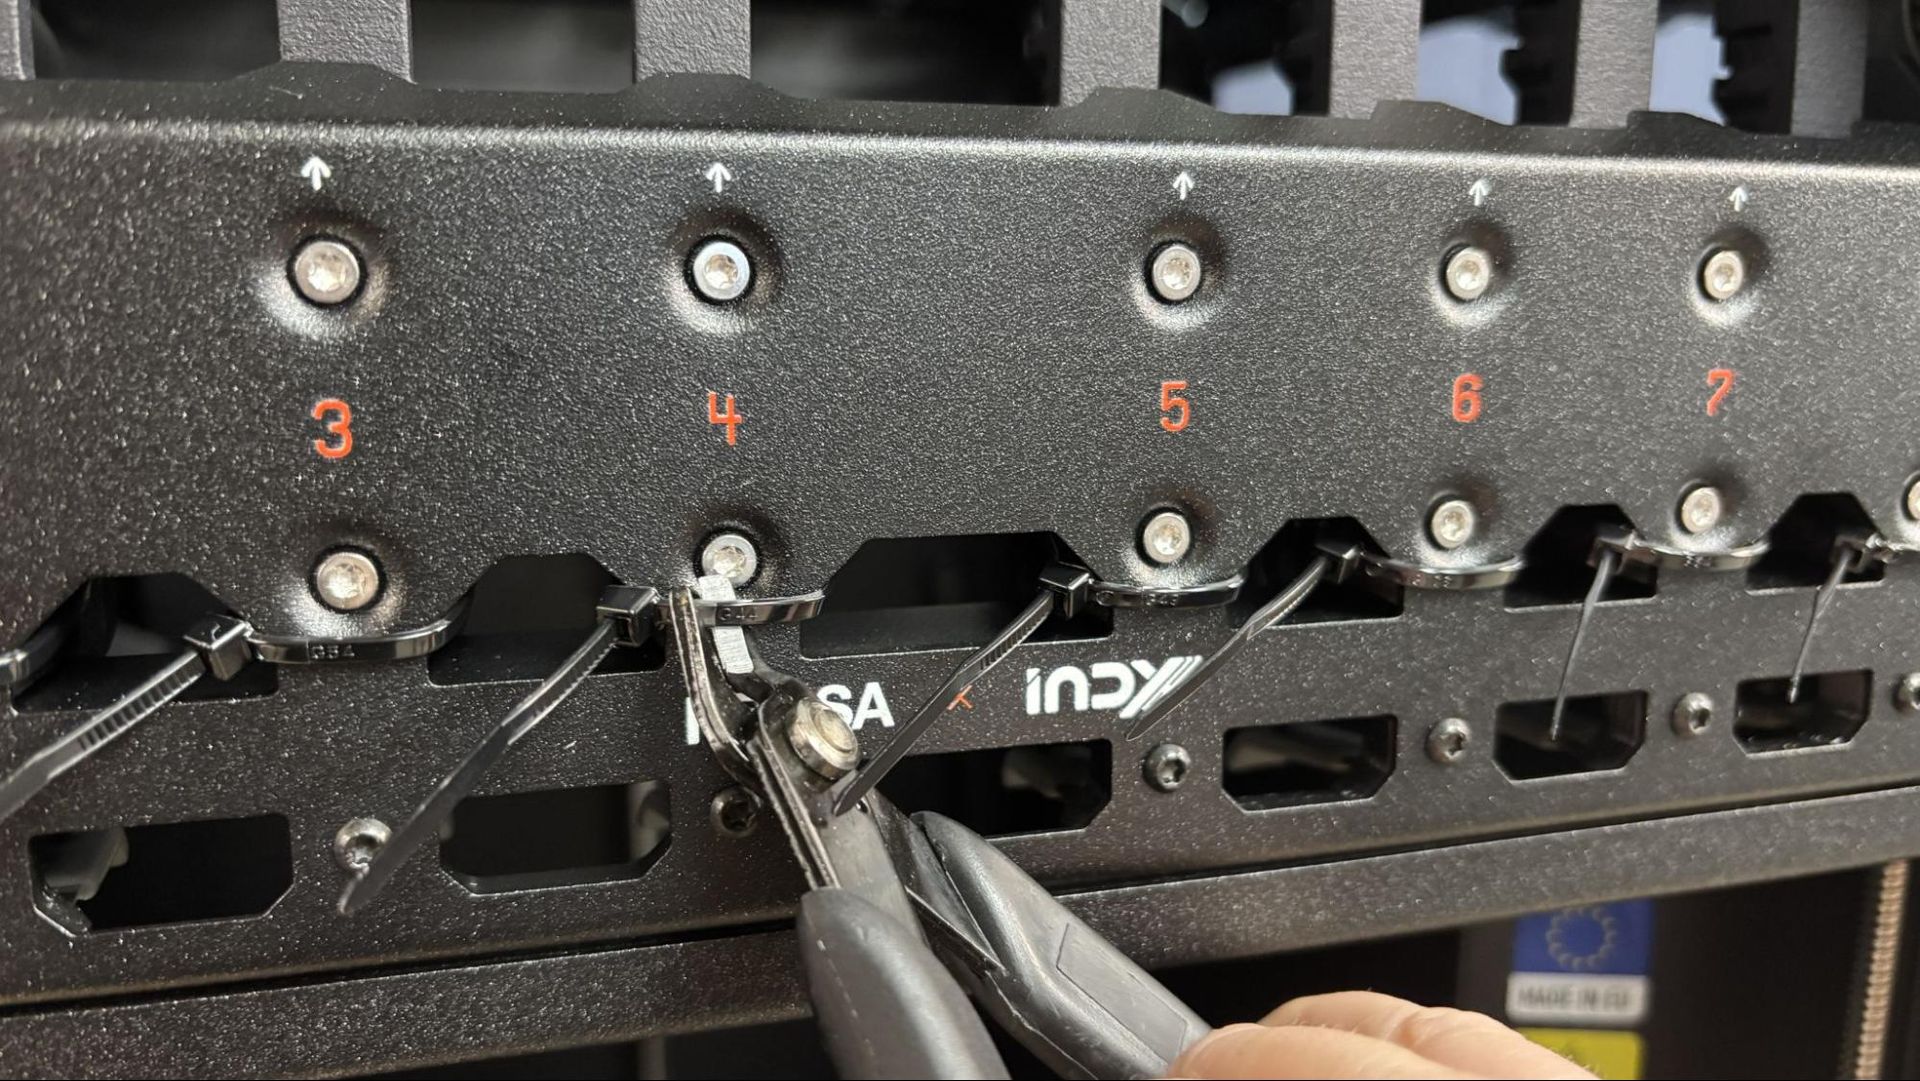
The Prusa CORE One+ INDX we reviewed came fully assembled and only needed to be unpacked. Simply pull it out of the box, remove the packing materials, snap the screen on and the spool holders, and plug it in.

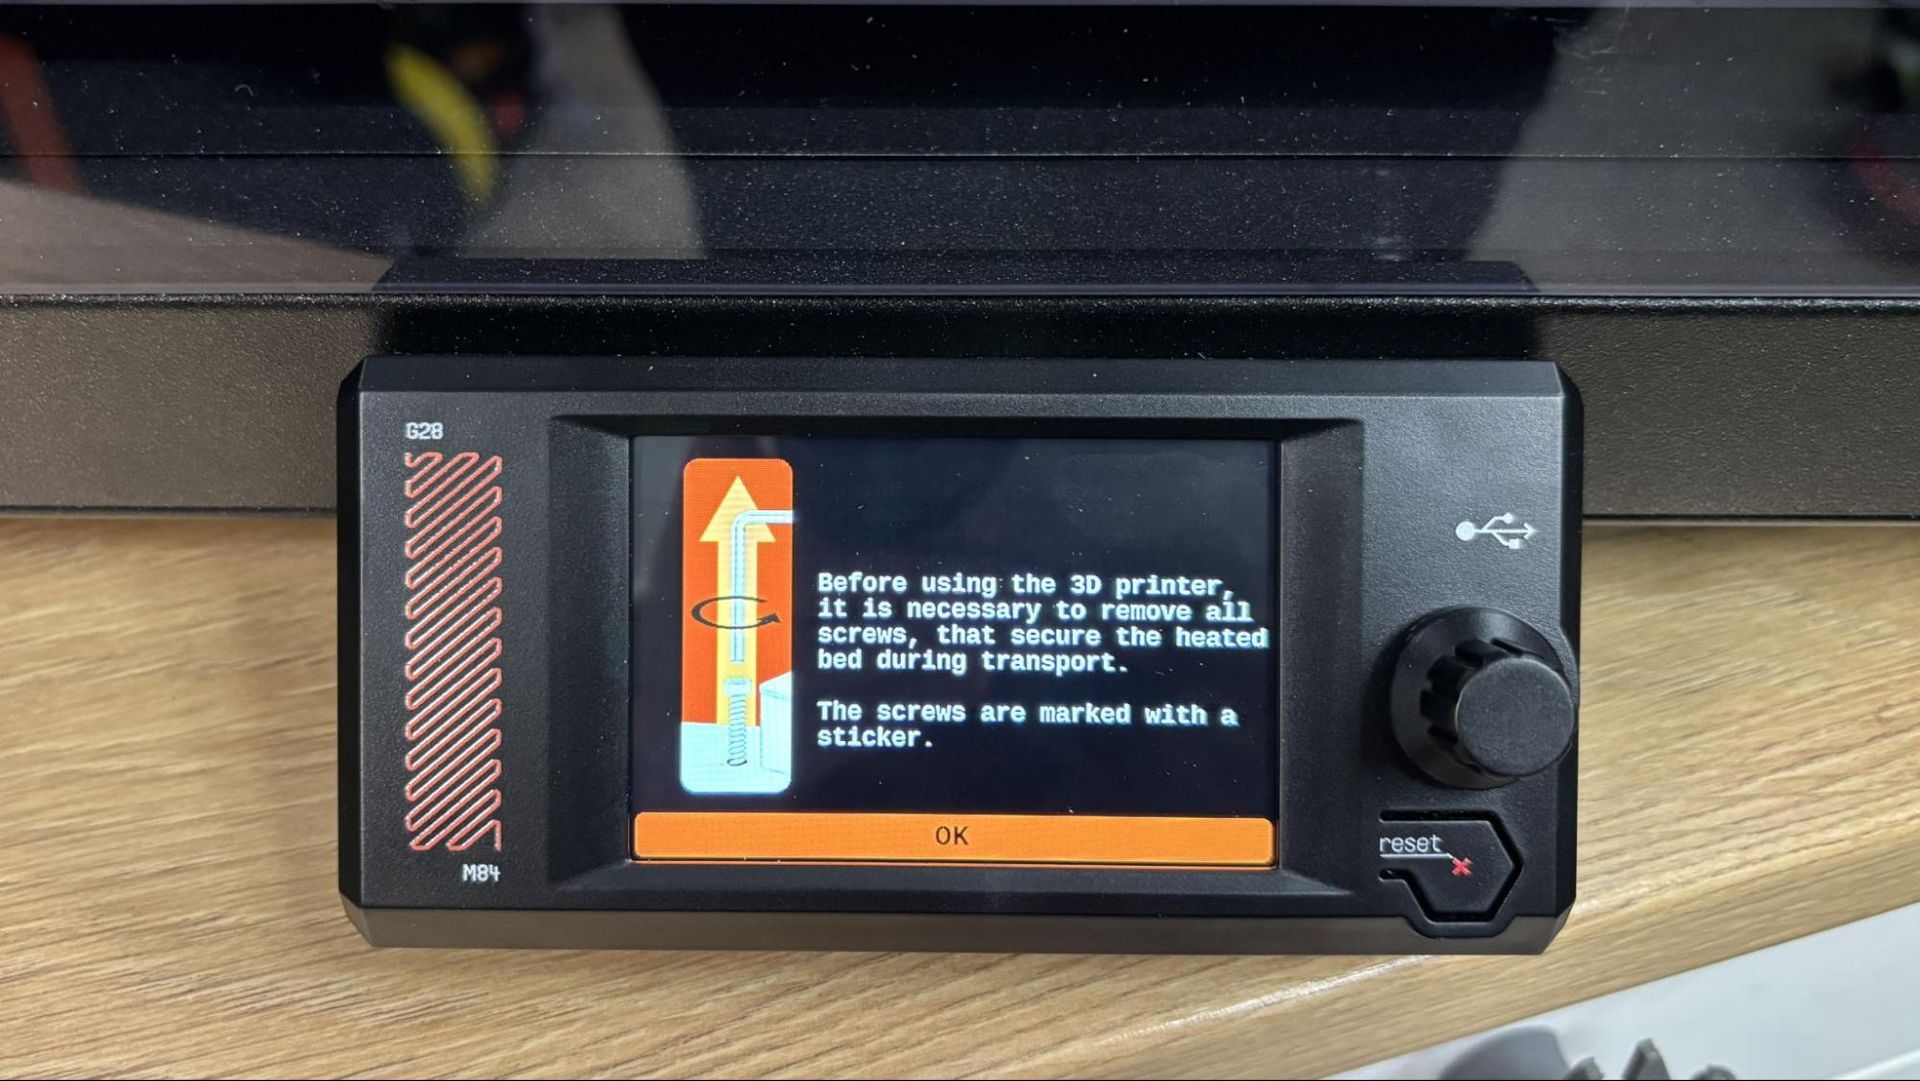
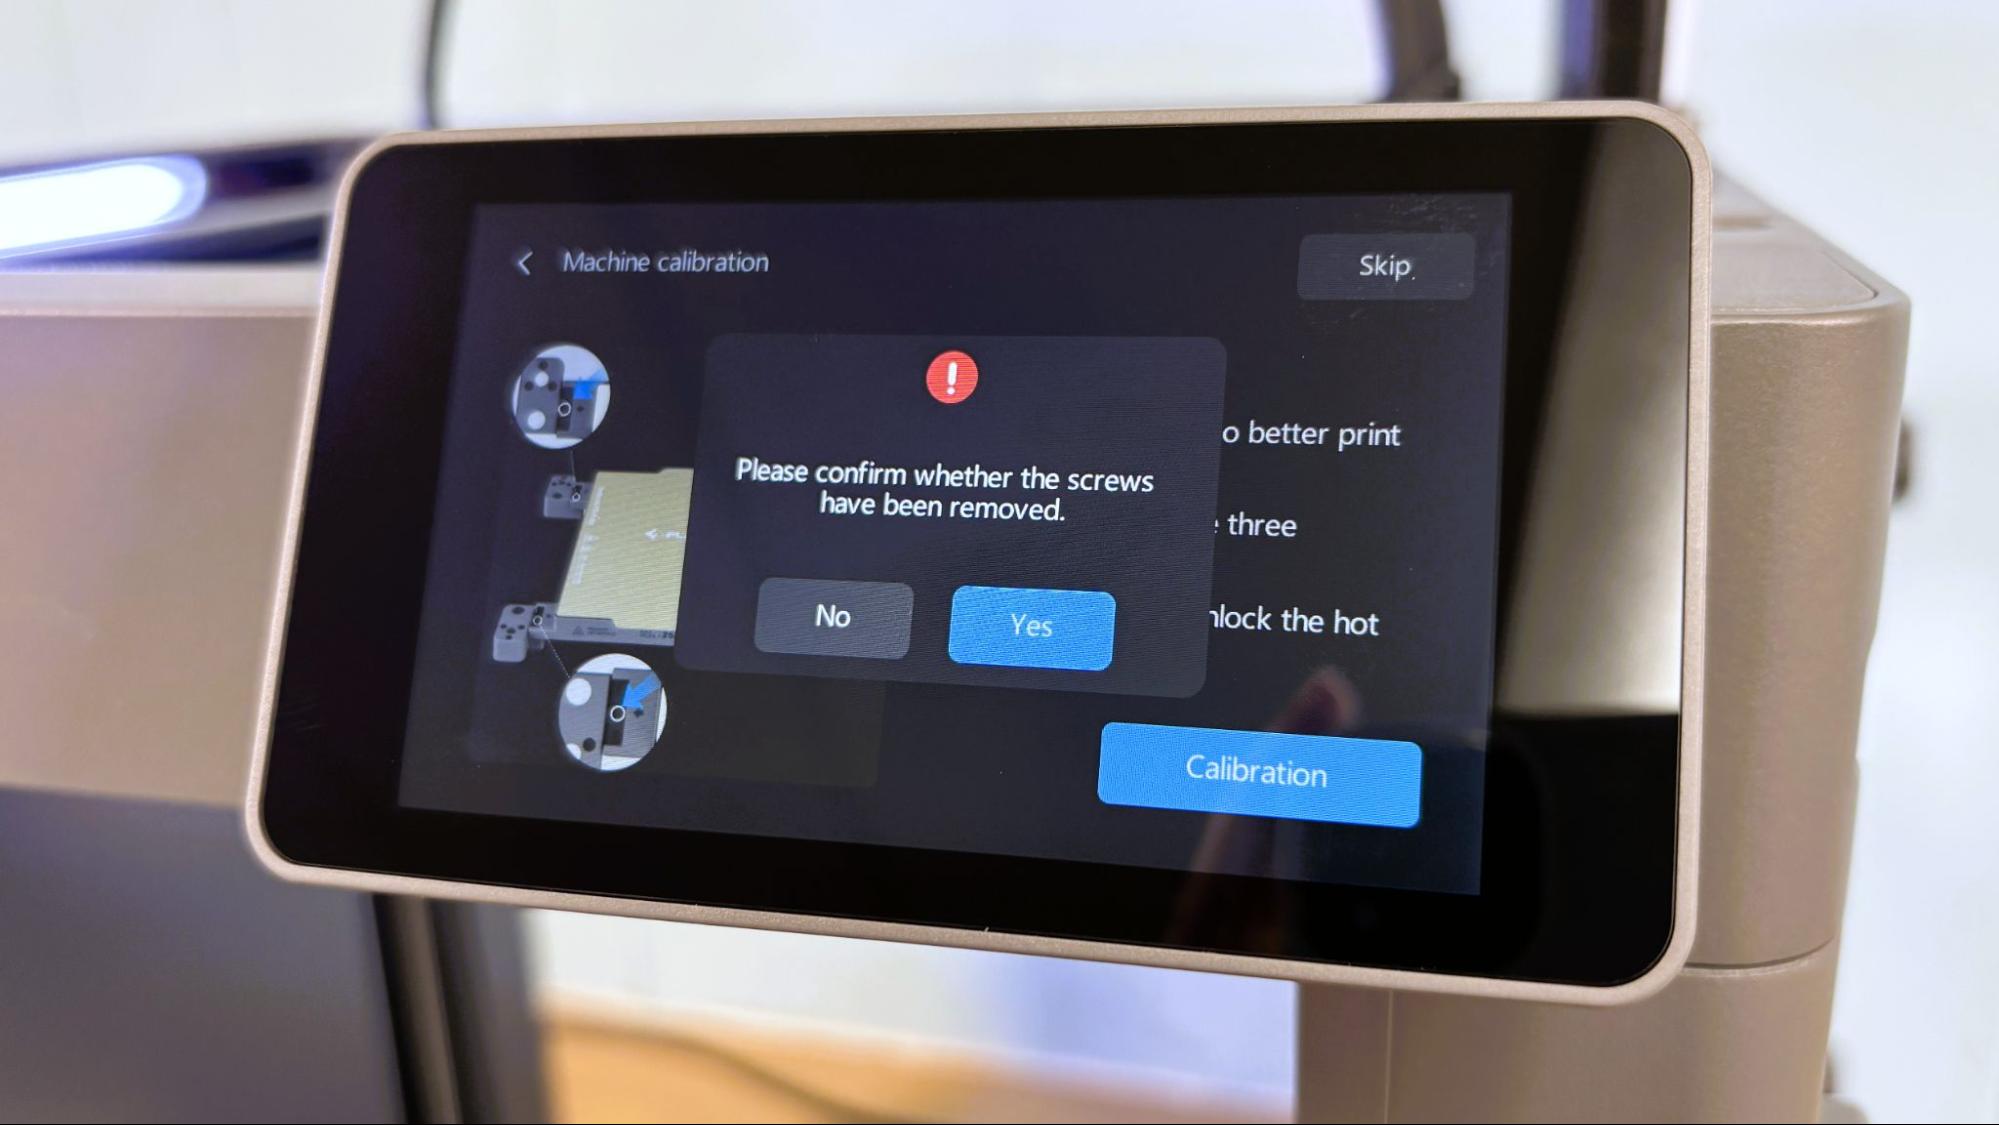
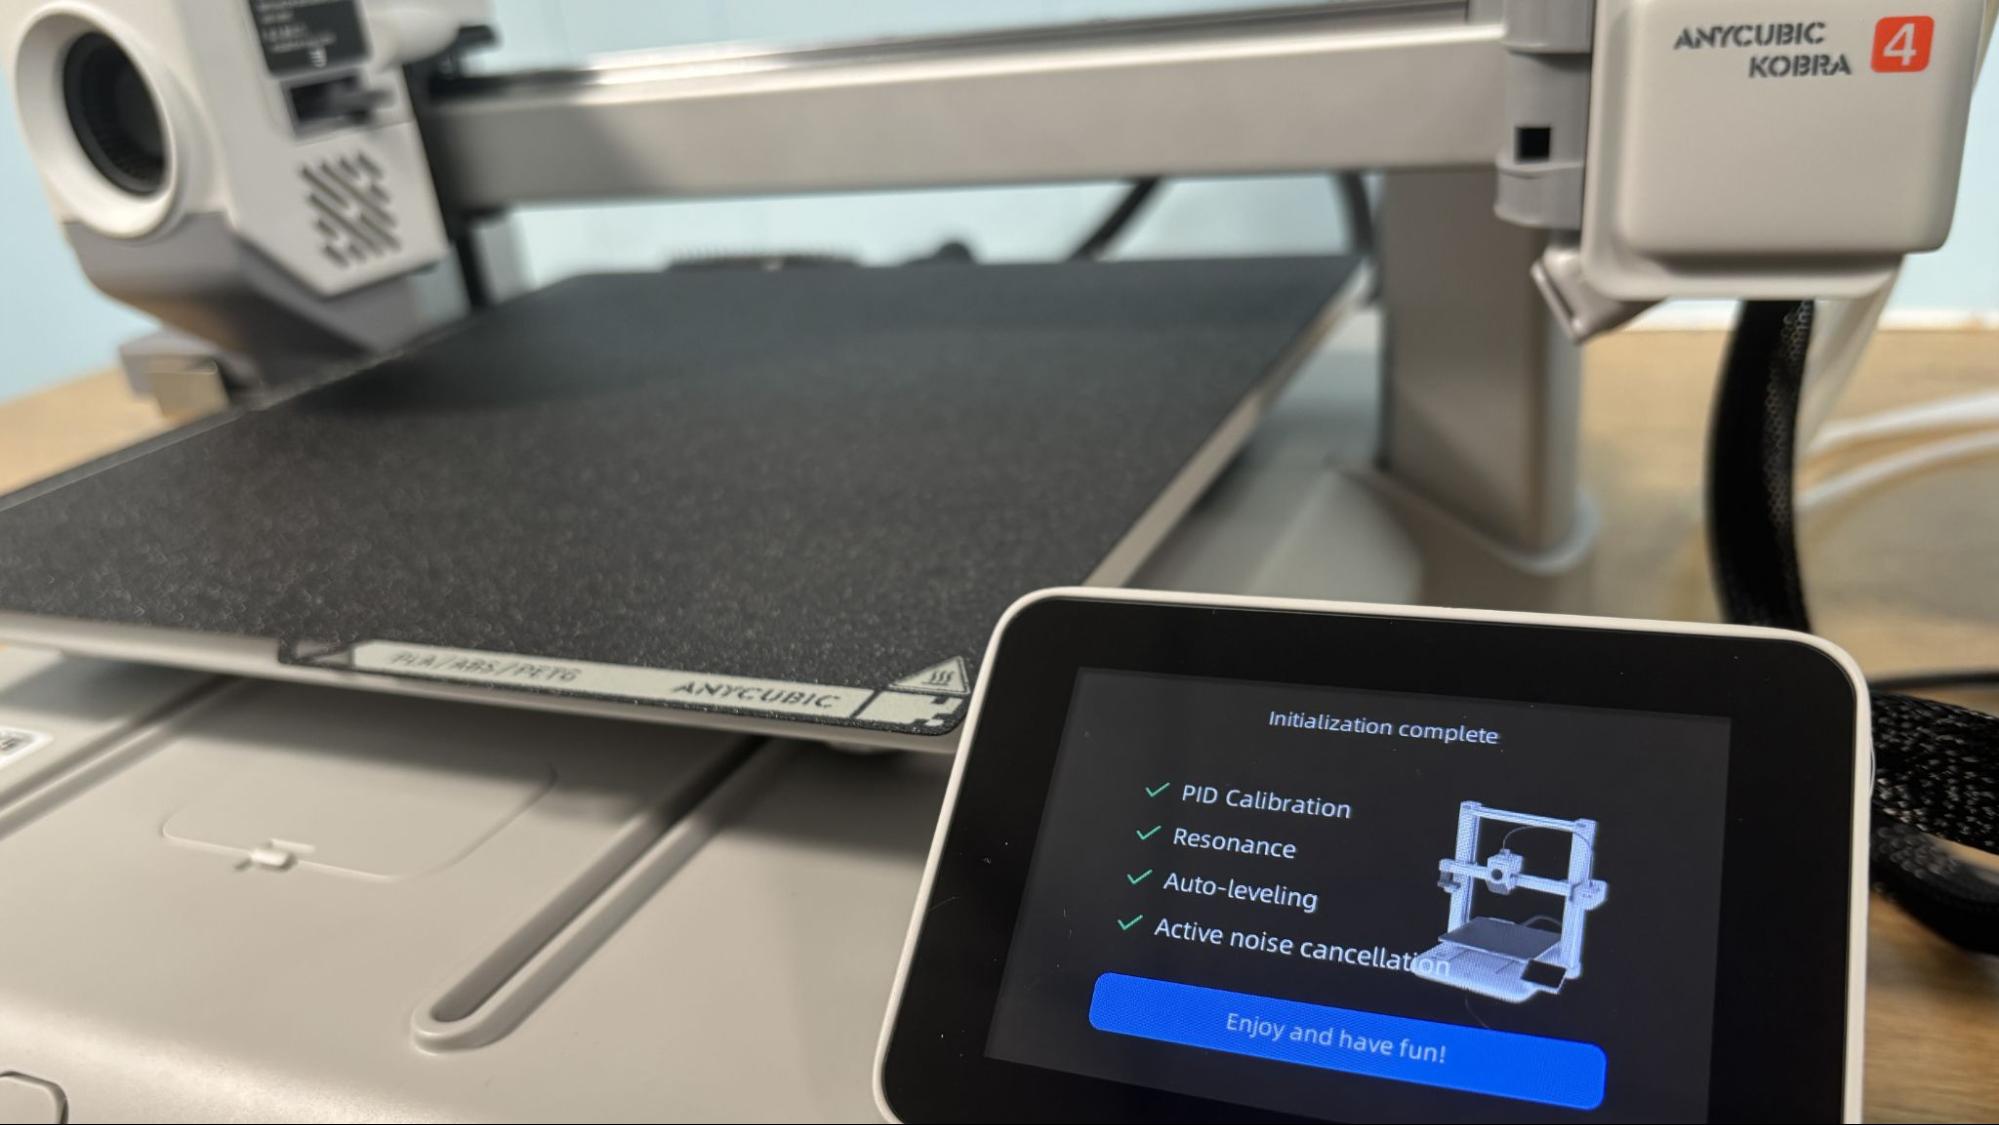
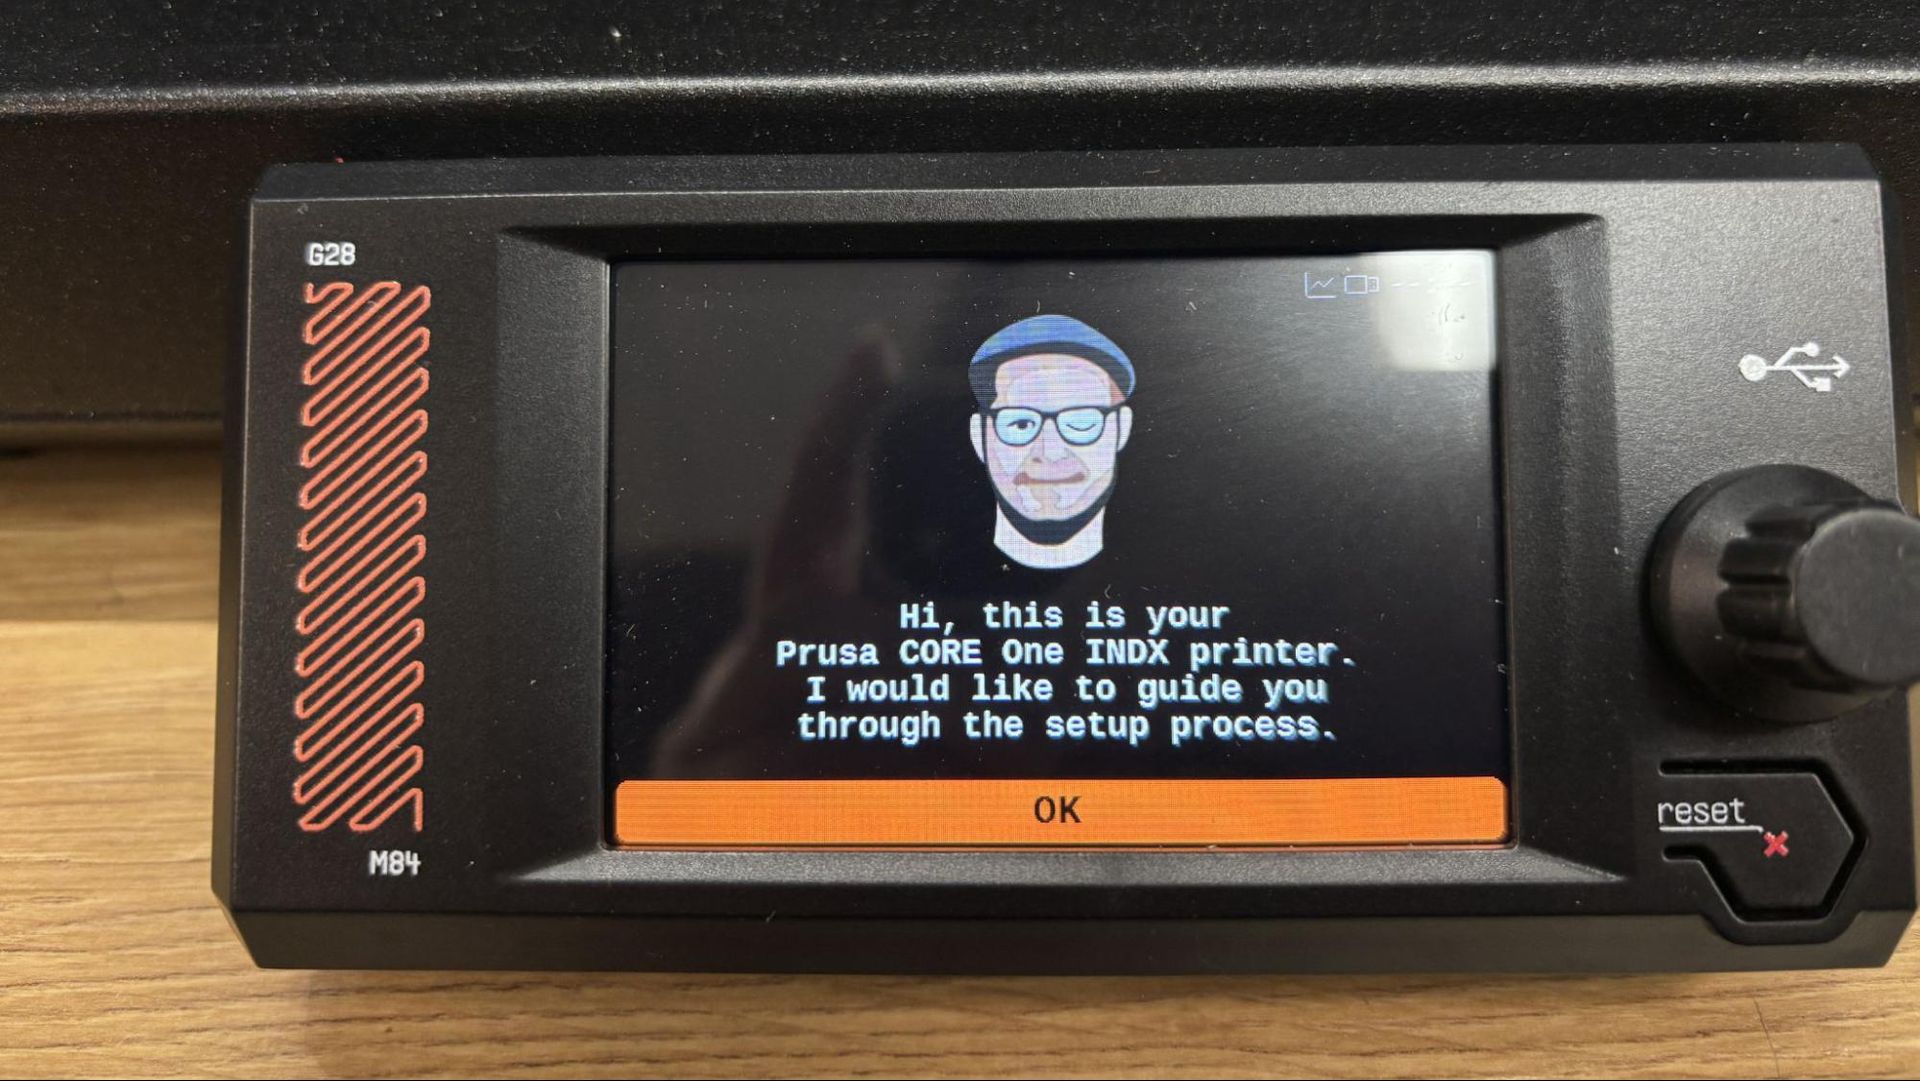
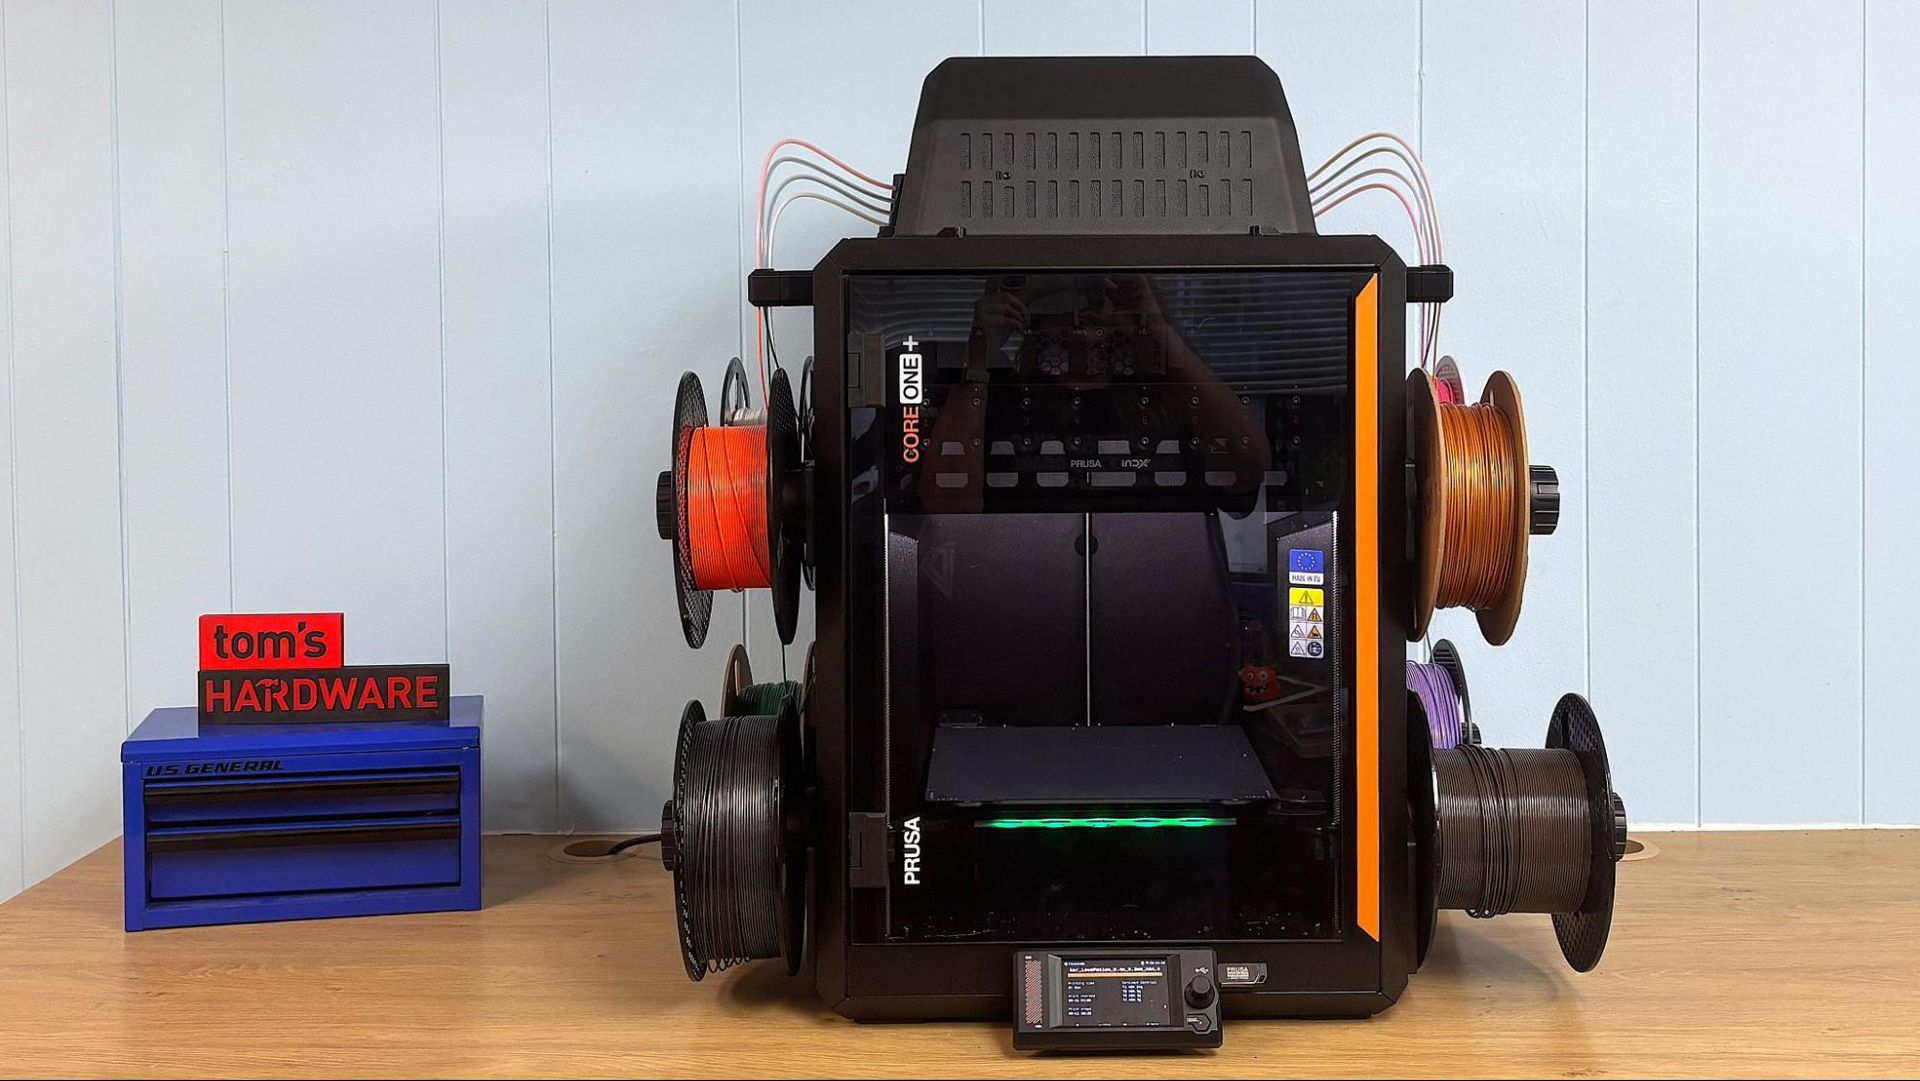
Once the machine is turned on, you’ll see a cartoon version of Josef Prusa to guide you through setup. However, calibration is now handled at the factory, so there’s nothing left to do but make sure you’ve removed the zip ties and carry on your merry way.

Leveling the Prusa CORE One+ INDX
Prusa CORE One+ INDX

(Image credit: Tom's Hardware)

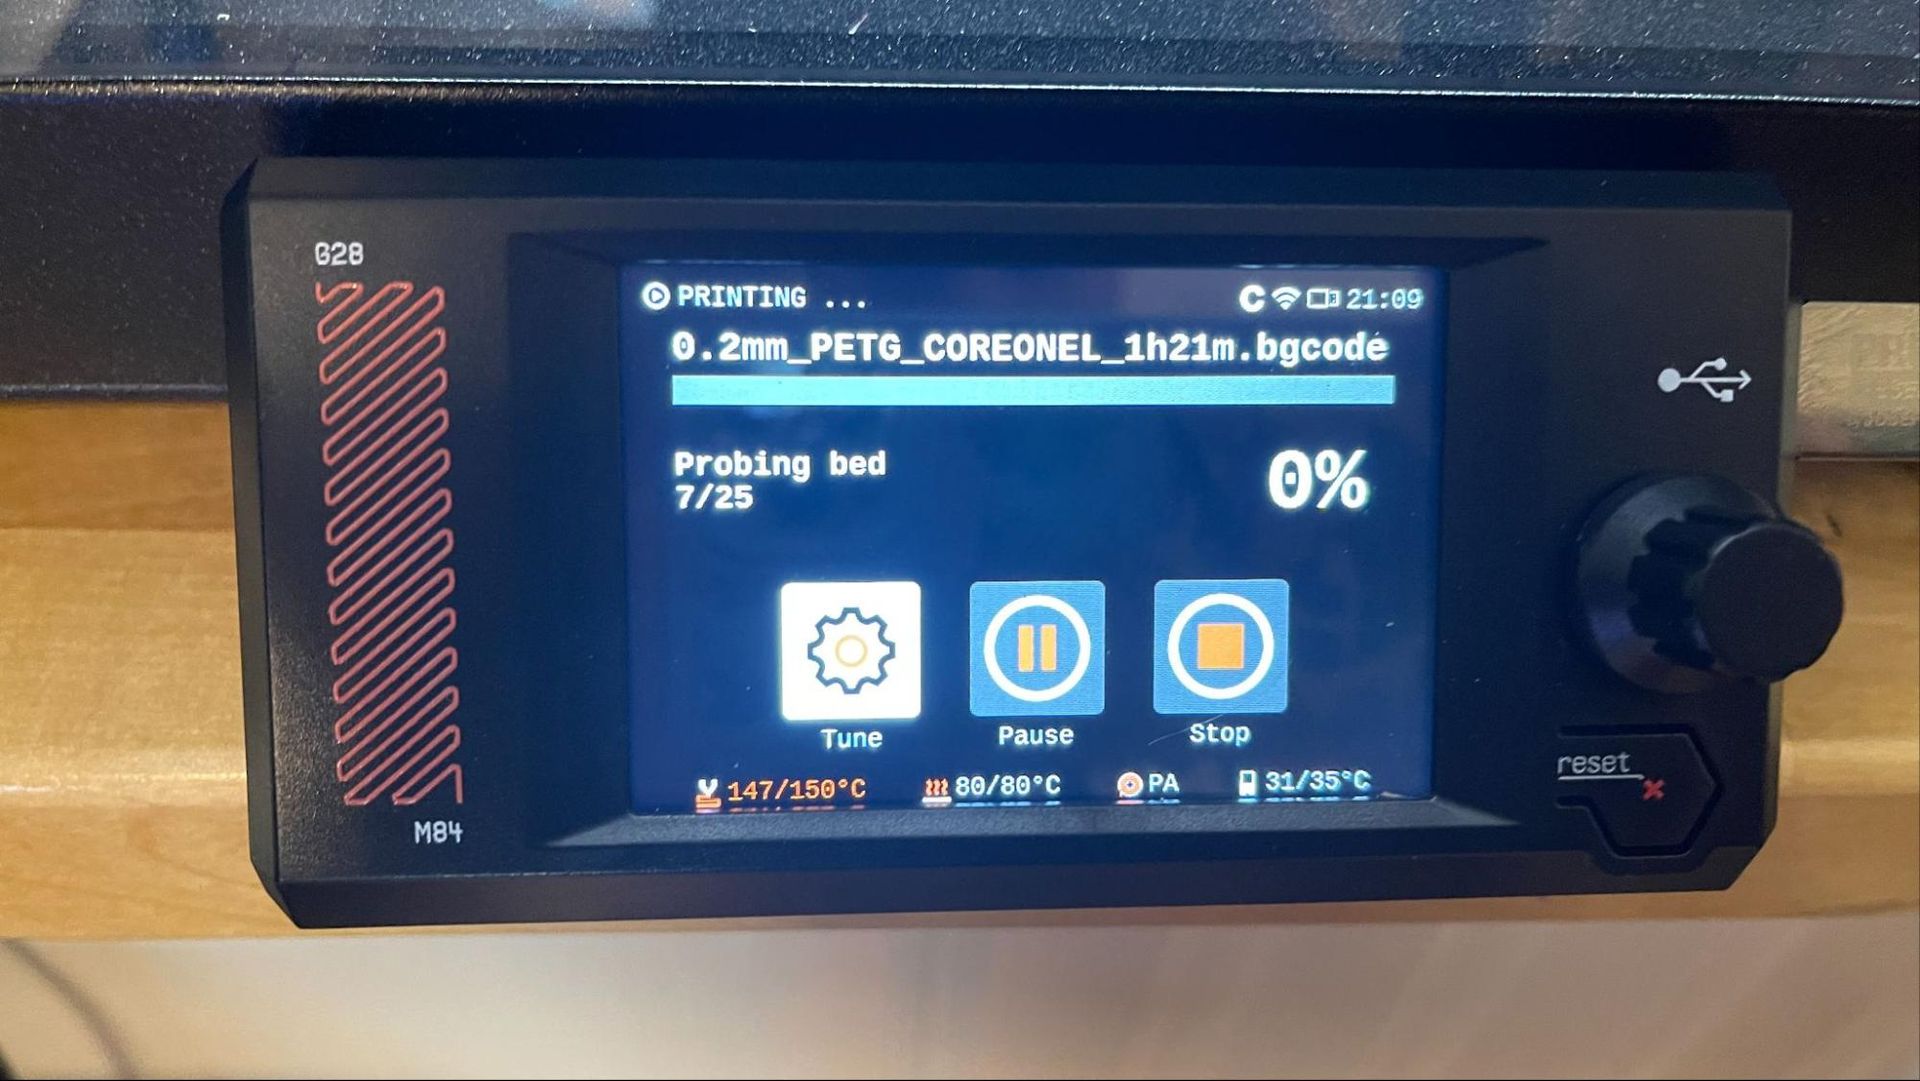
Bed leveling is a no-brainer, as the Prusa CORE One+ is fully automatic. There are no manual adjustments and no need to adjust the Z offset. The printer uses a load cell sensor connected to the nozzle, which physically taps the print surface for precise measurement.

The printer trams the bed and calculates the required Z height before each print. And yes, if you need it, live Z adjustments are available in the control panel.

Loading Filament on the Prusa CORE One+ INDX
Prusa CORE One+ INDX

(Image credit: Tom's Hardware)

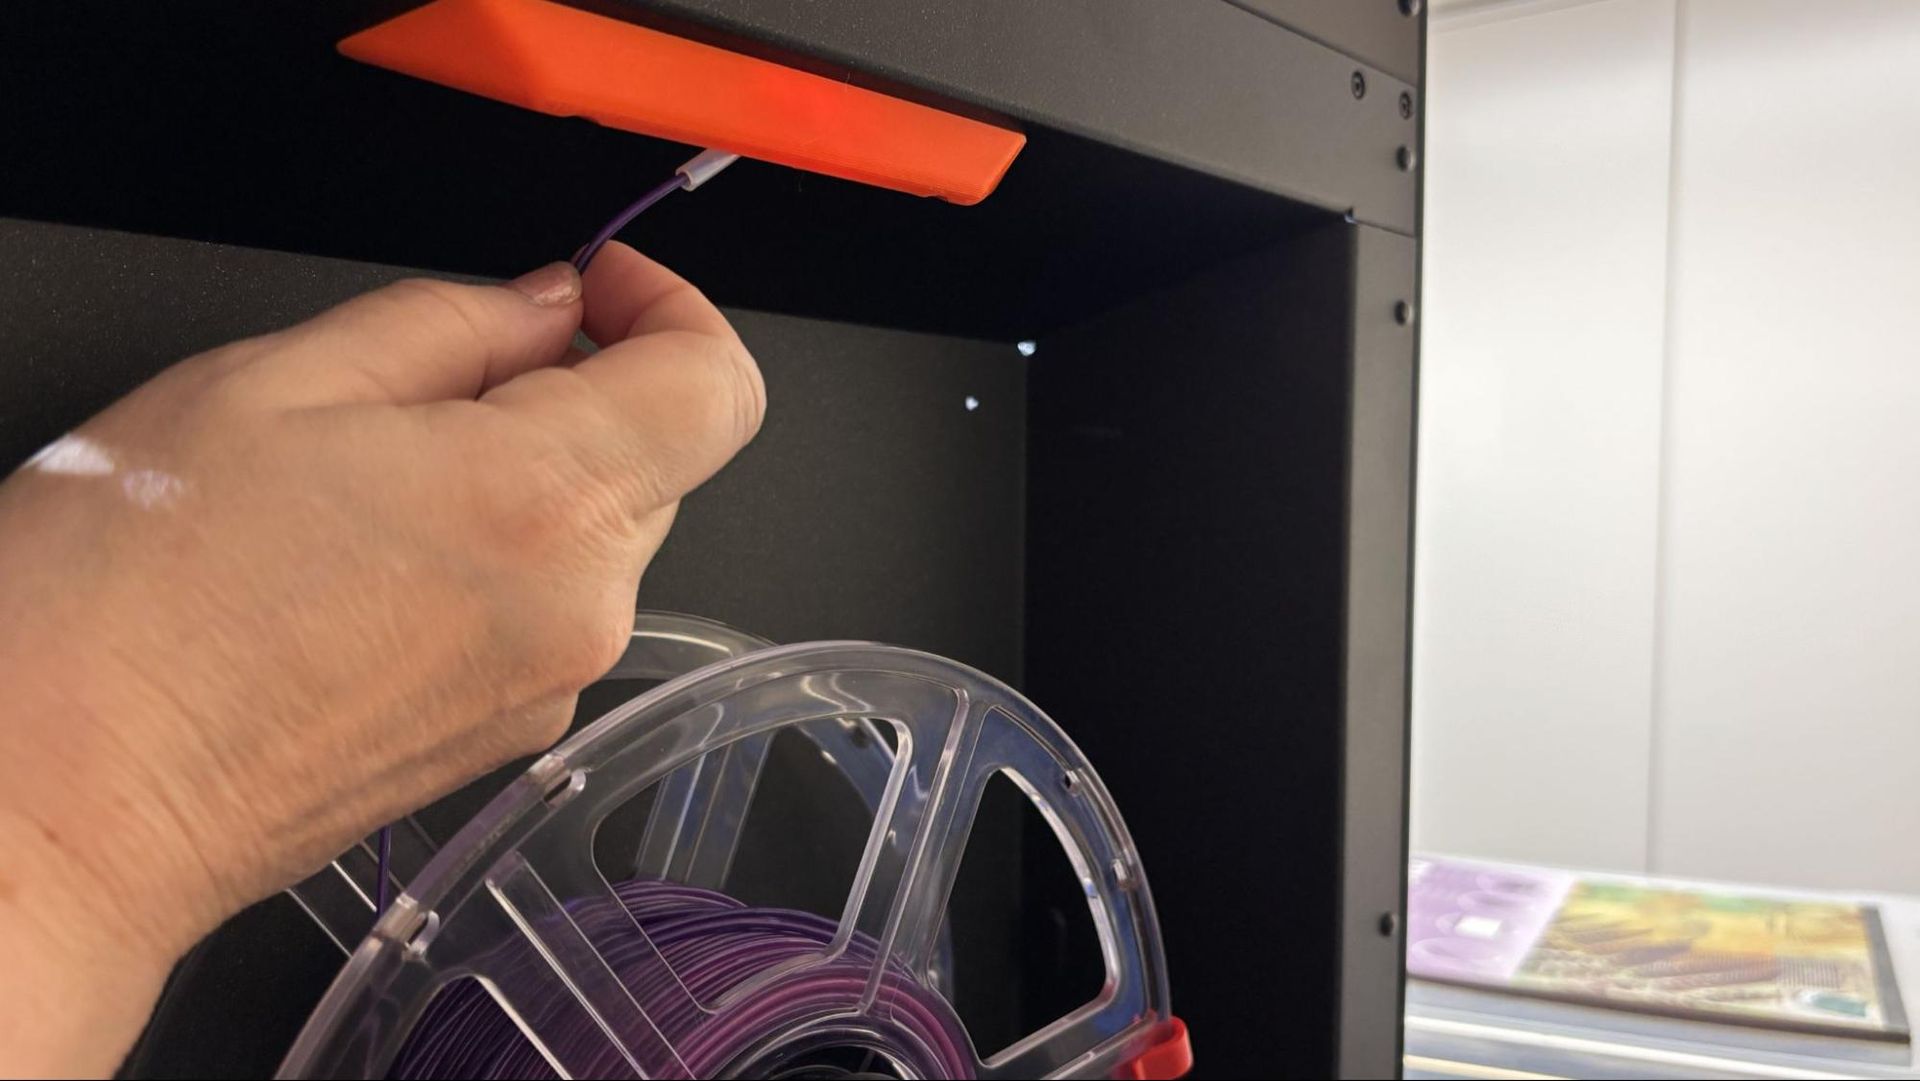
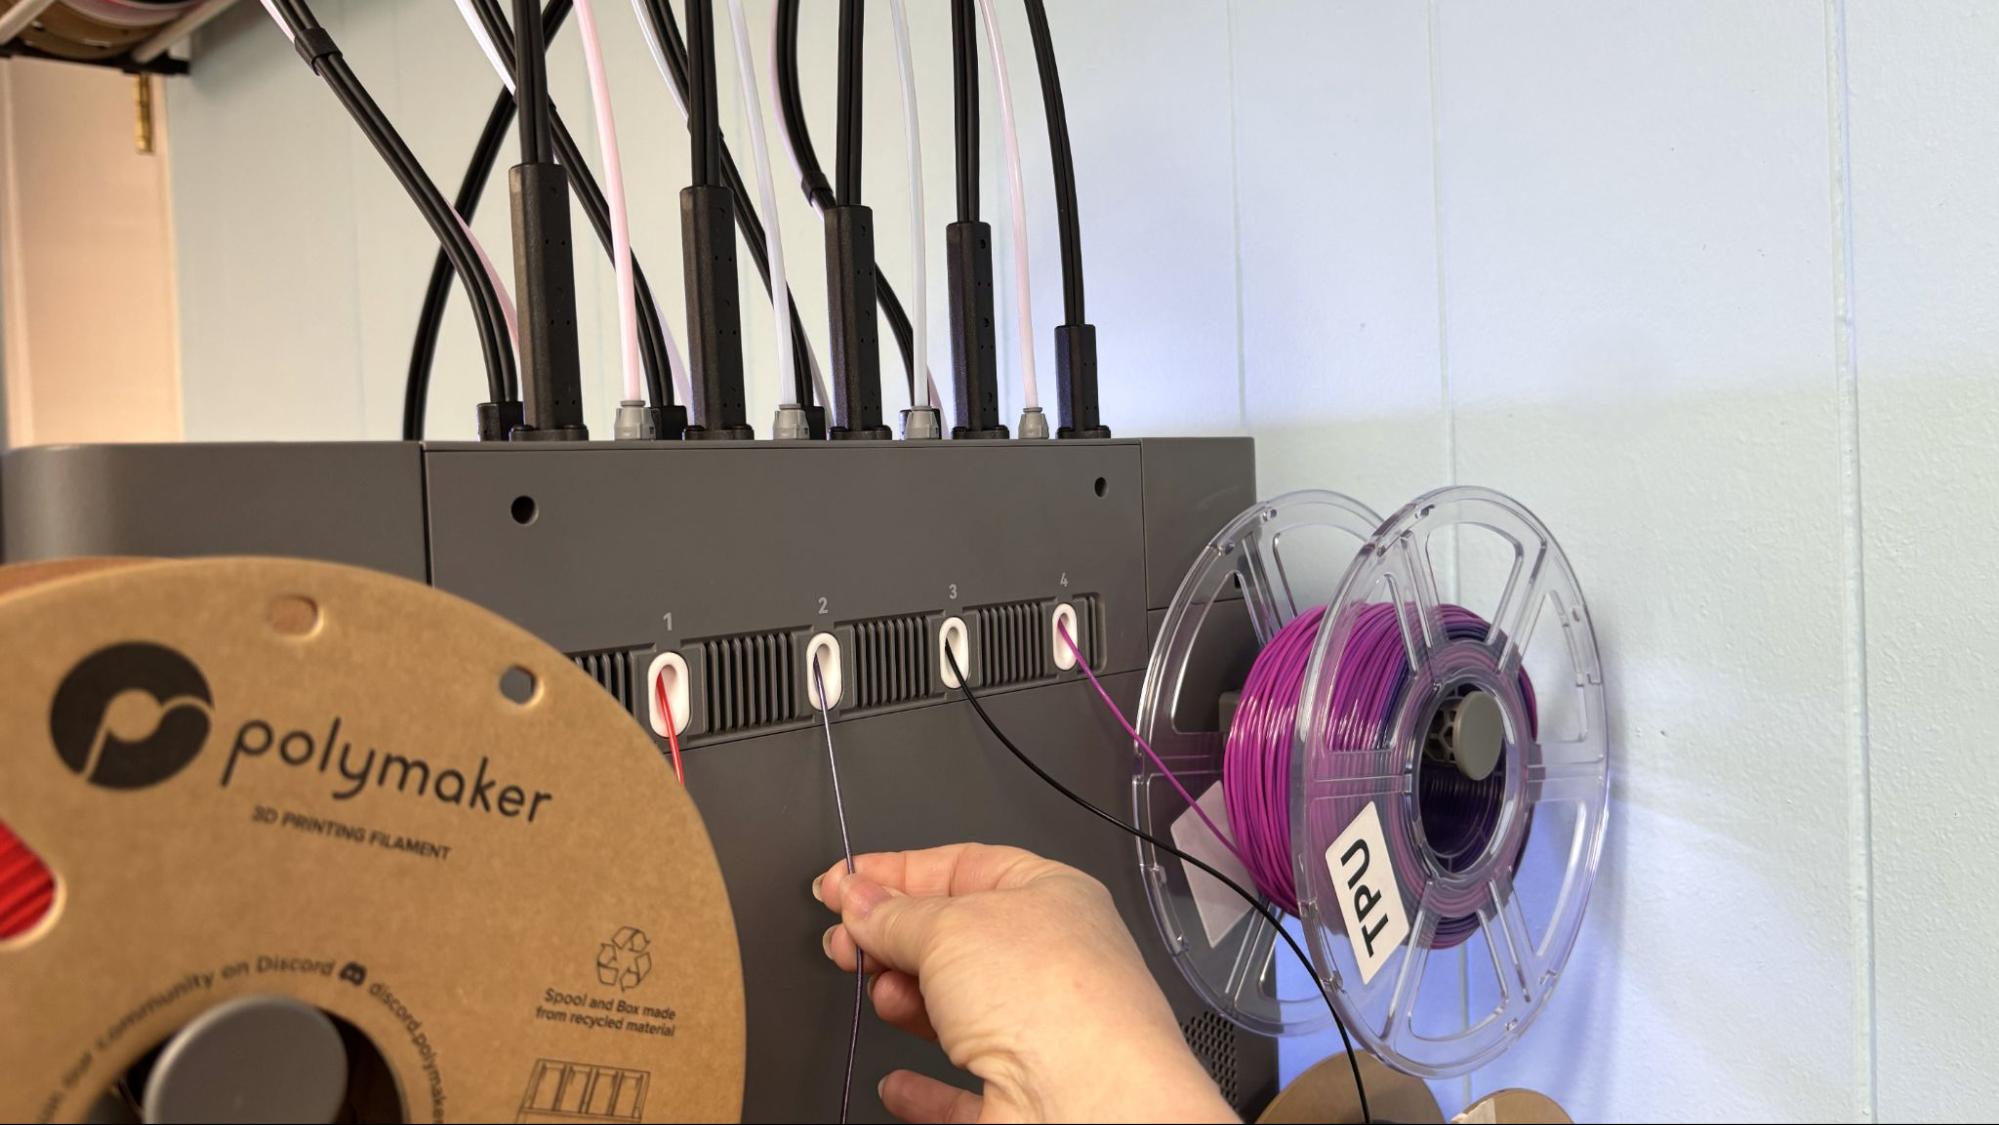
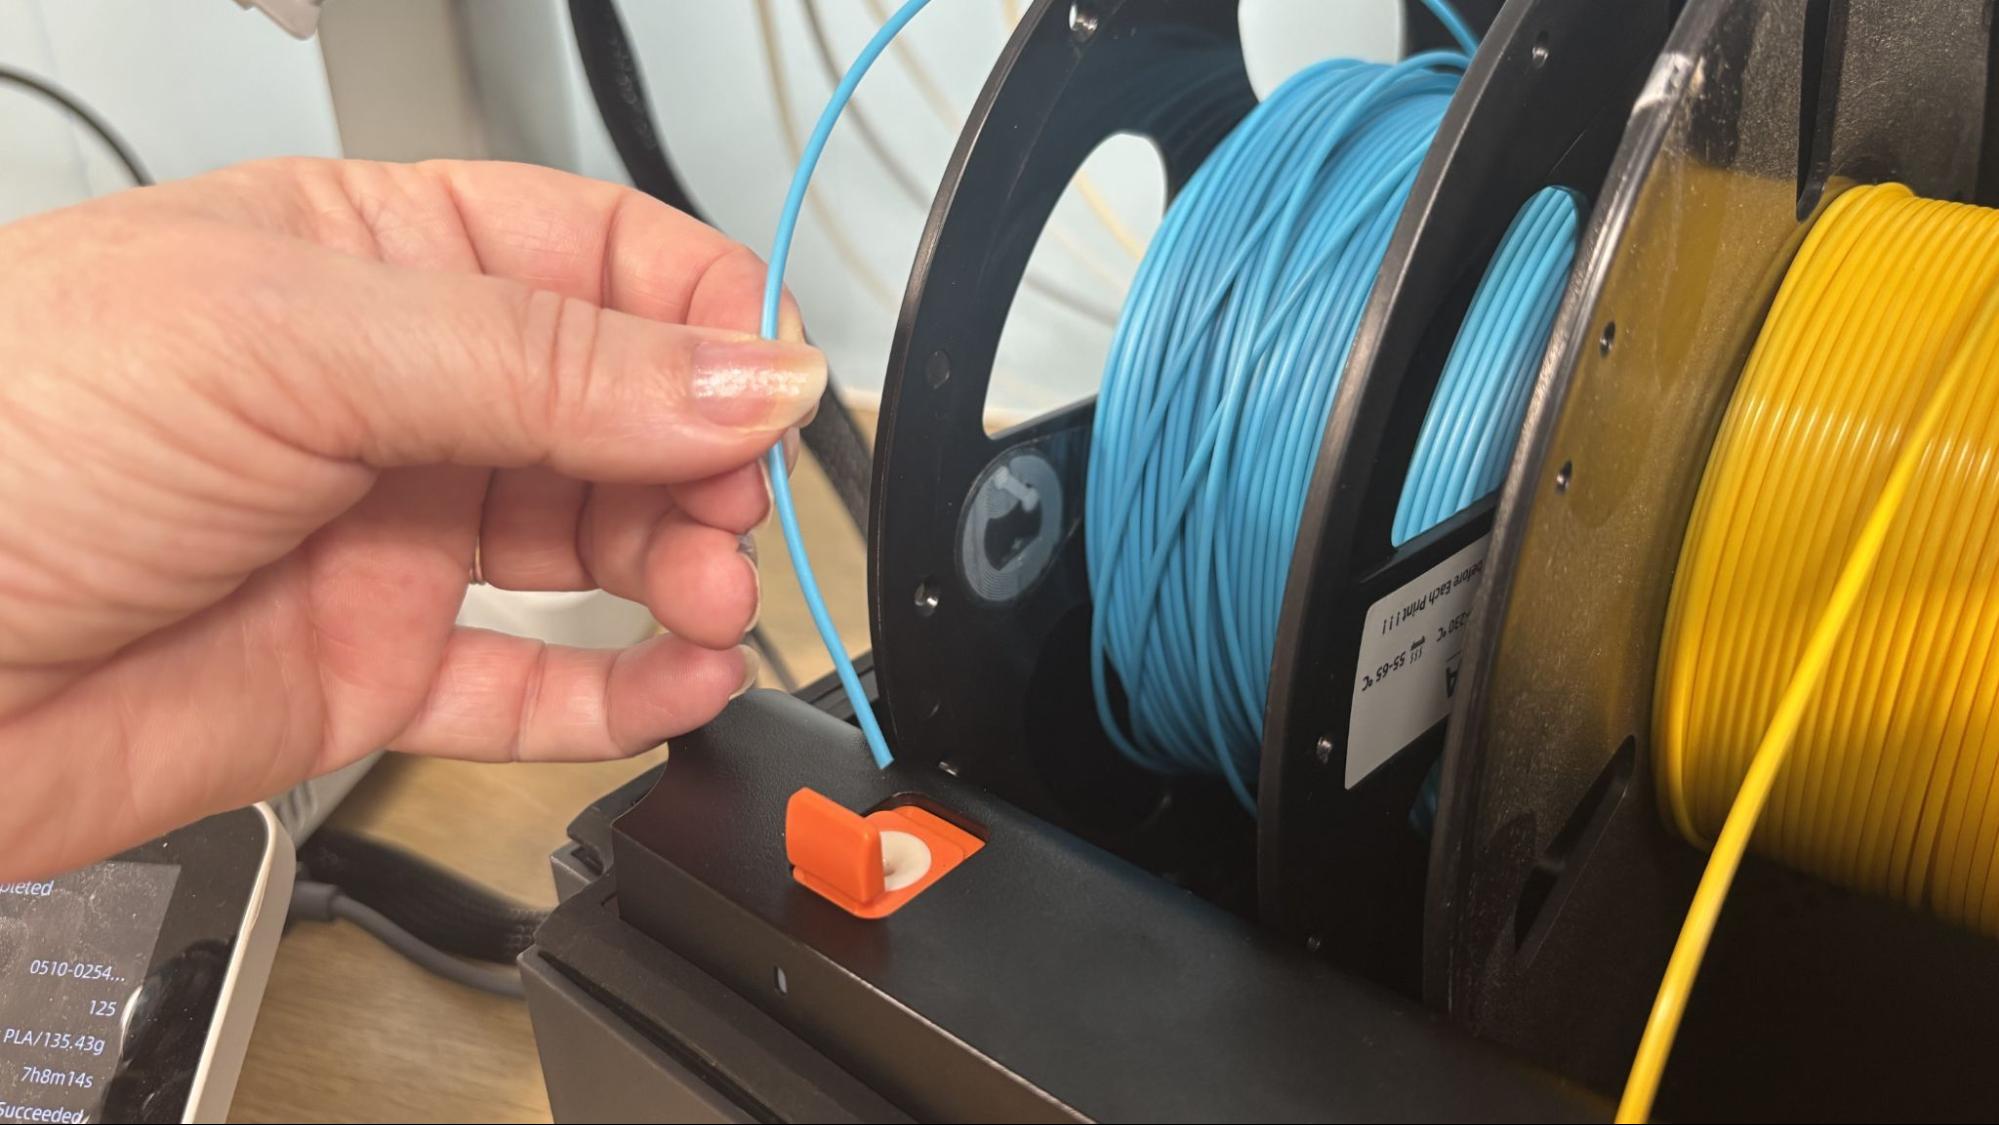
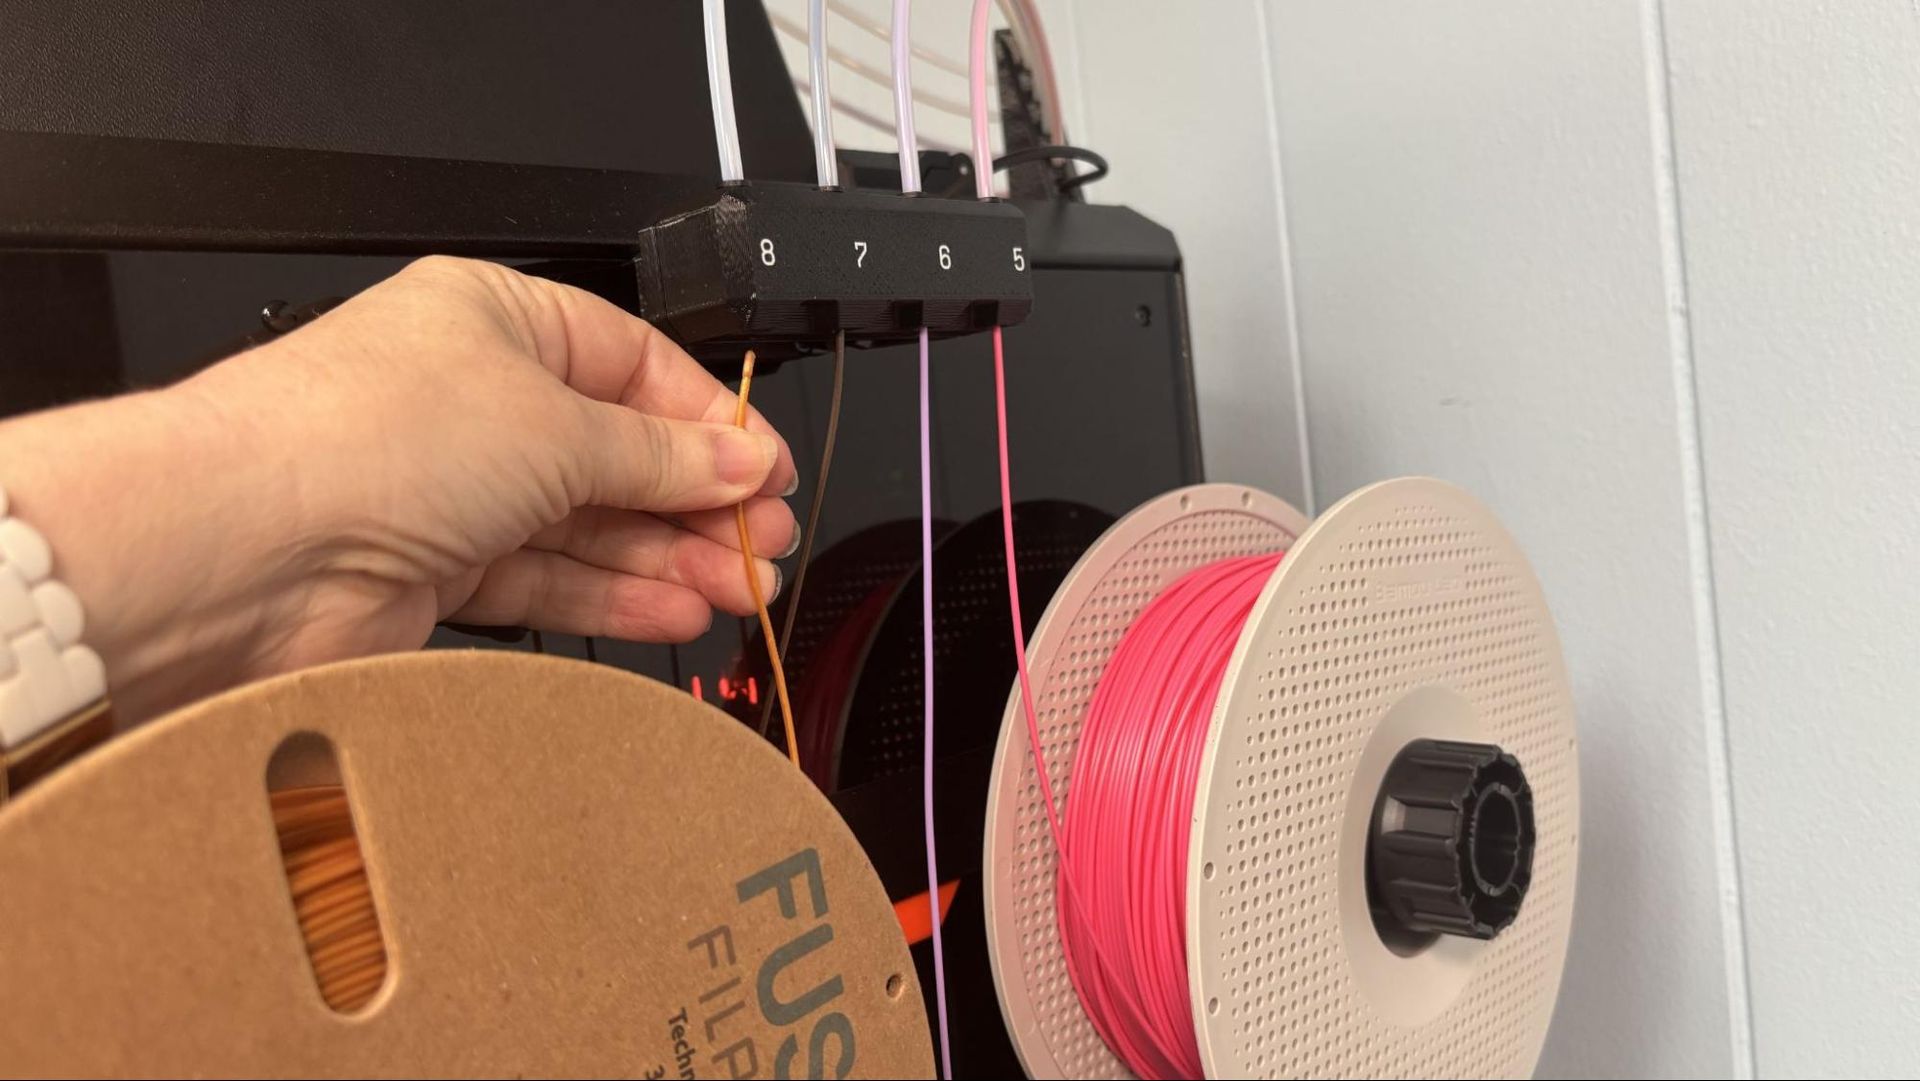
Loading filament is very simple. Simply place the spools on the side-mounted rack and feed the plastic into the reverse Bowden tube until it reaches the hotend. You’ll need to open the printer menu and tell it which toolhead you’re loading, since the toolheads themselves are passive. The carriage will zip over, grab the requested tool, and take it to the nozzle wiper to purge a small amount of filament into the cup. It will wipe the nozzle and park the toolhead when you’re done.

The inductive heater brings each nozzle up to temperature in a matter of seconds.

Unfortunately, the printer only asks what kind of filament you’re loading (PLA, ASA, Flex, or more) but not what color. This is probably due to the fact that the slicer does not constantly communicate with the printer over the cloud, but I’m hoping that this feature will become available with a future firmware update. For now, you’ll have to manually enter your filament colors into the slicer. There is a remapping option on the control screen, but shifting around eight spools' worth of information in this fashion is tedious.

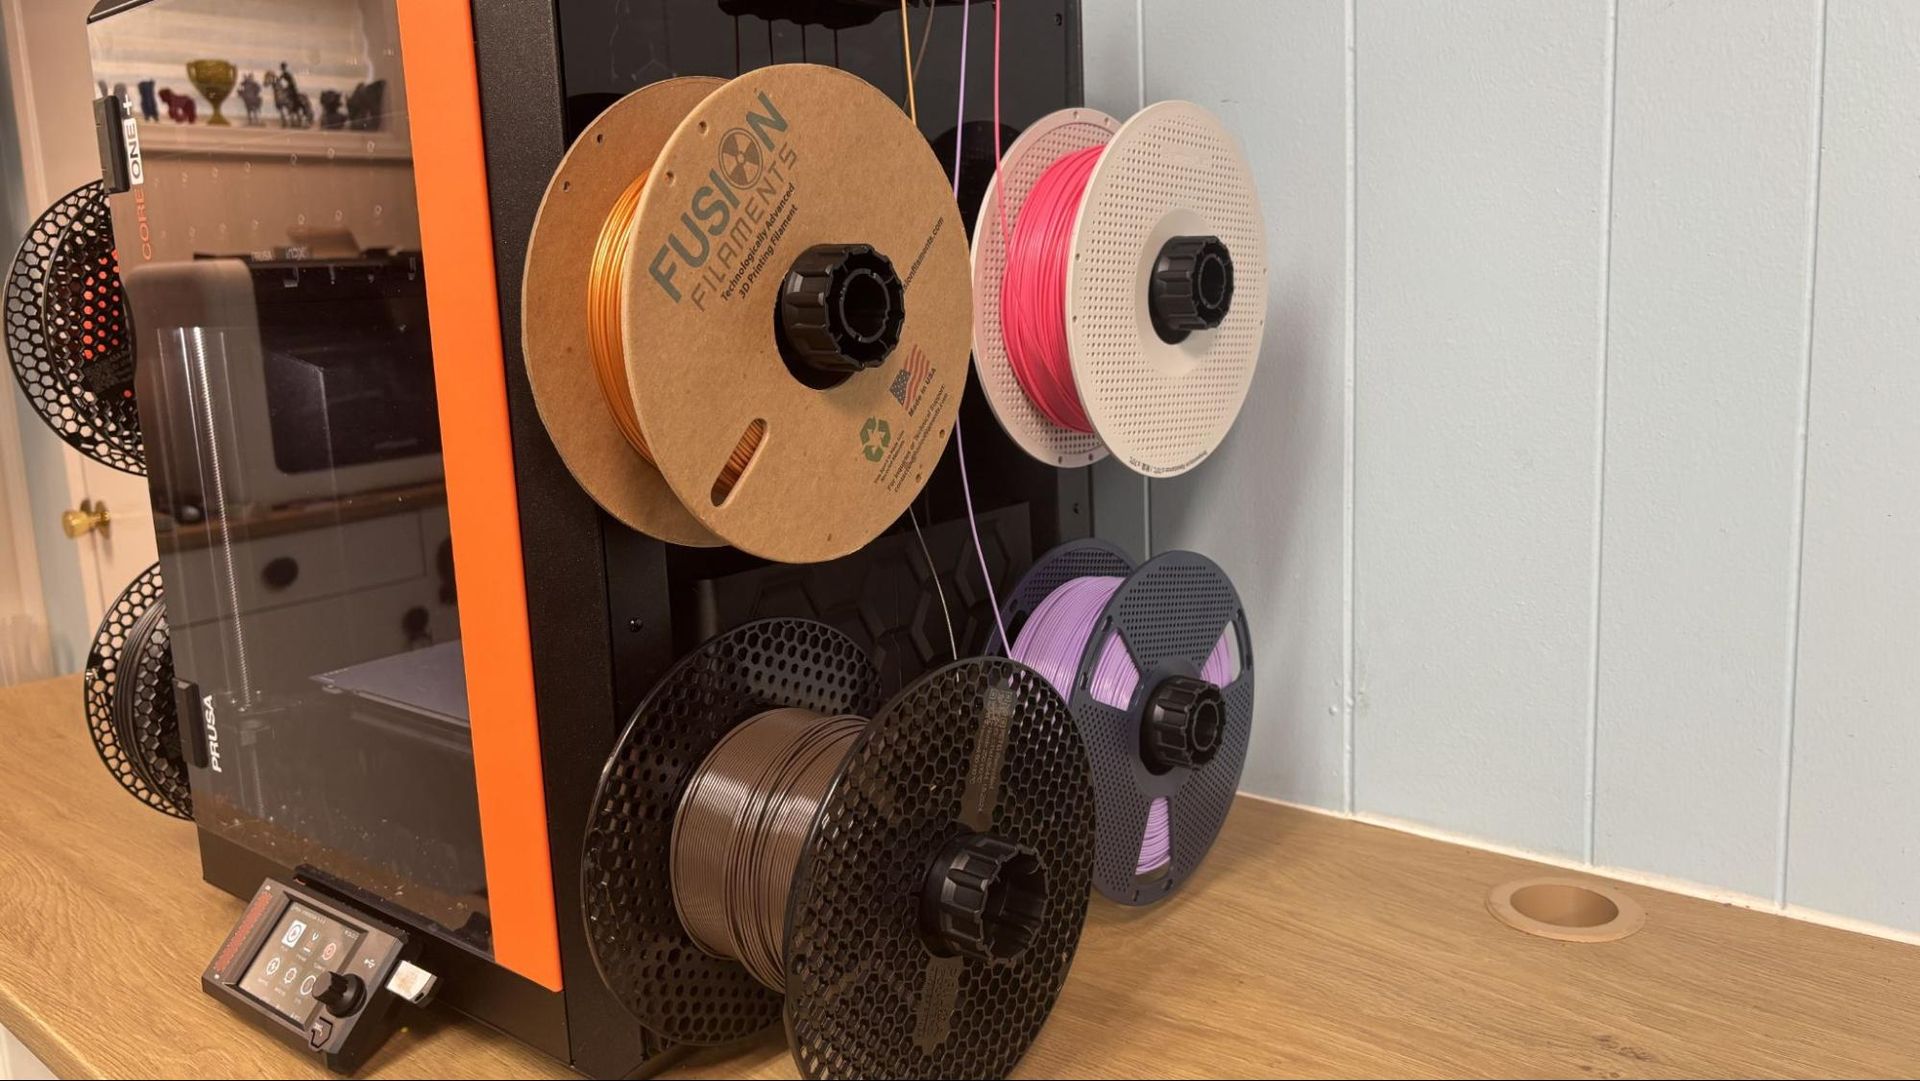
The spoolholders are sturdy manual devices that can hold literally any brand of filament you might be using. They even expand to hold 3KG spools.
Prusa CORE One+ INDX

(Image credit: Tom's Hardware)

Preparing Files / Software for Prusa CORE One+
Prusa CORE One+ INDX

(Image credit: Tom's Hardware)

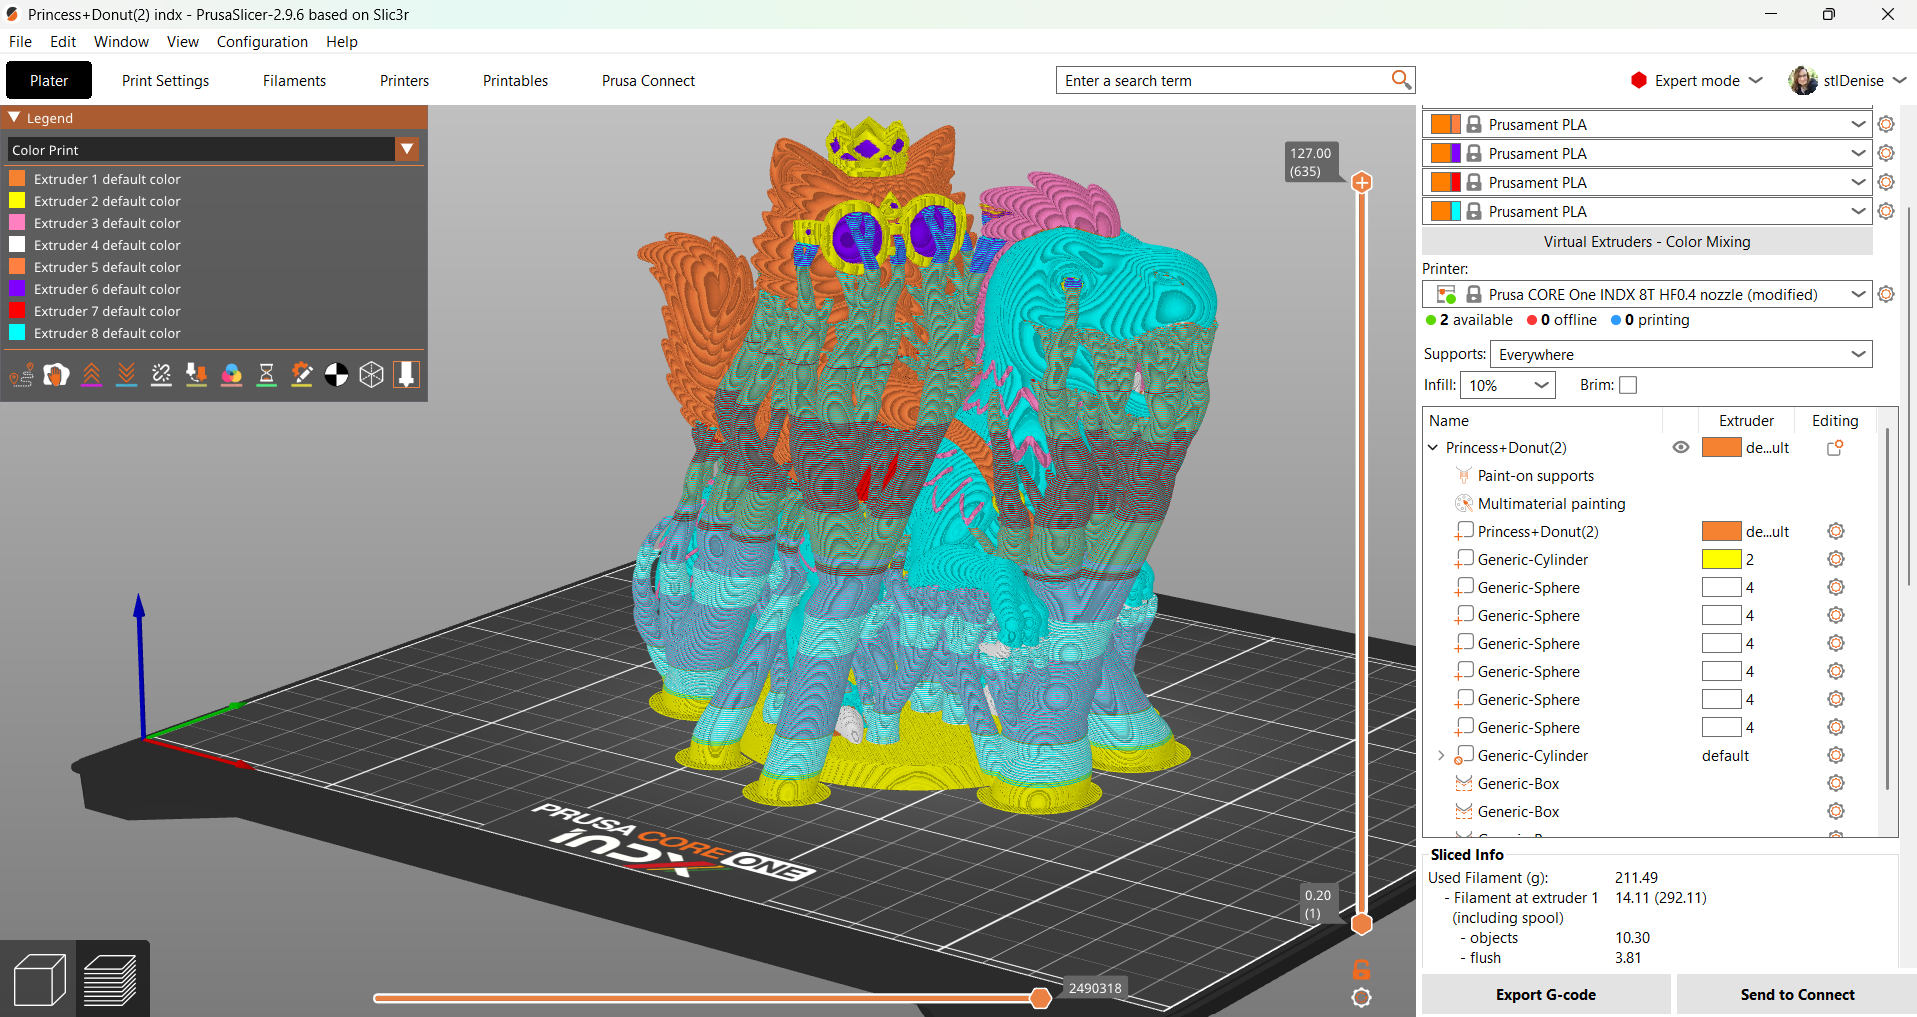
The Prusa CORE One+ uses its native slicer, PrusaSlicer. This open-source slicer is developed by Prusa Research and serves as the foundation for many other slicers. It comes with dozens of profiles for every material and nozzle size that Prusa Research makes.

The slicer also has built- in Color Mixing, which allows you to blend two or three colors with ultra-fine layers to create the illusion of more colors.

The CORE One+ can also use Prusa’s web-based slicer, EasyPrint, to print directly from Printables, Prusa’s free library of files, or from a mobile device.

Printing on the Prusa CORE One+ INDX

The fully assembled CORE One+ comes with a full 1 KG roll of Prusament PLA Galaxy Black. If you want more colors and materials like silks and multicolor filaments, you should check out our guide to the best filaments for 3D printing for suggestions.

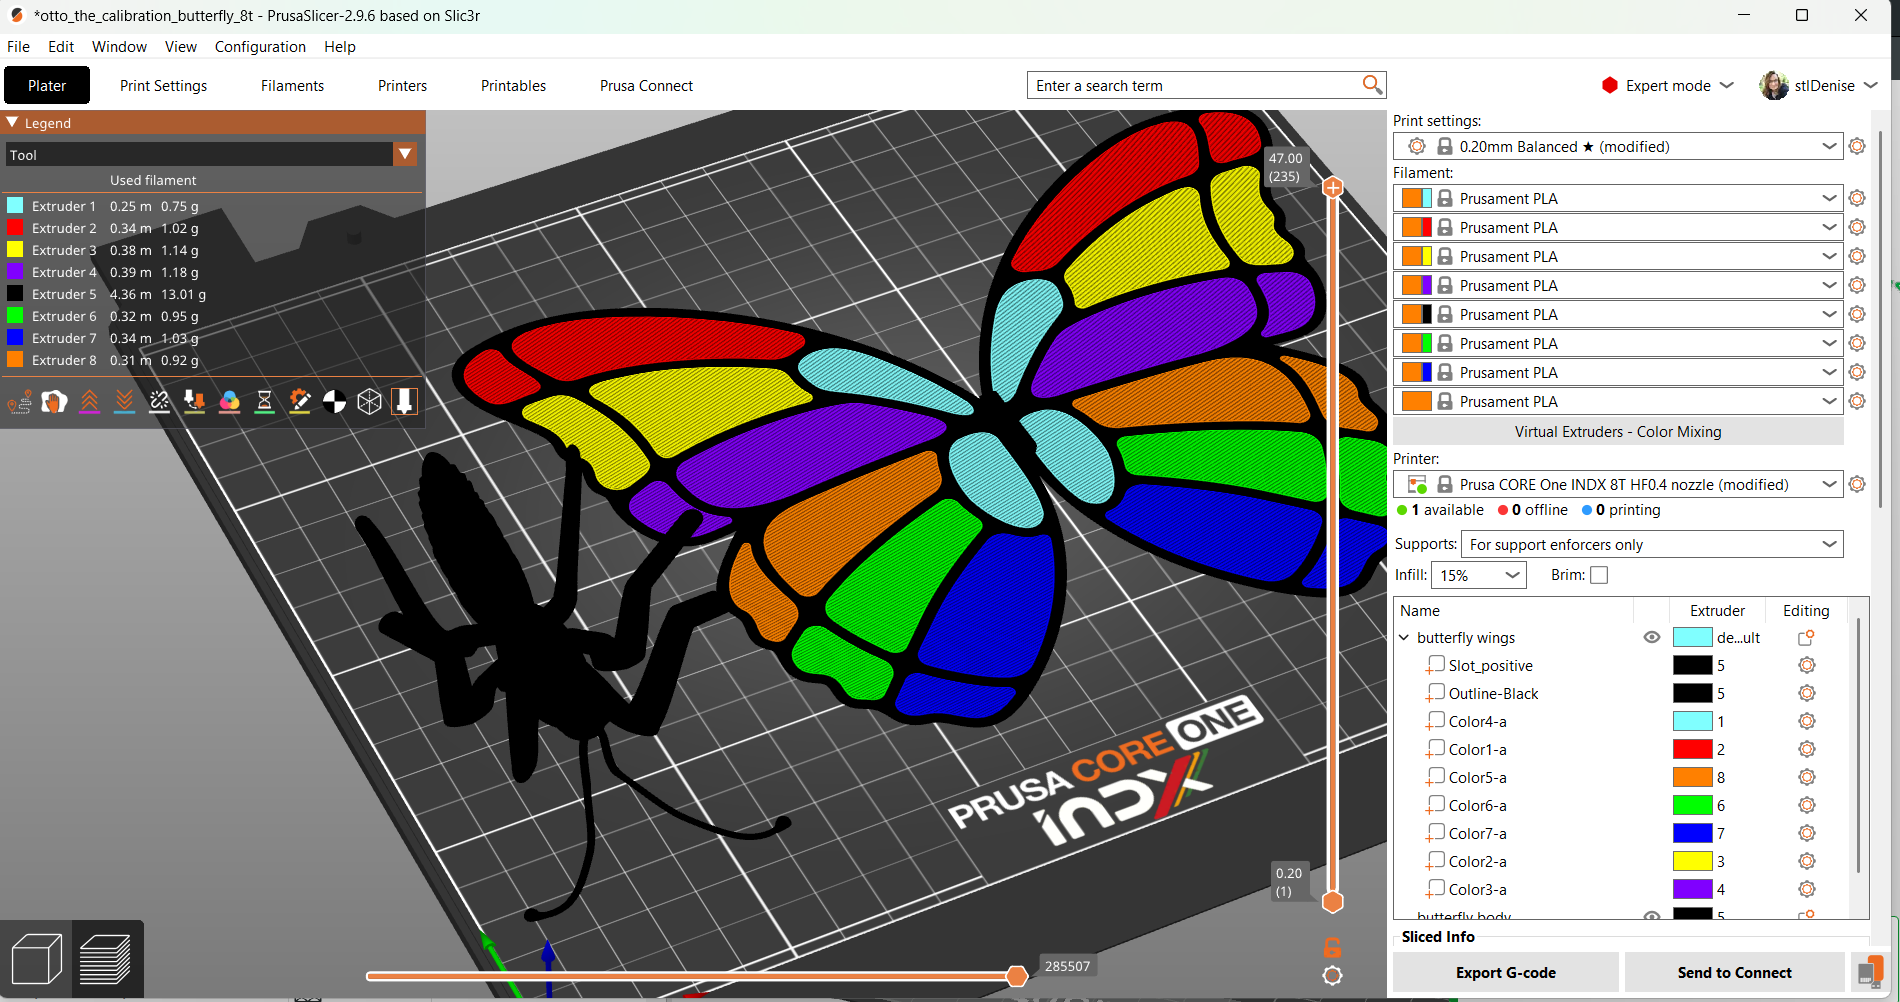
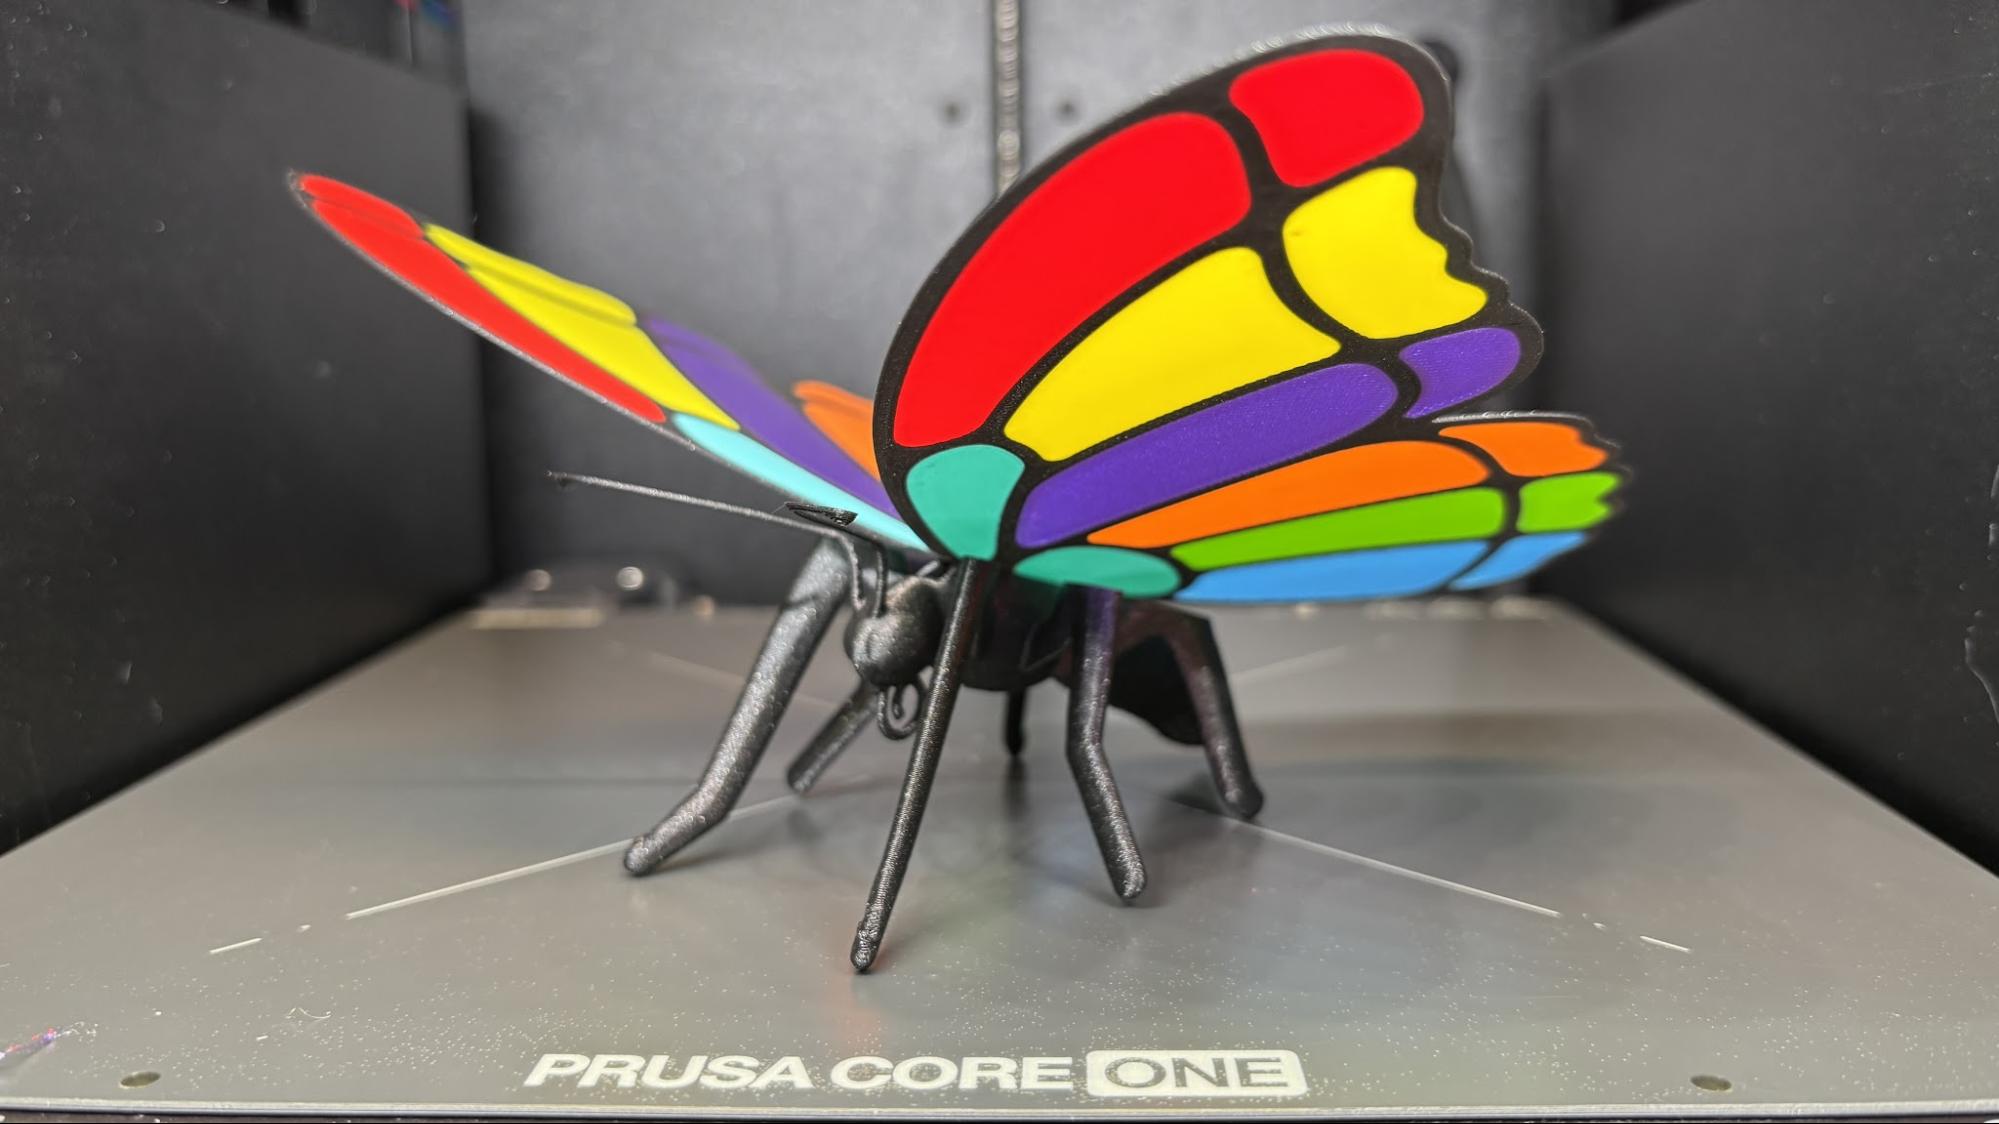
I used some of the sample rolls sent my way, plus a couple more lying about the workshop, to Prusa’s new calibration butterfly, Otto. This eight-color sample test print took 1 hour and 14 minutes. The wings are a first-layer test and are only two layers thick. A tab on the wing slots into the body to prove that tolerances and extrusion flow are correct. The multi-colored wing segments act as a visual test for first-layer quality, belt tension, and toolhead alignment, as any tiny offset in color boundaries or axis motion will show up instantly. This is a lot more useful than a Benchy for multicolor printing, and it makes a cool decoration you can keep on the shelf.
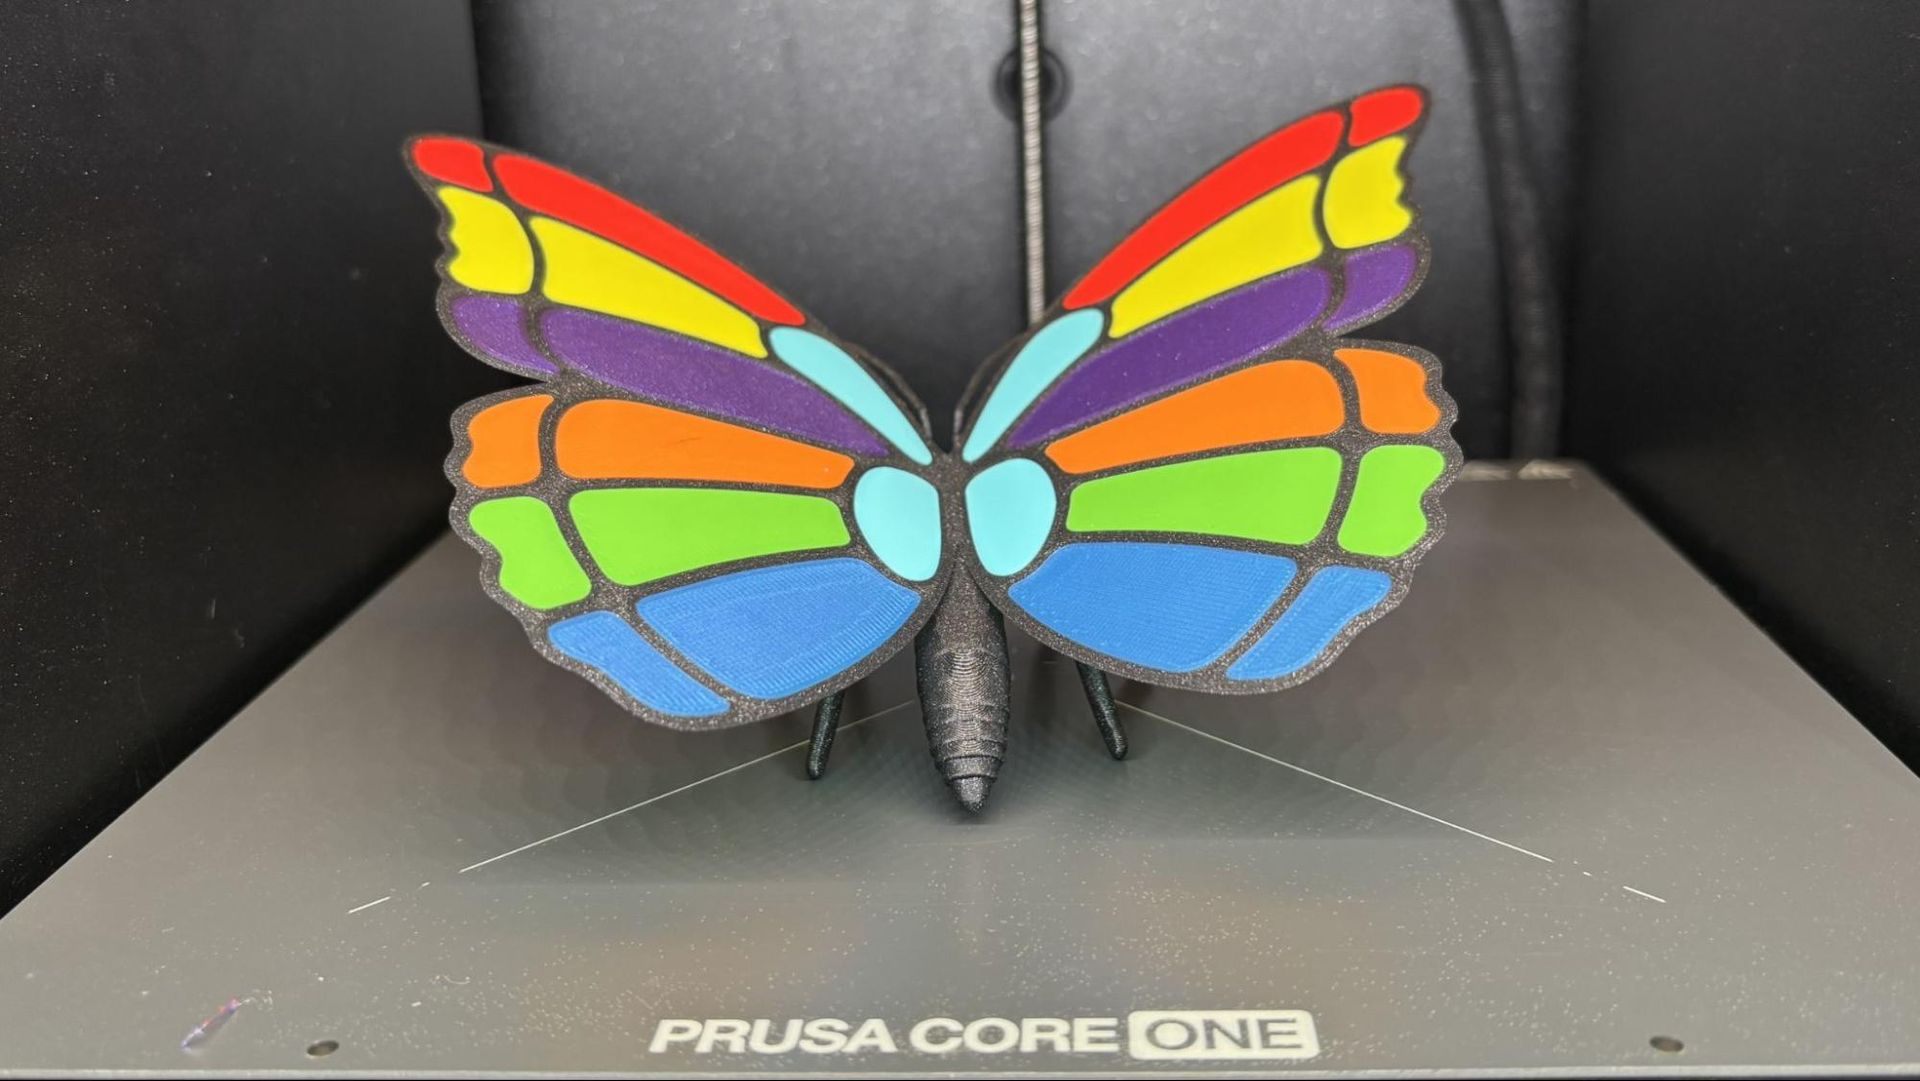
Prusa CORE One+ INDX

Prusa Research, Otto the Calibration Butterfly (Image credit: Tom's Hardware)

I printed this 100%, 150mm tall, Cinderwing3D Butterfly Dragon that I could never get to stick to the bed with other multicolor machines. Sitting next to it is a small container with all the waste this print produced from 1646 tool changes: 18 grams. When you look really close, they look like Nerds candy.

This printed in 25 hours, 41 minutes, using a .2 mm layer height, 3 walls and 10% gyroid infill. It took a little longer to print because I slowed it down to 100mm/s across the board due to the precarious wing situation. The filament is Prusament PLA in Orange, Yellow, Simply Green and Galaxy Black; Inland Purple, and Bambu Lab Basic Pink.
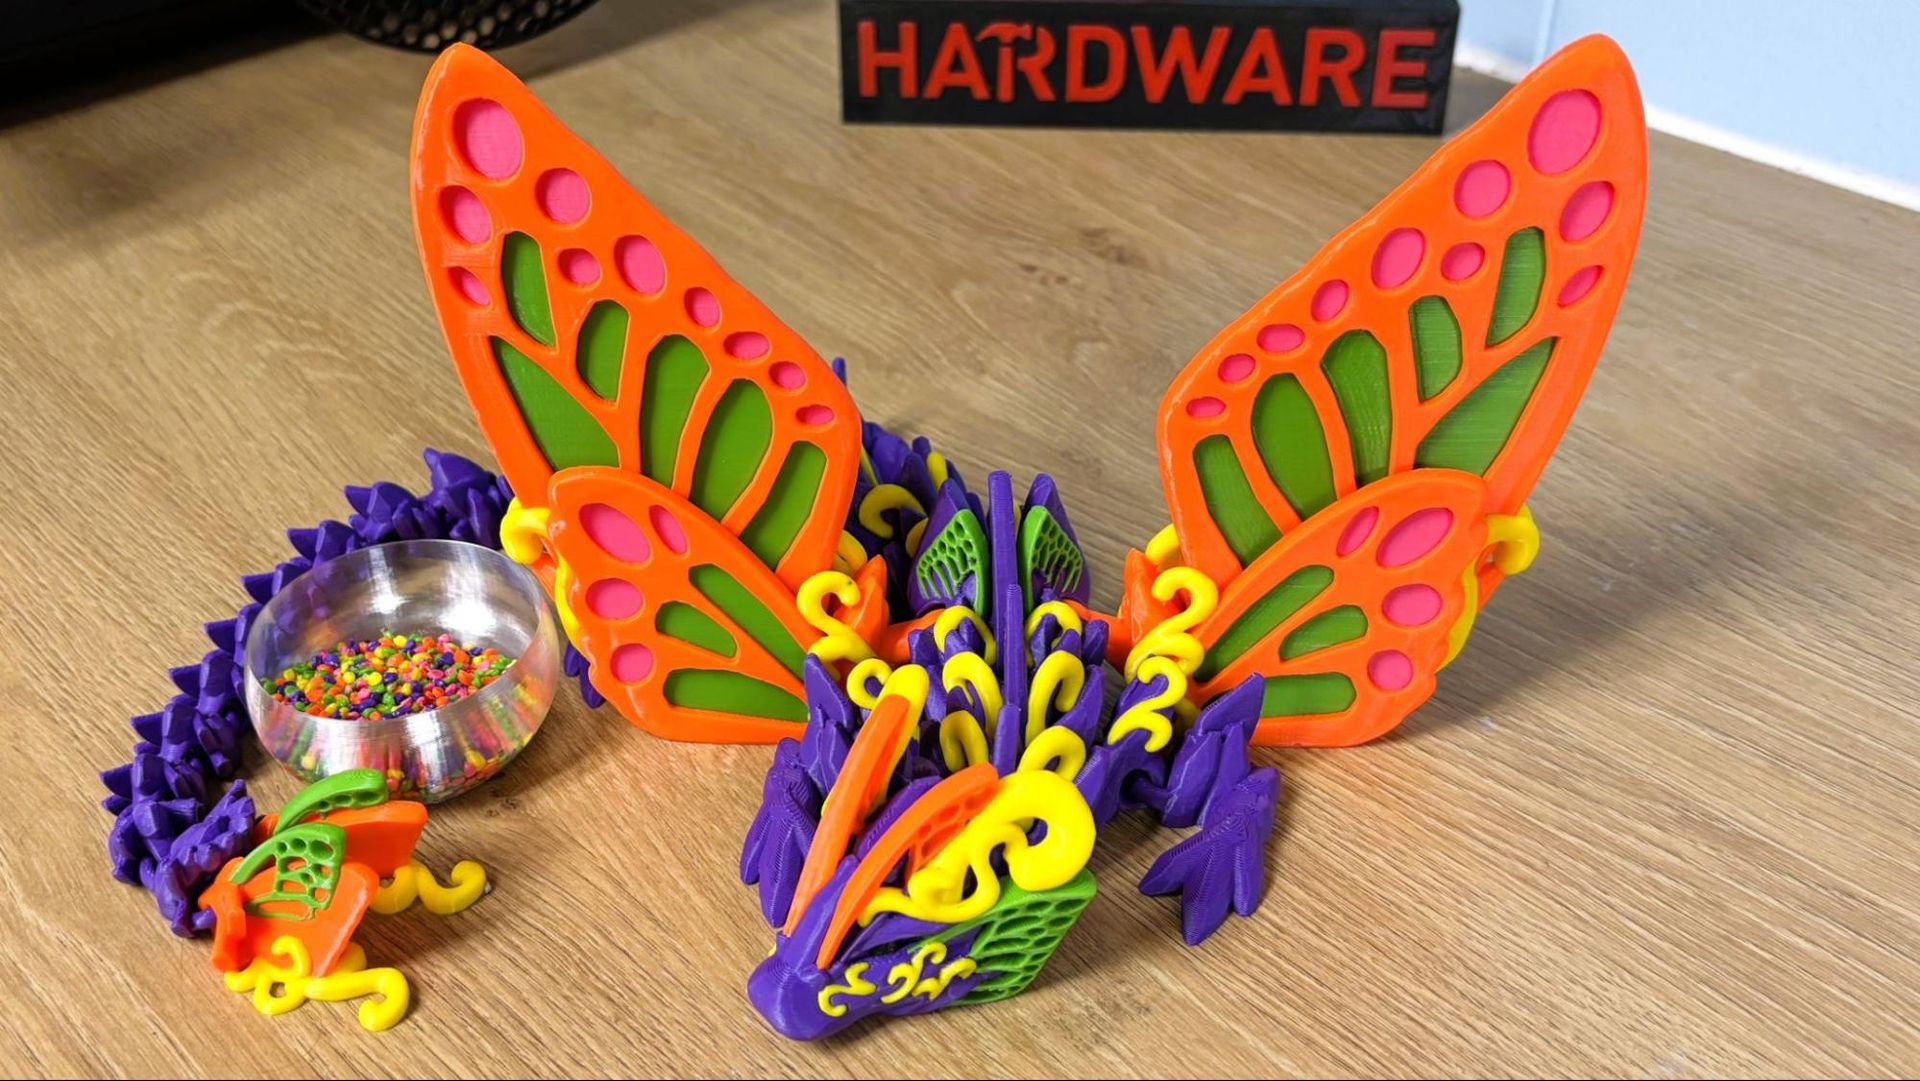
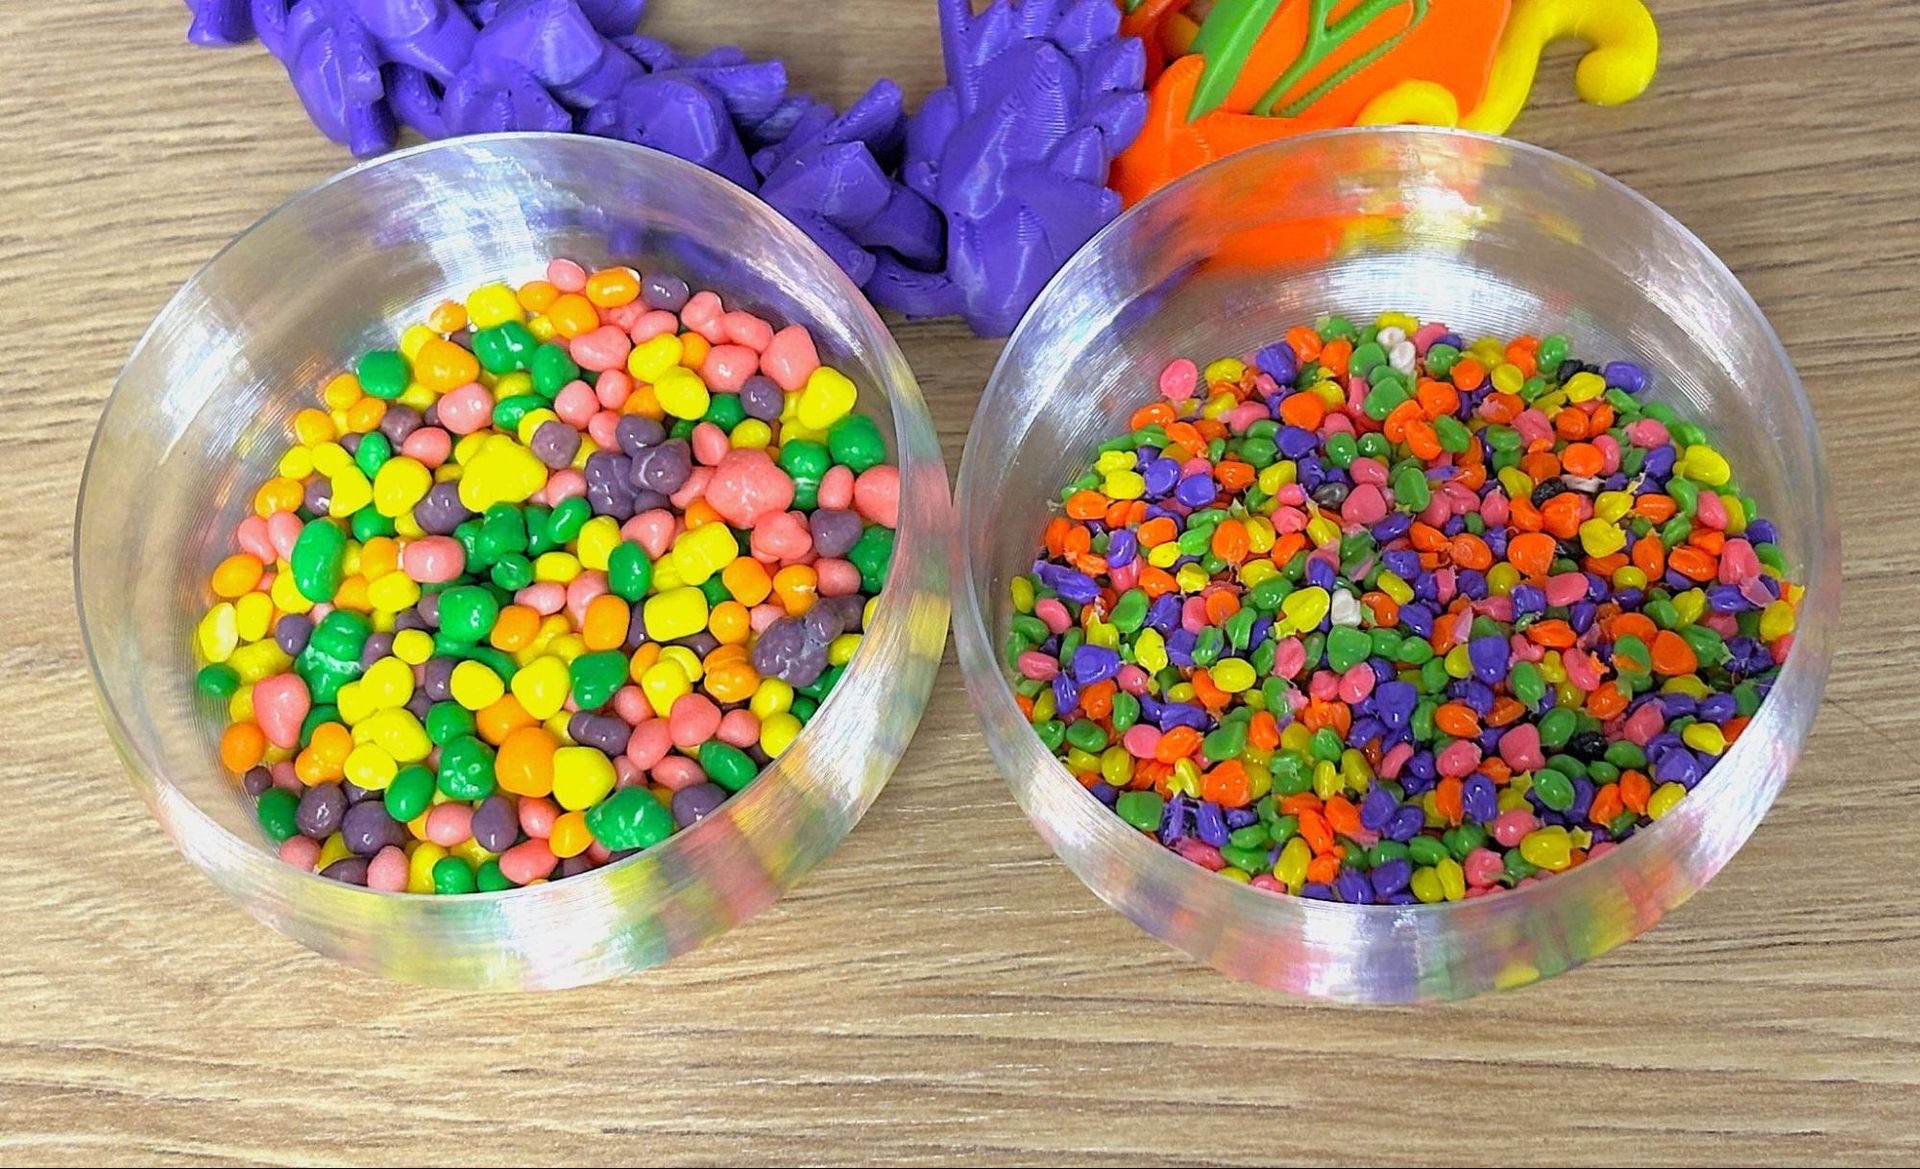
Prusa CORE One+ INDX
Cinderwing3D Butterfly Dragon and 18 grams of Nerds candy.Tom's Hardware
Prusa CORE One+ INDX
Cinderwing3D Butterfly Dragon and 18 grams of Nerds candy.Tom's Hardware

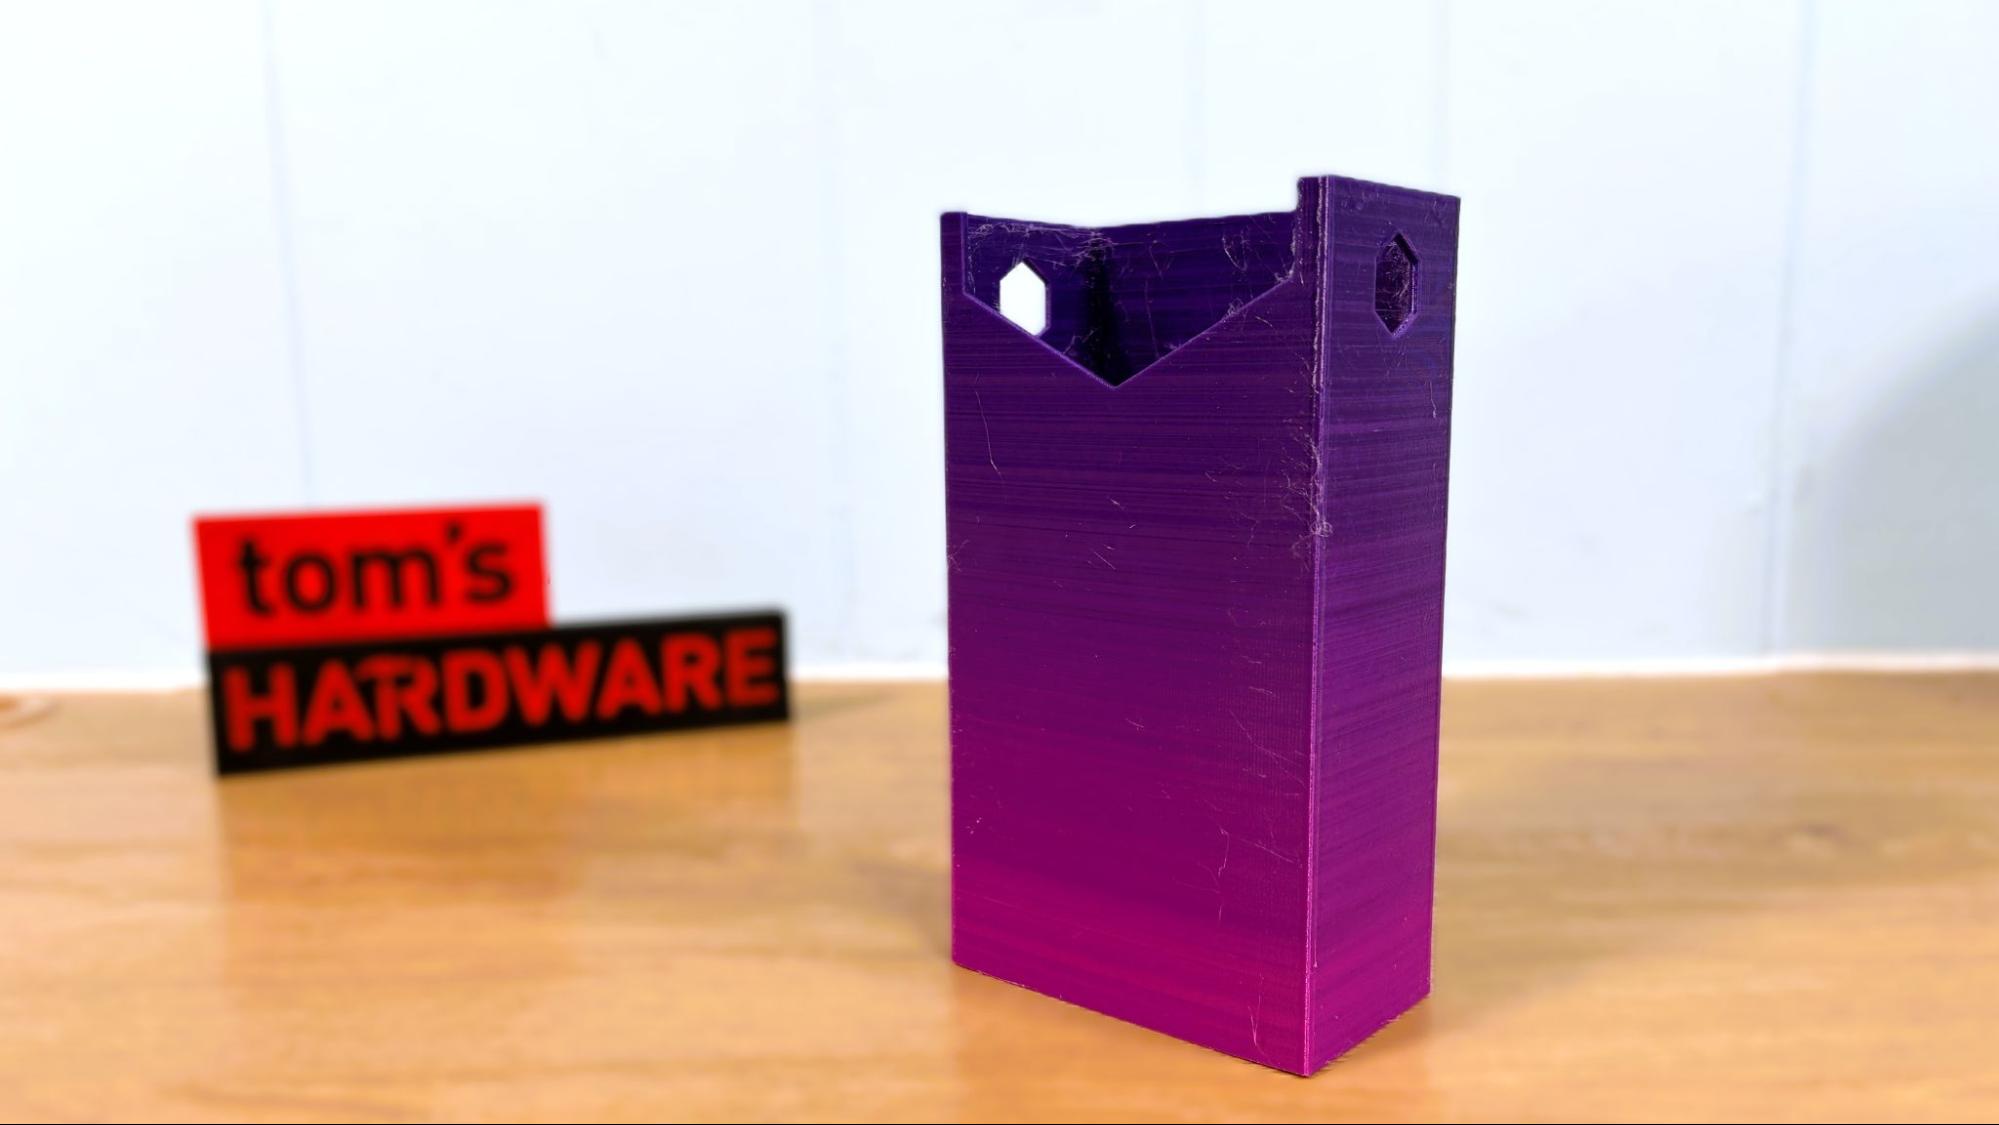
For PETG, I printed a planter I designed. I’ve been trying to learn Nomad Sculpt, but I still need to rough things out in Tinkercad. For that reason, please excuse the rough layer line near the bottom, which is entirely a design flaw and not the printer’s fault. PETG doesn't color swap quite as cleanly as PLA, and I had to pick a few stray flecks off the print. Otherwise, it’s pretty darn good. This is printed in Prusament Galaxy Black and Yellow Gold PETG, with Deepwater Blue from Greengate. This print took 6 hours and 14 minutes to print using default settings and a .2mm layer height. There was 6.84 grams of filament wasted with 537 tool changes.
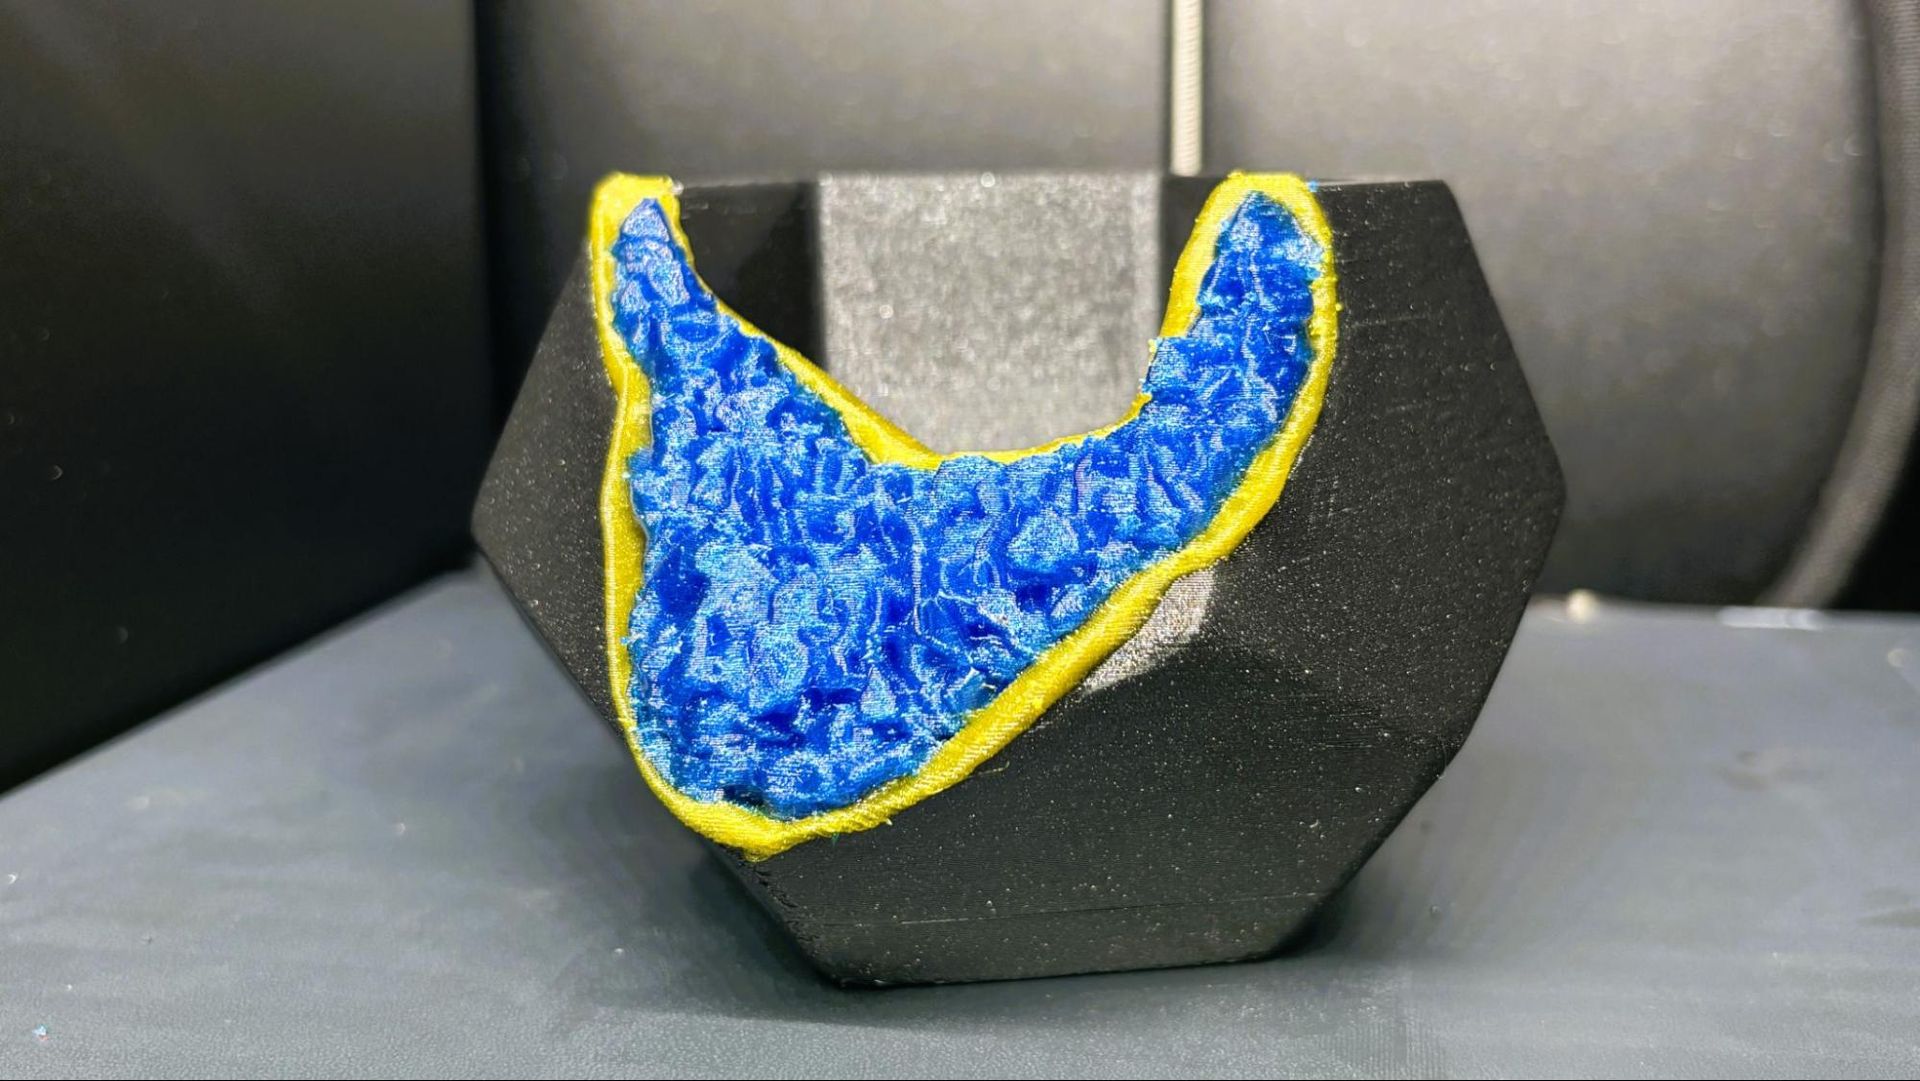
Prusa CORE One+ INDX

(Image credit: Tom's Hardware)

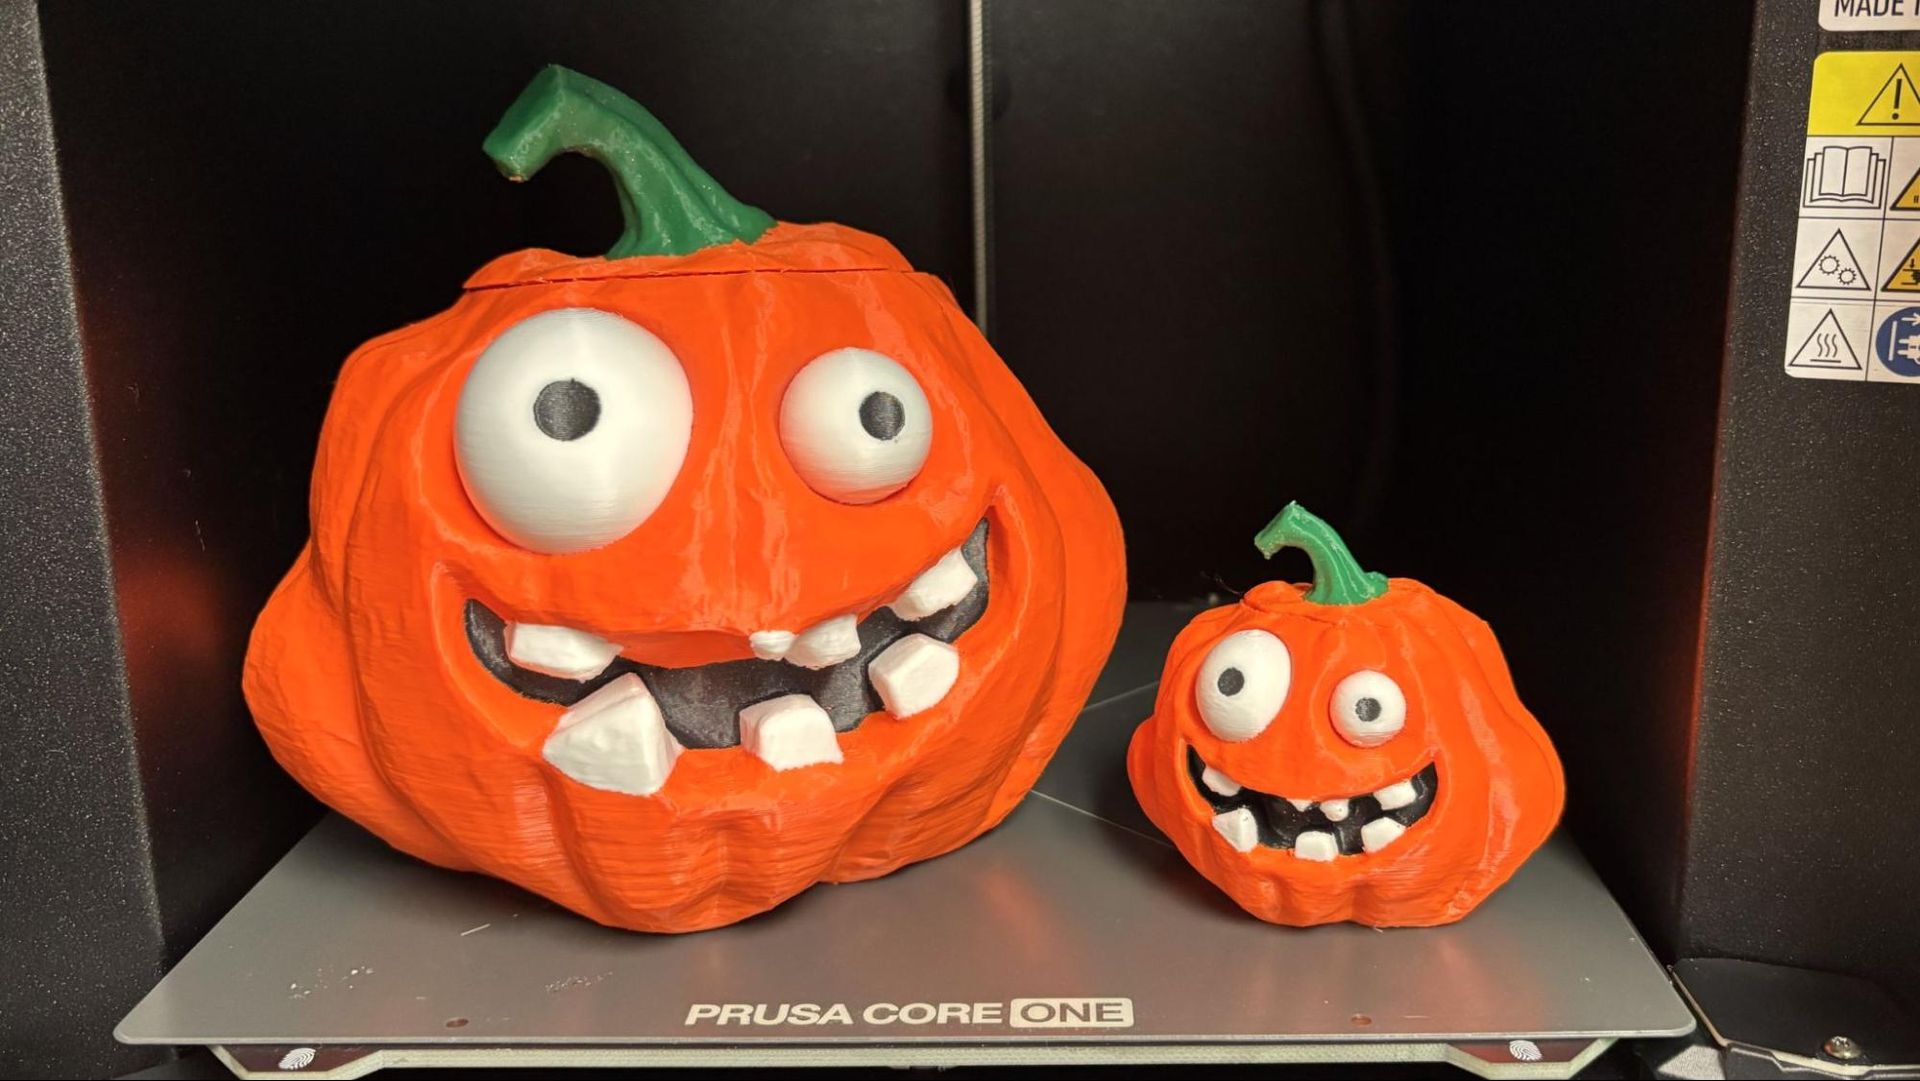
For high-temperature testing, I made these pumpkin containers, again with a mash-up of Tinkercad and my fledgling Nomad Sculpt skills. You really don’t want to see the insides of these things. But they printed really well in Prusament ASA Orange and Galaxy Black, with Ambrosia Armored Turtle Green ASA. I couldn’t find any white ASA, so I found a random spool of white ABS to fill in. The printer had no problem mixing the two materials as they are quite similar. I don’t think this photo does the orange justice; it’s possible it’s a bit fluorescent. Most importantly, there was no odor while these ran, as the printer remained closed and filtered. The large pumpkin took 13 hours and 45 minutes to print using a default .2mm layer height. It had 9.4 grams of waste over 632 tool changes.
Prusa CORE One+ INDX

(Image credit: Tom's Hardware)

A note on TPU: The Prusa INDX does not have an official profile for flexible materials as yet, but it is listed as being TPU-capable. I wrote up my own profile, copied from a standard CORE One+, and had mixed luck. It had difficulty with oozing and would occasionally jam up when trying to print with more than one color. This needs further work and experimentation.

Bottom Line
Prusa CORE One+ INDX

(Image credit: Tom's Hardware)

The Prusa CORE One+ INDX is the machine Prusa Research needs right now to compete in the modern marketplace. Is it a bit of a splurge? Yes, but the company’s reputation for reliability, right to repair, data security, and continued support through the years makes it a safe splurge.

Starting at $749 for a four-tool conversion kit and going to $2,119 for a fully assembled machine with the works, the CORE One+ INDX offers flexible price points for Prusa fans. Once assembled, the 3D printer itself is easy enough for families and school kids to use, but capable enough for small businesses and workshops. Plus, the ability to take the machine completely offline means it's a secure work partner for those who are mindful of data security or simply have unreliable internet service.

If you're a tinkerer and already have a CORE One or heck, even a MK4S, there is an upgrade path that could be a fun project that will net you the latest printer at half the cost.

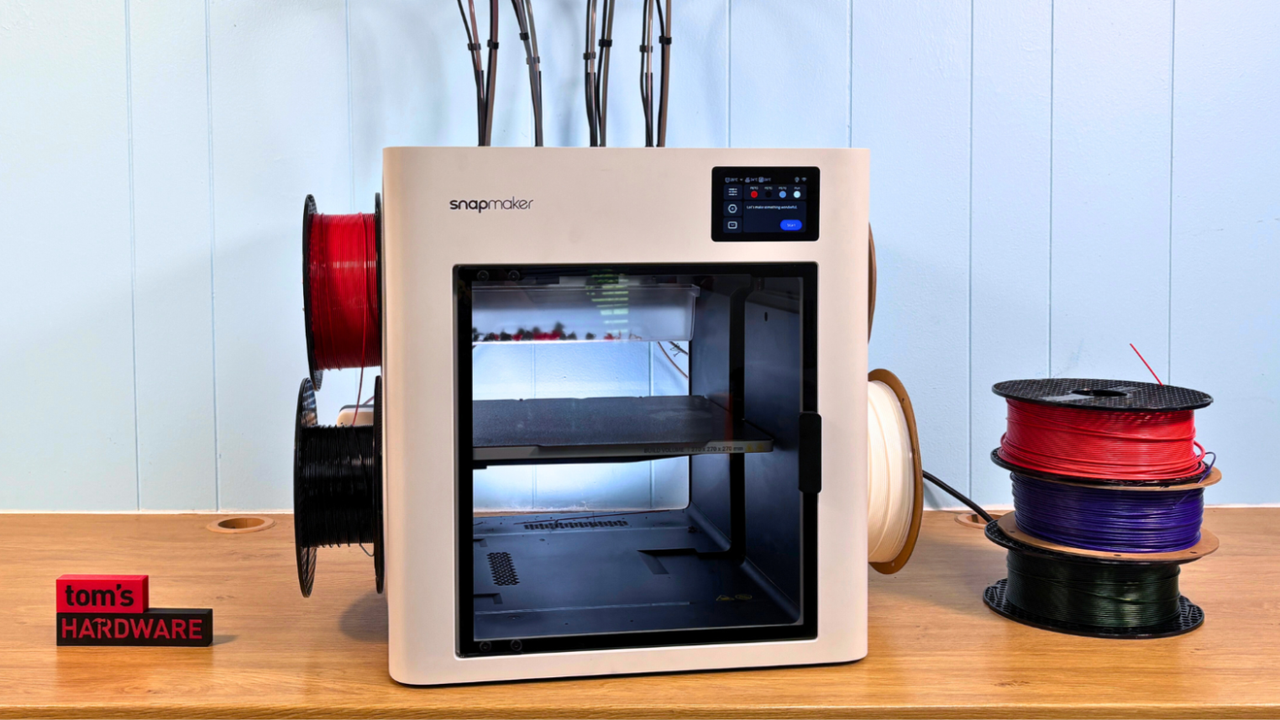
If a Prusa machine seems just a bit too spendy for your budget, the $849 Snapmaker U1 is an awesome four-color toolchanger with an evolving ecosystem and a thriving community of users. The Bambu Lab H2C nozzle swapper is a touch more expensive at $2,499, but has a larger 330 x 320 mm build plate, even if it only does five colors.

MORE: Best Budget 3D Printers
MORE: Best Budget 3D Printers for Beginners
MORE: Best Multicolor 3D Printers

✇Tomshardware

Prusa CORE One L+ review: More precise

How do you make a really good printer even better? How about a $25 upgrade kit? Recently, Prusa Research rolled out a series of upgrades to the big three: the CORE One, CORE One L, and the XL 3D printers. Since the CORE One L is the newest printer of the batch, it only needed a tweak rather than a full overhaul to earn a “+” designation. No one was surprised by this update, as Josef Prusa has a reputation for upgrading his machines rather than letting them fall by the wayside. In fact, the CORE One L is only the third major variation of Prusa-designed printers since the company was founded in 2012.

As we were wrapping up this review, Prusa Research announced the CORE One L+ is now compatible with the Prusa INDX conversion kit, which is $799 for four tools, or $1,079 for eight. We’re currently reviewing the INDX on a standard-size CORE One + (Gen 2), and spoiler alert: it’s running spectacularly.

The Prusa CORE One L never left my workshop since its introduction nearly a year ago. In over 1000 hours of hard use, it’s been quietly printing abrasives like carbon and glass fiber, and even a pinch of Prusa Ultra Glow, with no problems. It’s been a real workhorse for practical prints.

The “plus” upgrade removes a super annoying flaw that has spoiled an otherwise perfect machine: nozzle wiping failures. Before this upgrade, all Prusa machines would clean the nozzle before bed leveling by tapping the bed, leaving little dots of filament on the plate. When you’re running higher-temp filaments, oozing is a real problem and nozzle wiping fails are more frequent. The error itself isn’t a big deal, and I would often choose to ignore it as I still get excellent prints. The problem is the time I’d lose if I wasn’t watching the printer like a hawk, as the printer would shut down bed heating while it waits for you to come tend to it.

We’ve had nozzle wipers on other brands of 3D printers for years now, and it’s a relief that Prusa has finally gotten on board. With a simple addition of a silicone brush, the CORE One L+ is now one of the few printers I trust to set it and forget it.

The Prusa CORE One L+ upgrade also came with a set of GT1.5 timing belts. The tighter tooth spacing on the belts and drive gears makes an already precise system more precise, resulting in smoother surfaces.

Prusa CORE One L+

(Image credit: Tom's Hardware)

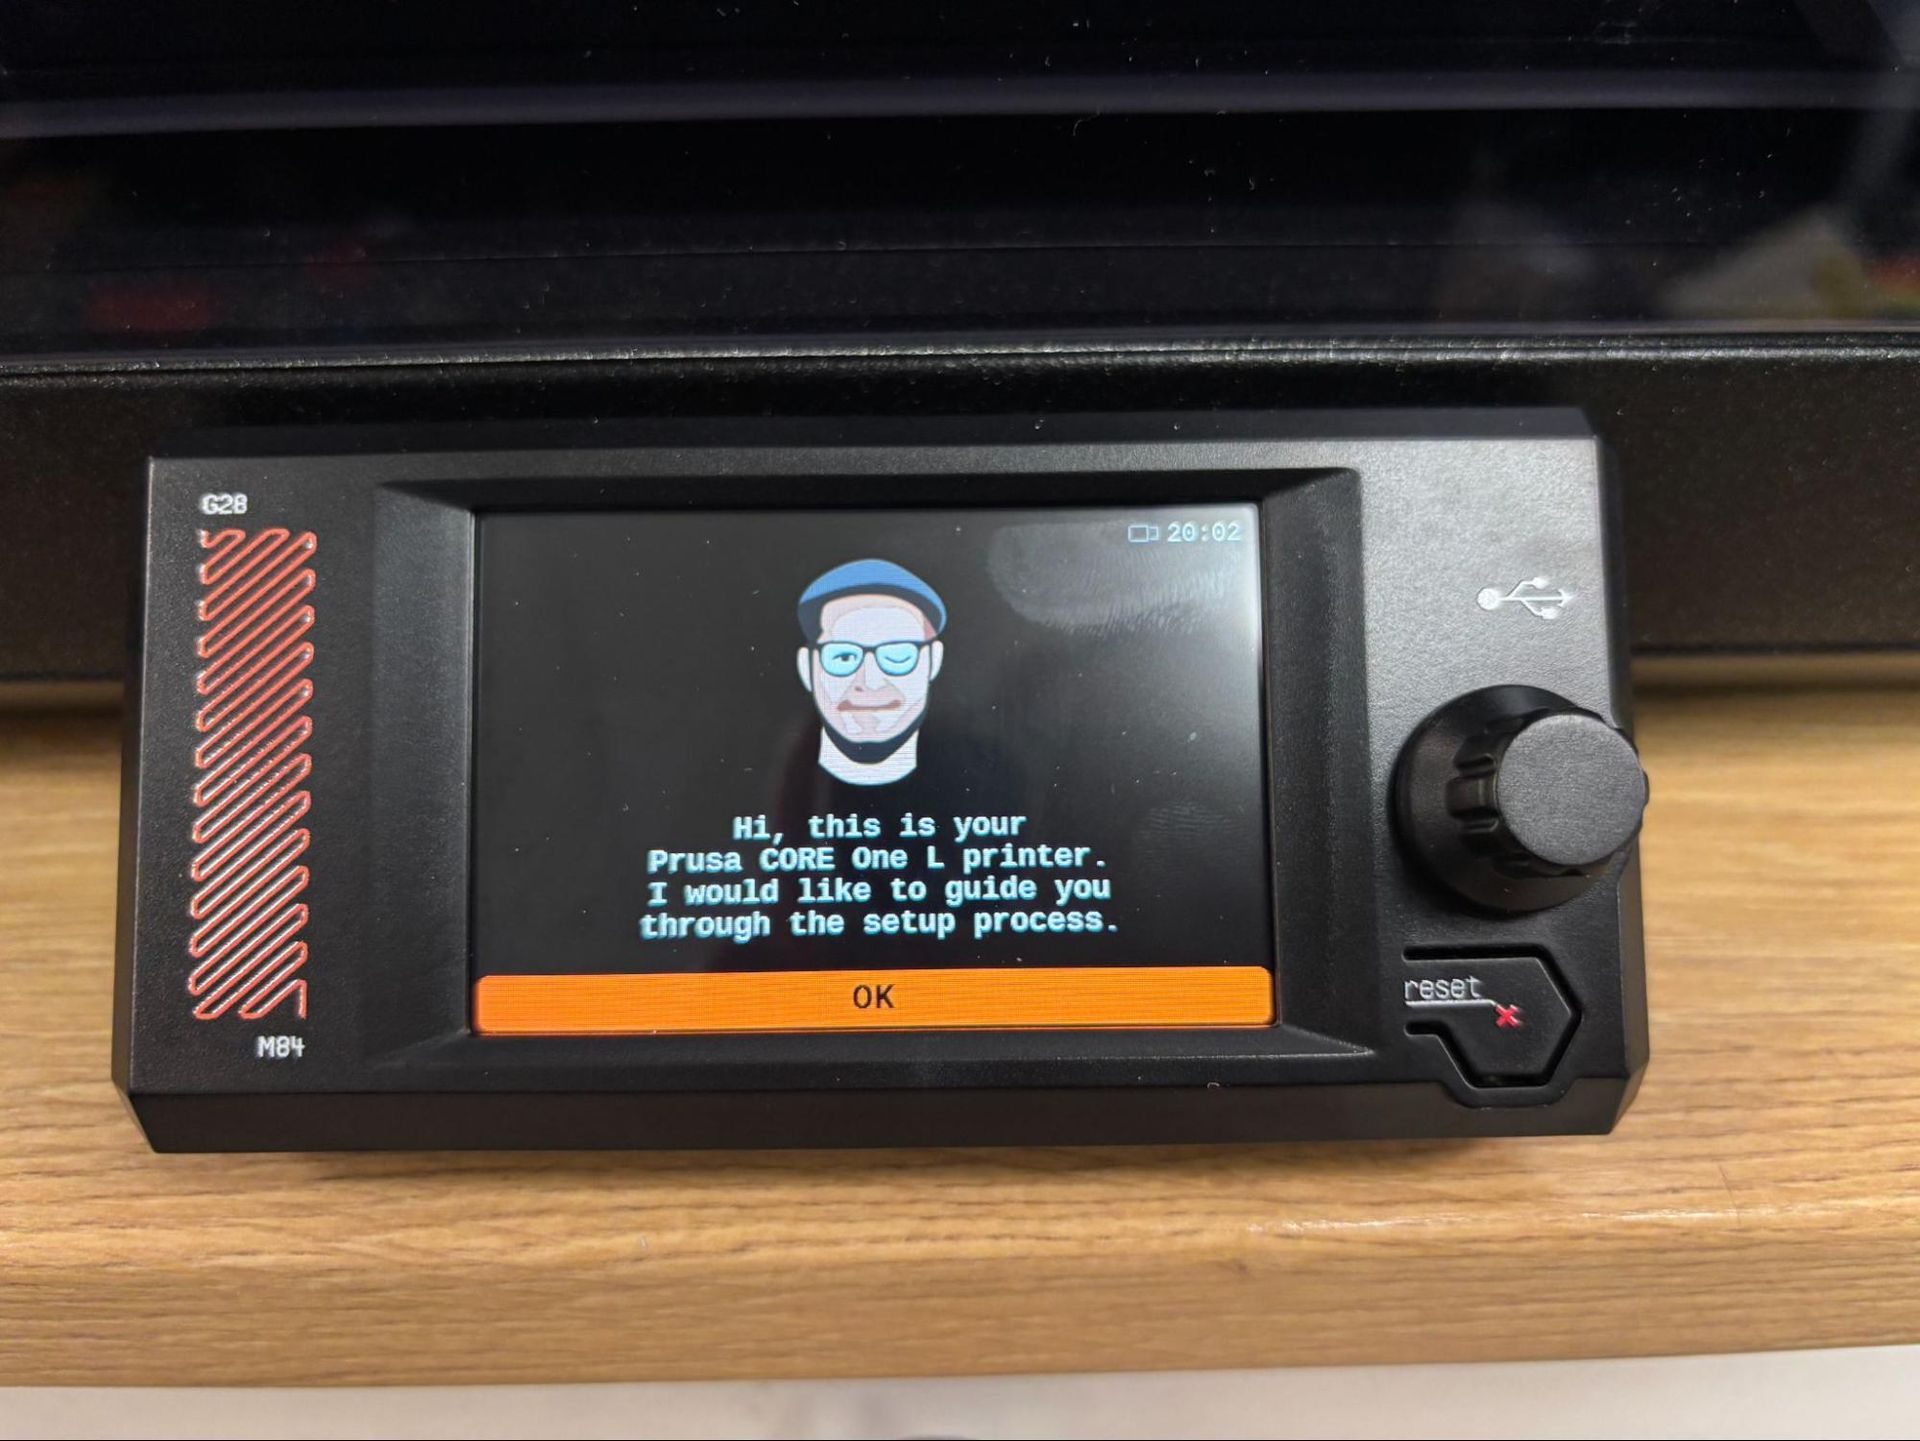
Another update is that this 3D printer is finished at the factory. When firing up the Prusa CORE One L+ for the first time, you’ll notice one thing right off the bat. A winking Josef Prusa pops up to help you set up your printer (as usual), but now there isn’t much set up to do. All the calibration has been done at the factory, and you get your first print going in about five minutes after ripping into the box. You can eat your complimentary package of Gold Bears while watching the first layer go down.

One thing that Prusa Research did not change is the 290 °C hot end limit. Most printers in this class can go 300 °C, with the Bambu H2S good to 350 °C and the Qidi XPlus 5 capable of 370 °C. Prusa offers an HT hotend upgrade that hits 400 °C and is listed at $199, but it's currently out of stock. 400 °C is hot enough for PEKK and more than enough for PPS CF. But I’d like to see the CORE One L+ do at least 300°C from the get go.

This is one of the few printers that can be operated entirely offline, making it the 3D printer of choice for businesses and government entities who need to keep data extra secure. Yet the machine itself is mostly online and open source, to make sure users can freely repair and mod their own devices.

Plus, the CORE One L+ has an optional Advanced Filtration Module with HEPA and Active Carbon filters to make sure whatever fumes your filament produces stays out of your home or office. That same vent can also be attached to an HVAC system.

For these reasons, we’re happy to put the Prusa CORE One L+ on the list of best 3D printers we’ve tested as the best Cloud Free/Open Source 3D Printer we’ve seen so far. The CORE One L+ is retailing at $1,999, the same price as before the upgrade. It’s only being offered as a fully built machine, no kits this time.

Specifications

Prusa CORE One L+

Prusa CORE One L

Prusa CORE One

Build Volume

300 x 300 x 330 mm (11.81 x 11.81 x 12.99 in)

300 x 300 x 330 mm (11.8 x 11.8 x 12.99 in)

250 x 210 x 270 mm (9.84 x 8.3 x 10.6 in)

Material

PLA/PETG/Flex/PVA,ABS/ASA/PA/PC (up to 290C degrees)

PLA/PETG/TPU/ABS/ASA /PC (up to 290 degrees)

PLA/PETG/TPU/ABS/ASA /PC (up to 300 degrees)

Extruder Type

Direct drive

Direct drive

Direct drive

Nozzle

.4mm (Brass CHT Installed, Abrasive Resistant Included)

.4mm (Highflow CHT & Hardened Steel)

.4mm (Highflow CHT)

Build Platform

Double-sided PEI flex plate

PEI spring steel flex plate

PEI spring steel flex plate

Bed Leveling

Automatic, Loadcell

Fully automatic

Automatic

Filament Runout Sensor

Yes

Yes

Yes

Connectivity

LAN, WiFi, USB Flash Drive

USB, LAN, Wi-Fi, App

USB, LAN, Wi-Fi, App

Interface

Color touch screen

3.5-inch color screen touch screen with additional knob

Color touch screen with knob

Machine Footprint

469 x 521x 635 mm (18.5 × 20.5 × 25 in)

469×521×635 mm (18.5×20.5×25 in)

415 x 444 x 555 mm (16.3 x 17.5 x 21.8 in)

Machine Weight

21.9 KG (48.21 lbs)

21.9 KG (48.28 lbs)

22.5 KG (49.6 lbs)

MSRP

Starts at $1,999

$1,999

$1,199

Release Date

August 2026

November 19, 2025

November 19, 2024

Prusa CORE One L+: Included in the Box

Prusa CORE One L+

(Image credit: Tom's Hardware)

The Prusa CORE One L+ is 99% assembled at the factory. Also included are a bag of Haribo Goldbears, a toolkit, a USB stick, country specific power cord, a PEI flex plate, a spool holder, and a full spool of Galaxy Black Prusament PLA.

Design of the Prusa CORE One L+

Prusa CORE One L+

(Image credit: Tom's Hardware)

The CORE One L+ is a tank of a machine, weighing almost 50 lbs and built with a rigid metal frame, metal side panels, a plexiglass door, and top and side windows. The side panels jut into the interior of the machine to both allow clean lines on the outside and to get rid of useless space on the interior that would need to be heated. The filament spool nests neatly inside the recessed panel.

With a build volume of 300 x 300 x 330 mm, the CORE One L+ has a lot of heat area. This is accomplished with a thick aluminum heatbed that runs on line current, switching automatically from 110V to 220V. The chamber is heated with two fans mounted under the bed to create a convection effect, blowing cold air over the bed. The toolhead is now driven by finer-toothed GT1.5 belts that run on a linear rail for the X-axis and two linear rods for the Y-axis. The bed is driven by three independent stepper motors with lead screws.

The toolhead has a planetary-geared Nextruder, which does a great job pushing plastic. A large cooling fan is on the front, and a large parts cooling blower on the back leads to a duct that wraps almost completely around the nozzle.

The CORE One L+ comes with a .4 brass CHT high flow nozzle installed, and a bonus hardened steel nozzle included. The first thing I did after a quick test print was to switch to the hardened nozzle. These nozzles are not exactly quick release, but are fairly easy to replace. The two thumb screws on the left side of the tool head release the nozzle, which then must be unscrewed from the heater block. Care must be taken since, once the nozzle is removed, the only thing holding the heater block is the wiring. I haven’t run into any issues yet, but I’m very careful with the wiring.

Prusa CORE One L+

(Image credit: Tom's Hardware)

The hotend can reach a temperature of 290 °C, and as mentioned earlier, there's an optional HT hotend that hits 400 °C if you really need the extra heat.

The door on the Prusa CORE One L+ has a switch, which can be disabled, to safely stop the printer if it is opened while running. I really love that the door can be mounted on the opposite side of the machine, in case that works better for your setup.

The top vent on the printer is opened and closed automatically as needed. There are two fans on the back of the case to help ventilate the chamber. This is quite enough to run lower-temp filaments like PLA with the door shut. There is an optional HEPA filter that mounts over the rear case fans.

The Buddy3D camera provides excellent video for monitoring your prints from Prusa Connect and the Prusa App. The one thing it can’t do is send a timelapse video to your computer. To record a timelapse video, you must add an SD card to the camera.

Prusa CORE One L+

(Image credit: Tom's Hardware)

Assembling the Prusa CORE One L+

Prusa CORE One L+

(Image credit: Tom's Hardware)

The Prusa CORE One L+ arrives mostly assembled. After removing three screws holding down the bed, you can put the tool kit away. The screen and trim panel slot into the front of the printer and are held in place with magnets. The wiring for the buddy cam is preinstalled, and the camera mounts to the printer’s inner wall with magnets. The spool holder attaches to its base with a quarter turn. The toolhead is freed by removing the cardboard holding it in place. Within just a minute or two, you are ready to print.

Leveling the Prusa CORE One L+

Prusa CORE One L+

(Image credit: Tom's Hardware)

The Prusa CORE One L+ is calibrated at the factory. So there is no need to run through the usual 30 minutes of calibrating and leveling when powered on. The printer does check the level before each print.

Loading Filament on the Prusa CORE One L+

Prusa CORE One L+

(Image credit: Tom's Hardware)

Loading filament on the Prusa CORE One L+ is simple. Filament is pushed past the runout sensor and into the toolhead, where it is grabbed automatically by the extruder. The printer then asks what kind of filament you are loading and heats the nozzle to the appropriate temperature.

Loading TPU is the same, but there is a switch to disengage the filament runout sensor. This really helps loading noodly TPU. I tried TPU from several companies, and 95A TPU loaded just fine. For softer TPU, I couldn’t push it past the 90 degree bend in the Bowden tube at the toolhead. I needed to remove the Bowden tube and load the filament directly.

Prusa CORE One L+

(Image credit: Tom's Hardware)

Preparing Files / Software for Prusa CORE One L+

Prusa CORE One L+

(Image credit: Tom's Hardware)

Prusa printers run on PrusaSlicer, an open-source slicer based on Slice3r that serves as the foundation for most of the other slicers out there. While the Prusa CORE One L+ can be run completely offline, PrusaSlicer can directly access Printables, Prusa’s vast and curated file-sharing service, and can directly control and upload files to the printer through Prusa Connect.

Prusa CORE One L+

(Image credit: Tom's Hardware)

Initially, the buddy camera only produced still photos that were updated frequently, but after a firmware update (which was already present on the camera for this printer), the live video quality is excellent. Prusa has also developed its web-based EasyPrint slicer, which can be used for slicing files on mobile, and it offers a more comprehensive set of options than any other app or online slicer I’ve seen.

Printing on the Prusa CORE One L+

The CORE One L+ comes with a full 1 KG roll of Prusament PLA Galaxy Black. If you want more colors and materials like silks and multicolor filaments, you should check out our guide to the best filaments for 3D printing for suggestions.

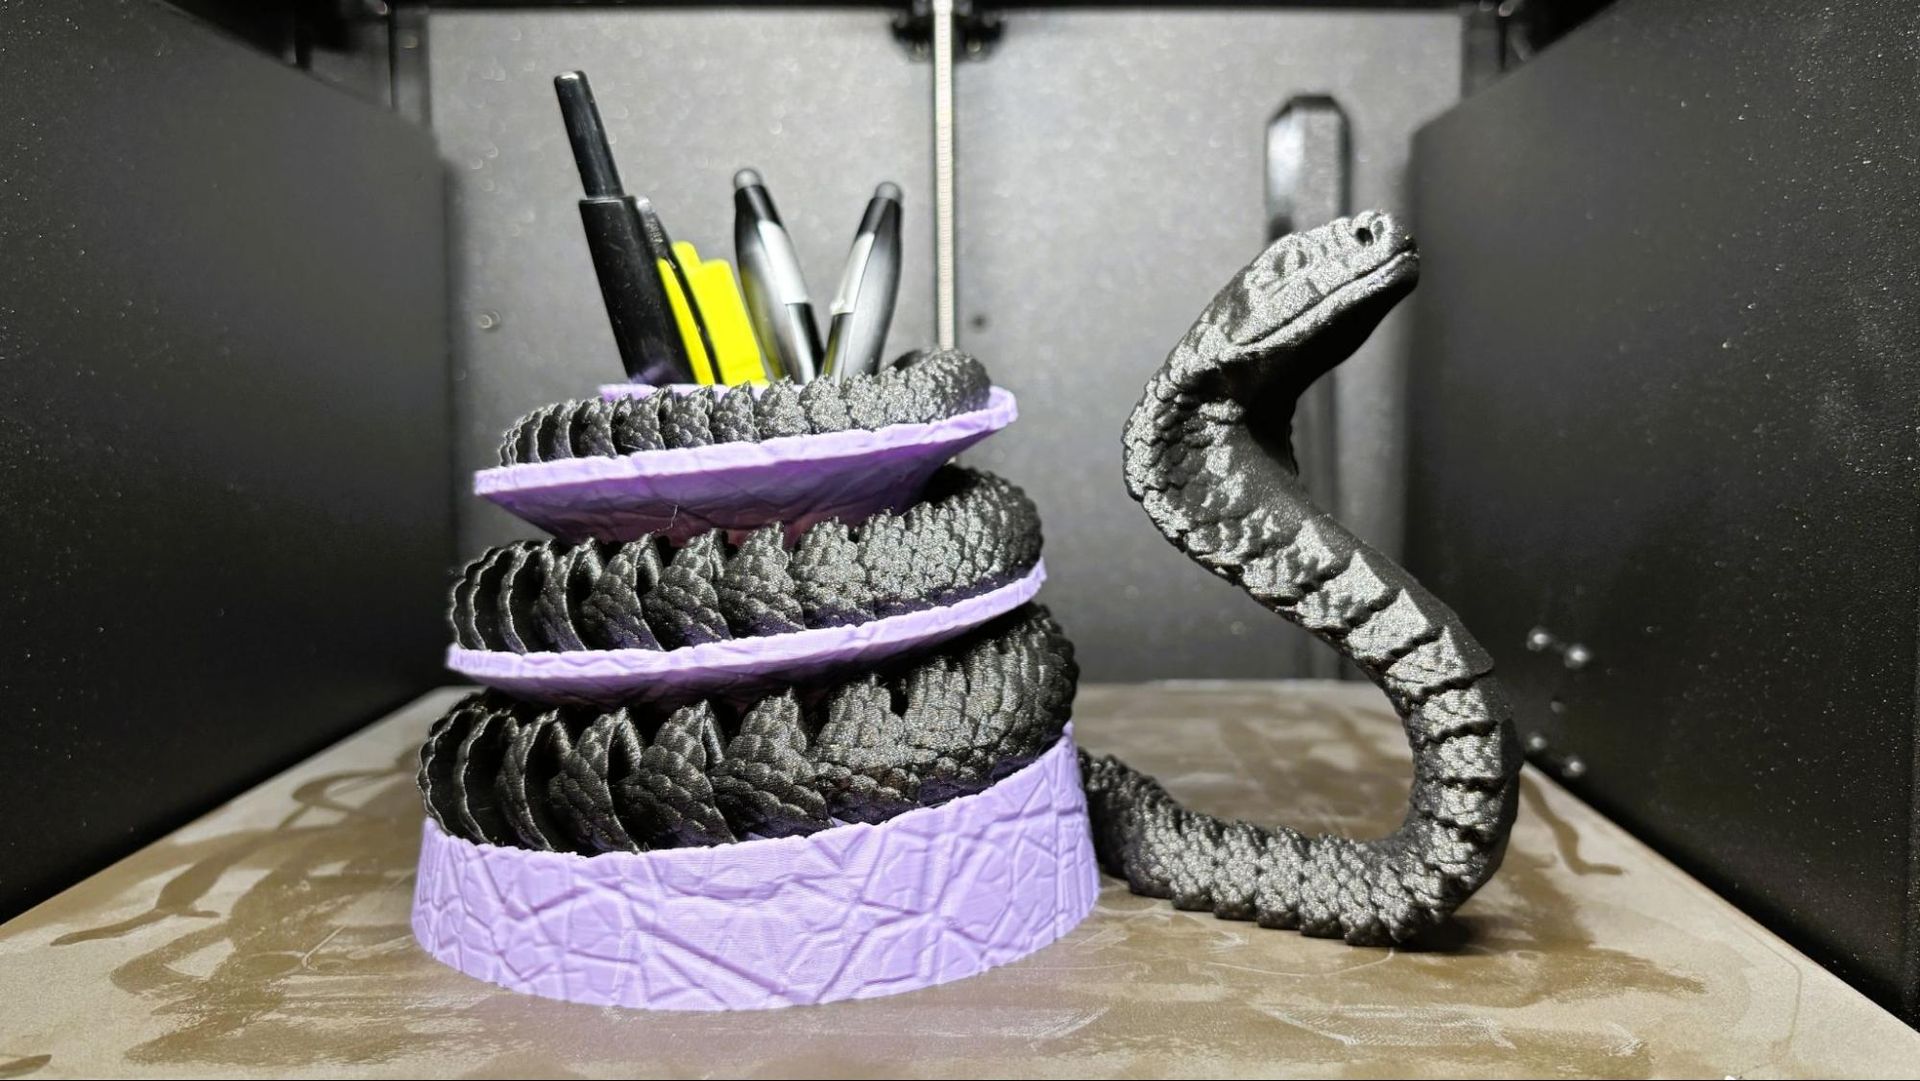
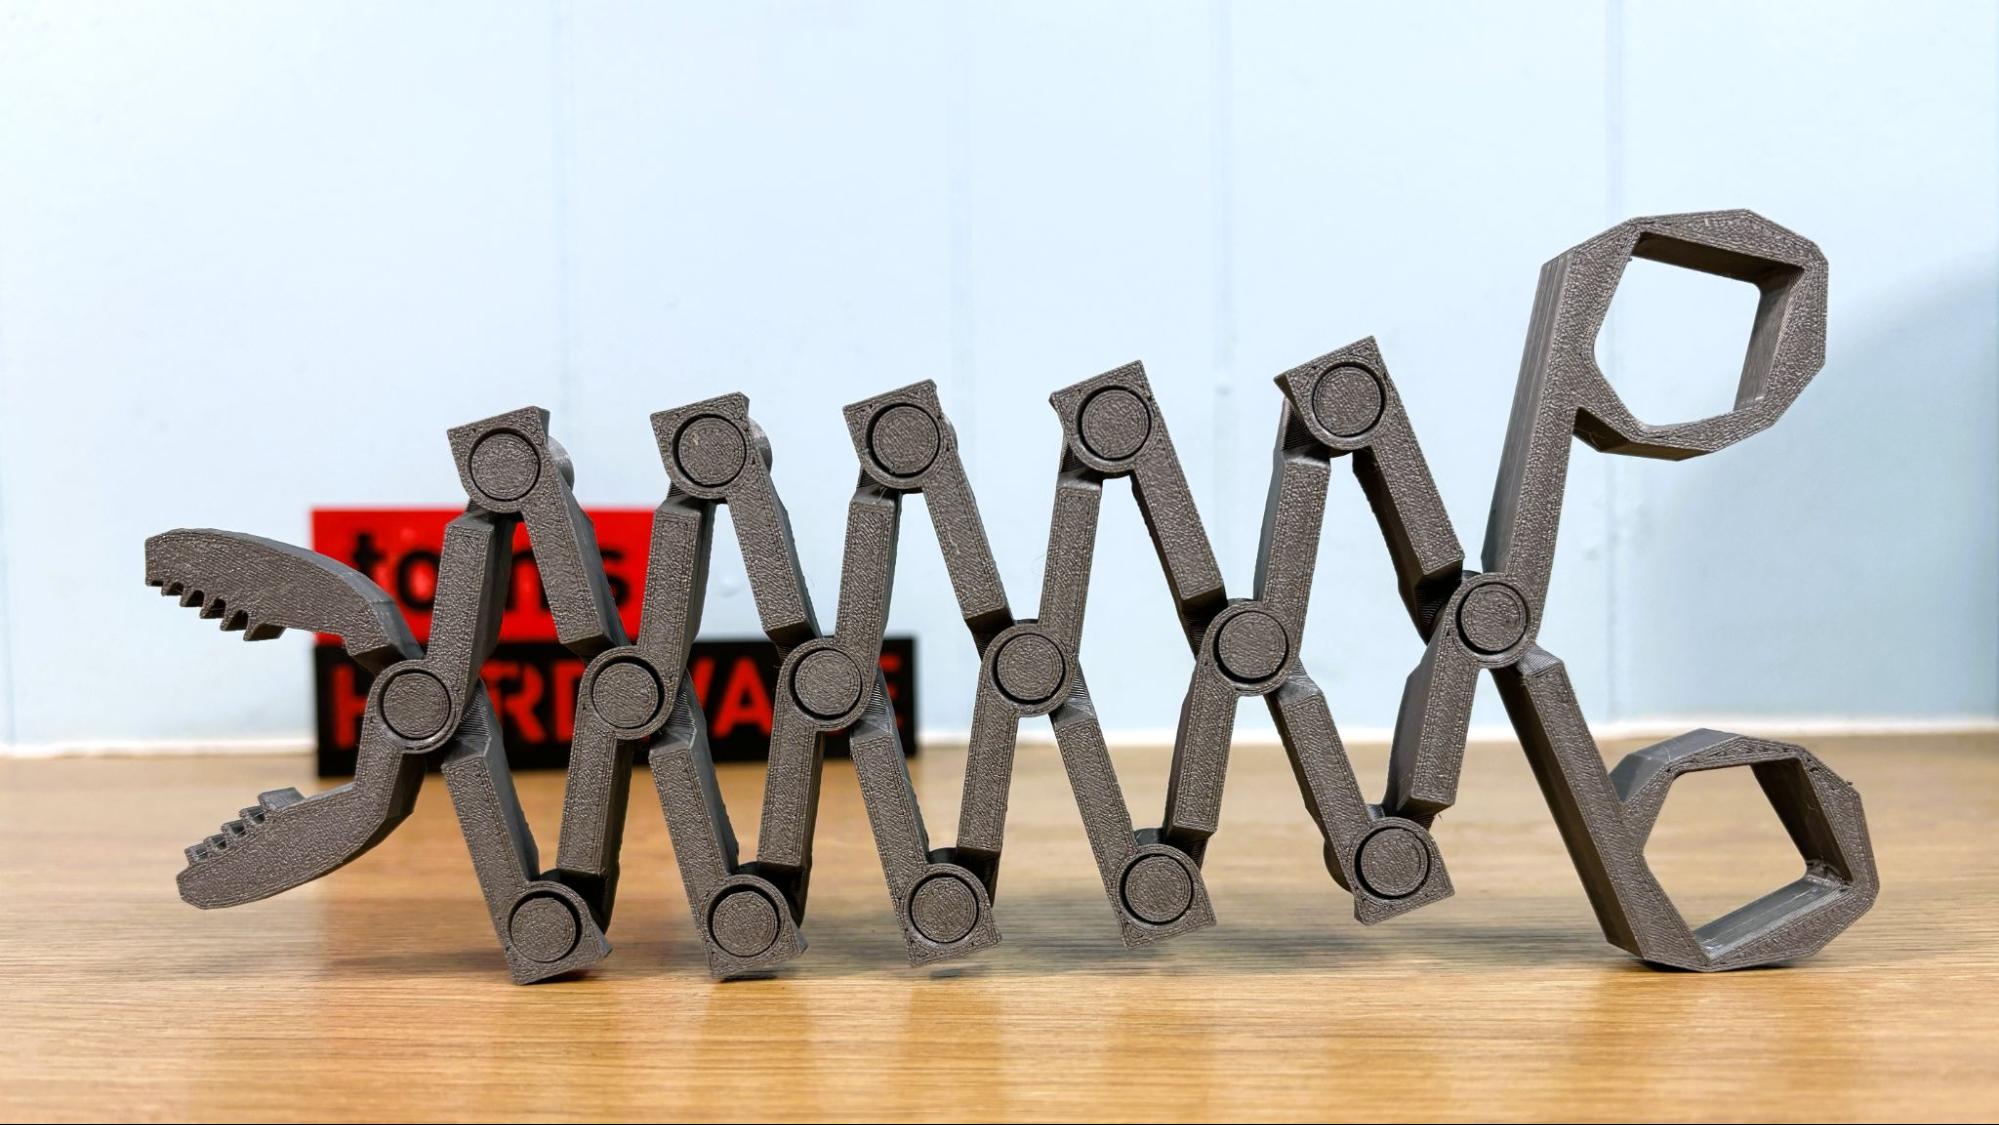
First, I printed an Articulated Cobra + Pencil Holder from McGybeer. I used the provided Galaxy Black PLA for the snake, and the pencil holder was run in Meta Taro Purple PLA from Sunlu. Both were printed with a .2 layer height with an average print speed of 100 mm/s. The pencil holder took 9 hours and 44 minutes to print, with the cobra taking 16 hours and 44 minutes. The snake is wrapped around the pencil holder when you’re not playing with it. Both look absolutely perfect.

Prusa CORE One L+

Cobra Pencil Holder by McGybeer. (Image credit: Tom's Hardware)

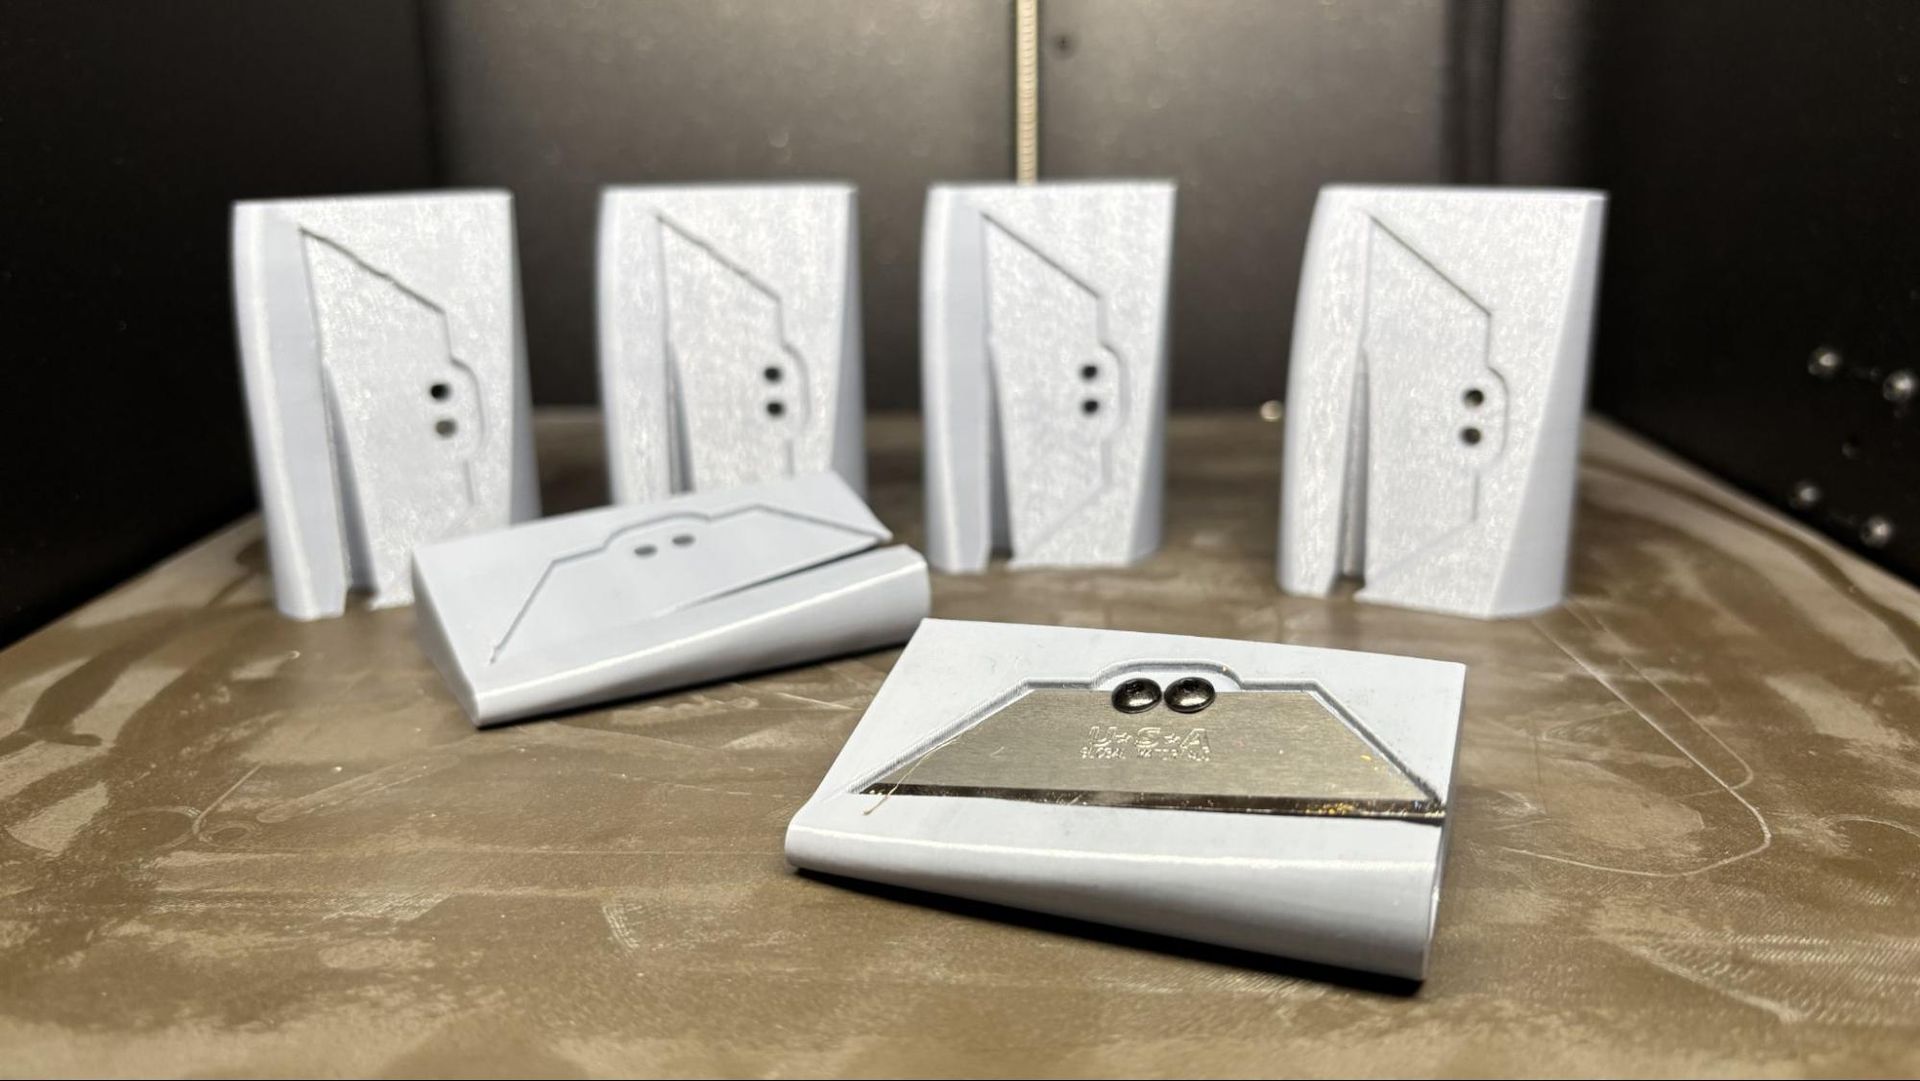
I printed a plate of carpenter pencil sharpeners from Anakel. They use a standard utility blade and work really well. Printed at a .2 layer height and an average print speed of 120 mm/s, they were completed in 3 hours and 35 minutes. They look great in grey high-speed PETG+ filament from Inland.

Prusa CORE One L+

Pencil Sharpeners by Anakel. (Image credit: Tom's Hardware)

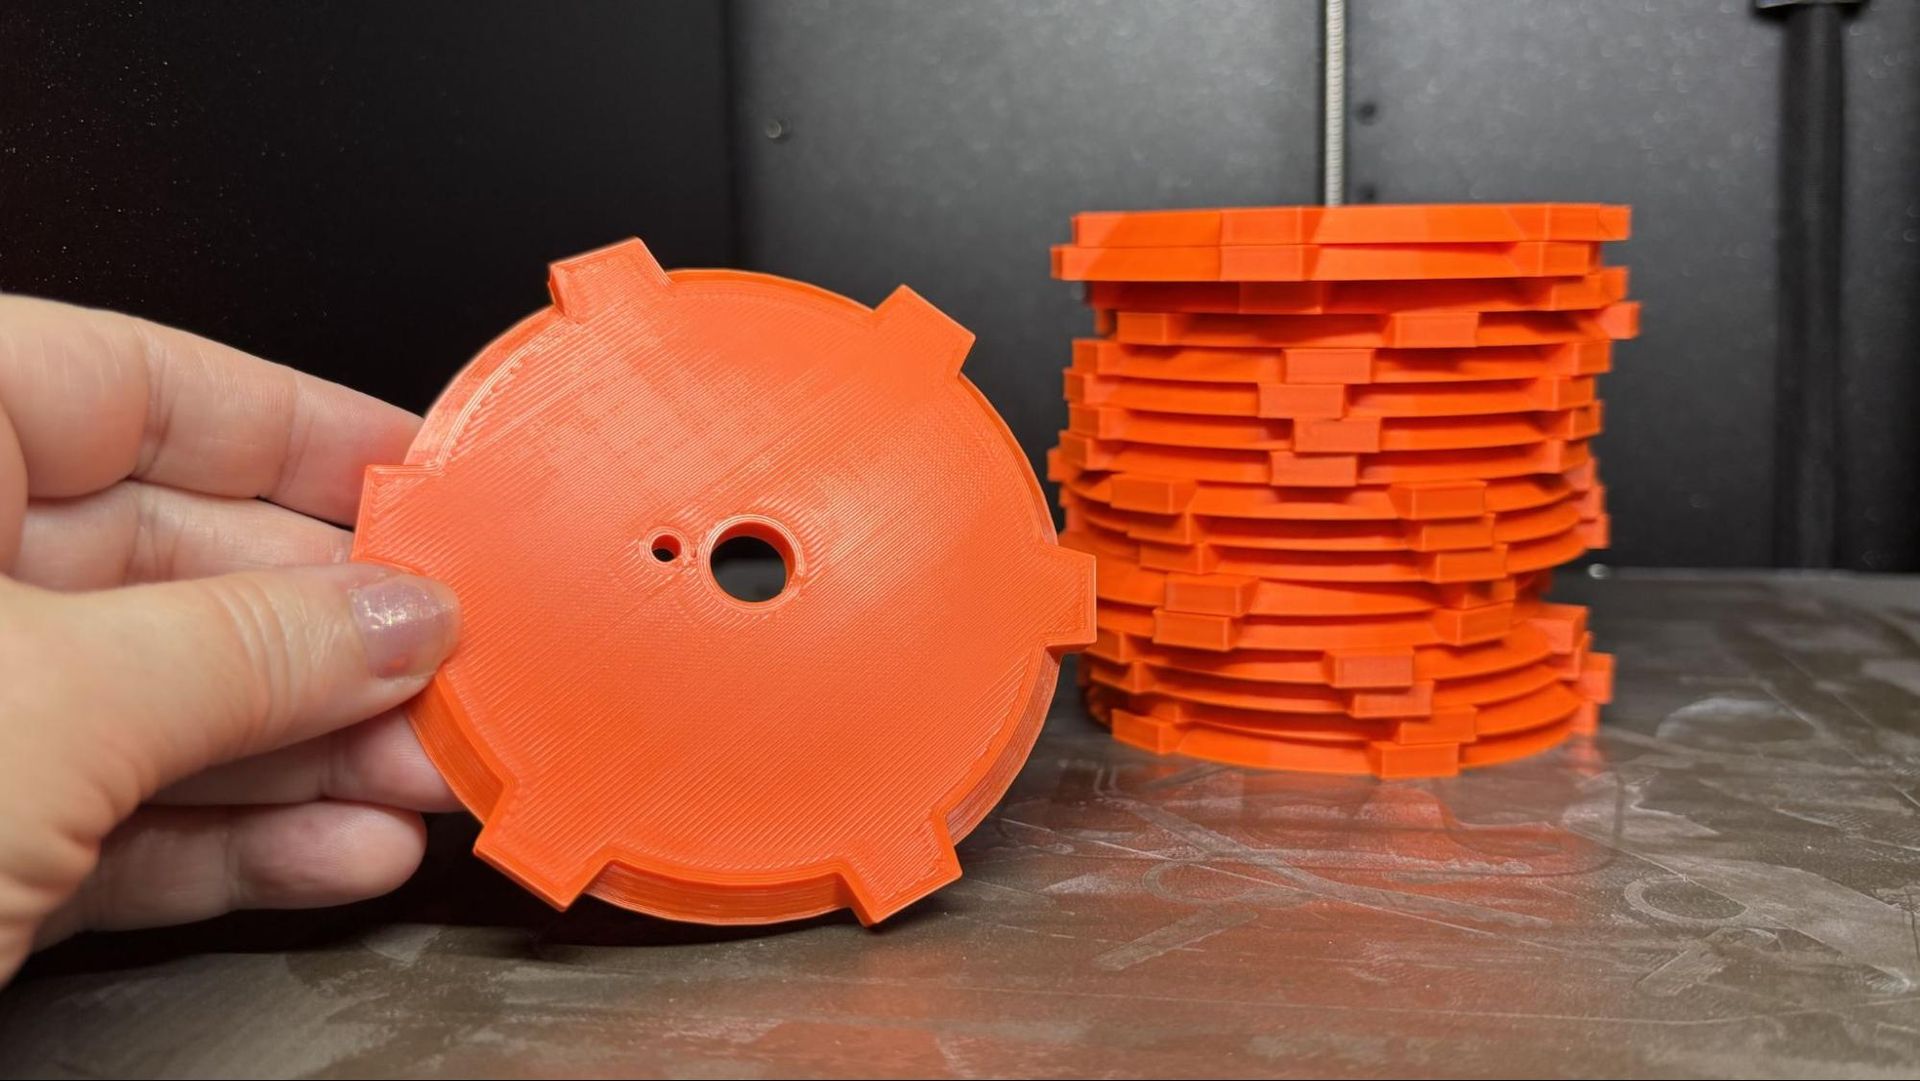
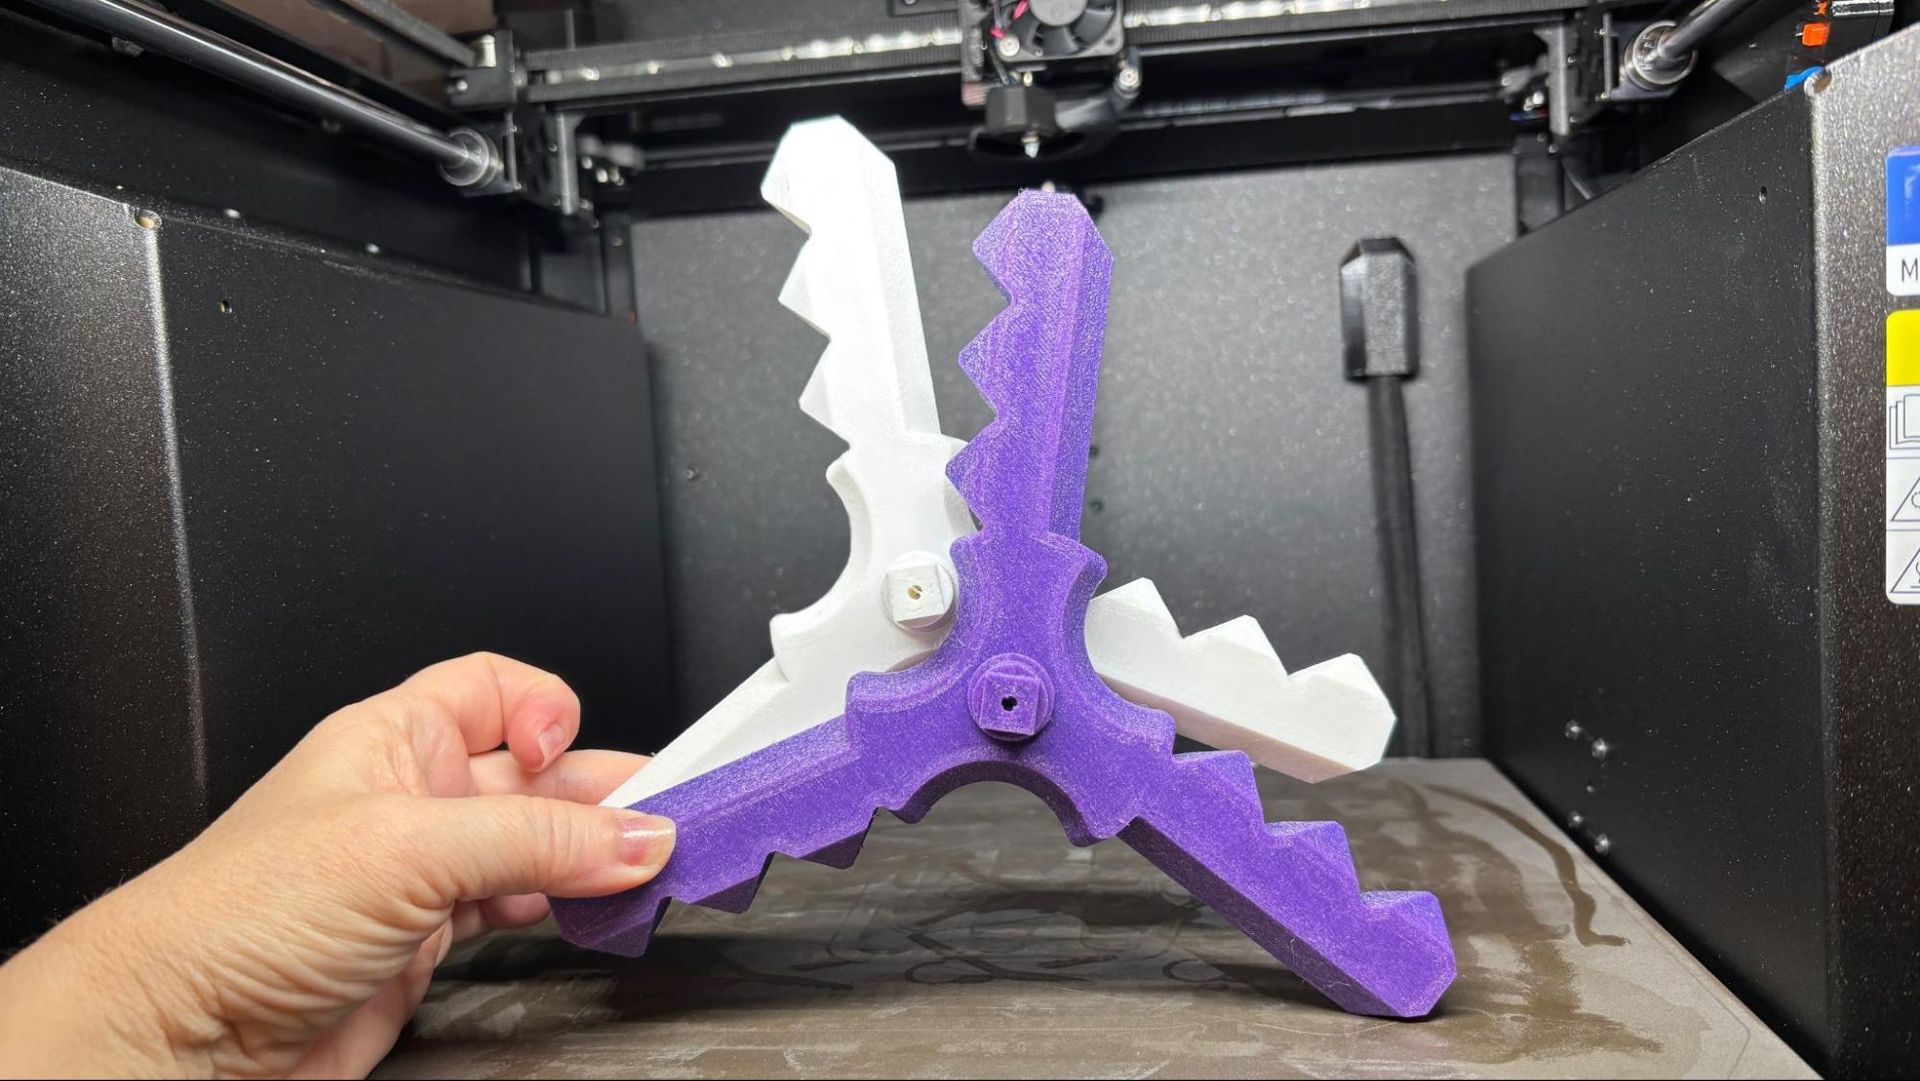
Next, I ran two plates of weapons for our battle tops, which are listed on Printables.com. Printed in Prusa Orange ASA with a .2 mm layer height and running at an average of 120 mm/s, the plates took a little over 5 hours each. They are printed solid with a bit of overextrusion to lock everything together and look really good, if I do say so myself. The bed leveling and adhesion were perfect out to the edges of the build plate.

Prusa CORE One L+

Battle Tops by Denise Bertacchi (Image credit: Tom's Hardware)

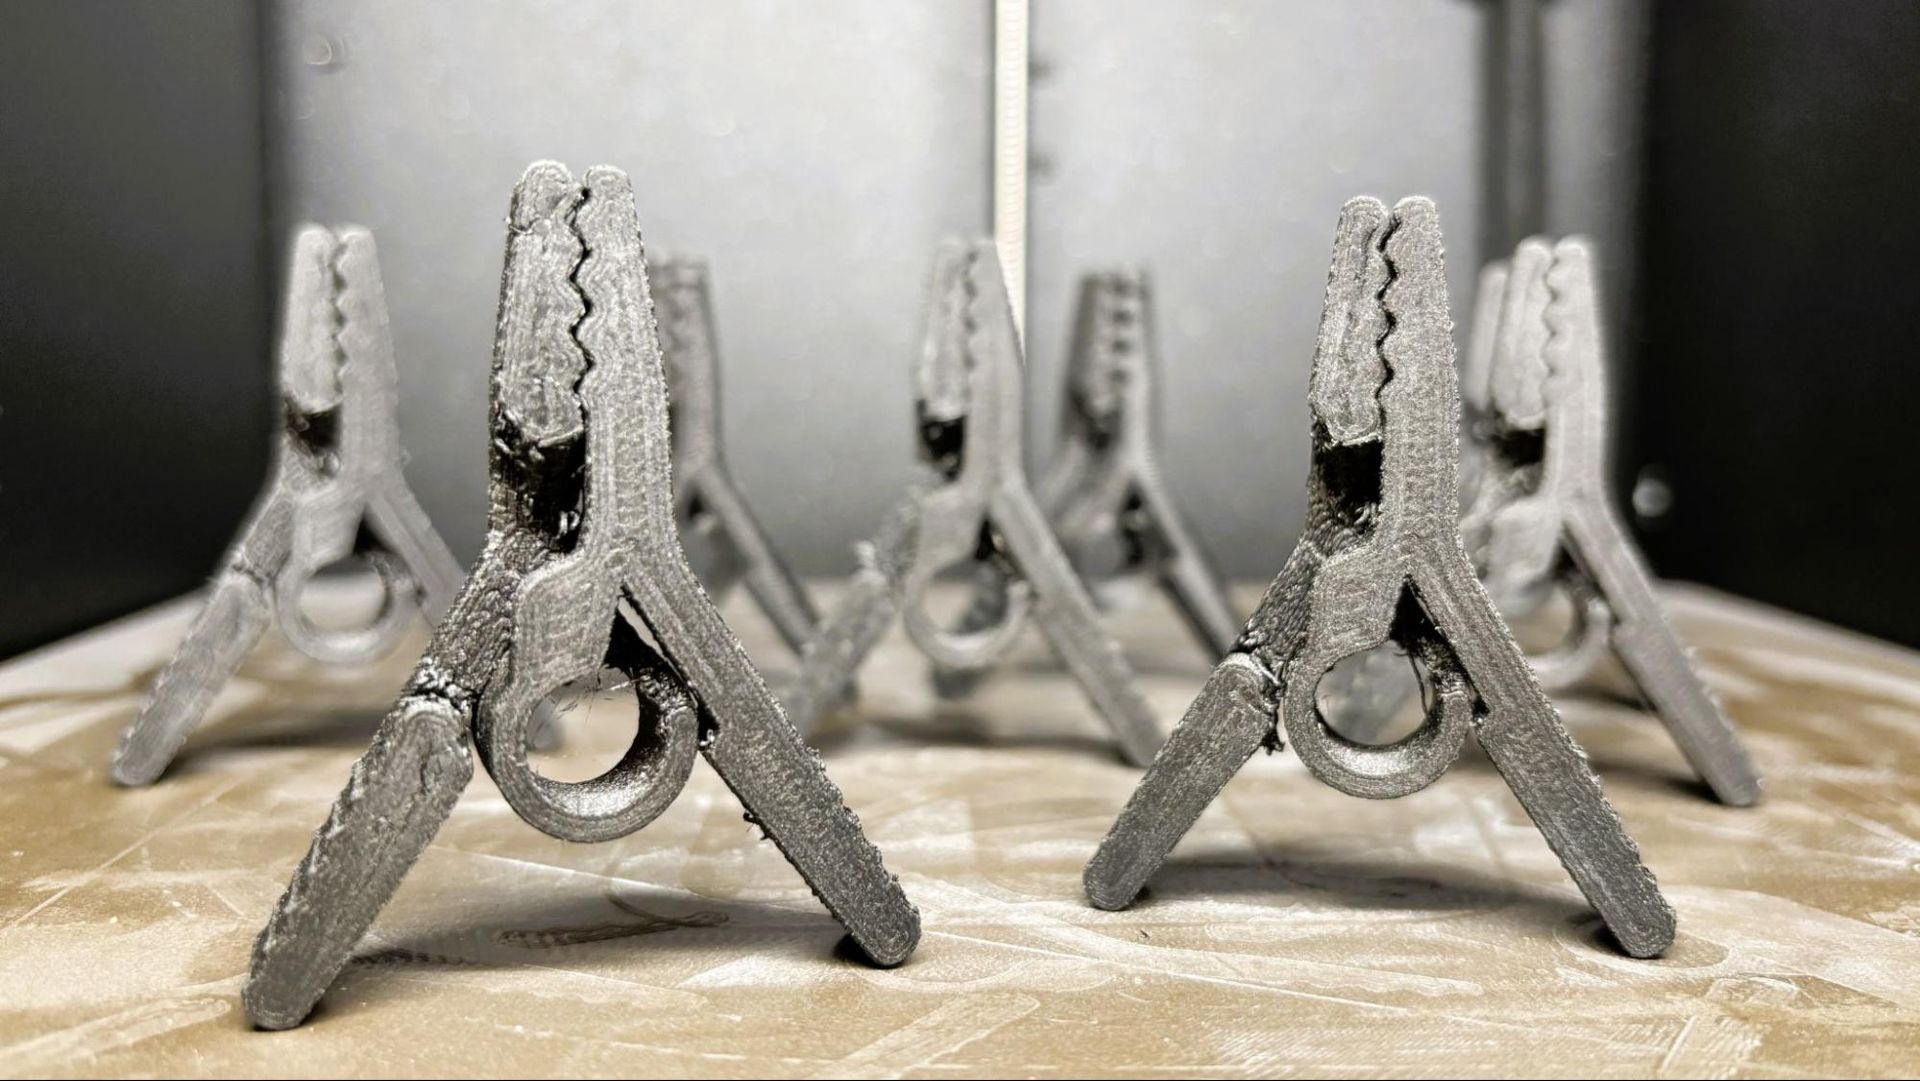
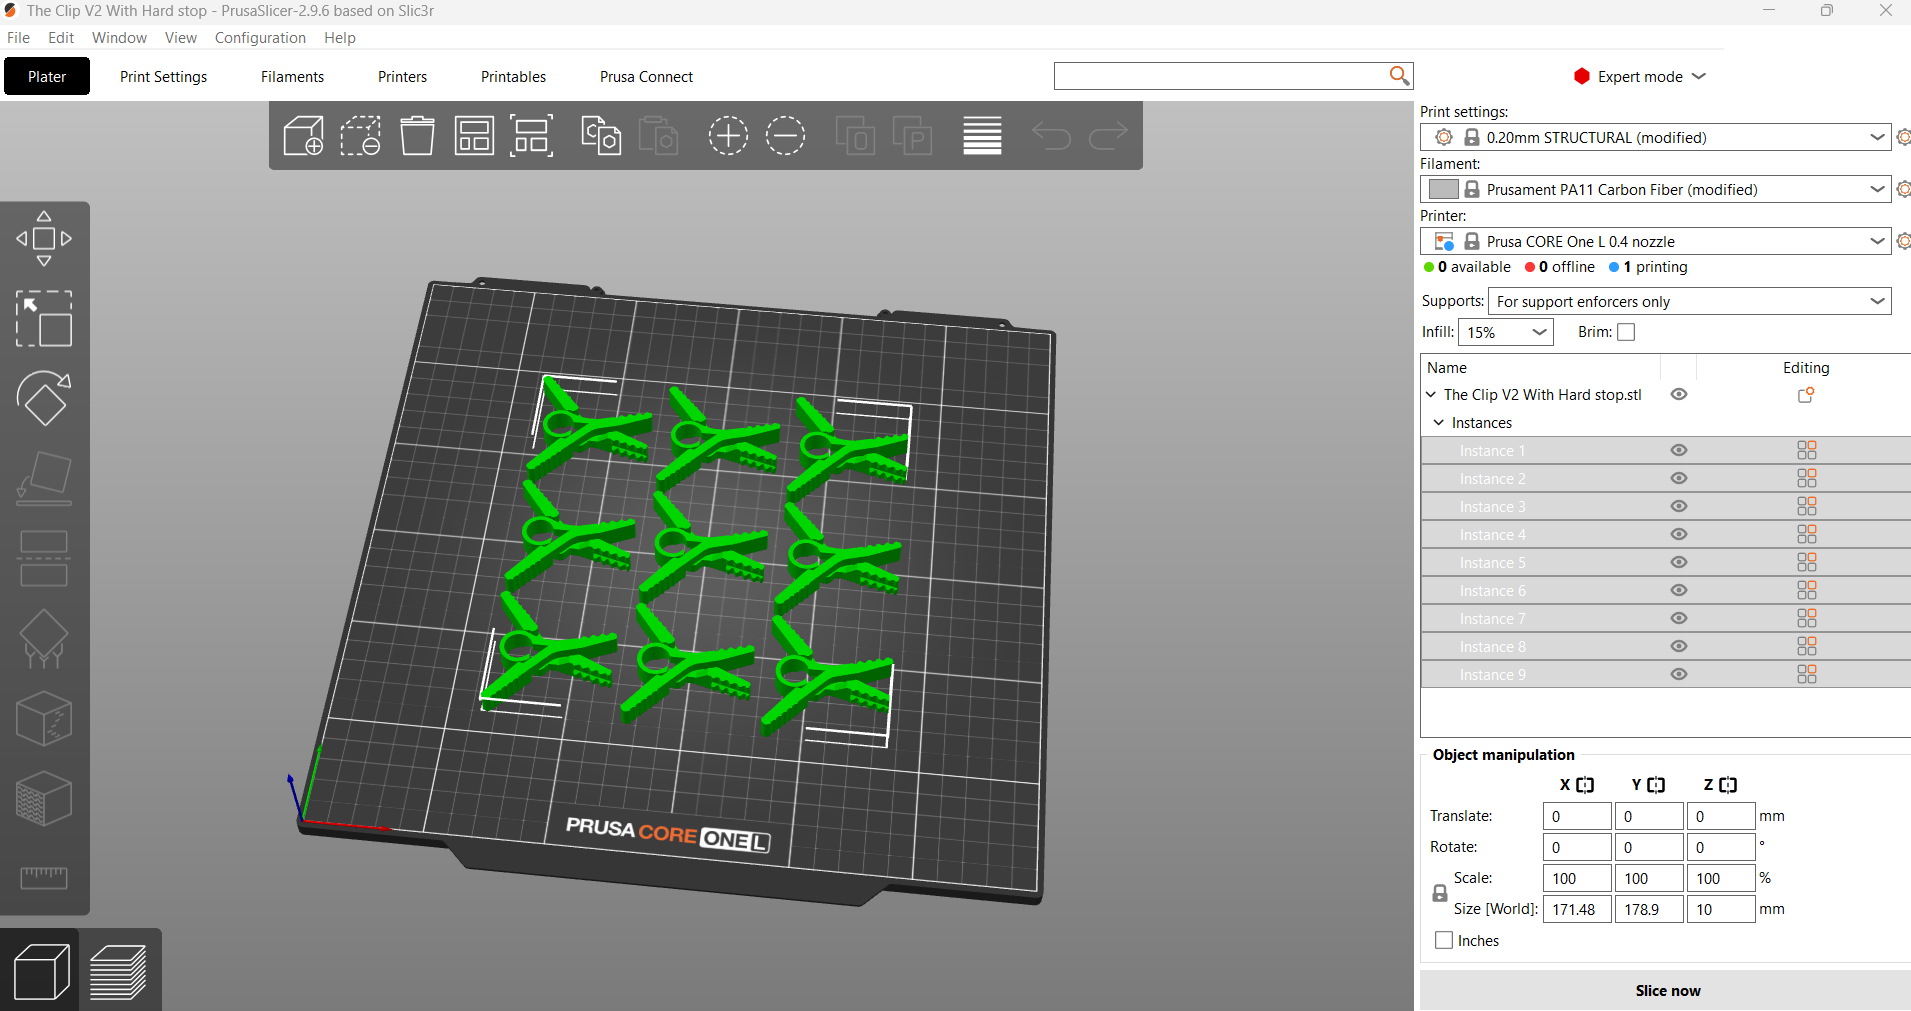
To test the Prusa CORE One L+ on a more technical filament, I printed a plate of clips from Afrie using PA6-CF20 from Polymaker. This is not the easiest filament to print, and one that I normally run at 300C, which is hotter than the CORE One L+ can go. Using a .2mm layer height and an average speed of 50 mm/s, the clips took almost four hours to print. The parts are print-in-place, and there is some roughness on the unsupported overhangs, but for PA6-CF they still look fantastic. After a few hours of annealing, they are in use all over my house at this point.

Prusa CORE One L+

Clips by Afrie. (Image credit: Tom's Hardware)

TPU is easier to print on the CORE One L+ than on many printers on the market today. I printed weapons for our DeathRacer combat robots using Cookiecad Witches Blue 95A TPU and white Polymaker Polyflex TPU 90A. With a .2mm layer height and an average print speed of 35 mm/s, these blades took a little over 6 hours each and look great with just a tiny amount of stringing.

Prusa CORE One L+

DeathRacer parts by Mr. Baddeley. (Image credit: Tom's Hardware)

Bottom Line

Prusa CORE One L+

(Image credit: Tom's Hardware)

The CORE One L+ is a fast, quiet, easy to set up printer that is a joy to use. If it could get a little hotter on the nozzle without an upgrade, it would be nearly perfect for a wider range of practical filaments.

With a retail price of $1,999, the CORE One L+ is a significant investment when compared to the more budget-friendly Core XY machines from other brands. However, the legendary 24 hour 7 days a week, English speaking customer service and rabid fan base willing to share tips and tricks are a huge perk. So is the knowledge that when you buy a Prusa today, you’ll still be running it in 10 years or more because it is infinitely repairable and moddable.

If a Prusa CORE One L seems just a bit too spendy for your budget, the smaller Prusa CORE One comes in at $999 for a kit. The slightly more budget-friendly, but equally sized Bambu Lab H2S Combo is currently on sale for $1,399, and if you need some massive CORE XY size, the Creality K2 Plus is worth checking out at $1,199.

✇Tomshardware

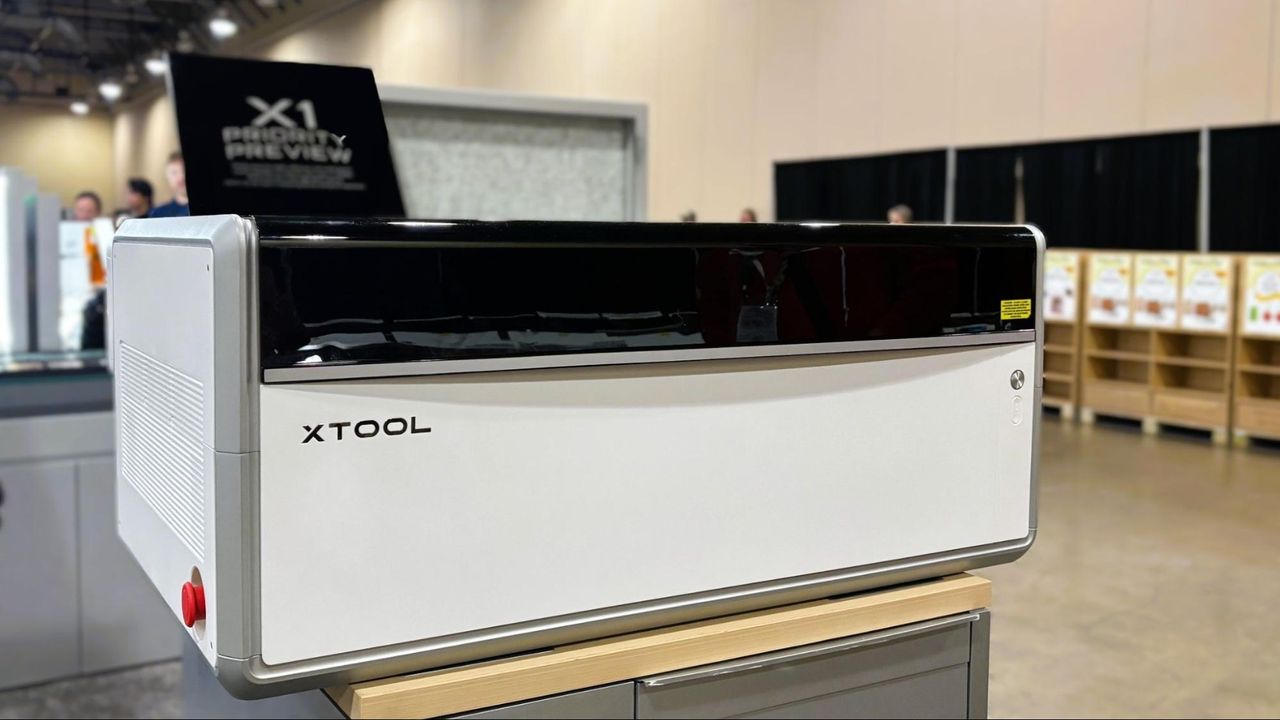
xTool reveals its next generation of lasers — modular X1 supports CO2, Diode, UV, Fiber, and MOPA lasers

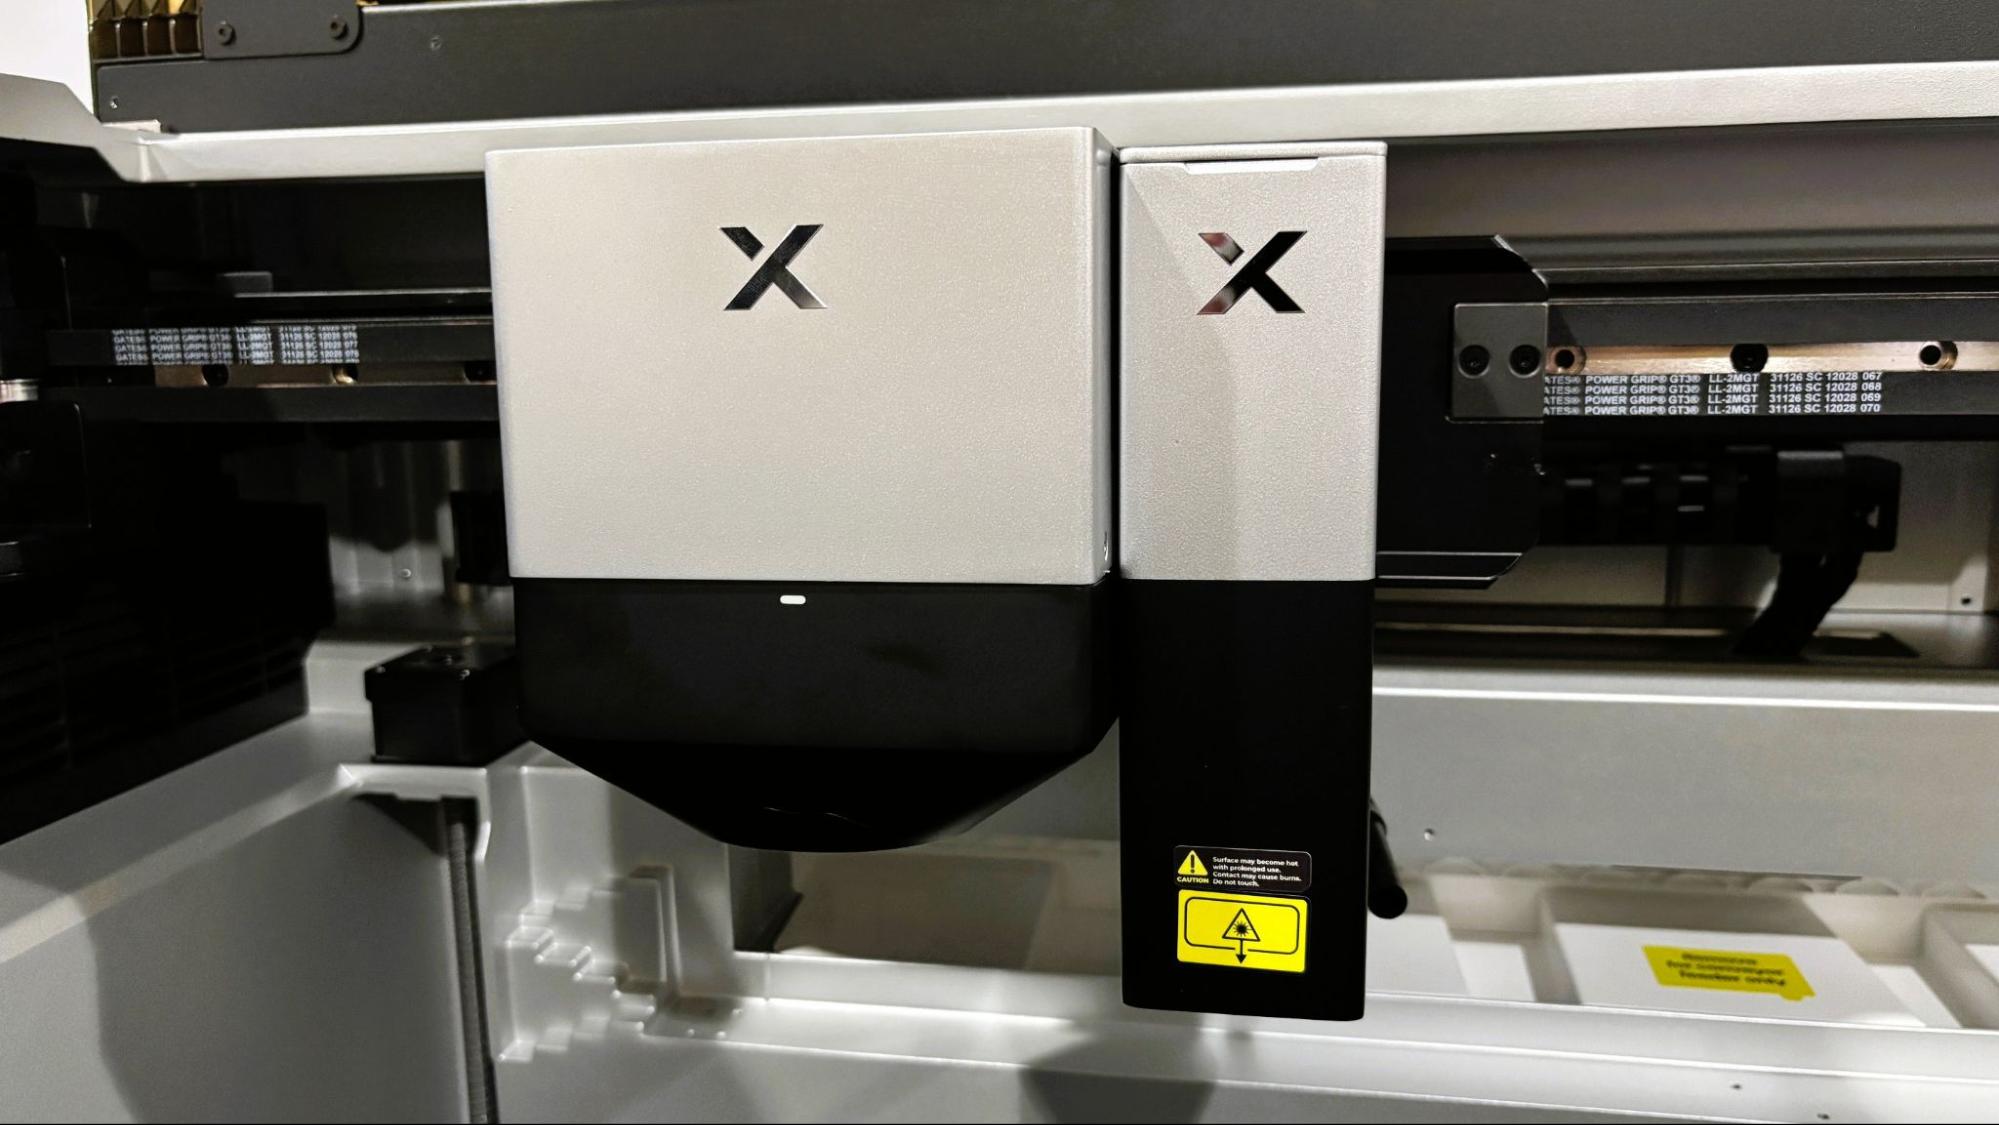
xTool says its new X1 laser will be the last one you’ll ever need. The machine is modular, allowing users to add every style of laser xTool makes to the system: CO2, Diode, UV, Fiber, and MOPA. It will also be xTool’s first flying-galvo unit, combining the large size of a gantry system with the speed of a galvo.

And if that isn’t interesting enough, it's also a dual-head system, meaning the galvo will sit side by side with a CO2 laser. The unit will be able to pick and choose which head to deploy for the job – both if needed.

xTool

(Image credit: Tom's Hardware)

The announcement was made at The Next Level Maker Conference in Grapevine, TX. The event is a combination of maker retreat and expo, with a wide variety of classes and motivational talks by experts who have turned maker hobbies into successful businesses.

Disclaimer: xTool provided travel accommodations for this trip. Coverage remains editorially independent.

Previous “all in one” machines have used swappable toolheads, but these have been limited to various powers of diode and IR lasers. The X1 will use a swappable backpack system to provide the different laser frequencies routed to the galvo toolhead. This means the galvo can be a wood-burning diode, a crystal engraving UV, or a metal etching MOPA.

The machine’s default build will be a powerful 55w CO2 laser paired with a 20w diode for the galvo head. No price was mentioned at the reveal, so we’ll have to wait until closer to the laser’s October launch date to learn more.

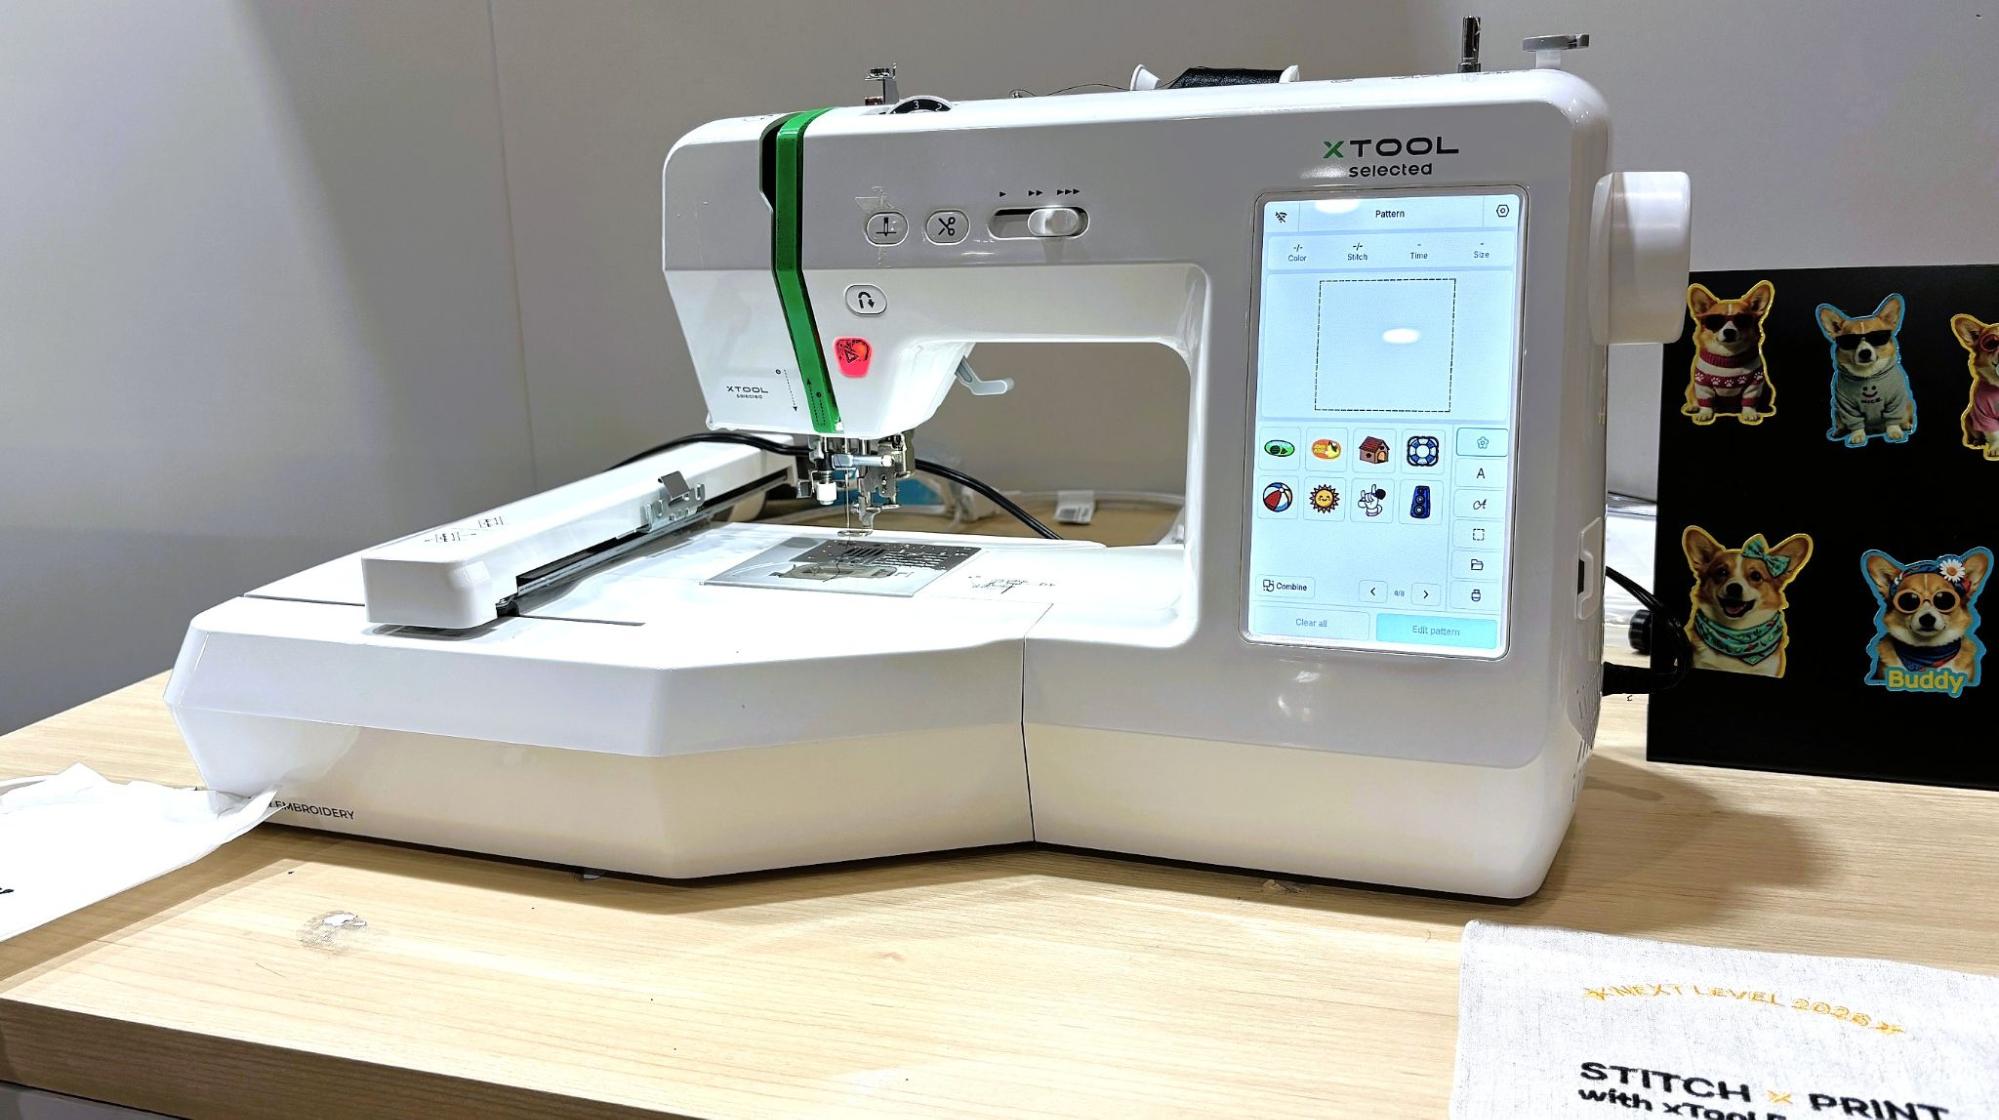
A representative from xTool said the company wanted to embrace all forms of making, and be more than “just” a laser manufacturer. To that end, they announced an upcoming embroidery machine, the SE1. The machine, capable of both normal stitching and single-color embroidery, is presented as an entry point to embroidery for those already within the xTool ecosystem. The machine can be paired with the O1 Omni to paint the threads with DTG color.

xTool

(Image credit: Tom's Hardware)

This may seem to be an overly complex way to achieve colorful stitching, until you consider that full-color embroidery is accomplished with multi-needle machines costing thousands of dollars. They are also insanely complex and require high levels of skill to manage and maintain, whereas a single-color embroidery machine can be purchased for way less and operated by a beginner.

The SE1 will also use the xTool design suite, which makes transferring designs between the sewing machine and UV printer fairly straightforward. During the demo, a piece of fabric was stitched on the SE1, removed from the hoop, then placed inside the UV printer to add color. It was finished with a heat press to set the DT ink.

xTool wasn’t the only company presenting at the show. The vendor hall was full of makers turned small business owners, something that xTool actively encourages with its products and ecosystem.

Makerflo

xTool

(Image credit: Tom's Hardware)

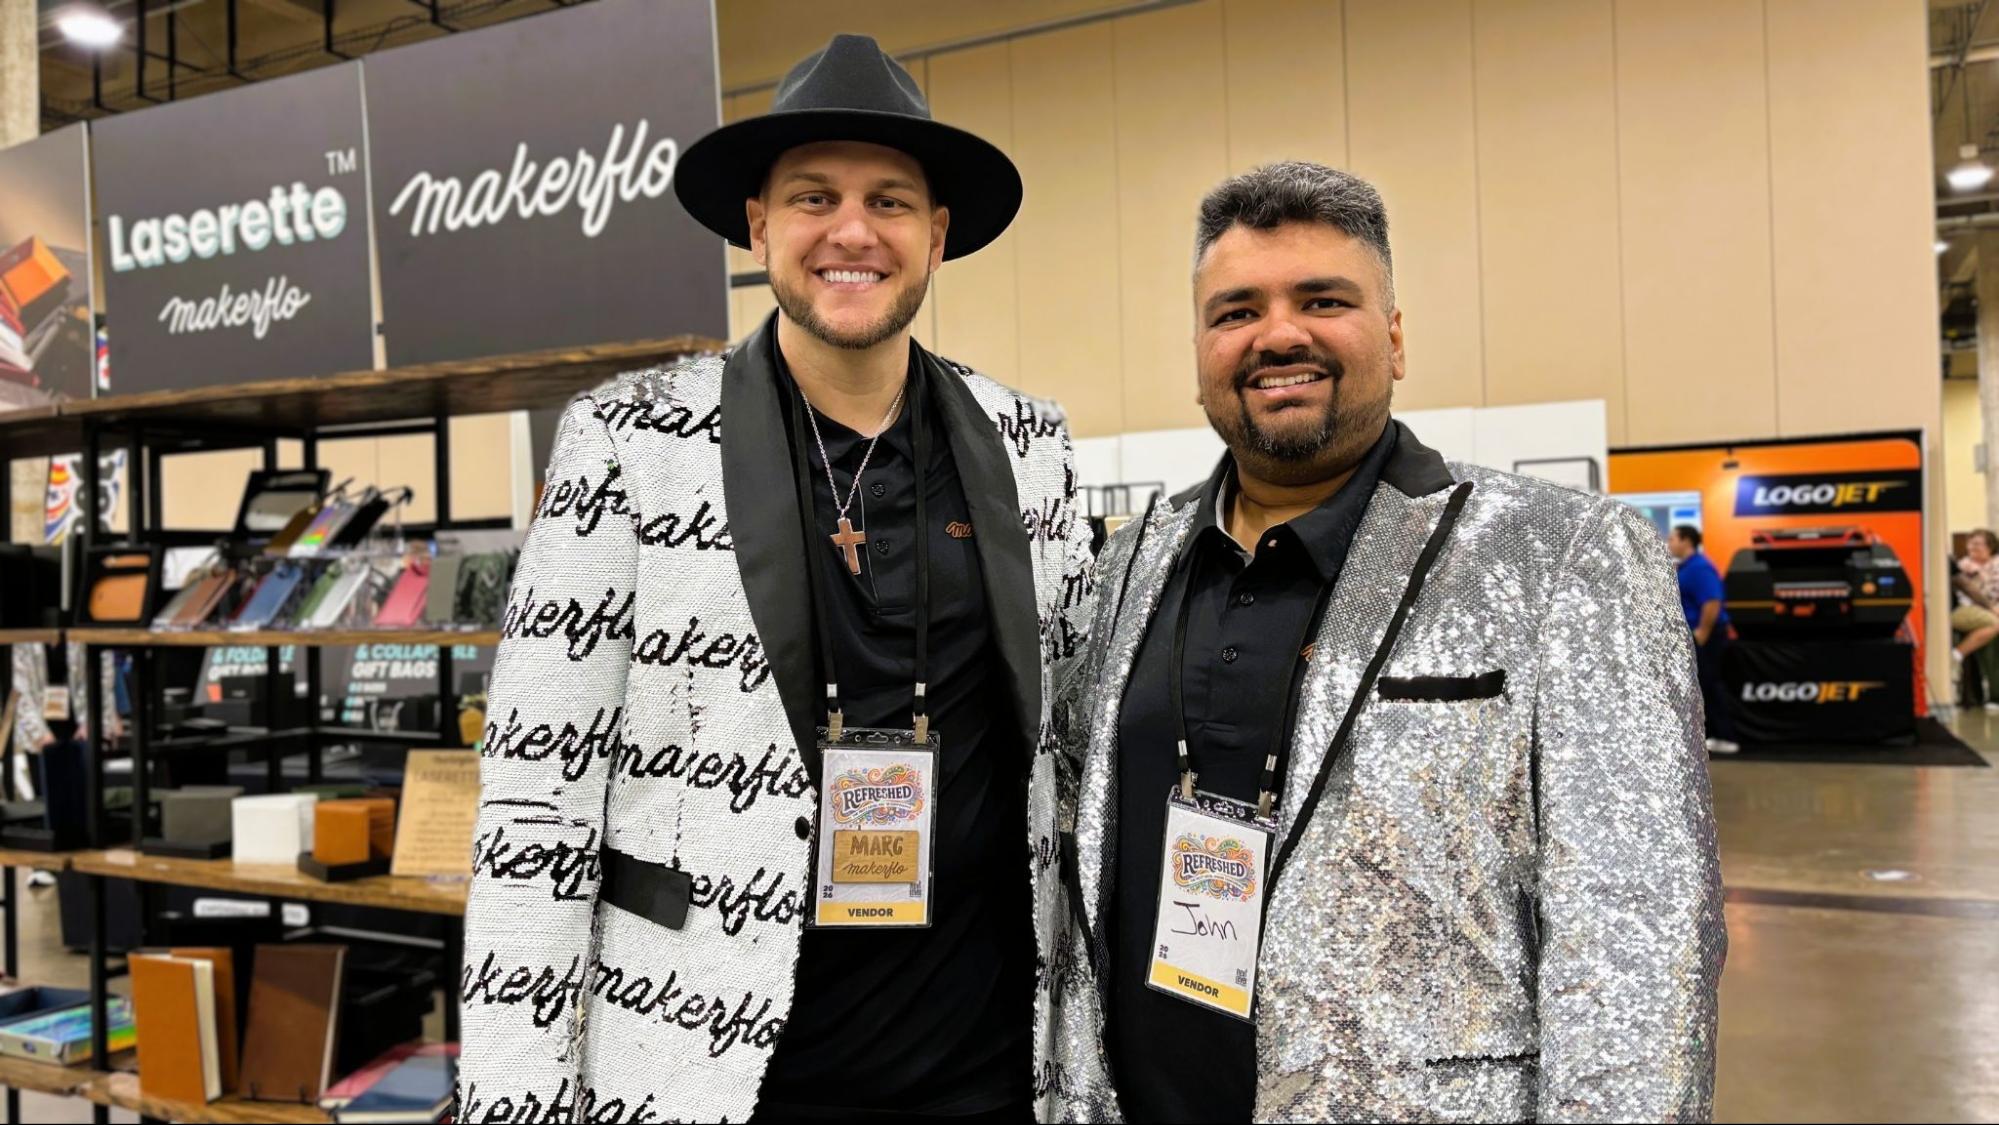
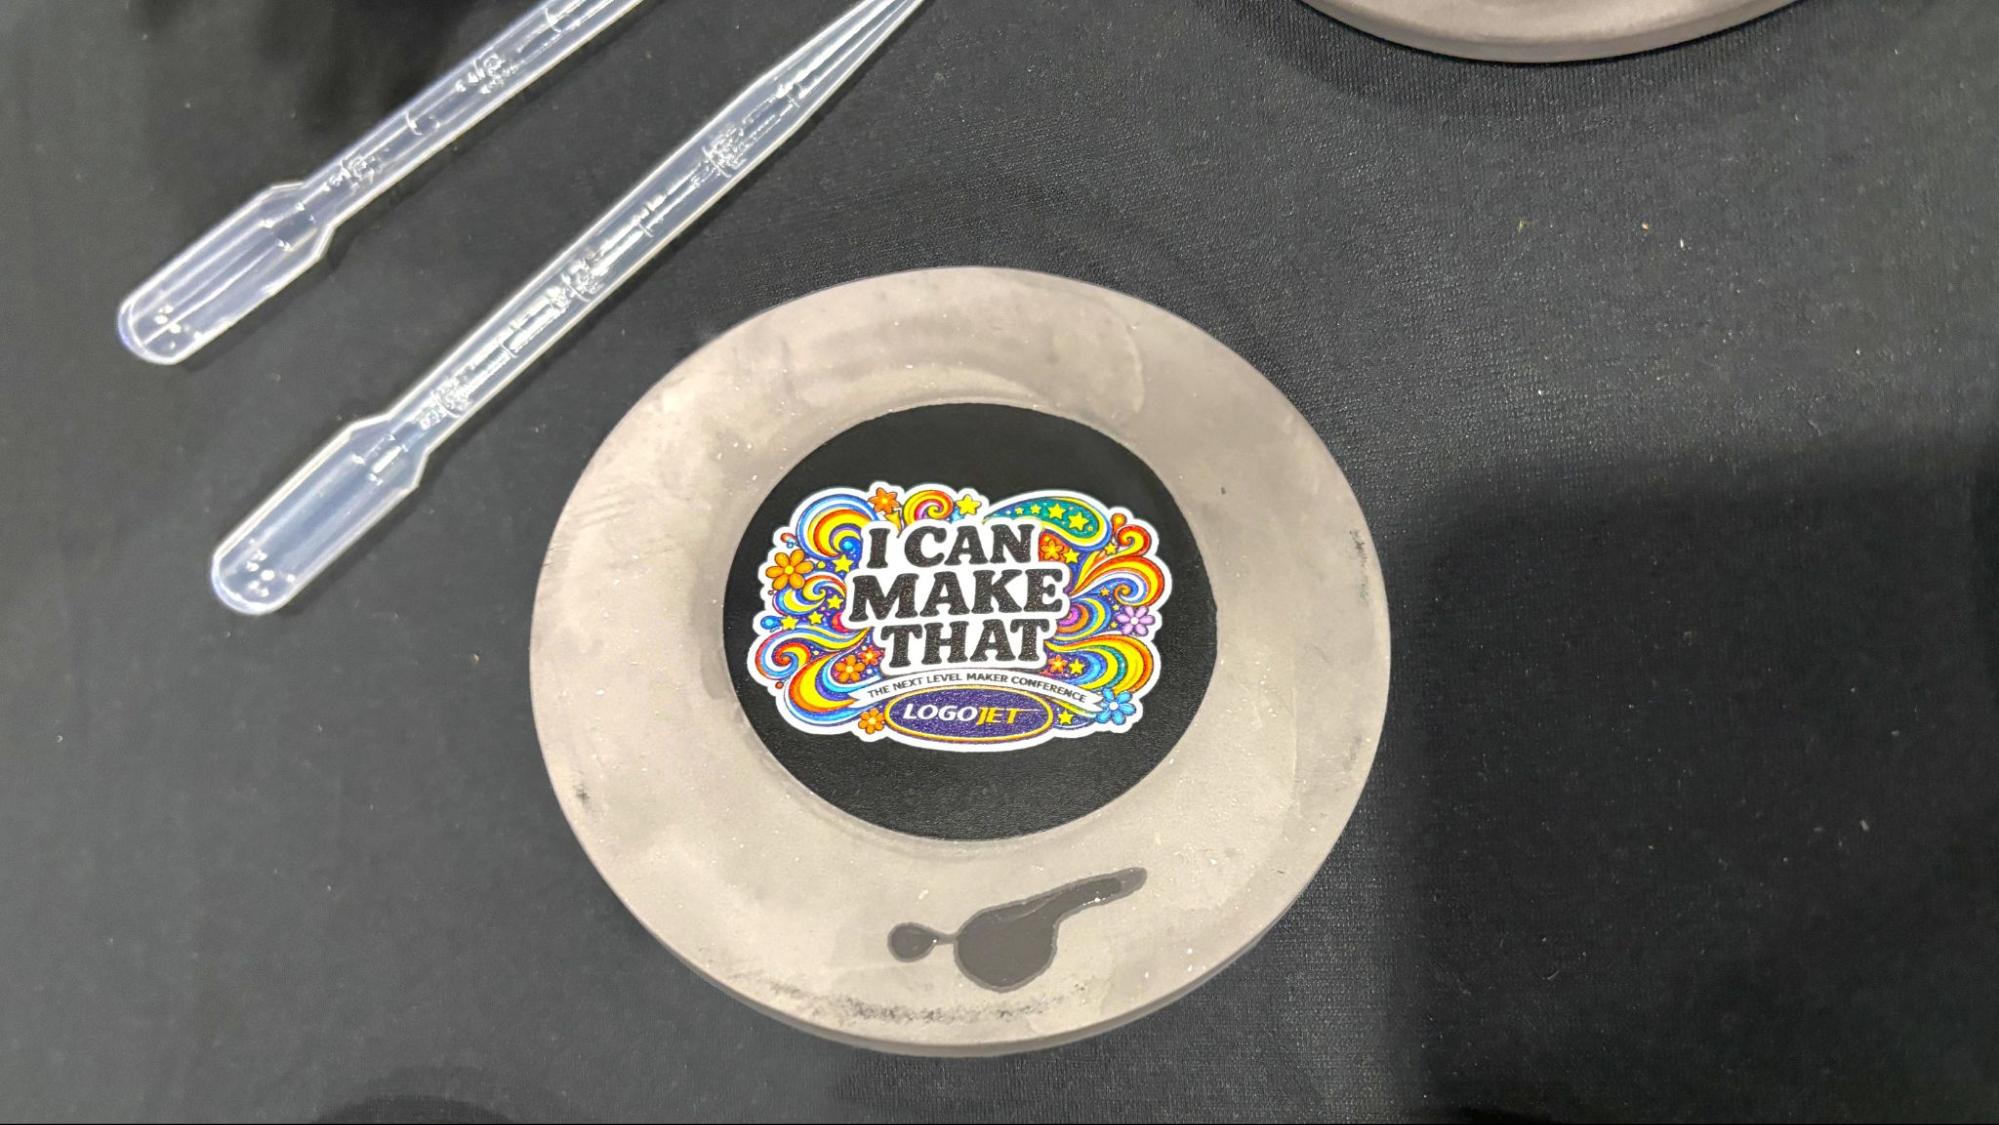
Marc Pendergraft and John Modi started selling laser-cut products right out of college, and now own Makerflo, a wholesaler that provides “the kind of materials we wish we had.” They sell premium laser-ready merchandise that comes with upscale gift packaging. Their booth also has several new items seeking feedback from shoppers. I was impressed with a coaster that consisted of absorbent stone with a laser-ready metal disc embedded in the center.

Marc and John also led several popular breakout sessions on running a successful laser business.

xTool

Diatomite stone coaster under going beta testing at Makerflo. (Image credit: Tom's Hardware)

Smokey Hill Designs

xTool

(Image credit: Tom's Hardware)

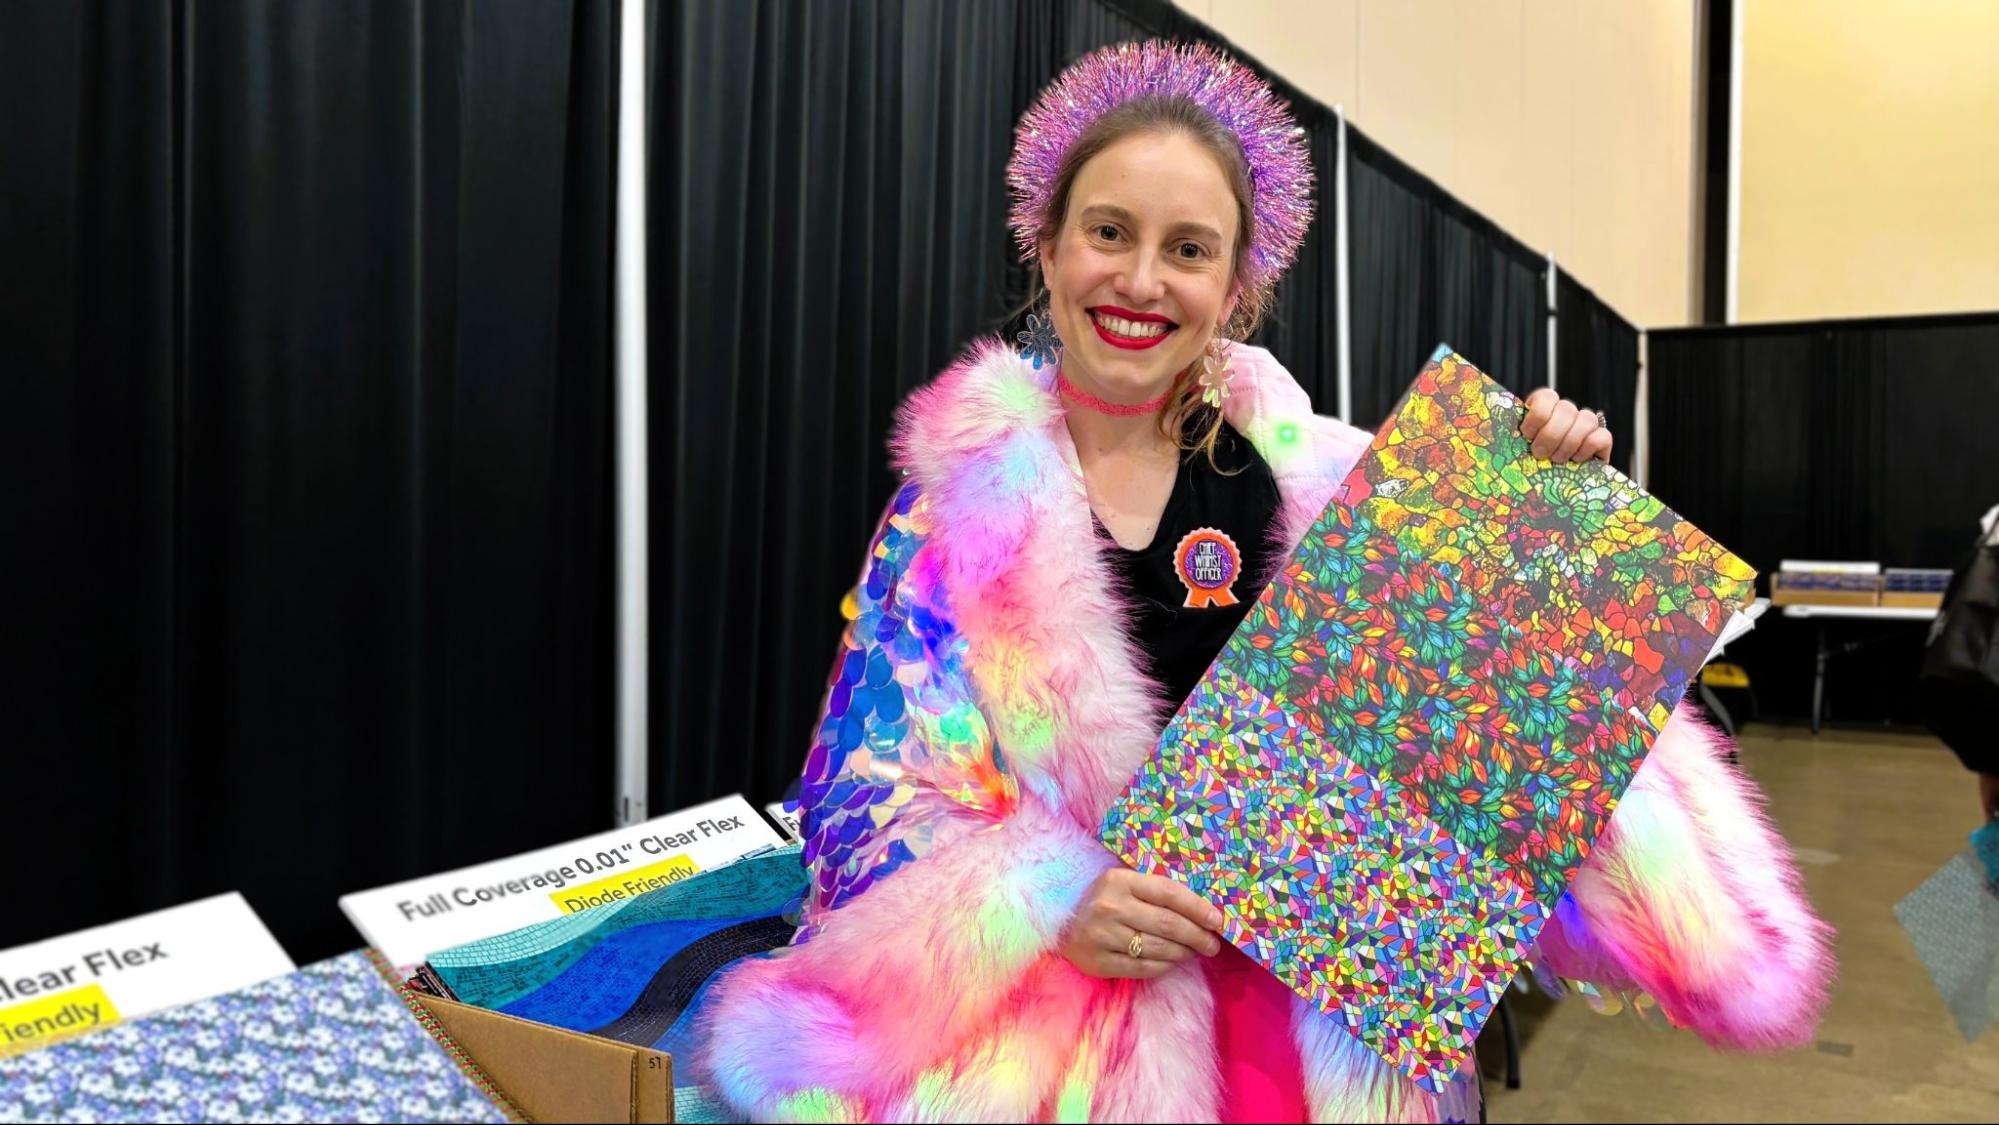
Angela Cruise, owner of Smokey Hill Designs, brought pallets full of high-quality plywood, acrylic, leatherette, and other sparkly laser substrates. Most were custom printed in eye-catching designs using a diode-safe material. Her goal is to use premium materials, like natural wood and pre-finished acrylics, that require less effort to turn into amazing, high-value products. Nearly everything she sells is manufactured in-house at her company’s North Carolina shop and is held to strict quality standards for use in lasers.

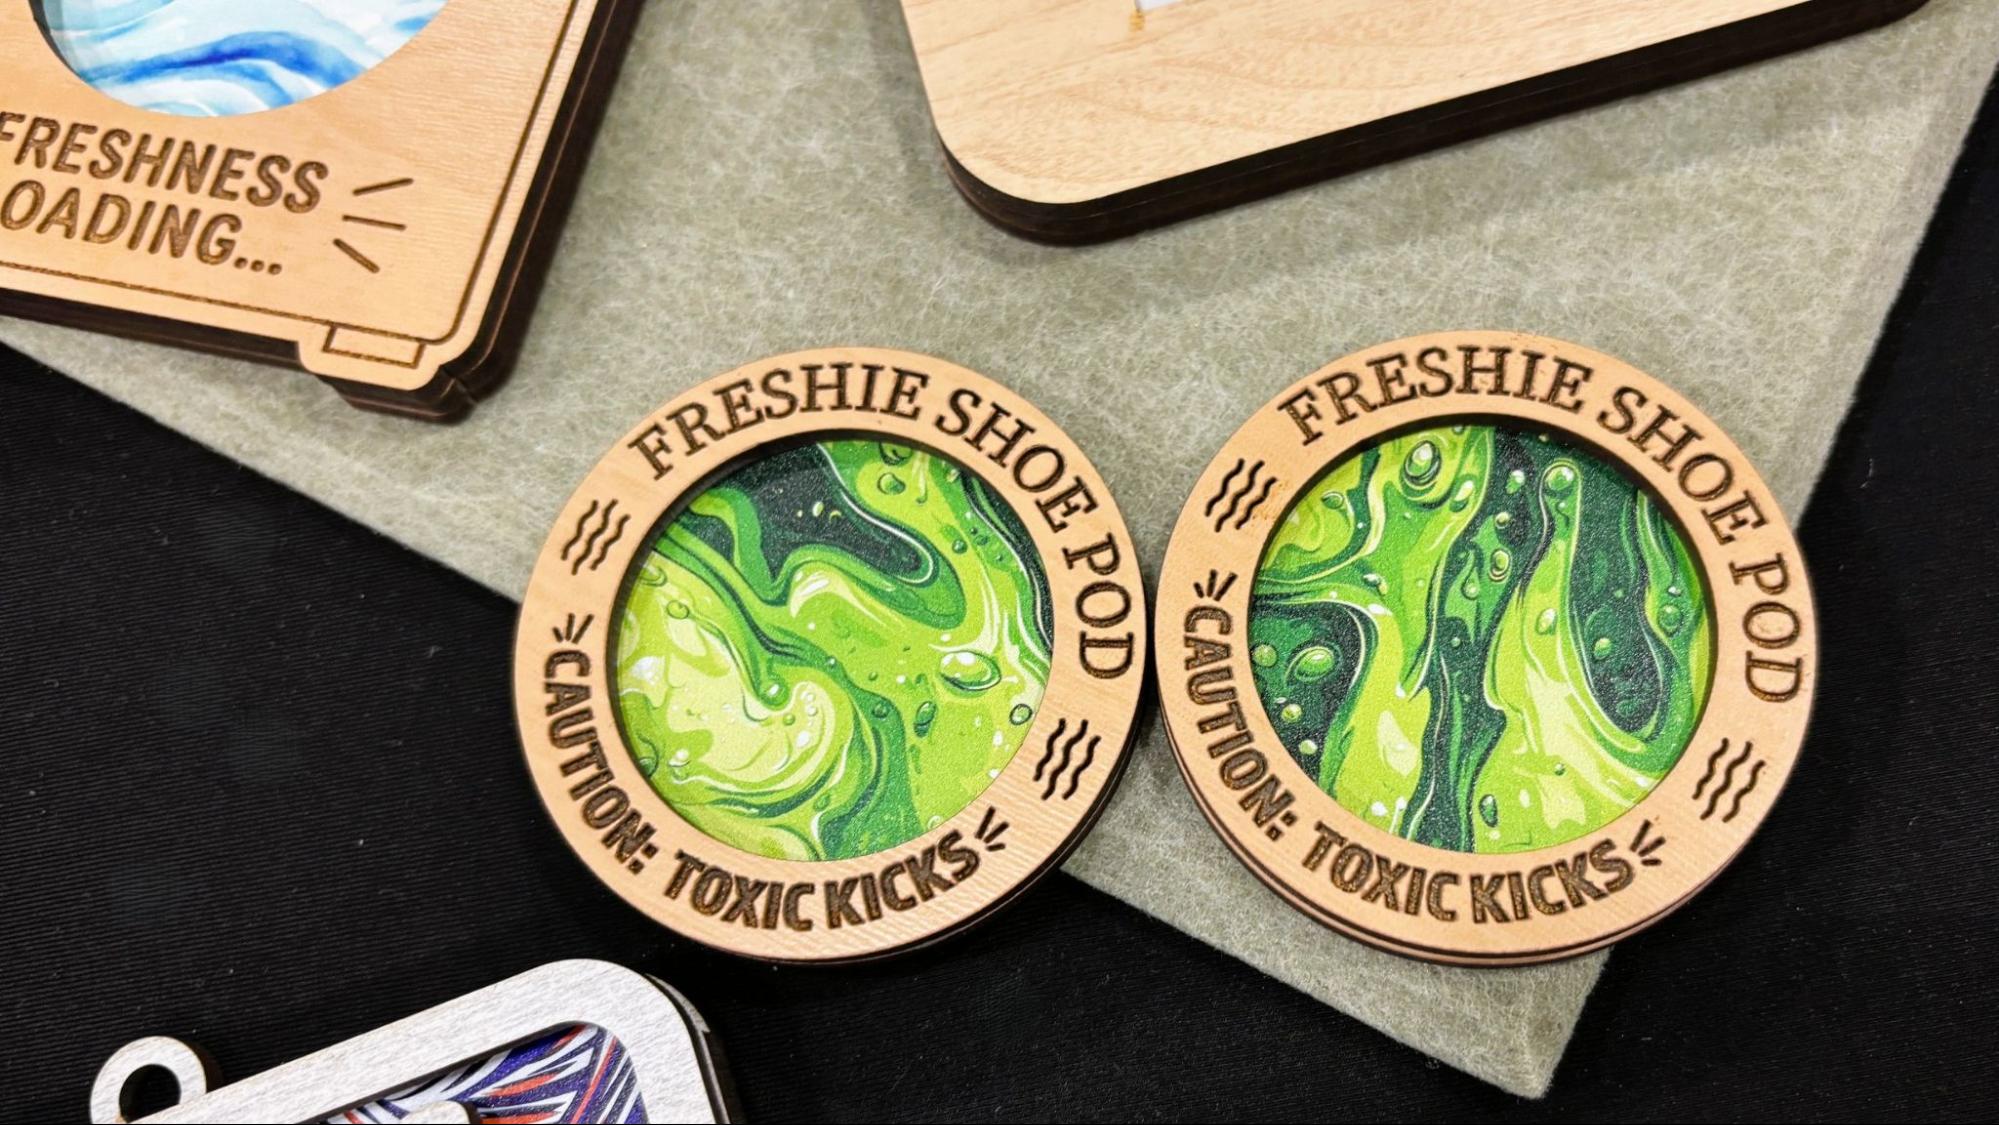
One of the unique materials they had for sale was Freshy Sheets, a thick absorbent material with a colorful printed surface, designed to hold essential oil and act as an air freshener. Naturally, the sheets are designed to be cut in shapes and encased in laser-cut designs.

xTool

(Image credit: Tom's Hardware)

BurnForge Software

xTool

(Image credit: Tom's Hardware)

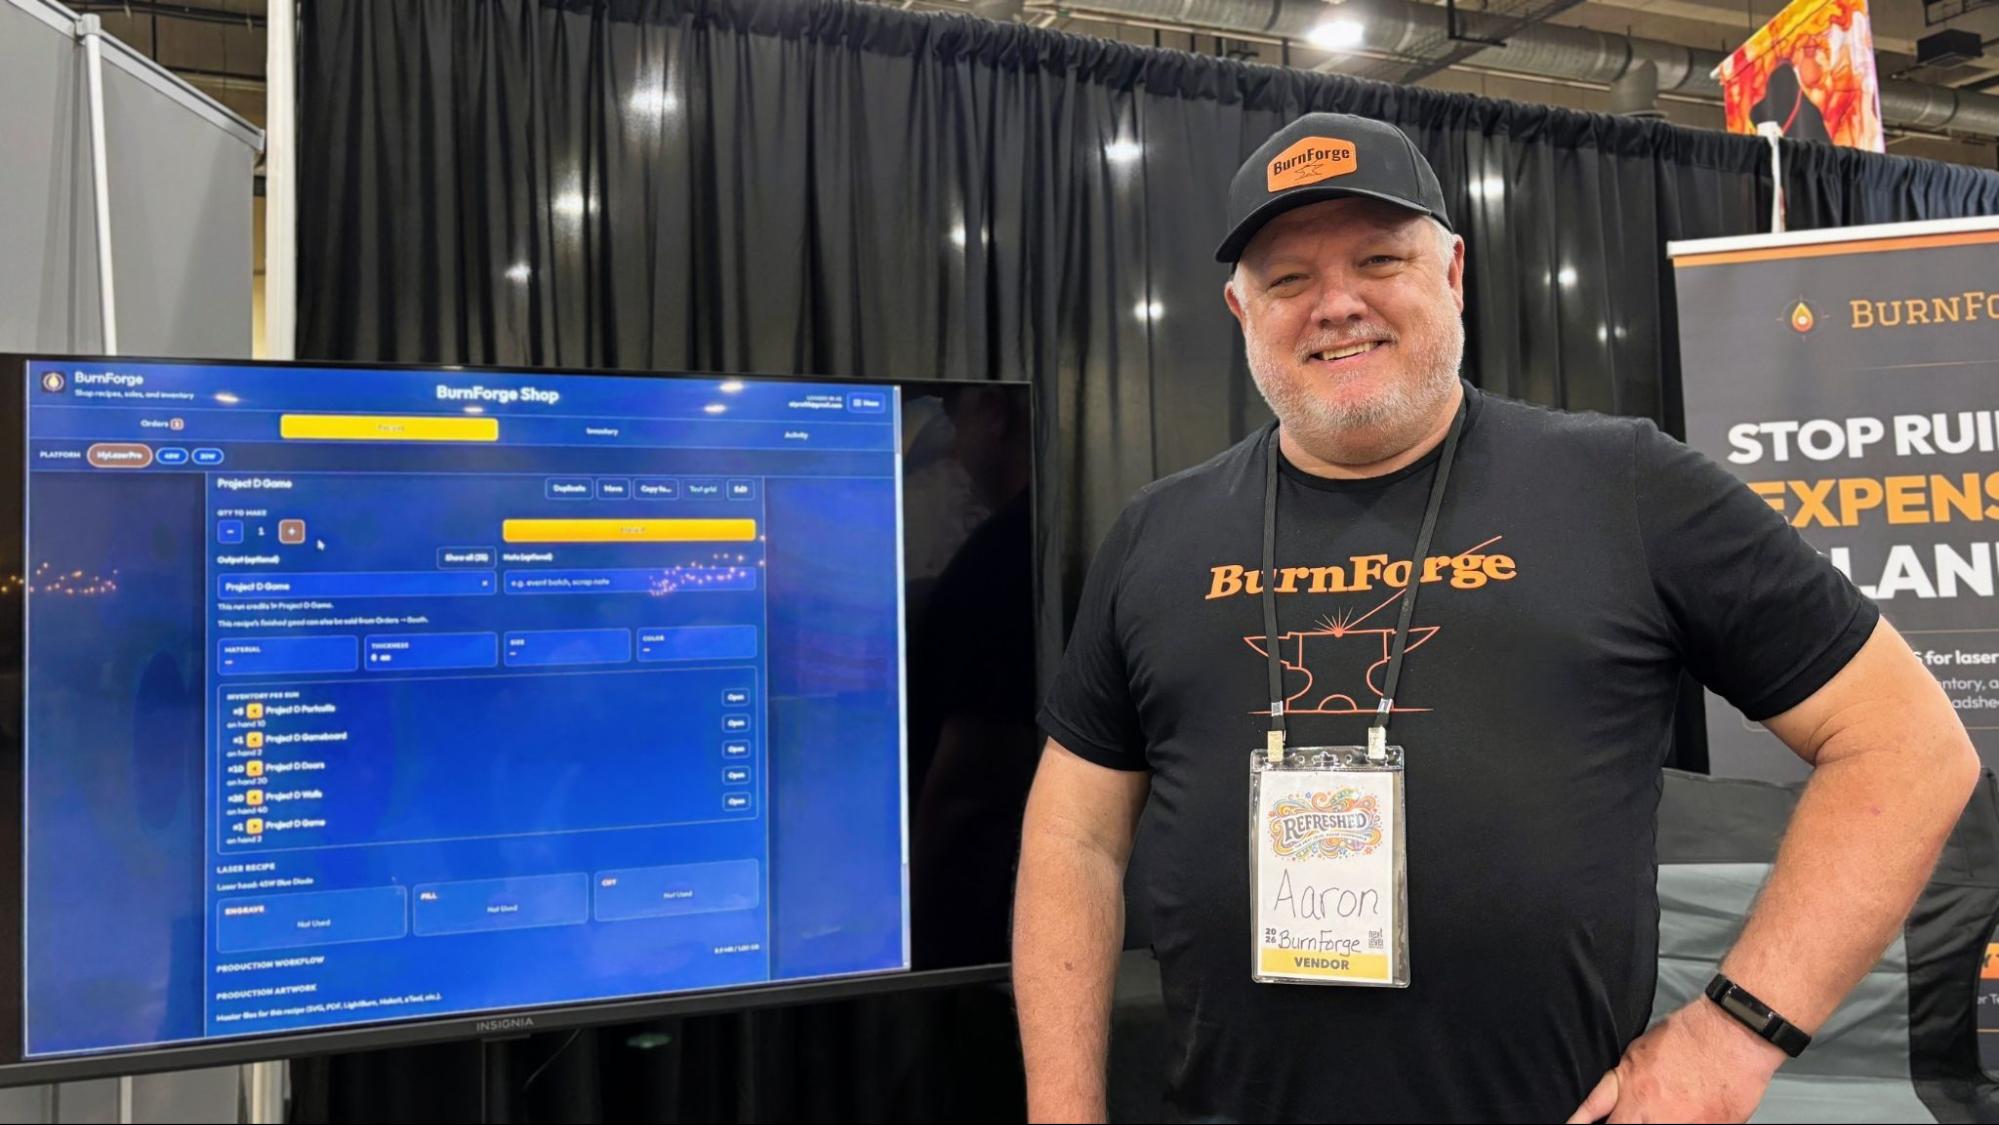
Aaron Pratt created BurnForge, a subscription-based business tracking system for crafters. The app lets makers track customer orders every step of the way so you stop “ruining expensive blanks.” The program helps you remember machine settings and tracks your inventory and orders. He’s offering a 30-day free trial with the code NEXTLEVEL30 for a limited time.

xTool

(Image credit: Tom's Hardware)

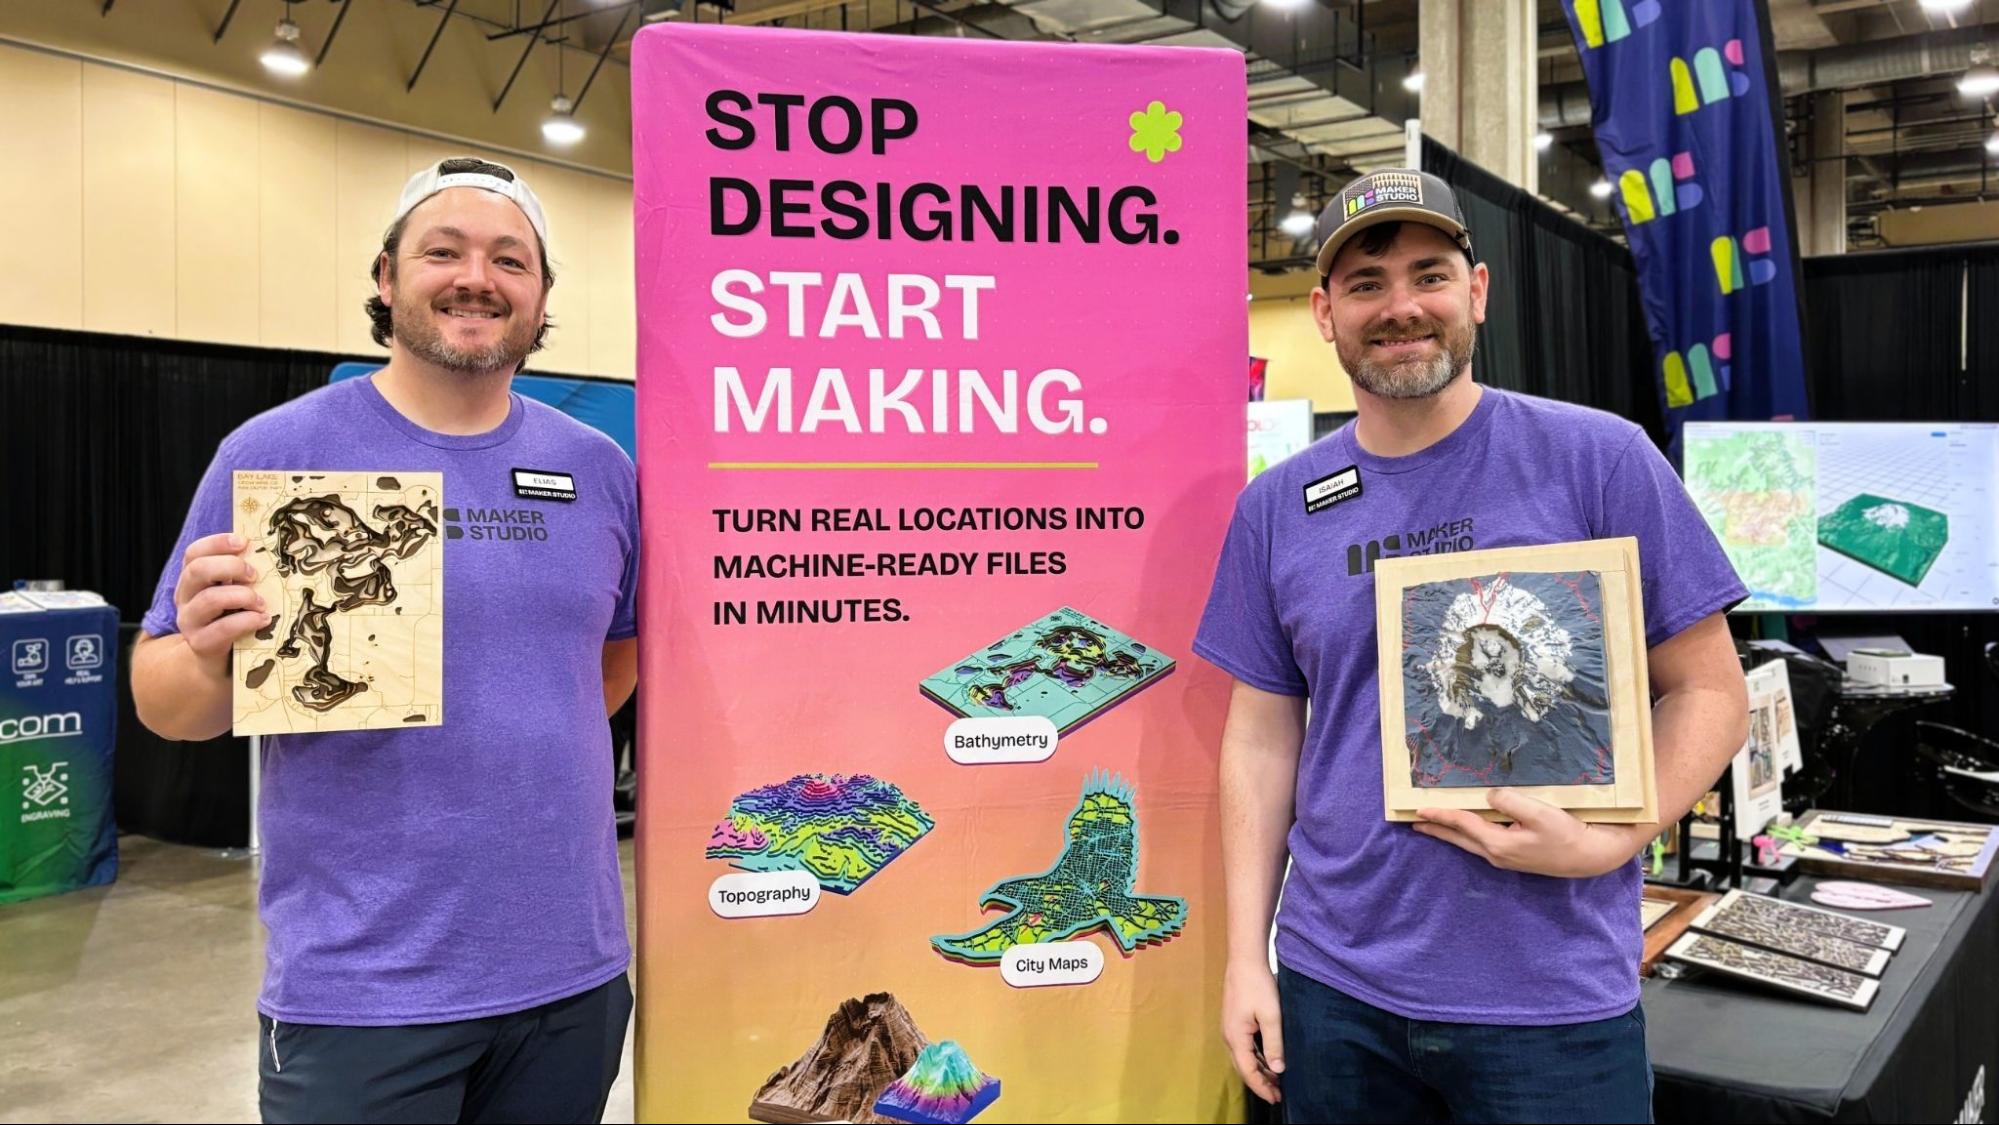
Brothers Elias and Isaiah Grey designed Maker Studio, a suite of apps that create custom maps you can reproduce with a laser cutter, CNC, or 3d printer. The maps come in either a layered style that looks great when laser cut and stacked, or 3D terrain relief maps that can be 3D printed or CNC carved. Their product lets makers easily turn real locations into design files without needing CAD skills.

Maker Studio is a subscription service that will soon include a box maker, a fit sheet for help with packaging, and a tumbler art maker. You can sign up for a 14-day free trial to test out the program before you commit.

✇Tomshardware

xTool F2 Ultra UV dual laser engraver review: So cool it’s hot

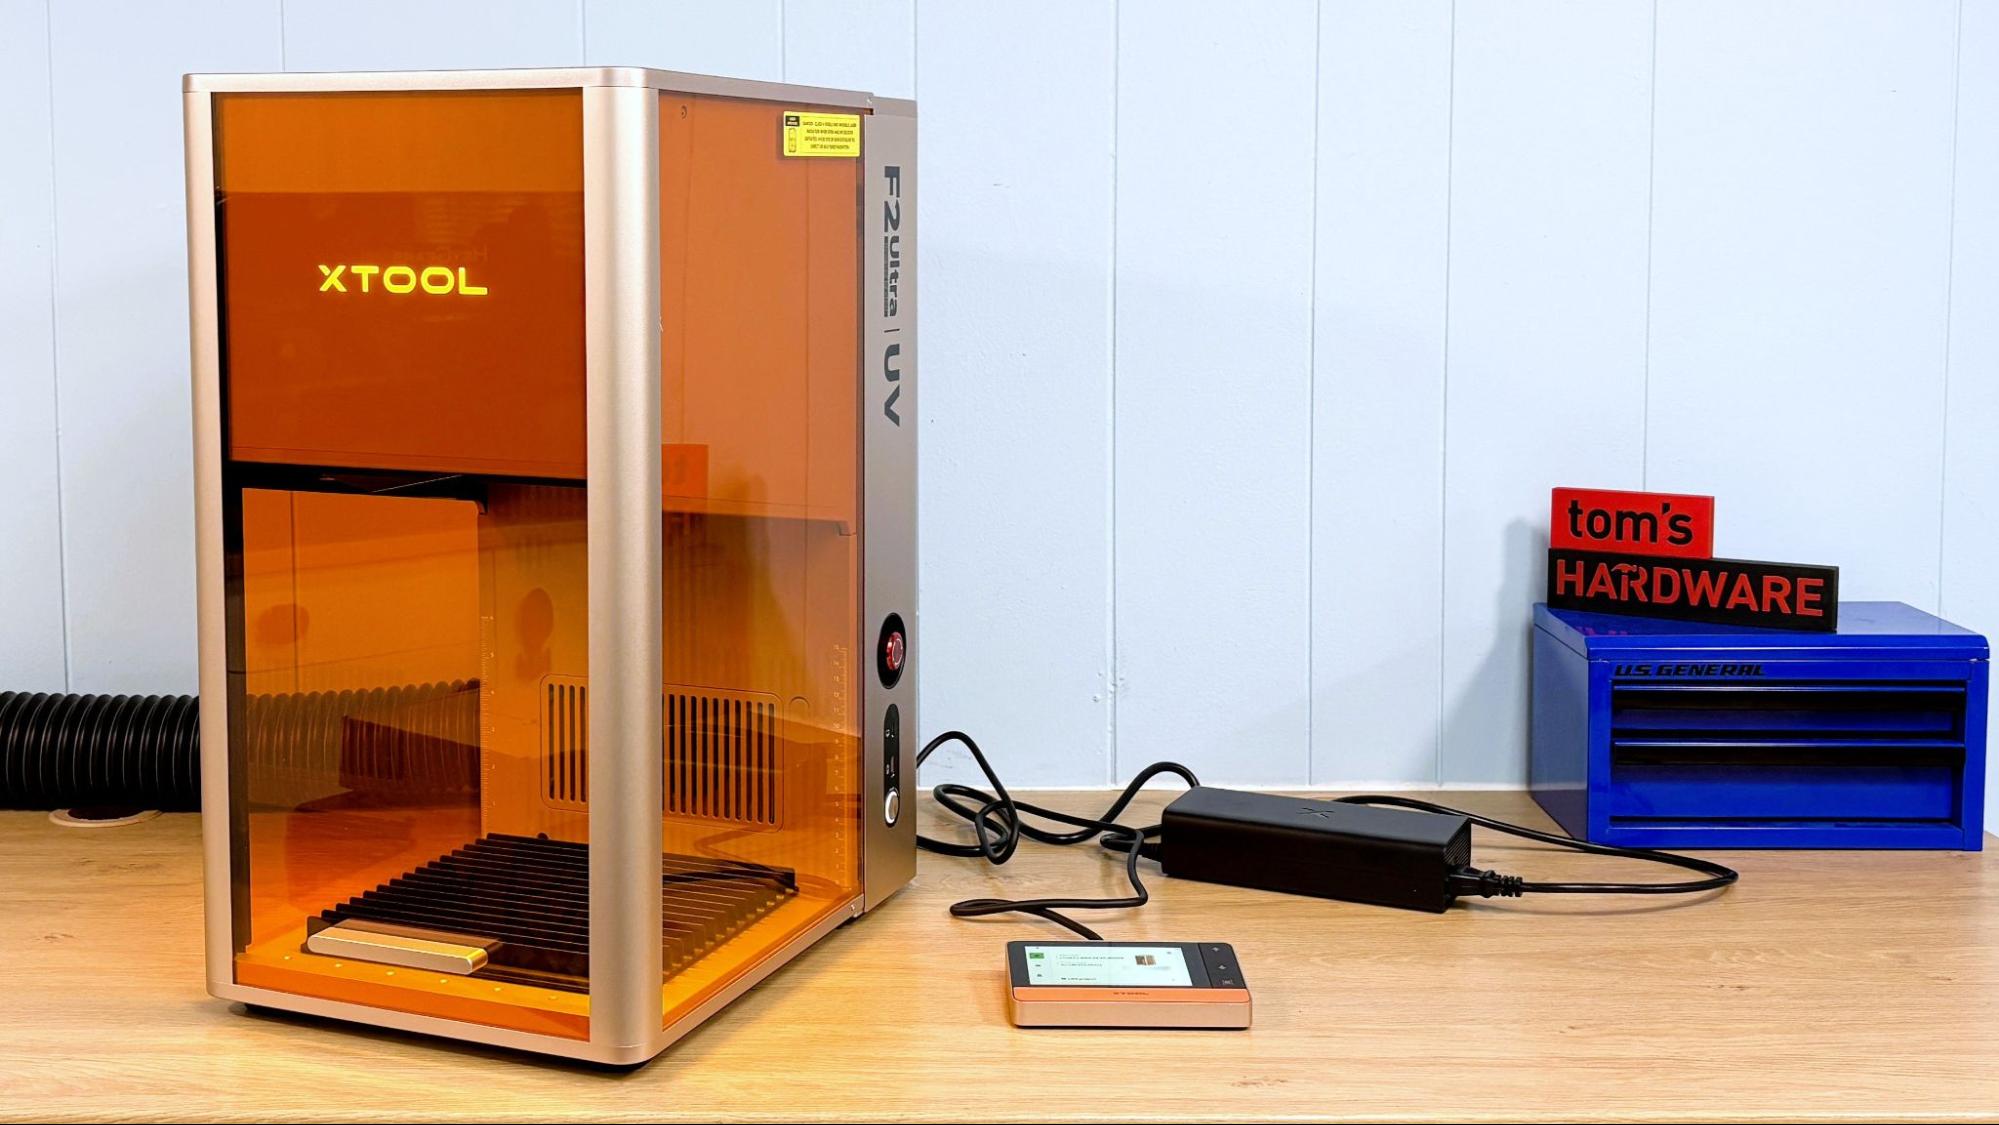
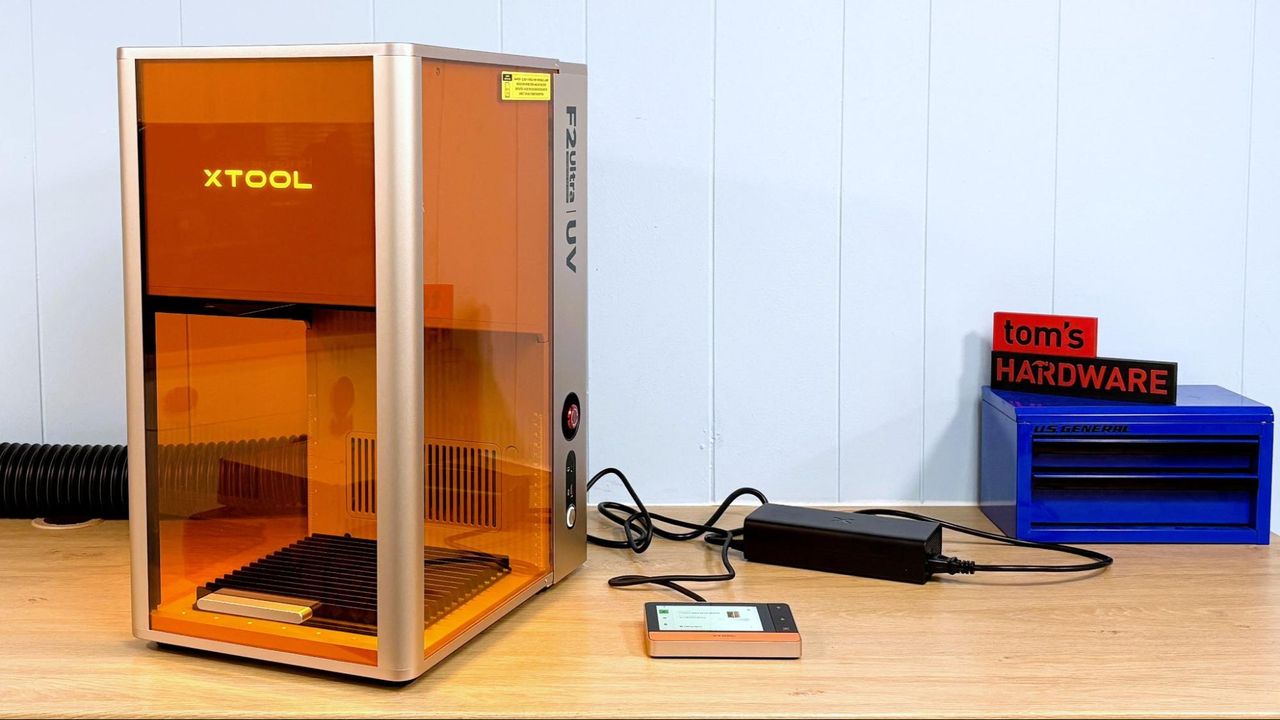
The xTool F2 Ultra UV laser is not your ordinary laser. Normally, lasers mark, engrave, and cut by burning the material. Instead, a UV laser uses a shorter wavelength of light (355 nm) that produces a photochemical reaction that breaks down the material instead of simply setting it on fire. These are called “cold” lasers, but I still wouldn’t put my hand in there.

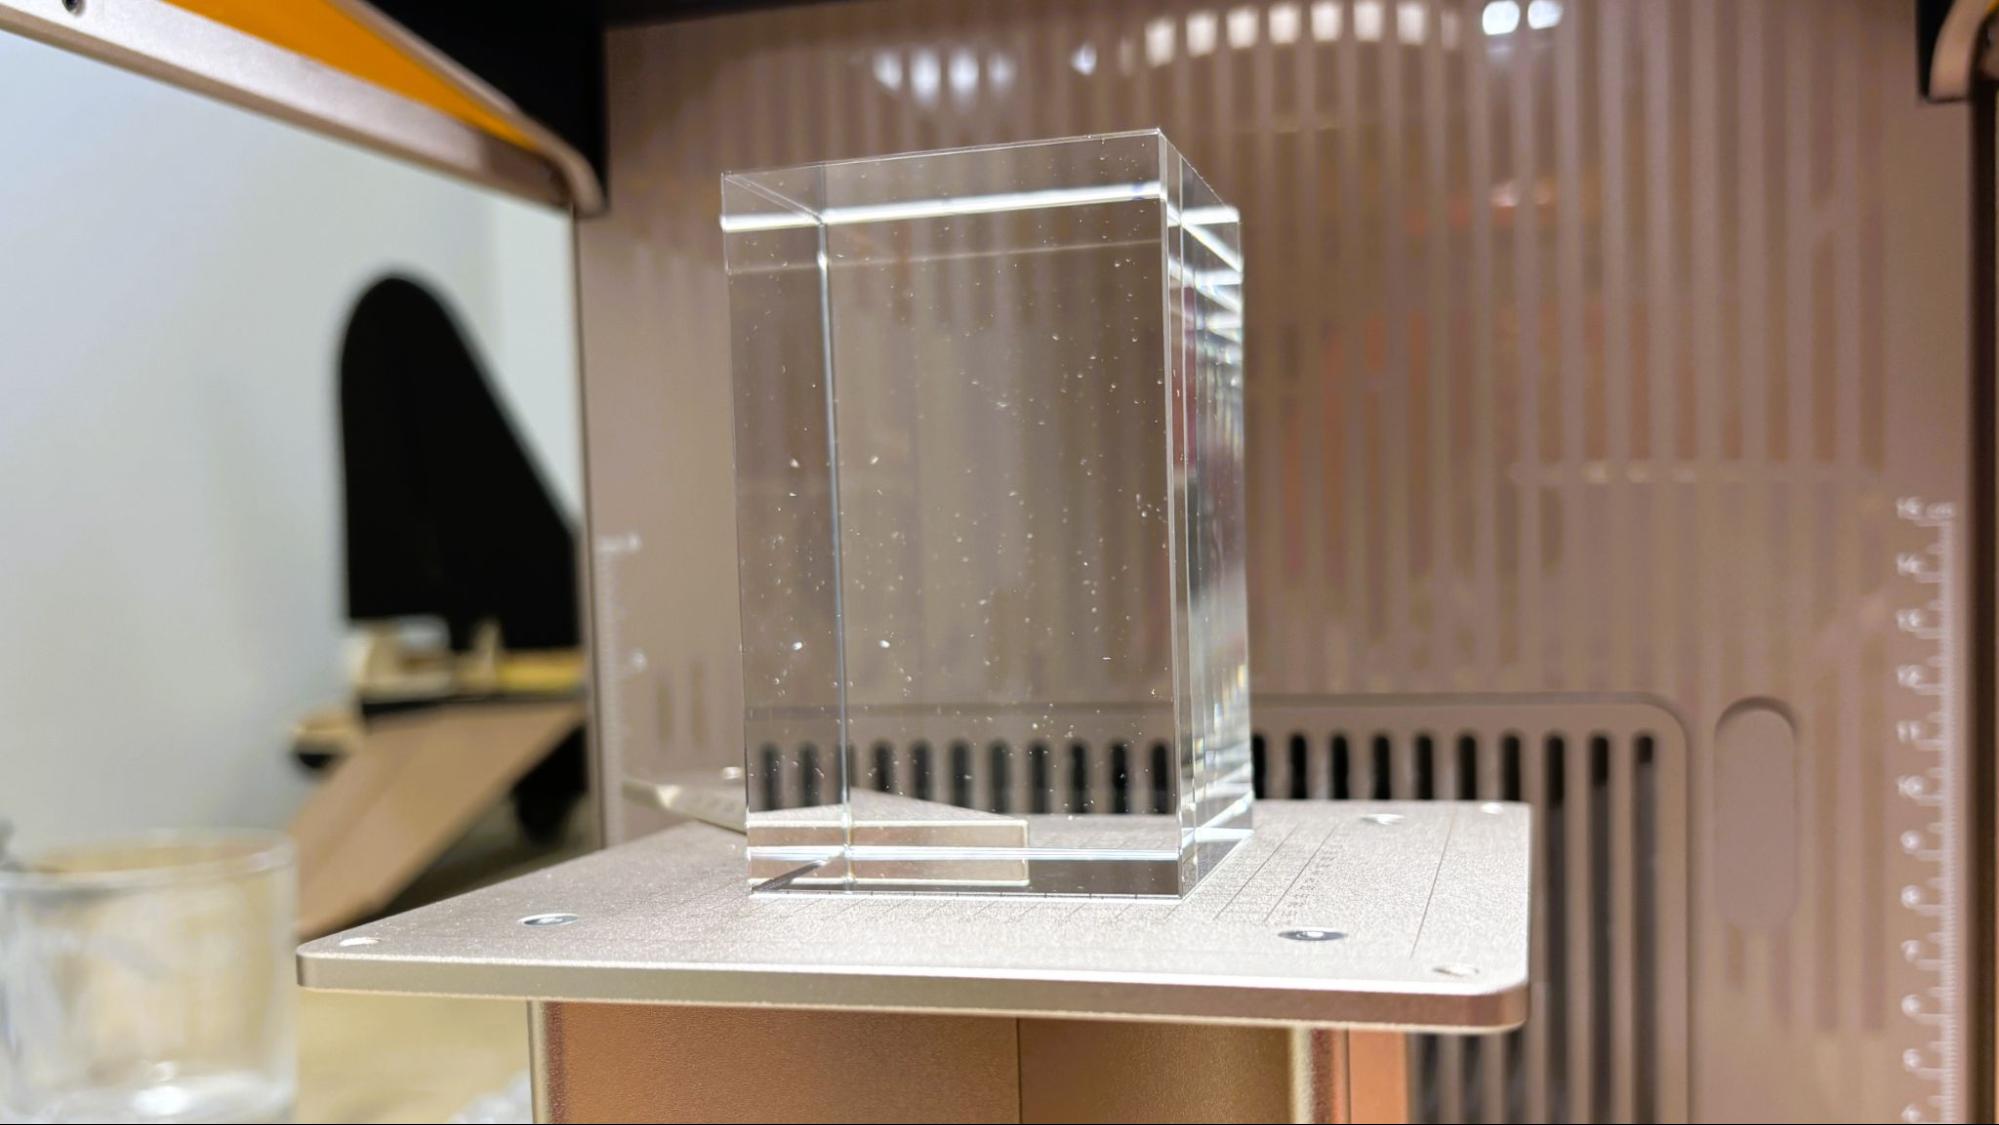
The UV laser generates extremely clean cuts and engravings in wood and plastic that are simply not possible with other types of lasers. It's also able to etch glass and crystal, and can actually engrave the INSIDE of glass for some fantastic effects.

The F2 Ultra UV is a galvo laser. Instead of moving around on a gantry, the laser is stationary while the beam is directed by galvanometer mirrors. It’s extremely fast and capable of “moving” at 15,000 mm/s. The downfall of many galvo lasers is that they lose focus the farther away from the center point the beam travels. At the edges of the 200 x 200 mm work area, the F2 Ultra UV still does a great job.

The F2 Ultra UV is part of a family of lasers. The F2 is a portable “standard” diode laser, the F1 Ultra has both a diode and a fiber laser for etching metal, and the F2 Ultra is a 60W MOPA with a 40W diode. I wish the UV laser had been given its own class, as this is a confusing cluster of machines.

The retail price for the F2 Ultra UV starts at $4,299. It's pricey, but it can handle everything but metal and is the only laser that can handle crystal. This makes it a good all-around machine for many home and business uses. For that, it’s going on the best laser cutter list for a small business.

Specifications: xTool F2 Ultra UV

Machine Footprint

294 mm x 429 mm x 520 mm (11.57'' × 16.88'' × 20.5'')

Machine Weight

22.5 kg (49.6 lbs)

Engraving Size

200 mm × 200 mm (7.9" × 7.9")

Inner Engraving Size

70 mm x 70 mm (2.8” x 2.8”)

Engravable Material

Glass, Crystal, Acrylic, Wood, Metal, Leather, Plastic, Rubber, Silicone, Ceramic

Cuttable Material

Glass, Plastics, Fabric, Leather, Acrylic (Not Fully Transparent), Paper, Wood

Laser Type

355 nm UV

Laser Power

5w

Cutting Platform

Included (flat, slatted panel, and riser)

Connectivity

USB, WI-FI/IP

Interface

Corded Touch Screen with Start Button

MSRP

$4,299.00

Pre-order Launch

November 14, 2025

xTool F2 Ultra UV: Included in the Box

xTool F2 Ultra UV

(Image credit: Tom's Hardware)

The xTool F2 Ultra comes fully assembled, with the surface engraving lens in place. The inner engraving lens and riser are packed in a reusable foam box. Also included is a slatted cutting plate, corded touch screen, equipment safety key, surface engraving material pack, tool kit, cables, and paper copies of the quick start guide and safety instructions, For the review, we also received the optional button and pedal switches, rotary attachment, the xTool SafetyPro AP2 fume extractor, and a bunch of glass and crystal materials for testing.

Design of the xTool F2 Ultra

xTool F2 Ultra UV

(Image credit: Tom's Hardware)

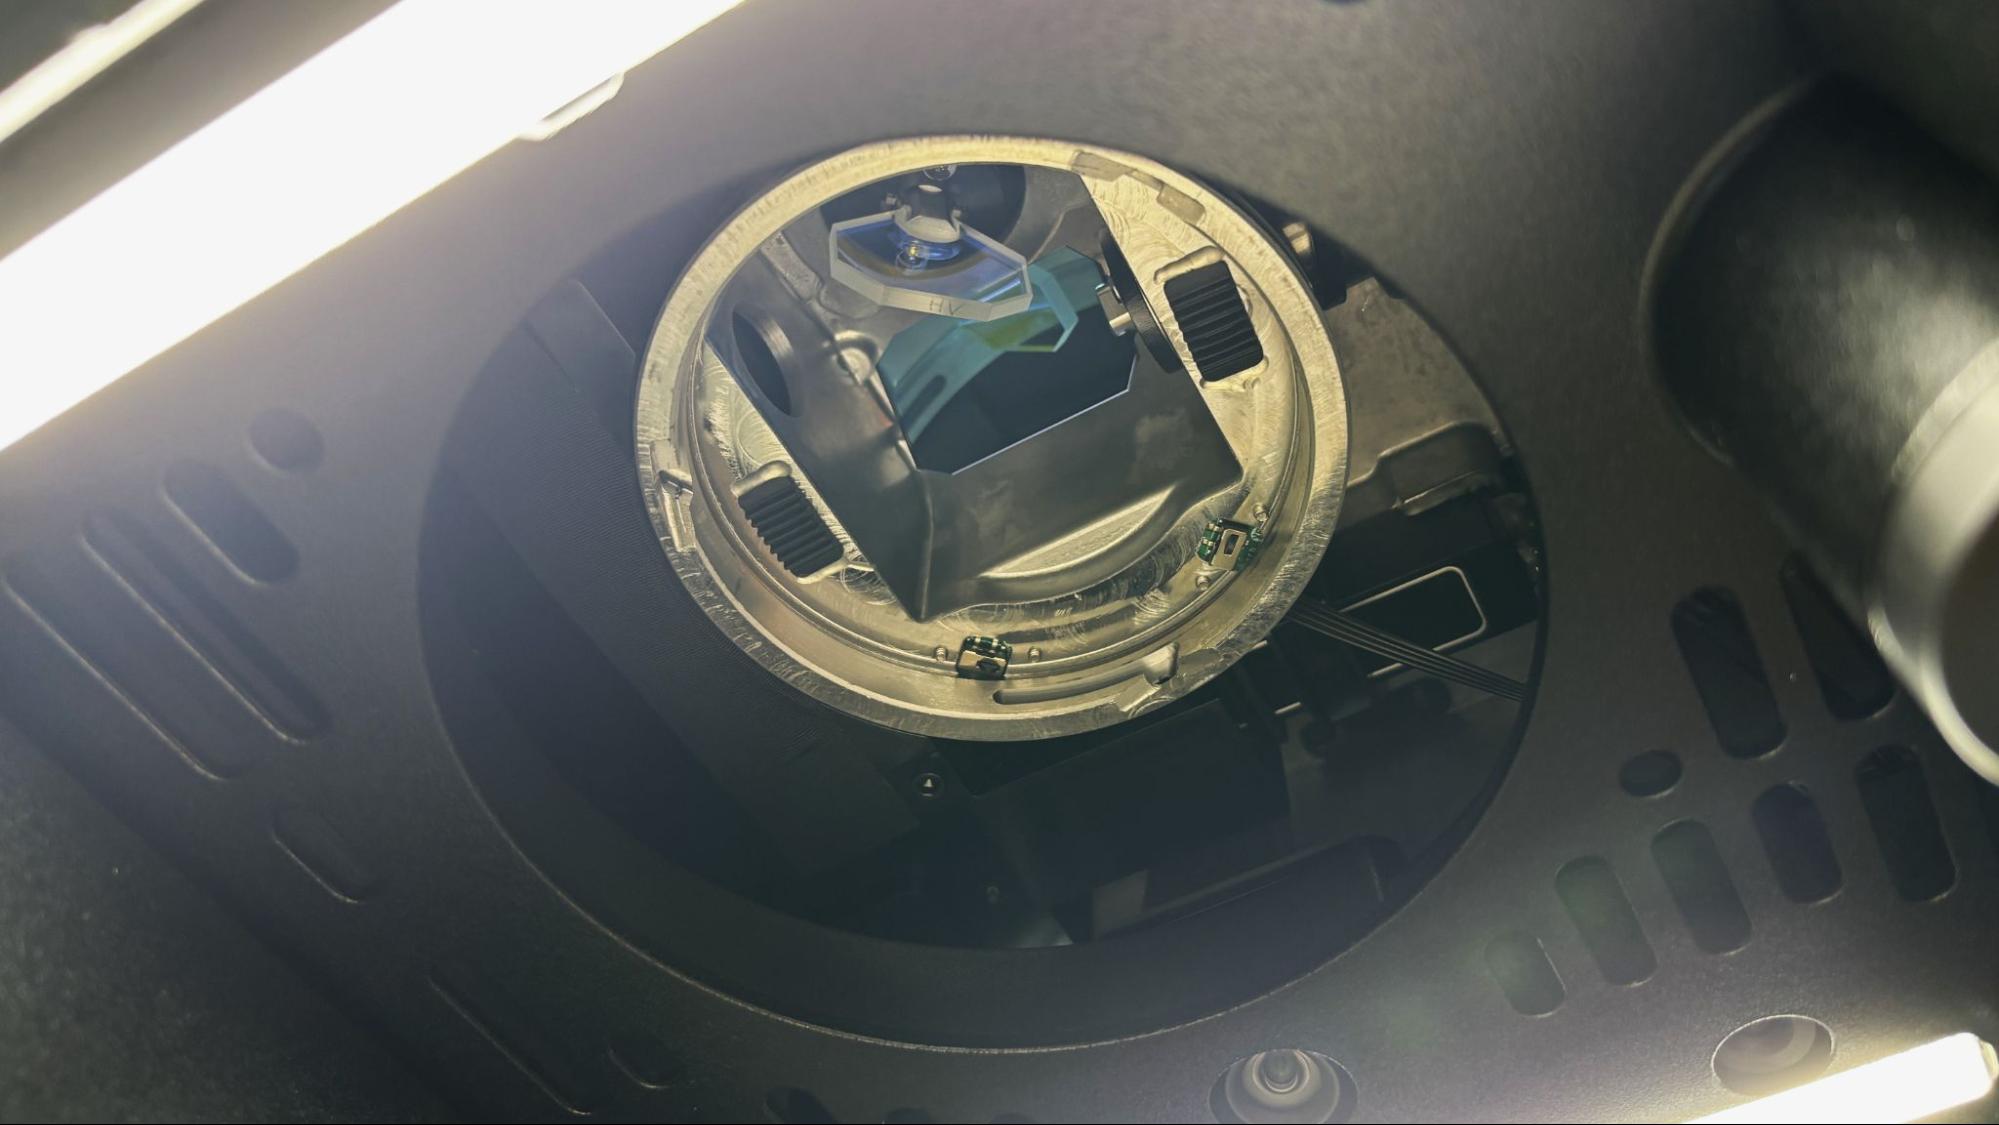
The xTool F2 Ultra UV is a galvo laser with a 355-nanometer wavelength. At this wavelength, the laser marks by way of a cold photochemical process rather than just burning. Unlike a flat bed laser, which has the laser on an XY carriage and moves across the work area, a galvo laser is fixed in place and moved with two galvanometer mirrors. Since these mirrors are small and light, they can be used to move the laser beam extremely fast, up to 15,000 mm/s.

The only downside is that the laser’s work area is roughly cone-shaped, and the beam tends to lose focus the farther it moves from the center. The xTool F2 Ultra UV does an excellent job cutting and engraving throughout the entire 200 x 200 mm work area.

xTool F2 Ultra UV

(Image credit: Tom's Hardware)

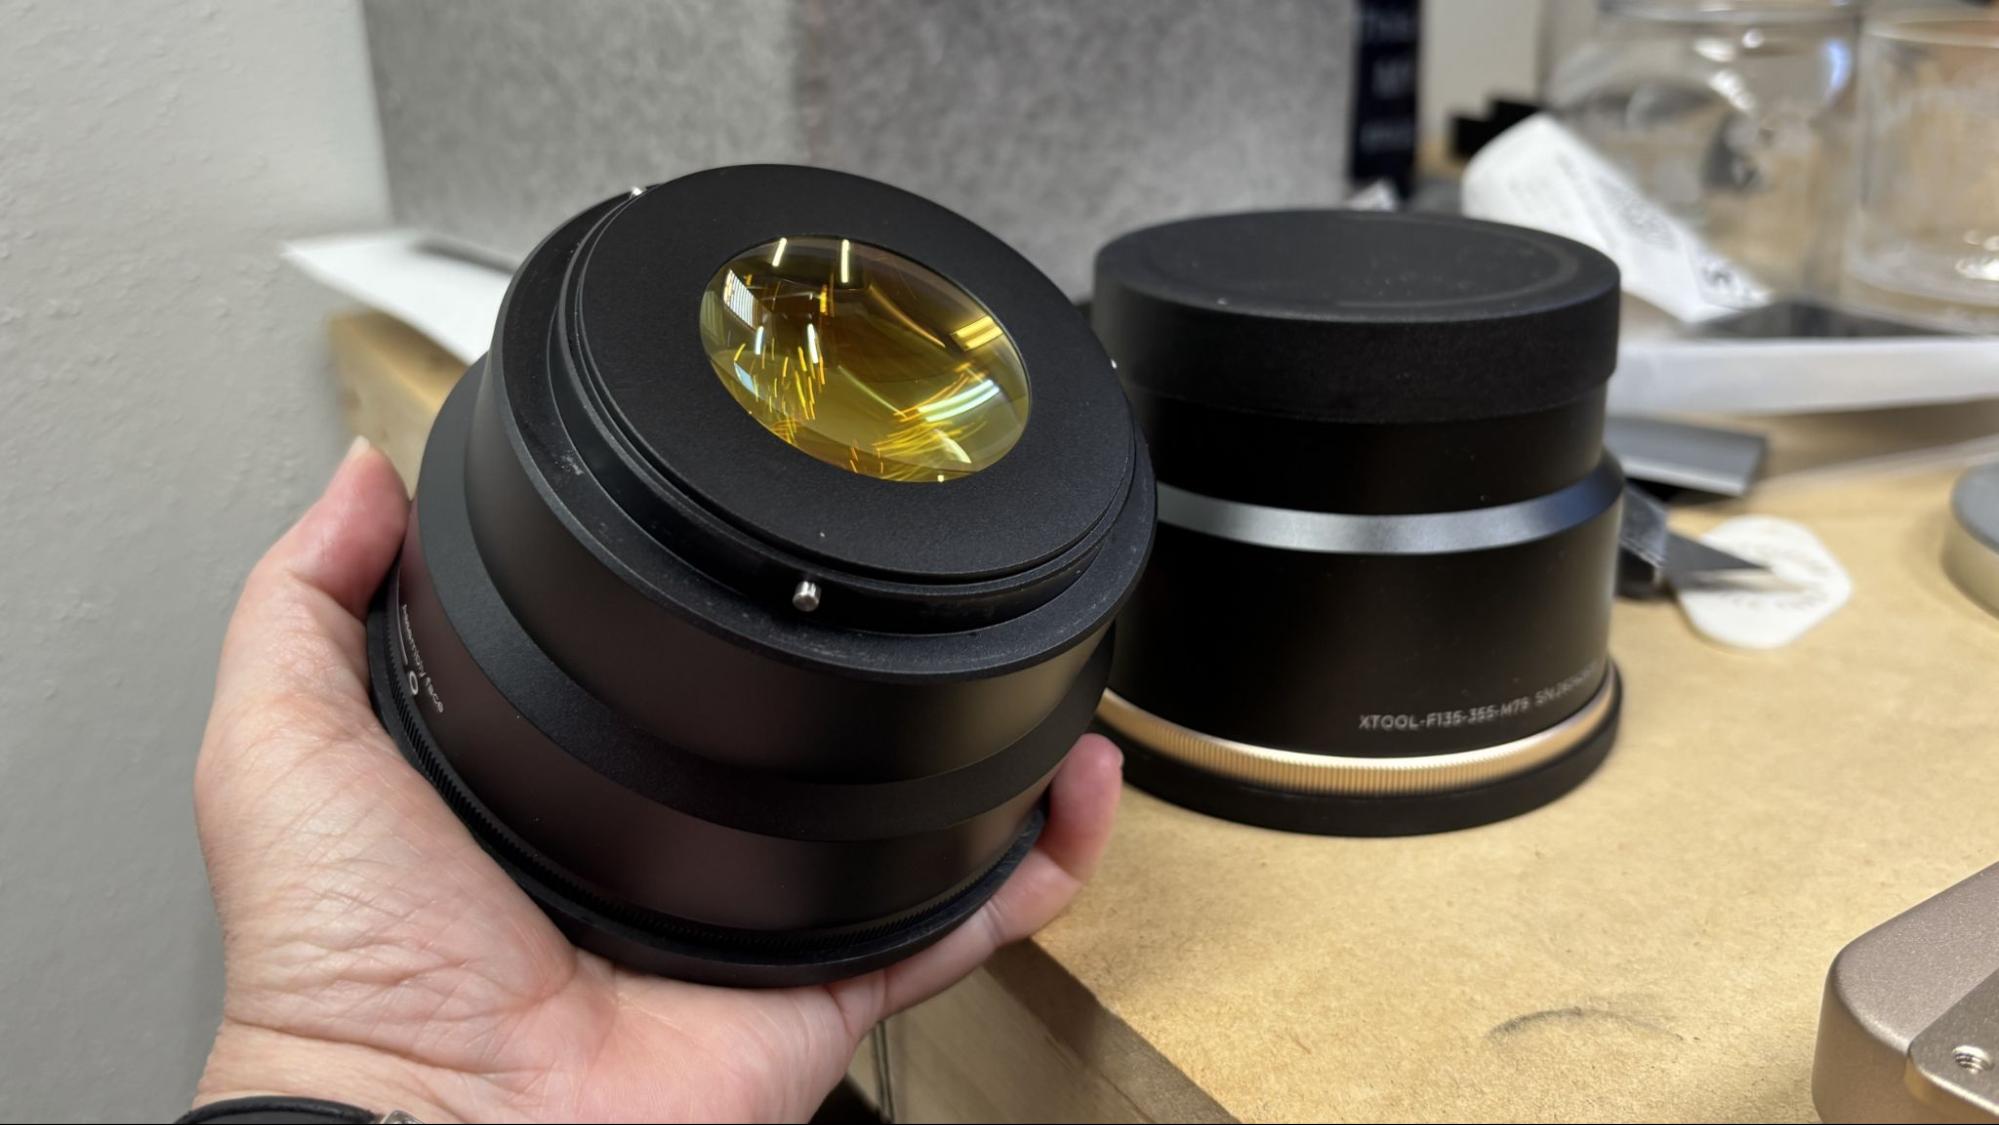
The xTool F2 Ultra UV comes with a lens for surface engraving and cutting and a lens for inner engraving. These attach to the laser with a quarter turn.

xTool F2 Ultra UV

(Image credit: Tom's Hardware)

The inner engraving lens requires the installation of the included riser, which is attached to the baseplate of the laser with two thumb screws.

The xTool F2 Ultra UV has a nicely counterbalanced cover which slides down for protection against direct or scattered laser radiation. The laser will not operate without the cover in place, unless this safety feature is disabled in the printer’s software. We only needed to do this while using the optional rotary attachment.

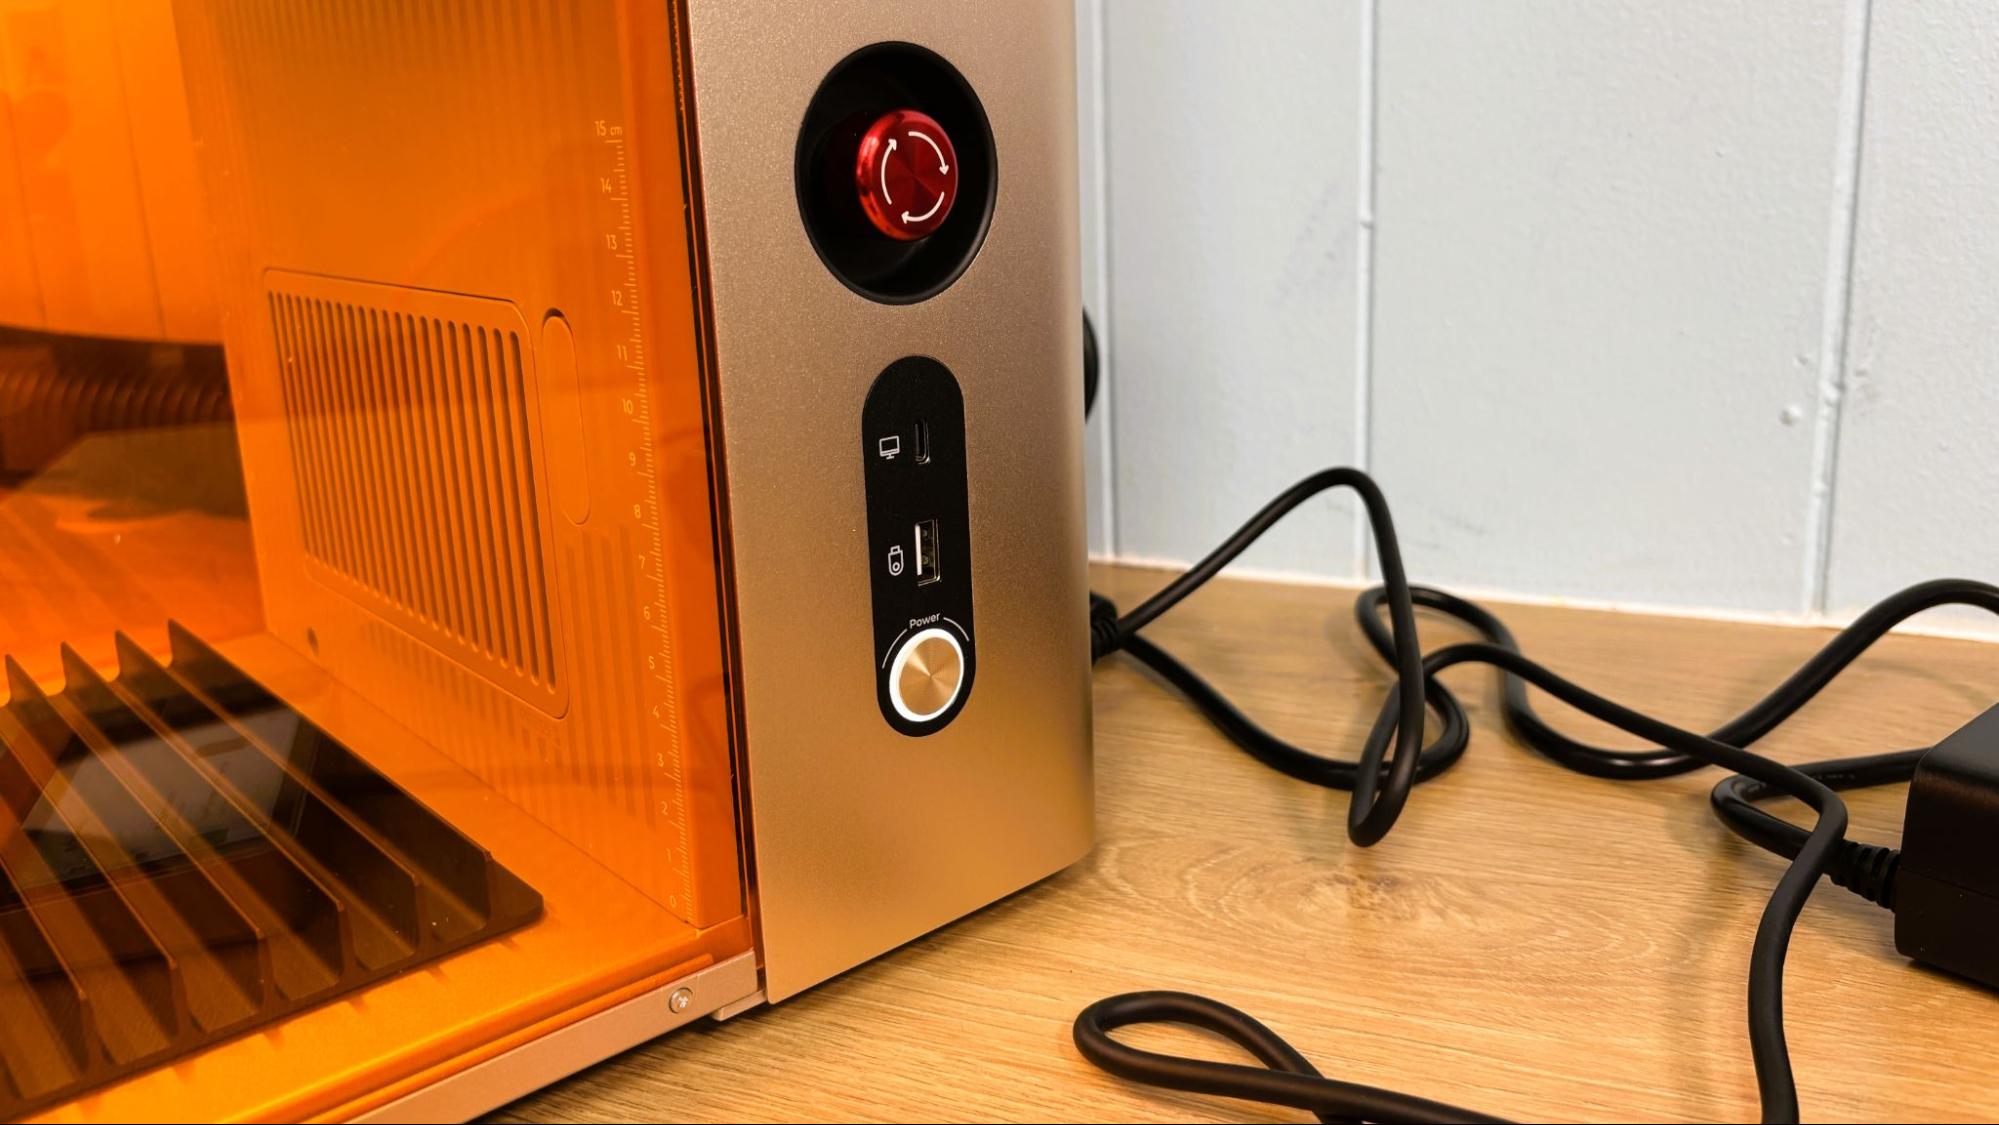
On the right side of the machine, there is a large red emergency stop button, the regular power button, A USB-C port for attaching a PC to the laser, and a USB-A port for moving files to the laser from a USB drive.

xTool F2 Ultra UV

(Image credit: Tom's Hardware)

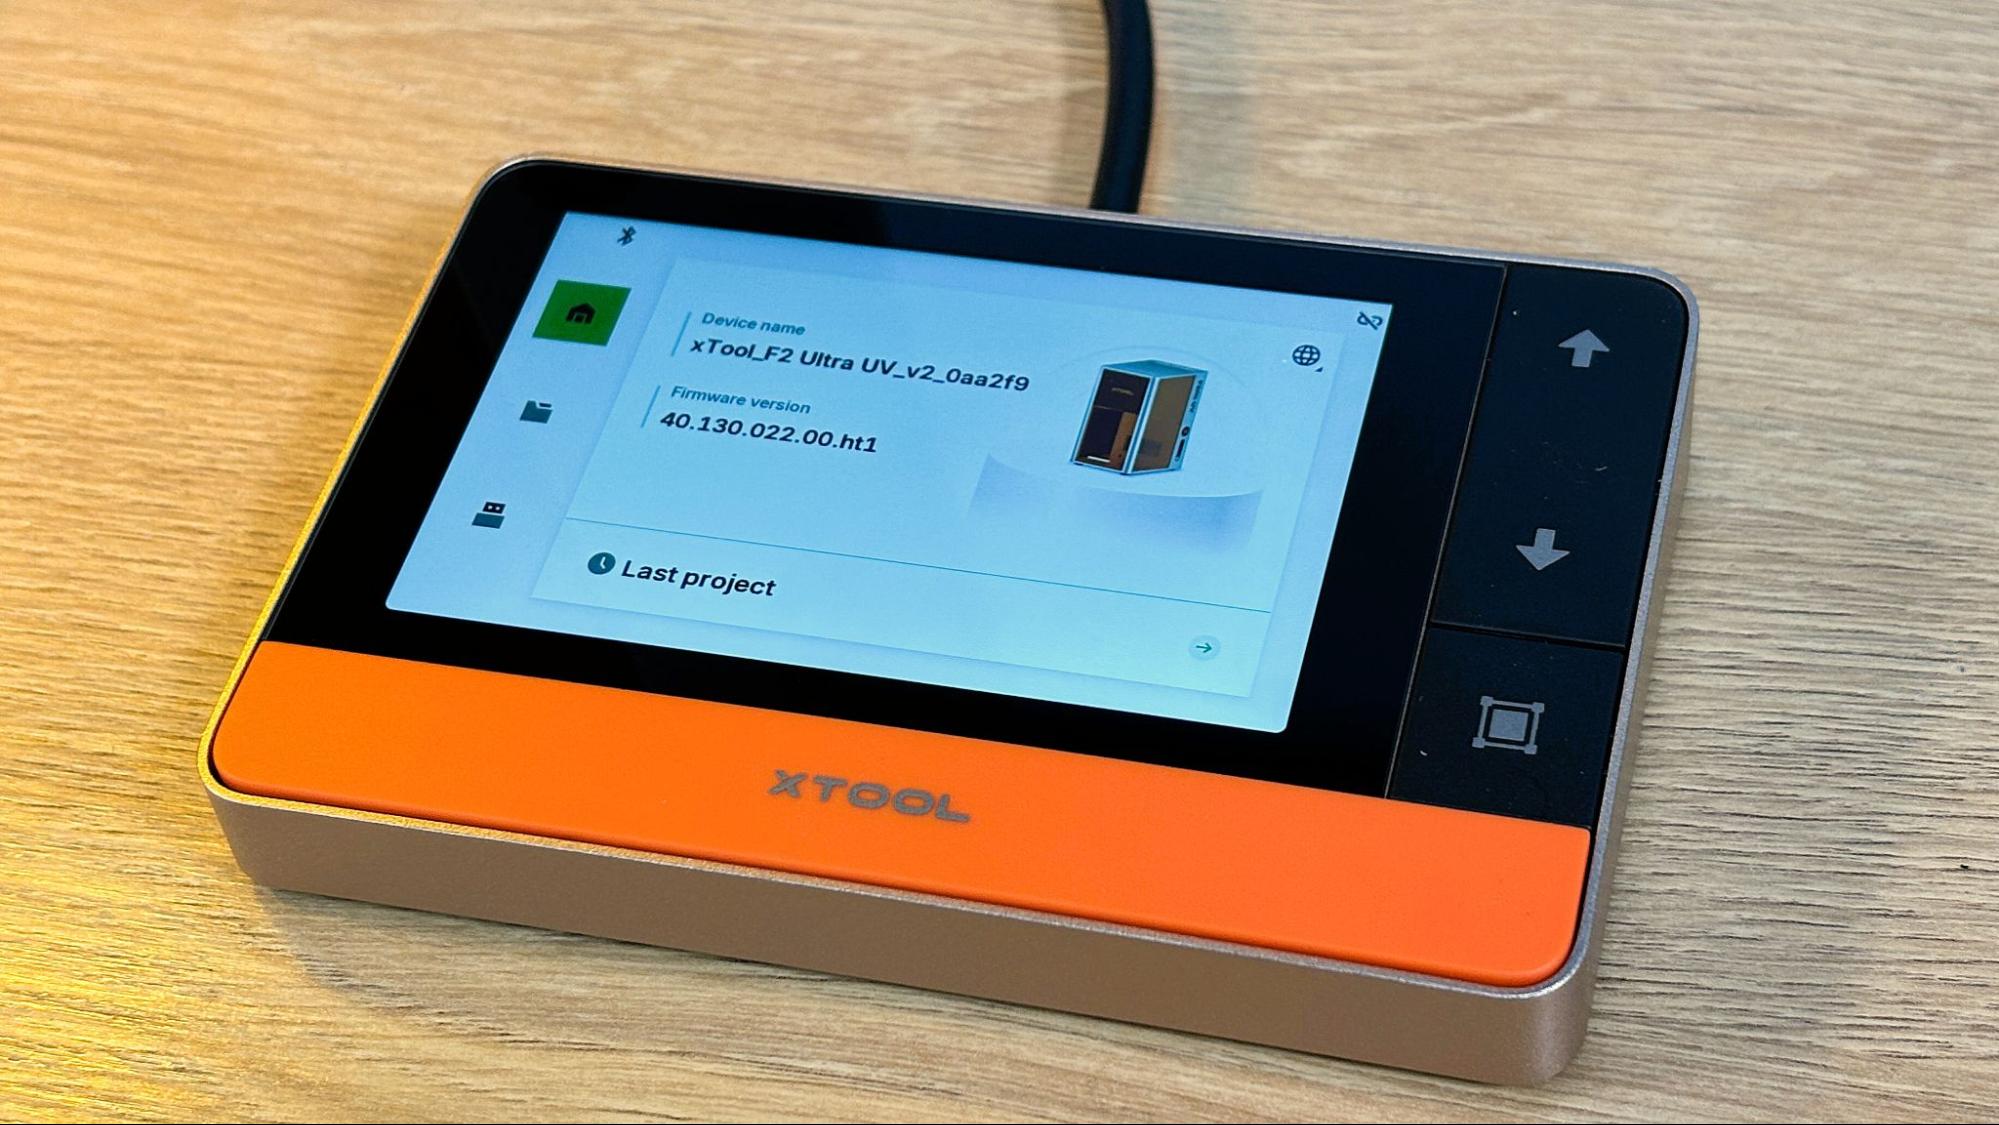
The machine has an excellent corded touch screen which is used to start each print and resume after an alarm or other pause in printing. It shows files available to print from a USB drive and can reprint the last file without the need to resend it. While printing, the screen shows elapsed time and time remaining on the current job.

xTool F2 Ultra UV

(Image credit: Tom's Hardware)

The xTool F2 Ultra UV has dual 48 MP cameras for positioning, with an accuracy of .2 mm. For surface engraving, the camera did not require calibration, as the positioning was perfect. After attaching the Inner engraving lens, it’s a good idea to calibrate the Z-Axis, which will also require calibrating the inner engraving work area. Our Z-Axis starting point was pretty far off the mark.

The auto focus function works perfectly on everything except glass. Since the beam goes through the glass, a piece of tape or scrap paper needs to be held to the surface to be lasered, and the focus can be set manually from the touch screen. Once the focus is correct, you can subtract out the thickness of the paper, but that level of precision is not really necessary.

xTool F2 Ultra UV

(Image credit: Tom's Hardware)

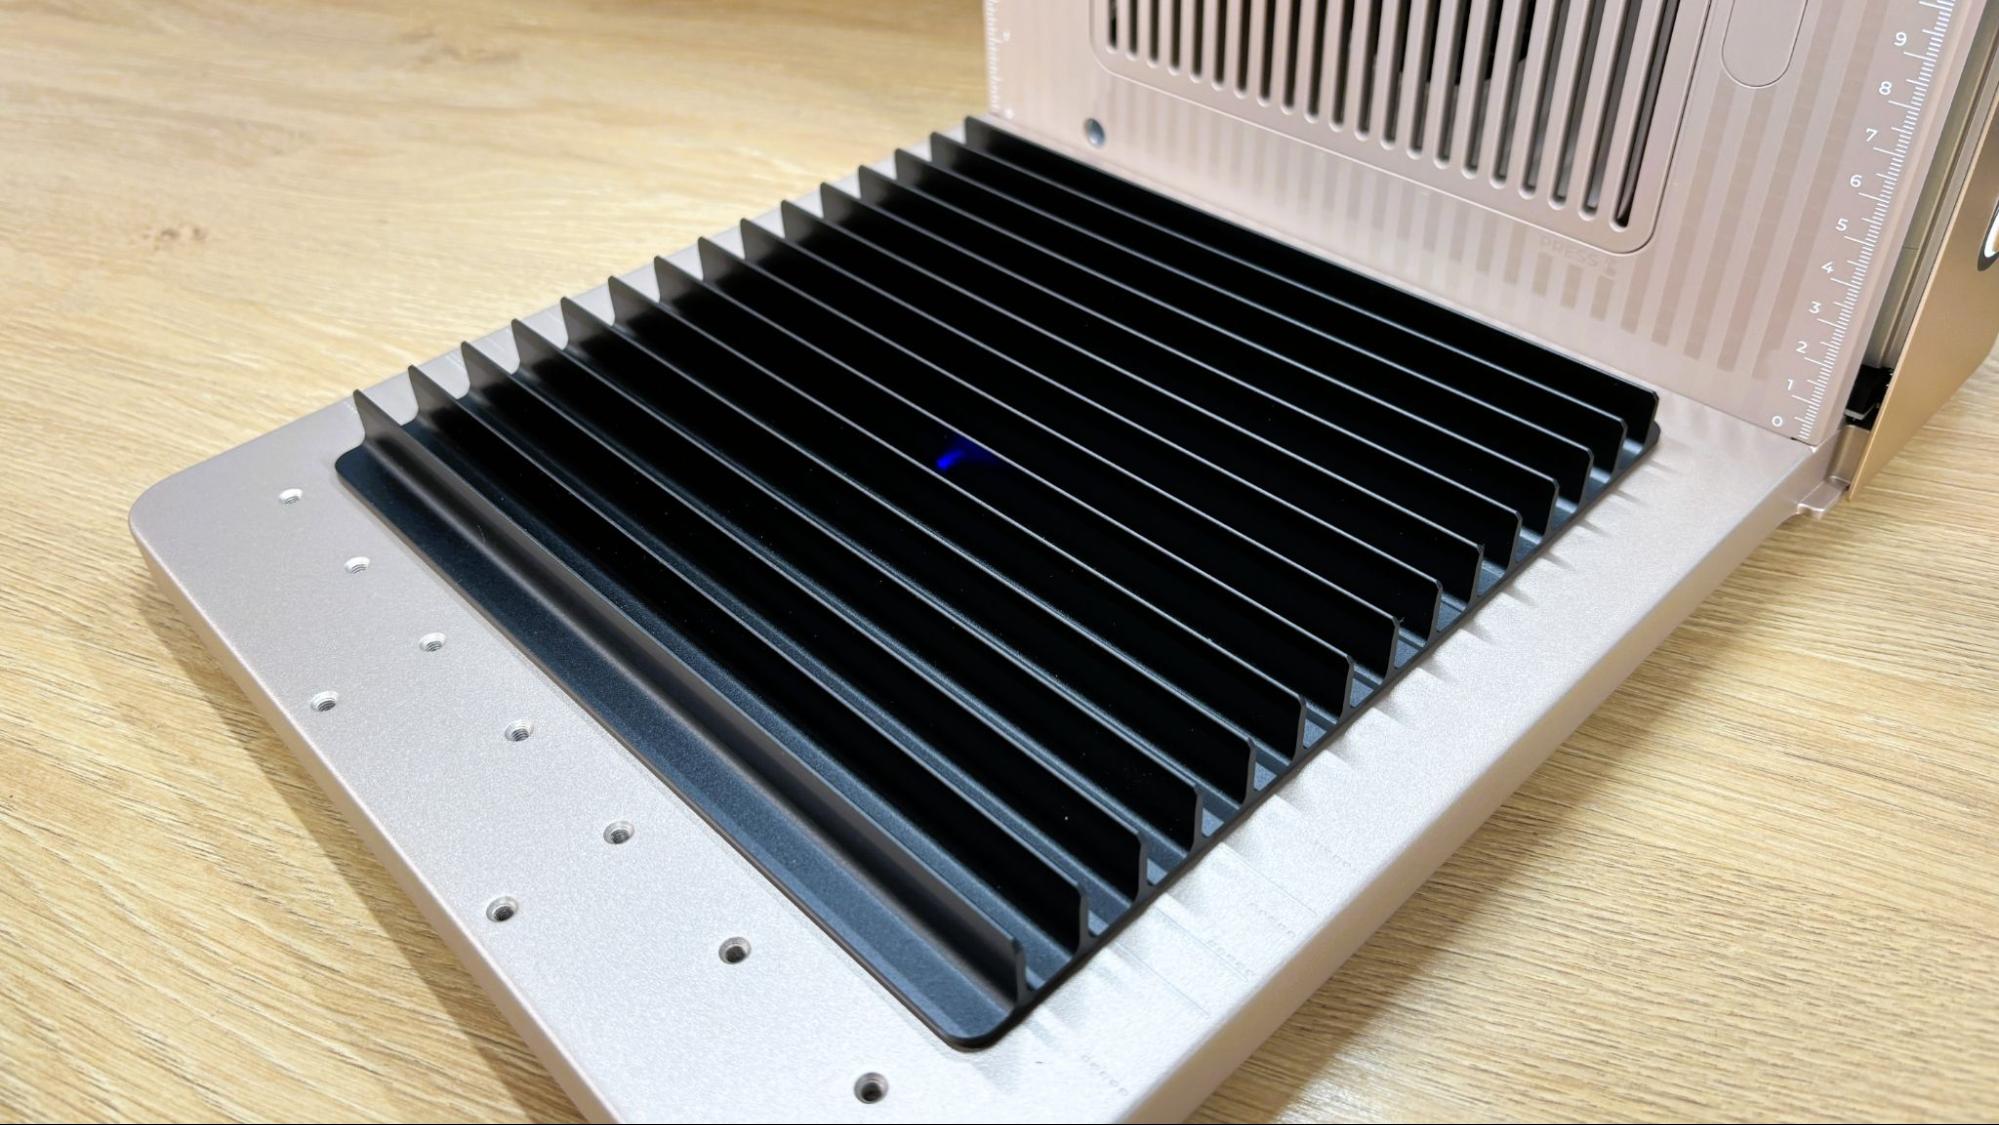
The bottom plate of the laser is anodized aluminum, with threaded holes for positioning jigs and the inner engraving riser. Also included is the black plate for cutting material.

xTool F2 Ultra UV

(Image credit: Tom's Hardware)

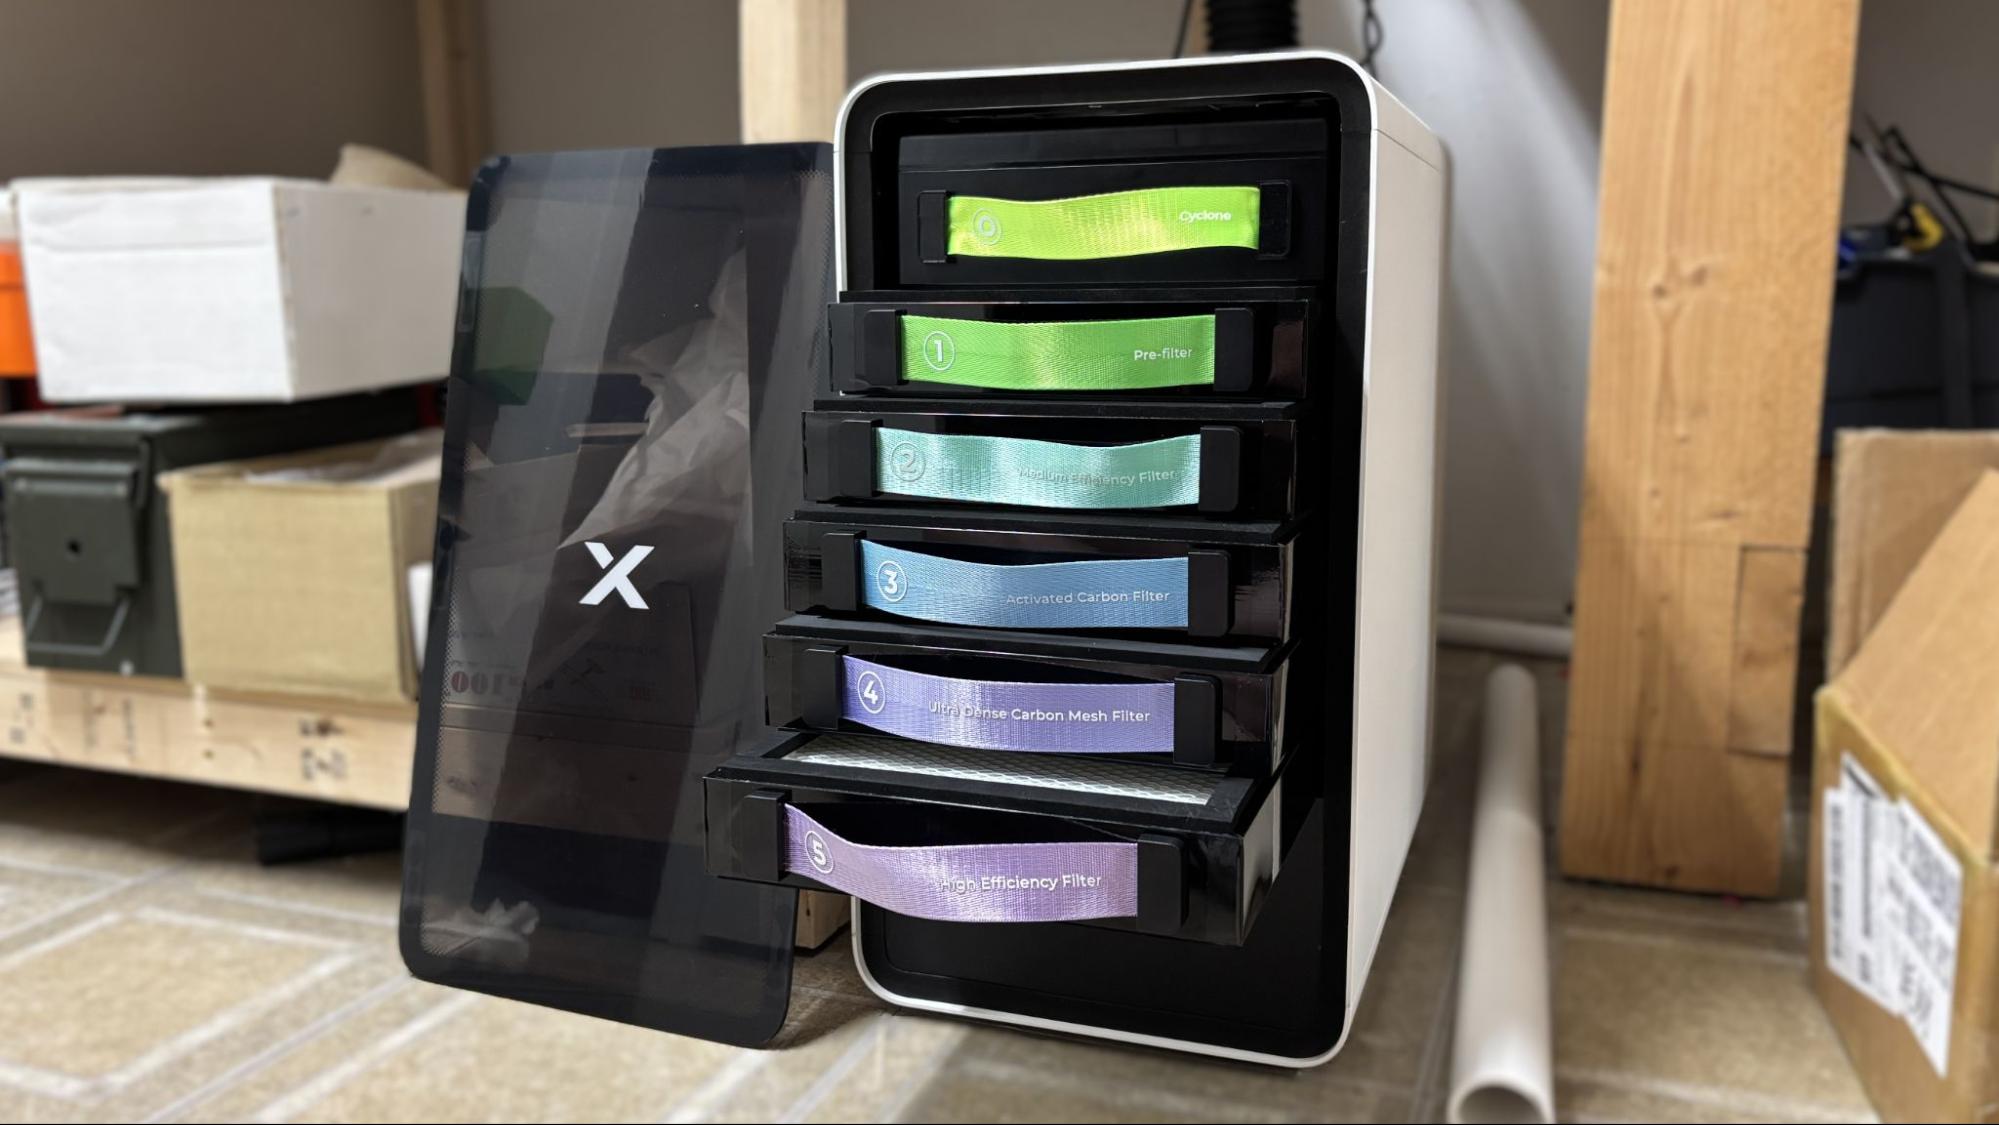
For fume extraction, we received the Safety Pro AP2 air purifier. While the xTool F2 Ultra UV does engrave cooler, it still produces a good deal of smoke when cutting and engraving wood and plastics. Engraving glass doesn’t produce smoke, but it does produce a fine powder of glass, which is mostly sucked into the purifier. The laser has a fan to extract fumes from the chamber, but it must be vented to the outside.

If you aren’t up for installing an exterior vent, the Safety Pro AP2 is a great, though somewhat pricey, choice. It has a six-stage filter that removes every trace of smoke from the air. With the F2 Ultra UV, the Safety Pro AP2 can be set to run automatically when needed, and the filter life cycle is monitored in the xTool App. The filters last between 100 and 600 hours and cost between $20 and $60 presently. The top SuperCyclone filter is cleanable and reusable.

Assembling the xTool F2 Ultra UV

xTool F2 Ultra UV

(Image credit: Tom's Hardware)

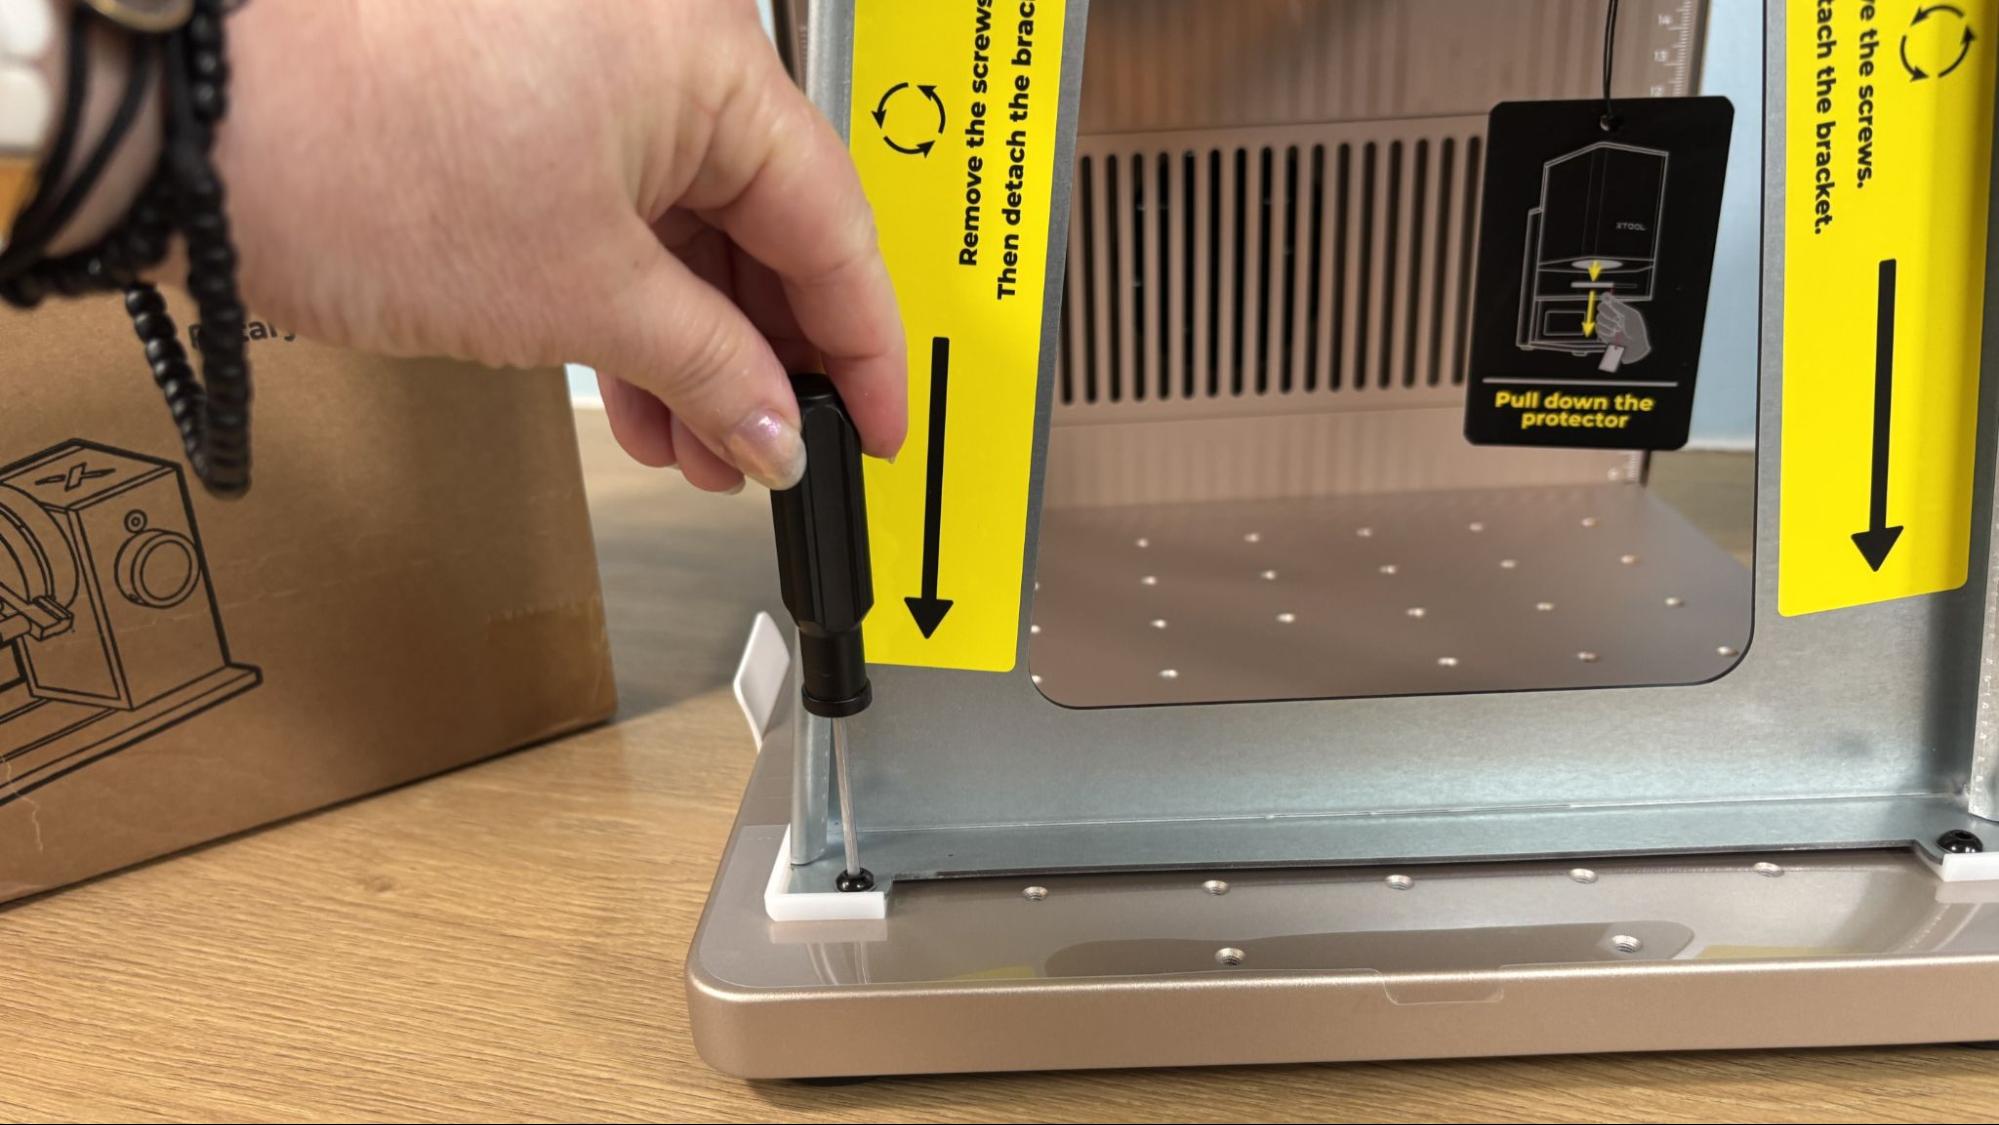
The xTool F2 Ultra UV is fully assembled from the factory with the surface engraving lens installed. Setup requires removing the metal bracket which secures the laser head for shipping.

xTool F2 Ultra UV

(Image credit: Tom's Hardware)

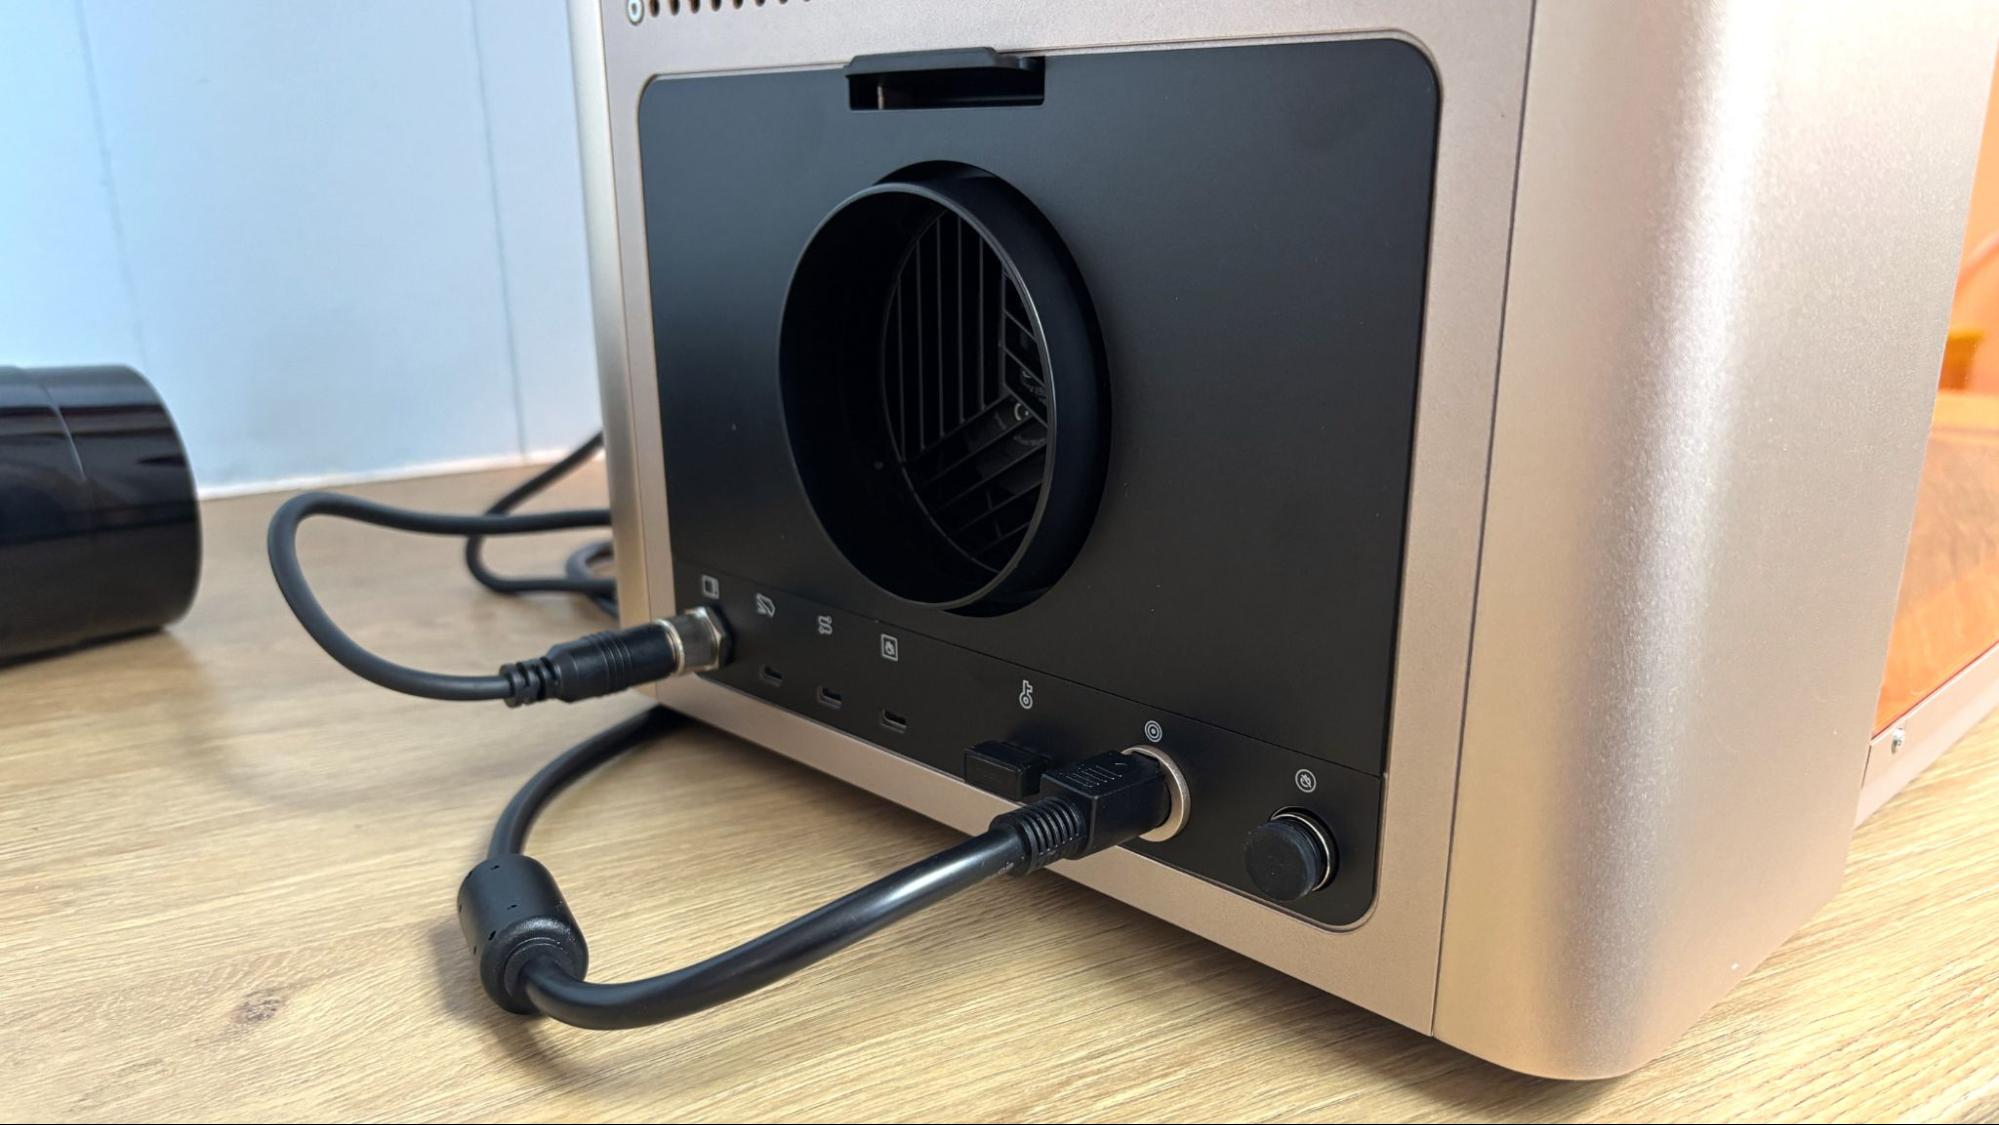
The power cord, touch screen, and exhaust hose attach to the rear of the laser, as does the equipment key. With those in place you are ready to go.

Safety Precautions for the xTool F2 Ultra UV

xTool F2 Ultra UV

(Image credit: Tom's Hardware)

The xTool F2 Ultra UV is a Class 4 laser, which is the highest and most hazardous class of laser. Direct and reflected laser light can cause damage to eyes and burns on skin. The processing of certain materials can produce toxic fumes. Care should be taken when operating this and any laser.

The F2 Ultra UV has an impressive list of safety features to make your experience less hazardous. The enclosure traps both dangerous light and fumes inside it and is set to stop the current process if opened. This safety stop can be overridden in the software, and needs to be for larger jobs and jobs requiring the rotary attachment. The safety will need to be turned back on manually. The machine has a flame sensor which is needed for cutting and engraving wood and plastic. Though the UV laser cuts and engraves cooler than the usual diode and CO2 lasers, it is still possible to cause a fire at higher power levels. If the laser is moved or tilted while in use, it will shut off automatically. As is usual with larger power tools, the xTool F2 Ultra UV has a USB equipment key plugged in the rear of the unit. If little hands are about or if the machine will be idle for a while, this key can be pulled, rendering the laser unable to function. There is also a large red emergency stop button on the side of the machine that can be used to quickly turn the machine off in the event of fire or other immediate issue.

For smoke and other potentially toxic fumes, the xTool F2 Ultra UV has an exhaust fan on the rear of the unit, which needs to be vented to the outside or to a purifier like the Safety Pro AP2. Some materials like PVC and fiberglass should not be burned with a laser due to their chemical makeup. Dallas Maker Space has published a list of safe and hazardous materials to use with their laser.

One necessary safety precaution xTool has stopped providing is safety glasses. They are a good idea if you are operating the laser without the cover in place and are available from xTool on their website.

Software for xTool F2 Ultra UV

xTool F2 Ultra UV

(Image credit: Tom's Hardware)

xTool Studio was frustrating when it was first launched and replaced xTool Creative Space. It took some time for all of xTool’s tutorials, material settings, and the maker community as a whole to catch up with the new program. Studio is now what I’ve come to expect and love about xTool. It is the most intuitive and powerful design software I’ve used from any of the major manufactures. It is also simple enough to get good results without being an expert.

xTool F2 Ultra UV

(Image credit: Tom's Hardware)

While xTool offers a bunch of free tools to make your projects easier, they also have some excellent tools that cost credits to use. I despise microtransactions in all software. In this case, the credits are not super expensive and can be earned for posting your projects to Atomm, xTool’s file-sharing platform, and for other tasks. There are also currently 3 free uses a month. At best, I can say that there isn’t an annual subscription required to access these tools. They are optional and work well if you don’t have other options for things like removing the background from an image or converting it to a vector.

xTool F2 Ultra UV

(Image credit: Tom's Hardware)

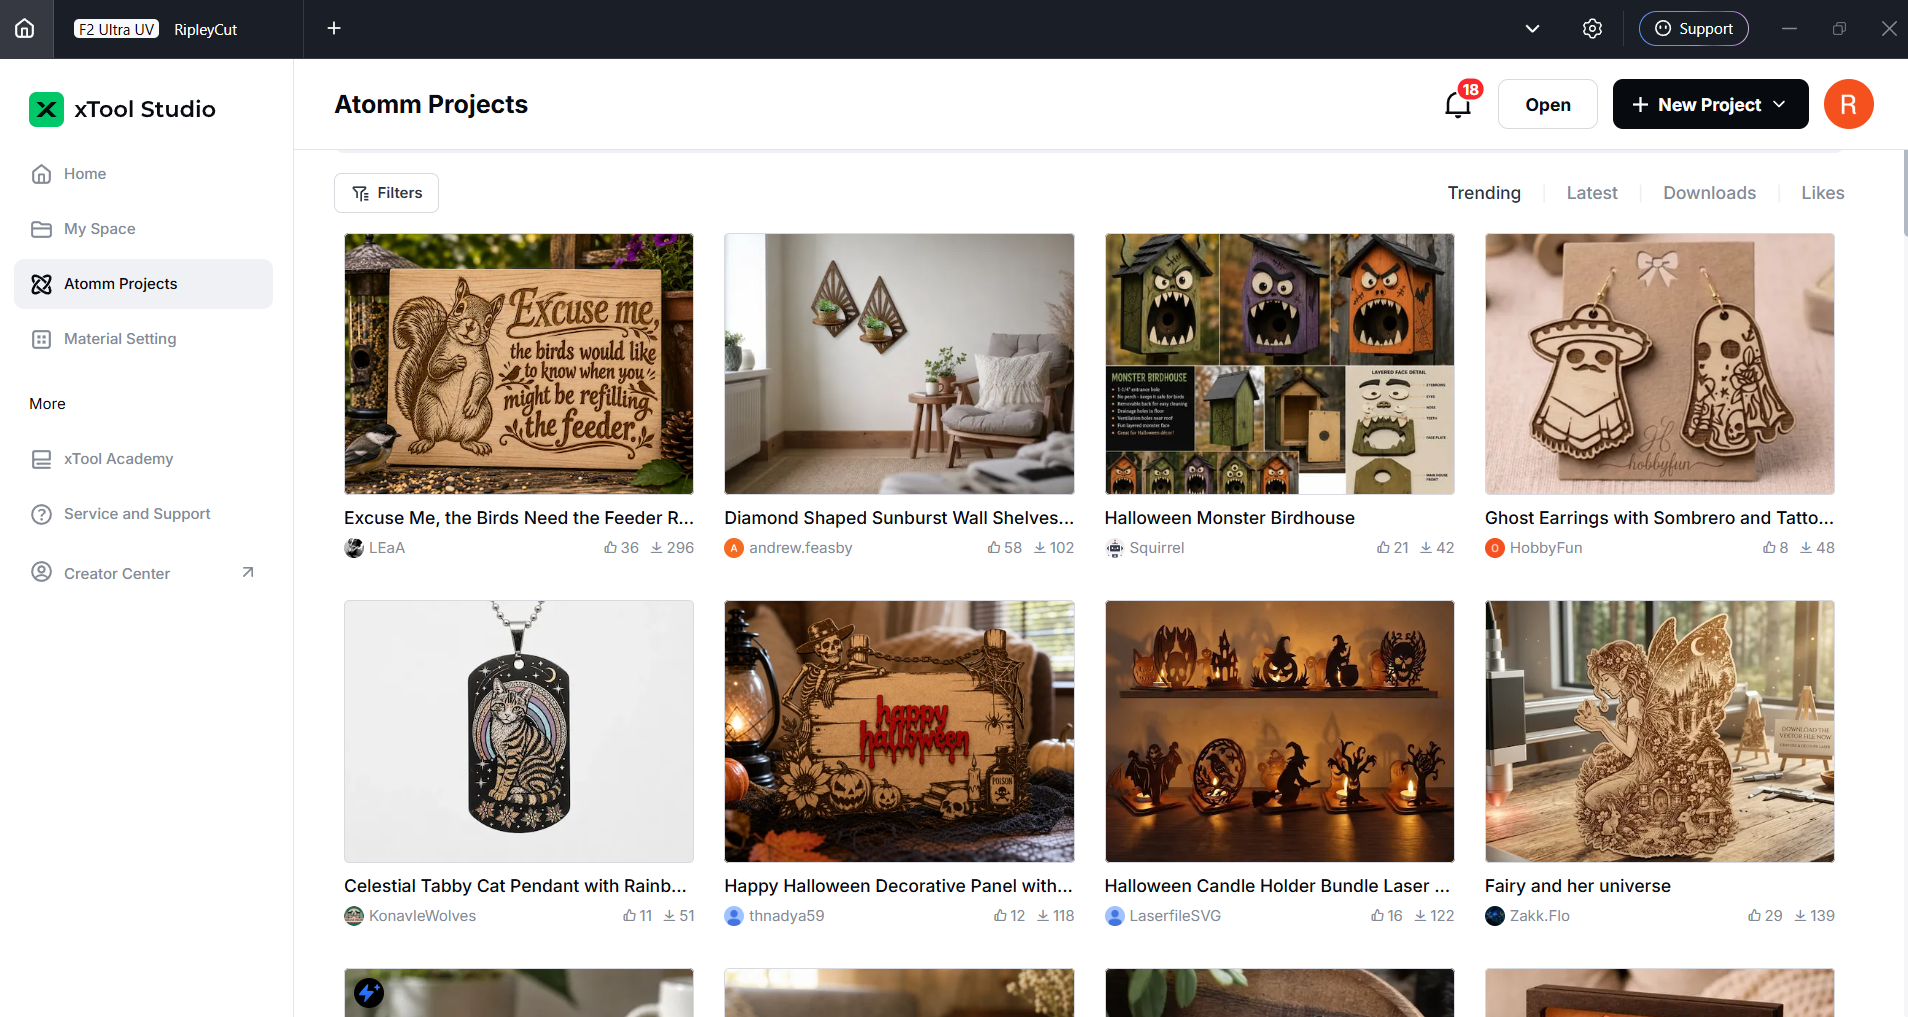
Atomm is available from the home page and offers a ton of projects, mostly free, to give you ideas or just something to create outright. It also has a bunch of tools to create everything from custom key chains to puzzles to boxes.

Engraving / Cutting with the xTool F2 Ultra UV

The xTool F2 Ultra UV is a powerful laser. Five watts doesn't sound like a lot, but it can cut through 15 mm of basswood and 12 mm of acrylic using multiple passes, which is respectable, and it can cut without the usual charring you expect with a diode or CO2 laser.

The UV laser can engrave metal but is really not up to cutting it. For metal cutting, you may want to check out the MOPA-powered F2 Ultra.

xTool has excellent material profiles that cover nearly everything you might want to cut or engrave. They also sell almost everything you might want to engrave, with an eye toward using your F2 Ultra UV as a business.

xTool F2 Ultra UV

(Image credit: Tom's Hardware)

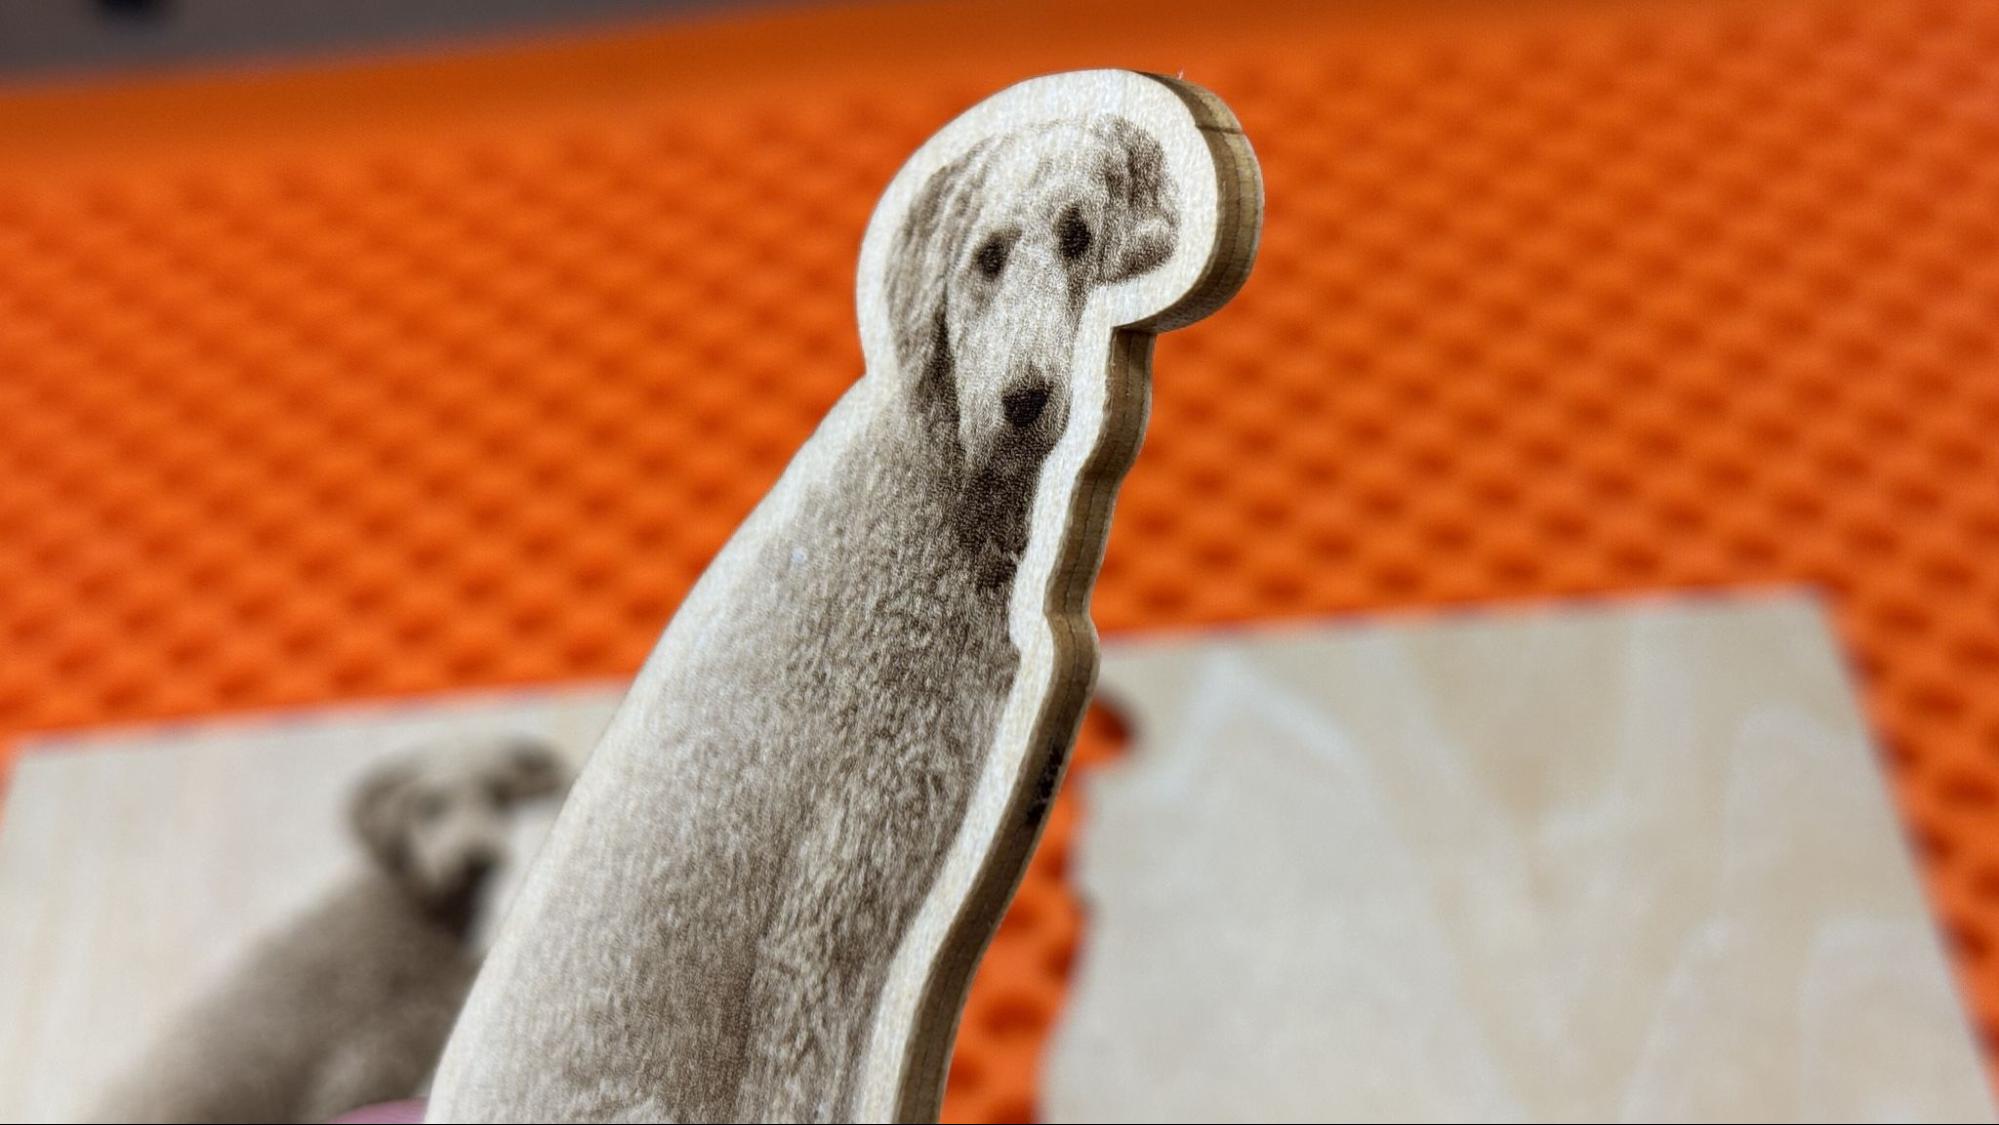
The first test I ran was engraving and cutting out a picture of my dog Ripley. The material is 3mm bass plywood, and I used the default settings. For the engraving, I used 90% power with a dot duration of 800 and using Jarvis mode. For the cut, it was 100% power at 146 mm/s for 44 passes.

To prep the photo I used the AI background remover in xTool Studio which cost 6 credits and sharpened the photo using the free tools. The resulting image is really nice. Using the offset function, I put a cutline around the image and the laser cut it with no charring at all. It might be the cleanest laser cut I’ve ever seen. 44 passes sounds like a lot to cut 3mm plywood but, with the speed of this laser the entire process took only 4 minutes and 28 sec.

xTool F2 Ultra UV

(Image credit: Tom's Hardware)

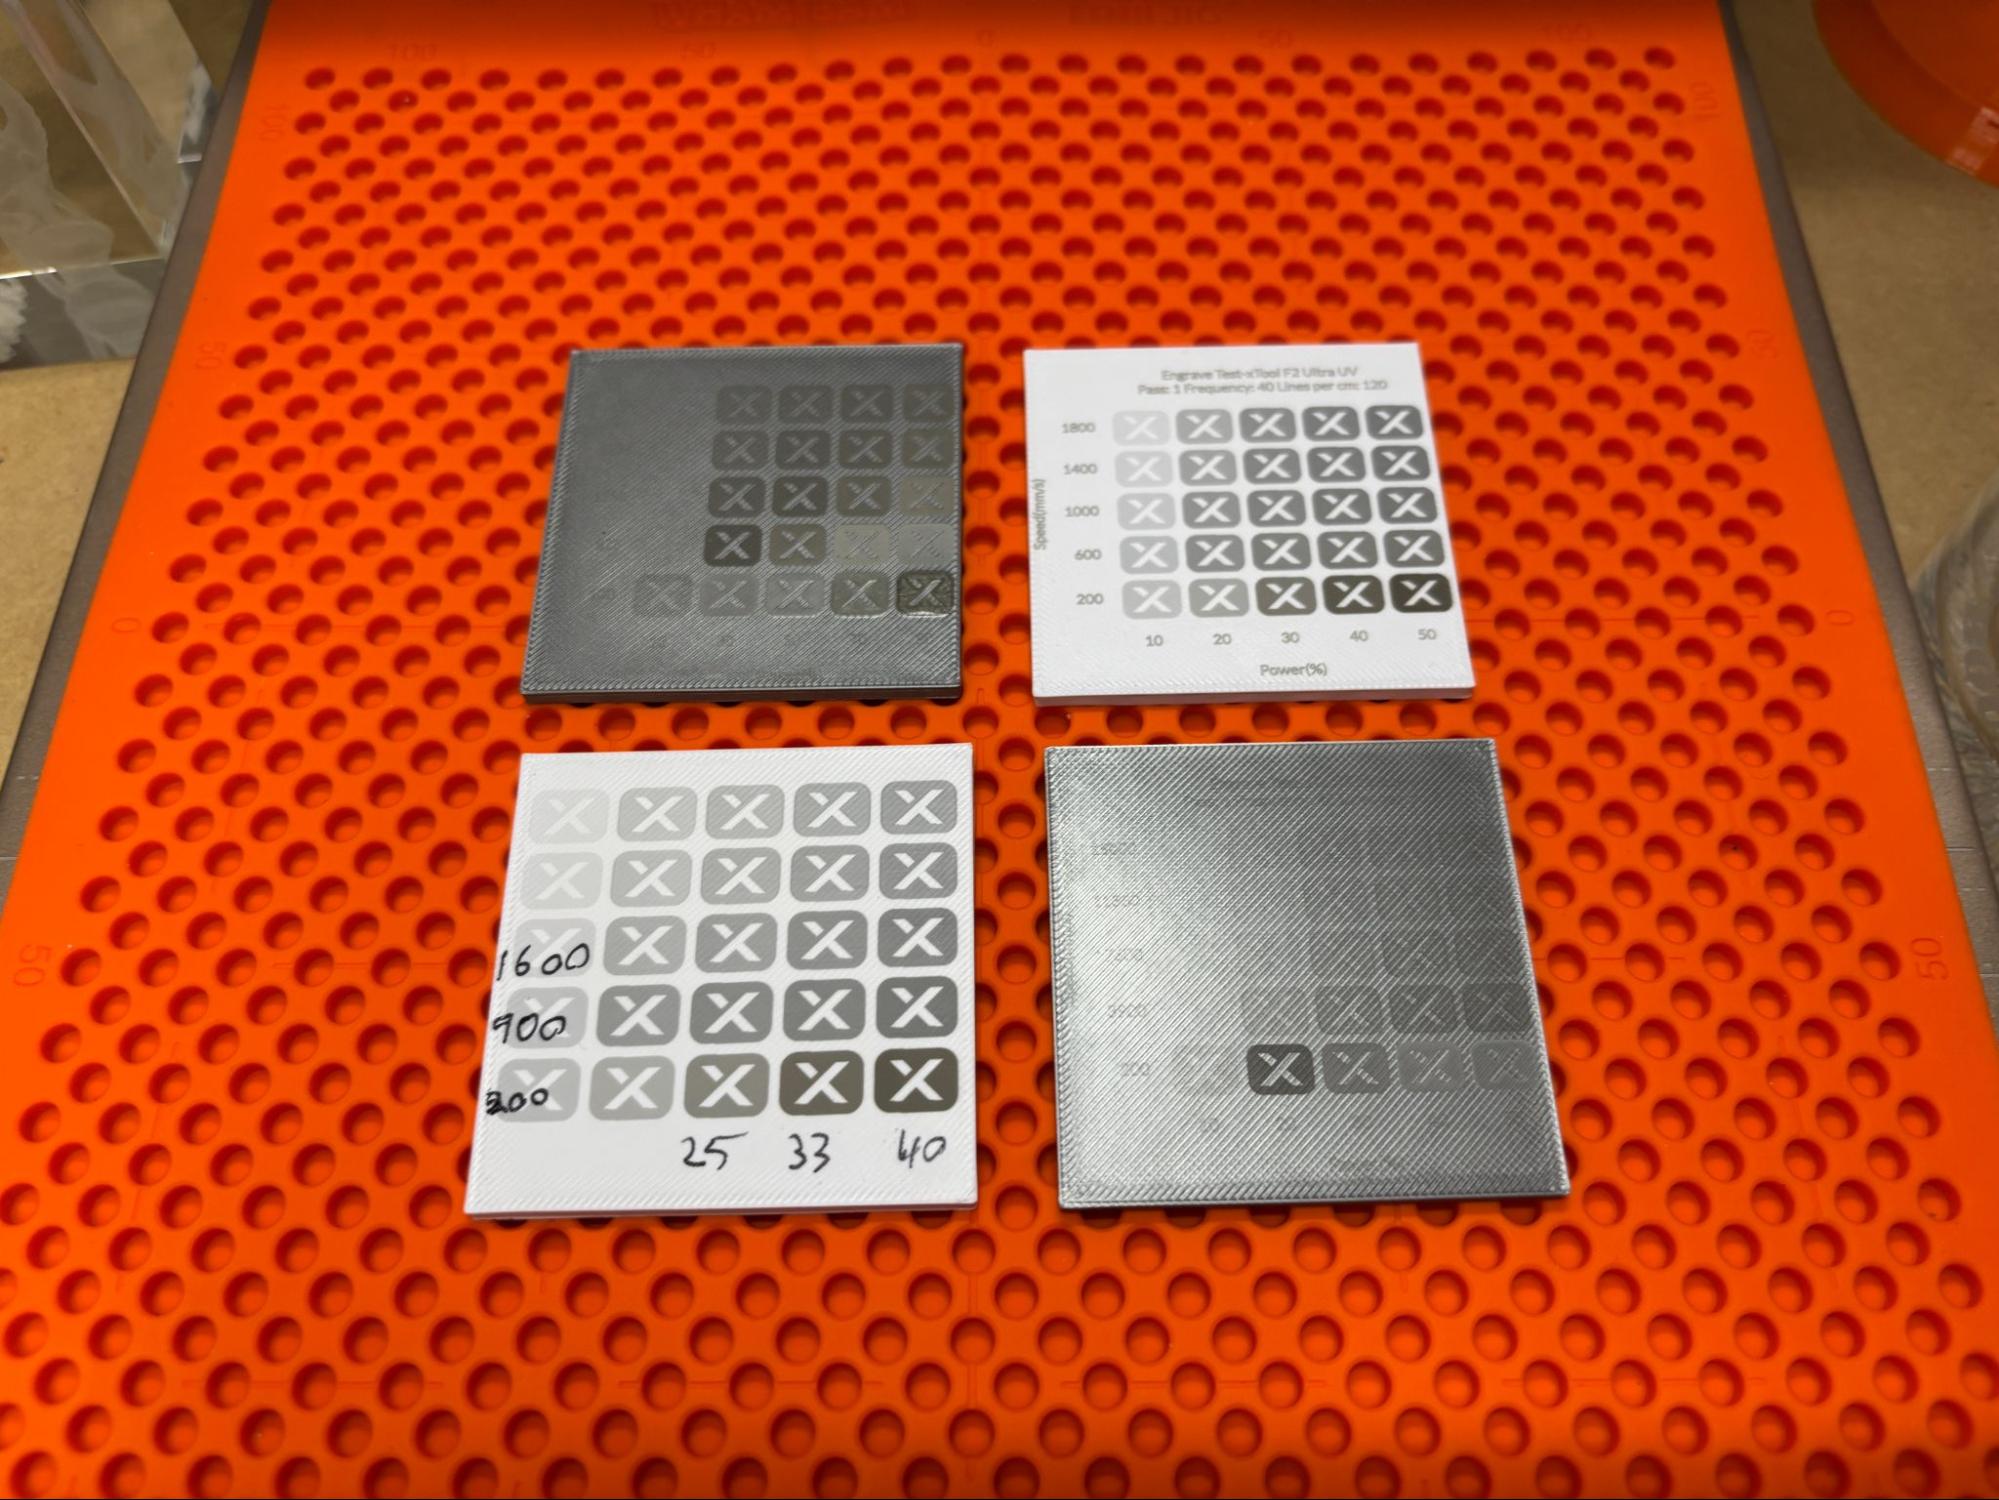
I was intrigued by the F2 Ultra UV’s marking ability on plastic, since it’s much cooler than other lasers. I printed some generic squares to test this out of Bambu Lab silver ABS and Inland white high speed ABS+. Since there is such a wide variety of plastic out there I ran some test arrays using xTool’s black 3D printing ABS material preset as a starting place. The grids were generated by xTool Studio and took only 2 minutes each to print. I learned three things from these tests: It is possible to finely engrave/mark plastic with the F2 Ultra UV. It is also possible to set it on fire. Lastly the Safety Pro AP2 is fantastic at keeping the smell of burning ABS from overwhelming my workshop.

xTool F2 Ultra UV

(Image credit: Tom's Hardware)

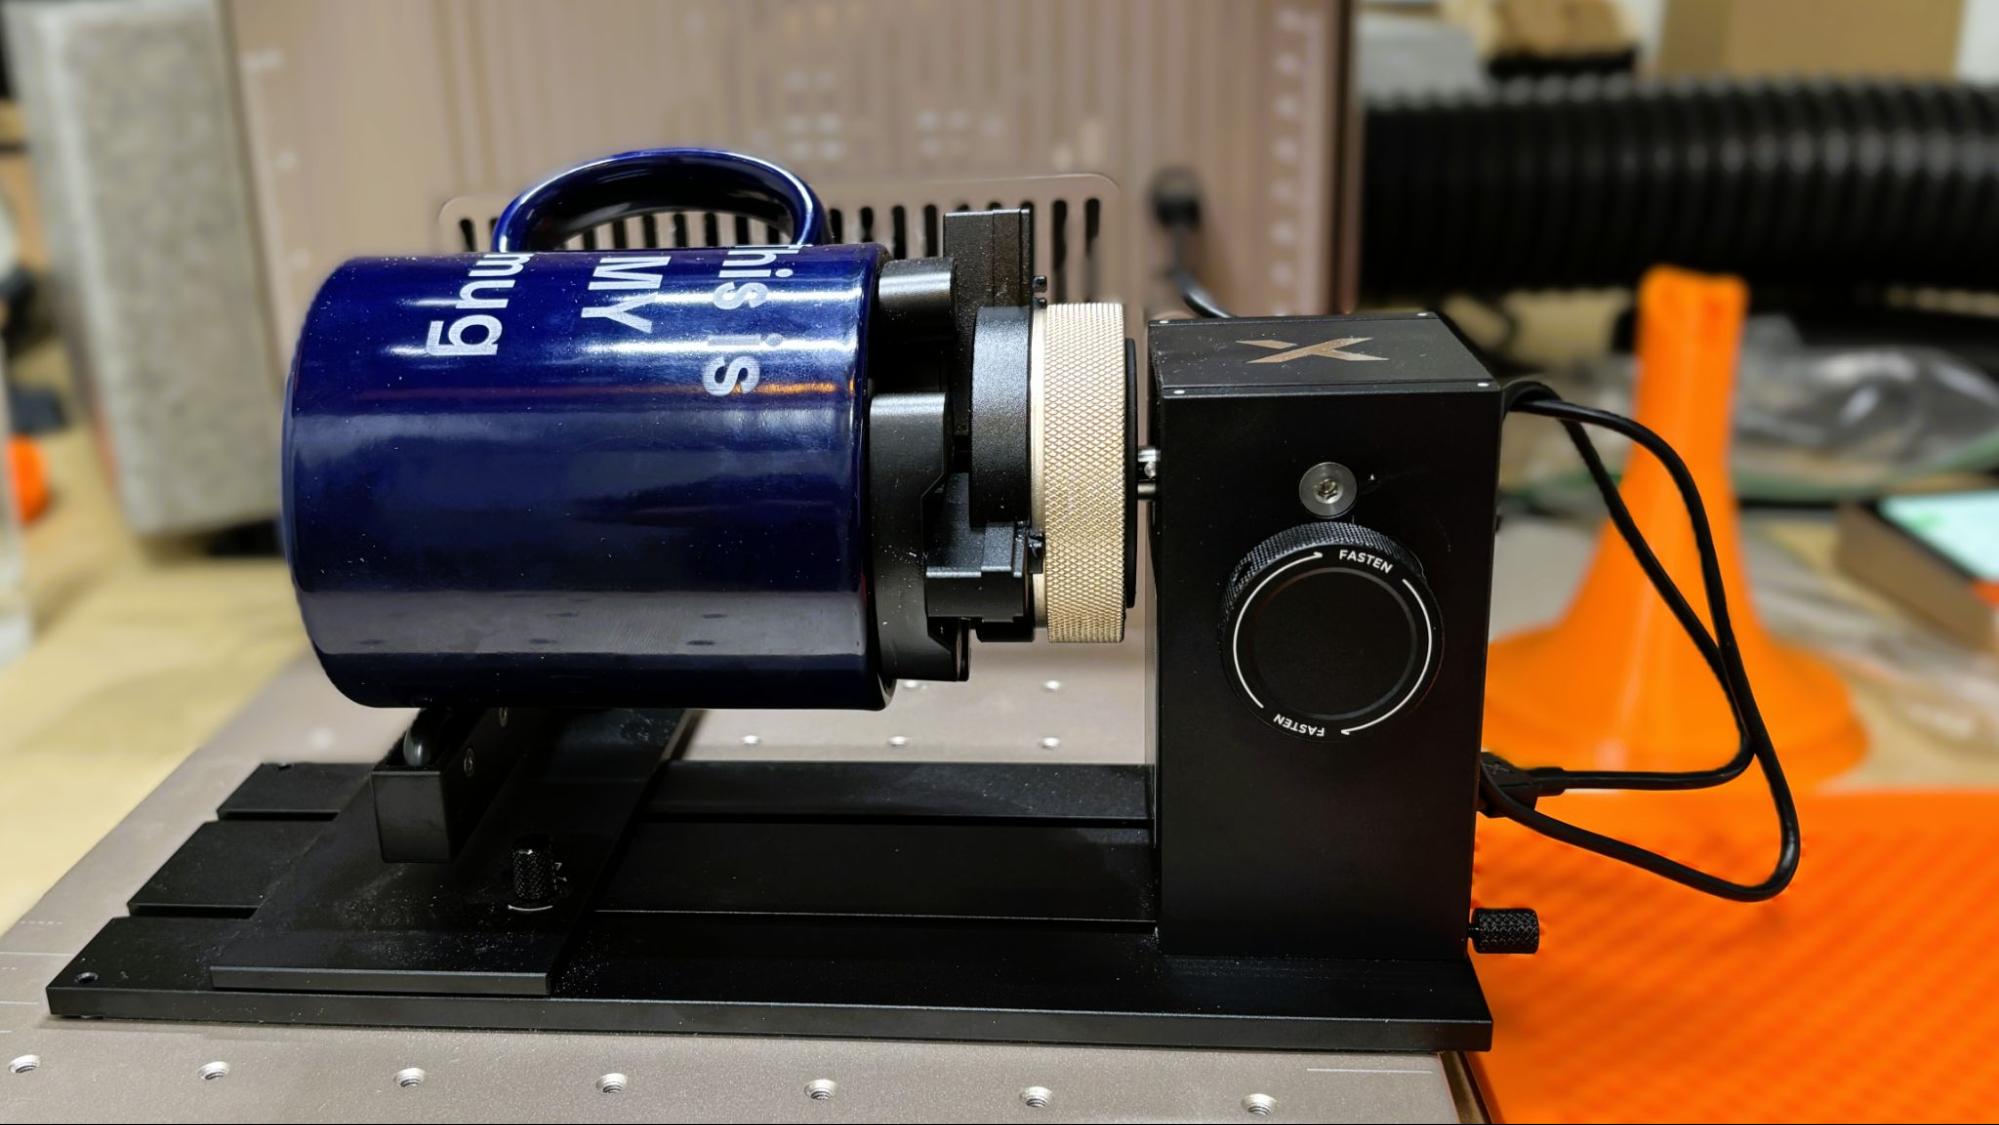
The xTool RA3 rotary attachment can be set to use rollers for cylindrical objects or a chuck to grab onto the inside or outside of items, from rings to tumblers. It works perfectly well; just make sure you choose the correct node since the calculations needed are wildly different.

xTool F2 Ultra UV

(Image credit: Tom's Hardware)

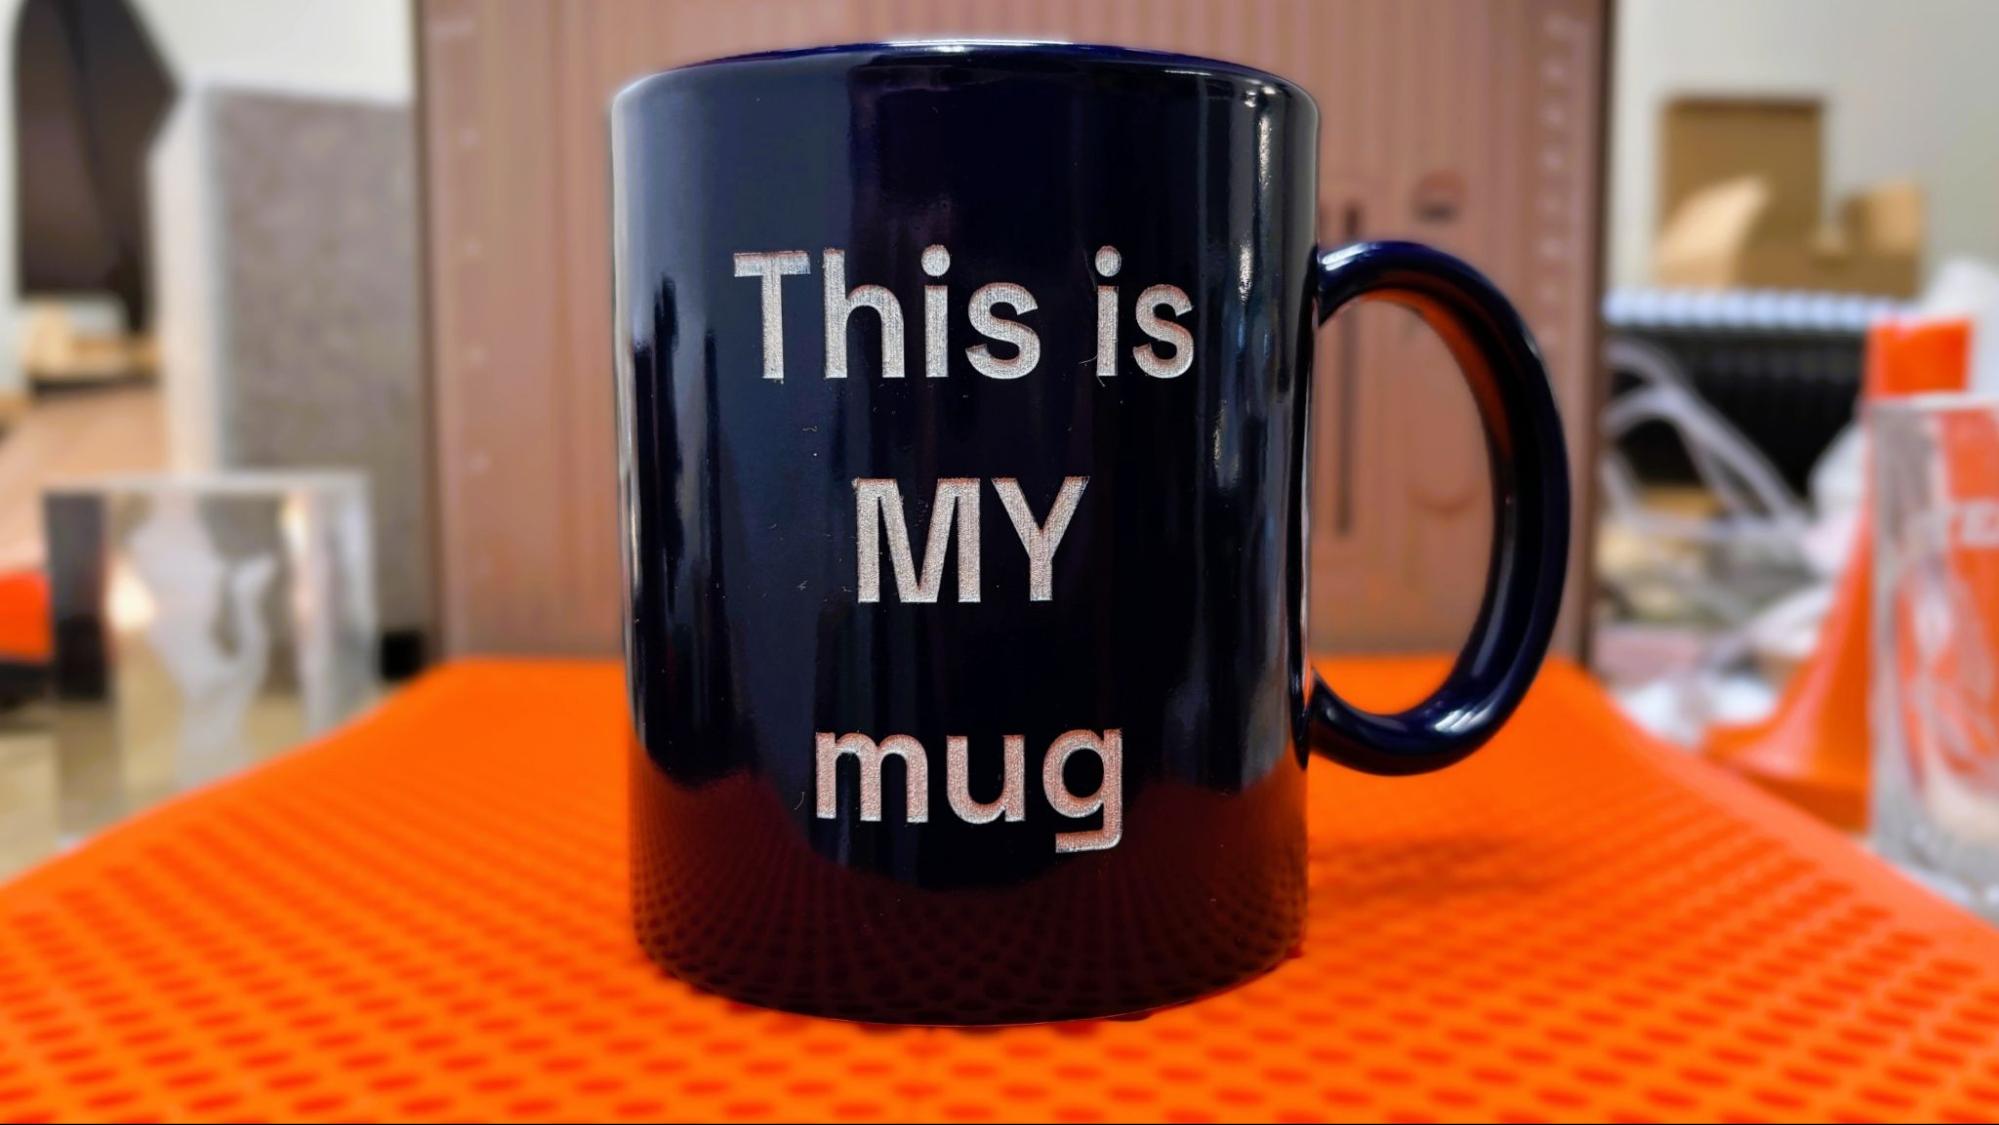
Using the text editor in xTool Studio, I engraved an old coffee mug. Using the white glazed ceramic board material preset, the laser was able to break through the glazing and fairly deep into the ceramic at 100% power at 88 MM/s in 2 passes. It took a while: 40 minutes total. The resulting cut had a nice light blue left over from the glaze. I ran a silver Sharpie permanent marker over the letters to make them pop.

xTool F2 Ultra UV

(Image credit: Tom's Hardware)

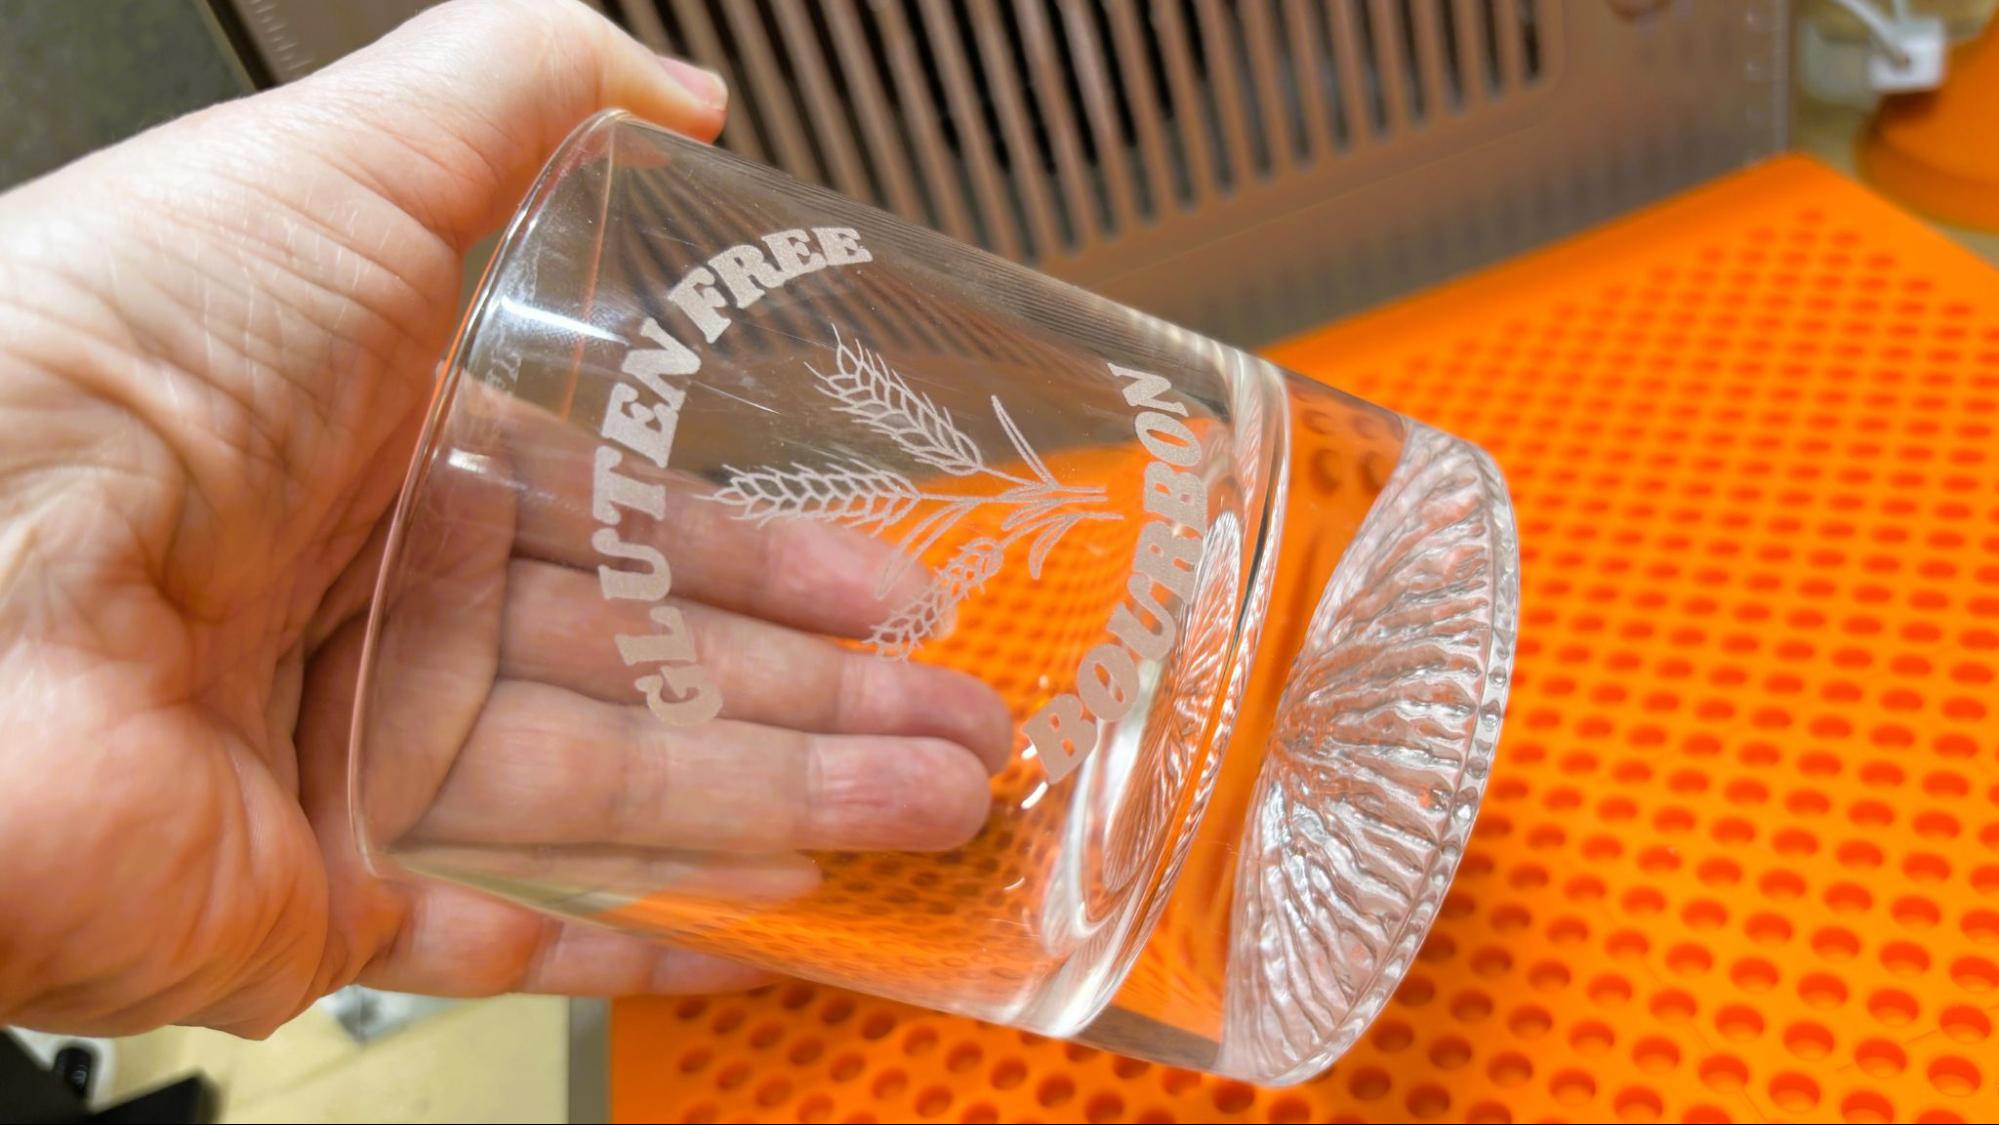
The xTool F2 Ultra UV does an excellent job engraving directly on glass. I used clip art and text from Canva and inverted the image using the free tool in xTool Studio. The image must be inverted to etch correctly on glass. Using 80% with a dot duration of 400 and 1 pass, this took 4 minutes and 15 seconds and looks fantastic. Sadly we were out of bourbon to show it off.

xTool F2 Ultra UV

(Image credit: Tom's Hardware)

The switch to the inner engraving lens is mostly painless. Mostly. It’s a little unsettling since the lens is far inside the body of the laser housing, so I was working by feel to make the swap. The riser bolts easily onto the middle of the base with two thumb screws.

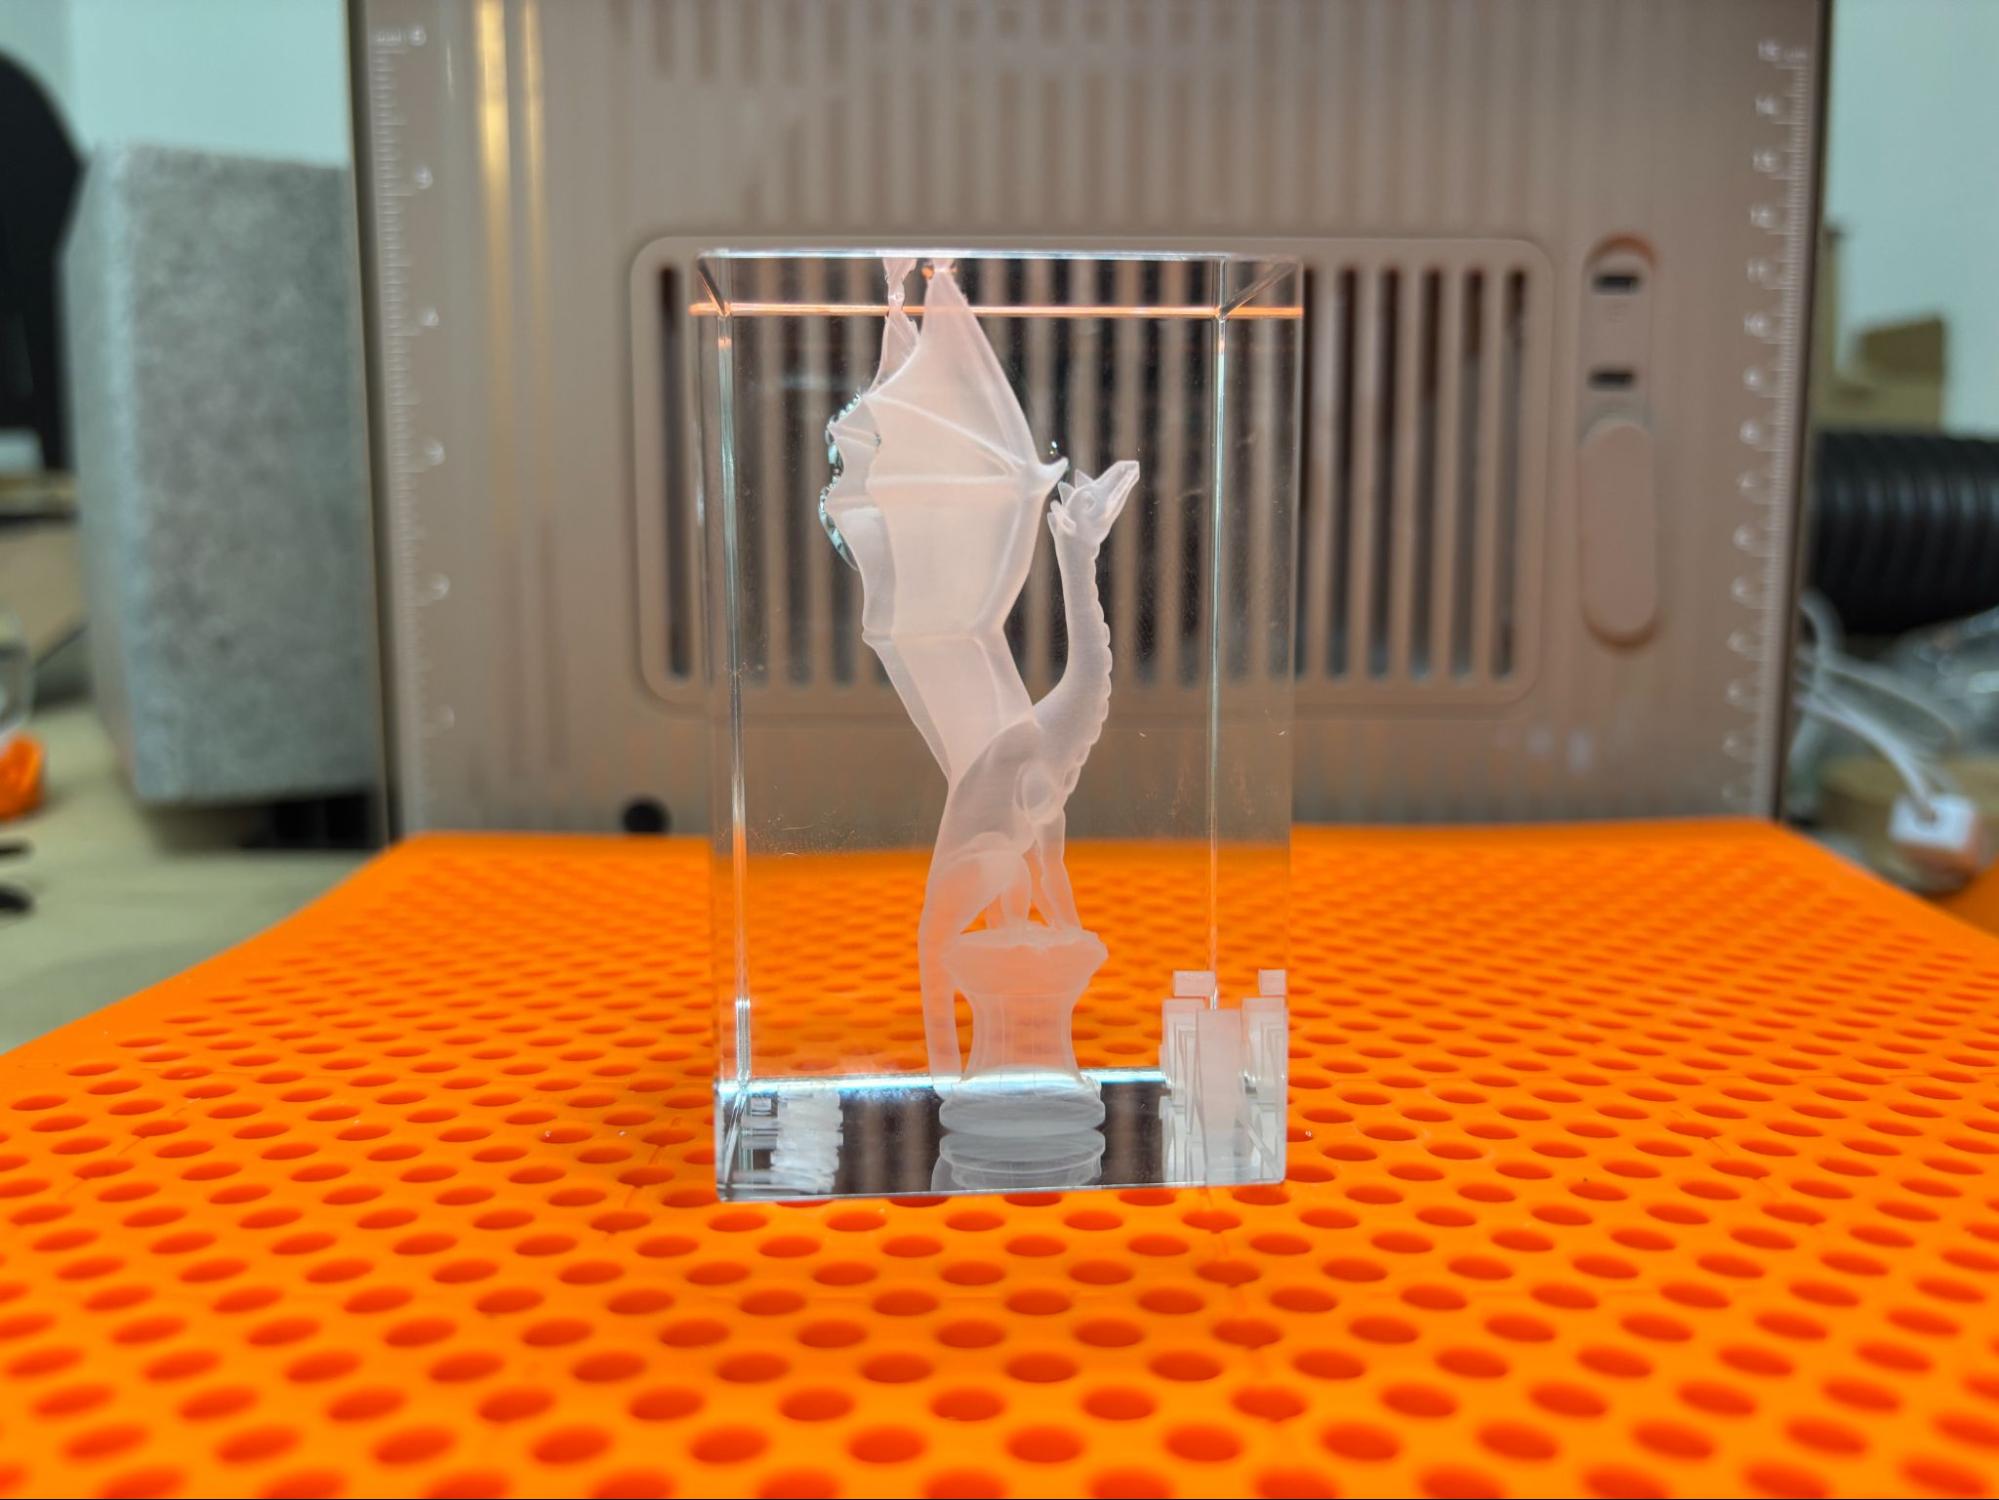
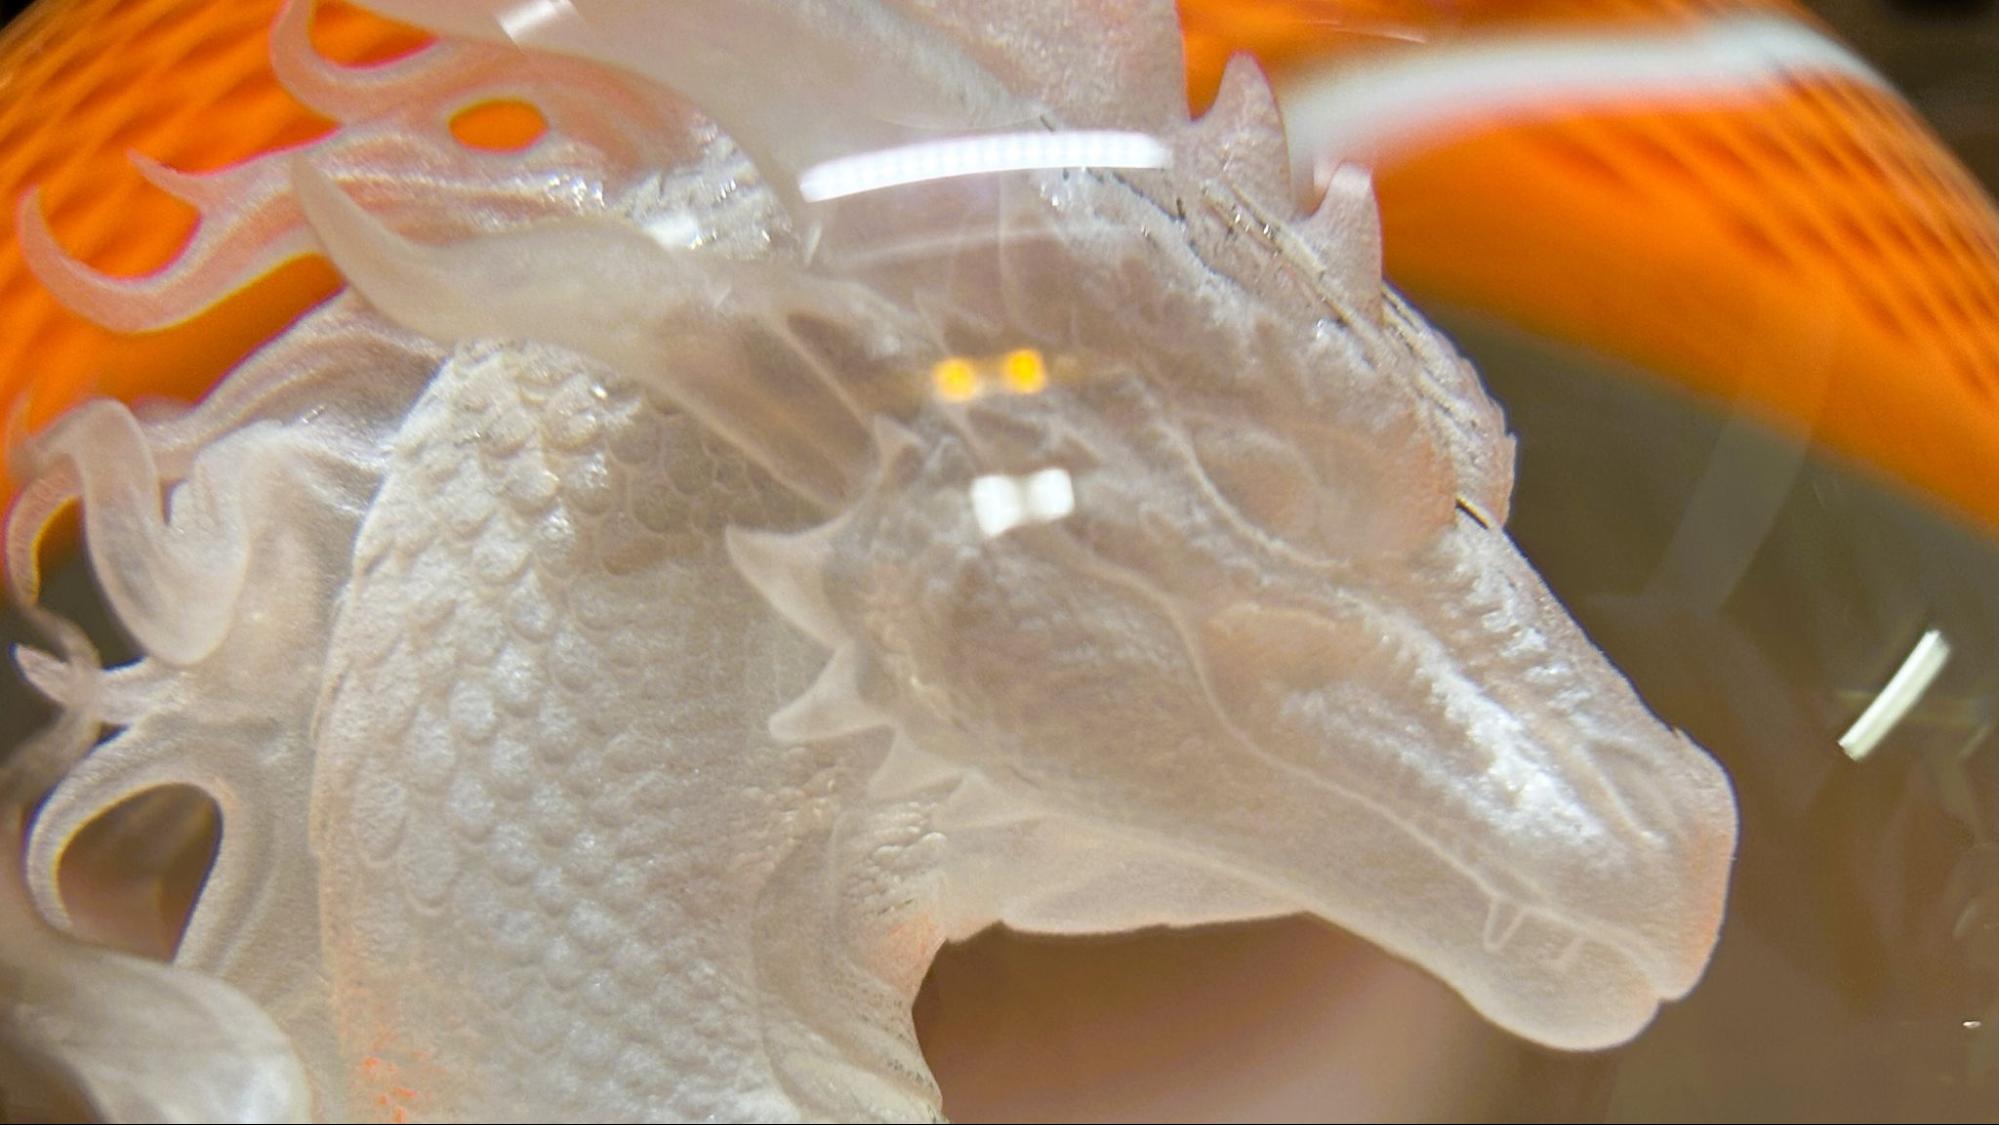
Because inner engraving is three-dimensional, you can use “normal” 3D printing STL files. For the first inner engraving, I chose a classic: Aria the Dragon by Loubie3D.

xTool F2 Ultra UV

(Image credit: Tom's Hardware)

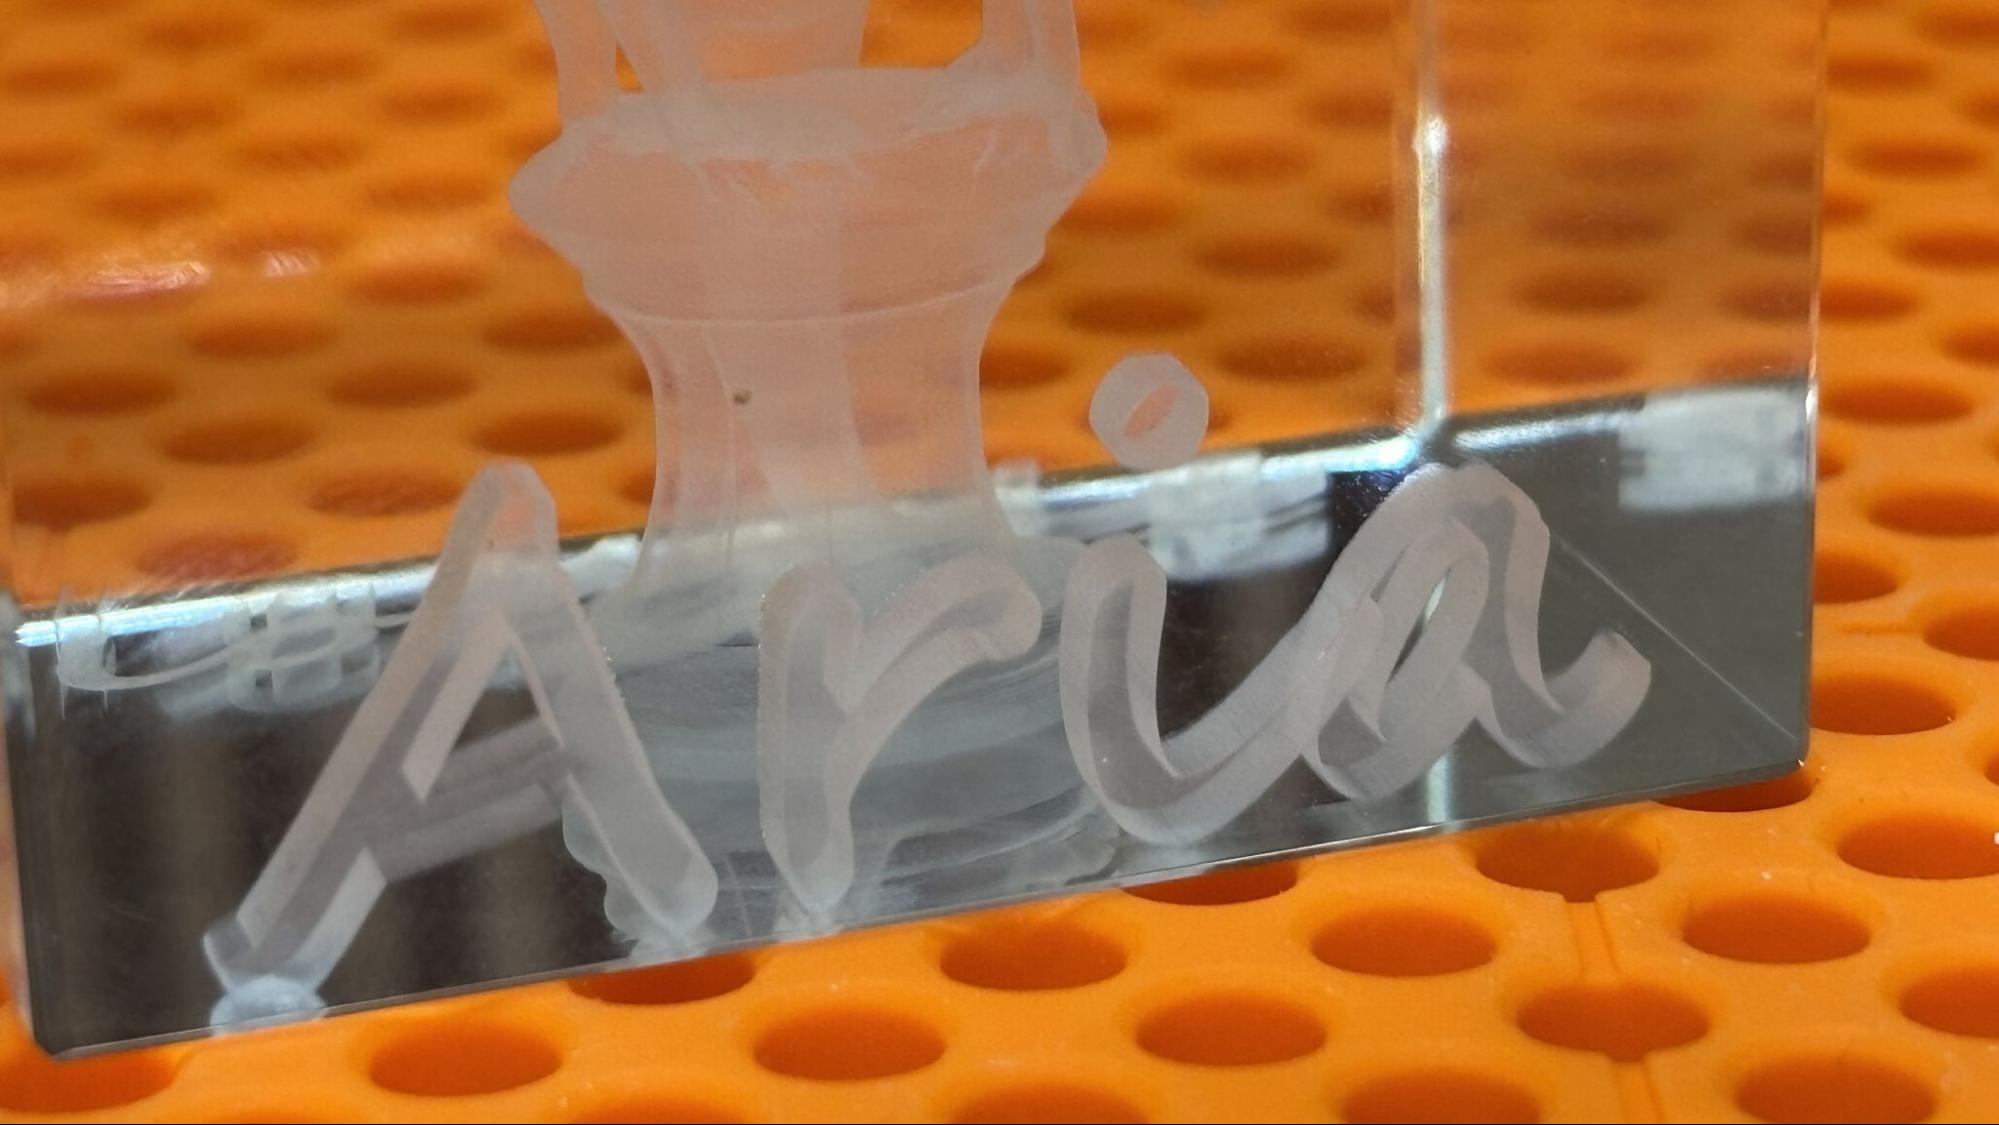
I also added text to the bottom of the engraving. This was when I realized that the Z-axis needed to be calibrated for inner engraving, so now I have Loubie3D etched on the surface of the riser permanently. After calibrating the Z-axis, the inner engraving work area must be calibrated too.

The inner engraving looks like magic and takes quite a bit of time to process. Using the dotting engraving method at 70% power and 200 dot duration, with a .01 layer height and a .02 point spacing, the engraving took 5 hours and 7 minutes. The result, other than the riser being engraved too, was amazing.

xTool F2 Ultra UV

(Image credit: Tom's Hardware)

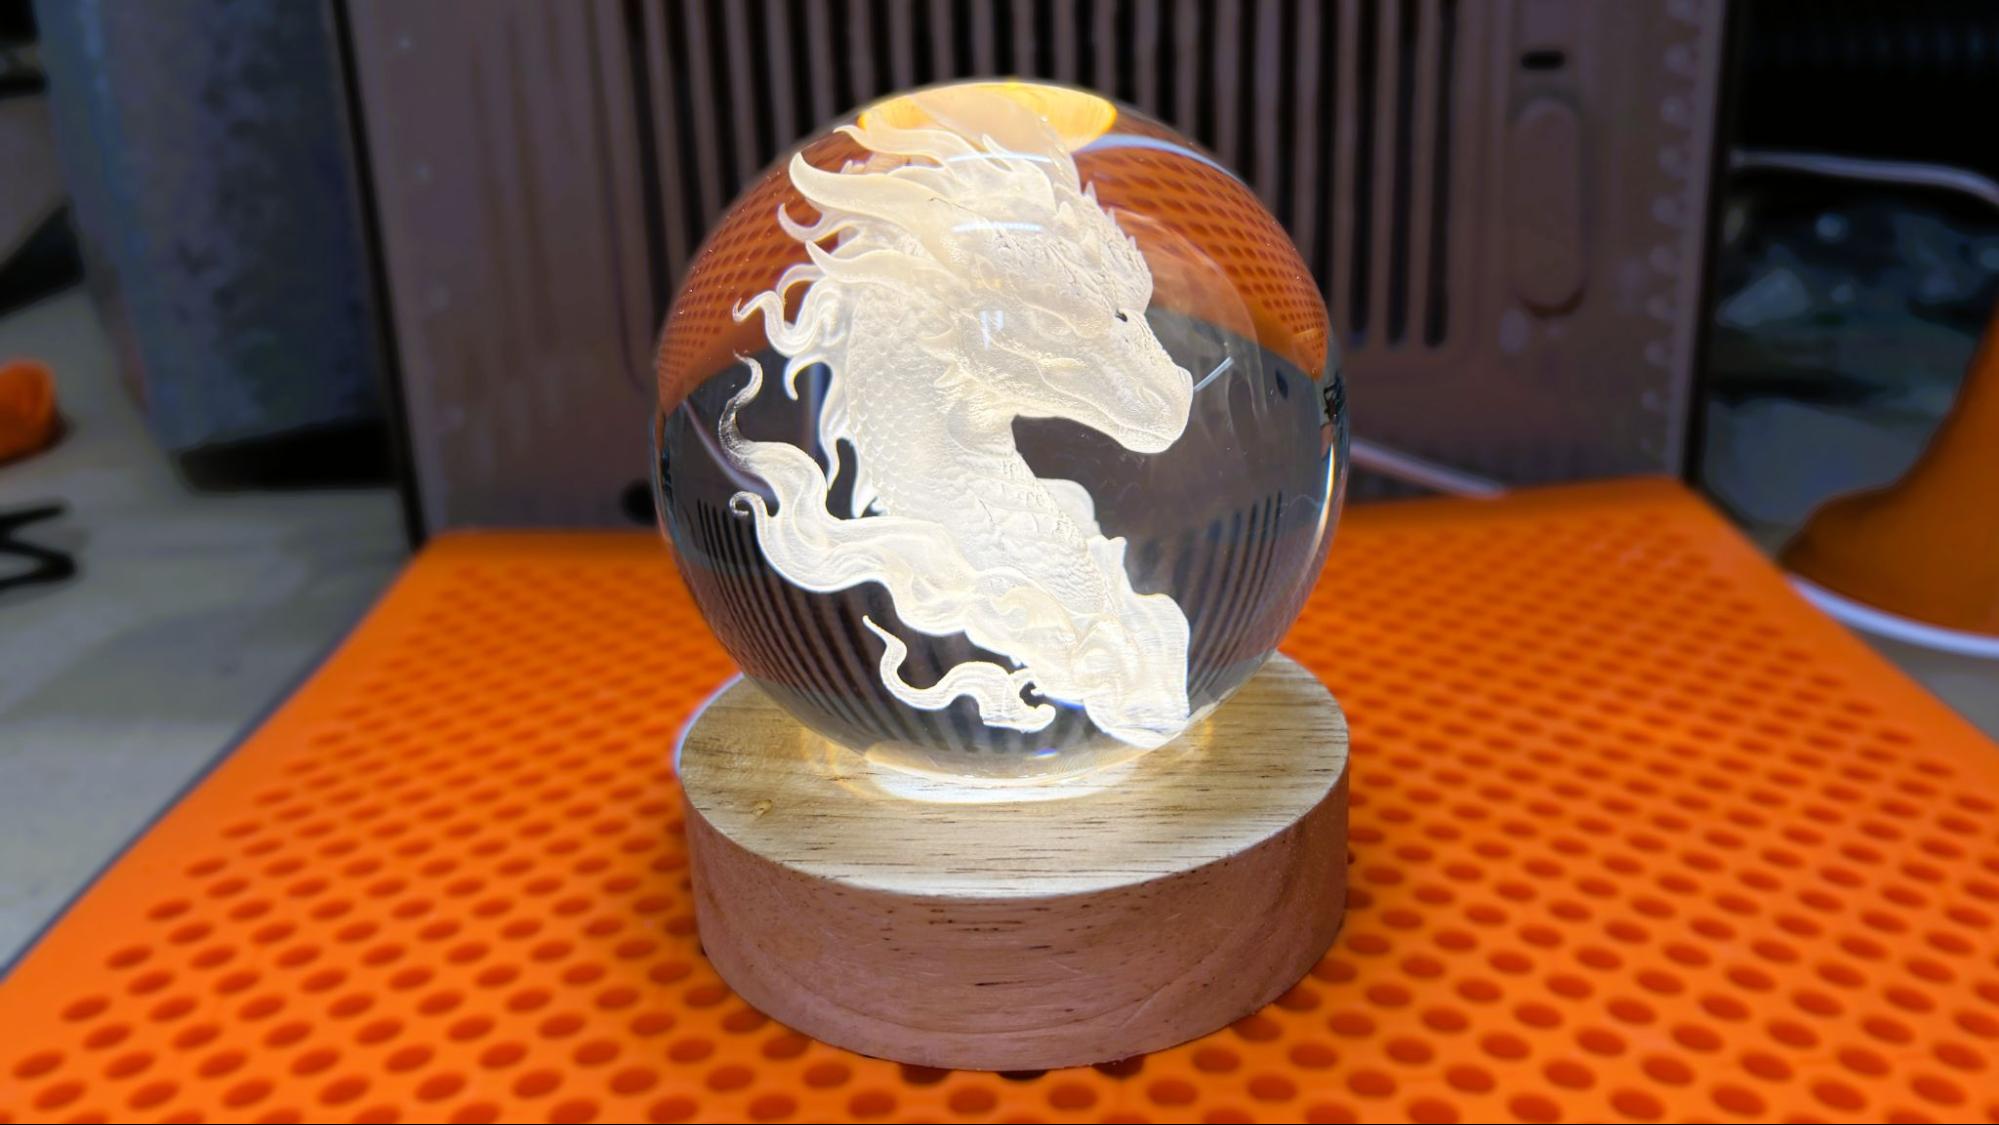
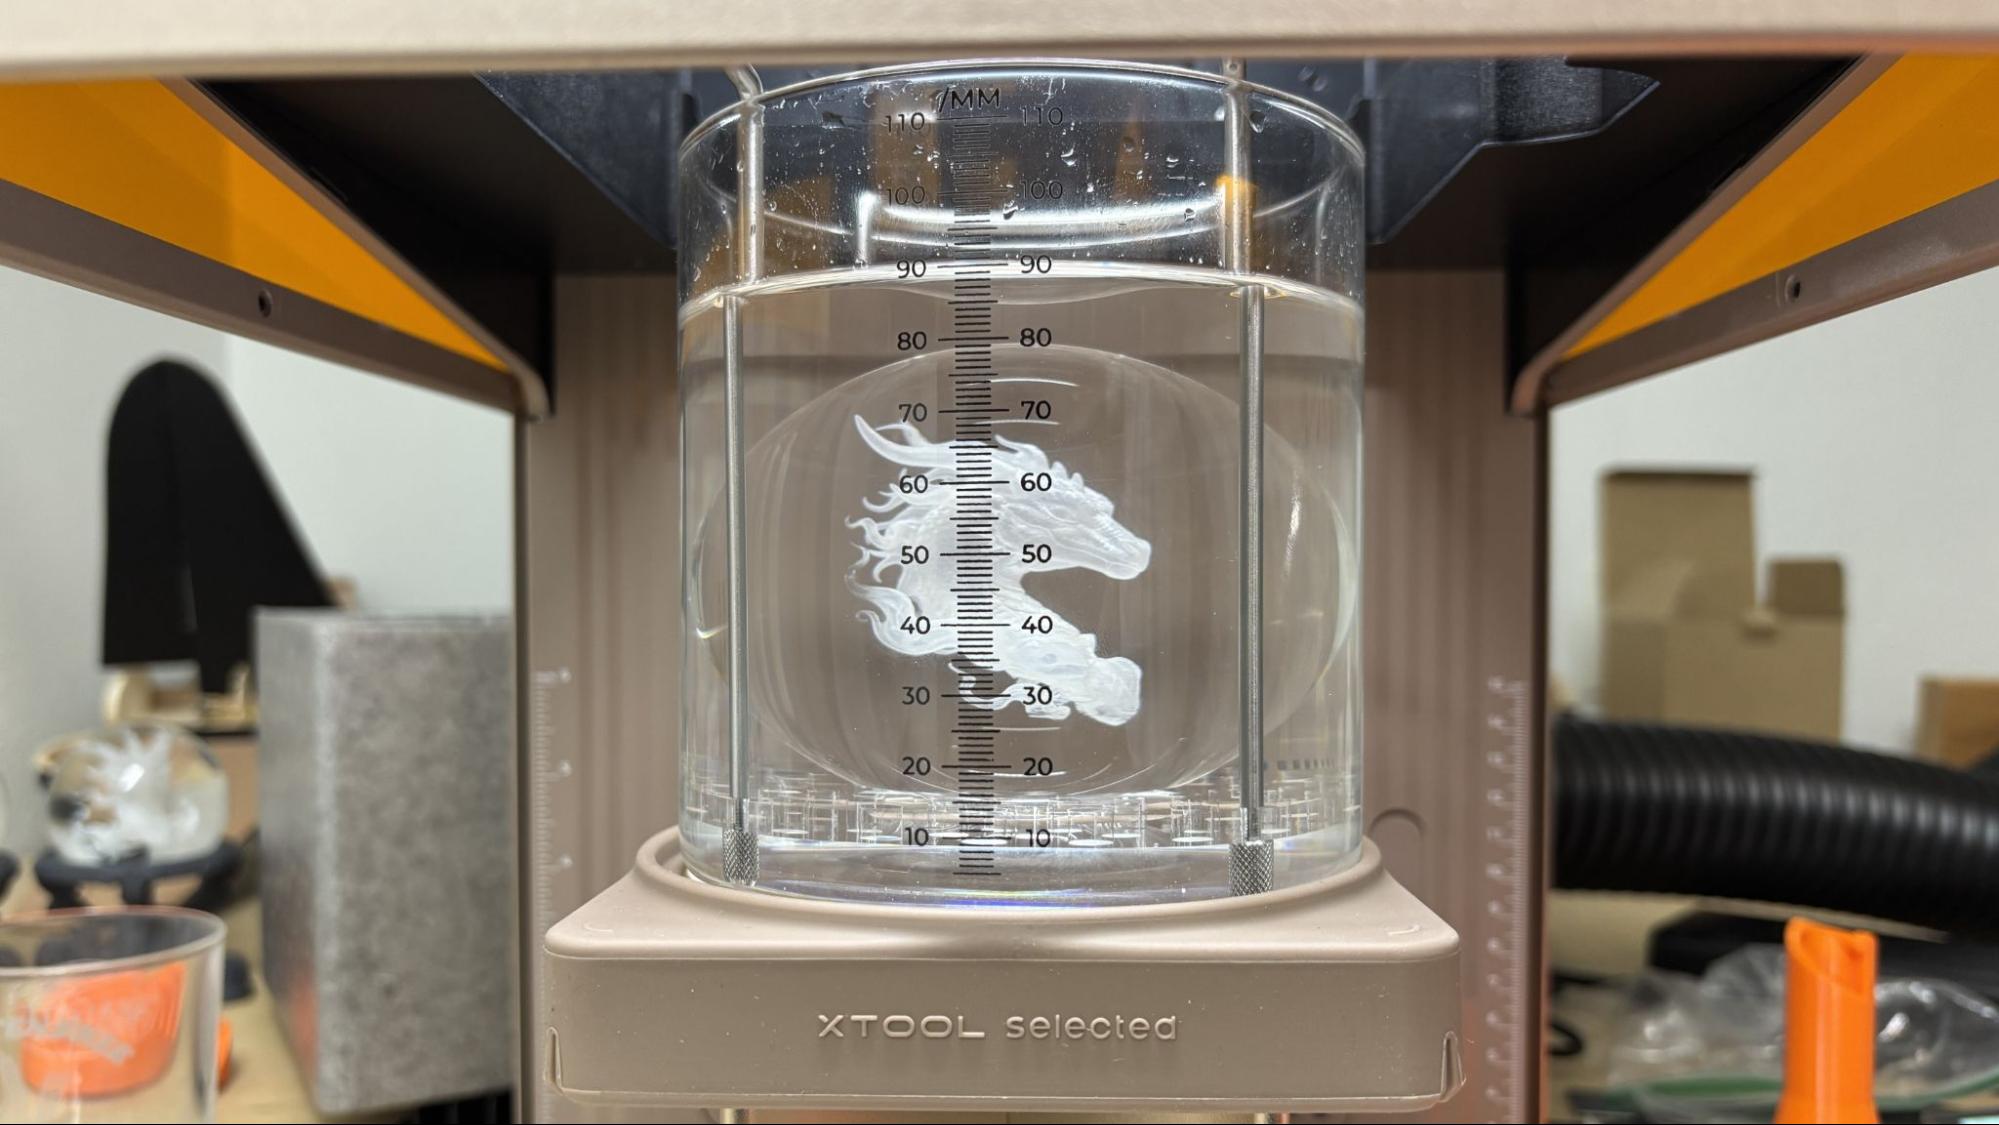
Probably the most impressive thing I’ve ever engraved is this crystal ball. Engraving a crystal ball is more of a production than the other inner engraving, since it requires the ball to be immersed in liquid that is approximately the same refractive index as the crystal. We used mineral oil and initially attempted to use a Pyrex measuring cup to hold everything in place.

xTool F2 Ultra UV

(Image credit: Tom's Hardware)

Based on that experience, I highly recommend the xTool kit, which includes the silicone pad to keep things centered and a beaker with easily read measuring lines. It was nearly impossible to center the engraving without this. Even with the xTool kit, it requires a steady hand to avoid slopping oil around.

xTool F2 Ultra UV

(Image credit: Tom's Hardware)

The engraving took 5 hours and 7 minutes at 40% power and a dot duration of 180 with a .04 layer height and a .02 point spacing. The resulting detail is just phenomenal.

Bottom Line

xTool F2 Ultra UV

(Image credit: Tom's Hardware)

I feel like I’ve just scratched the surface of what the xTool F2 Ultra UV can do. While it cuts and engraves wood as well as most of the lasers I’ve tested, its ability to engrave glass and plastic is unusual. The inner engraving is just magic, bordering on witchcraft. It does not take a rocket scientist to see the sales potential of items easily crafted with this machine.

Starting at $4,299, the F2 Ultra is a bit of an investment. But it earns its keep by delivering outstanding crystal engravings that no other laser can deliver.

If you’re not ready to make such a sizable investment, the portable xTool F1 laser is still available for $819 and is great for taking to festivals for personalizing merch on the go. If you want to laser large things safely tucked inside an enclosure – including clear acrylic – check out the xTool P2 CO2 laser, which is on sale for $3,399.

✇Tomshardware

Elegoo Centauri 2 Combo review: A budget-friendly printer made even more budget-friendly

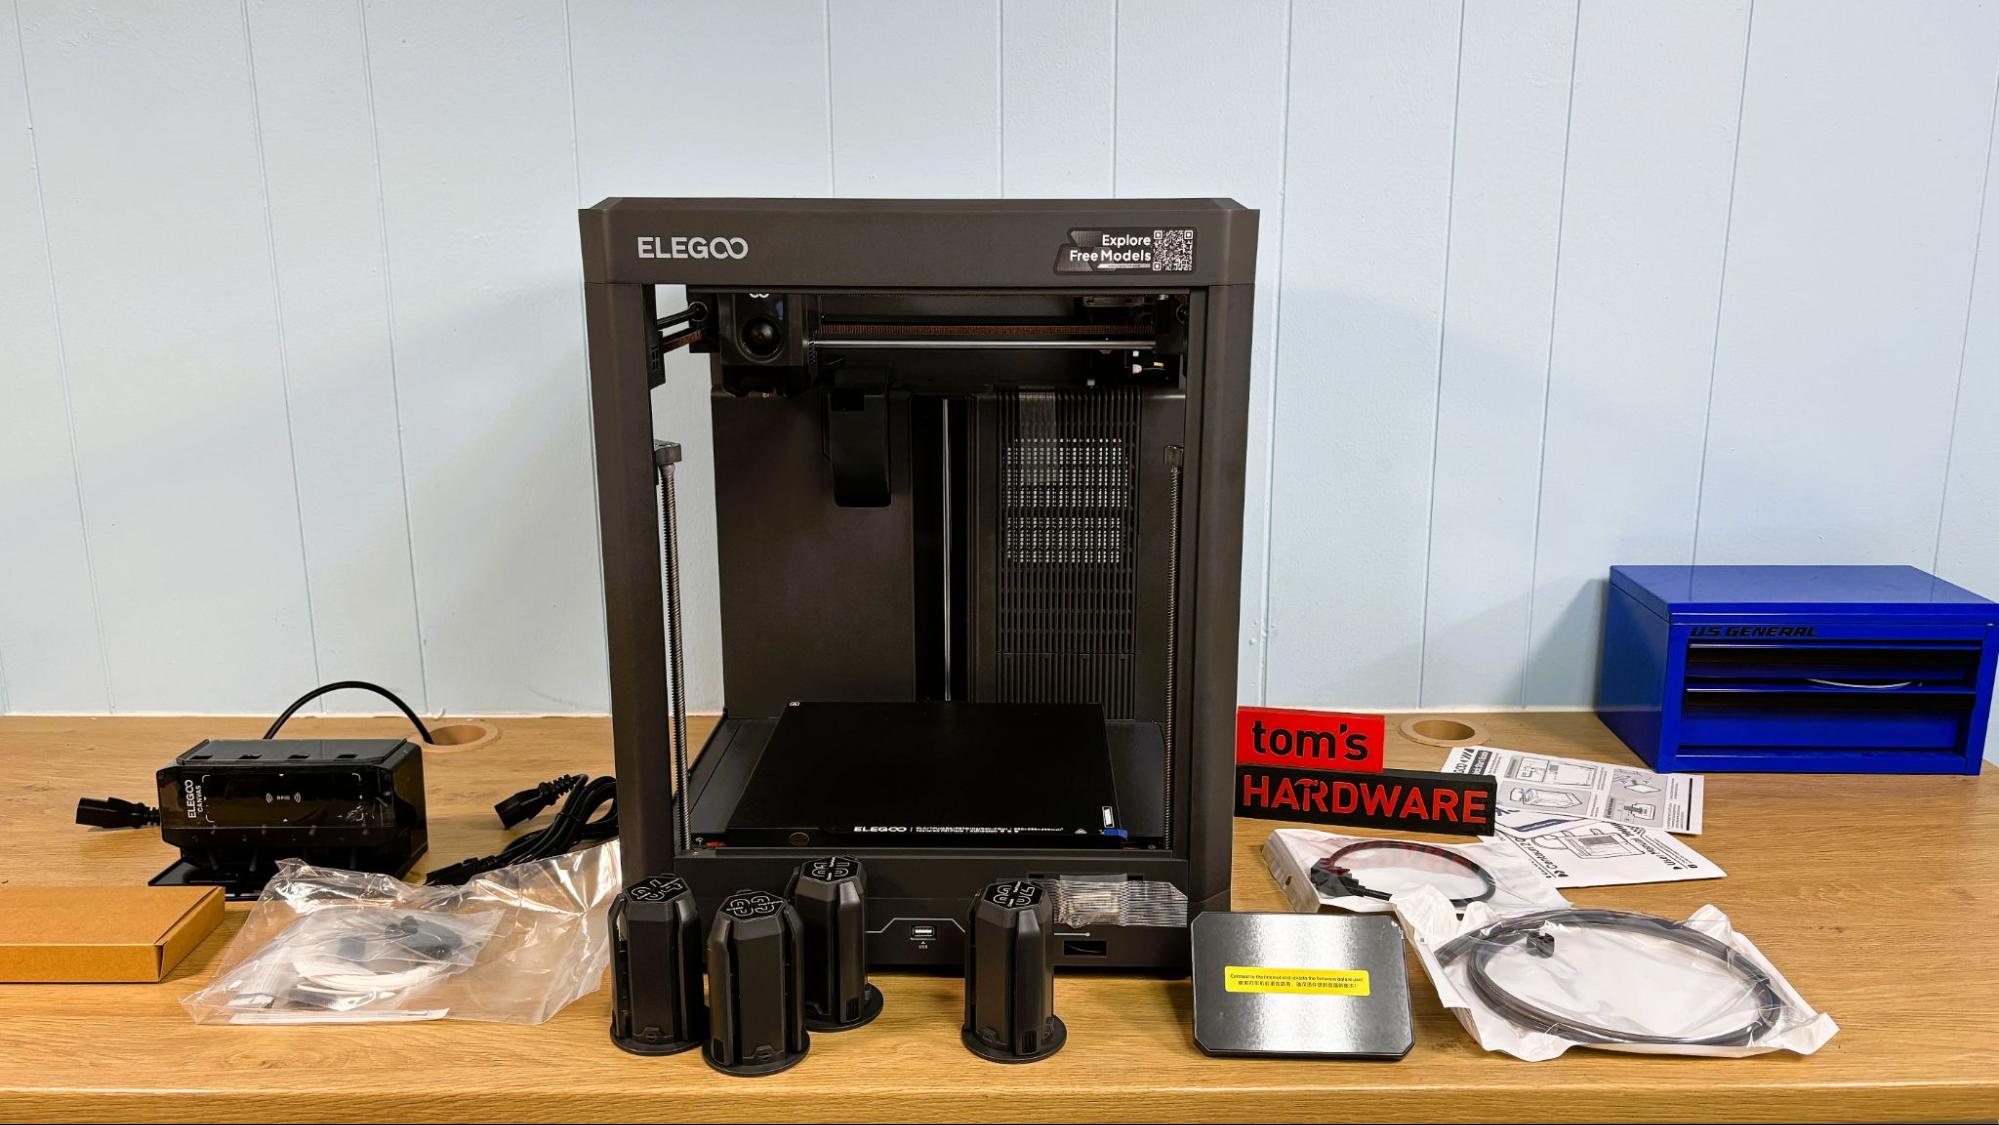
The Elegoo Centauri 2 Combo is a stripped-down version of the Centauri Carbon 2, but we’re left wondering if losing the camera, lights, enclosure, and ventilation is worth the $60 you’re saving. This printer is so affordable, one wonders if Elegoo is making any profit at all.

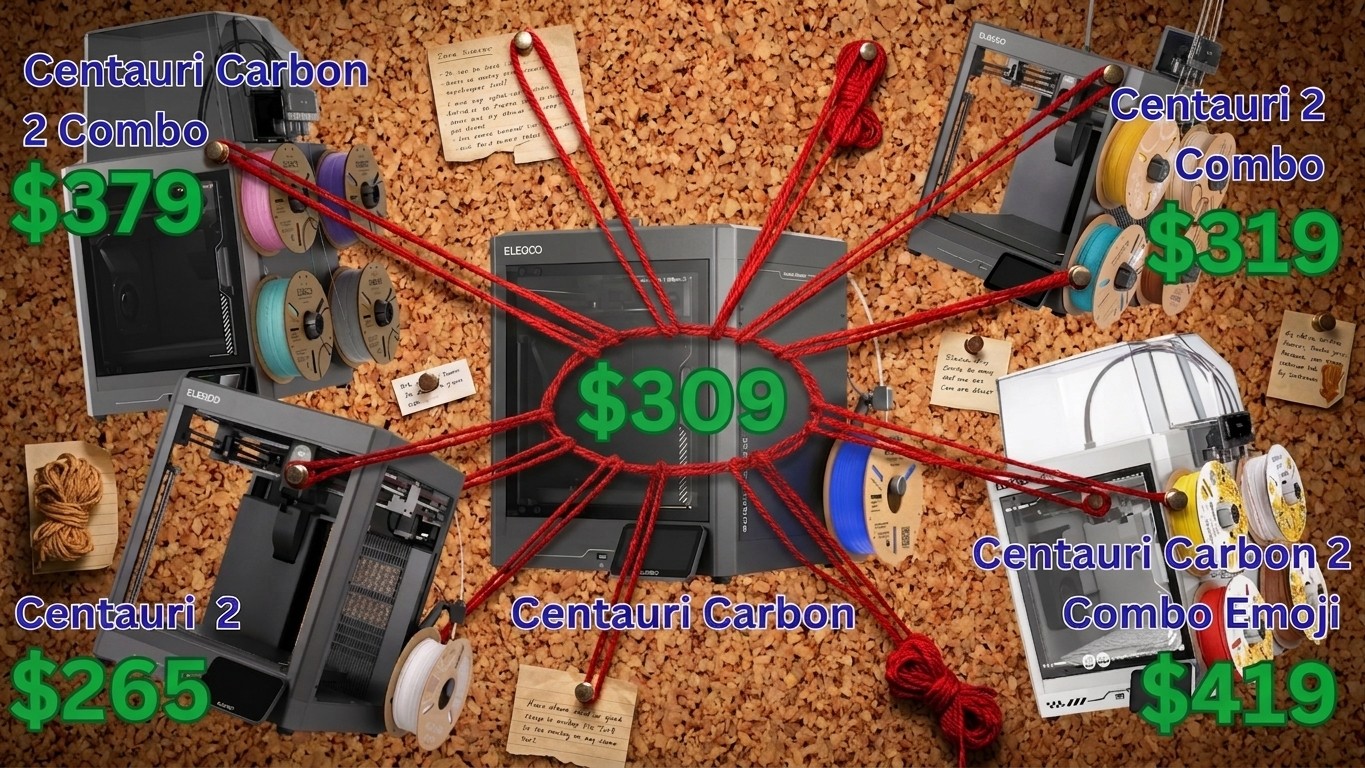
The math and naming convention are downright puzzling. The Centauri 2 Combo is currently on sale for $319, while the single-color Centauri Carbon is $309, the Centauri Carbon 2 is $329, and the Centauri Carbon 2 Combo is $379. Forgive us if we need an evidence board and spool of red string to make sense of all this.

Elegoo Centauri 2 Combo

(Image credit: Tom's Hardware)

You’re still getting a lot of printer for your money. It’s a fast Core XY machine with the rock-solid CANVAS four-color system and a 256 mm cubed build volume. The toolhead can get to a toasty 350°C with 110°C on the bed, which is great for a bunch of technical filaments that you ultimately can use without an enclosure, but it does come in a pinch for printing less finicky high-temperature filaments like PET-GF and PCTG.

The big question is, is it worth the savings? A lot of beginners only use PLA, and see a four-color machine as a toy printing factory. But you might regret not getting that enclosure when you start getting into more practical prints and could really use the strength of an ASA print.

Ranking this printer was difficult, because yes, the print quality is great and it’s easy to use. But with so many other, even better, Centauri options available, this one just falls short of making our list of Best 3D printers.

Specifications: Elegoo Centauri 2 Combo

Build Volume

256 x 256 x 256 mm (10.07x10.07x10.07 inches)

Material

PLA/PETG/TPU (up to 350°C)

Extruder Type

Direct drive

Nozzle

.4mm hardened steel

Build Platform

PEI-coated steel flex plate, both smooth and textured, heated

Bed Leveling

Automatic, Including Z offset

Filament Runout Sensor

Yes

Connectivity

LAN, WiFi, USB Flash Drive

Interface

5 inch Color touchscreen

Machine Footprint

500 x 480 x 500 mm (19.68 x 18.89 x 19.68 inches)

Machine Weight

15 kg (33.06 lbs)

Elegoo Centauri 2 Combo: Included in the Box

Elegoo Centauri 2 Combo

(Image credit: Tom's Hardware)

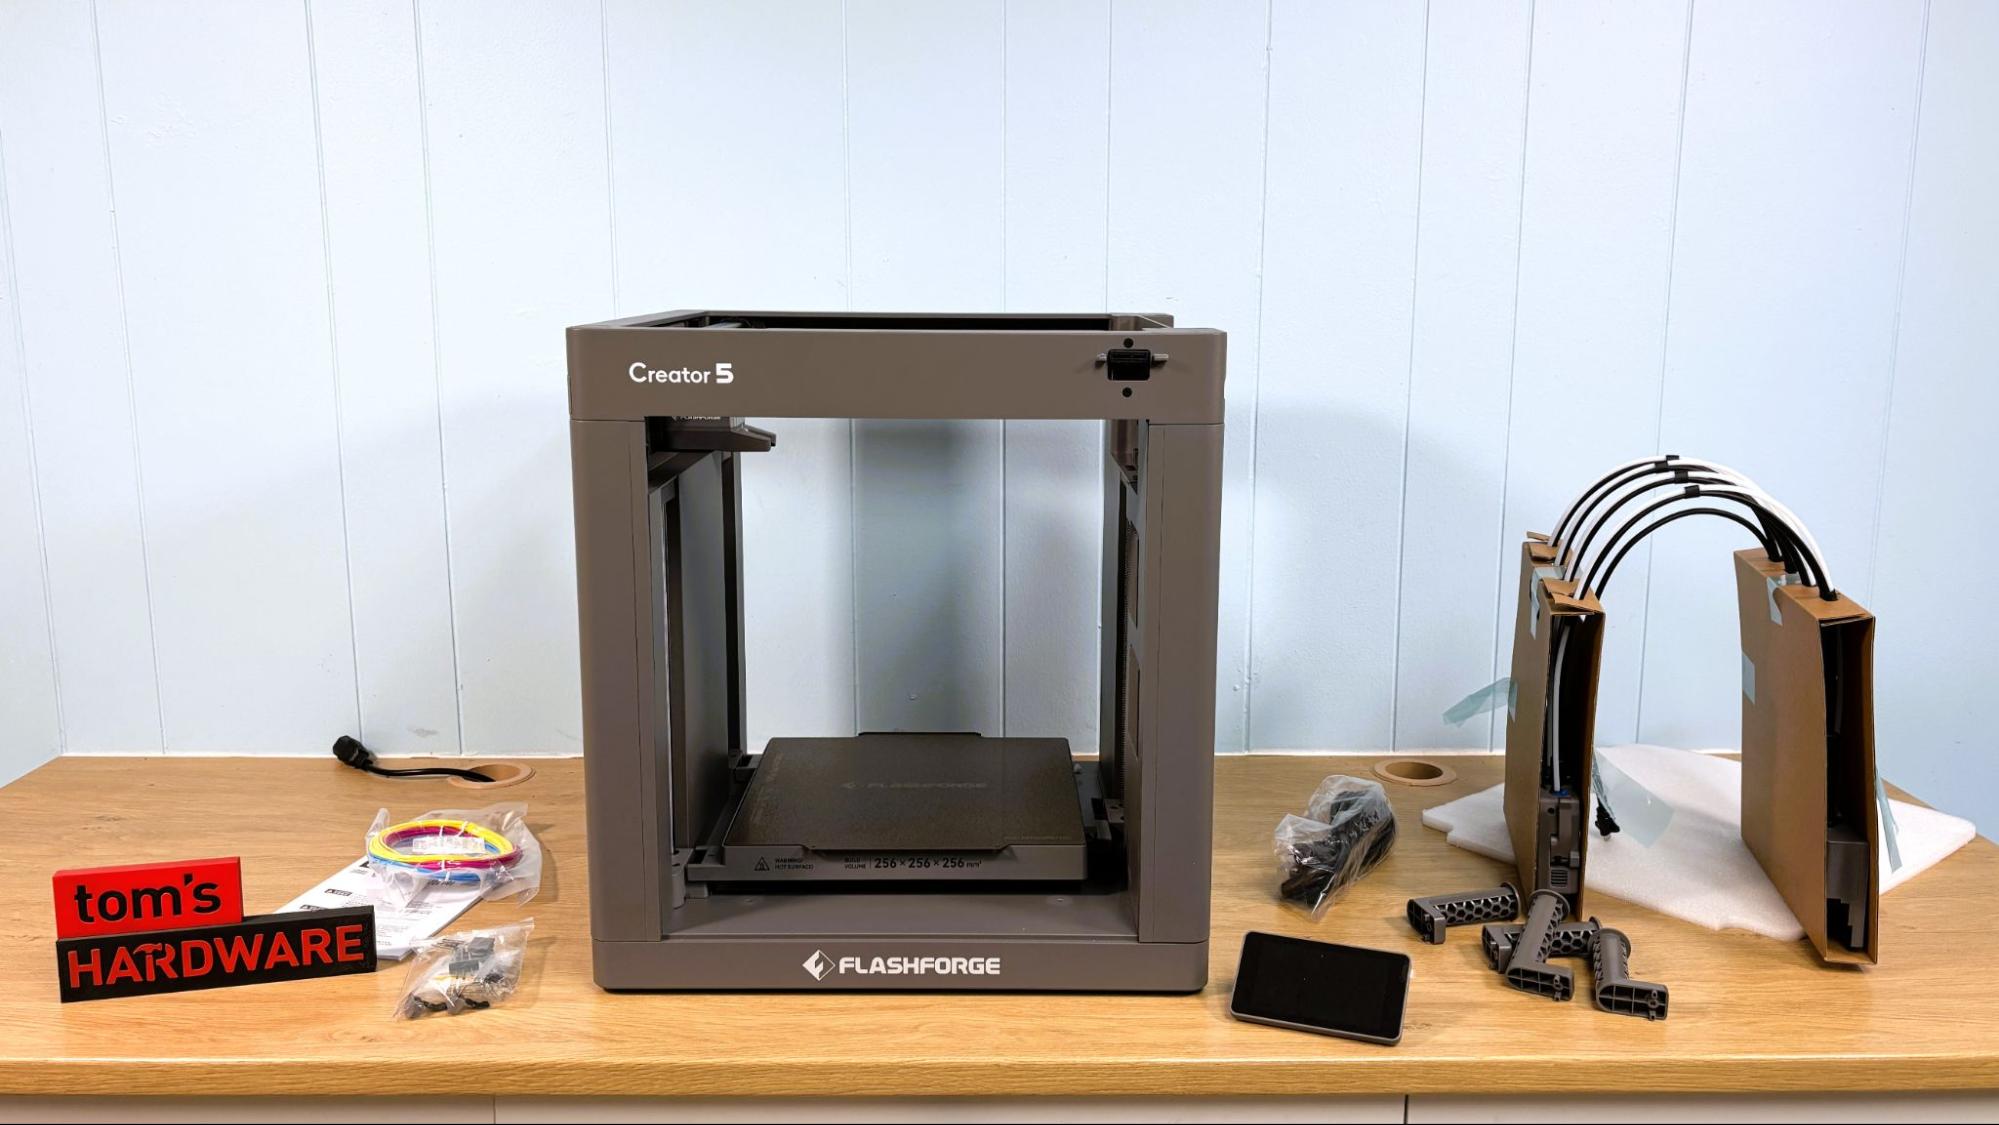
The Elegoo Centauri 2 Combo comes nicely packaged with almost everything you need to get started. There is a bag of tools, hardware, and a coil of white PLA. Noticeably absent is a nozzle wrench. There is a paper copy of the manual along with a USB stick containing a PDF of the manual and a copy of ElegooSlicer. The spool holders, touchscreen, and CANVAS system are also packed inside the printer.

Elegoo sent spools of black, red, yellow, and white PLA equipped with RFID tags to test for this review (but you'll need to buy those separately).

Design of the Elegoo Centauri 2 Combo

Elegoo Centauri 2 Combo

(Image credit: Tom's Hardware)

The Elegoo Centauri 2 Combo is an open-frame Core XY printer with both the X and Y axes running on linear rods. The Z axis runs on three linear rods and is driven by three lead screws, belted at the bottom, driven by a single stepper motor.

Elegoo Centauri 2 Combo

(Image credit: Tom's Hardware)

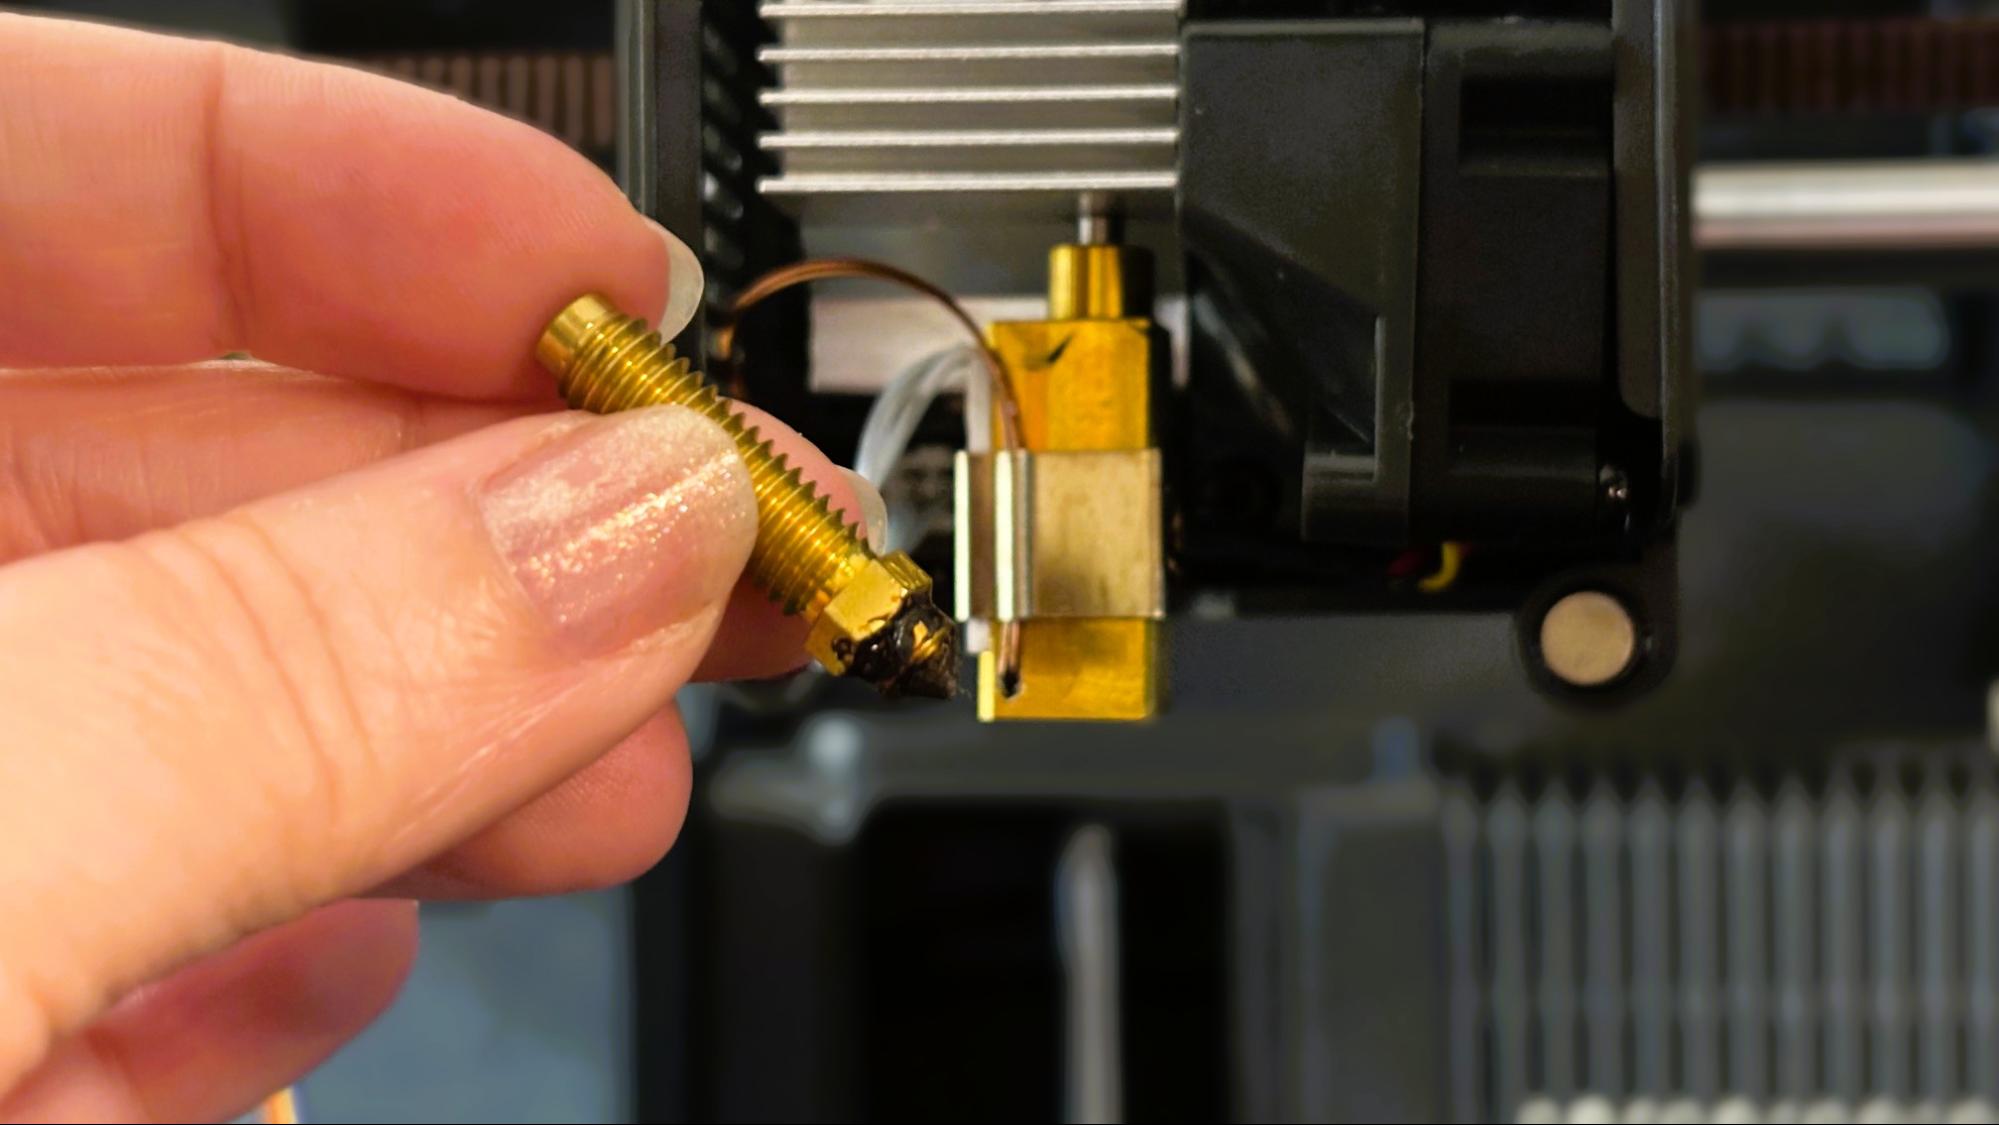
The Centauri 2 Combo uses the same brass high-flow nozzle with a hardened steel insert as the rest of the Centauri line, and the hot end can get up to 350°C.

Since the printer is open frame, the single-part cooling fan in the toolhead cover is more than sufficient.

Elegoo Centauri 2 Combo

(Image credit: Tom's Hardware)

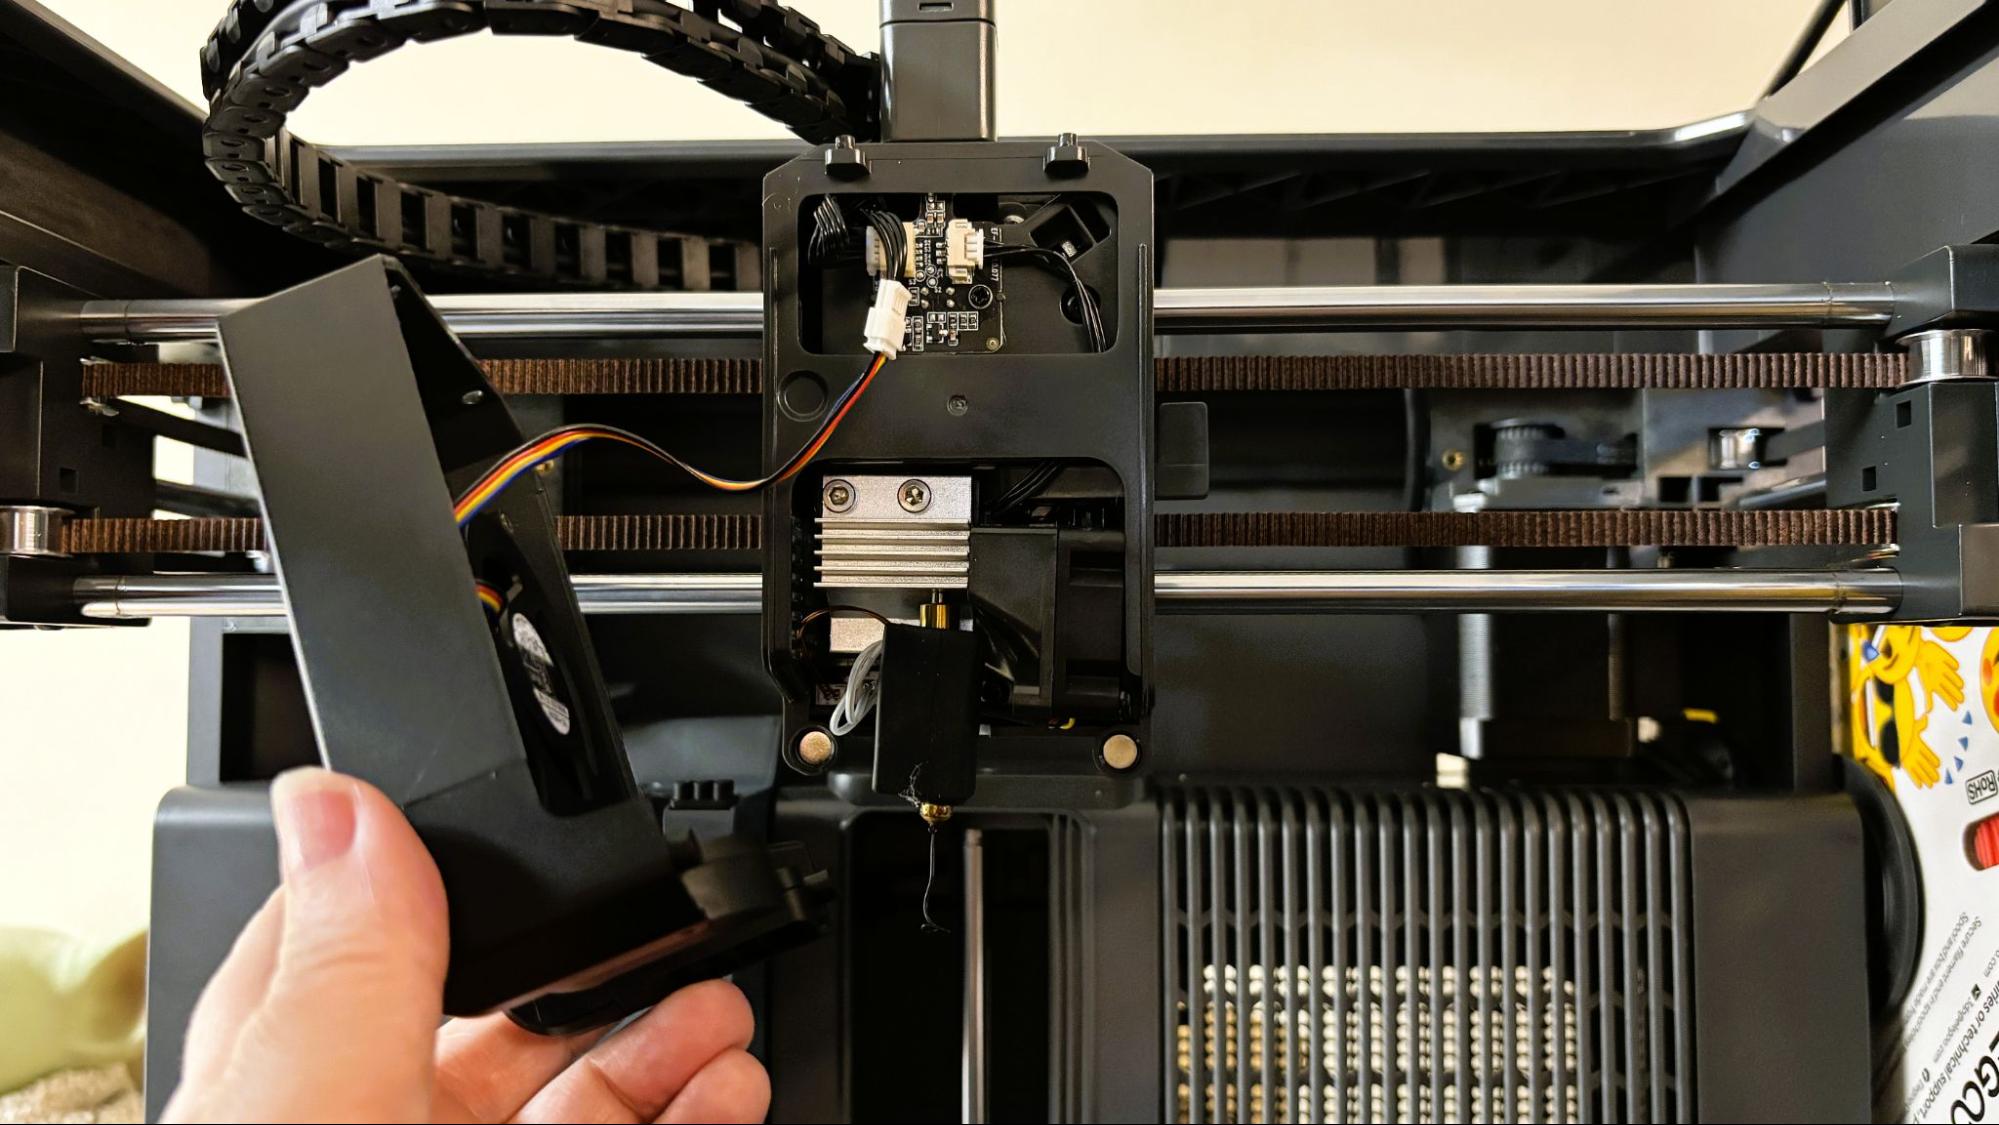
One of the only frustrating things about the Centauri 2 Combo is the filament hub attached to the top of the toolhead. The collets holding the Bowden tubes into the top are almost impossible to compress enough to remove the tubes. Elegoo has a tool that can be printed to make this easier, but it does not work well. Even if you can remove the Bowden tubes, every clog I’ve had on any of the Centauri has required the removal of the hub. On the Centauri Carbon 2, I was able to do this without removing the toolhead wiring, but not on the Centauri 2 Combo.

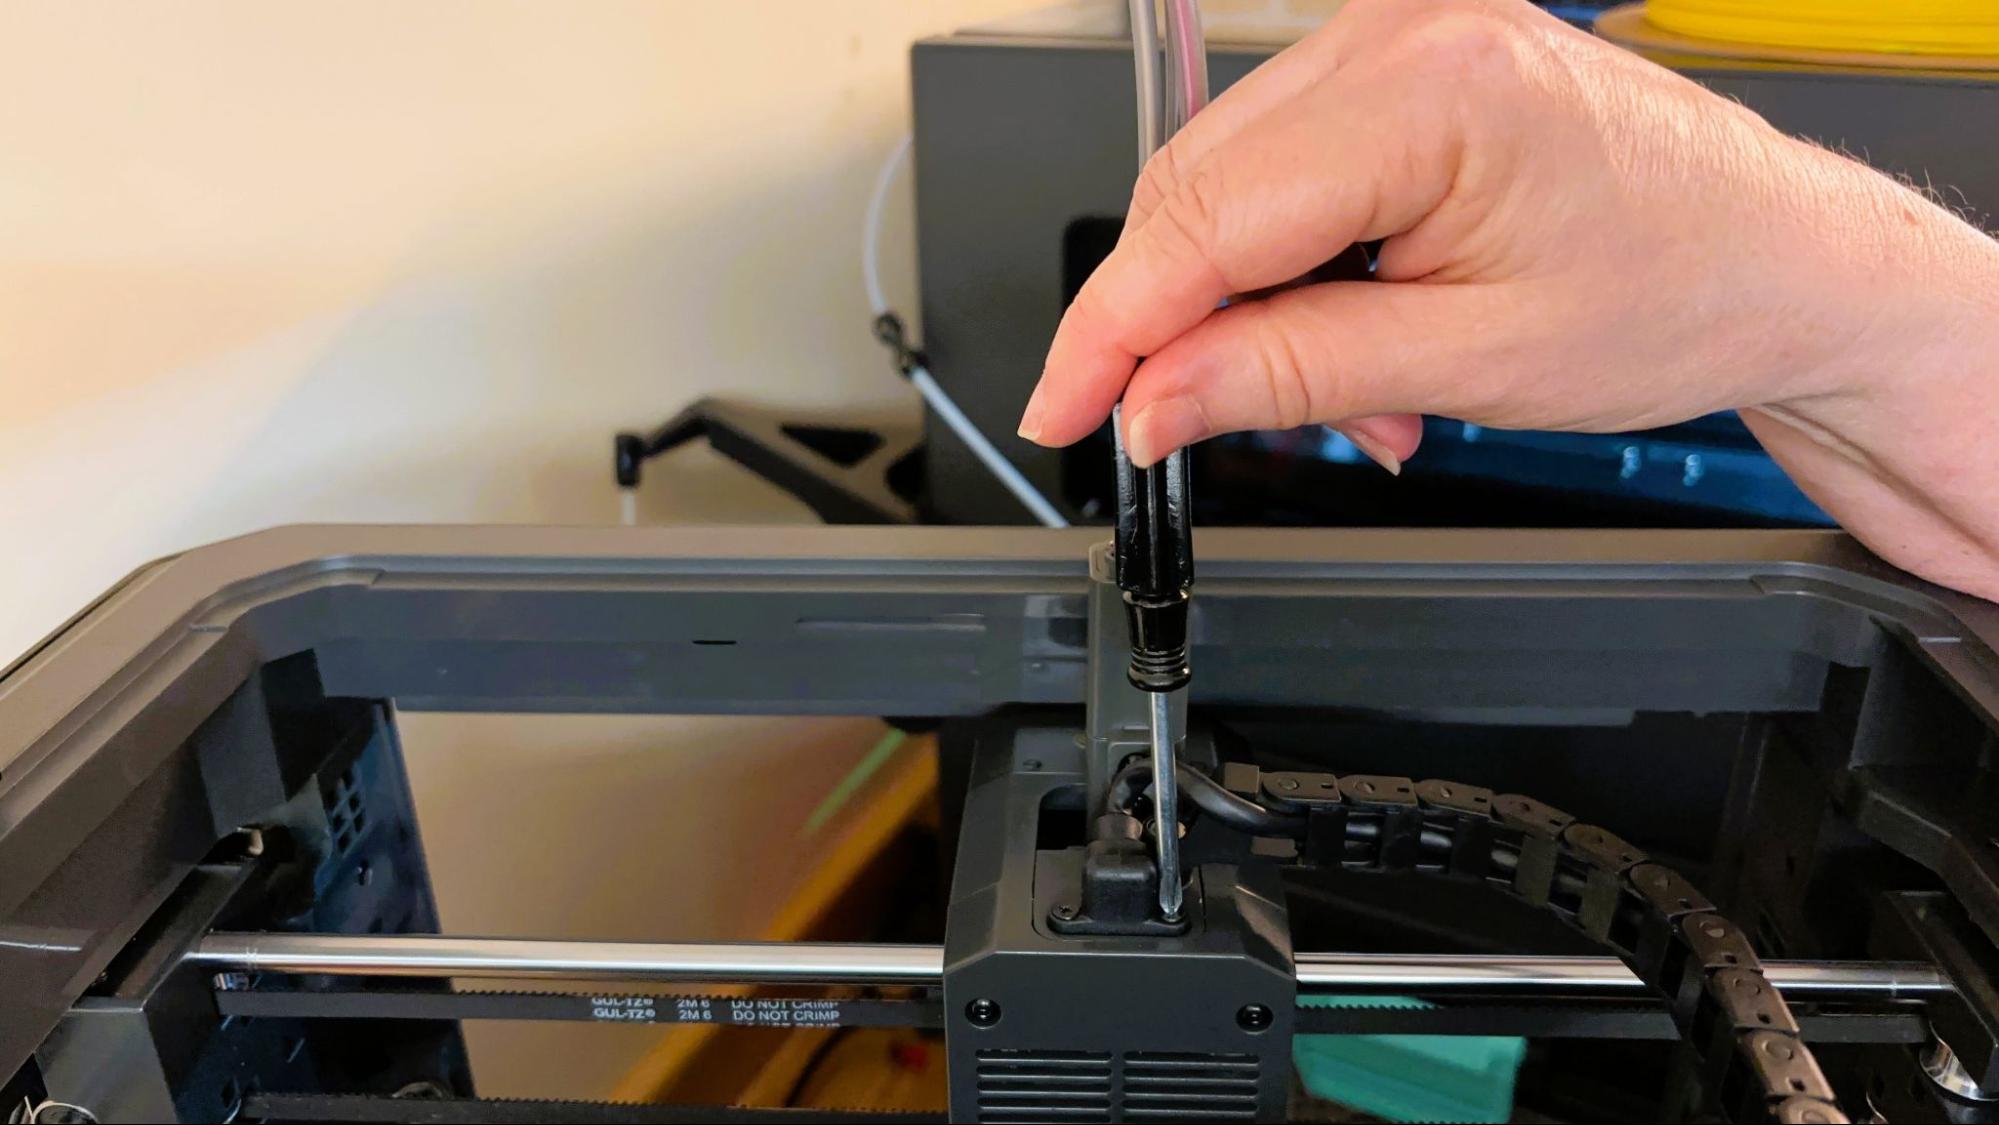
The toolhead wiring is a USB-C cable that is held down, inexplicably, with two Phillips-head screws. The hub is held on with two screws threaded directly into the plastic of the hub. Fortunately, the Centauri 2 Combo does not clog often, and I’ve yet to strip out the holes in the hub.

Elegoo suggests printing a one-color hub for use with TPU, and includes a press-fit collet for this purpose. However, I had no problem feeding 95A TPU directly from the CANVAS into the four-port hub. I tried using a softer TPU, and it also fed into the hub, but it ended up clogging the extruder.

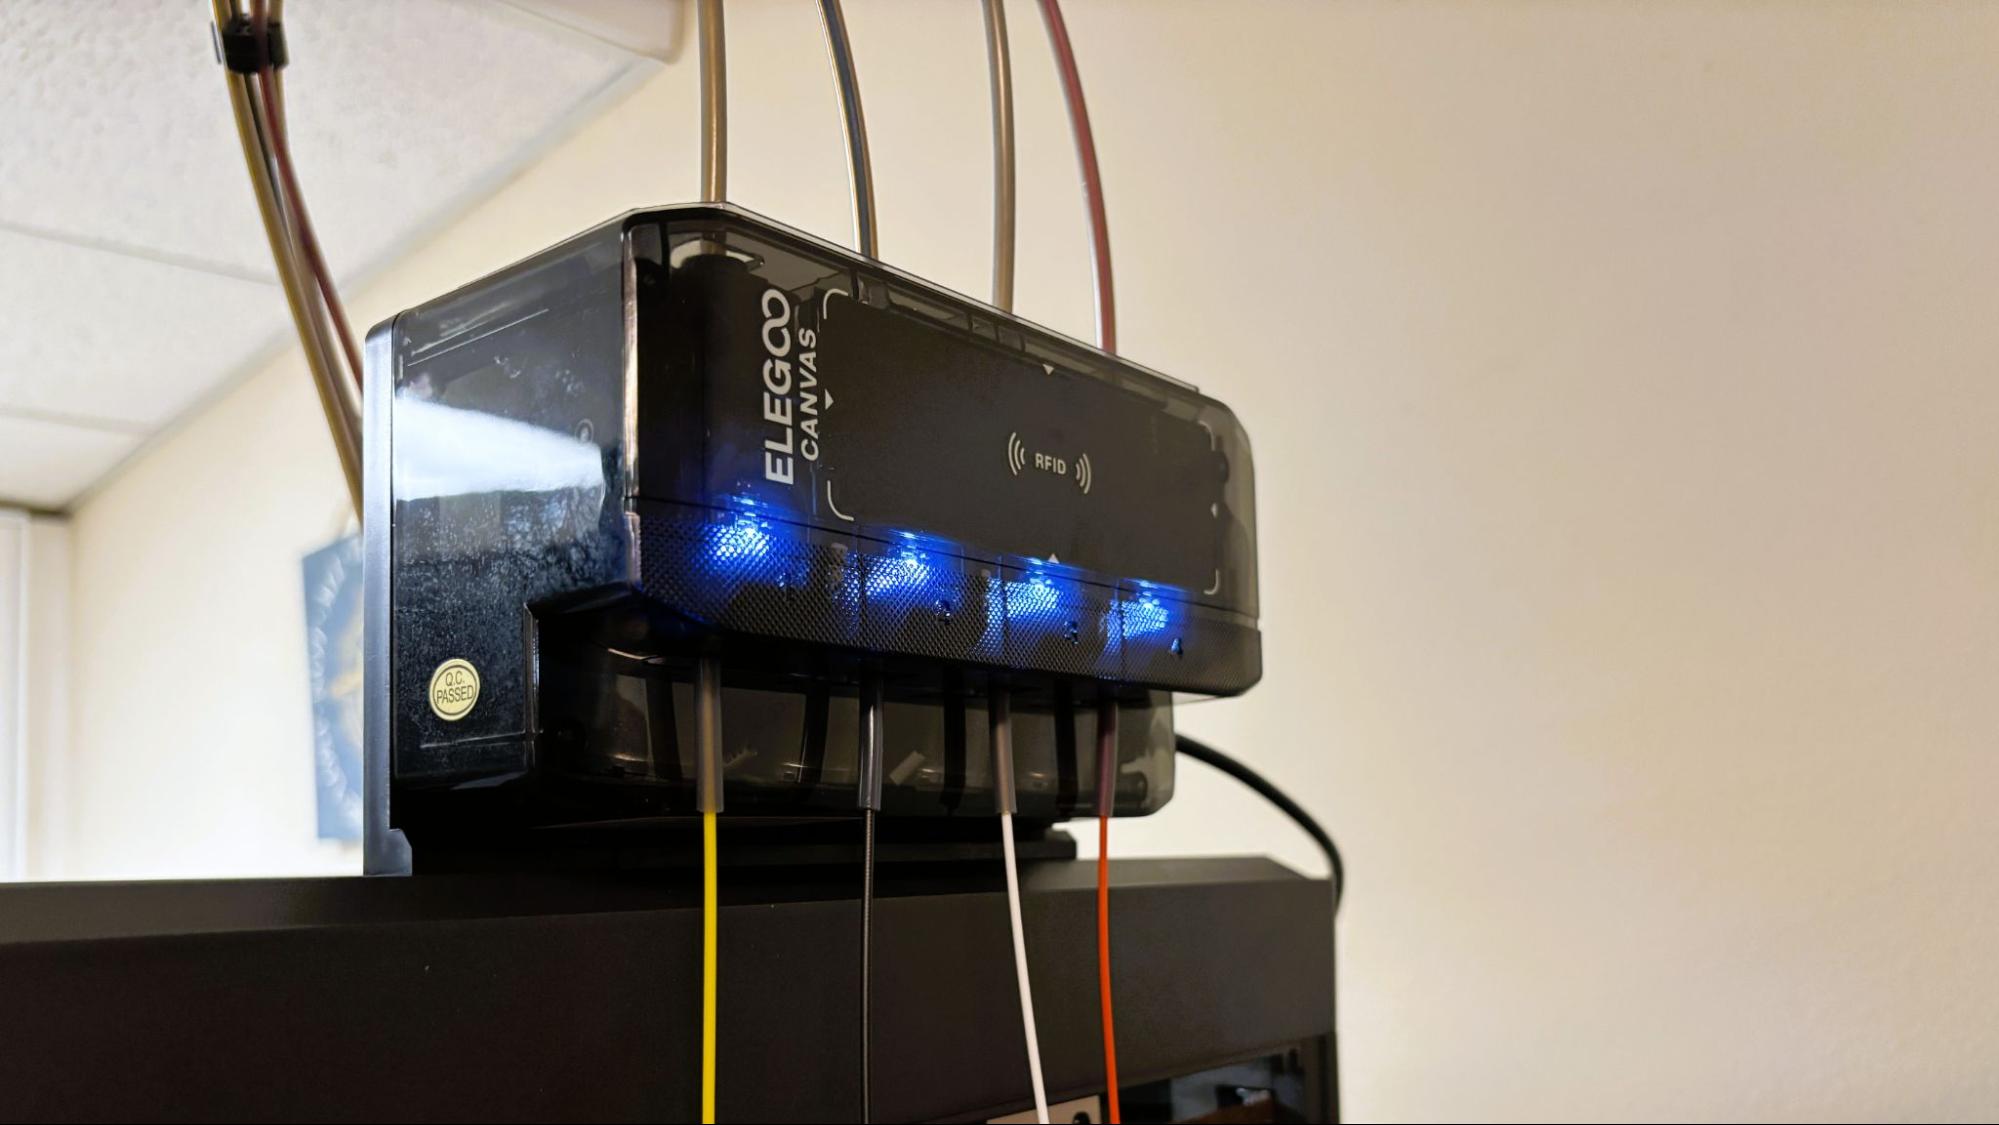
The CANVAS system for four-color printing is pretty much bulletproof. The only quirk in the system is the way the spools are numbered. It makes sense for the way the filaments enter the CANVAS, but it’s easy to confuse spools three and four when assigning colors on the printer.

Elegoo Centauri 2 Combo

(Image credit: Tom's Hardware)

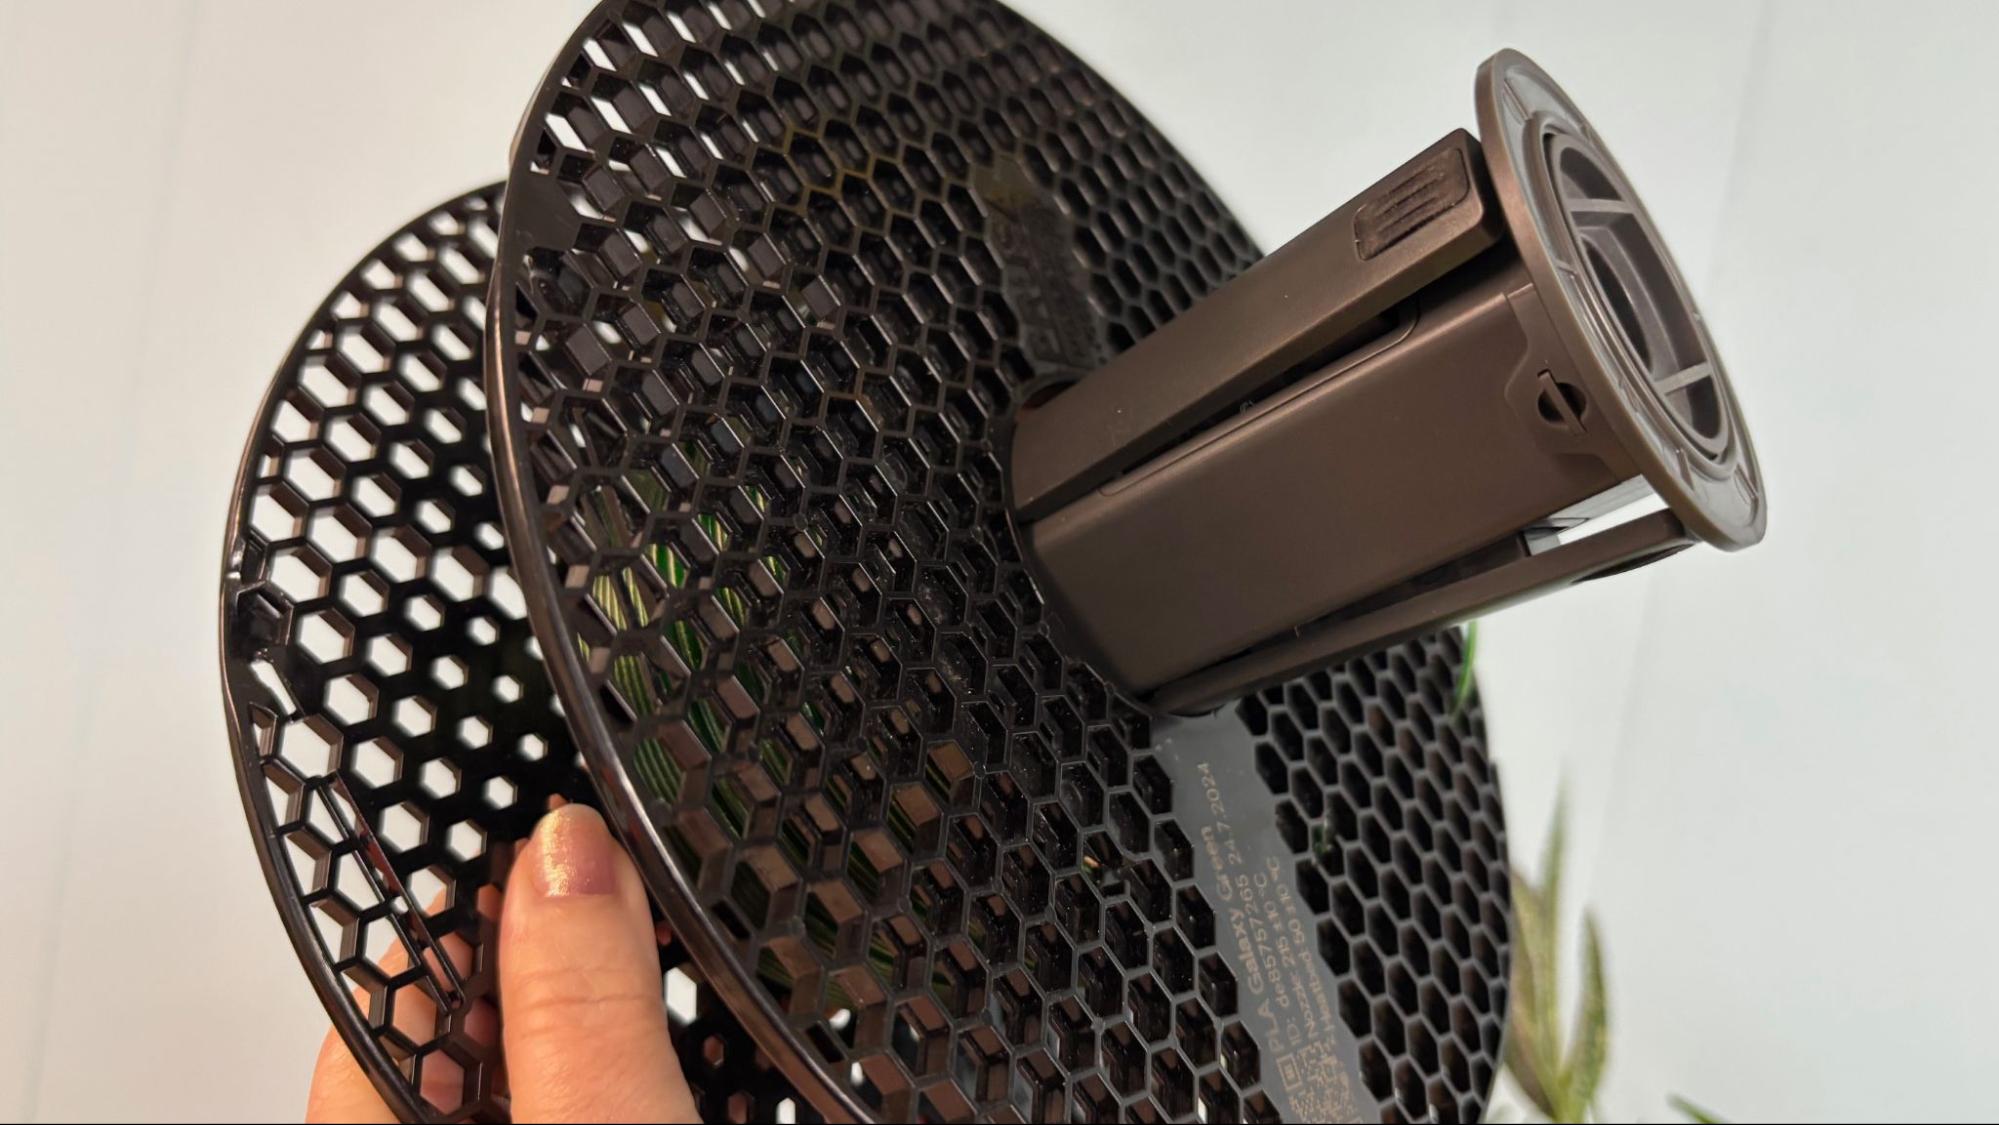
The spool holders on the Centauri 2 have a return spring that draws filament back onto the spool when it is retracted from the CANVAS system. They work well with many brands of filament - but not all. We had to print alternative spool holders to run Prusament and a few others that did not fit.

Elegoo Centauri 2 Combo

(Image credit: Tom's Hardware)

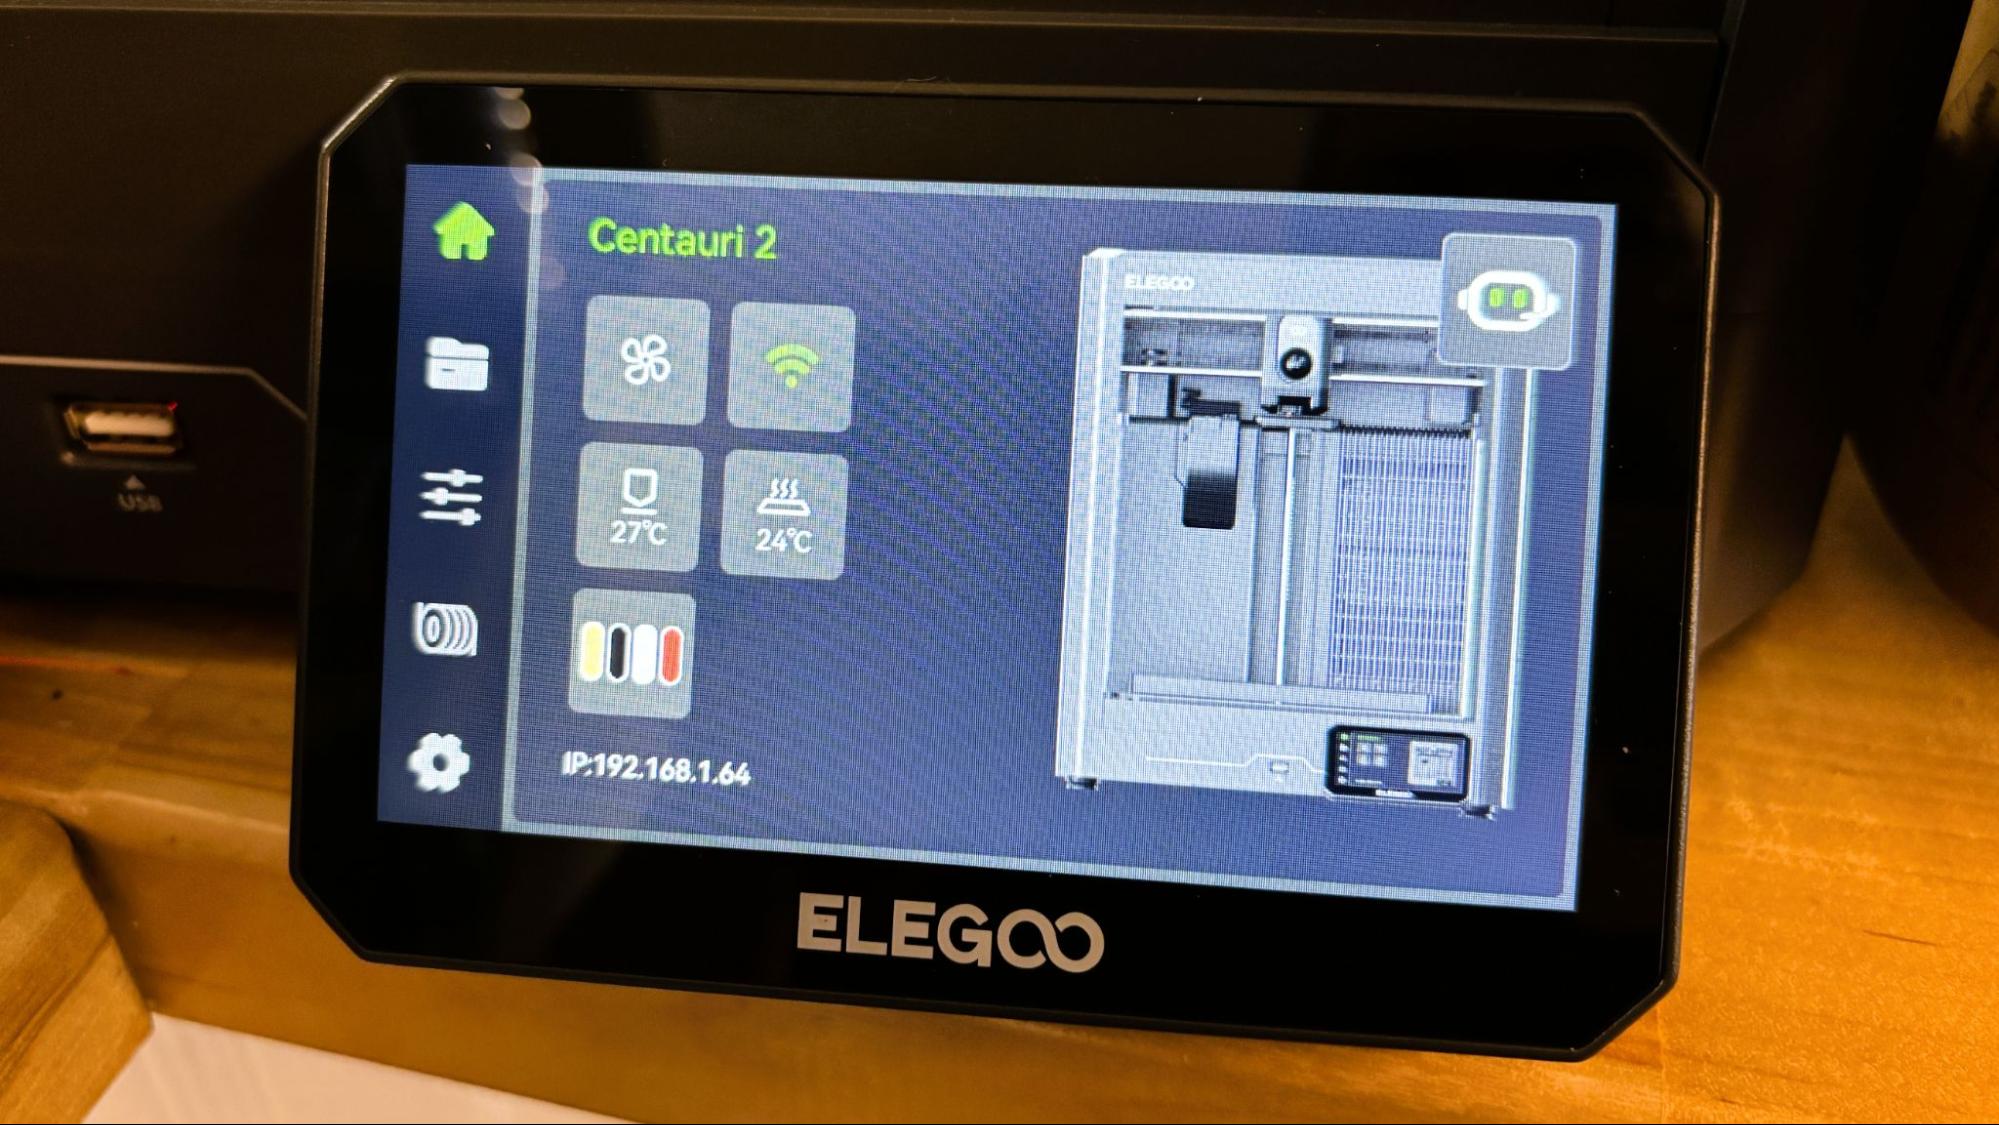
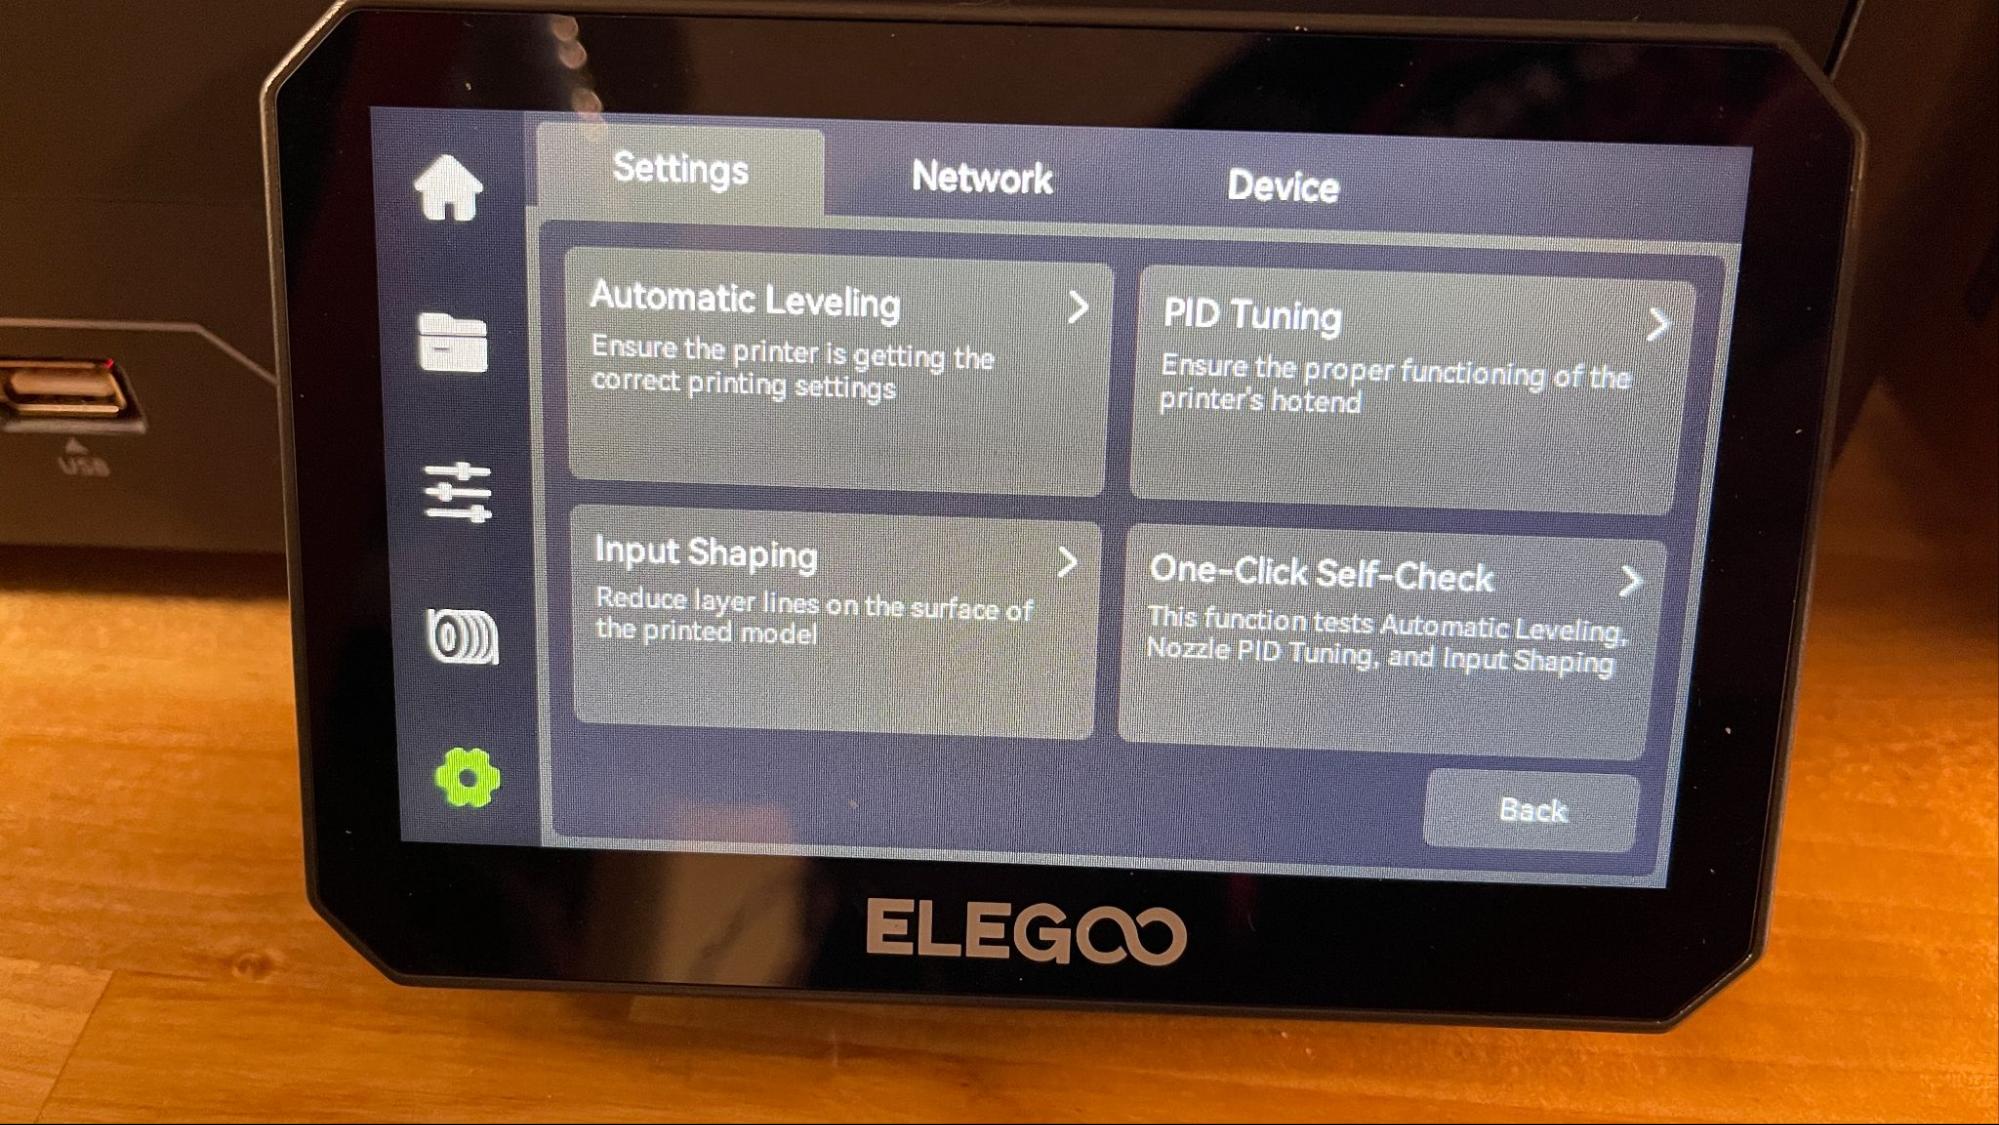
The Centauri 2 has a very nice 5 in touch screen with a well thought out and intuitive UI.

Assembling the Elegoo Centauri 2 Combo

Elegoo Centauri 2 Combo

(Image credit: Tom's Hardware)

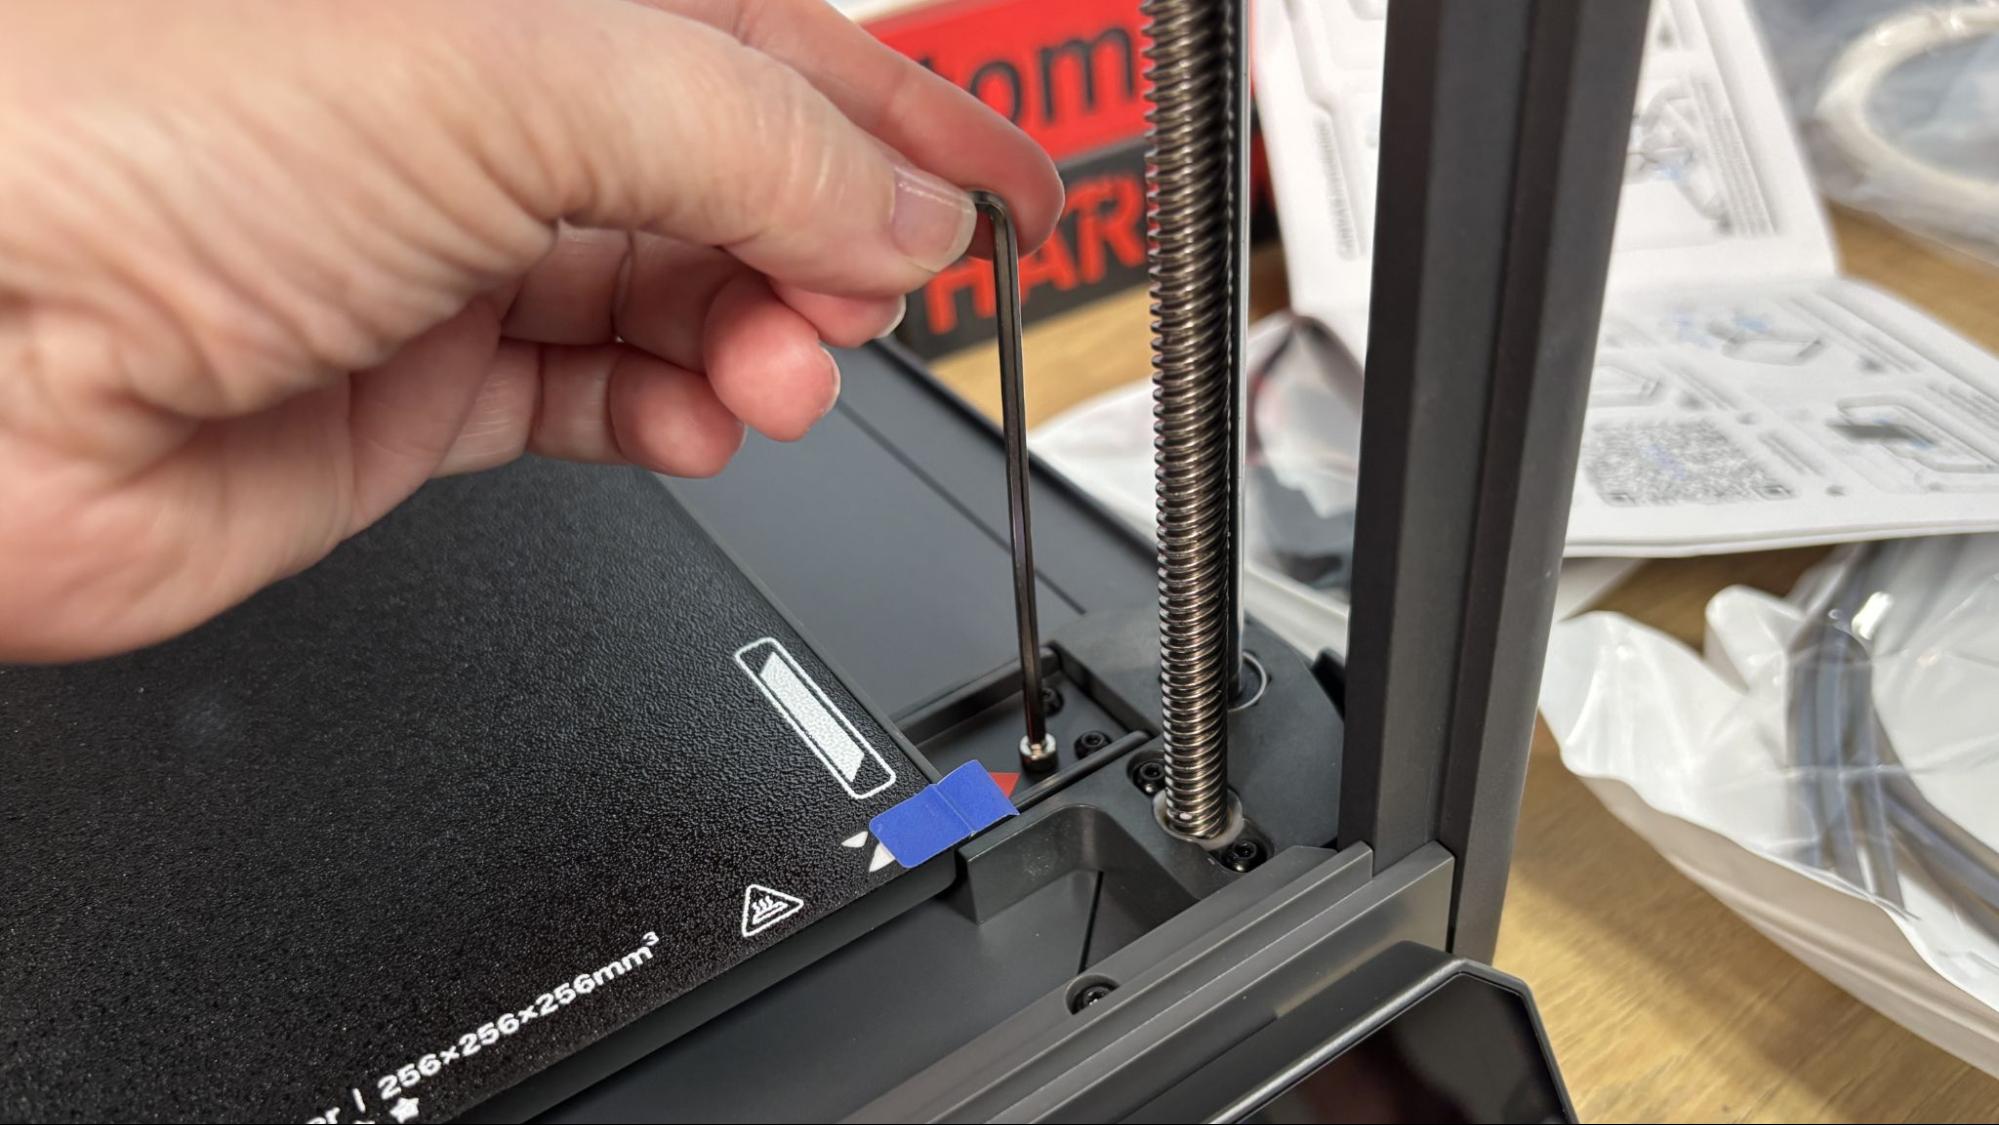
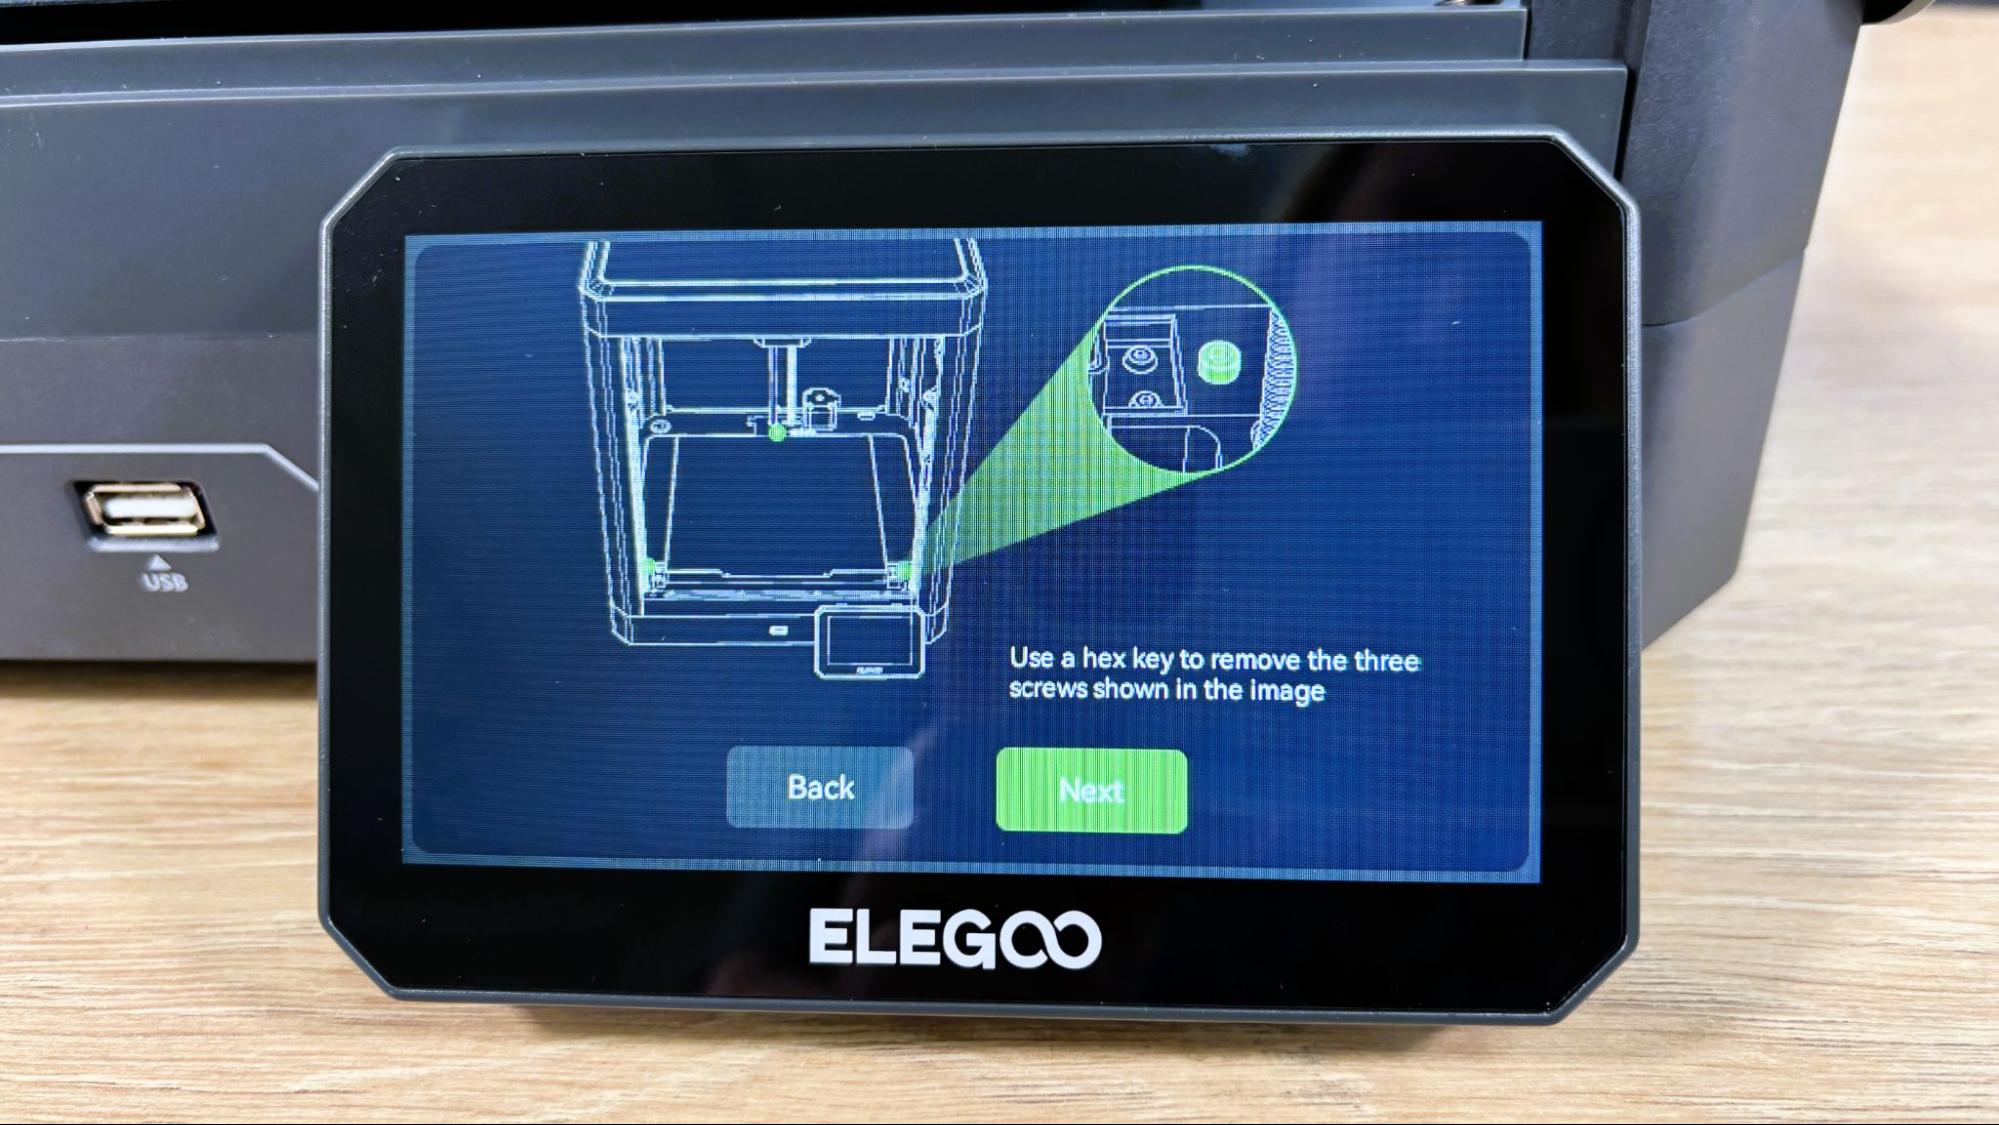
The Elegoo Centauri 2 Combo is shipped mostly assembled. After removing the packing material, you must remove three screws that hold down the bed. There are stoppers attached to the lead screws that must be removed as well. The touch screen is connected via a ribbon cable and slots into place on the front of the printer without tools.

There is a bracket to mount the CANVAS system to the top of the printer with two M3x50 screws, and the CANVAS mounts to the bracket with three M3x8 screws. The filament hub attaches to the toolhead with 2 M3x6 screws, but also requires the removal of the toolhead wiring, which is attached with 2 Philips head screws. The CANVAS cable attaches with the right-angle connector going into the back of the printer and the straight one into the CANVAS. The four Bowden tubes run from the top of the CANVAS to the ports in the toolhead, and the order does not matter.

When powered up for the first time, the printer gives you a reminder to unlock the bed and remove the lead screw stoppers.

Elegoo Centauri 2 Combo

(Image credit: Tom's Hardware)

Leveling the Elegoo Centauri 2 Combo

Elegoo Centauri 2 Combo

(Image credit: Tom's Hardware)

The Elegoo Centauri 2 Combo does a self-check and full calibration when initially powered up and offers to level the printer at the start of every print. The system works perfectly.

Loading Filament on the Elegoo Centauri 2 Combo

Elegoo Centauri 2 Combo

(Image credit: Tom's Hardware)

Loading filament on the Elegoo Centauri 2 Combo is simple. For Elegoo RFID-labeled filament, the spool can be held against the reader on the CANVAS until it beeps, and then the spool can be assigned to any of the four slots. For other filament brands, the type and color must be chosen manually from the touchscreen. The filament is inserted into the Bowden tube corresponding to its spool holder. It’s easy to confuse spools three and four, with spool four being in the top rear position.

Preparing Files / Software for Elegoo Centauri 2 Combo

Elegoo Centauri 2 Combo

(Image credit: Tom's Hardware)

The Centauri Carbon 2 Combo comes with a copy of ElegooSlicer, which is based on OrcaSlicer and Bambu Studio. The program will feel like home to anyone familiar with those programs.

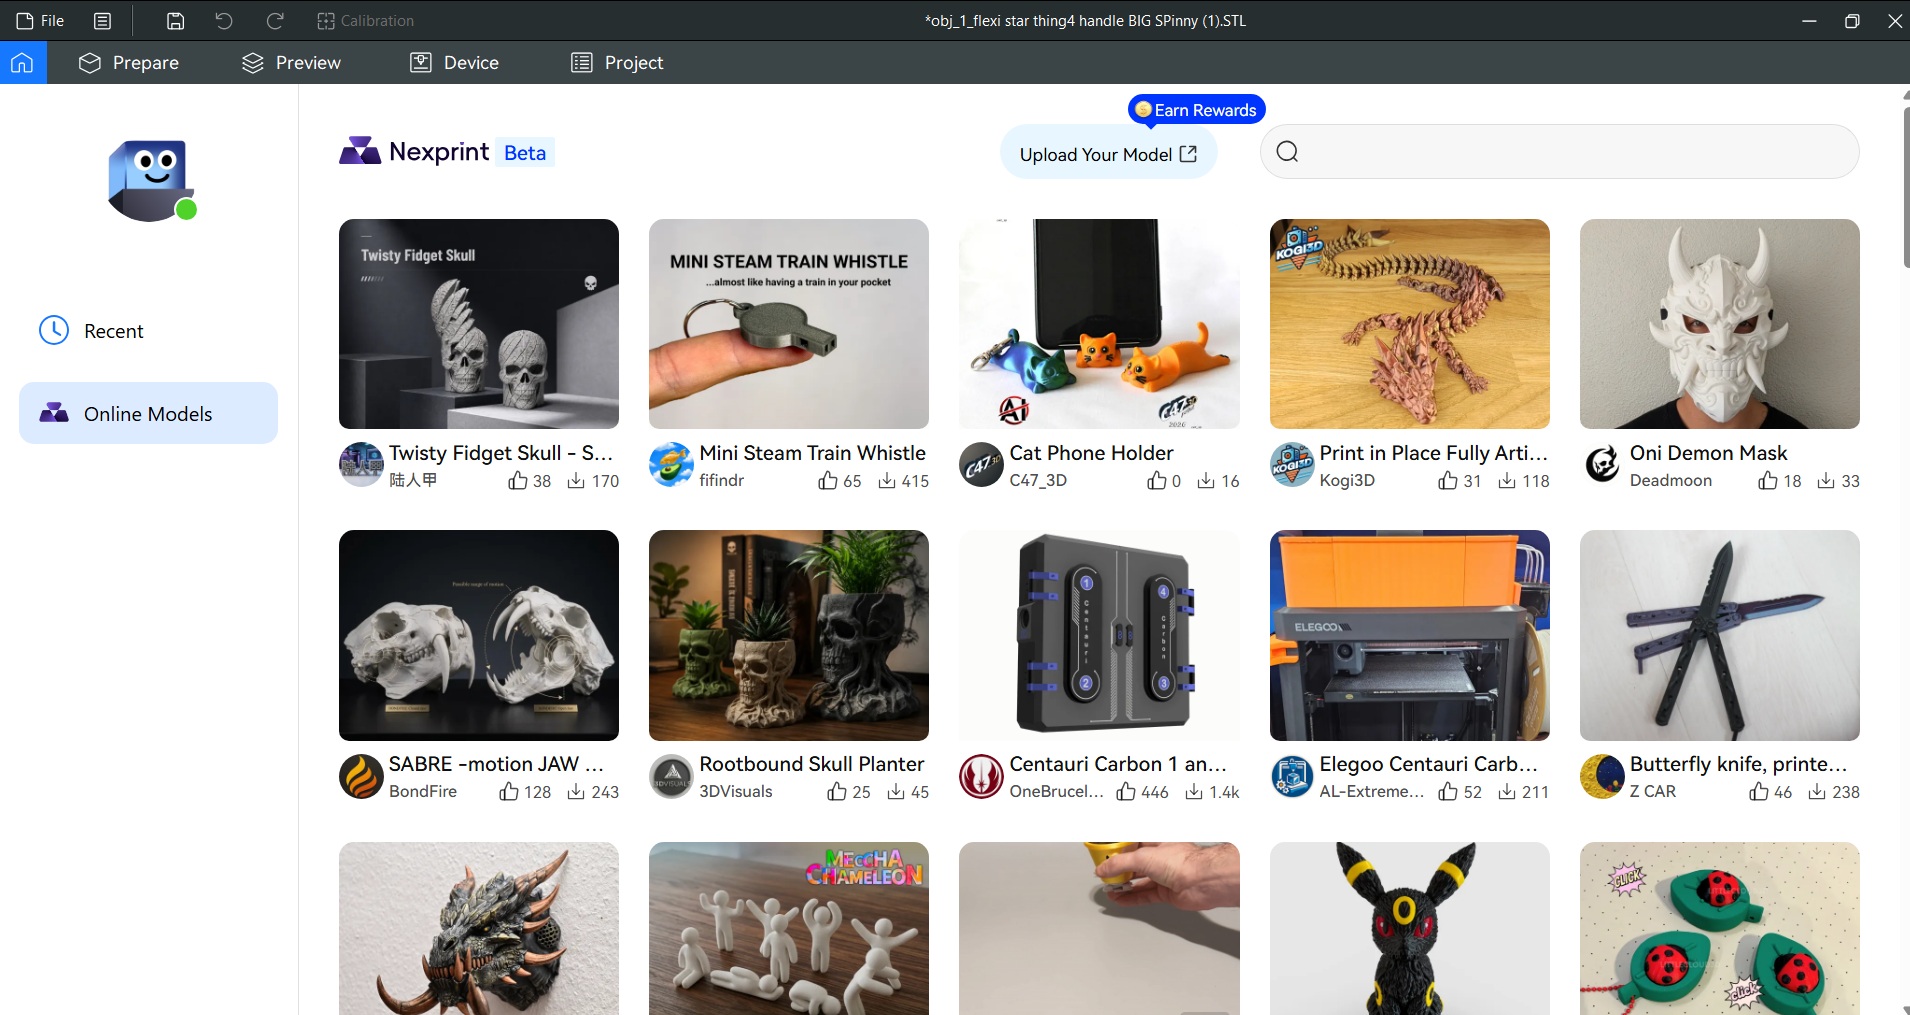
ElegooSlicer now features Nexprint, Elegoo’s online file sharing service, which is currently listed as beta. Nexprint allows users to select files directly from the slicer’s home screen. It currently has a more limited selection than its rivals, but should grow over time.

Elegoo Centauri 2 Combo

(Image credit: Tom's Hardware)

Printing on the Elegoo Centauri 2 Combo

The Elegoo Centauri 2 Combo comes with the usual sample of white PLA. You should go to our guide of the best filaments for 3D printing to begin printing in earnest

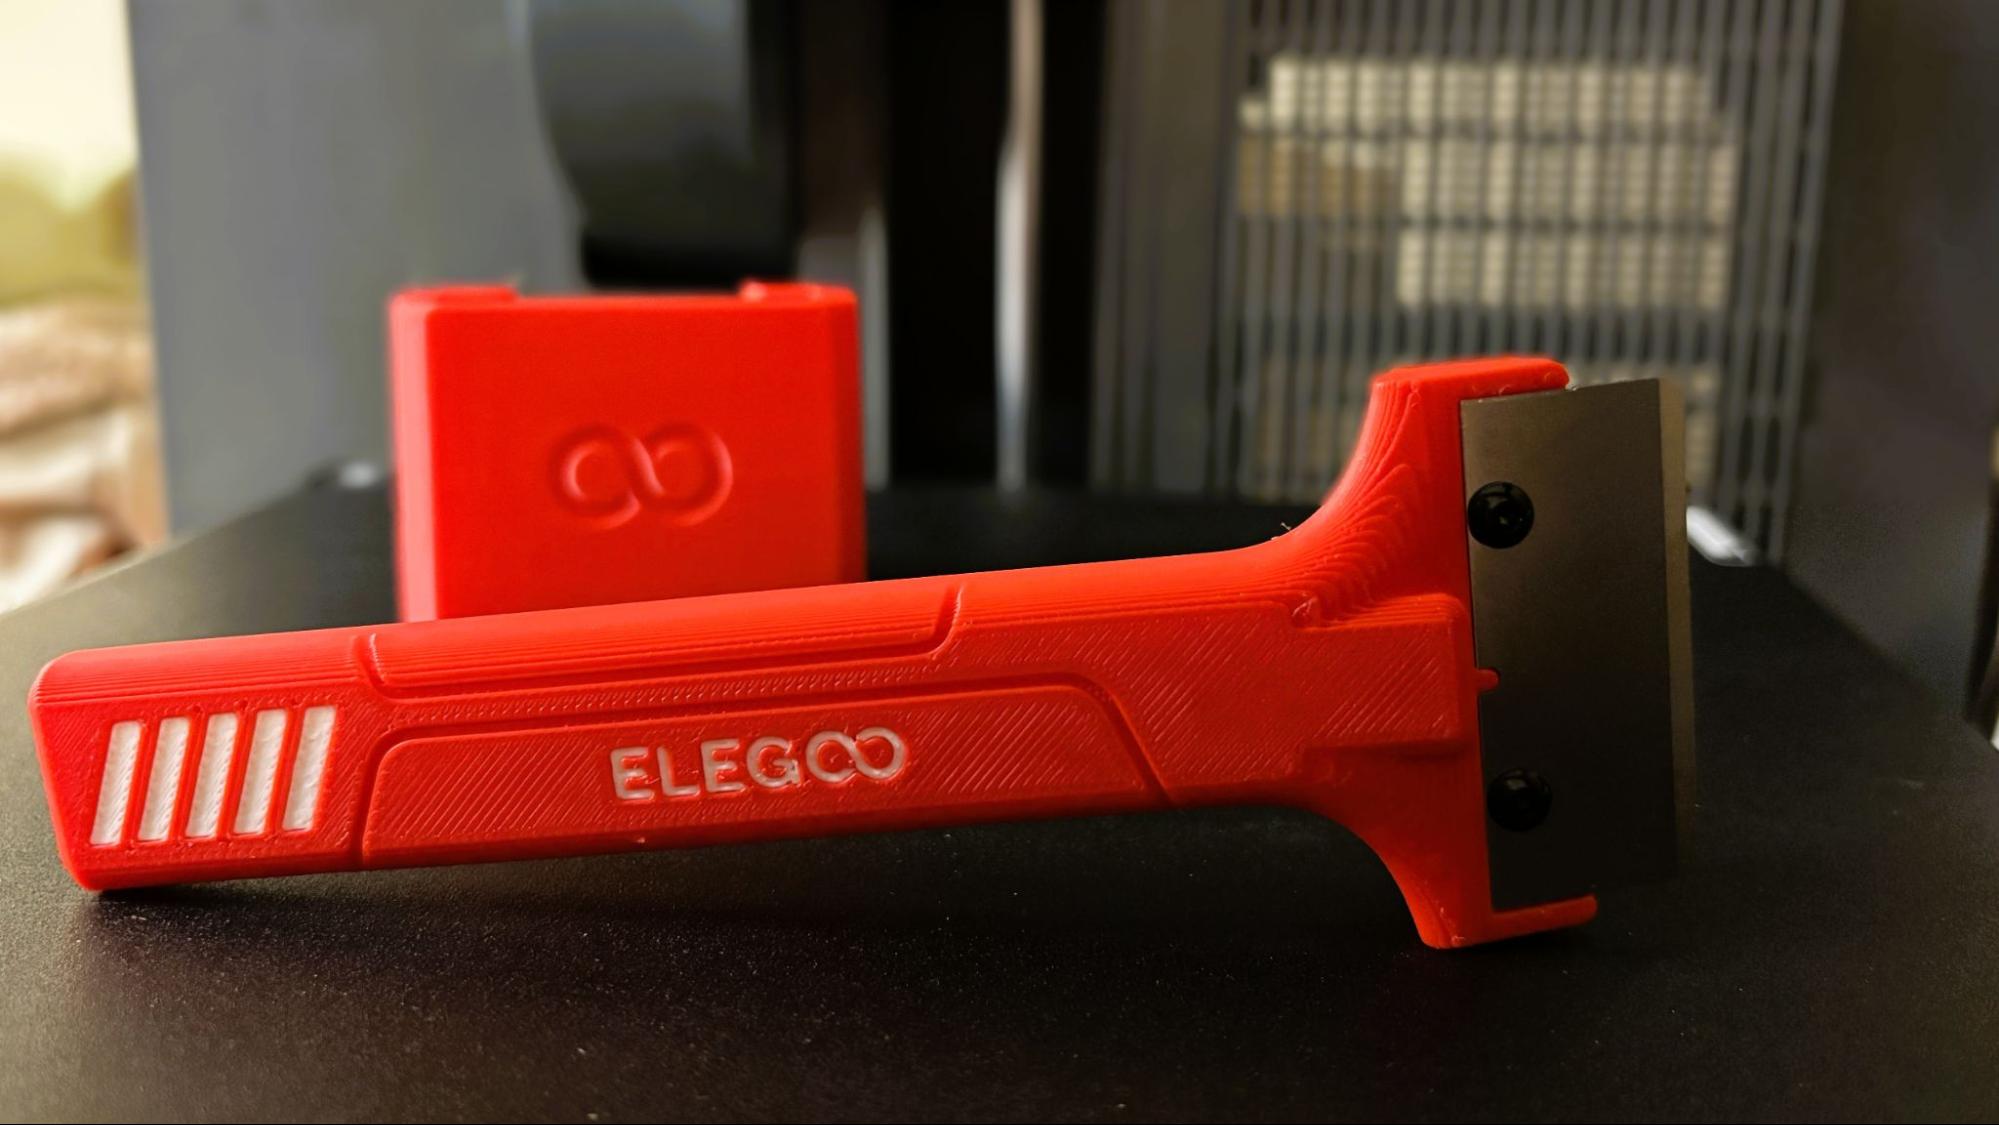
For the first print, I chose the pre-sliced two-color bed scraper that is included in the printer’s memory. The print took 1 hour and 30 minutes and looks fantastic in Elegoo’s red PLA and white PLA. One thing I noticed on this and other multicolor prints is that Elegoo seems to have refined the default purge values to reduce purge waste, which is very welcome.

Elegoo Centauri 2 Combo

(Image credit: Tom's Hardware)

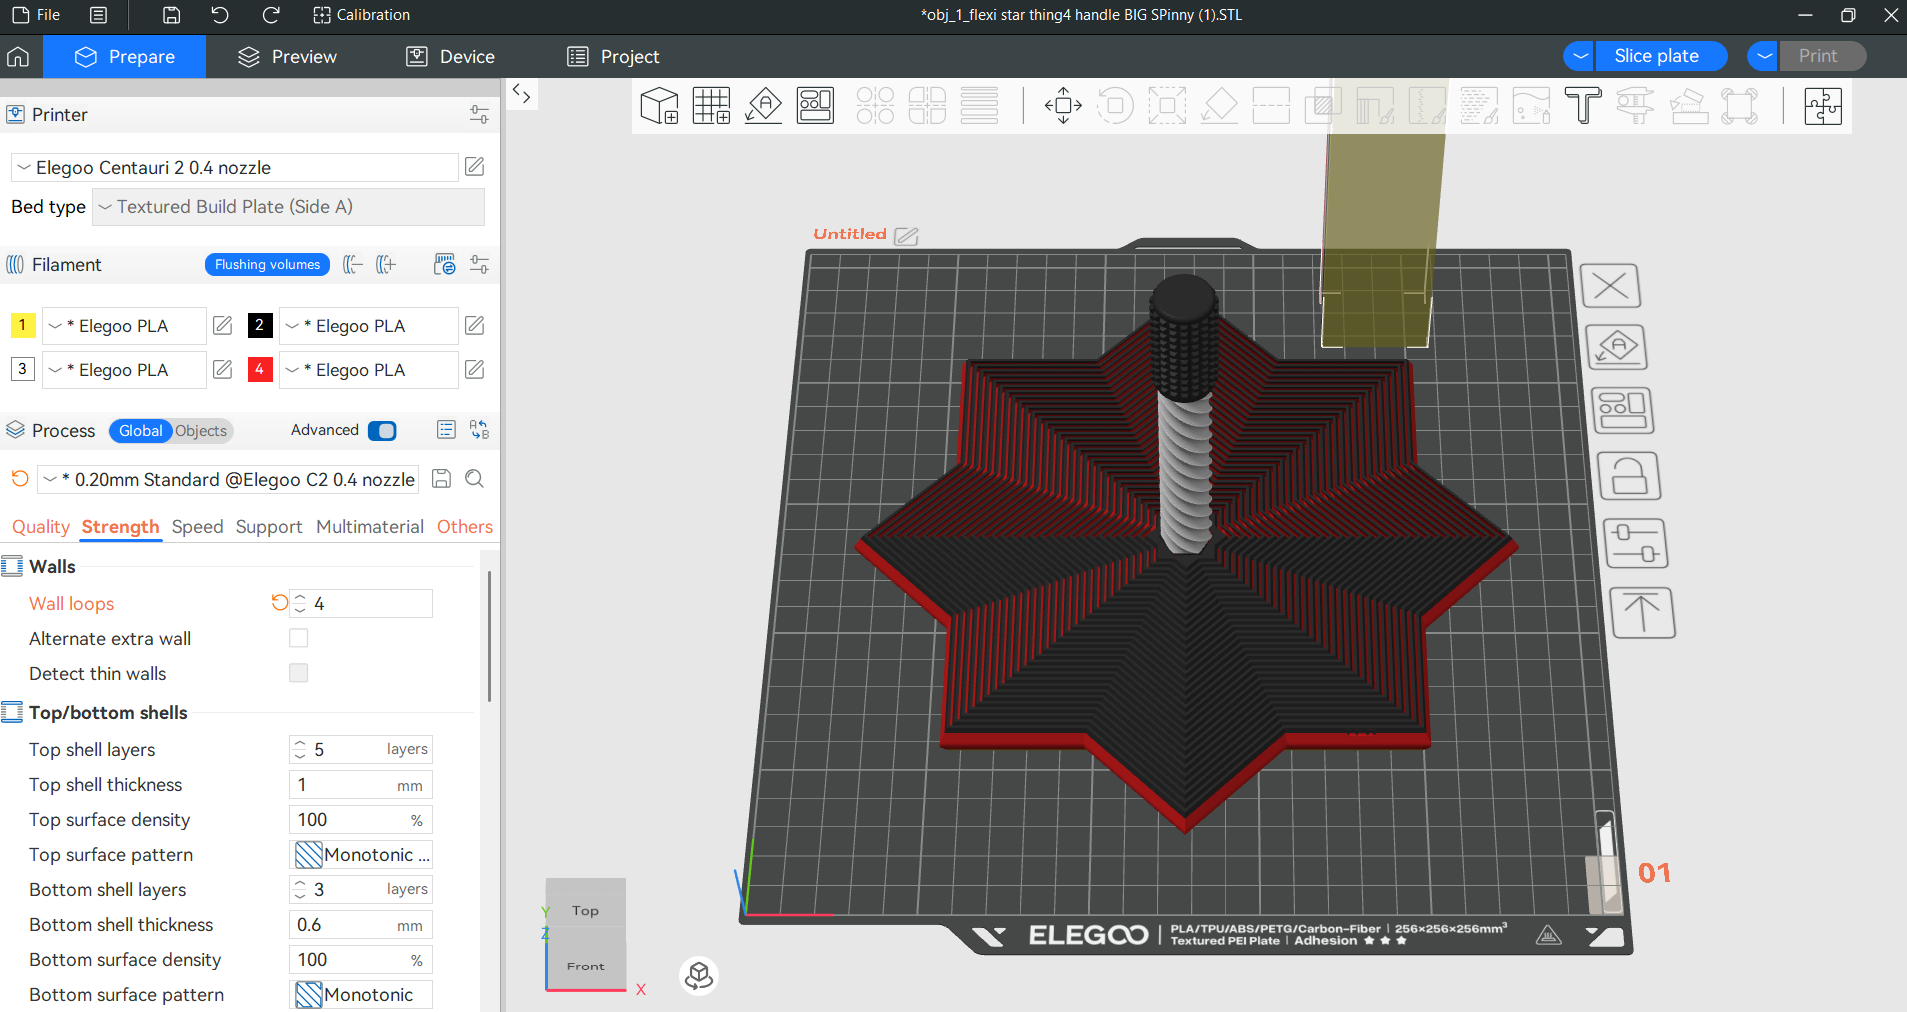
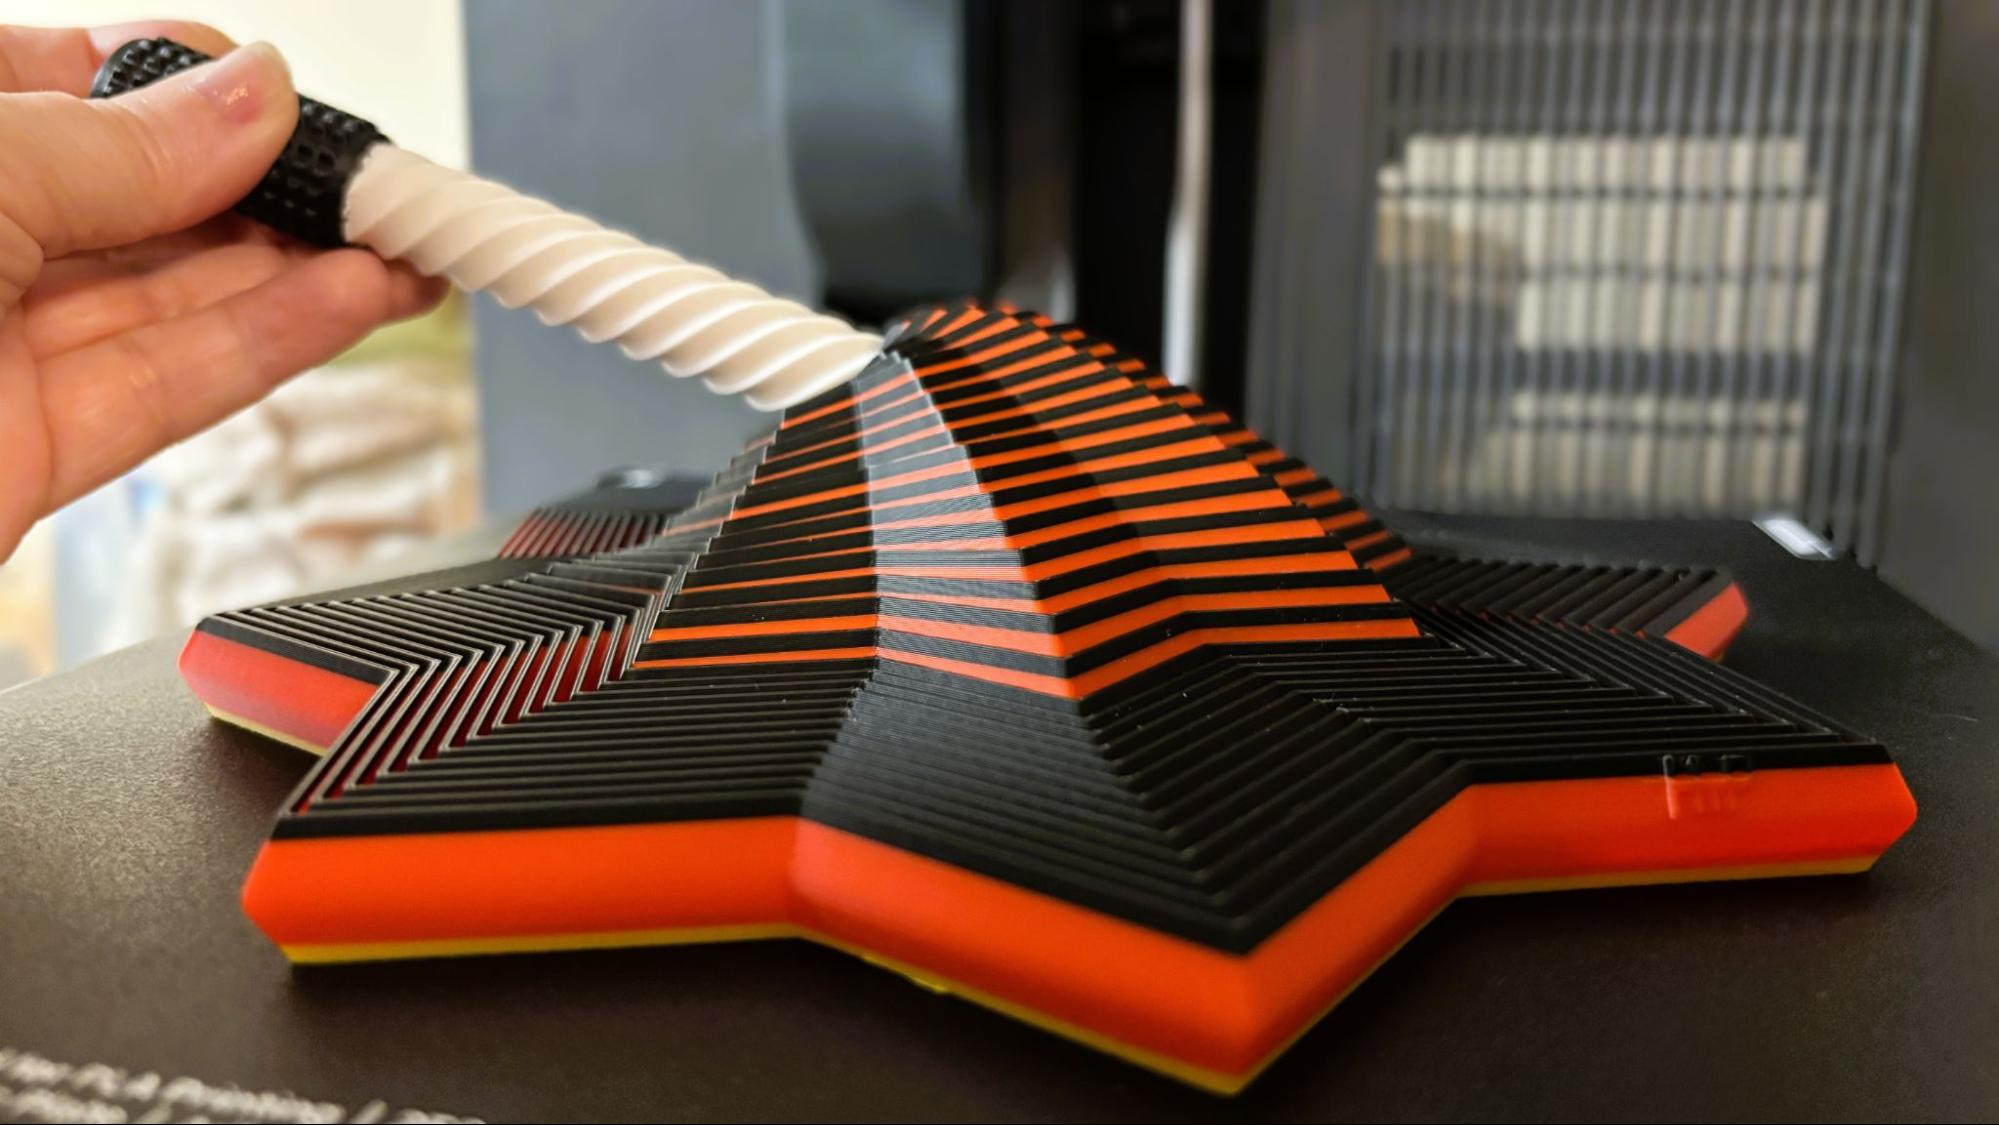
For a large multicolor print I chose a collapsible star fidget from Makerworld. I painted it in the slicer to use all four colors on the printer and it turned out very nice using Elegoo white, black, red, and yellow PLA. Using a .2mm layer height, and running at an average of 120 mm/s, the print completed in 5 hours and 13 minutes.

Elegoo Centauri 2 Combo

Spinny Collapsible Star Fidget from horseman3000 (Image credit: Tom's Hardware)

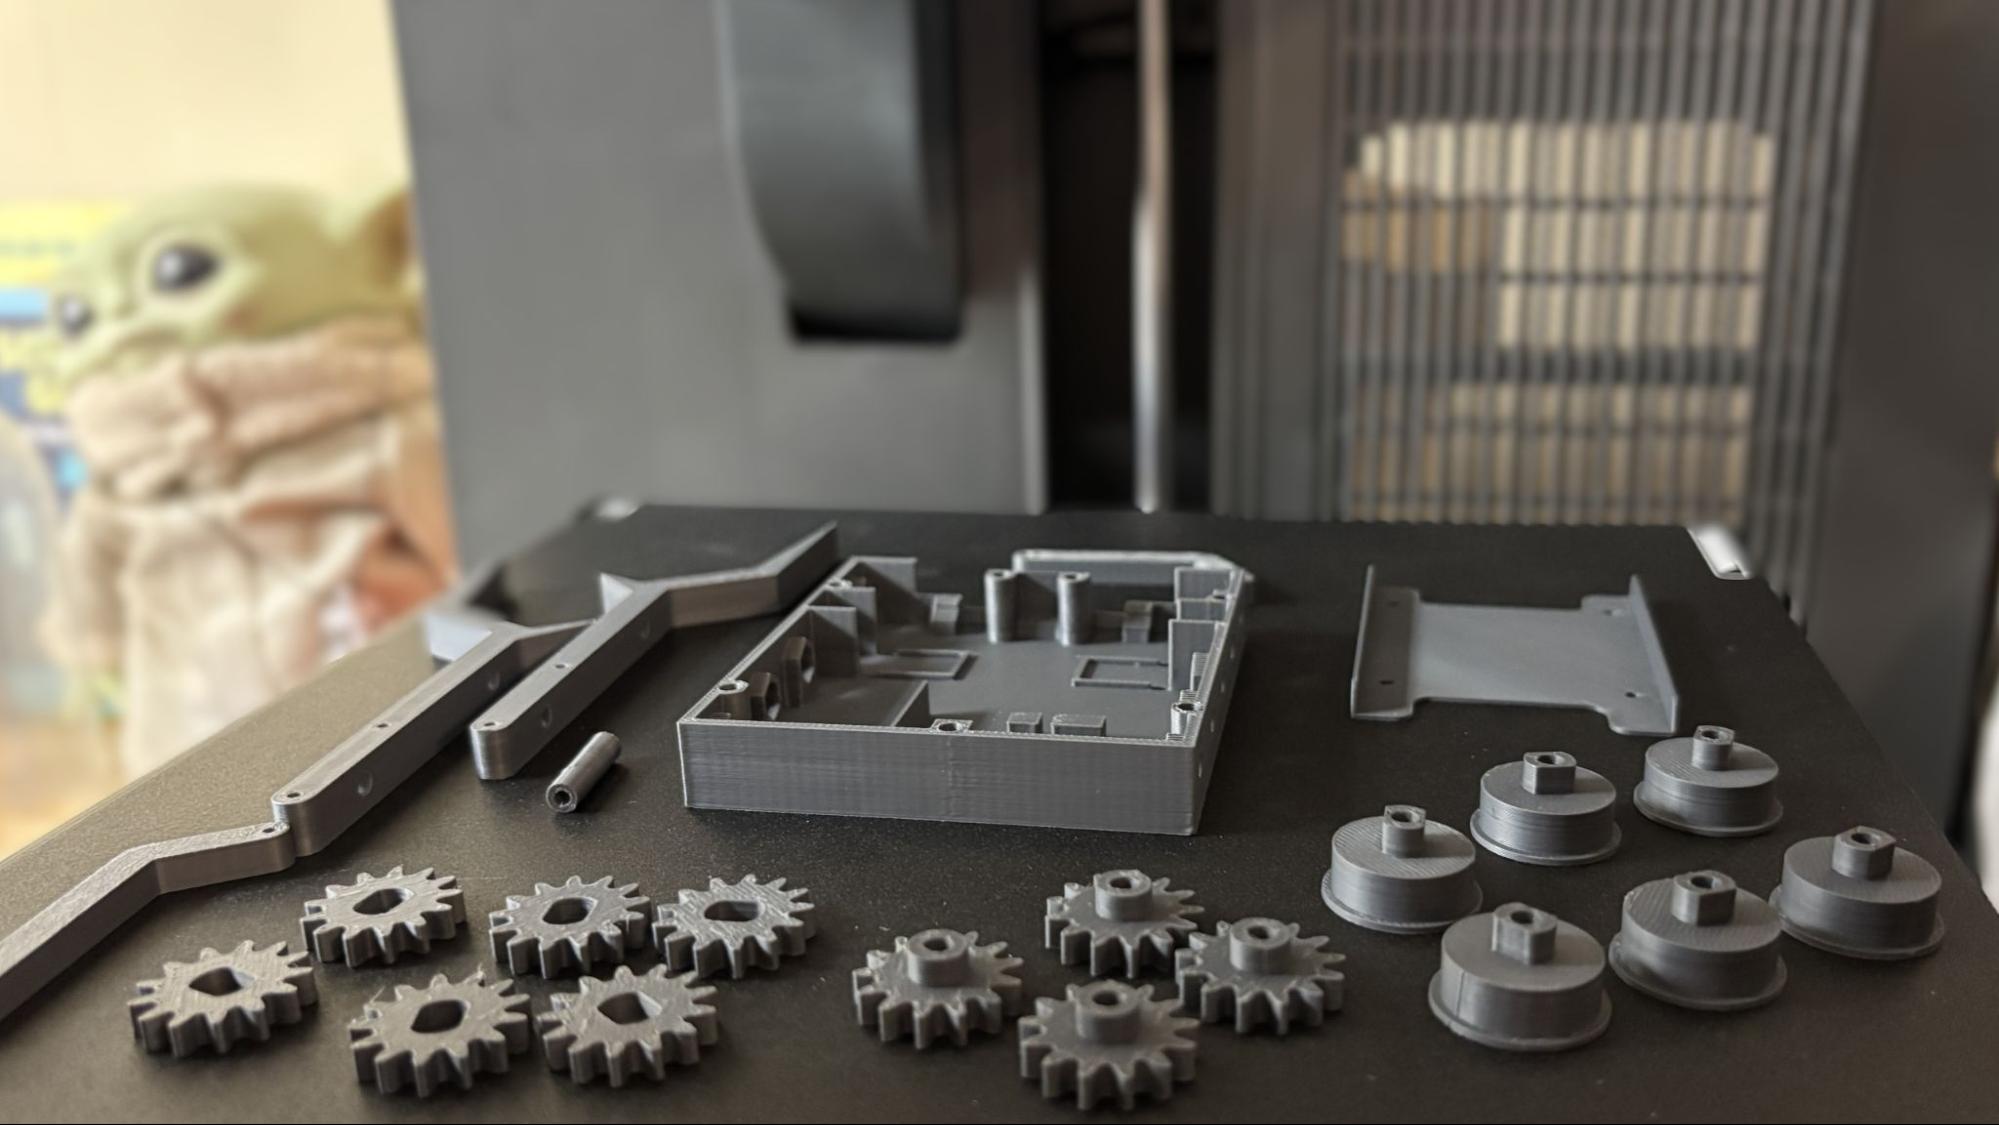
I decided to fill the smooth cool plate with a bunch of small pieces, and the results weren’t great, even after using some glue stick. Fortunately, after cleaning the plate and flipping it back over to the textured side, things worked much better. I printed Leonjong’s 6 wheel antweight combat robot from printables.com. By US classes it’s called a “fairy weight” robot and fits with room to spare on the Centauri 2’s build plate. The entire plate printed perfectly on the first try and looks terrific in Polymaker’s gray HT-PLA. The print took a little over four hours, with a .2mm layer height and an average print speed of 70 mm/s.

Elegoo Centauri 2 Combo

Leonjong’s 6 Wheel Antweight Combat Robot (Image credit: Tom's Hardware)

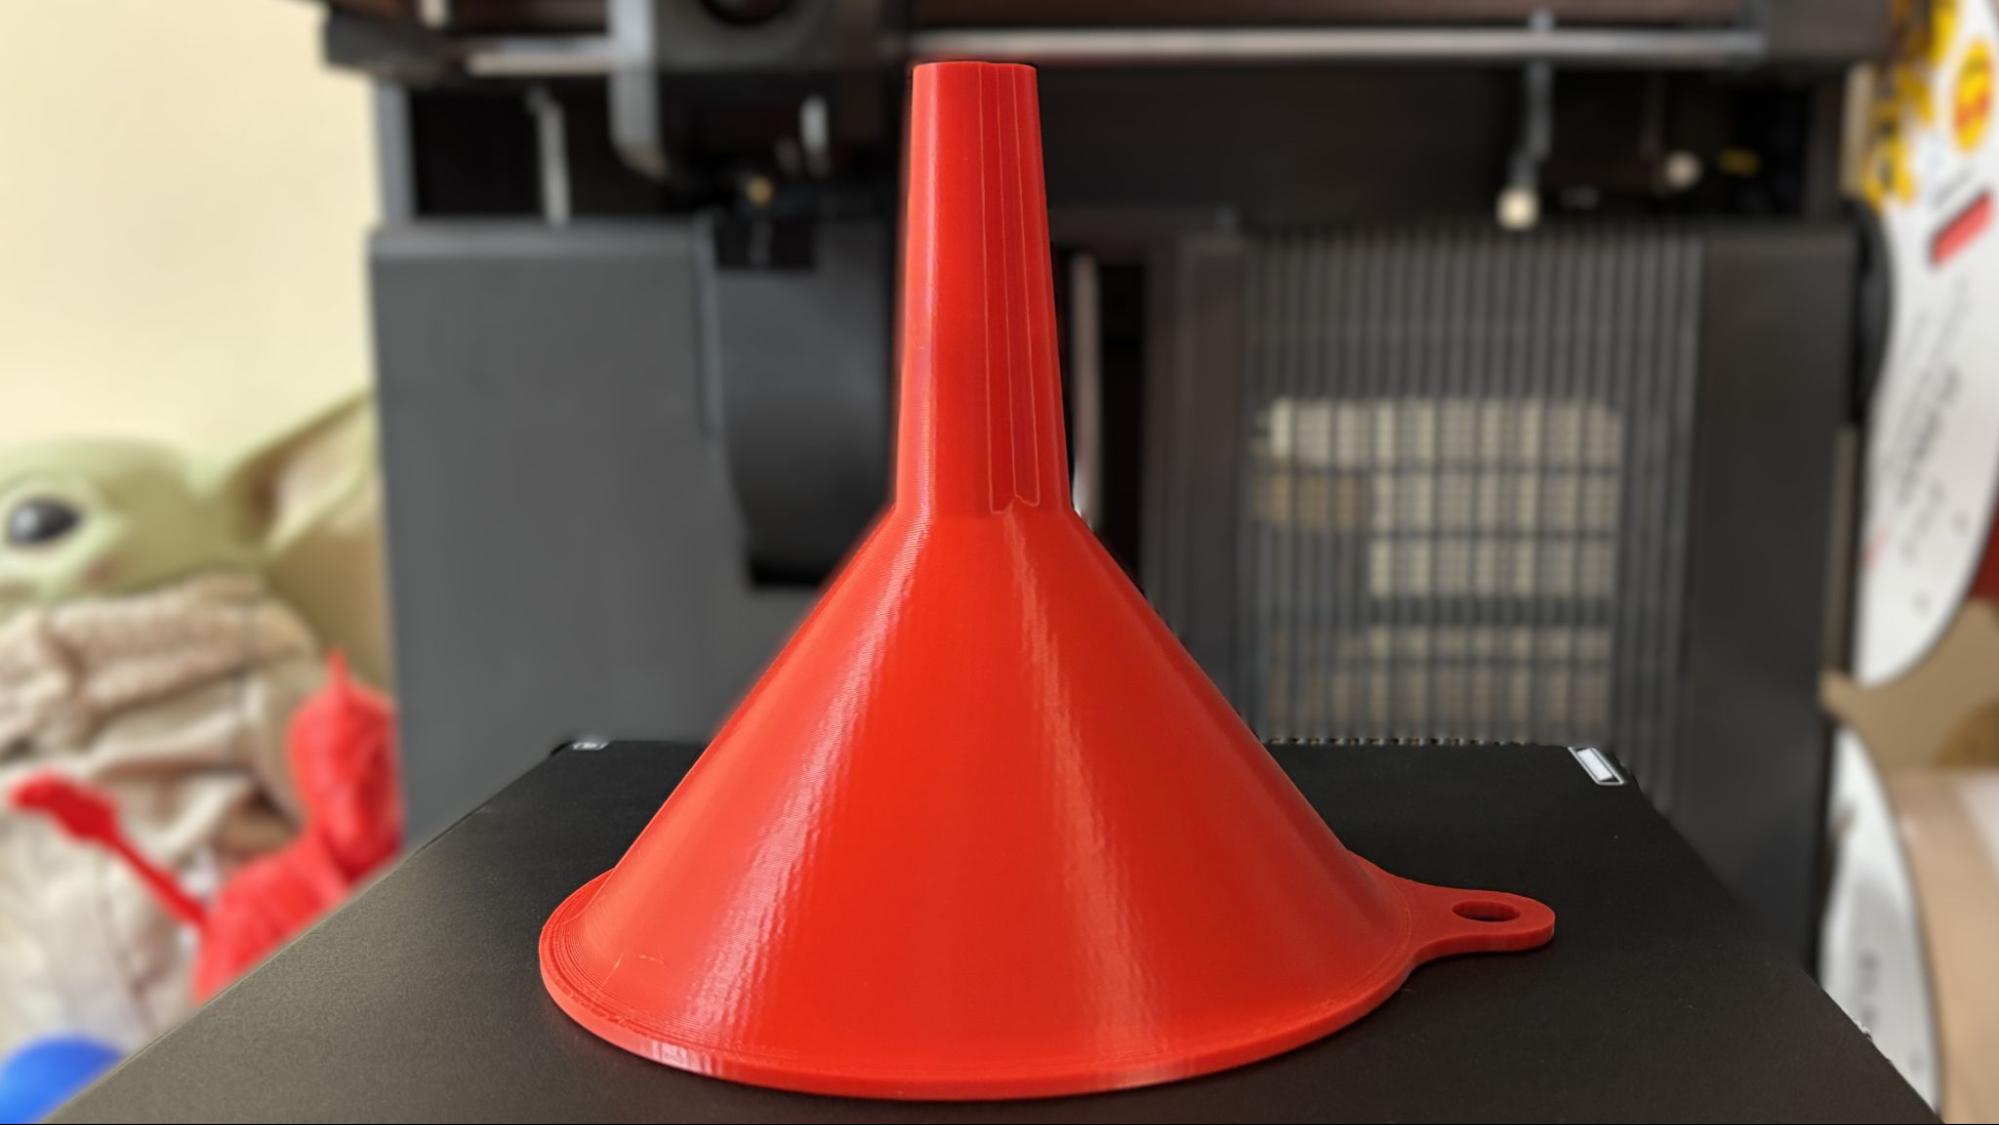
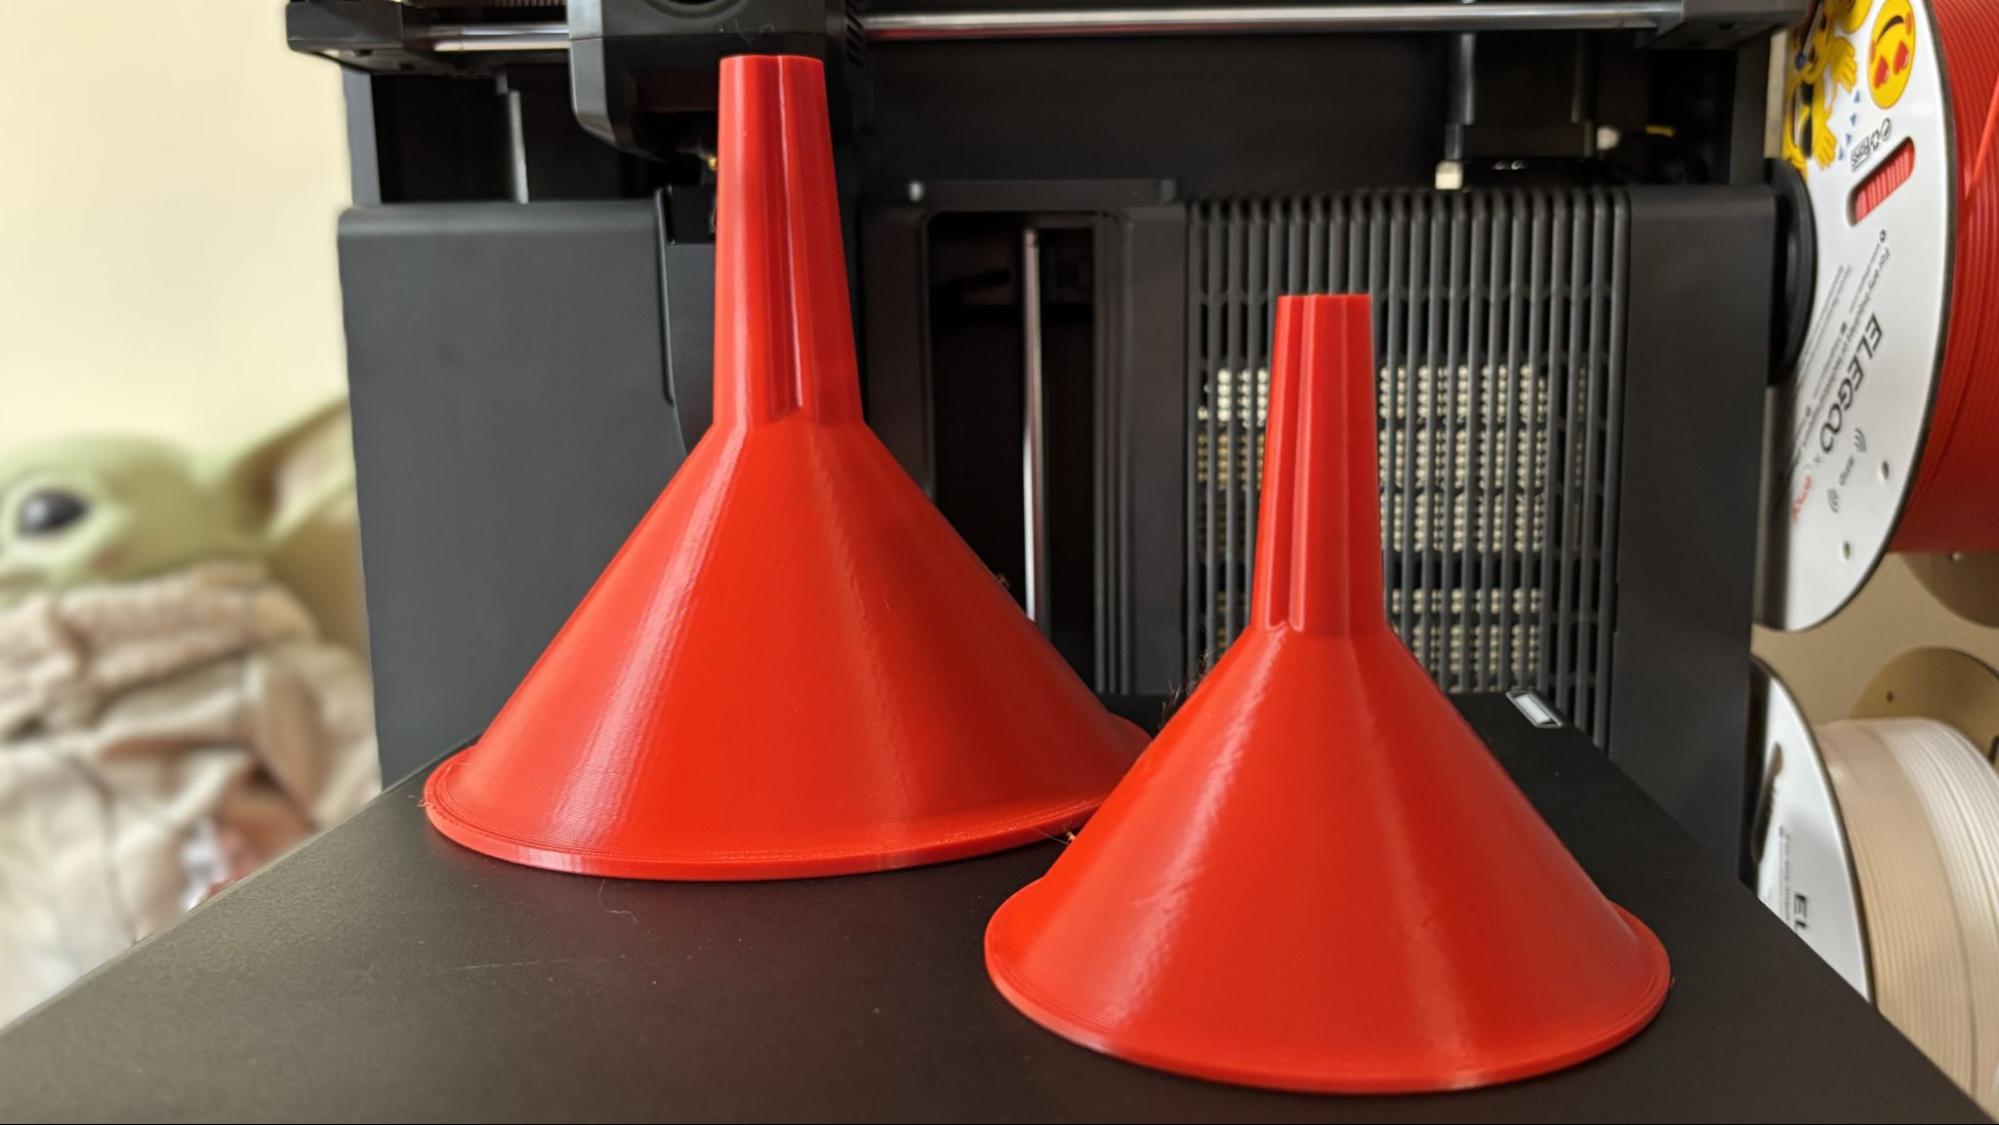
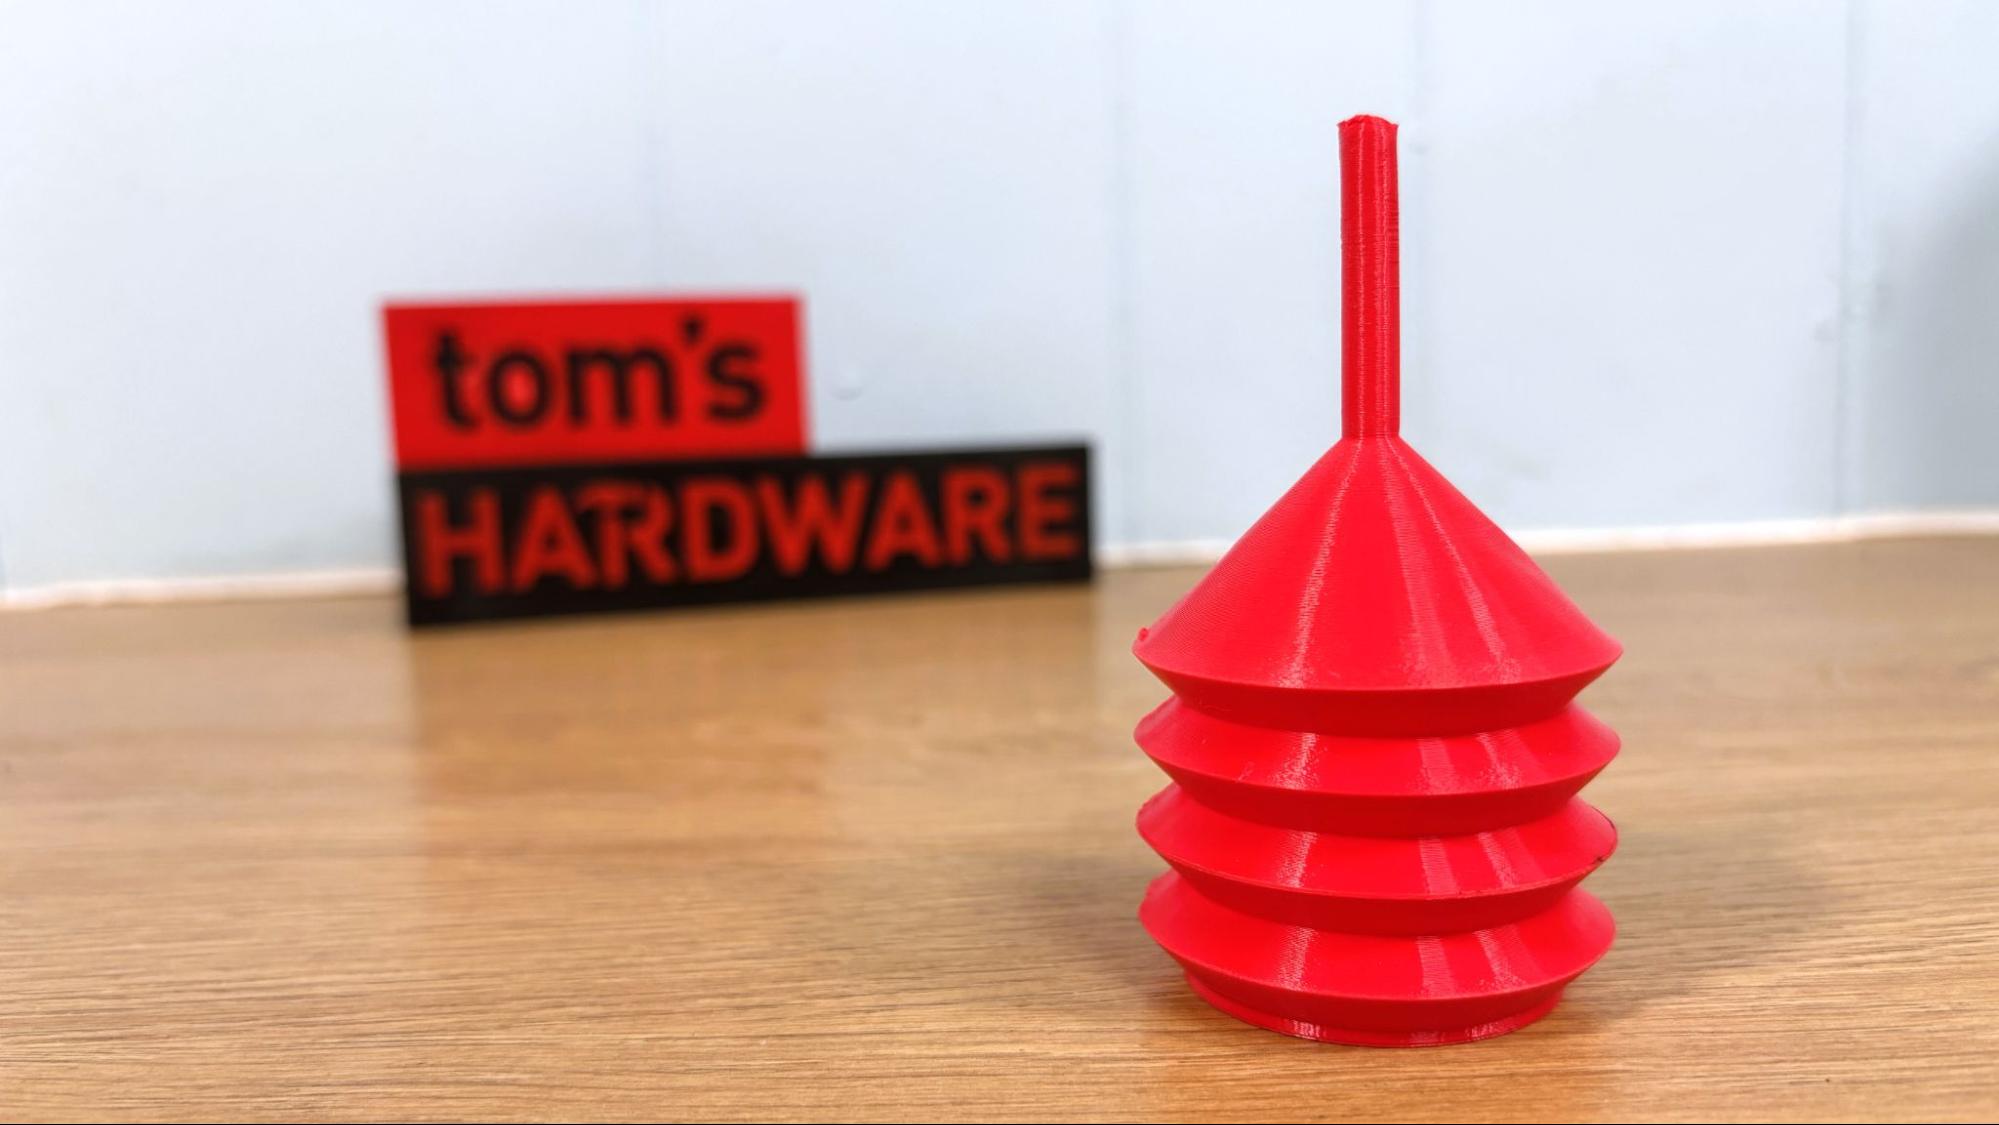
To try out PETG, I printed a set of three funnels from Makerworld using red Polymaker PETG and the default Anycubic PETG profile. The print came out perfect, with just a tiny bit of stringing across the mouths of the funnels. With a .2mm layer height, the medium funnel took 2 hours and 30 minutes to print with an average print speed of 90 mm/s.

Elegoo Centauri 2 Combo

Fast Funnels by ngprint (Image credit: Tom's Hardware)

The large and small funnels ran together and took 4 hours and 48 minutes at the same settings.

Elegoo Centauri 2 Combo

Fast Funnels by ngprint (Image credit: Tom's Hardware)

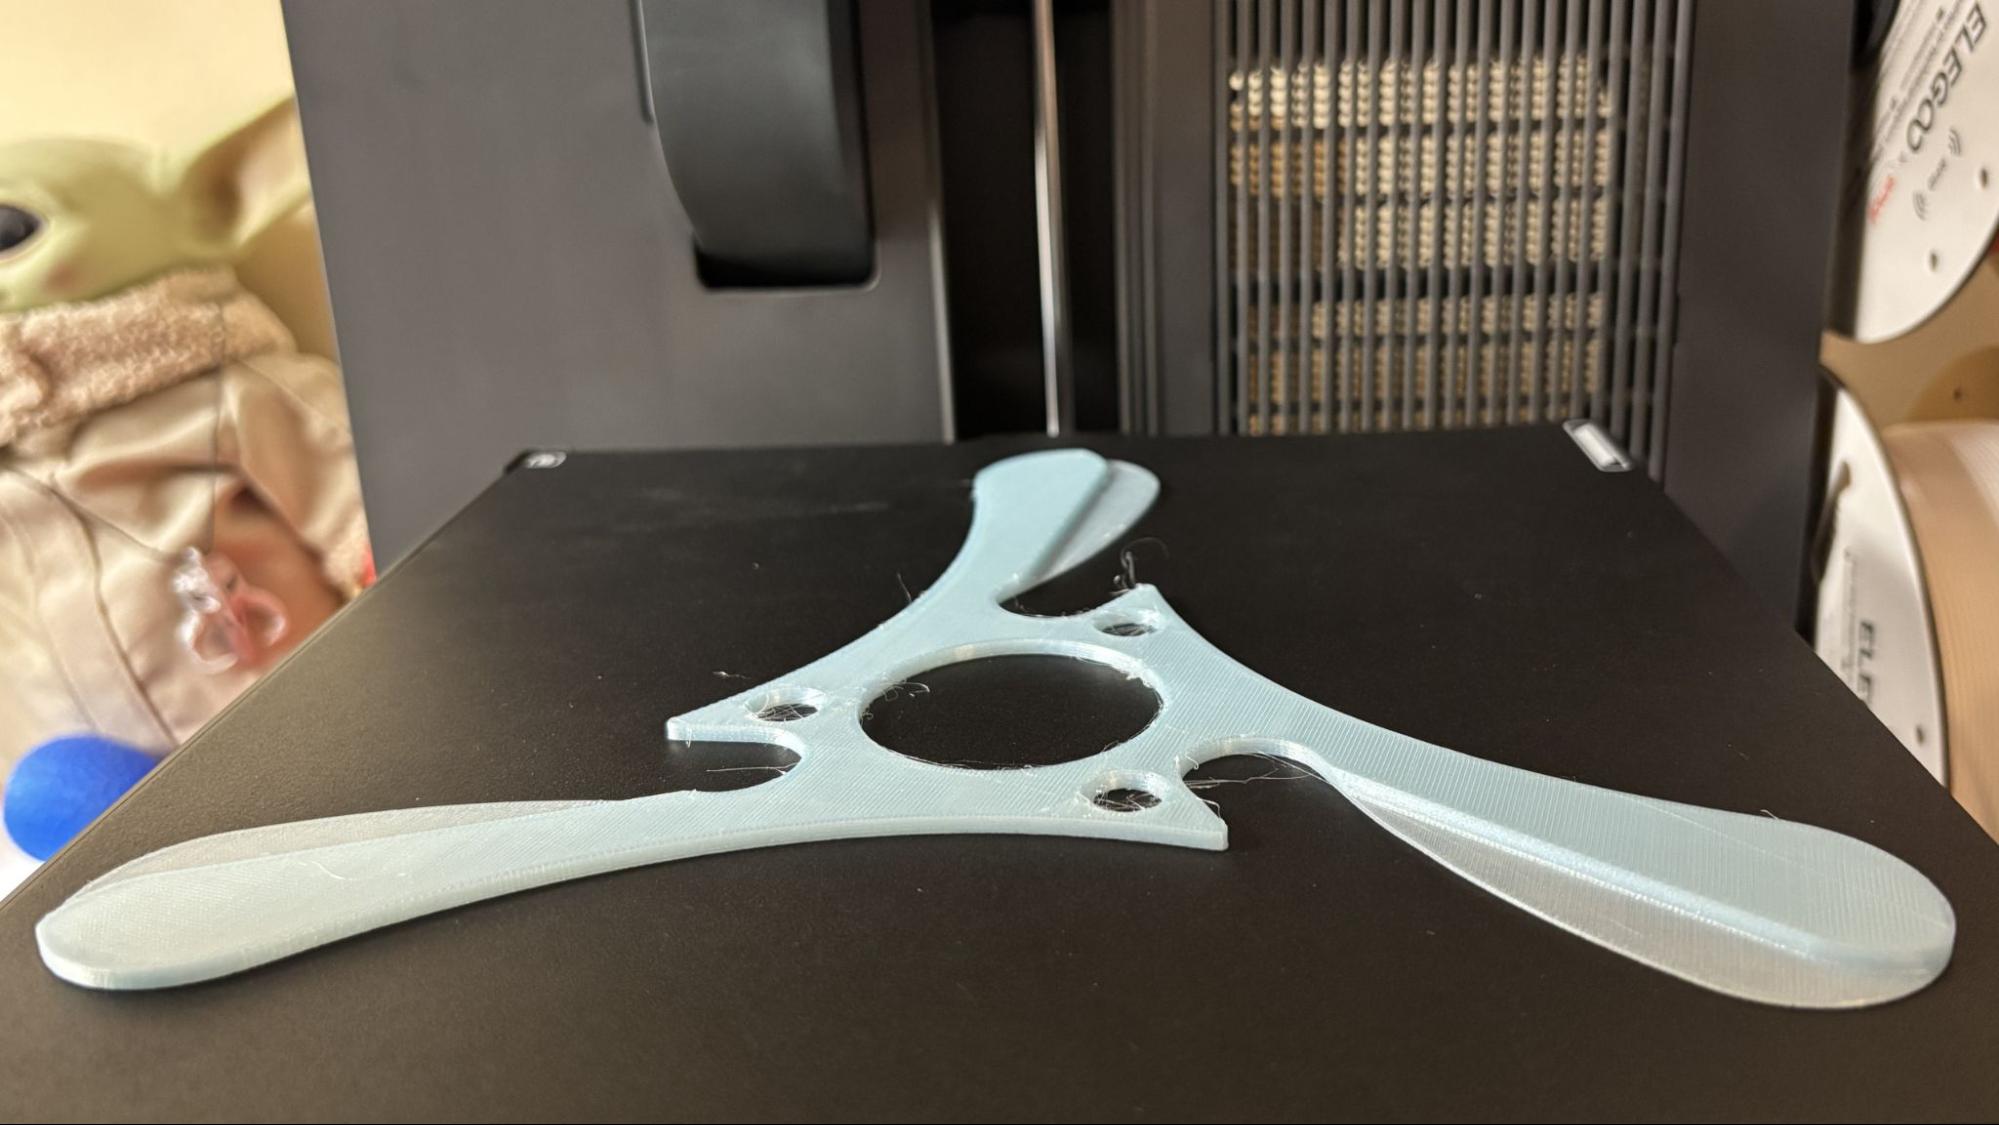
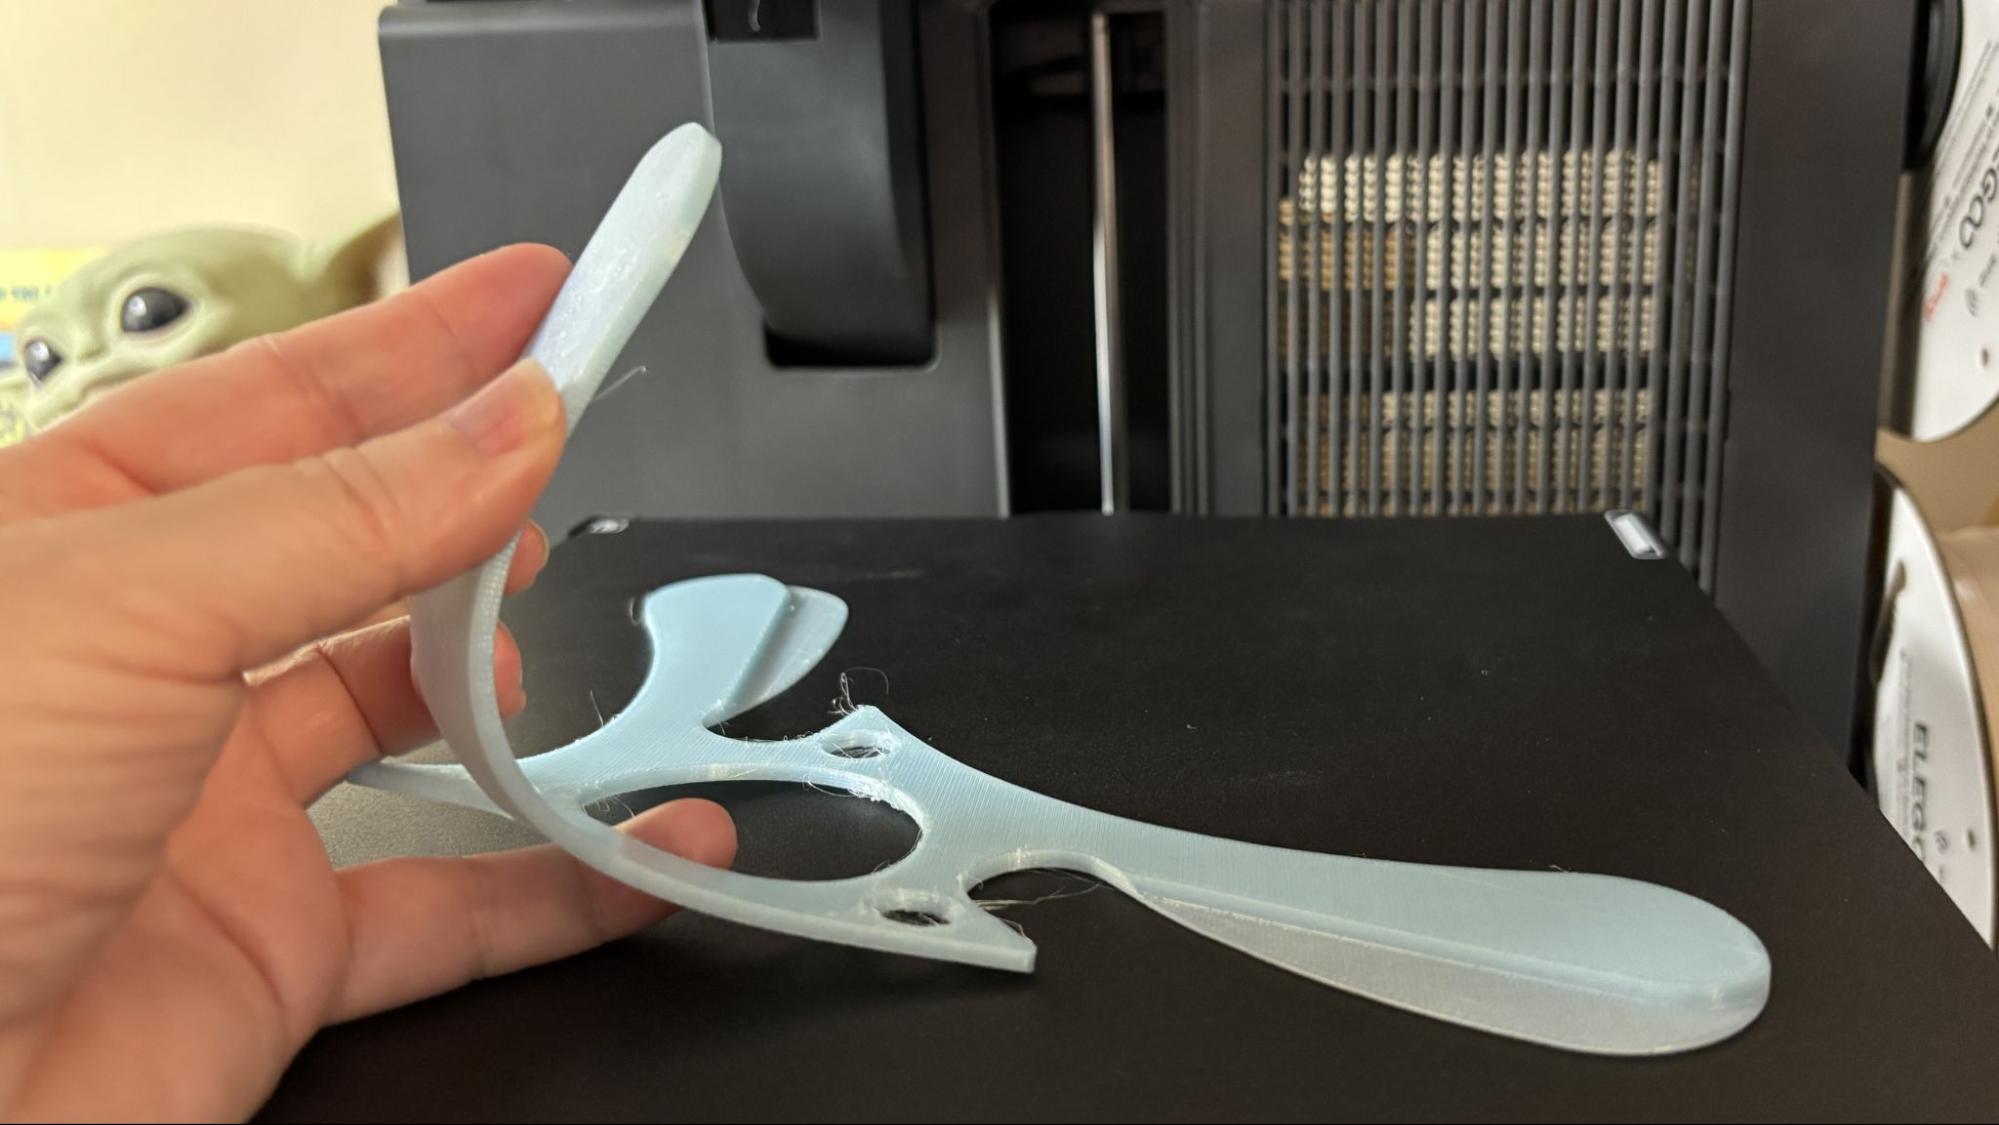
For TPU, I tempted fate by trying some LW TPU that turned out to be way too soft for the extruder. It loaded just fine through the filament hub, but clogged in the gears almost immediately.

After clearing the problem, I printed a boomerang I found on Printables. Using a .2mm layer height and an average print speed of 50 mm/s, the print completed in 1 hour and 56 minutes. It has a few strings, but the boomerang looks great in Cookiecad pale blue elixir. Sadly, it didn’t really work when I tried tossing it around the yard. Maybe next time we’ll try PETG.

Elegoo Centauri 2 Combo
Boomerang by quibeckTom's Hardware
Elegoo Centauri 2 Combo
Boomerang by quibeckTom's Hardware

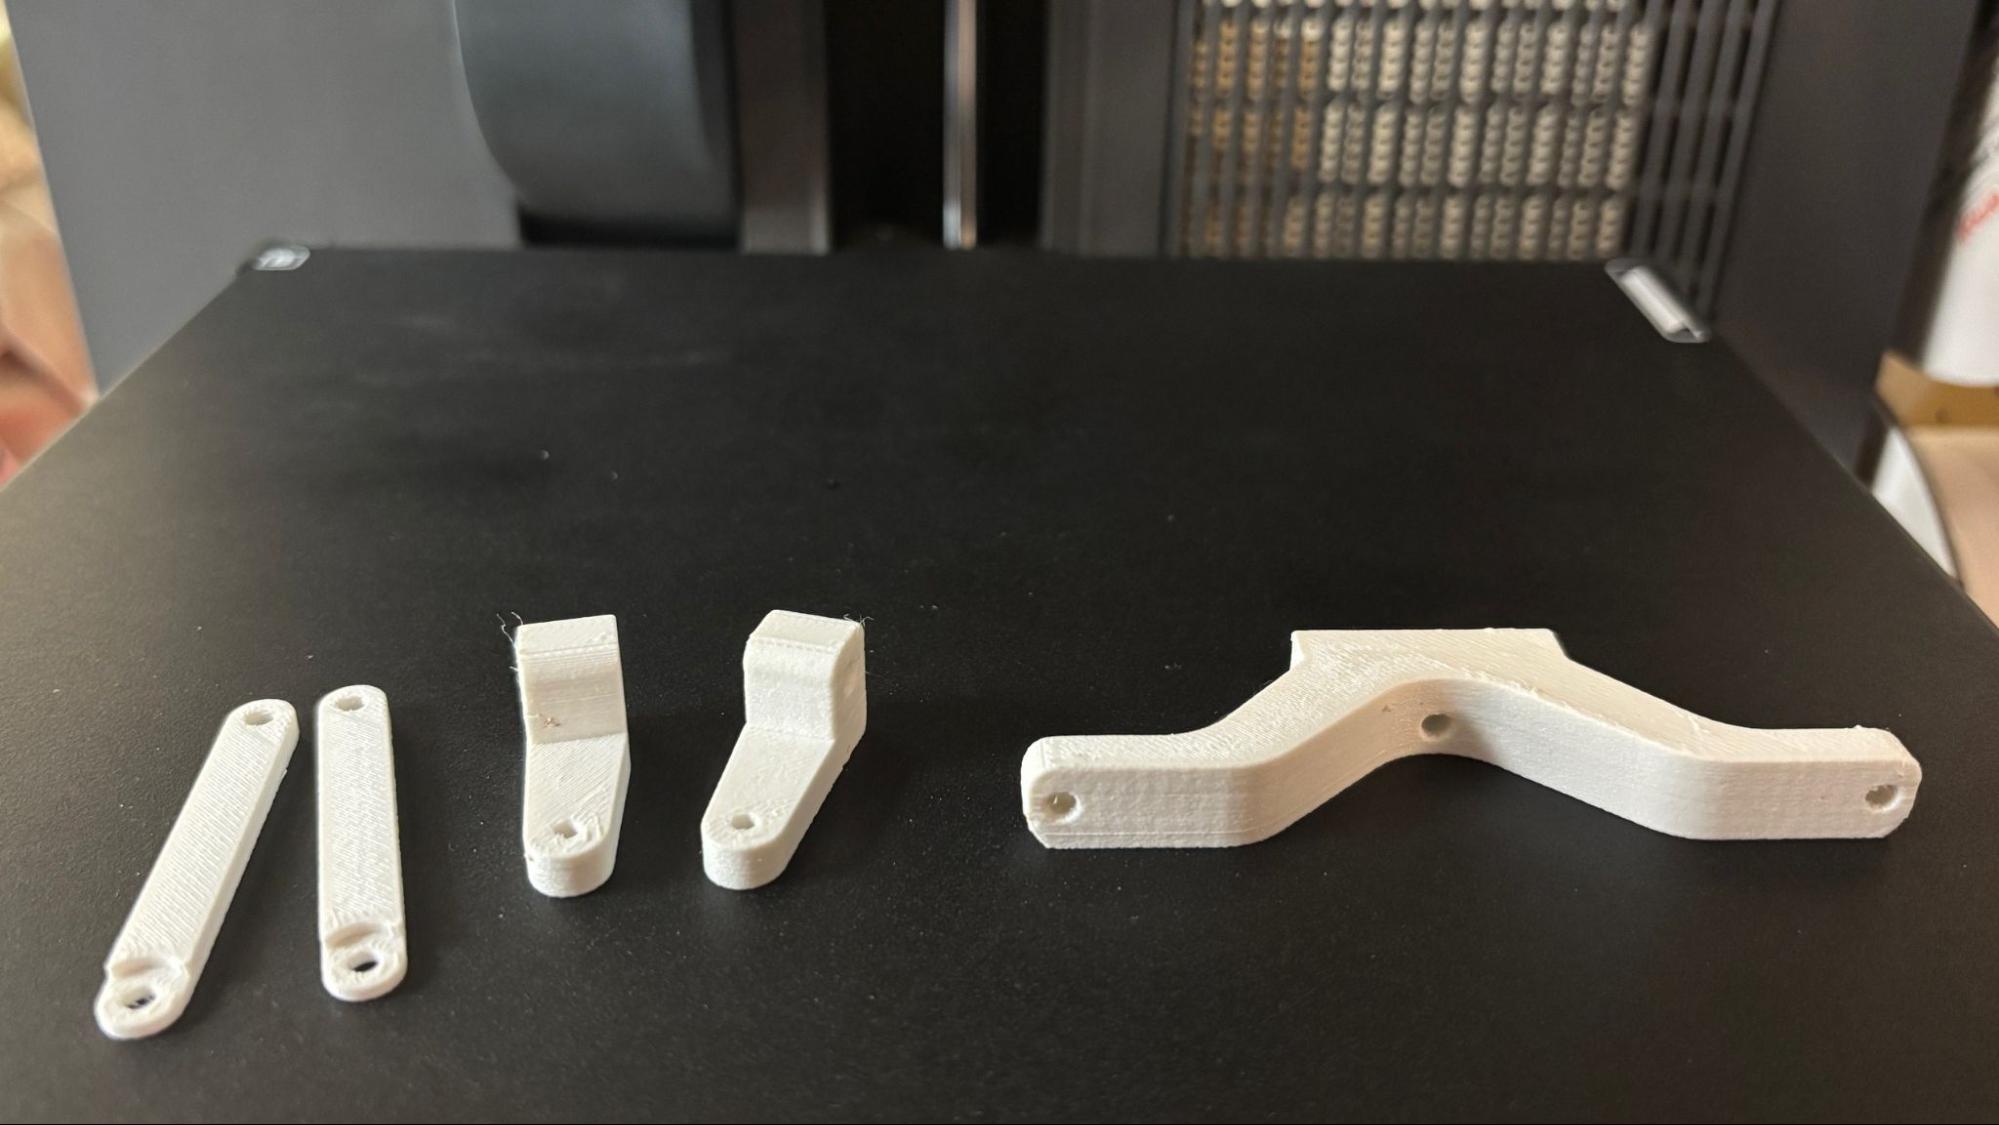
Lastly, I had to try a print that would take advantage of the high hotend temperature the Centauri 2 can reach. Polymaker’s PET-GF is a nice, semi-technical filament that is right in the sweet spot for the open frame Centauri 2. Running at 350 °C and using a modified PETG profile with 1 mm of retraction was perfect. I printed steering parts for my husband’s RC dragster that we’ll show off at 3D Printopia this fall. Using a .2mm layer height and an average print speed of 65 mm/s, the parts took 1 hour 23 minutes to print. The quality of the parts is just perfect.

Elegoo Centauri 2 Combo

From Edge of 3D’s Top Fuel Dragster (Image credit: Tom's Hardware)

Bottom Line

Currently on sale for $319, the Elegoo Centauri 2 Combo is the most budget-friendly four-color Core XY printer I’ve seen. From the well-designed UI to the rock-solid CANVAS 4-color system, the printer is really a joy to use, especially if your main interest is 3D printing colorful toys, decor, and gadgets.

For only $60 more, you can get the fully enclosed Centauri Carbon 2 Combo, which is a heck of a deal for a machine you won’t outgrow. For $10 more, you can get the single-color, fully enclosed Centauri Carbon, which is still our favorite budget 3D printer. But you have to admit, it’s quite a bargain when you compare any of the $899 Centauri printers to the current reigning champion Core XY machine, the Bambu Lab X2D, a machine with dual nozzles, five colors, and one of the best ecosystems around.

✇Tomshardware

Desktop UV printers and wild custom builds take over Open Sauce 2026 — $1,700 full-color printers, flash-cured resin, and a rideable speeder bike

If you want to see the bleeding edge of 3D printing tech, you go to FormNext in Frankfurt, Germany. If you want to see the latest in consumer electronics, you go to CES in Las Vegas. If you want to see what it’s like to microwave your own head, you go to Open Sauce in San Mateo, California.

The decidedly quirky maker festival marked its fourth year a few weeks ago, bringing together inventors, makers, artists, cosplayers, YouTubers, and yes, a number of sponsors. Founded by science YouTuber William Osman, the festival has become a must-see event for the maker community.

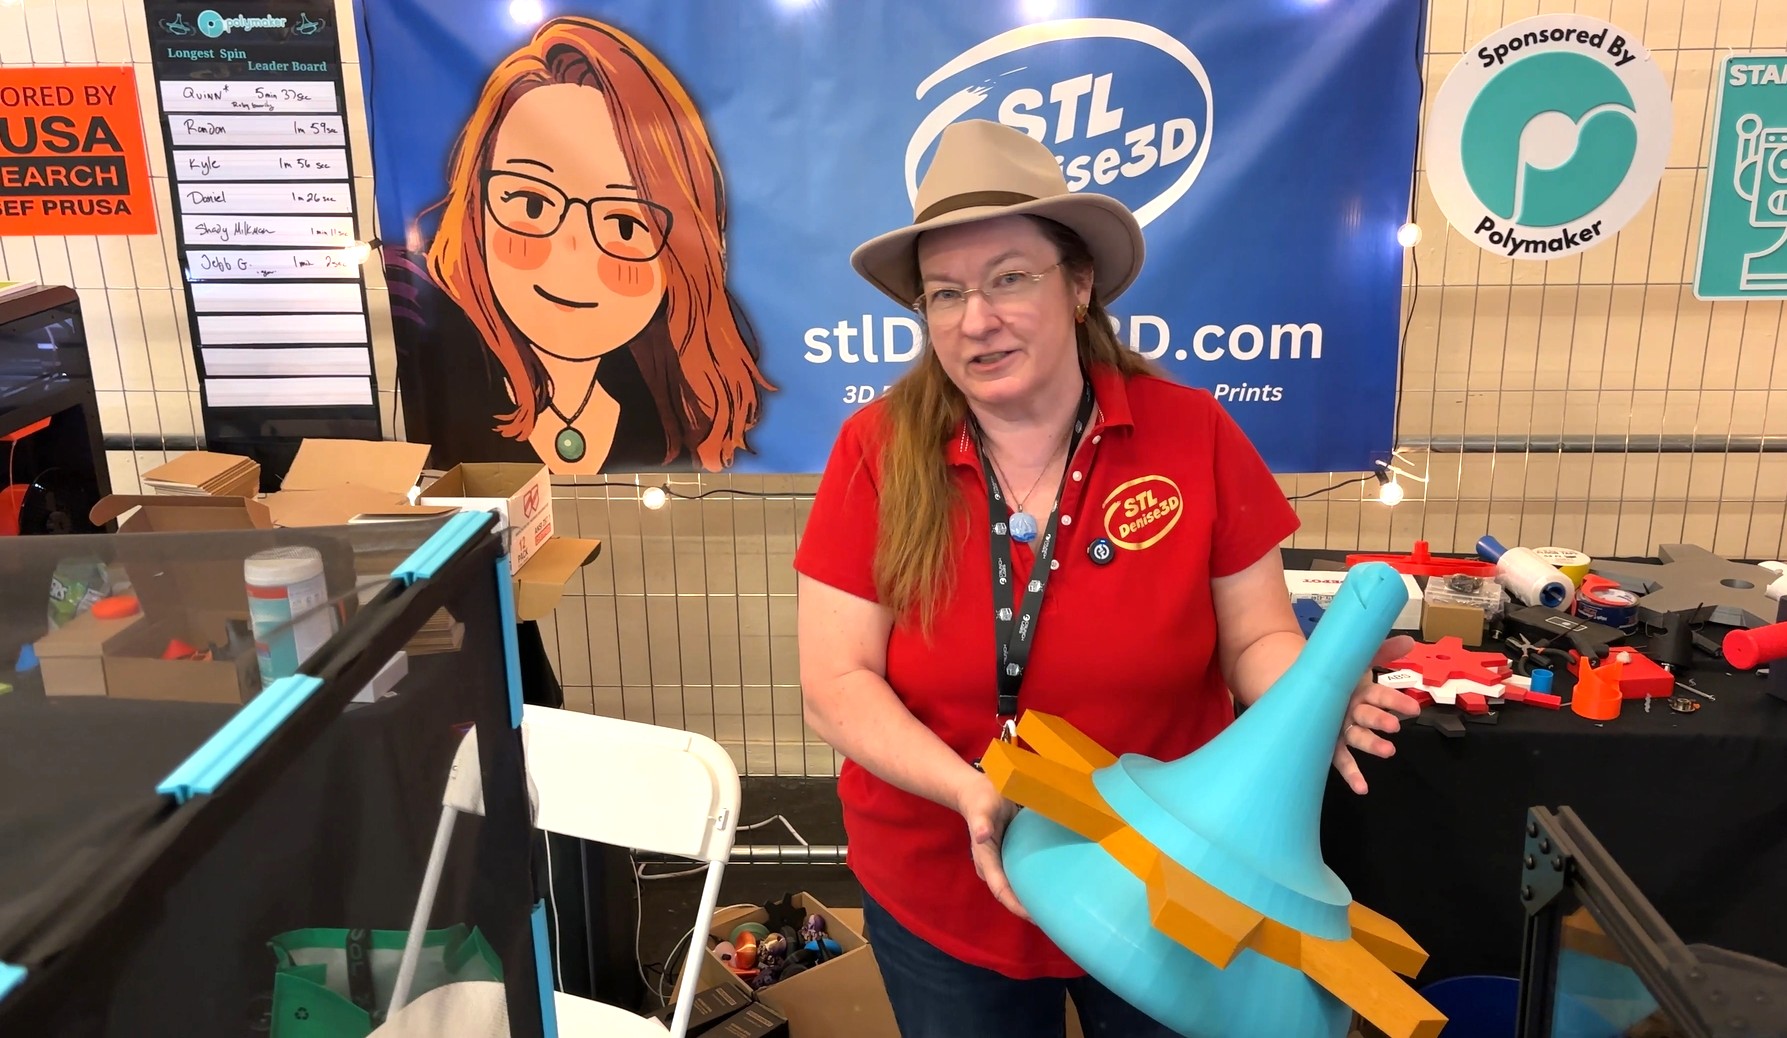
Denise Bertacchi with her Open Sauce project.

Denise Bertacchi with her Open Sauce project. (Image credit: Tom's Hardware)

I attended this year’s festival as an exhibitor, with my “freakishly large, 3D-printed fighting tops.” For full disclosure, Prusa Research sponsored my travel costs and also partnered with me on a contest hosted on Printables, where I provided the example model and was on the judging panel. Polymaker sent an insane amount of filament for printing the tops and arenas.

We received some amazing and creative entries; even YouTuber and maker Jeff Geerling stopped by to join in on the fun.

Open Sauce 2026

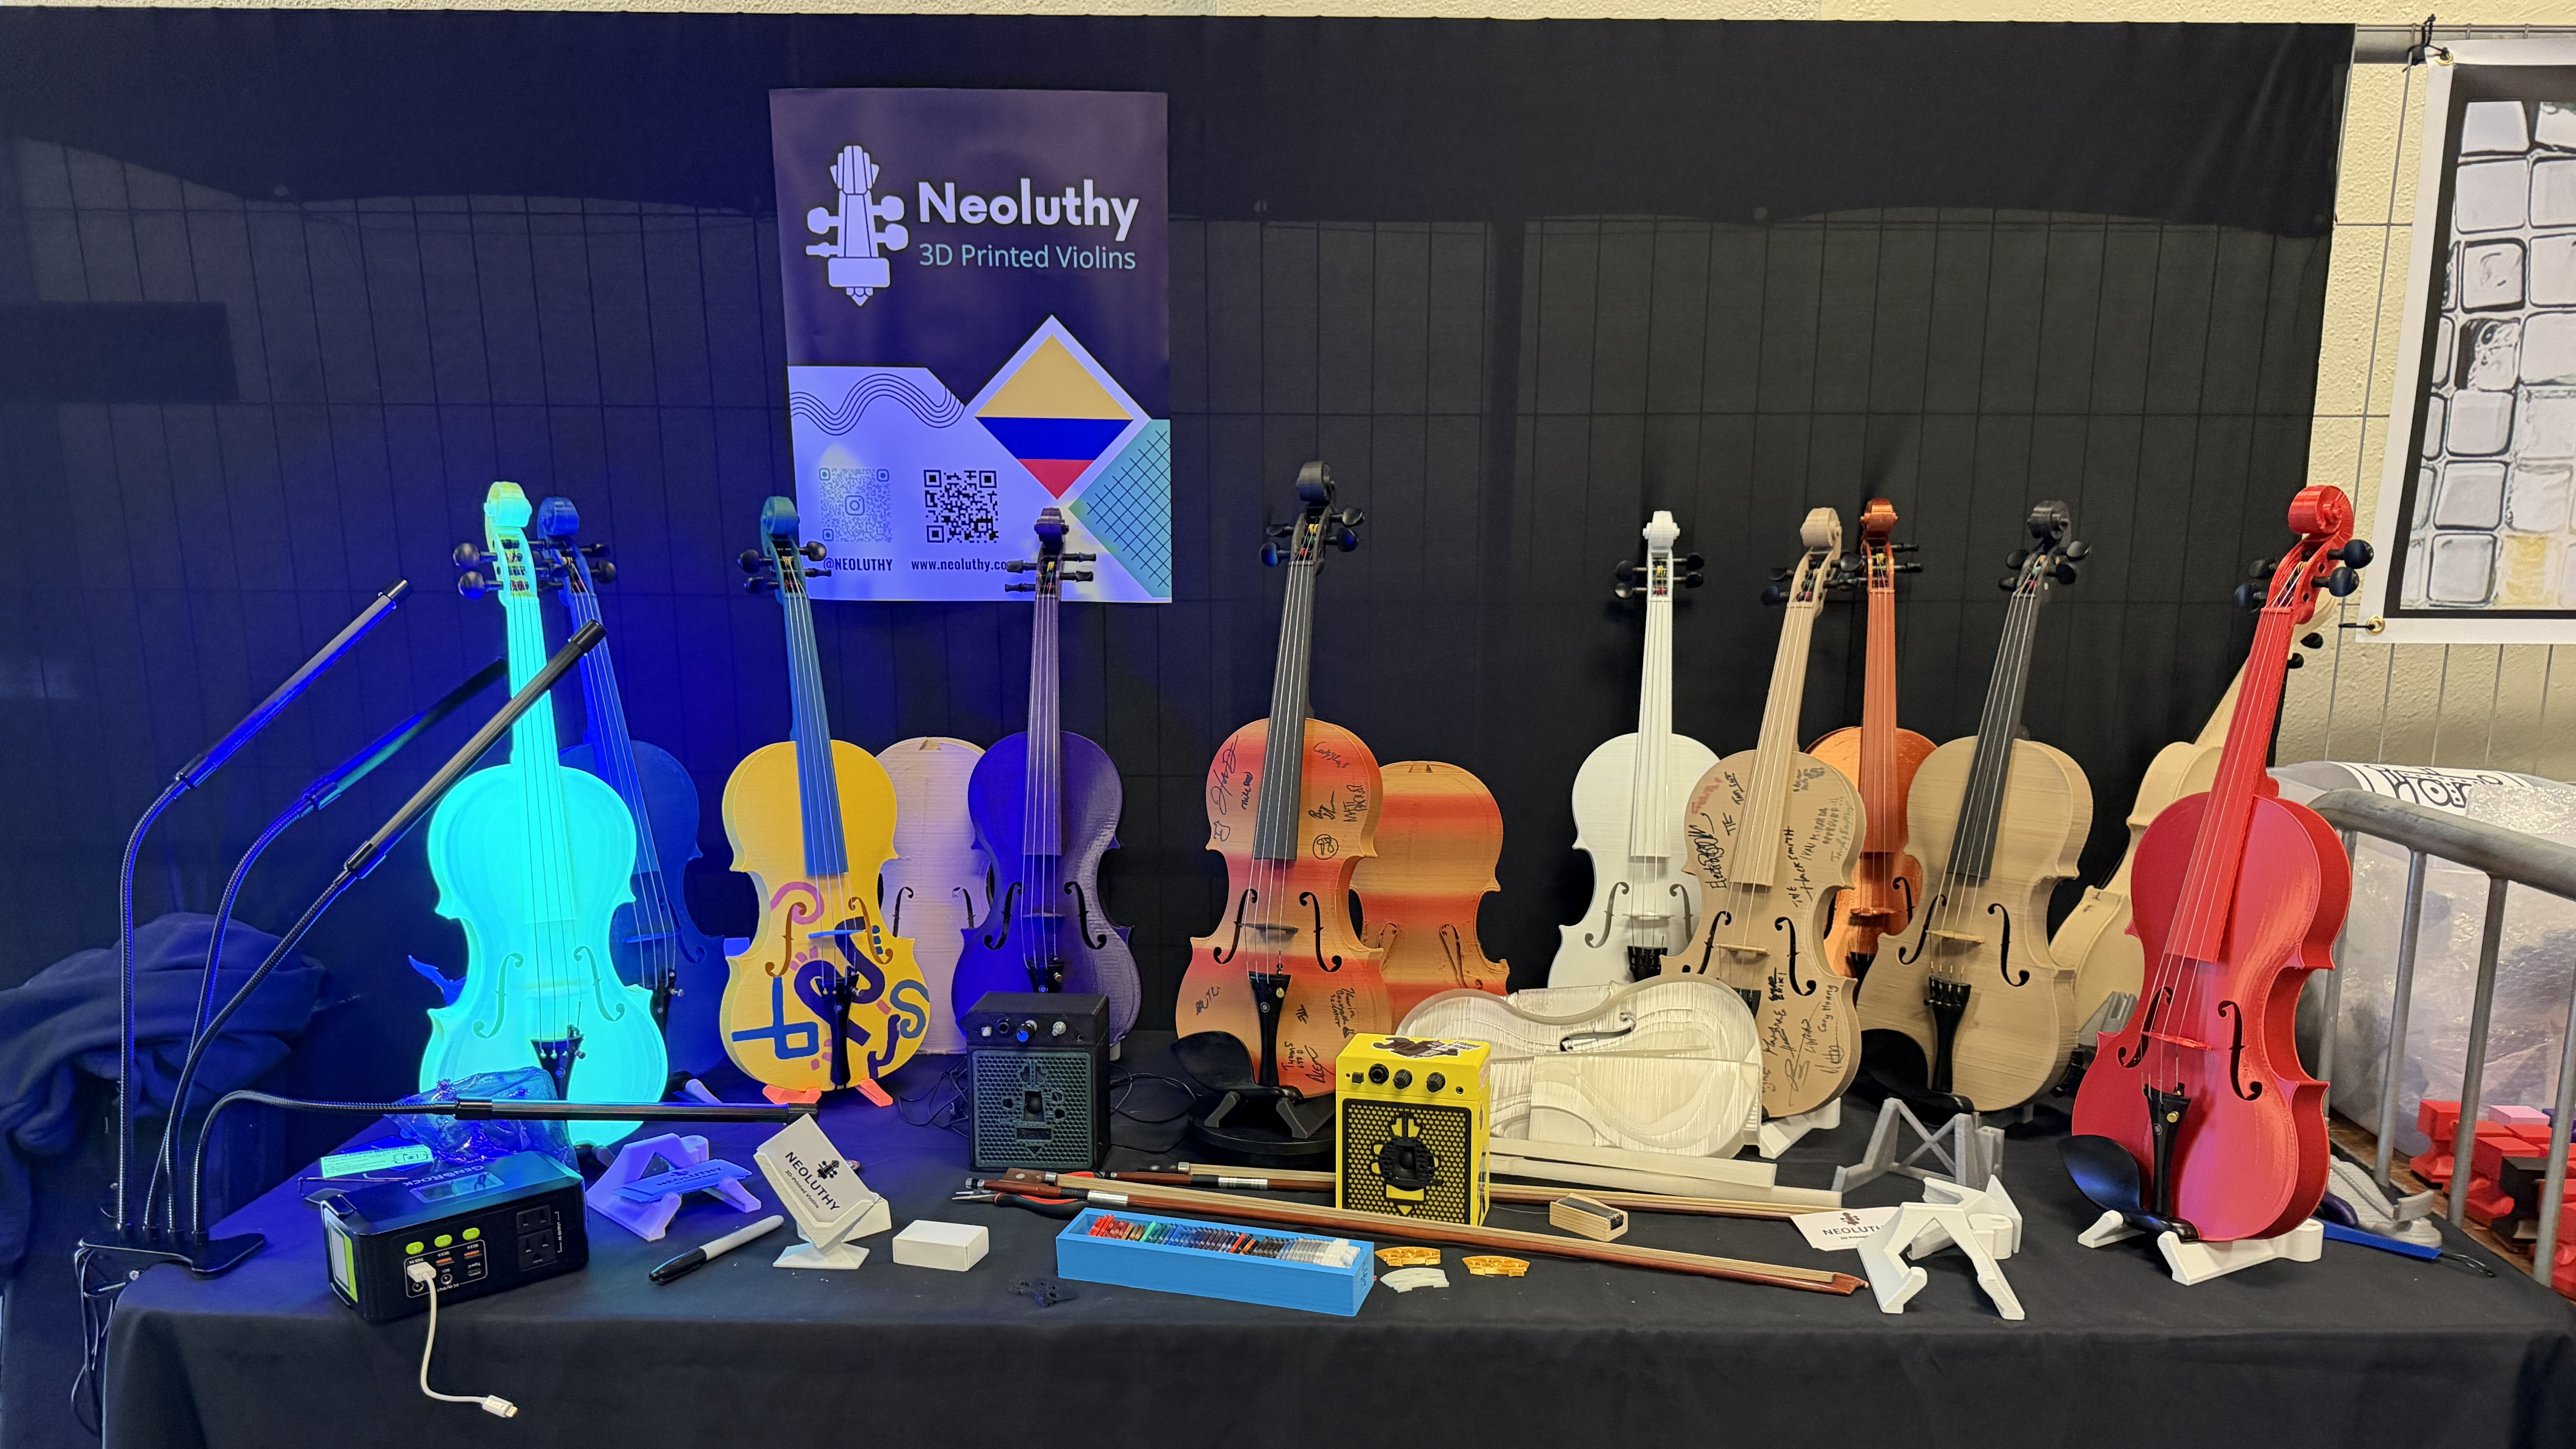
PLA and wood PLA 3D-printed violins by Daniel Quicazán, founder of Neoluthy. (Image credit: Tom's Hardware)

Besides the obvious 3D-printed robots, 3D-printed printers, and 3D-printed violins (see above), a lot of exhibits used 3D-printed parts as an easy method to prototype and manufacture their project. Here are a few gems we found on the show floor.

Positron 3D

Open Sauce 2026
Tom's Hardware
Open Sauce 2026
Tom's Hardware

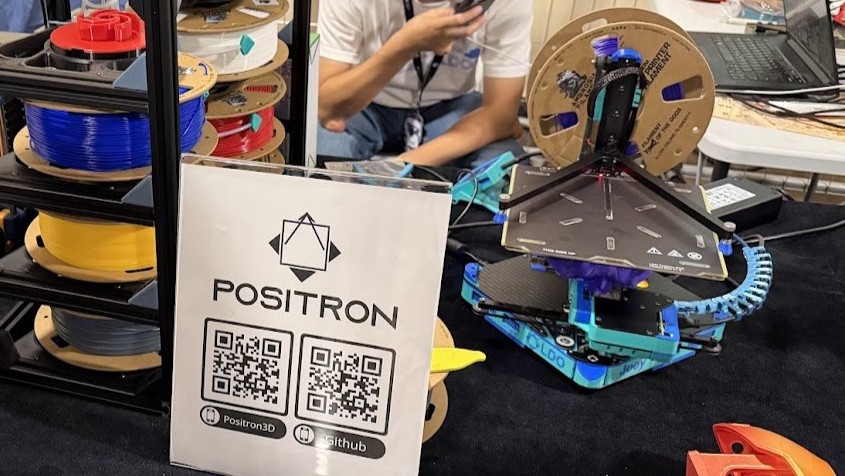
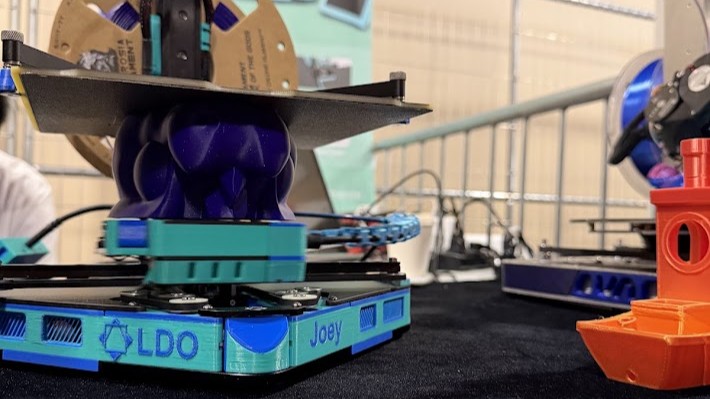
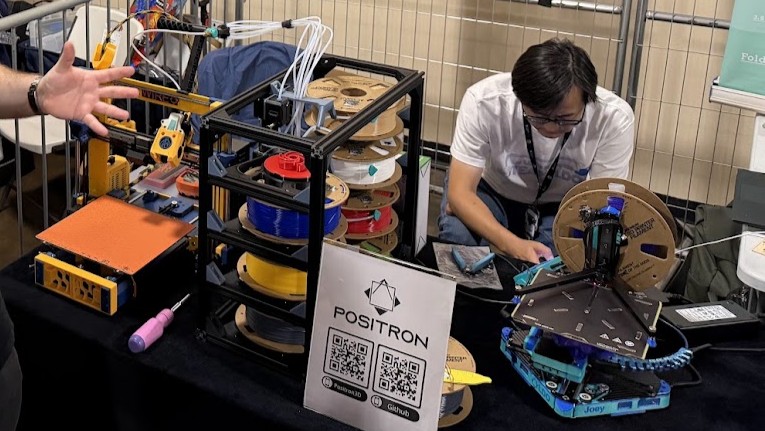
Even with a modest display, you still can't help but notice Positron 3D's amazing LDO Positron upside-down 3D printer. Designed to fit into a 1kg filament box, this printer can be folded down to 200 × 200 × 70 mm in size, making it easy to store or travel with.

PrusaWire

Open Sauce 2026
Tom's Hardware
Open Sauce 2026
Tom's Hardware
Open Sauce 2026
Tom's Hardware

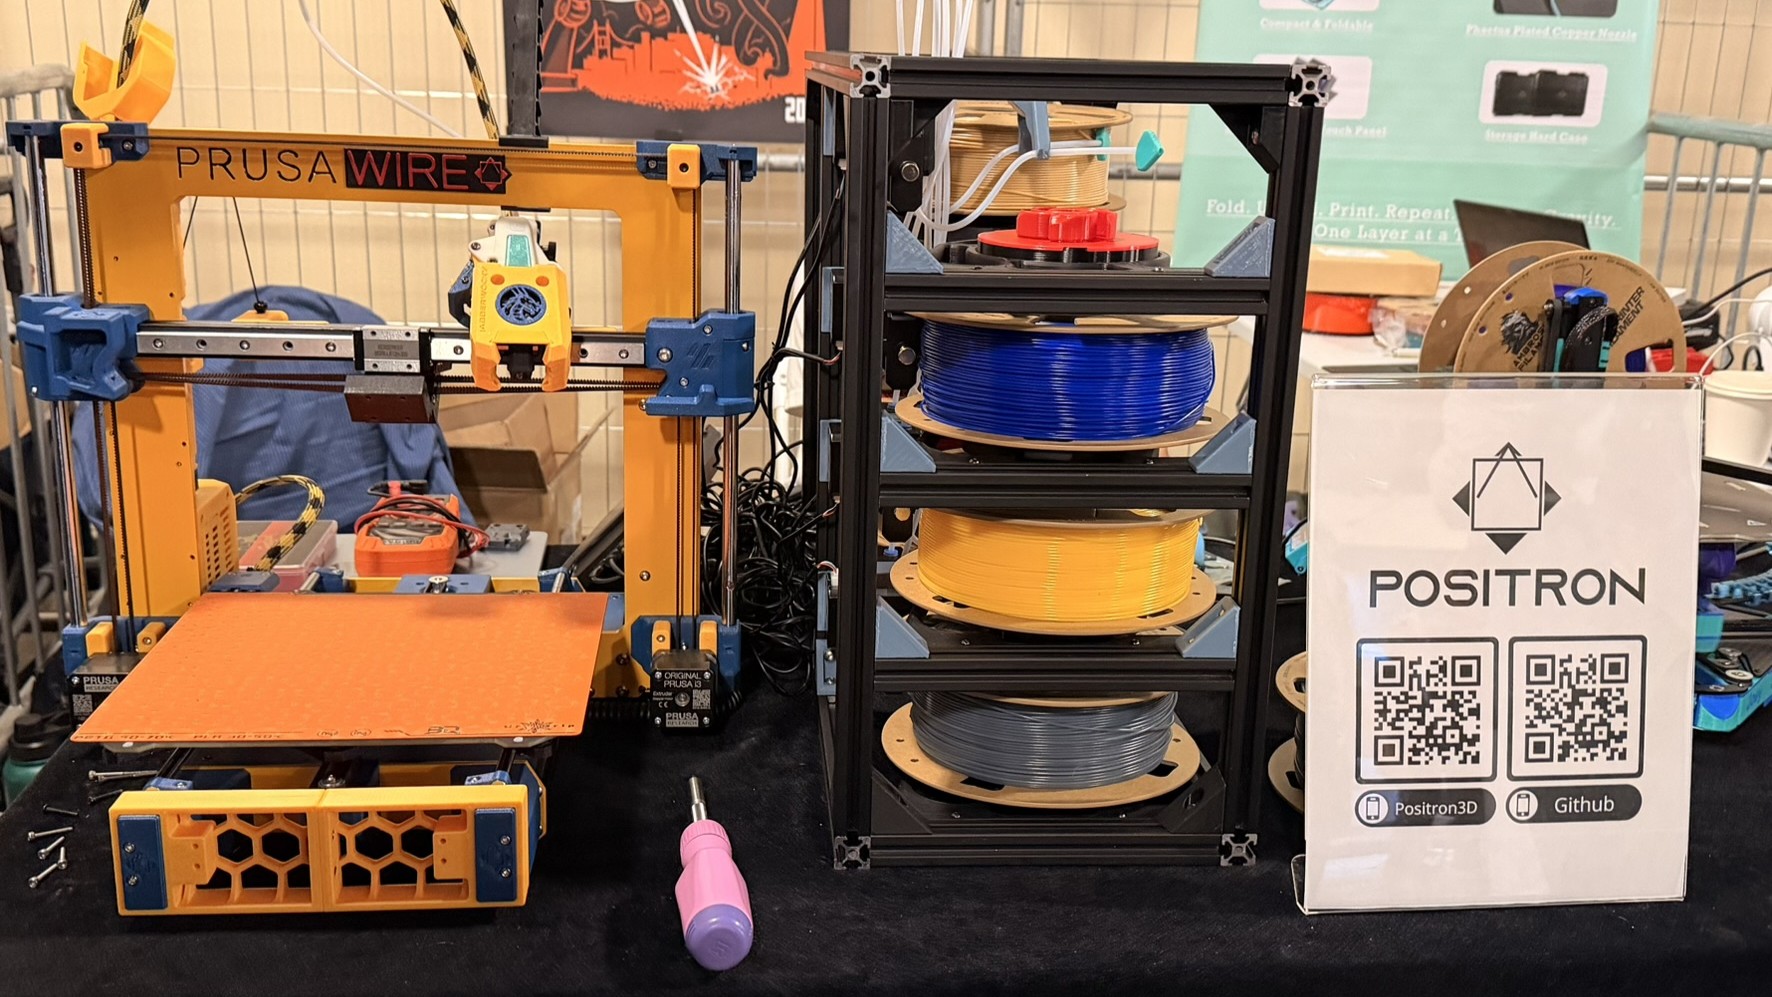
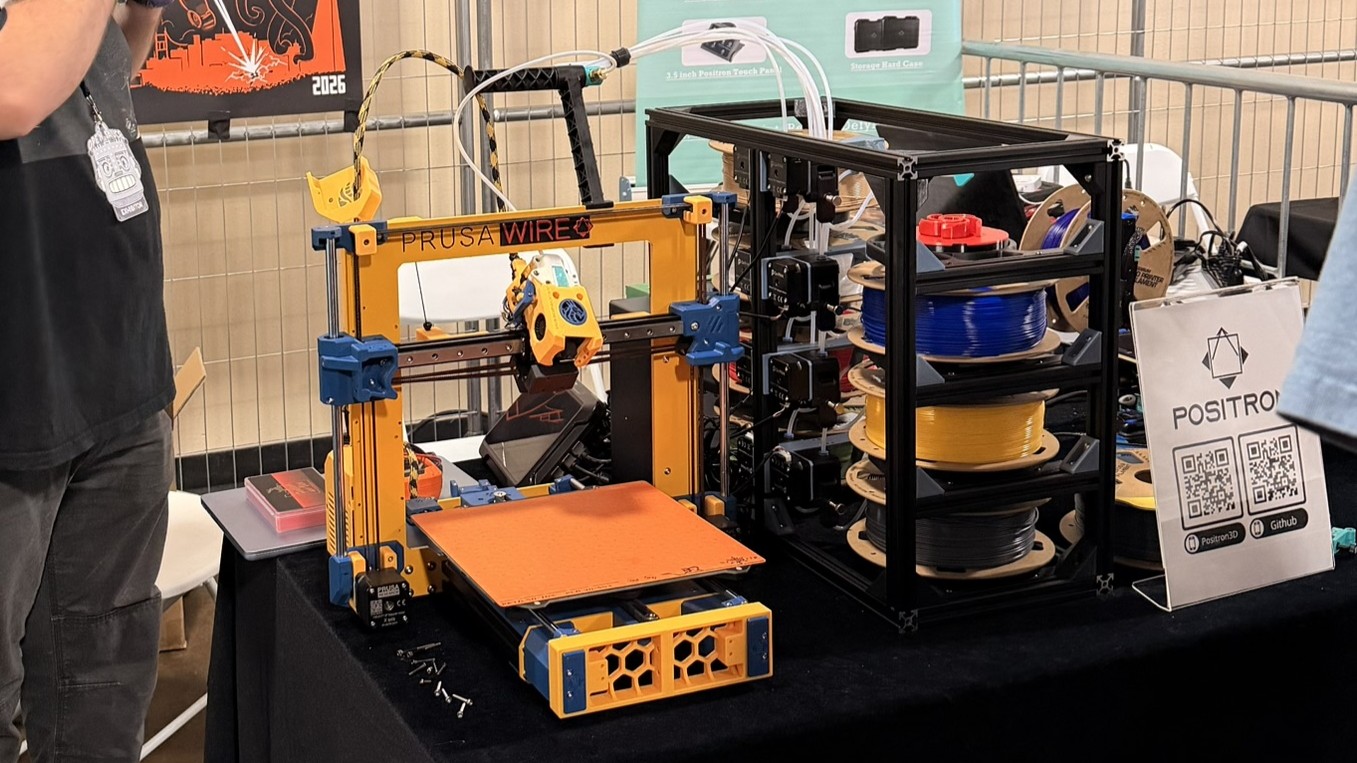
Also from Positron, 3D printing enthusiast @joescalon brought his Prusawire R1 project to the show. For the full assembly guide and 3D configurator, go here.

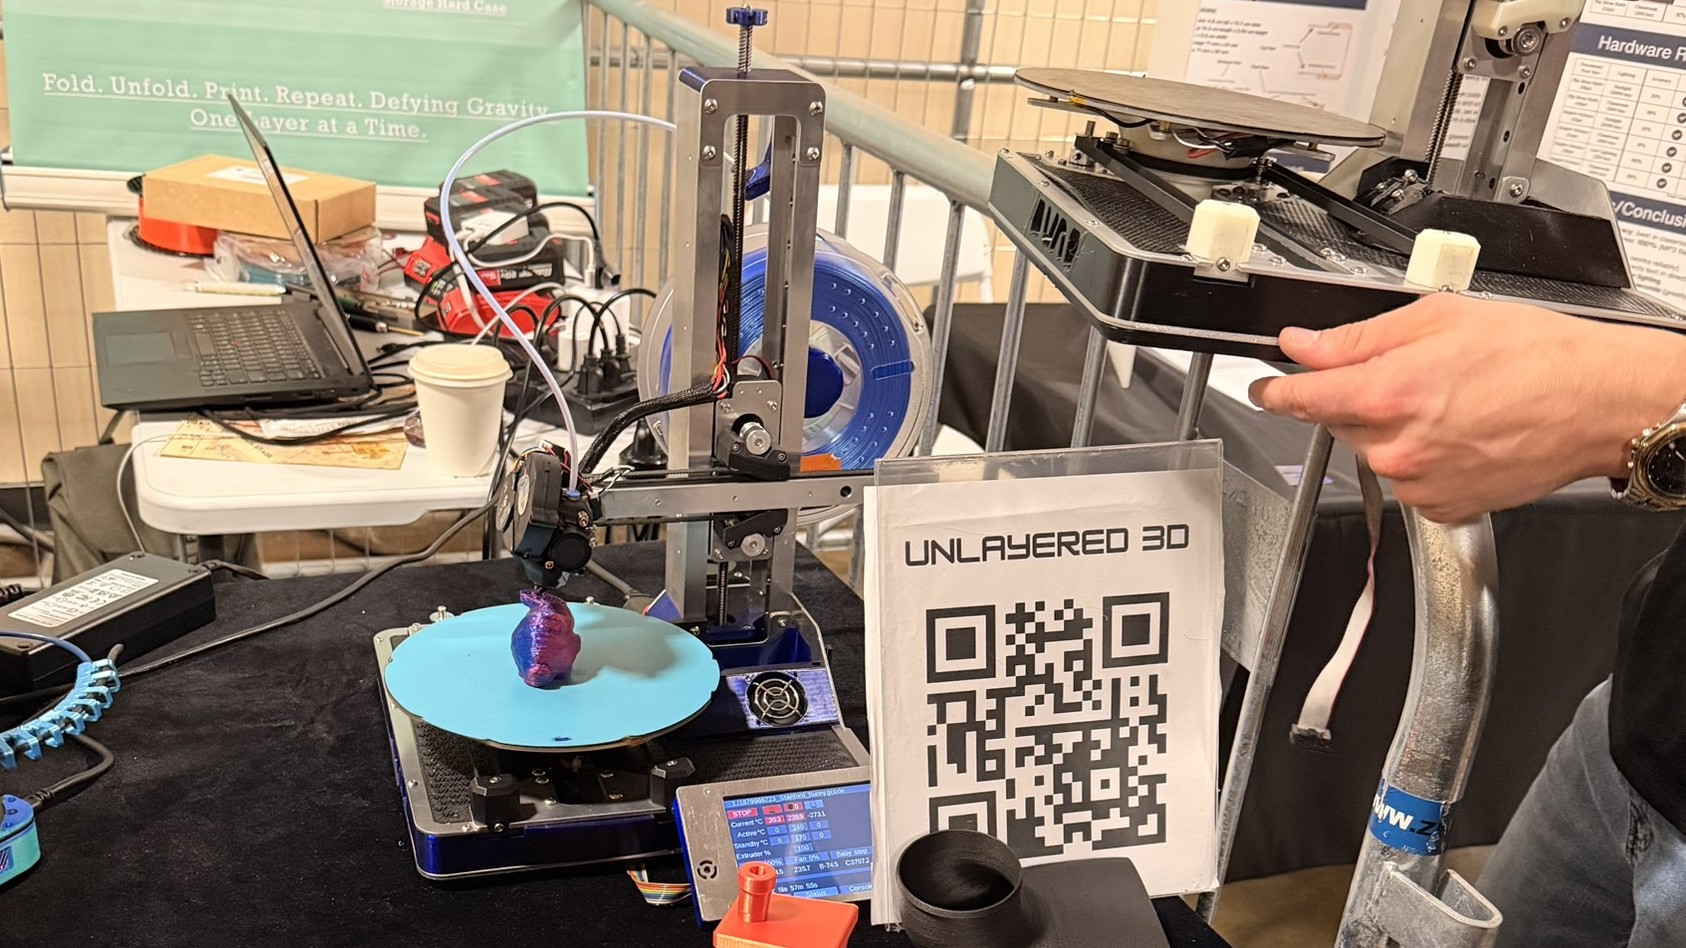
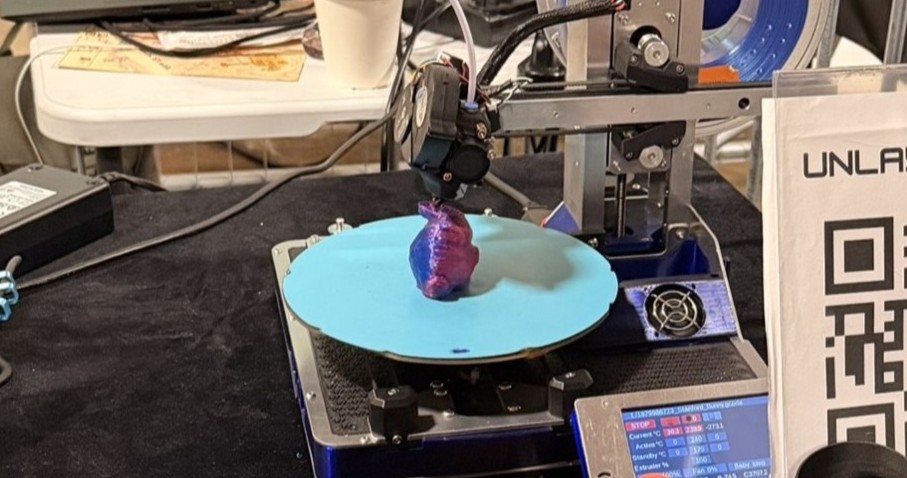
Unlayered 3D

Open Sauce 2026
Tom's Hardware
Open Sauce 2026
Tom's Hardware

Although still in the development phase, seeing Unlayered 3D's non-planar 5-axis 3D printer in action is very impressive. It defies the traditional FDM layered printing process with its tilting print head and rotating bed feature, eliminating the need for supports. This results in a stronger, smoother output.

Now, for the professionals.

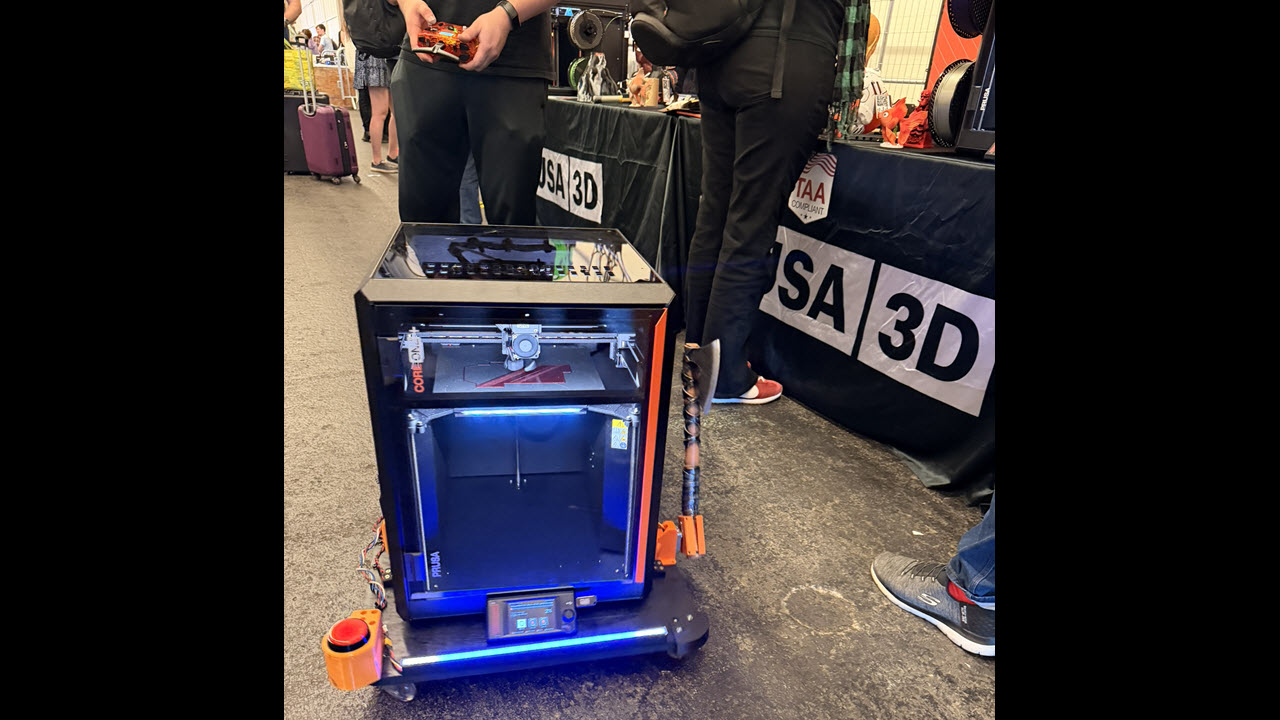
Prusa Research: the INDX and Killer CORE One+

Prusa CORE One bot at Open Sauce 2026
Tom's Hardware
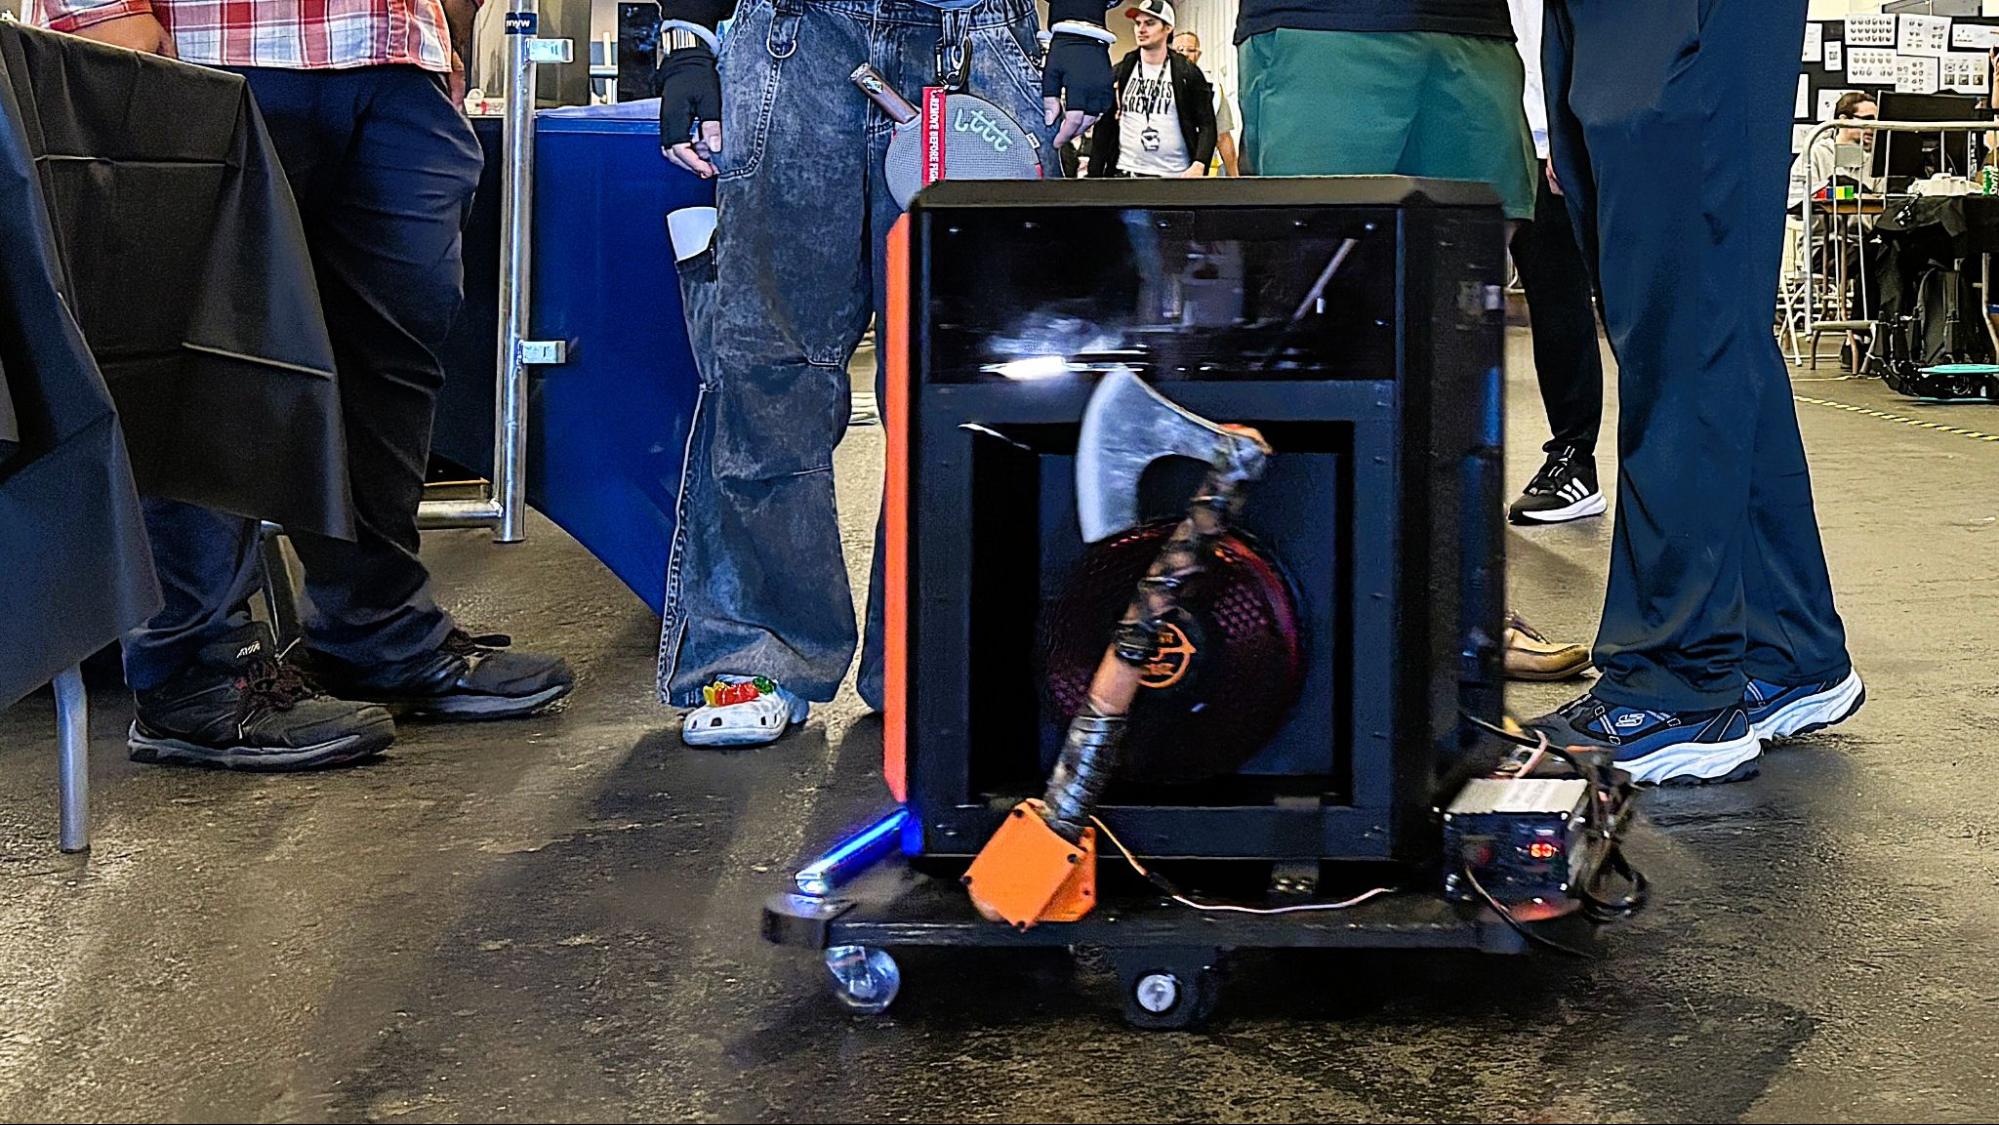
Prusa CORE One bot at Open Sauce 2026
Tom's Hardware

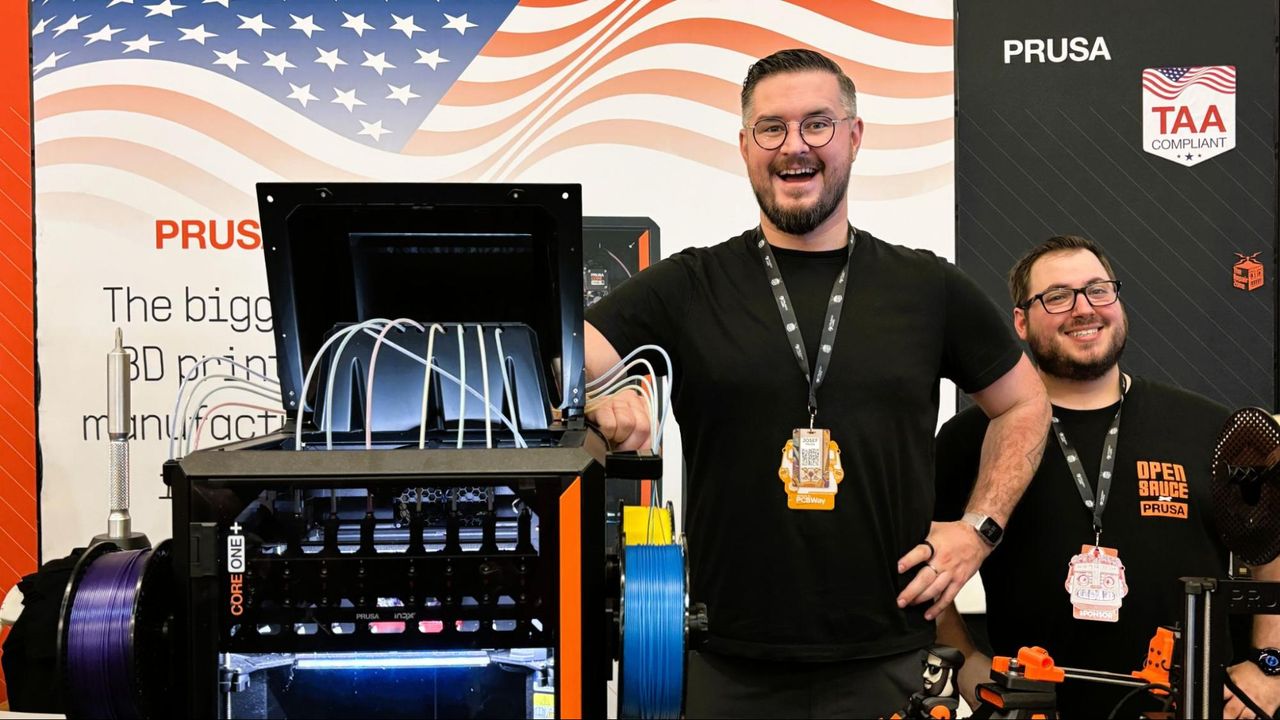
Prusa Research’s booth was a hub of activity, with the new CORE One+ INDX on display, next to Prusa’s CORE One L, MK4S and XL machines. They also brought along several creators and their projects, such as a giant cardboard Core One+ (with a working touchscreen) photo booth and an axe-wielding CORE One bot that printed while it zipped around the venue.

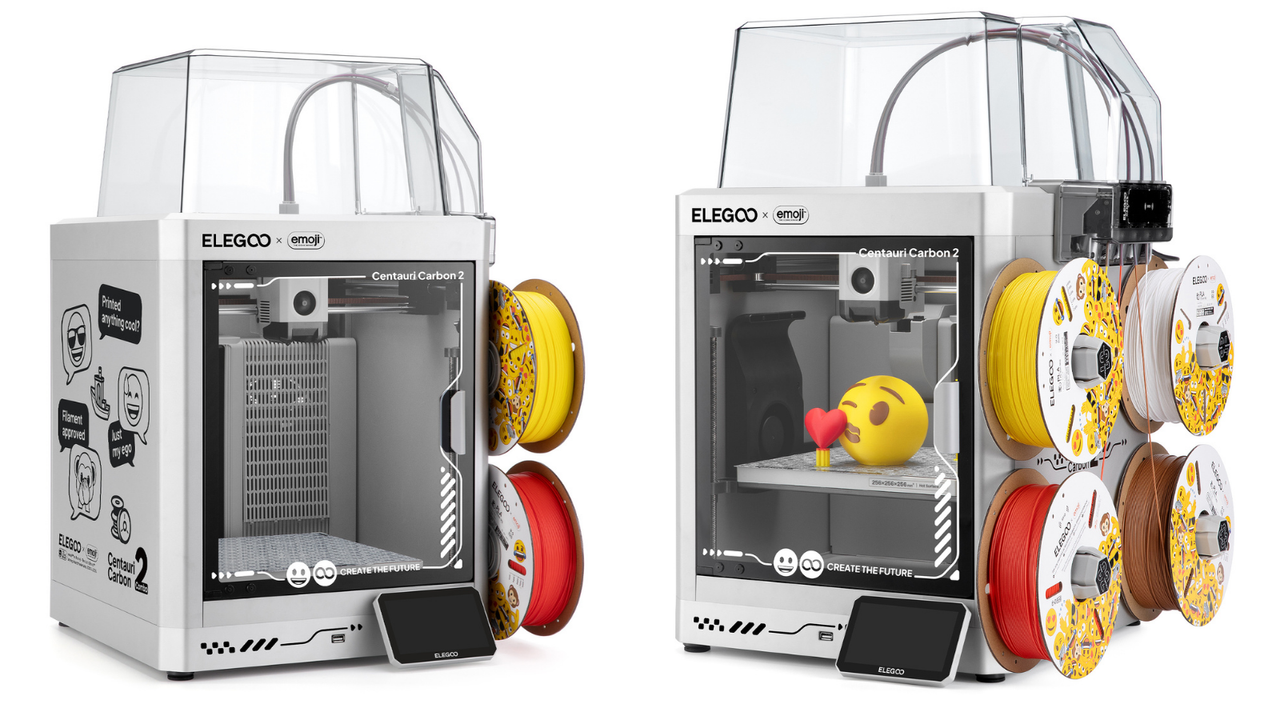
Elegoo: emoji x Centauri Carbon 2

Open Sauce 2026
Tom's Hardware
Open Sauce 2026
Tom's Hardware
Open Sauce 2026, San Mateo, CA
Tom's Hardware

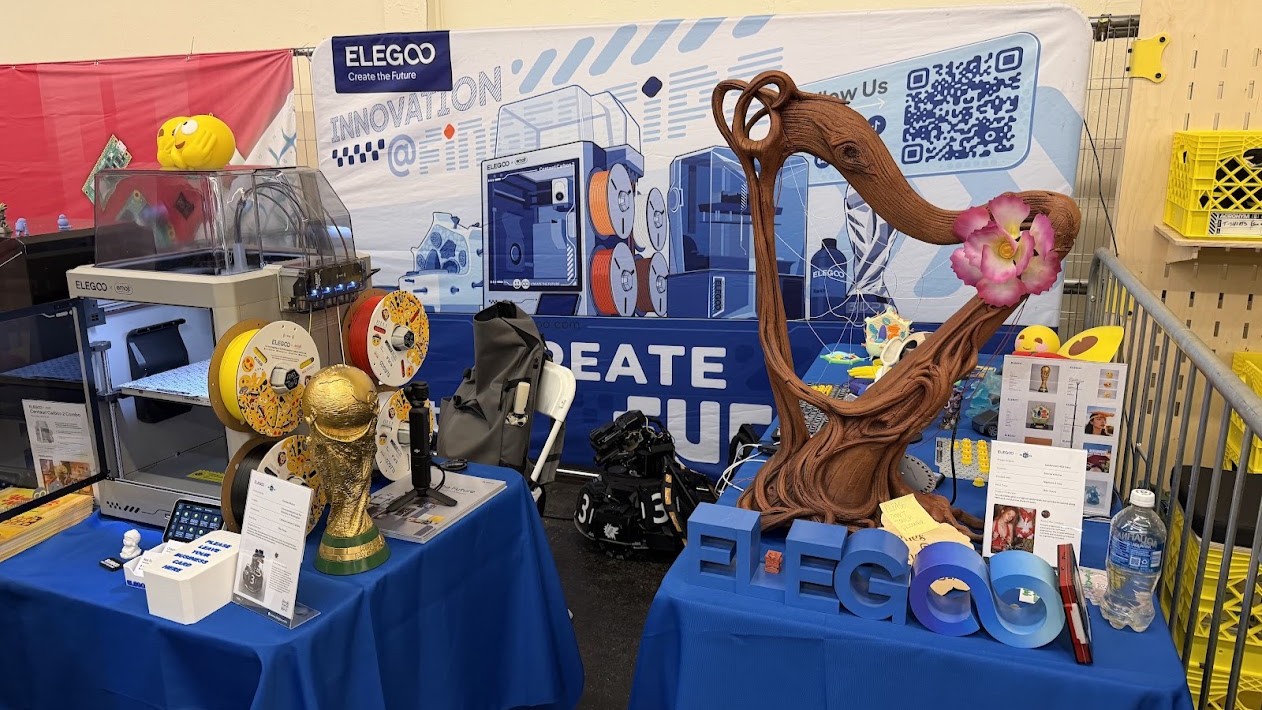
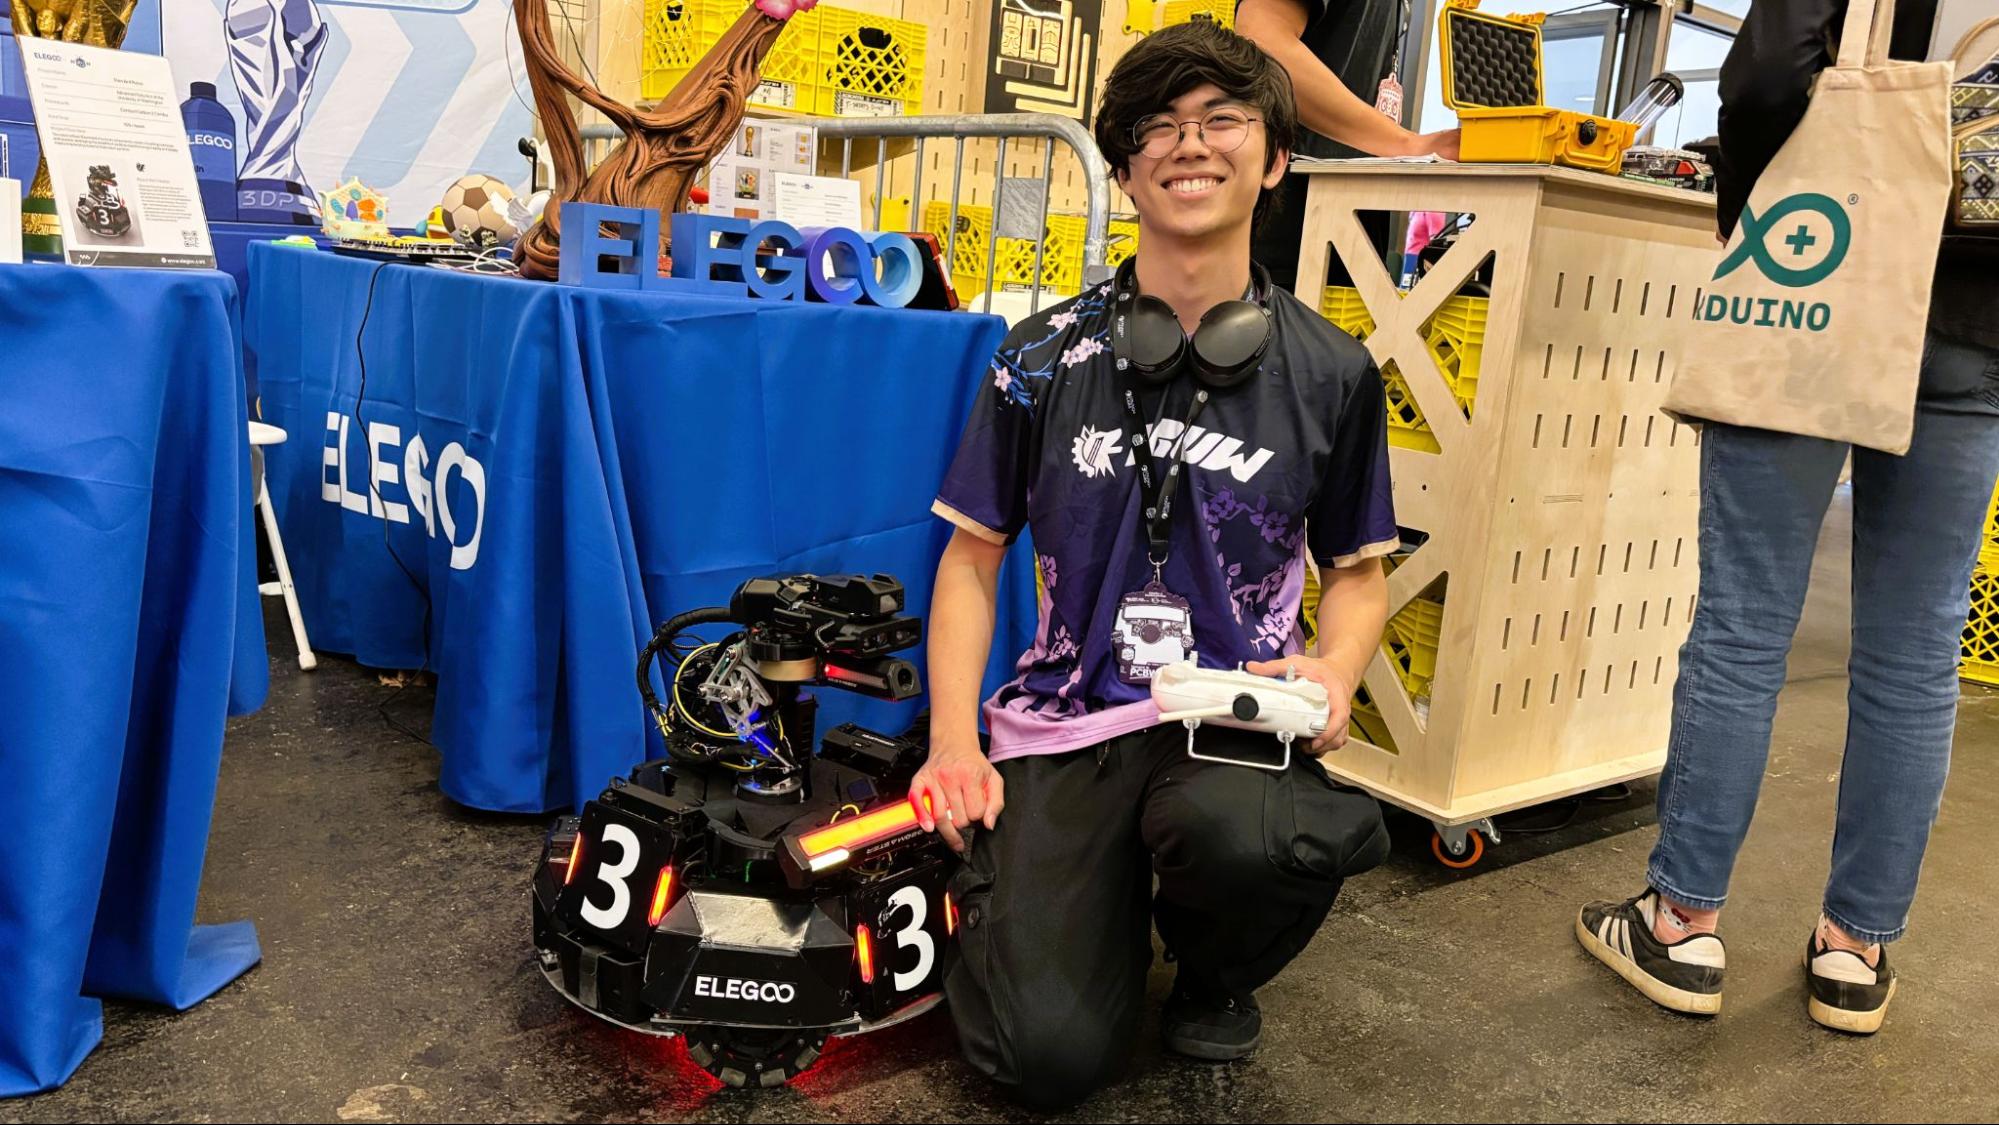
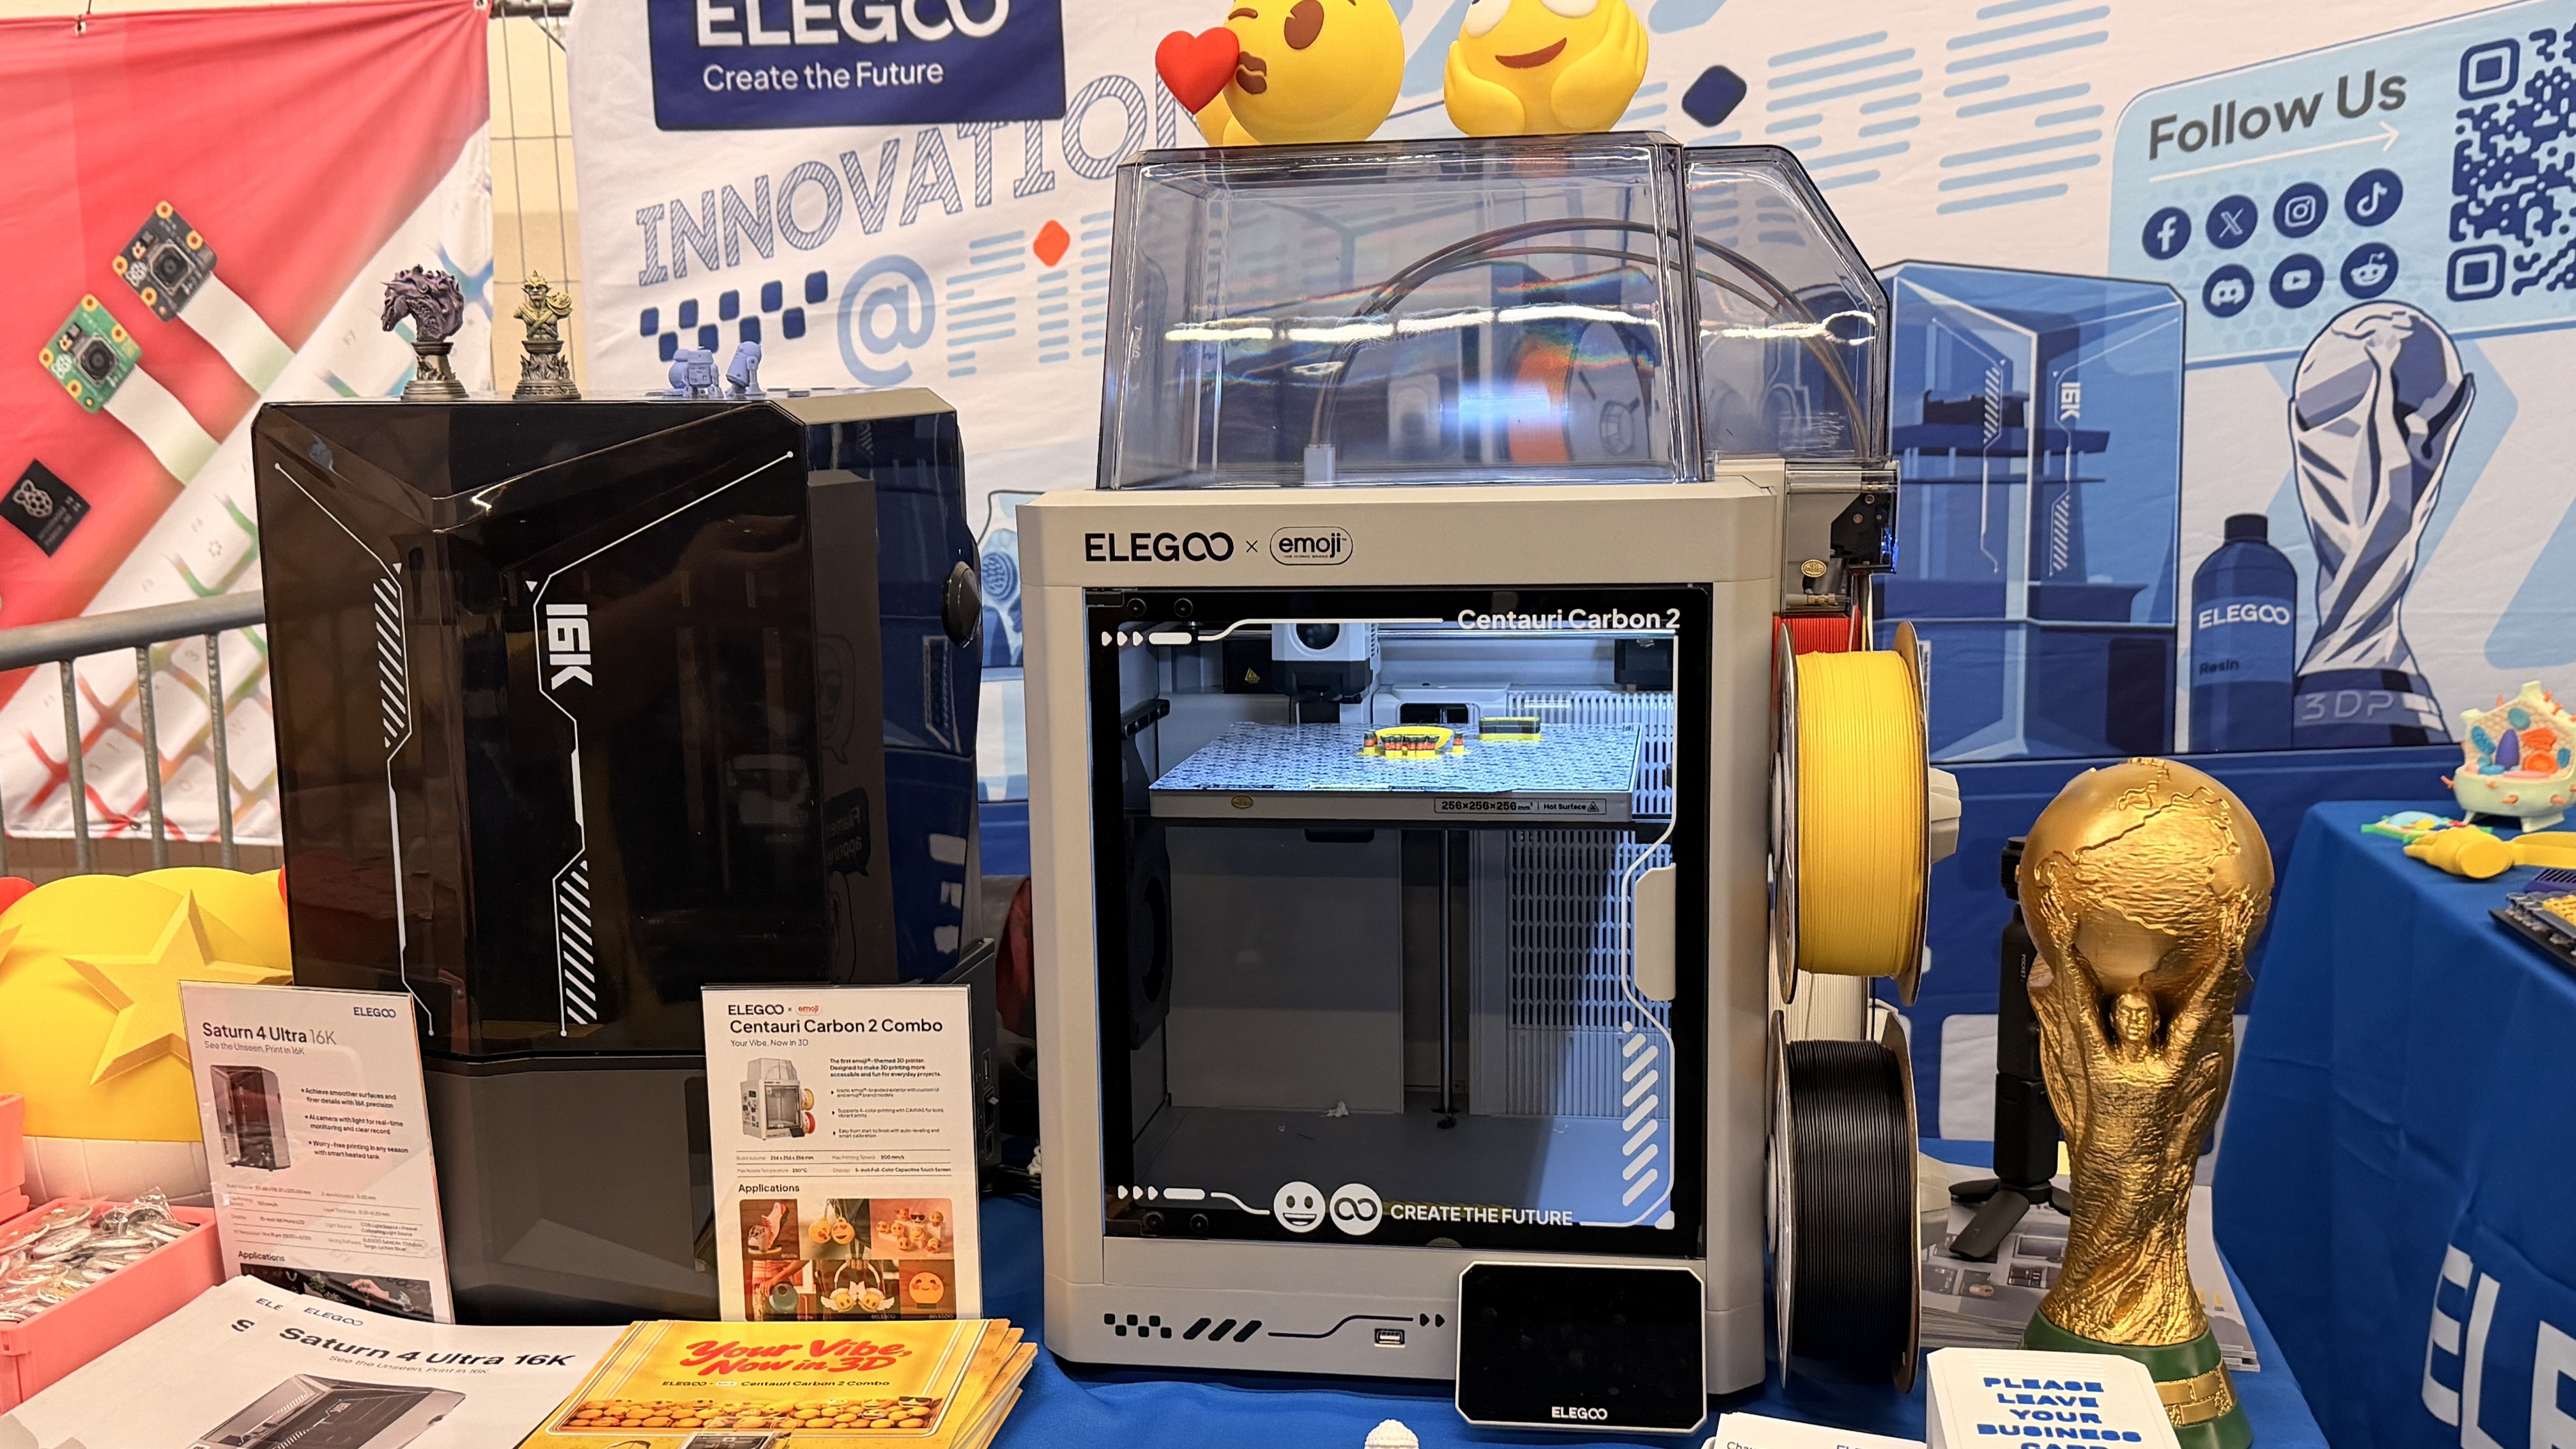
Elegoo booth featured some amazing creations, like a functional “web harp” and a battle bot built by the University of Washington Advanced Robotics team using the Centauri Carbon 2 and Elegoo filaments. They had an emoji x Centauri Carbon 2 on display with many emoji-themed props for visitors to use for selfies.

Snapmaker: U1 toolchanger

Open Sauce 2026

(Image credit: Tom's Hardware)

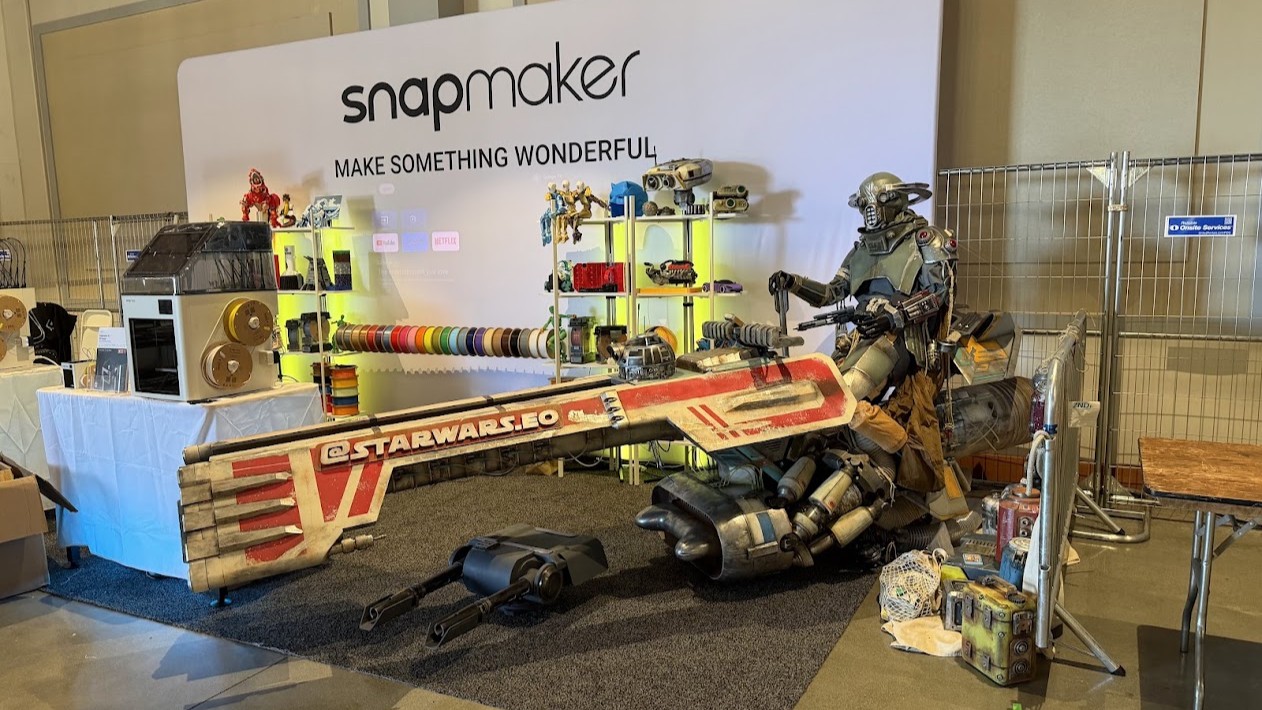
Snapmaker brought their U1 toolchanger, which printed this mostly 3D-printed, fan-made Star Wars speeder bike, built with an electric scooter cleverly hidden underneath so it appears to float along the road. See it in action here.

Open Sauce 2026, San Mateo, CA

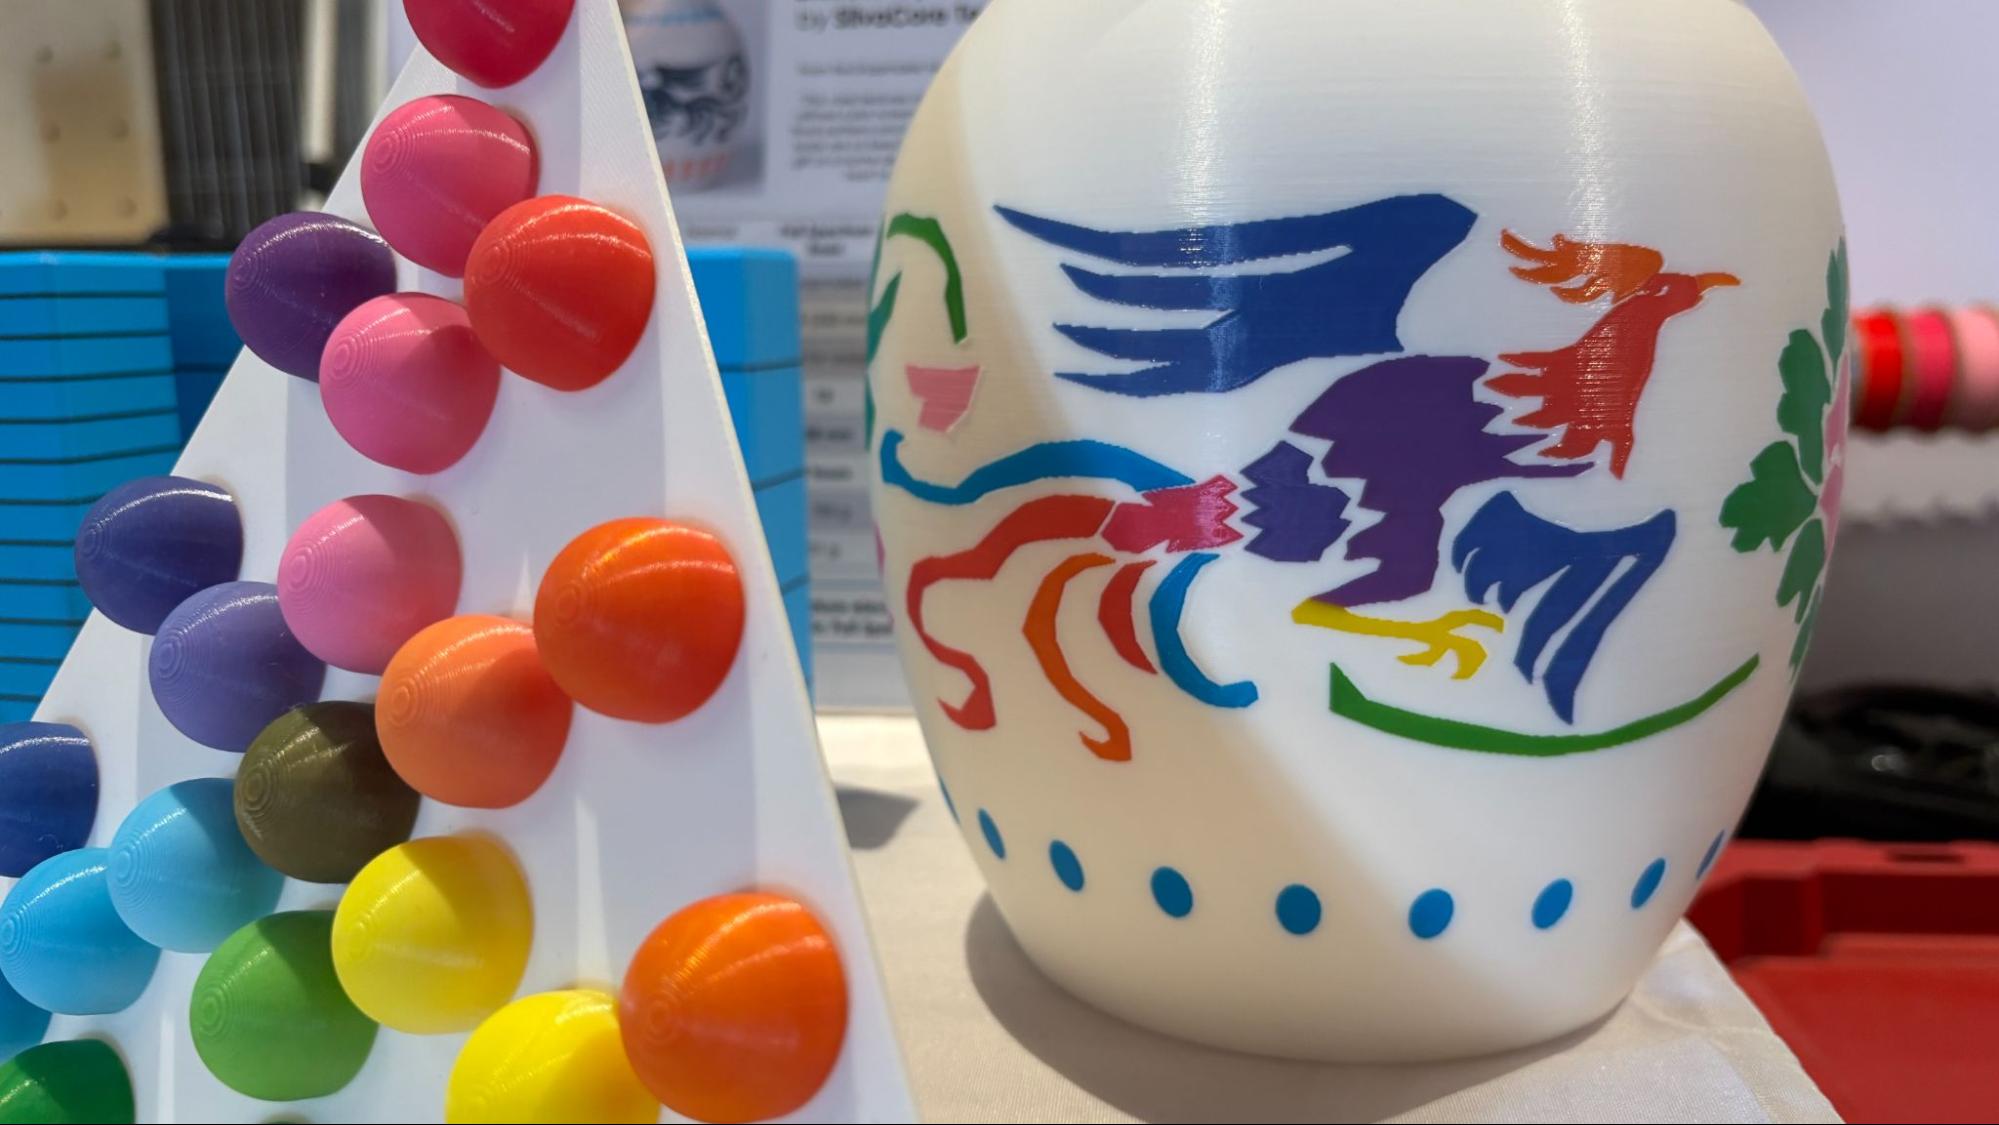
Snapmaker sponsors Full Spectrum, which printed this eight-color vase using only four filaments. (Image credit: Tom's Hardware)

The Snapmaker team also showed off the latest from the Full Spectrum project, which can mix four filaments into an unlimited color palette with no obvious layer lines by using subdivided layers. We’ll be checking that one out soon.

Three for UV

UV printing is an industrial technology just now landing on home users’ desktops in the form of somewhat affordable machines. It’s like a cross between 2D photo printing and resin 3D: it uses UV-cured ink to print photographic color on nearly any material you can place inside the machine’s compartment. This can be flat stickers and photos or “2.5D textures” that are generally limited to a few millimeters in height. Some machines are even venturing into full color 3D printing.

The tech is very new, with most machines still at the prototype stage or lurching its way through Kickstarter.

We are aware of five companies making the attempt to shrink these $50,000+ machines down to something a small business or garage-based entrepreneur can wrap their budgets around. Three of the companies were at Open Sauce: xTool, EufyMake, and Morpho.

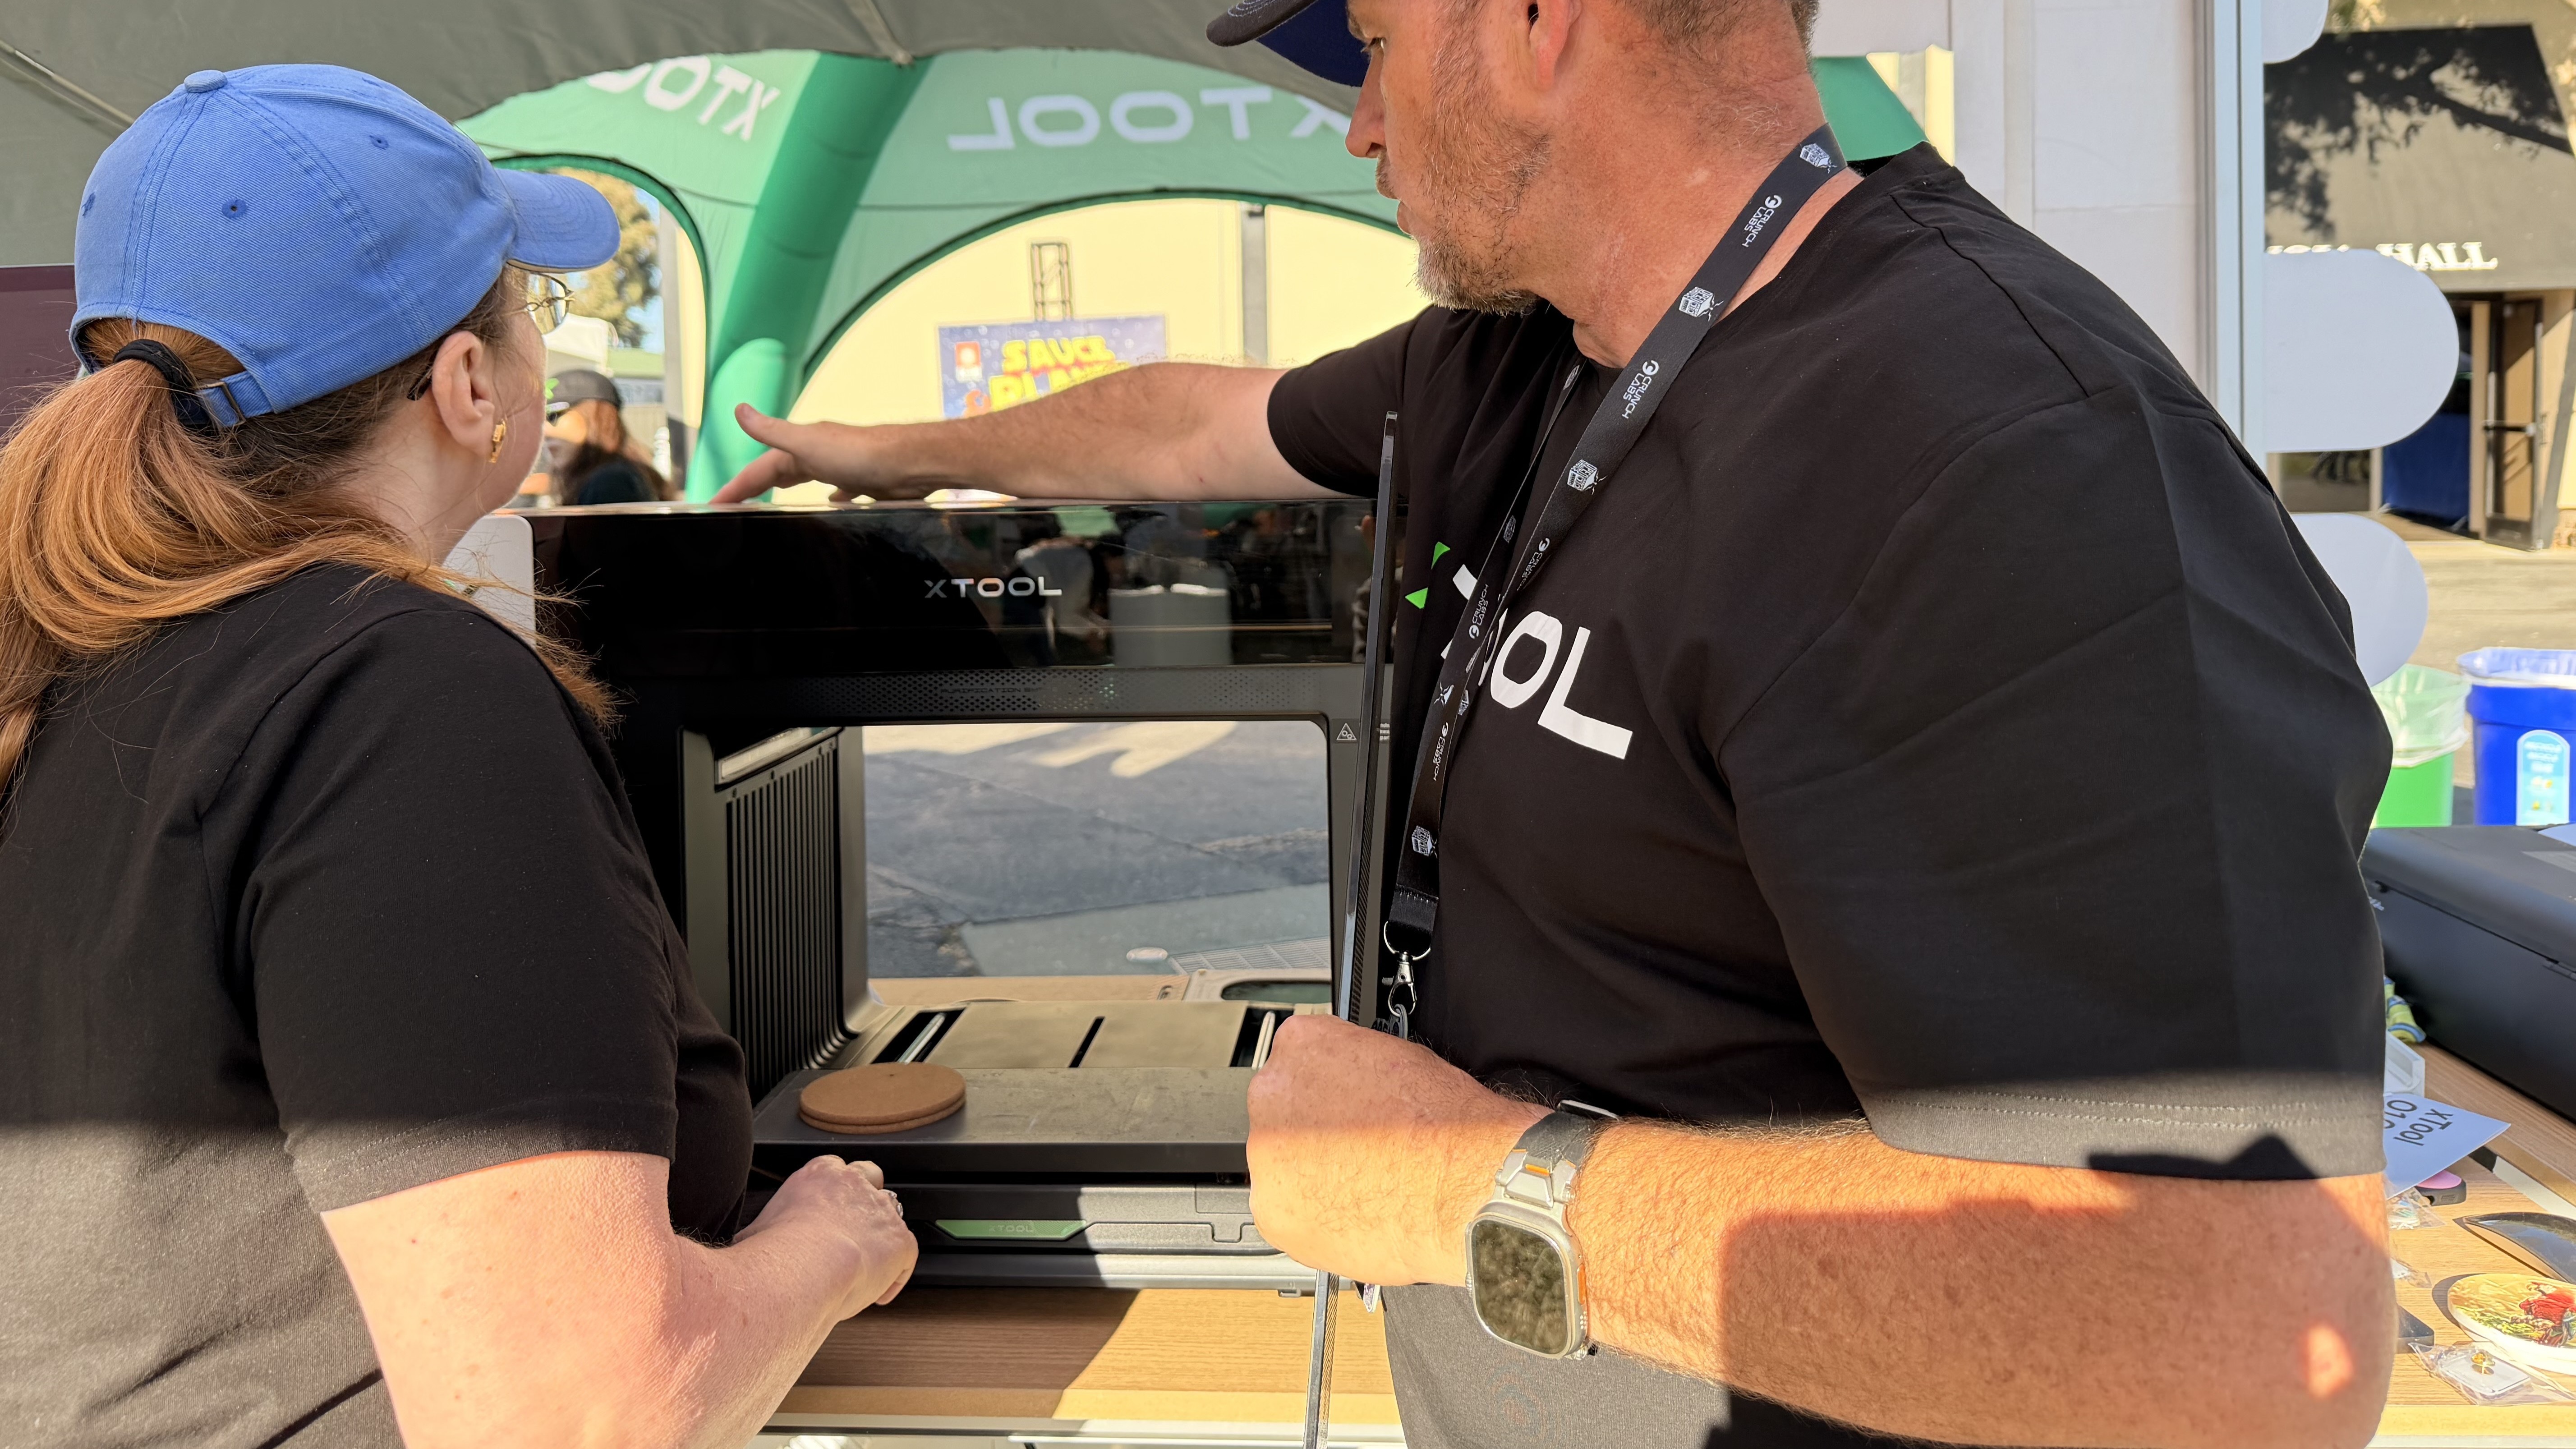
xTool: O1 Omni Printer

xTool 01 Omni UV printer at Open Sauce 2026
Tom's Hardware
xTool 01 Omni UV printer at Open Sauce 2026
Tom's Hardware
xTool 01 Omni UV printer at Open Sauce 2026
Tom's Hardware
xTool 01 Omni UV printer at Open Sauce 2026
Tom's Hardware

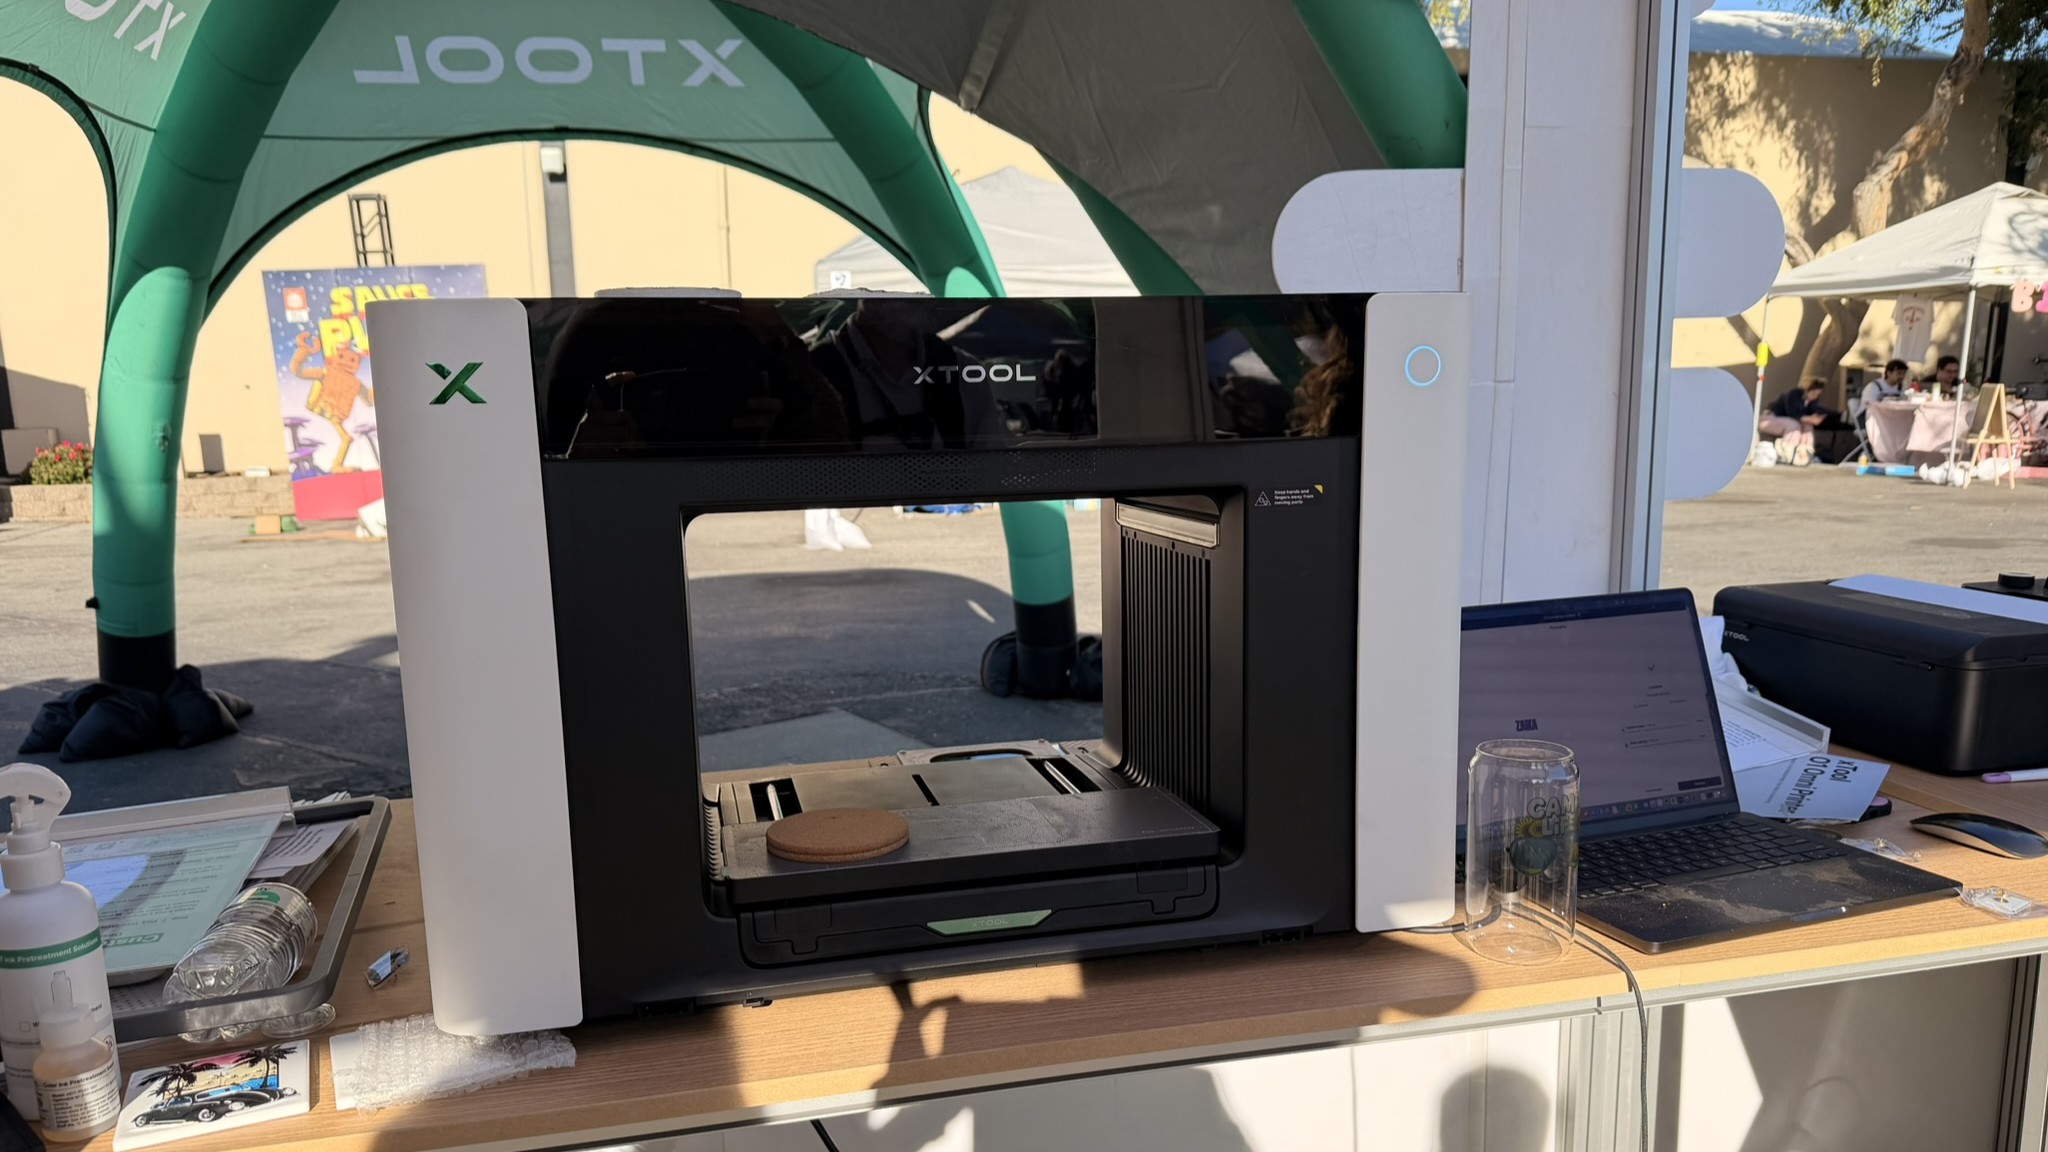
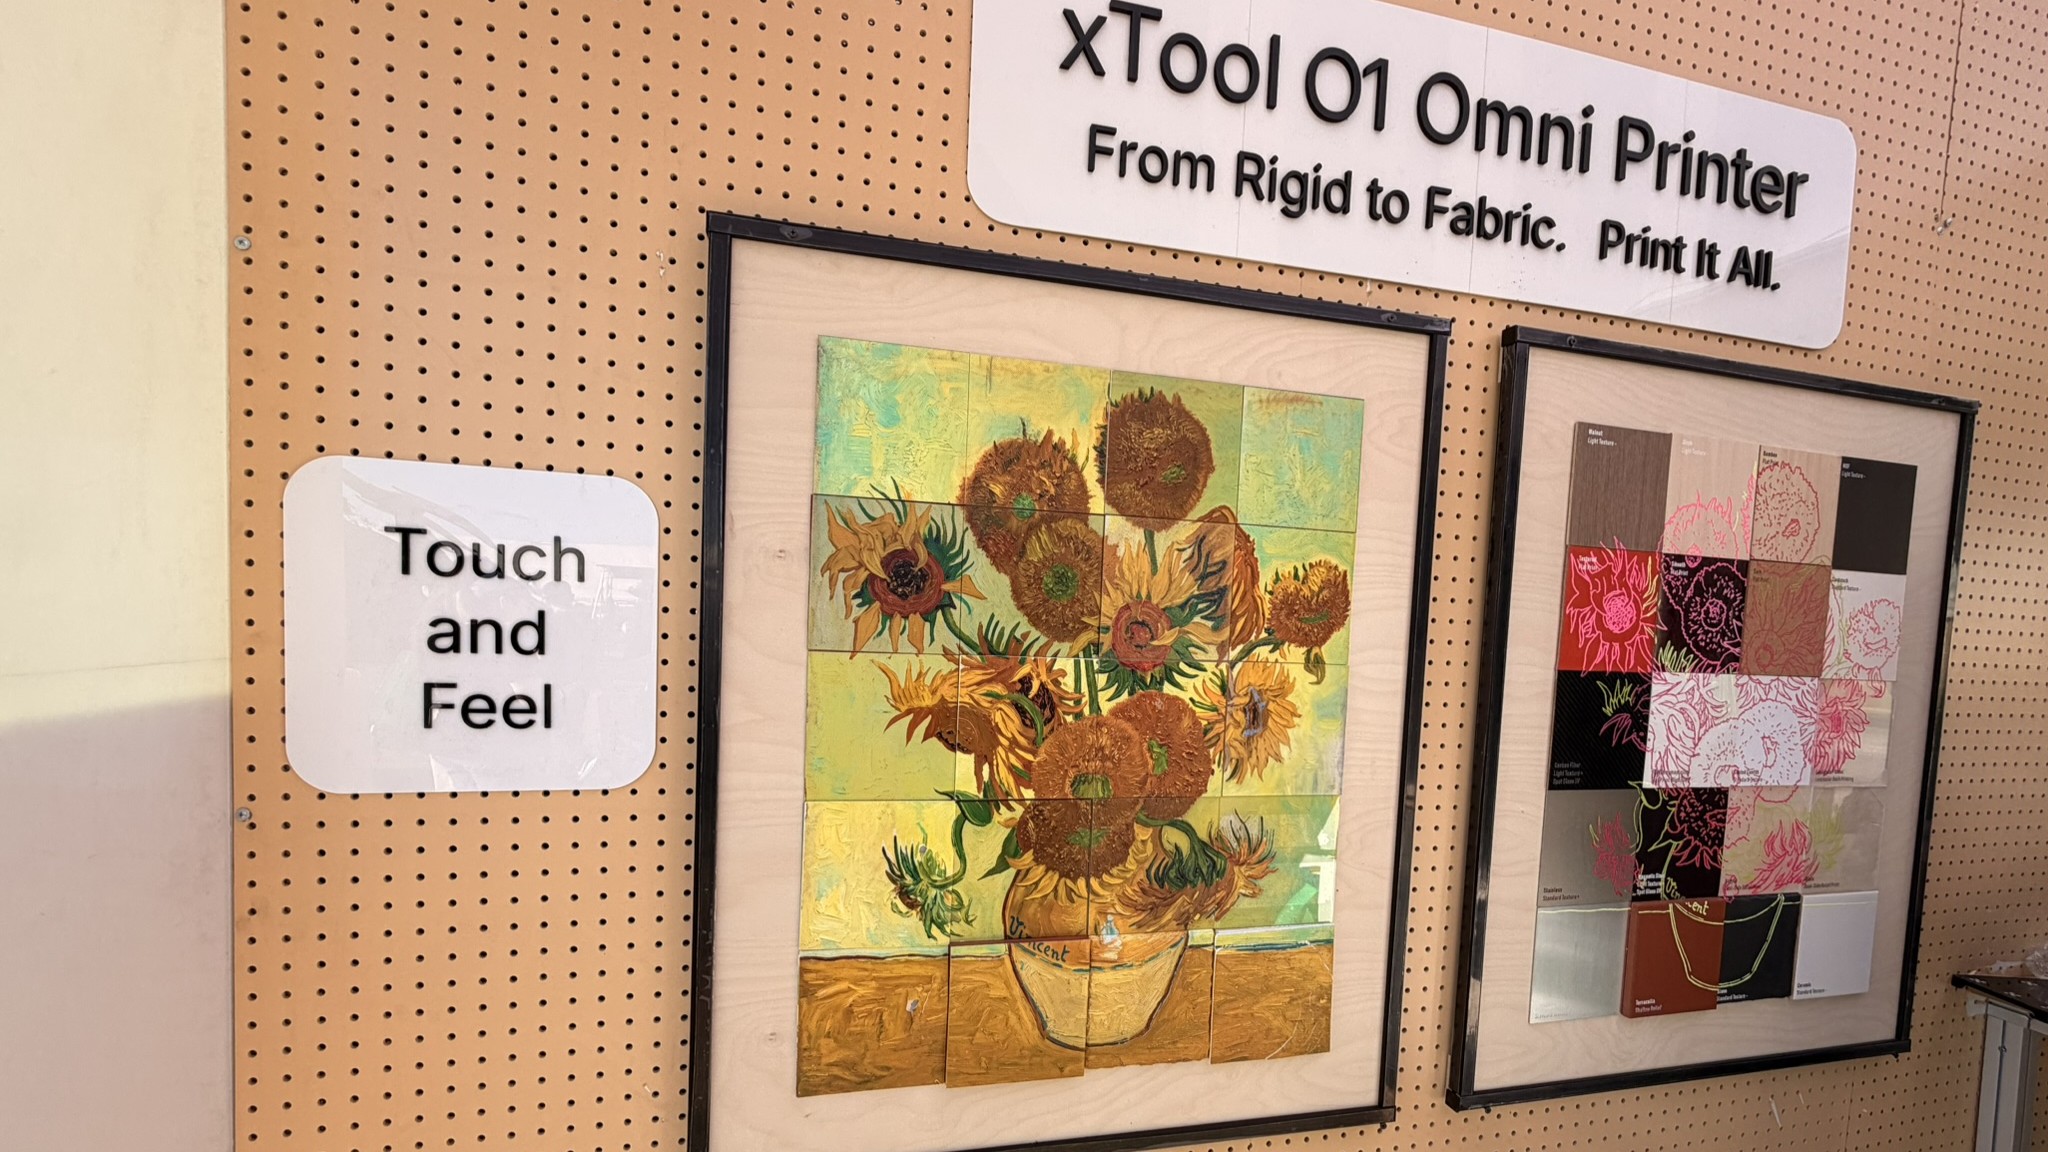
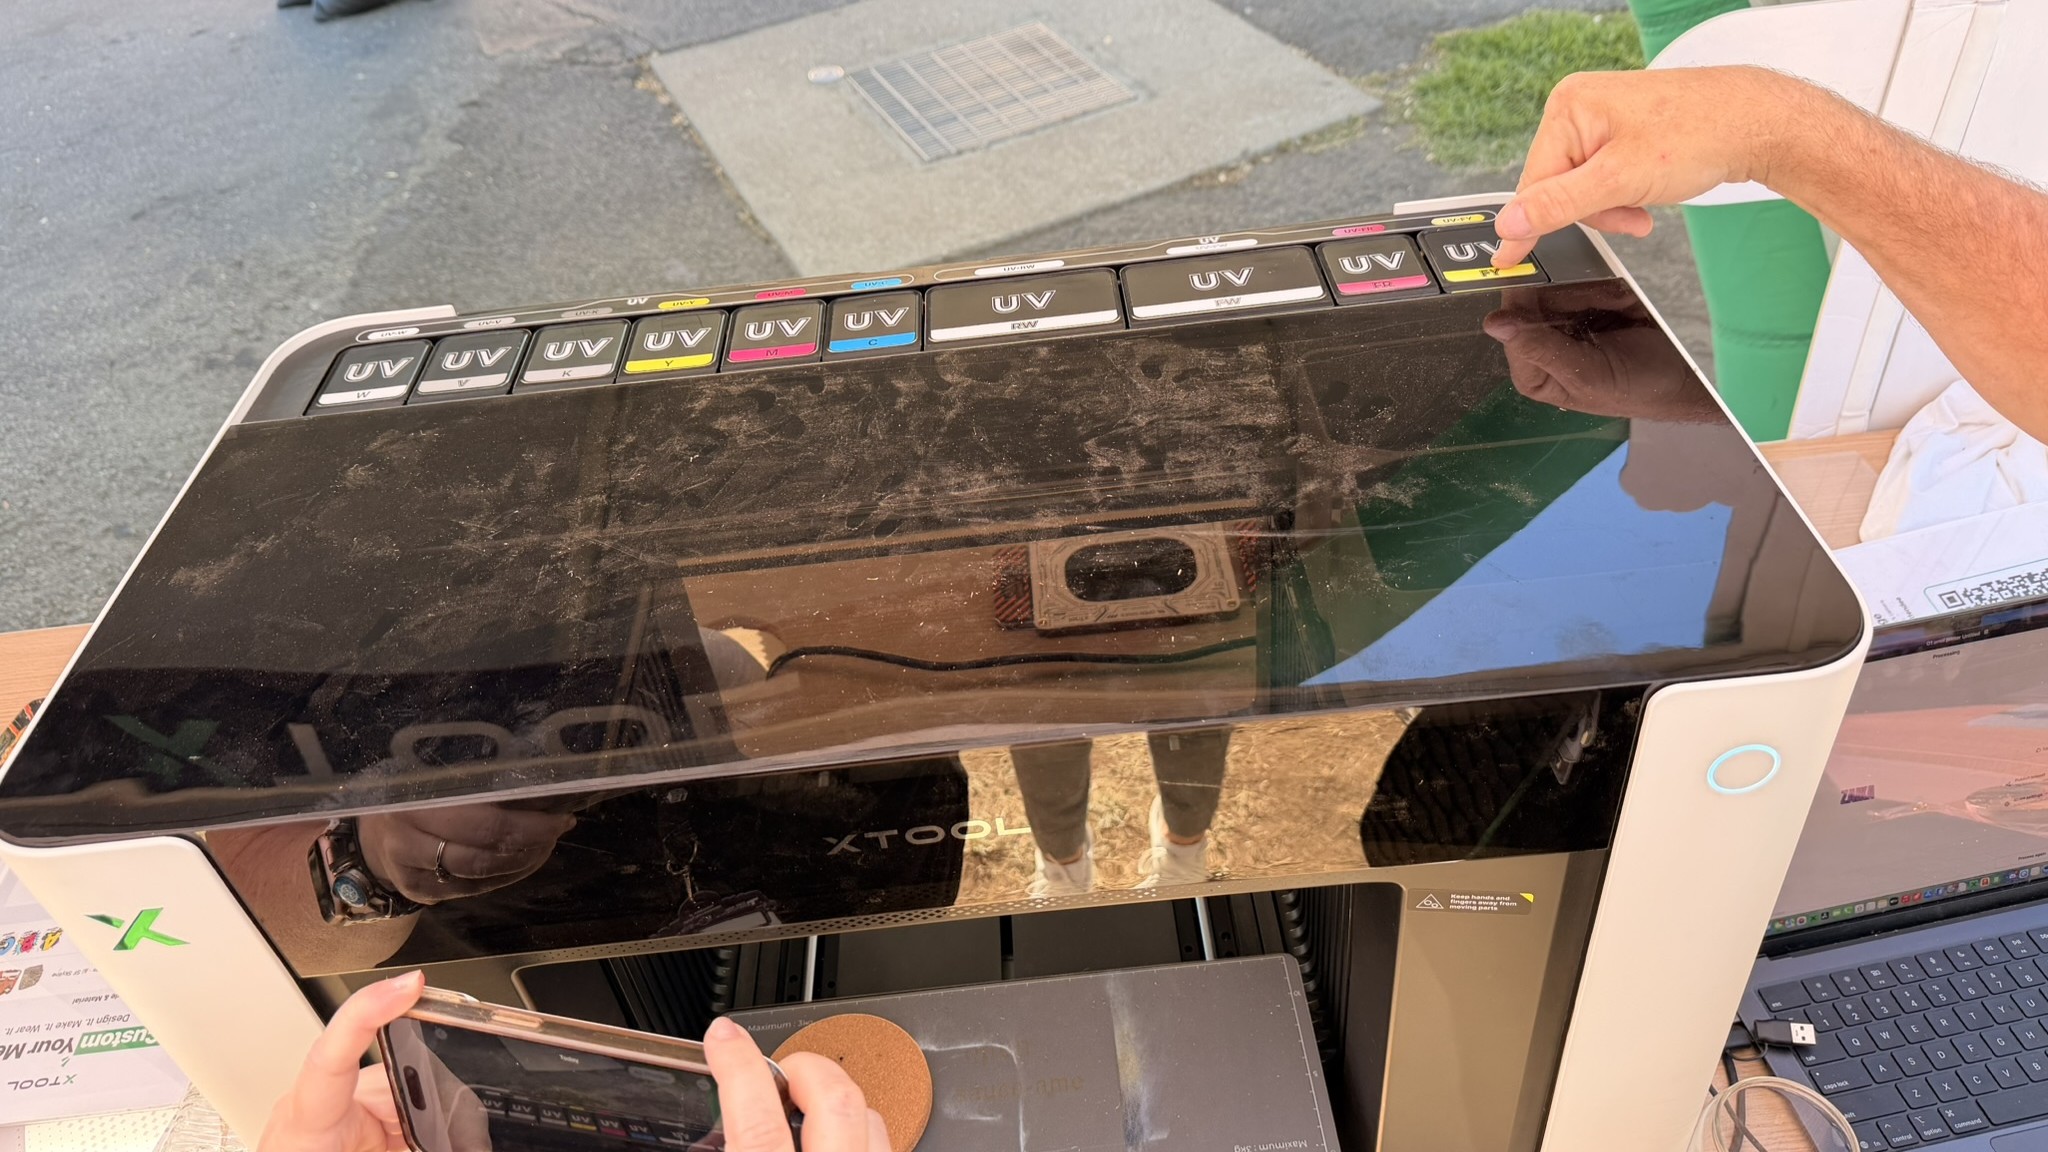
xTool had the largest visible presence of any of the sponsoring companies, with a huge display of hands-on stations in front of the outdoor stage, which it sponsored. The company brought out all its lasers and creator tools, with plenty of team members standing by to run demos. I was particularly interested in the new xTool O1 Omni, a four-in-one UV printer that can print on any material you can stuff in the print zone.

We’re waiting on a production-quality review unit for the Omni, which should be arriving soon. However, this one looks pretty good and is backed by xTool’s tremendous experience in similar categories. Machines start at $1,699 for a single UV head and go up to $3,969 for the works.

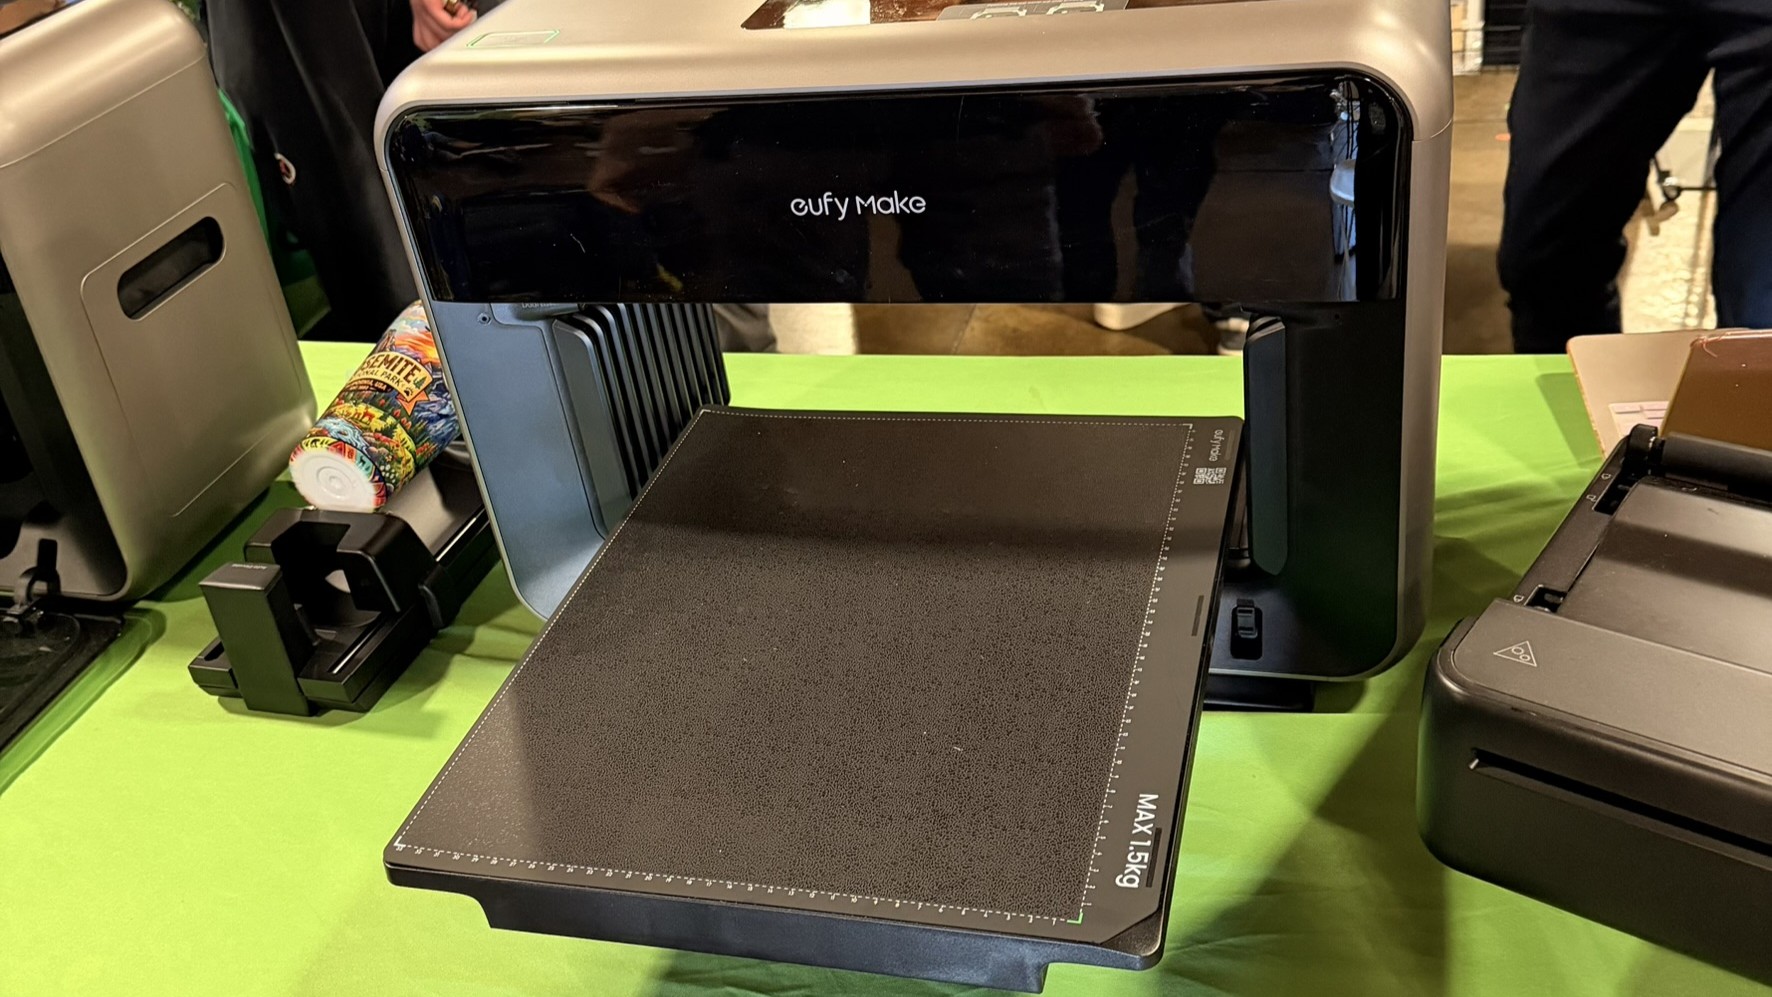
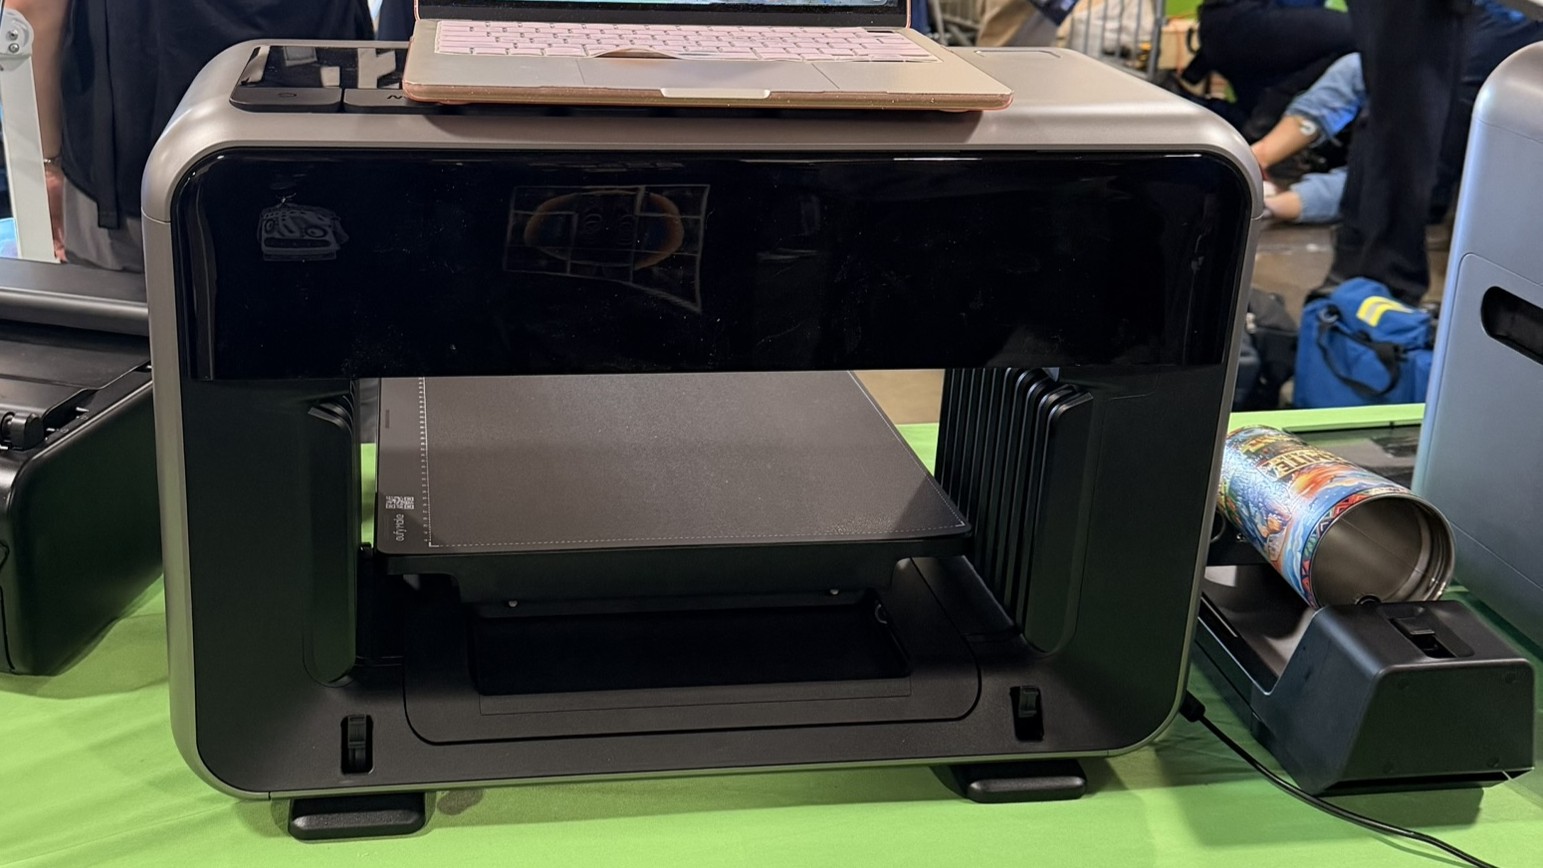
EufyMake: E1

Eufymake E1 at Open Sauce 2026
Tom's Hardware
Eufymake E1 at Open Sauce 2026
Tom's Hardware
Eufymake E1 at Open Sauce 2026
Tom's Hardware

EufyMake, formerly known as AnkerMake, was the first company to get a desktop UV printer to market. Unfortunately, being first is not always best when it comes to technology, and the company had some supply chain issues when their Kickstarter was overwhelmingly successful. We reviewed the E1 last November.

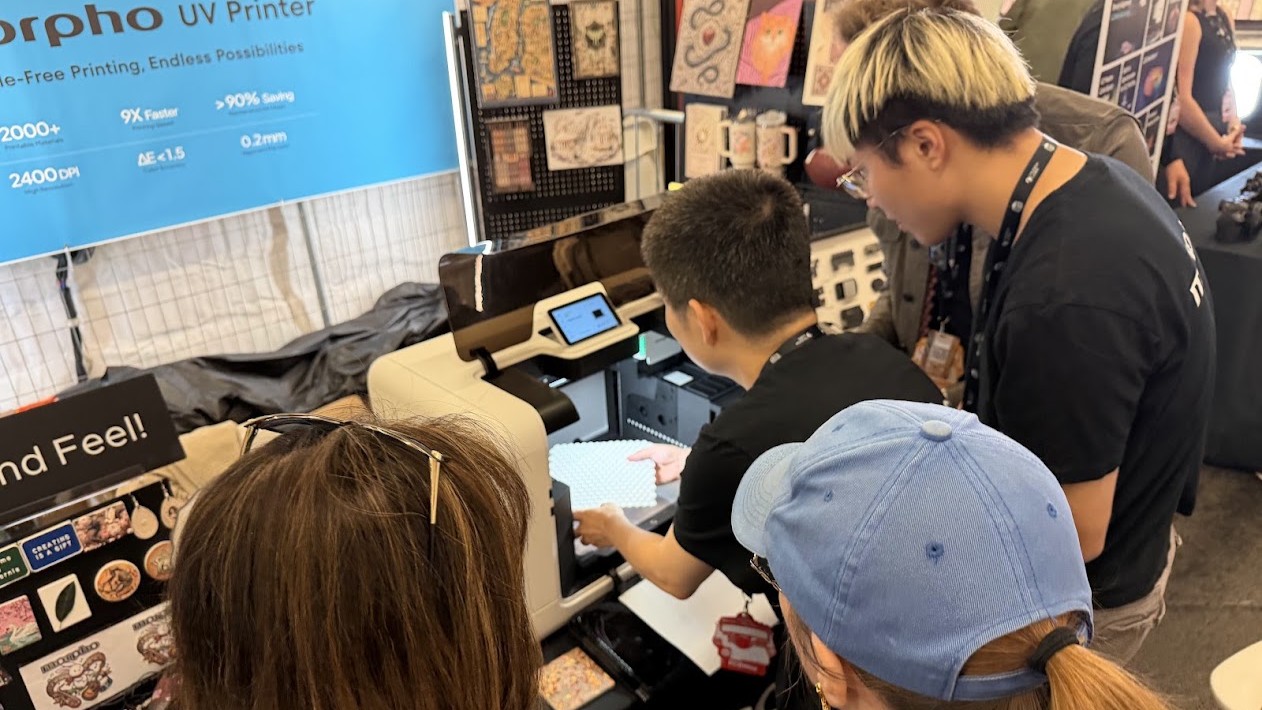
Morpho

Morpho at Open Sauce 2026
Tom's Hardware
Morpho CEO, Brett Wang at Open Sauce
Tom's Hardware
Morpho CEO, Brett Wang at Open Sauce
Tom's Hardware

Morpho is the dark horse in this race, with one of the best-looking machines we’ve seen. The unknown startup took a modest booth in the main hall and brought their founder and CEO, Brett Wang, to personally demo the unit. Wang comes from DJI, where he was the former VP of R&D and founder of the company’s camera division. If that sounds familiar, Bambu Lab’s CEO, Dr. Tao, headed up consumer drones for DJI before launching his own 3D printer company. We’re looking forward to reviewing this open-source UV printer as soon as it’s ready.

But this was Open Sauce, and though we love to see what's coming to our retail shelves, the real draw is the projects. From the experimental to the unexpected, they are all incredible creations.

Resin Printing in a Flash

Open Sauce 2026, San Mateo, CA

The UC Berkeley OpenCAL V2 (Image credit: Tom's Hardware)

Students from UC Berkeley showed off an experimental method of resin printing their department has worked on since 2017. Dubbed OpenCAL, the open-source resin printer uses a video projection method to project an entire model at once, and flash-cure it in a special resin in just a few minutes.

The specialized resin will be commercially available through FormLabs, and the printer’s specs are available online for anyone who wants to push the science forward.

Recycling All the Plastics

Open Sauce 2026, San Mateo, CA

Recycled plastic chess board and pieces. (Image credit: Tom's Hardware)

Some projects were a little less high-tech, but just as worthy. Peninsula Precious Plastics showed how they support STEM and the arts with a focus on sustainability. They demonstrated how plastic can be shredded, melted, and injection-molded into new products. This certainly gives me some ideas for recycling my failed prints.

Mini 3D Printers

Open Sauce 2026
@TheBasedDoge's mini 3D printersTom's Hardware
Open Sauce 2026
@TheBasedDoge's mini 3D printersTom's Hardware

@TheBasedDoge came out with an array of mini 3D printers he designed, from an Encore Mini Core XY 3D printer with a 3D-printed chassis to miniature 3D printers made with DVD motors and CD drives.

A Different Kind of Engineering

Open Sauce 2026, San Mateo, CA

JT Engineering’s Backyard Railroad (Image credit: Tom's Hardware)

Sometimes it's not even obvious which projects were 3D printed, like this giant 1/8th scale model train, large enough to take twenty adults for a ride. This built-from-scratch train had tons of 3D-printed parts to give the steel body detail for a cheaper price: the lights, the numbers, the latches, air tanks, suspension, and more. If you want to see how it’s done, you can watch a video here that shows how the train is painted and detailed.

✇Tomshardware

Prusa Research XL, Core One, and Core One L all to receive second-generation upgrades — all new orders get updated model for 'free'

If you’re feeling sad that you can’t afford a new 3D printer this summer, perhaps you can swing an upgrade instead? Prusa Research just announced that its “entire lineup” of 3D printers is getting second-generation upgrades and a “+” designation. This includes the XL, Core One, and Core One L.

All “plus” upgrades will be automatically added to printers being sold today. If you have an order in progress, you will receive the plus version at no extra charge. Prusa Research is not increasing the price of any machine receiving a “plus” upgrade.

Upgrade kits will soon be made available for Prusa owners. The components can be purchased à la carte if you want to pick and choose your upgrade. Prusa Research said all upgrades will be available on its webstore by September.

The bedslinging MK4S was notably left off the list, but while the descendant of Josef Prusa’s original i3 printer may have hit the end of the upgrade line, the company has not pulled support for the machine. Prusa Research supports every machine they’ve made for years.

“If there’s one thing worth knowing about how we develop our printers, it’s this: we don’t expect you to replace a working machine just because we’ve come up with something new. Most tech becomes obsolete over time. Our printers keep getting better,” said Mikolau Zuza, the Head of Content at Prusa Research, in a recent blog post.

All three machines will now have a nozzle wiper, which Zuza says is the most requested upgrade. There have been several community mods to do just that, but these also require adjusting your slicer’s g-code to teach the printer to use it.

Prusa Research XL

(Image credit: Printables)

The XL has received several small tweaks and firmware upgrades since its release in 2023, but this is the first major upgrade. Prusa’s original large-format toolchanger will get the same 360-degree cooling system introduced on the MK4S. It will also get the INDX’s Tool Offset Sensor for toolhead alignment to replace the cumbersome pin tapping. The eddy-current sensor is 20 times faster and will be permanently mounted to the machine. It is also compatible with the Silicone toolhead showcased last October during Prusa Day, which will be released this fall.

The XL will also get GT1.5 belts to improve surface areas, and new machines will ship with high-flow nozzles standard. Prusa is also upgrading the optional XL enclosure with a chamber heating and better seals.

The Core One+ (Gen 2) will receive the same nozzle wiper and GT1.5 belts as the XL+, plus improved heatbed mounting, and the same snap-on top panel as seen on the larger CORE One L.

The Core One L is Prusa’s most recent design and will get the new GT1.5 belts and integrated nozzle wiper.

An optional HT Hotend for the CORE One lineup will be available in September. This hotend is specifically designed for finicky engineering filaments, which are often brittle and require higher melting temperatures. The swappable hotend hits 400°C, which unlocks materials such as PEKK-CF and PPS-CF.

Zuza said Prusa Research has been working on upgrading the entire user experience for all of their 3D printers. This includes not only hardware, but firmware and slicer software as well. Prusa Slicer 3.0, also teased last October, will be released in a few weeks. Lastly, connecting your Prusa 3D printer over LAN will be easier with the introduction of Prusa Connect Local. This will replace the outdated PrusaLink.

✇Tomshardware

QIDI Plus5 3D printer review: The best one yet

The QIDI Plus5 goes toe-to-toe with Bambu Lab’s H2 series for nearly half the price. At first glance, the QIDI Plus5 looks pretty much like the QIDI Plus4, but it’s so much more. With TARDIS-like engineering, the Plus5 has a smaller footprint, yet gains 18% more build volume than the previous model by comparison. The Plus5 can go a little hotter on the nozzle, up to 370 °C, which makes it great for tackling engineering-grade filaments.

The UI on the Plus5 is sleek and feels like a more expensive printer. It has a helpful status light on the bottom of the bed, which you guessed it, looks a lot like the Bambu H2 series. If QIDI could just get their QIDI Box to swap colors consistently, Bambu will have a serious fight on their hands.

The debut price of the QIDI Plus5 is $749, which is $50 less than the Plus4 was at launch, and is considerably less than a Bambu Lab H2S, which is currently $1399. This is definitely my favorite high-temp workhorse and one of the best 3D printers we’ve seen.

Specifications: QIDI Plus5

Build Volume

320 x 320 x 300 mm (12.59 x 12.59 x 11.81 in)

Material

PLA/PETG/TPU/ASA/PA/PC (up to 370 degrees)

Extruder Type

Direct drive

Nozzle

.4mm (Bimetal)

Build Platform

Double sided PEI flex plate

Bed Leveling

Automatic, Loadcell

Filament Runout Sensor

Yes

Connectivity

LAN, WiFi, USB Flash Drive

Interface

4-inch color touch screen

Machine Footprint

500 x 488 x 558 mm (19.68 x 19.21 x 21.96 in)

Machine Weight

29 kg (63.93 lbs)

MSRP

$749 (Stand alone)
$899 (Combo)

Release Date

August 5, 2026

QIDI Plus5 : Included in the Box

QIDI Plus5

(Image credit: Tom's Hardware)

The QIDI Plus5 comes with everything you need to get started. Included is a tool kit for assembly, a scraper, a glue stick, and a USB stick with a copy of QIDI Studio and a PDF copy of the quick start guide. A paper copy of the manual is also included.

Design of the QIDI Plus5

QIDI Plus5

(Image credit: Tom's Hardware)

The QIDI Plus5 is a nice upgrade to the QIDI Plus4 with an extra 20mm of print area in all dimensions, with nearly the same footprint. The Plus5 is a hefty 64lbs, so you may need some help to get it in the door.

The Plus5 has a Core XY motion system, driven by a beefy 9mm 1.5GT belt, riding on a linear rail for the x-axis and linear rods for the y-axis. The z-axis runs on 4 linear rods and is driven by stepper motors turning two independent lead screws. The Plus5’s tool head is compact with an all-metal nozzle, which is shared by the QIDI Q2.

QIDI Plus5

(Image credit: Tom's Hardware)

The nozzle includes the heat throat and features a hardened steel insert. The filament path is accessible in multiple locations, which should make clearing jams easy. The toolhead includes a cutter with a nearby waste chute and nozzle wiper, in case you want to try your luck with a QIDI Box for multimaterial printing. We were not provided one for this review, but we did test it out on the QIDI Q2 and found it lacking.

A black plastic tube is attached to the toolhead for an optional active cooling system dubbed the QIDI Polar Cooler. This is a little AC box which can be strapped to the side of the printer and pump cooler than room temperature air directly on the extruder. This is meant to prevent heat creep when you need to keep the rest of the chamber toasty. We didn’t get to test this add-on, but it sounds intriguing.

QIDI Plus5

(Image credit: QIDI)

The chamber heater and the air circulation fan, with an activated carbon and HEPA filter, are located at the rear of the printer. The HEPA filter keeps the fumes from ABS and ASA trapped inside the machine. A large parts cooling fan on the left side augments the fan on the toolhead.

QIDI Plus5

(Image credit: Tom's Hardware)

The QIDI Plus5 has an excellent 1080p chamber camera, which is accessible for monitoring the printer from the device page in QIDI Studio and from the QIDI Maker app. It can be used to make time-lapse videos and is for AI anomaly detection (aka the dreaded spaghetti monster).

The printer has a glass top that is designed to slide back for ventilation while printing lower temperature filaments like PLA and PETG, and the glass front door opens a full 180 degrees. This is a simple feature that I wish more companies would adopt.

Running lower temperature filaments in the PLUS5 seems like taking a race car on a shopping trip. With a bed that heats to 120 °C, an active chamber heating to 65C and a hotend capable of 370 °C, the PLUS5 was made for PPS, PA, and PC.

Assembling the QIDI Plus5

QIDI Plus5

(Image credit: Tom's Hardware)

The QIDI Plus5 is almost completely assembled. The only thing you need to do is attach the spool holder to the rear, then attach the bowden tubes to the spool holder and tool head. If you are assembling the printer in low light conditions, take care to avoid attaching the filament line to the inlet for the optional cooling system – they’re the same size.

QIDI Plus5

(Image credit: Tom's Hardware)

The UI on the QIDI Plus5 does a great job of walking you through the removal of the packing screws and the shipping material, so you don’t forget anything.

Leveling the QIDI Plus5

QIDI Plus5

(Image credit: Tom's Hardware)

The QIDI Plus5 auto levels as part of the initial calibration and offers to relevel at the start of every print. The system worked perfectly.

Loading Filament on the QIDI Plus5

QIDI Plus5

(Image credit: Tom's Hardware)

Loading filament on the QIDI Plus5 is both simple and frustrating. QIDI really took pains to make the UI on the PLUS5 intuitive and simple. Two clicks from the touch screen, and loading is right there. The annoying part is reaching around this behemoth to load filament into the Bowden tube located at the back. The filament will almost always catch on the coupler, which needs to be uncoupled to allow the filament to pass through it. Then if you are using a full spool, it’s super awkward to push a few centimeters of filament at a time toward the tool head.

QIDI Plus5

(Image credit: Tom's Hardware)

Preparing Files / Software for QIDI Plus5

QIDI Plus5

(Image credit: Tom's Hardware)

QIDI included a copy of QIDIStudio, which is based on BambuStudio, which is based on PrusaSlicer. If you are familiar with Bambu Studio or ORCA Slicer, you will feel right at home.

QIDI Plus5

(Image credit: Tom's Hardware)

The device tab in QIDI Studio allows you to control the printer and monitor printing through the camera. It also allows you to skip parts of your print that might have failed. The QIDI Maker App offers the same functionality on your mobile device.

Printing on the QIDI Plus5

The QIDI Plus5 does not come with a sample coil of filament, which is just as well. You’ll want to pick out a spool of filament from our guide to the best filaments for 3D printing for suggestions.

To get warmed up, I printed the pre-sliced Benchy provided by QIDI using red Creality Hyper PLA. The print completed in 32 minutes and was technically flawless, with just a little stringing.

QIDI Plus5

3D Benchy (Image credit: Tom's Hardware)

Next, I printed a vase I whipped up in Tinkercad, using a mystery spool of Fusion Filament PCTG. If you like the color, too bad, Fusion mystery spools are created when they change colors on their filament lines and thus are unique. It’s worth the gamble because these spools are also about $10 off, dropping the price from $26.99 to $16.99. This is printed in vase mode, with a .28 layer height and a chunky .65 line width. At an average speed of 65 mm/s, the print completed in 3 hours and 11 minutes. The quality of the print is excellent, and the PCTG makes it flexible enough to withstand use.

QIDI Plus5

Tinkercad (Image credit: Tom's Hardware)

QIDI sent us a spool of their TPU GF 67D for the review, and I used it to print a plate of parts for my RC Death Racer. Using a .2 layer height and running at an average speed of 50 mm/s, the parts took 4 hours and 25 minutes to print. Using only 2 walls, the parts are light, yet very hard and darn near indestructible. These parts are, by their nature, a stringing test, and despite this, the quality is really good. I was pleasantly surprised when the supports popped right off, a blessing from the glass fiber.

QIDI Plus5

Death Racer Hubcaps (Image credit: Tom's Hardware)

I printed this bird feeder I found on Printables using faded desert brown and armored turtle green ASA from Ambrosia. I whipped up the hanger in Tinkercad. Using a .2 layer height and running at an average of 120 mm/s, the base of the bird feeder was completed in a little over 7 hours. The top took 5 hours 30 minutes running at an average of 100 mm/s. The hanger took only 2 hours running at an average speed of 180 mm/s. The print quality is really good, with just a little rough patch on the top where better supports could have helped. It’s currently hanging outside my office window, so I can see how well ASA holds up to the sun…and squirrels.

QIDI Plus5

Merandey’s Birdfeeder (Image credit: Tom's Hardware)

Jumping into the deep end of the pool, I printed this sanding block I found on Printables using QIDI’s PPS-CF filament. The Plus5 takes a while to heat up to 350 °C on the nozzle, 100 °C on the bed, and 65 °C on the chamber. I got out an infrared thermometer to read the temp on the printer’s top glass and decided not to store PLA there while the machine ran. It read 56C. I should point out that I did not get good results with the QIDI Plus4 when I tried to run this filament. The Plus5 printed this just perfectly, with a glorious surface finish and without a hint of a warp. The texture is from the carbon fiber, which also helps the PPS stay flat on the bed.

QIDI Plus5

Peel’s ⅓ Sheet Sanding Block (Image credit: Tom's Hardware)

Bottom Line

The QIDI Plus5 printed everything we threw at it and is the best 3D printer we’ve seen from QIDI. This hits the sweet spot for makers and engineers who need a serious high-temp 3D printer without breaking the bank. The lack of color capability won’t disappoint you when all your filament only comes in black anyway.

At its current price of $749, it’s an attractive addition to the large-format printer market. Filament loading could be better, but it’s a trade-off we’re willing to deal with for a machine that’s otherwise very pleasant to use.

If you like what you see in the QIDI Plus5 and you want to compare notes, then check out the Bambu Lab H2S, which is pretty similar but with a more robust ecosystem and a functional AMS system. It’s $1,399 for a Combo and $1199 as a standalone printer. If you need a printer that’s just plain big, the Sovol SV08 Max with an enclosure can handle practical prints the size of a hubcap (500x500mm) for $1,298. And if you just want a bit of elbow room at an affordable price, then you should check out the Bambu Lab A2L, which can do four colors on a 330 x 320 build plate for $569.

✇Tomshardware

'Nozzlegate' erupts as Prusa CORE One 3D printer kits arrive with soft steel nozzles — Bondtech admits machining flaws with no quick fix (Updated)

Bondtech, the inventor of the INDX toolchanger system used to create the highly anticipated Prusa CORE One+ INDX, admitted to a significant mistake. The nozzles, which are nitrocarburized steel, do not meet industry standards for “hardened steel” as advertised.

Prusa Research has pumped the brakes on the INDX project, and has delayed shipping INDX conversion kits until mid-August. They issued a statement on Reddit:

“Bondtech has recently confirmed that the nozzles currently supplied with the INDX system are surface-hardened rather than fully hardened as originally planned, and has not yet finalized the compensation plan for affected customers. We believe it is better to wait until both we and you have clearer information, rather than ship the kits while this important question remains unresolved.”

r/prusa3D

The statement was also emailed directly to everyone with an active INDX order in the system. The company said this delay will also give customers a chance to cancel their orders if they wish. As an olive branch, Prusa Research INDX conversion kits will included extra hardware free of charge. The statement didn’t say what the gift would be, but that specifics would be shared before shipping.

Prusa engineers immediately began testing the INDX nozzles and determined that little wear could be seen after running five kilograms of carbon fiber PETG through the nozzles. However, after just 100g of super-abrasive Ultraglow filament, the protective coating began to fail.

Nitrocarburized steel is tougher than the standard brass nozzles that come with a stock Prusa CORE One+, but not as durable as hardened steel. The real problem is not that they went with a lesser nozzle, but that they kept the “hardened steel” wording in promotional materials. If Bondtech said from the beginning (or before customers locked in their pre-orders) that the INDX shipped with ordinary steel nozzles, no one would have blinked.

Information on the nozzle quality began to surface after a Reddit user posted a support email from Bondtech founder, Martin Bondeus. The email stated that “during production, we encountered manufacturing challenges that prevented us from machining that material reliably – the cutting tools simply did not withstand the process. Rather than releasing a product with inconsistent quality, we decided to supply the nitrocarburized version for the time being.”

NozzleGate

Reddit (Image credit: Reddit)

These nozzles are not of poor quality, but they fall short of the standards set for hardened steel. According to a statement by Bondtech, the Founders Edition shipped with nitrocarburized steel, which is steel treated to obtain a hard shell. They’ve batch tested the nozzles and found them to be around 30-32 on the Hardness Rockwell C scale (HRC). For comparison, true hardened steel lands at 55-60 while an everyday brass nozzle comes in under 10 HRC.

For most users, and most materials, these mid-tier steel nozzles work exceptionally well and will last for an extremely long time. But once you start to feed your INDX abrasive filaments like glass-fiber, carbon-fiber, glow in the dark and metal filled filaments, things get dicey. The treated steel nozzles will last longer than brass, but Bondtech said they will experience “accelerated wear” when printing abrasives.

Bondtech has stated on its website that a “concrete solution” to the problem is not ready and that manufacturing truly hardened INDX nozzles could take months. They are also not offering any form of compensation before knowing the cost of the replacements. They are requesting that customers hold off on returning the kits and simply enjoy using non-abrasive materials until a solution is found.

The INDX takes a bespoke induction heated nozzle that has no off the shelf replacement at this time.

The news has hit the Founders Edition buyers quite hard, as many have already found difficulty with the kits they so eagerly purchased months ago. Some assembly problems can be expected with such a product, as they are being mounted on CORE One printers already in service. The INDX is a separate upgrade kit, and it requires stripping down a CORE One, removing the Nextruder and replacing it with the INDX carriage, then mounting a rack to hold the eight tool heads.

One “founder” was so upset he vibe coded an entire website in protest: Nozzlegate.com. The website outlines what the perceived problems are with Bondtech, and what consumers can do about it. We contacted the website owner, who asked to go by his handle “Daddie0.”

NozzleGate

Nozzlegate.com (Image credit: Tom's Hardware)

He told me that, like others who purchased Founder Edition kits, he’s disappointed in the quality of the product. He said his INDX was suffering from multiple mid-print crashes and layer shifts, and after two weeks of troubleshooting, it was finally fixed with a firmware update from Prusa. “Then nozzlegate hits. My EU right-given two-week return window ends a day after the news breaks.”

Realizing that his window for a standard, hassle-free return had closed on a machine he felt was a lemon, he shifted strategies. He began digging into Bondtech’s official documentation to see what recourse he had for a defective product.

What he found sparked a new battle. Disagreeing with Bondtech’s listed 90-day warranty policy, which he claims misleads consumers by failing to mention Sweden's mandatory multi-year consumer protections, he channeled his frustration into the NozzleGate website.

The INDX kit is a collaboration between Prusa Research and Bondtech, with the first wave of Founders Edition kits a limited edition run going to early adopters.

Tom’s Hardware received a Founders Edition INDX kit, which we installed on a Prusa CORE One we previously reviewed. Though the build took over the kitchen table for an entire weekend, our resulting INDX is printing non-abrasive filaments with excellent quality.

NozzleGate

(Image credit: Tom's Hardware)

✇Tomshardware

Delaware’s Printed Solid rebrands to Prusa USA

Printed Solid, the Delaware-based filament manufacturer acquired by Czech Prusa Research in 2022, is now known as Prusa USA, Inc. I chatted with Prusa Research team members at Open Sauce, who confirmed the name change was largely window dressing, with nothing changing in the company’s day-to-day operation. Josef Prusa will remain CEO of both companies, with a new Marketing Officer moving up the ranks internally.

During the changeover, Printed Solid will be known as “Printed Solid, a Prusa Company”. The website now proudly states that Prusa Research is a “European-American” company with U.S. production capabilities. The company has a duplicate print farm at its 100,000-square-foot Delaware factory for the production of 3D printers and filament. The printers are not yet fully “Made in the USA,” as some parts are still needed from the factory in Prague. This helps overcome supply chain issues for American customers.

Prusa USA

(Image credit: Prusa)

Josef Prusa states, “We wanted to be closer to our customers. Expanding to America was the natural next step to support the most important market in the world.” His booth at Open Sauce proclaimed Prusa to be the biggest 3D printer manufacturer in the USA. Though Prusa Research ships well over 10,000 printers a month from both Prague and Wilmington, it’s a fraction of what its Chinese competitors produce overseas. 3D printing is simply getting bigger as more businesses and individual makers discover the ease of additive manufacturing.

The change comes at a difficult time for 3D printing enthusiasts, as several anti-3D printing bills are sprouting up around the country. These bills are trying to impose government oversight by installing spyware on new 3D printers to prevent the machines from manufacturing firearms. This is the antithesis of Prusa Research, which stands firmly on the side of Open Source, the right to repair, and proudly produces 3D printers that meet the high security needs of the US military and government agencies. Delaware, Prusa Research’s new home away from home, has just introduced House Bill 399, which would place so-called “blocking technology” on all 3D printers.

The Wilmington, Delaware facility manufactures Original Prusa MK4S and the Prusa CORE One+ 3D printers, plus Prusament and the Jessie line of PLA and PETG (named after Randolph’s dog). When we toured the facility in 2025, only three filament lines were established, with a massive space left clear for future expansion.

It is also the American fulfillment center for Prusa Research’s Amazon sales and the official US Service Center for printer support, which includes repair and maintenance.

Prusa USA

We toured the Printed Solid print farm in 2025. (Image credit: Tom's Hardware)

The corporate restructuring follows some major leadership changes at Printed Solid. David Randolph, the former CEO of Printed Solid, stepped down in February, and Chris Pelesky, the company’s Chief Sales and Marketing Officer, stepped down earlier this month. Both veterans are still deeply involved in 3D printing, with Randolph taking the reins at Cocoa Press and Pelesky still leading 3D Printopia, one of the biggest consumer-focused 3D printing expos set to take place this fall in Philadelphia.

✇Tomshardware

Prusa Research Founder Edition INDX launches — limited 1,000-unit run of revolutionary toolchanger mod now shipping

One thousand Prusa CORE One INDX Founder’s Editions have shipped, giving a lucky few first access to Bondtech’s revolutionary toolchanger mod. The Founders Edition is a special limited run, intended for early adopters and Prusa fanatics.

The INDX toolchanger promises multi-material printing without the headache of prime towers and massive purge waste. Since toolchangers have a dedicated nozzle for each filament path, they don’t need to clean out the nozzle between color or material swaps; however, they do need to “prime” the nozzle to make sure the filament is flowing at the right pressure. Before the INDX, this meant printing a smallish, unavoidable prime tower. The INDX has been precisely tuned to purge only tiny crumbs of waste into an internal tray, then wipe the nozzle on a silicone pad.

Prusa INDX

(Image credit: Tom's Hardware)

The INDX, invented and patented by Bondtech, uses an induction heater to rapidly bring each nozzle to temperature in a few seconds. This allows the Prusa Core One with INDX to have some of the fastest color swap times we’ve seen.

Tom’s Hardware was sent an eight-tool kit so we could share our first-hand experience with the INDX. It took the better part of a weekend to strip down our existing CORE One and modify it. This involved completely removing the Nextruder, replacing it with the INDX carriage, then mounting a rack to hold the eight tool heads. Eight spool holders were mounted on the sides, using preexisting screw holes. A calibration sensor was mounted to the front corner of the build platform, and an internal waste catcher was installed.

Prusa INDX

(Image credit: Tom's Hardware)

Prusa requested that we not conduct a full review of the Founder’s Edition, as it is merely a taste of what’s to come. The final retail INDX will be a more refined version, with a few tweaks (like better visibility through the front grill) and firmware upgrades. Prusa Research is taking feedback from Founders to improve the retail launch.

Prusa Research is expected to launch the retail version of the INDX for Prusa CORE One + by the end of July. A 4 tool kit will cost $749, while an 8 tool kit will run $999. Bondtech is offering a Development Kit that can be installed on Vorons, Sovols, or whatever you can hack, with a starting price of $487.50 for one toolhead.

So why is the Founders Edition considered unfinished? Bondtech’s original INDX concept was designed as a generic add-on to any compatible 3D printer, not as a bespoke Prusa mod. We first saw a Bondtech demo of the INDX at Rapid/TCT in April of 2025, mounted on a Voron 0. The partnership with Prusa Research was announced seven months later at Formnext, with a functional CORE One sporting eight tool heads.

The CORE One was not built with the INDX in mind, and it’s a testament to Prusa’s ingenuity and Open Source moddability that such a collaboration can work at scale. Prusa Research has always maintained a close connection with its user base and encourages owners to creatively tinker and customize the machines they own.

Unlike previous purpose-built toolchangers we’ve reviewed, the INDX is an upgrade kit. This is not a beginner-friendly piece of hardware to install, and Prusa Research is looking into issues that Founders are having with assembly to improve the retail experience. They may need to offer a fully assembled “Prusa INDX” to properly compete in this era of dumbed-down “just push play” 3D printers.

Though our “definitely-not-a-review-unit” had a few hiccups, most issues were solved by a firmware update and a second run through the calibration program. We’ve not had any issues with print quality, and our first calibration print turned out flawless.

Prusa INDX

Otto, the Calibration Butterfly by Prusa Research (Image credit: Tom's Hardware)

Meet Otto, the Eight Color Calibration Butterfly

Prusa published a new calibration print just for the INDX. This eight-color sample test print took 1 hour and 14 minutes. The wings are a first-layer test and are only two layers thick. A tab on the wing slots into the body to prove that tolerances and extrusion flow are correct. The multi-colored wing segments act as a visual test for first-layer quality, belt tension, and toolhead alignment, as any tiny offset in color boundaries or axis motion will show up instantly.

Our Otto printed perfectly on the first try.

Prusa INDX

(Image credit: Tom's Hardware)

✇Tomshardware

Flashforge Creator 5 review: Basic and affordable tool changer

The Flashforge Creator 5 is the best budget tool changer currently on the market. Of course, there are only two other true toolchangers out there right now, three if you include the Bambu Lab H2C nozzle swapper. At the time of this review, the Creator 5 is on sale for $699, after a $100 discount. For that, you get a solid, open-frame Core XY machine with a 256 mm cubed build volume and four speedy toolheads that won’t waste your filament budget.

The Creator 5 is not perfect. It purges an insane amount of material when it loads, and the required prime block is surprisingly large. If you don’t use the Flashforge filament profiles, you’ll be in for a shock at the heft of the prime tower. Why? They only adjusted the filament profile for their own material. Everything purges at single-nozzle AMS levels. This setting is buried pretty deep in the slicer, and it took some time for me to find and correct it.

The printer handle high temperature materials well, which is more relevant if you opt for the enclosed Creator 5 Pro. It's still useful on the open frame machine because it loads and unloads at a higher temp to avoid clogging.

Being an open-frame printer, the Flashforge Creator 5 is limited in the materials it can print. We used the basics, PLA, PETG, and TPU for most of our prints. Since the hot end temperature can go all the way to 320°C and bed can get to 120°C we did try some higher temp filaments like PET-GF which printed fine at 310°C.

There’s no upgrade path to take the Creator 5 to an enclosed Pro, something that other companies might offer. Even though it looks like Flashforge uses the same case for both machines, there’s no fan behind the exterior grill for extra cooling, and no way to install one. However, if your plan is to print in multicolor PLA, PETG, and TPU, this is a good, no-frills machine for your workshop. It's one of the best 3D printers we’ve seen this year, and I highly recommend checking it out for your next multicolor machine.

Specifications: Flashforge Creator 5

Build Volume

256 x 256 x 256 mm (10.07 x 10.07 x 10.07 inches)

Material

PLA/PETG/TPU (up to 320 degrees)

Extruder Type

Direct Drive Tool Changer

Nozzle

.4mm stainless steel proprietary

Build Platform

Double-sided textured PEI steel flex plate

Bed Leveling

Automatic + Z height

Filament Runout Sensor

Yes

Connectivity

USB, LAN, Wi-Fi

Interface

4-inch Color Touch Screen

Machine Footprint

520 x 443 x 710 mm (20.47 x 17.44 x 27.95 inches)

Machine Weight

14 KG (30.86 lbs)

MSRP

$799

Release Date for Pre-Orders

June 2026

Flashforge Creator 5: Included in the box

Flashforge Creator 5

(Image credit: Tom's Hardware)

The Flashforge Creator 5 arrives mostly assembled. The tool heads are pre-assembled with a mounting plate. The spoolholders, touch screen, toolkit, filament coils, and quick start guide are included.

Design of the Flashforge Creator 5

Flashforge Creator 5

(Image credit: Tom's Hardware)

The Flashforge Creator 5 is a fast Core XY open-frame printer with a simple grey case that prioritizes mechanical simplicity to keep the price down. We mainly see this in how filament is manually loaded to each tool head and requires picking up each head to physically hold down a lever while you push the material through to the nozzle.

The build volume is 256 mm³, which is a fairly standard size when compared to most 3D printers. The removable flex plate is two-sided and coated with a common PEI textured surface, which gave us no problem.

As I mentioned previously, the open frame case is not meant to be upgraded with a door or top lid. It appears to be the same one used on the Pro version of this machine, which is a great cost-saving method for Flashforge, but disappointing to the buyer when you notice there are no fans behind the vents in the body.

The X and Y axes run on beefy 8mm belts with a linear rail for the X axis and linear rods for the Y. The Z runs on three linear rods, driven by three lead screws belted to a single stepper motor.

The tool head carriage includes the extruder motor and parts cooling fan, which are shared by four very lightweight tool heads. Each tool head has a manual cutter, hot end, and cooling fan. The tool heads attach to their base with magnets and are picked up by the tool carriage mechanically by gripping the circular protrusion on the back of the tool head, and aligned by mating with three pins on the tool head carriage. This is less complex than motorized latching pins that other machines use, but during our testing, it proved to be a very reliable system.

Flashforge Creator 5

(Image credit: Tom's Hardware)

The hot end includes the thermistor and heater, and is replaced as a unit. This is not a quick-release system, and you will need tools and a bit of patience to change out the nozzles.

The Flashforge Creator 5 has basic, static, spool holders which allow for the use of a wide variety of spool types from sample spools and coils to oversized spools and spools with dinged up rims. Since the Creator 5 does not automatically unload filament, these work just fine.

Assembling the Flashforge Creator 5

Flashforge Creator 5

(Image credit: Tom's Hardware)

For a complex machine, the Flashforge Creator 5 is very simple to assemble. The 4-inch touchscreen plugs into a socket on the printer, with no ribbon cable to fuss with, and attaches with two screws.

Flashforge Creator 5

(Image credit: Tom's Hardware)

The tool heads are prewired and attached to a plate, which is screwed into the right side of the printer, and the tool heads dock magnetically, also on the right side of the printer.

The spool holders are attached to the right side of the printer with a single screw each. Four nozzle blockers slot into the right side of the printer to prevent oozing. There is one cable to plug into the toolhead carriage, and it attaches with two screws.

Flashforge Creator 5

(Image credit: Tom's Hardware)

Before calibration, there is a nice reminder to make sure you’ve removed the three screws holding the bad in place for shipping.

Preparing Files / Software for Flashforge Creator 5

Flashforge Creator 5

(Image credit: Tom's Hardware)

The Flashforge Creator 5 requires a download of Flash Studio, which is based on Orca Slicer, which traces its lineage to Bambu Studio and Prusa Slicer. Flash Studio is stable and works fine for connecting to the Creator 5 in either cloud or LAN mode. The filaments input from the printer itself show up on the device page, but have to be manually chosen in the slicer as they do not sync up automatically.

Flashforge does not give access to the printer directly from a browser using the IP address, but does offer LAN mode if you want to avoid the cloud. Files can also be transferred manually via a USB drive.

Flashforge Creator 5

(Image credit: Tom's Hardware)

You can access Voxelshare, Flashforge’s file sharing site from the home page of the slicer. While not as deep as some of the other file sharing services out there, it is a good place to start looking for something to print.

Flashforge Creator 5

(Image credit: Tom's Hardware)

Flashforge does have a nice series of guides that can be accessed directly from the slicer. Information is a little light on the Creator 5 largely because it is still in pre-order status.

Leveling the Flashforge Creator 5

Flashforge Creator 5

(Image credit: Tom's Hardware)

The Flashforge Creator 5 sets Z offset and levels the bed as part of its initial calibration, along with vibration compensation and extruder offset calibration. It calibrates the four tool heads by tapping a calibration disk hidden underneath the build plate. This takes about 40 minutes, but only needs to be done when the machine is first set up.

Flashforge Creator 5

(Image credit: Tom's Hardware)

The printer offers to recheck the level at the start of each print. Since the printer sets the level using the tool head carriage, without the need to level each individual tool, it’s quick enough to just let it level each time.

Loading Filament on the Flashforge Creator 5

Flashforge Creator 5

(Image credit: Tom's Hardware)

Loading filament in the Flashforge Creator 5 is a very simple, though oddly manual, process. Each tool head has a manual cutter, triggered by a lever, which also releases the extruder. To load filament, place the spool on the holder, push the end of the material into the appropriately numbered port, and hand-feed the material to the tool head. You then remove the toolhead from its dock, press the lever to release the extruder tension, and feed the material until it stops. To unload, you reverse the process.

The loading routine on the printer nicely sets the hot end temperature to match the last filament loaded, 250 °C for PLA and TPU, and 270 °C for PETG. It will then purge a rather large amount of material onto the floor of the printer.

Flashforge Creator 5

(Image credit: Tom's Hardware)

Printing on the Flashforge Creator 5

The Flashforge Creator 5 comes with four small sample coils of basic colored PLA, which are too small to be of any real use. You should check out our guide to the best filaments for 3D printing to stock up on filament before using the Creator 5.

Flashforge Creator 5

Little Hoff made with Creality’s Cube Me Tool (Image credit: Tom's Hardware)

For my first print, I decided to jump into the deep end of the pool. I used Creality’s Cube Me tool to make a model from a photo of Dave Hasselhoff from his Knight Rider days. I used the .12 mm layer height default profile, which set an average print speed of 160 mm/s. I tilted the model 90 degrees backward to avoid supports on Hoff’s face and stuck with the default values for tree supports. The supports were very stout, but were removed with very little trouble.

The print took 8 hours 28 minutes to complete and looks fantastic. The purge block generated by the defaults was massive on this model, weighing in at 44 grams, more than the model’s 33 grams. This purge value can be adjusted in the slicer and should be refined in future software releases as well.

I used Anycubic PLA Plus in peach pink, cyan, and black. The white is Microcenter’s Inland PLA.

Flashforge Creator 5

TPU Air Duster by Dan the 3D Printing Dad (Image credit: Tom's Hardware)

I wanted to test the ability of the Creator 5 to push TPU, so I loaded up some FiberFlex 40D from Fiberology. 40D is a little bit softer than standard 95A TPU, and many of the printers I test have a hard time handling it. To make it more interesting, I gave it a difficult model, the TPU air duster from Dan the 3D Printing Dad on Printables. This file will fail at the first hint of underextrusion. Using a .12mm layer height and an average print speed of 50 mm/s, the print completed in 2 hours and 9 minutes.

The duster printed great, with no leaks in the bellows, but did fail ¾ of the way up the straw. That soft TPU was way too wiggly at the top, where the model was very small.

Sadly, the extruder clogged, which required disassembling the tool head to clear.

Flashforge Creator 5

Tinkercad (Image credit: Tom's Hardware)

I wanted to give the machine another shot, so I loaded up some CookieCad Sunset TPU, which has a shore hardness of 95A. This time, I was prototyping a phone bag I made in Tinkercad.

This printed at a .2mm layer height, with an average speed of 50 mm/s. The print took a little over 10 hours to print. The quality is very nice with just a little bit of stringing on the interior of the bag, which just means I should have dried the TPU before printing with it.

Flashforge Creator 5

Fidget Grabber Long by shol (Image credit: Tom's Hardware)

For PETG, I printed a Fidget Grabber I found while browsing MakerWorld. Using a .2mm layer height and an average print speed of 120 mm/s, the print completed in 2 hours 57 minutes. The print looks really good in Polymaker Silver PETG, and all of the print-in-place joints came out super clean. It’s not the most functional print, but it’s certainly fun.

Bottom Line

Flashforge Creator 5

(Image credit: Tom's Hardware)

The Flashforge Creator 5 printed everything we threw at it (except softer than soft TPU) and did an excellent job. It will be even better if Flashforge can tone down the purge waste when loading and on the prime block. The slicer could be a little less clunky and sync filaments directly, but again, this is a small issue.

$699 isn’t exactly the cheapest price for a 3D printer, but it is currently the best deal you’ll get on a tool changer. If you want to print in four colors, but hate wasting your filament, the Creator 5 is worth a look.

Right now, our options for tool changers are limited. The Snapmaker U1 has a bit more polish and can be upgraded to be fully enclosed by slapping an IKEA tub on top of it. It is currently $899. The prosumer Prusa Research XL, which has a larger print volume and five heads, is $3,899.

✇Tomshardware

Bambu Lab collabs with Insta360 for epic design contest — win thousands in 3D printers, Luna Ultra cameras, and gift cards

Bambu Lab announced a major collaboration with the camera brand Insta360, featuring a “Let’s Make It” Luna Ultra Design Challenge on MakerWorld. The two companies invite fans to design and 3D print custom hardware to fit the new Luna Ultra, a dual-lens 8K gimbal camera built for vlogging. This is the first camera brand to establish an official presence on MakerWorld, the home of Bambu Lab’s file library and maker community.

Up for grabs are $11,160 in prizes, including Luna Ultra cameras, 3D printers, and gift cards. The most intriguing part of the contest is a “Mystery Grand Prize” that will go to the most inspiring concept and could be selected for development as an official Insta360 product.

Though the Luna Ultra uses AI-powered software, AI-generated designs are not welcome in the contest. Each model entry must be a new, unique, human-created design that is printable on an FDM 3D printer. Designers can download a mockup of the Luna Ultra to precisely fit their creations to the camera without needing to own one first.

MakerWorld – and other 3D printing file sites – are already full of useful camera mods for all sorts of cameras. Tripods, clips, grips, boom arms, dollies, stands, cases, and storage systems abound for every kind of camera. Type “Insta360” into MakerWorld, and over a thousand files pop up for the company's older camera models. Most files are born of necessity, then shared for free by the photographers who designed them.

Insta360’s decision to embrace the 3D printing community and encourage fan-made mods is a refreshing change from standard corporate behavior. We’ve seen many cases of brands being overprotective of their IP and shutting down the "unauthorized" use of their name and image. Rather than presenting Bambu Lab users with a cease-and-desist letter, Insta360 is leaning into the fandom. By providing official 3D-printable mockups of the Luna Ultra only a few weeks after the camera’s launch, they are asking users to become active participants in the hype train.

“We see a shift where creativity doesn’t stop at capturing images—it extends into building and shaping the tools themselves. This collaboration between Insta360 and Bambu Lab brings together imaging and the maker community for the first time in this way, bringing creators the freedom to push the boundaries of what's possible,” said Max Richter, Co-founder & Vice President of Marketing at Insta360.

The two companies hope the contest encourages users to “move past the limits of off-the-shelf parts” and build custom gear uniquely designed for each photographer’s shooting environment.

You don’t need to have an Insta360 camera or even a 3D printer to enter the contest. The contest consists of two tracks: one for 3D printed models posted to MakerWorld and a second for creative ideas posted to social media.

For the model design challenge, contestants need to upload an original creation that fits the Luna Ultra and mark it with the hashtag #PrintForLuna.

Track 1: The Model Design Challenge

For the core model track, contestants need to upload an original creation that fits the Luna Ultra to MakerWorld and tag it with #PrintForLuna.

Three grand prizes will be awarded for physical designs:

Most Original: Wins an Insta360 Luna Ultra Creator Bundle and a Bambu Lab X2D Combo.

Best Functional: Wins an Insta360 Luna Ultra Standard Bundle and a Bambu Lab A2L Combo.

Best Aesthetic: Wins an Insta360 Luna Ultra Standard Bundle and a Bambu Lab A2L Combo.

Models must fit the Luna Ultra, and be printable on an FDM printer. Each participant can submit up to five entries per contest, and each entry must be a new, unique design. AI generated models and remixes are not eligible. Models will be judged by a committee based on relevance, printability, uniqueness, visual appeal and functionality.

Track 2: The Social Media Campaign

The social media contest is for creators who may be new to 3D printing and lack design skills to actually design and print their ideas. Entries can be based on idea concepts, sketches or written descriptions shared on Instagram, TikTok, YouTube, Facebook, or Reddit (r/Insta360) with the hashtags #PrintForLuna #BambuLab #Insta360LunaUltra.

Two grand prizes will be awarded for social media posts:

Most Creative Idea: Wins an Insta360 Luna Ultra Standard Bundle and a Bambu Lab X2D Combo.

Most Practical Idea: Wins an Insta360 Luna Ultra Standard Bundle and a Bambu Lab X2D Combo.

Submissions will be open from July 10 to August 9, with winners announced on August 20, 2026

✇Tomshardware

Bambu Lab A2L 3D printer review: The A1 grows up

Bambu Lab has finally updated its popular A1 bedslinger with an increased build volume, a few technical tweaks, and additional capabilities. The A2L has all the room of a more expensive H2 Series, but at a fraction of the cost, at $569 for a four-color combo. Its open frame design makes this primarily a machine for PLA, PETG and TPU, which happen to be the most popular filaments for its target audience: family enthusiasts.

Bambu Lab has categorized this machine as a family-friendly craft center. When combined with its gold standard AMS Lite and the H2 Series blade cutter attachment, the A2L can whip up practical prints, toys, and vinyl iron-ons for apparel. The launch coincided with Bambu’s new PLA Pure, a new non-toxic PLA formula with low VOCs, and a pastel matte finish that hides layer lines.

Its one flaw is the insane vibrations generated by the A2L at speed. Normally, larger machines will be slowed down to avoid this, but Bambu Lab decided to toss granulated vibration-absorbing pellets in the frame and throw caution out the door. This makes the machine nearly as fast as the original A1 while still printing error-free. It also makes it a bit of a table snob, as most cheap tables can not hold it. I put the A2L on an IKEA Lack coffee table, a pretty standard surface for budget-minded makers, and the AMS Lite vibrated right onto the floor after 45 minutes of printing. If the table had been any higher (like a card table or wobbly kitchen table), it would have taken the whole printer onto the floor with it. Bambu has included a “steady” printing profile that quells the shaking at the expense of speed. A “high-quality” profile also runs at a less frantic pace.

The A2L retails at $469 for the standalone printer, $569 for a combo, with an additional $69 for a cutting upgrade kit. The printer is also compatible out of the box with the AMS2 Pro ($269), which would give you the ability to dry filament without needing additional equipment. Bambu Lab has really perfected its formula for quality, speed, and ease of use, making this one of the best 3D printers we’ve seen this year.

Specifications: Bambu Lab A2L

Build Volume

330 x 320 x 325 mm (13 x 12.6 x 12.8 inches)

Material

PLA/PETG/TPU (up to 300 degrees)

Extruder Type

Direct Drive

Nozzle

.4 stainless steel

Build Platform

PEI textured spring steel sheet, heated

Bed Leveling

Automatic + Z

Filament Runout Sensor

Yes

Connectivity

WiFi, Micro SD

Interface

3.5-inch Touch Screen

Machine Footprint

544 × 529 × 505 mm (21.4 x 20.8 x 19.8 in)

Machine Weight

12.8 KG (28.2 lbs)

MSRP

Standalone - $469

Combo - $569

Release Date for Pre-Orders

June 1, 2026

Included in the box: Bambu Lab A2L

Bambu Lab A2L

(Image credit: Tom's Hardware)

Our A2L unit came with an AMS Lite and an optional blade cutter/pen plotter attachment. A cardboard toolbox holds all the tools needed to assemble and maintain the printer, plus a blade for making your own scraper. There was also a small coil for running a test print (enough to make that scraper).

Assembling the Bambu Lab A2L

Bambu Lab A2L

(Image credit: Tom's Hardware)

The Bambu Lab A2L requires a small amount of assembly. First you need to attach the heatbed to the Y-carriage, then place the base into the gantry frame, which is a pretty beefy triangular unit. There’s a handful of screws to hold everything together, and a few wires to plug in. The instructions are very easy to follow.

Do apply lubricant to the Y-Axis while you have it exposed. It does not come pre-greased, and our test unit immediately requested grease after only a few prints.

The AMS unit snaps together quickly before being secured onto its stand.

Leveling the Bambu Lab A2L

The Bambu Lab A2L completely auto-levels itself during initial calibration, then can recheck the level before each print. It uses the nozzle as the probe, so it can also set the z height for you. I had no problems with the settings and no need to make adjustments.

Though calibration errors are rare, Bambu Lab has a section in its Wiki to guide you through troubleshooting advice.

Loading Filament in the Bambu Lab A2L

Bambu Lab A2L

(Image credit: Tom's Hardware)

Like the Bambu Lab A1, the A2L can work from a single spool holder mounted to the gantry, or from four spools on the Lite AMS unit. In addition, the A2L is also out of the box compatible with the box style AMS and AMS 2 Pro.

For a single spool you must push filament through the Bowden tube to the toolhead, then tap “load filament” on the main menu. The machine will take over from there and display a checklist on the screen so you can follow along.

For the AMS Lite, simply push spools onto the motorized spindles and poke the filament into the intake. The machine will detect the filament and draw it in.

The AMS has an RFID reader, which allows it to read tags on Bambu Lab branded filament. These tags will tell the machine what type and color of filament is on each spindle. If you’re using untagged filament, or the single spool holder, you’ll need to enter this information manually.

Design of the Bambu Lab A2L

Bambu Lab A2L

(Image credit: Tom's Hardware)

The Bambu Lab A2L is a plus sized Cartesian, or as we call them, bed slinger. The A-Series sleek white and brushed aluminum style has been copied by most of the competition, so Bambu Lab seems to be onto something.

The printer is extremely easy to use with a touch screen interface that contains guides to show you how to run the machine. It has the same build size as the H2 Series, but does not come with an option for an enclosure.

It has metal rails, linear bearings, and dual Z rods, all tucked inside a smooth frame and base that makes it look much more polished than other printers. To make up for its large size, it has a pair of hidden “granular dampers” designed to absorb vibration and stabilize the frame. You can’t see them, but you can hear them if you give the printer a bit of a shake.

Bambu Lab A2L

(Image credit: Bambu Lab)

The A2L has a new feature called “adaptive vibration compensation,” which uses a real-time algorithm to retune calibration as your print gets taller. This is to eliminate vibrations that can affect printers the taller – or heavier – they get.

When equipped with an AMS unit, the A2L takes up noticeably more space. Bambu Lab offered a clip that I could print myself that would attach the AMS to the X gantry, but I’m still not convinced that is the best place for it.

The extruder motor has been upgraded to a PMSM closed-loop servo to actively detect filament grinding in the gears, clogs and air printing. Combined with the new nozzle clumping detector on the purge sweep, the A2L should be able stop a lot of annoying small problems before they become huge spaghetti monsters.

One odd thing is the A2L uses the same quick swap steel nozzles as the A1 and A1 Mini. These are not the upgraded nozzles used on the H2 Series, but H-style nozzles are backward compatible with the A-Series. These nozzles have made a huge impact on the industry, with the competition scrambling to copy them as well. There’s no screws, wiring or messy thermal paste involved here.

Bambu Lab A2L

(Image credit: Tom's Hardware)

The A2L is compatible with a cutting and plotting attachment, which is available as a separate purchase. The add-on is easy to install: simply remove the front cover and the spinner, then snap on the cutting attachment and plug a cable into the toolhead. It is advised to remove the bowden tubes for the filament, but there’s little need to do so. The hotend remains in place and is kept off by the machine.

The attachment can hold either a Bambu Lab made drag knife or any standard size pen or marker. I was able to use a normal ball point pen in mine by adding a few wraps of tape to thicken the pen body.

This is the same attachment you can get on the H2 Series and uses Bambu Suite, a companion app, to “slice” files. There is no laser add-on, since the A2L is open frame. The A2L also lacks a top down camera for positioning, so you will need to use the cutting function with the help of a phone camera equipped with Bambu Handy. This system is a bit janky, but it works, especially if you take care lining up the photos.

Bambu Lab A2L
Tom's Hardware
Bambu Lab A2L
Tom's Hardware

Bambu Lab Automatic Material System (AMS) Lite

Bambu Lab A2L

Panda by Flexi Factory (Image credit: Tom's Hardware)

We received the A2L Combo, which includes an AMS Lite module. The AMS Lite is made specifically for the A-Series and is not compatible with the Core XY machines. It’s not as clean looking as the boxy AMS, with four Bowden tubes stretching from each spool to the tool head. However, this simplified version is much easier to unjam should brittle filament break in the tube.

Each spool is mounted on a spring-loaded spindle, which provides the necessary retraction. Since each color has its own Bowden tube, the A2L only needs to pull the filament a few inches until it's clear of the tool head, not all the way back to the AMS Unit, which makes it a bit faster during color swaps than the original system. Each spool also gets a motor to push filament to the tool head. This new system solves the problem of cardboard spools with crushed edges, spools that are too wide or too tall, and spools that are too light.

There are notable drawbacks to using either of Bambu Lab’s AMS systems. The printer wastes an amazing amount of material when it cleans out the nozzle between colors. The waste can be reduced with tuning, but takes time and patience. The slicer will tell you exactly how much it will use before you start a print.

The second drawback is loss of speed. The printer needs to pause between layers to purge filament, then do a nozzle wipe on the purge tower. The Flexi Factory Panda takes 2 hours and 40 minutes to print in one color using default settings, and 6 hours and 46 minutes to print in three colors.

Preparing Files / Software

Bambu Lab A2L

(Image credit: Tom's Hardware)

Bambu Lab has its own custom slicer, Bambu Studio, which is a fork of PrusaSlicer. The slicer is also the primary means of transferring files via Cloud service or local LAN to the printer. You can also control and monitor your printer remotely with Bambu Handy, a mobile app.

Bambu Studio is also the “paint” program you need to assign color to your prints. The device tab allows you to talk directly to the printer to define the filaments in the AMS, heat up the printer and control the speed.

It has a wide range of presets for filament from both Bambu Lab and other manufacturers. I’ve found these presets to be incredibly helpful and accurate.

You also use Bambu Studio to access MakerWorld, a one stop shop for the Bambu Ecosystem. Here you’ll find free files for your printer, MakerLab with AI powered design tools and Maker’s Supply, a store front will model kits, hardware, tools, LED lights and CyberBricks so you can level up your 3D printing hobby.

Printing on the Bambu Lab A2L

The printer arrived with several prints preloaded. You’ll definitely want to shop for filament before bringing this machine home, especially if you plan on doing a lot of AMS printing. We have a guide with our favorite filaments for 3D printing here.

To show what the Bambu Lab A1 can do under normal conditions, I printed three Ice Cream Narwhales using default settings of 200-300mm/s and a .2mm layer height, taking 10 hours and 44 minutes to print. The models came pre-painted by the designer.

It turned out beautifully smooth with no visible layer lines or ringing. There was a little color bleed from the gold cone to the top of the narwhale’s head. This was printed in a sparkle blue from an unmarked PLA spool I picked up from SMRRF a couple years ago, and now deeply regret not labeling it better, plus a basic PLA Pink and Black from Bambu Lab and gold from Polymaker’s Panchroma Dual Silk Sunset.

Bambu Lab A2L

Ice Cream Narwhale by CinderWing3D (Image credit: Tom's Hardware)

For a PETG test, I attempted to print a wind spinner for the garden, which I created in Tinkercad. The print ultimately failed due to the skinny base, but it got about 95% there, which is still impressive. When it fell over, it looped the rest of the layers around the print like a coil. If you look closely at the coil, you can see little bubbles caused by moisture. The print still looks fantastic and I’ll give it another shot later after I make the base wider. This is printed in Bambu Lab PETG Translucent 6 hours and 31 minutes using a .2 layer height and default settings. This print is smooth, without stringing or noticeable layer lines. The two flat bases printed separately – without supports– then snapped together.

Bambu Lab A2L
TinkercadTom's Hardware
Bambu Lab A2L
TinkercadTom's Hardware

For TPU testing, I printed a prototype phone bag that I created in Tinkercad, using CookieCad Pale Blue Elixir. This is a regular 95A TPU, so I needed to use the single spool holder on top and drop it directly into the extruder. The A2L did a great job, with smooth layers and only a couple stray bits from retraction errors at the very top. The print took 7 hours and 9 minutes using the printer’s defaults.

Reminder – the AMS can print special “TPU for AMS” which is a stiffer formula available from Bambu Lab.

Bambu Lab A2L
TinkerCadTom's Hardware
Bambu Lab A2L
TinkerCadTom's Hardware

I tested out the A2L’s cutting module by making a few branded price tags for items I sell at a local boutique. For this I used a simple shape I whipped up in Canva and my jpg logo. I dropped both into Bambu Suite, the “slicer” software that runs Bambu’s 2D cutter attachment and also the laser module for a H2 Series machine. (No, there’s not a laser for the A2L.)

I swapped the normal build plate for a purpose built sticky plate and very easily snapped the cutter module onto the tool head, then plugged it in. Because the A2L doesn’t have an overhead “birdeye” camera like an H2 Series, I had to take an overhead photo of the build plate with the Bambu Handy app. It’s surprisingly difficult to get the entire A2L bed into an overhead shot when you’re only 5’2” without getting a ladder. This might be why the registration is a little bit off and the inked logos are a little bit lower than they should be.

This required two passes. First the ink layer, which used a normal ball point pen that I wrapped tape around to fit in the pen holder. Then I swapped the pen for the cutting blade and finished it.

The cutter can also handle vinyl, and with the A2L bed size, you could really get a nice sized shirt made. Bambu didn’t send any vinyl to try out, but they do sell it on their website. Because this is a manual cutter and not a laser melting material, you are free to use any material that is under .5mm thick.

Bambu Lab A2L

(Image credit: Tom's Hardware)

Bottom Line

Bambu Lab A2L

(Image credit: Tom's Hardware)

The Bambu Lab A2L is the supersized evolution of the A1 bedslinger that does double duty as a family craft hub. It’s budget-friendly with an easy-to-use interface that lets beginners have a little extra room to play without having to move up to a price H2 Series.

Like the first A1, this is much easier to use and maintain than Bambu’s larger machines, as the AMS Lite isn’t prone to jamming, and the new nozzle clumping detector sweeps printer purge safely away.

At $569 for the combo and $469 for a single color machine, the A2L is a great choice for makers who want Bambu quality and access to the ecosystem without the price of a Core XY machine.

If you’re interested in a larger color bedslinger, the Anycubic Kobra 3 Max has a 420x420x500mm build volume and is currently on sale for $601.60. The Bambu Lab H2S has the same build size in a Core XY enclosed unit for $1349.

✇Tomshardware

Prime Day brings huge savings on affordable 3D printers — top value picks from Anycubic, Bambu Lab, Elegoo, and Creality hit rock-bottom pricing, can’t-miss deals on filament bundles

We’ve got our sights set on Amazon Prime Day, which is running from June 23-26, 2026, and the bargains for some of the best 3D printers are hot! But Amazon is not the only place to snag a great deal. Manufacturers are holding fantastic sales on their own websites, and most are offering free shipping along with can’t-miss filament bundles.

Even if you’re not in the market for a new 3D printer, Prime Day brings out the best sales on filament and accessories. Not to be left out, Bambu Lab is celebrating its 4th anniversary, Creality is honoring Father’s Day until the end of June, and Elegoo is running sales on its already budget-friendly 3D printers.

Anycubic Kobra X

Anycubic’s Kobra X

(Image credit: Tom's Hardware)

The Anycubic Kobra X is one of the best, most affordable 3D printers you can buy, and it’s currently on sale for $299.99 on Amazon for Prime members. We love its space-saving design with top-mounted spools and a compact multimaterial handler packed right in the tool head. It also has a quick swap nozzle and a roomy 260 x 260 mm build plate.

By keeping the material mere centimeters from the nozzle at all times, the Kobra X has a competitive speed advantage. During our testing, it could swap colors in about 35 seconds from cut to purge, while the Bambu A1 took as long as 90 seconds to swap. Those seconds can really stack up over hundreds of layers of multicolor printing.

Because it only needs to retract filament a very short distance, the Kobra X is one of the few machines that can mix standard TPU and PLA in one print.

Bambu Lab A1 and A1 Mini

Bambu Lab A1
Tom's Hardware
Bambu Lab A1 Mini
Tom's Hardware

Bambu Lab only offers three of its older model 3D printers on Amazon: the A1, A1 Mini, and P1S. It’s not surprising, as these are also its most popular, budget, and beginner-friendly machines.

The A1 Mini is our favorite recommendation for kids starting a 3D printing hobby. Its compact size, ease of use, and full access to Bambu Lab’s ecosystem make it a machine that can grow with you as you level up your skills. It’s currently $349 with a four-color AMS Lite, or $234 as a single-color machine on Amazon.

The A1, with its standard-sized 256x256mm build plate, is a no-brainer for beginners who want to start with a full-size machine. This machine is currently the most cloned 3D printer, but its print quality, speed, and simple interface are hard to beat. Bambu’s full-service ecosystem isn’t quite a walled garden, but it’s certainly a cozy place to stay for beginners learning the ropes. Amazon currently has the A1 Combo for $394, but you can get a better price, along with discounted filaments, at Bambu’s own website. The A1 Combo is $379 with a build-your-own filament bundle that lists spools at 45% off.

Bambu Lab P1S

Bambu Lab P1S

(Image credit: Tom's Hardware)

A fan favorite workhorse since the day it was launched in 2023, the P1S is Bambu Lab’s bargain, no frills, fully enclosed 3D printer. It’s currently on sale for $499 on Amazon as a four-color combo unit that includes the original AMS.

The P1S has all the print quality you’d expect from a Bambu Lab machine, but has a few old-school quirks. Swapping the nozzle involves minor surgery with a screwdriver, thermal paste, and a steady hand. It has an extremely basic “dumb screen” interface on the printer, which can be easily avoided if you use either the Bambu Handy mobile app or simply operate from your PC, as I do.

Elegoo Centauri Carbon

Elegoo Centauri Carbon

(Image credit: Tom's Hardware)

Elegoo’s single color, fully enclosed, Centauri Carbon is holding steady as a value leader with a $299.98 price tag on Amazon. You can also get it on the Elegoo website, but you’ll have to pay extra for shipping.

The Centauri Carbon is a bare-bones enclosed 3D printer that handles a wide variety of filaments, from PLA, PETG, and ASA to TPU, quite well, without the need for a heated chamber. It has a standard bed size of 256 x 256mm, which means 3rd party build plate upgrades are easy to find. Our only complaint was the dim light, which, when combined with a smoked glass door, makes watching your prints difficult.

Though Elegoo did recently come out with a $55 four-color CANVAS upgrade for the Centauri Carbon, if you really want a four-color machine, I’d recommend the Centauri Carbon 2, only available on the Elegoo website, for $449 at the time of this writing. The upgrade kit is a nice gesture for CC1 owners, but it requires about 2 to 3 hours to mod your printer.

Creality SparkX i7

Creality SPARKX i7

(Image credit: Tom's Hardware)

If you're looking for an affordable entry into multi-color printing, the Creality SPARKX i7 Color Combo is a fantastic pick. What really seals the deal is the CFS Lite spool manager, a low-maintenance, incredibly adaptable “magic box” that handles every size and type of spool I could throw at it, including quarter-sized mini spools and spoolless coils, during testing.

The SPARKX i7 Combo is currently $369 on Amazon. It has a 260 x 260 x 255mm build volume, which is a bit bigger than Creality’s old Ender 3s without moving into Plus size territory. The Creality Cloud mobile app is a worthy addition for new users who want to pick fun models from their phone, run them through an easy slicer, and send them directly to their printer without needing to log onto a PC.

Flashforge AD5X and Creator 5

Prime Day Affordable 3D Printers

(Image credit: Tom's Hardware)

The single-nozzle/multicolor Flashforge AD5X is a solid entry to four-color, Core XY printing on a budget. The machine is currently on Amazon for $322 as an open-frame machine. The enclosure seen on our review unit was a DIY kit sold for $50 that includes panes of acrylic and a bag of screws: you print the rest yourself.

The AD5X does a great job with standard filaments, soft TPU, and can handle ASA when enclosed. The simple material handler is similar to Elegoo’s CC2, which keeps each filament a few inches from the top of the toolhead and doesn’t need to retract back onto the spool. Sometimes keeping it simple really is the best.

Unfortunately, the Creator 5 tool changer is not on Amazon for Prime Day, but it is currently on sale for $699 on Flashforge’s own website. We recently finished testing the Creator 5 and found it to be one of the best 3D printers of the year, which we hope is filled with even more toolchangers to come.

More Prime Day Tech Deals

Best Tech and PC deals | Best gaming PC deals | Best RAM combo deals | Best 3D printer deals | Best RAM deals | Best gaming laptop deals | Best monitor deals | Best Wi-Fi Router deals | Best GPU deals | Best SSD deals | Best hard drive HDD deals | Best CPU deals | Best gaming chair deals | Best PC building tool deals | Best PC peripherals deals | Best filament and resin deals | Best motherboard deals | Best CPU cooler deals | Best PC case deals | Best Dell and Alienware deals | Best USB charger deals | Best gaming and productivity laptop deals under $1,000 | Best laptop PC deals

Also, you can join the Tom's Hardware deals Discord for up-to-the-minute hardware deals.

✇Tomshardware

Anycubic Kobra 4 Combo 3D printer review: Evolution, not revolution

The Kobra 4 Combo is an update of 2024’s Kobra 3 Combo, or perhaps a smaller version of the Kobra 3 Max, depending on how you look at it. It takes style points from the competition, with a brushed aluminum frame and pale plastic base that screams “A1 clone.” Though the printing experience is marked improvement over its predecessor, most of the technical advancement lies in the multimaterial handler, the ACE Pro 2.

Anycubic is clearly aiming the Kobra 4 at budget-minded beginners, with a current sale price of $379 as a combo and $279 as a single color machine. Which, oddly enough, is the same price as the four-color Kobra X we reviewed in February. The Kobra X was a true leap forward, introducing a brilliant multi-material filament switcher built right into the tool head that cut down on time and filament waste.

It’s not that the Kobra 4 is a bad printer. It's just a bit unwieldy when compared to the clean filament paths and slender footprint of the Kobra X. Both machines have excellent print quality and share a quick swap hotend introduced by the Kobra X. It has excellent auto bed leveling and vibration compensation, which is mandatory for modern 3D printers. The ACE Pro 2 can double as a filament drier, which comes in handy for printing moisture-loving PETG.

The Kobra 4 Combo doesn’t have what it takes to knock the Kobra X off its spot as our “best budget 3D printer”, so we’re not including it on the Best 3D Printers of 2026 list.
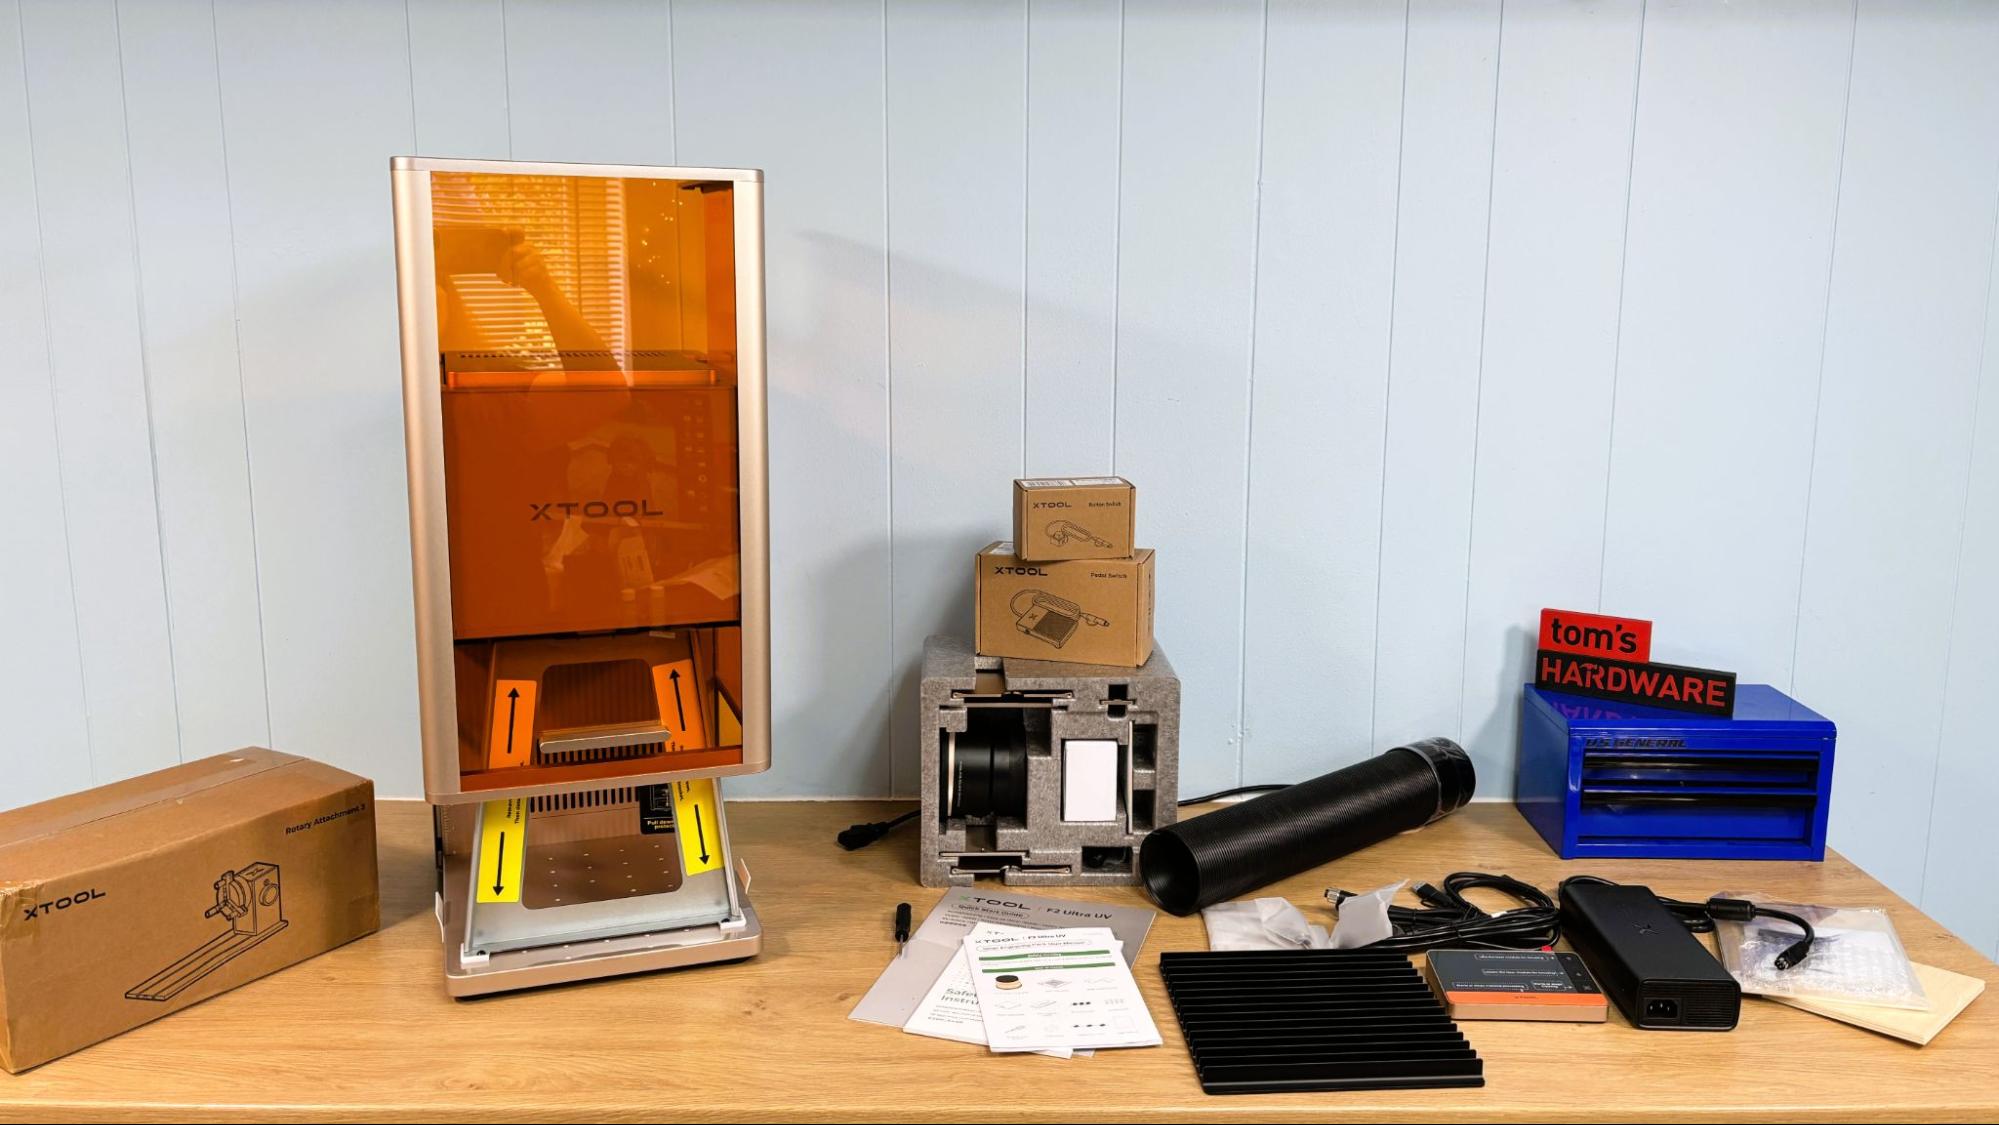
Specifications

Build Volume

260 x 260 x 260 mm (10.23 x 10.23 x 10.23 in)

Material

PLA/PETG/TPU (up to 300 degrees)

Extruder Type

Direct drive

Nozzle

.4mm

Build Platform

Double sided PEI spring steel flex plate

Bed Leveling

Automatic with Auto Z Offset

Filament Runout Sensor

Yes

Connectivity

USB, LAN, Wi-Fi, App

Interface

3.5-inch Color touch screen

Machine Footprint

455.4 x 445.3 x 461.3mm (17.92 x 17.53 x 18.16 in) (not including spool holder)

Machine Weight

9.9kg (21.82 lbs)

MSRP

$499

Release Date

May 18, 2026

Anycubic Kobra 4 Combo: Included in the Box

Anycubic Kobra 4 Combo

(Image credit: Tom's Hardware)

The Anycubic Kobra 4 was a beta unit and arrived almost completely assembled with the ACE Pro 2 in the same box. Included are two power cords, one for the printer and one for the ACE Pro 2, a signal cable, and four bowden tubes for connecting the printer to the ACE Pro. The included tool kit has hex keys, grease, and a nozzle cleaner.

Our printer was an early production unit that did not include a single spool holder, but we were able to borrow one from our Anycubic Kobra X to run TPU.

Assembling the Anycubic Kobra 4 Combo

Anycubic Kobra 4 Combo

(Image credit: Tom's Hardware)

The Anycubic Kobra 4 ships in one large piece. The only assembly is removing the packing screws and attaching the toolhead and purge wiper.

The brackets holding the bed in place require a very long hex key, which was included. Fortunately, the hex keys are magnetized because the screws are so far under the bed that they could be difficult to retrieve if they fell off while removing them. Once the brackets are removed, the included trim pieces hide the holes in the base nicely.

Attaching the printer to the ACE 2 Pro is simple with four Bowden tubes running from the tool head to the rear of the ACE 2 Pro, and a signal wire is run from the right side of the printer as well. Both the printer and the ACE require power cords.

Leveling the Anycubic Kobra 4 ­

Anycubic Kobra 4 Combo

(Image credit: Tom's Hardware)

Anycubic mastered auto bed leveling and Z offset with the Kobra 3 lineup, and this continues with the Kobra 4. The initial calibration includes PID tuning, resonance testing, leveling, and noise cancellation. The printer also offers bed leveling at the start of every print.
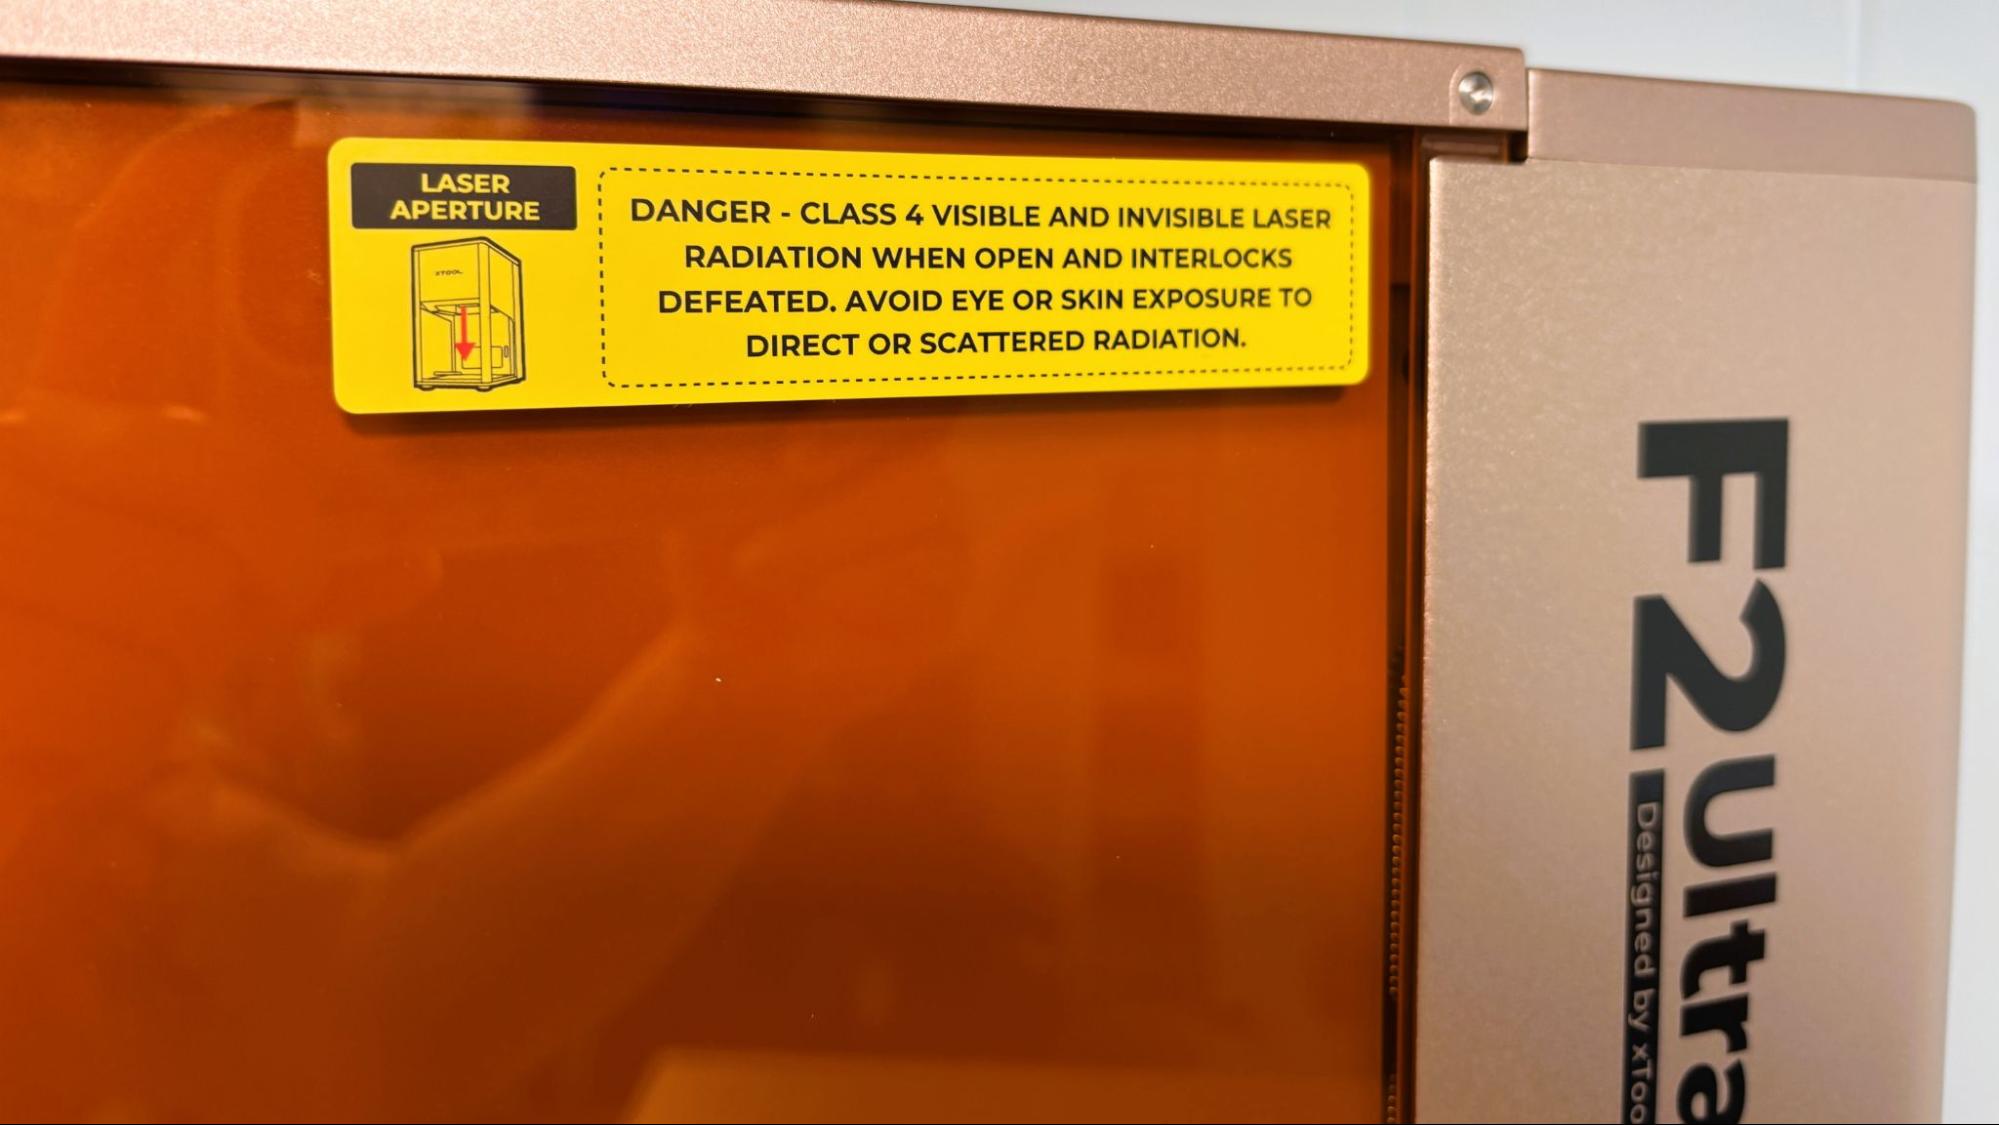
Loading Filament in the Anycubic Kobra 4

Anycubic Kobra 4 Combo

(Image credit: Tom's Hardware)

The Anycubic ACE 2 Pro makes filament loading simple. Just enter the filament in the feeder, and it gets slurped right up. This is a vast improvement over the earlier ACE generation, which often required multiple attempts.

Anycubic brand filament has RFID tags, which are read by the ACE 2 Pro and automatically identify the filament type and color. When using third-party filament, you need to enter the filament information from the printer’s screen and sync it to the slicer.

Design of the Anycubic Kobra 4 Combo

Anycubic Kobra 4 Combo

(Image credit: Tom's Hardware)

The Anycubic Kobra 4 shares its styling, motion system, and hotend with the Anycubic Kobra X, which is a definite upgrade over the Kobra 3. The Kobra 4 uses a new quick-release nozzle that uses a clip to hold it in place. Swapping a nozzle without tools takes no time at all. With the nozzle and the cutter being easily removable, clearing a filament jam also takes no time at all.

Anycubic Kobra 4 Combo
Tom's Hardware
Anycubic Kobra 4 Combo
Tom's Hardware

The Anycubic Kobra 4 has a 720p camera, which is good for monitoring from both PC and the Anycubic App, but not so much for recording timelapses. It suffers, the way nearly all bed slingers do, with the camera angle caused by its placement on the Z axis. The camera is also used for AI spaghetti detection, which does work, and is thankfully not oversensitive.
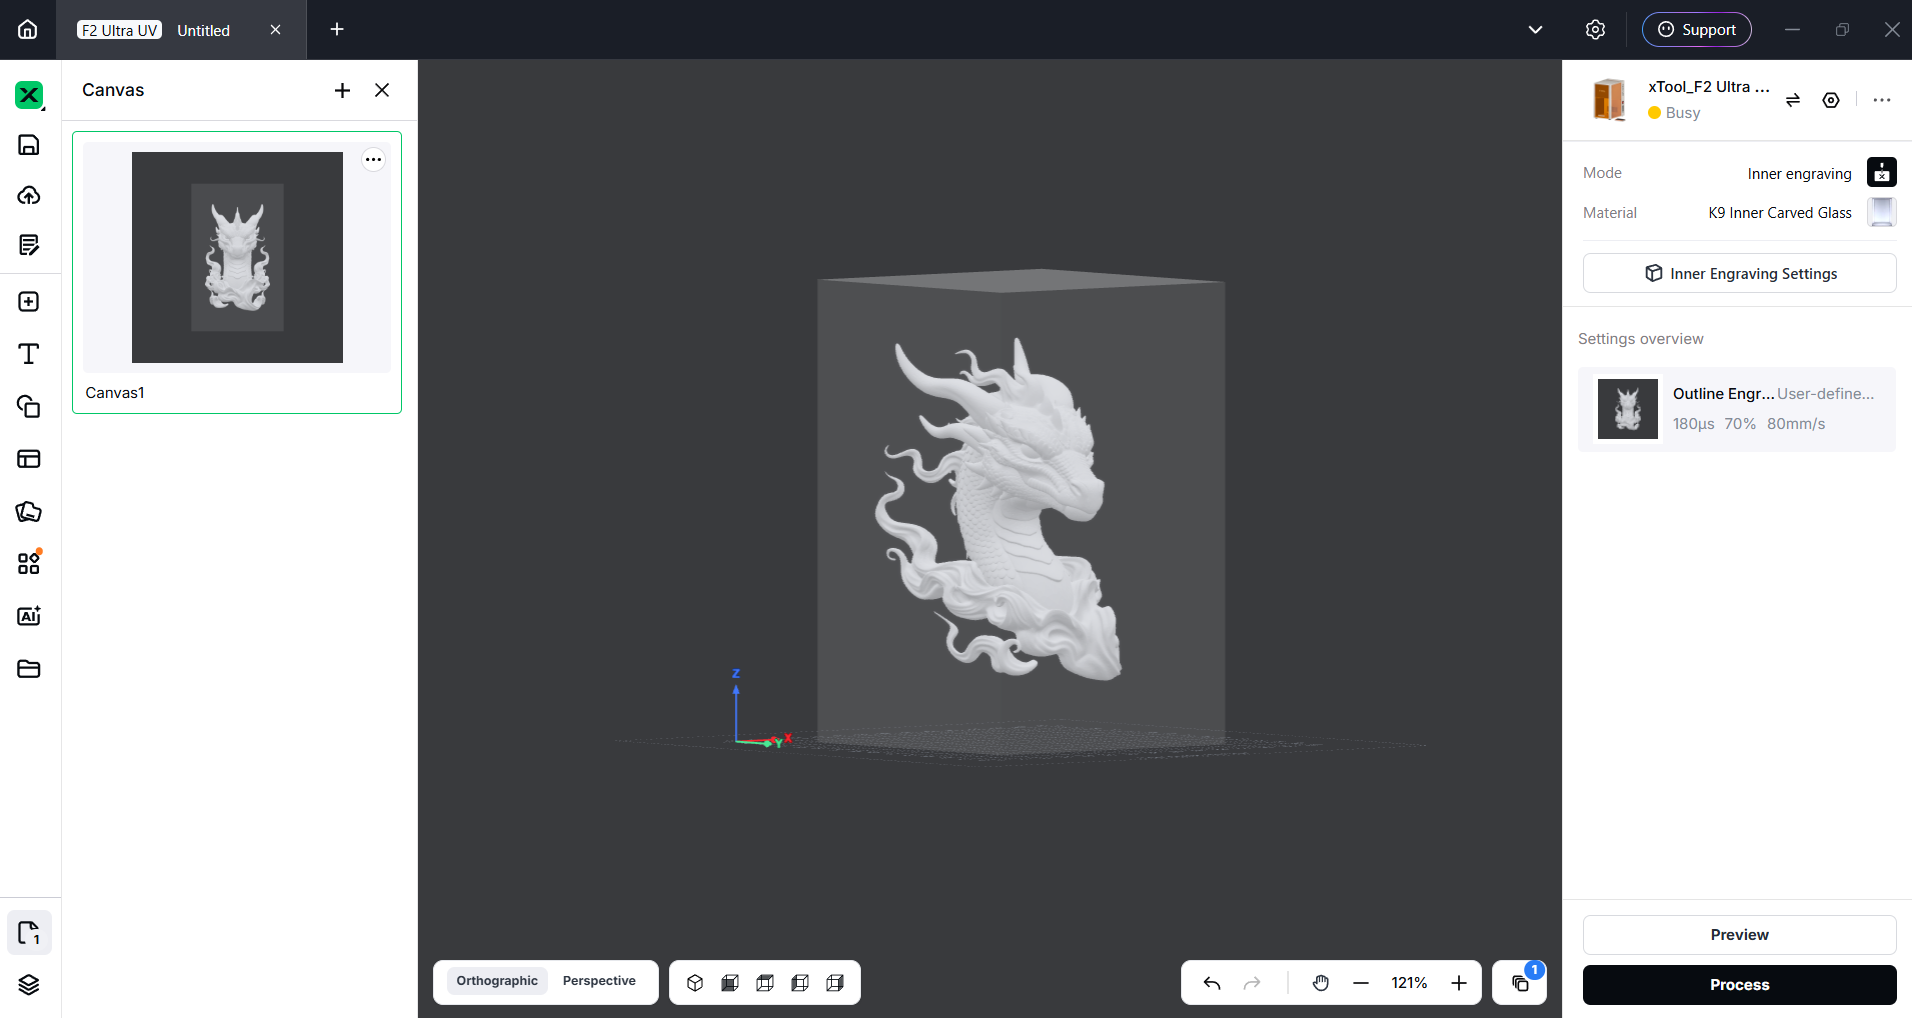
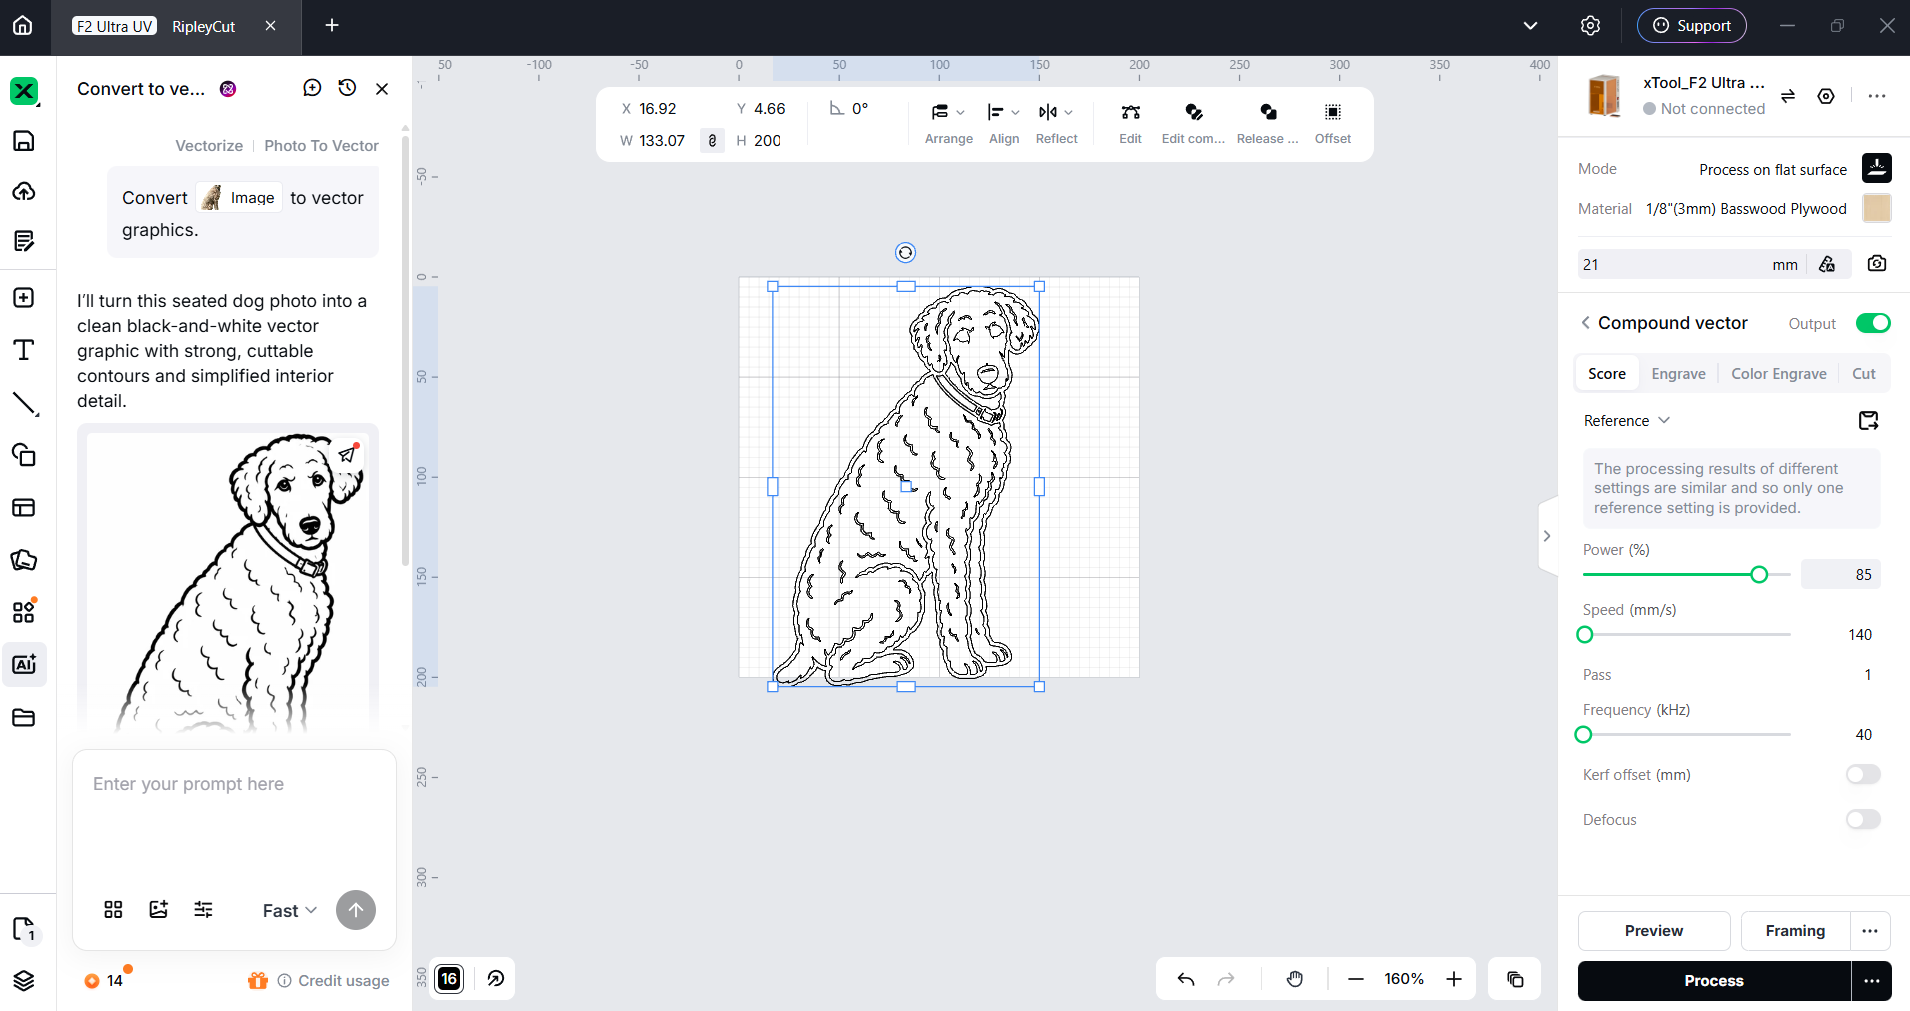
Anycubic Kobra 4 Combo

(Image credit: Tom's Hardware)

With the original ACE PRO, inserting filament was sometimes a chore, as it would often start feeding the filament next to the one you were trying to load. When trying to load filaments one after another, you had to wait for the first filament to be completely finished before loading the next, or misfeeds would happen. The ACE 2 Pro now operates like the Bambu Lab AMS with individual feeders for each filament. Currently, the feeding process is slow, and filament swapping takes a long time. I suspect that this will be sped up with a future firmware update.
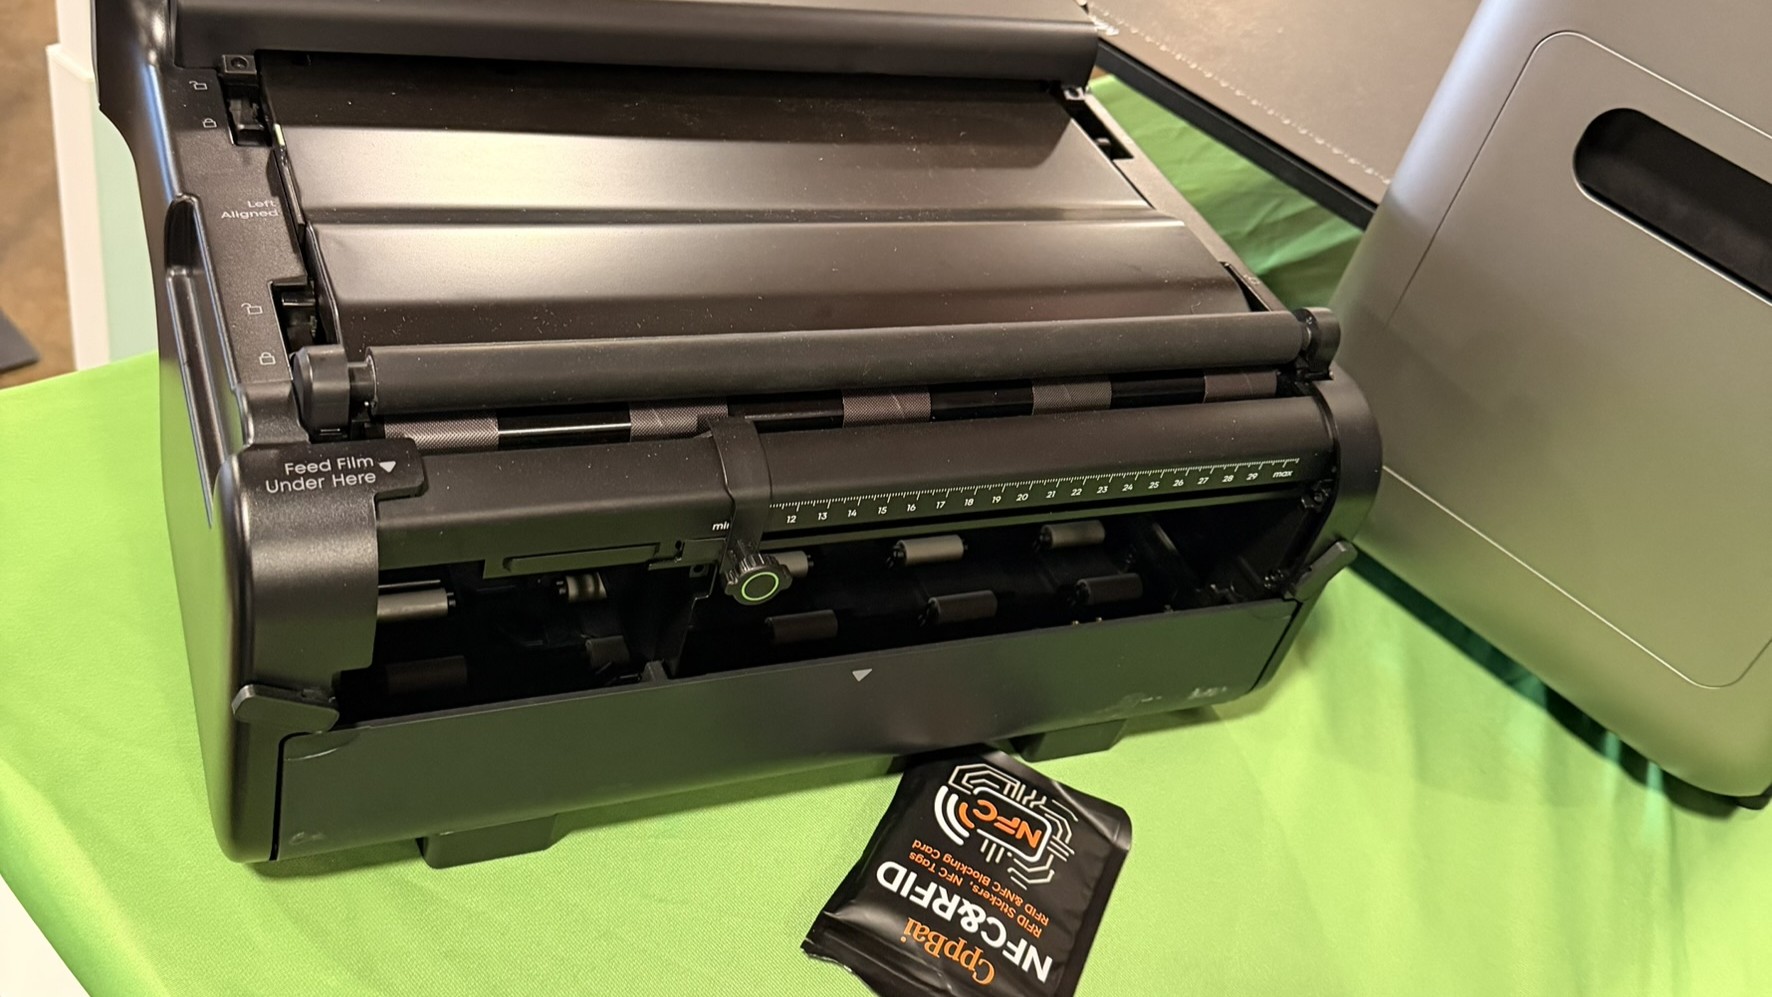
The ACE 2 Pro has guides for the filament spools on the lid and on the back of the unit. Most of the spools we tried were compatible, including Prusament spools. Smaller spools, coils, and damaged or fragile cardboard spools can be run only on the external spool holder.

Anycubic Kobra 4 Combo

(Image credit: Tom's Hardware)

While jamming in the ACE PRO was rare, clearing the jams could require extensive disassembly. The ACE 2 Pro solves this with the filament tubes running externally on the bottom of the unit with disconnects at the buffer.

Anycubic Kobra 4 Combo

(Image credit: Tom's Hardware)

My favorite feature of the ACE is its ability to dry filament and dry while printing. This feature might be wasted on an open frame bed slinger, but it could come in handy with PETG.

Sadly, the Kobra 4 can dry TPU with the ACE 2 Pro, but it can’t run it. Even when I used “made for AMS,” it refused to run through the ACE. The solution is to use the single spool holder (which I had to borrow from the Kobra X) and run TPU directly into the toolhead. Anycubic promised to add a printable “single hub” to the printer’s memory to use with TPU, but for now, I was able to simply pop the whole top off and shove it directly into the extruder. I tested TPU down to 83A shore hardness, and the Kobra 4 did great with all of it.

Anycubic Kobra 4 Combo

(Image credit: Tom's Hardware)

The Anycubic Kobra 4 Combo is very quiet, with fan noise being primarily what you hear. The ACE 2 Pro is almost completely silent unless it is drying filament and even then the noise is minimal.

Preparing Files / Software

Anycubic Kobra 4 Combo

(Image credit: Tom's Hardware)

The Anycubic Kobra 4 requires a download of Anycubic Slicer Next which is based on OrcaSlicer, which is based on Bambu Studio, which in turn has PrusaSlicer at the foundation. If you are familiar with Orca or Bambu Studio you should know what to do in Anycubic Slicer Next.

From the home page of the slicer you can see your most recently opened files and access Makeronline, Anycubic’s file sharing library.

Anycubic Slicer Next can be run offline with files transferred manually via USB. I prefer to have access to my printer from my computer and the Anycubic app if only to stop a failed print from wherever I happen to be. From the workbench page of the slicer or the task details page on the Anycubic App, you can stop a print, skip a part, and adjust everything from print temps to print speed. You can print pre-sliced files directly from the Anycubic App but the ability to change the print settings is very limited.

Printing on the Anycubic Kobra 4 Combo

The review unit came with an adorable (though mostly useless) vacuum sealed pack with four coils of PLA. To fill up that ACE 2 Pro, you’ll want to check out our guide to the best filaments for 3D printing for more suggestions.

The Kobra 4 comes with a number of presliced files on the machine’s memory, which include useful tools, test prints, and a few fun models. It also had this “four color cube” test, which is a complete waste of your time, filament and sanity. Don’t print this.

Anycubic Kobra 4 Combo

(Image credit: Tom's Hardware)

I ran a lot of PLA while testing the Kobra 4. This pair of Geckos is a good example of the results. They printed in 5 hours and 9 minutes at .2mm layer height using 3 walls, 10% infill, and default speeds. Because of the size and shape of the model, the print speed is more like 160mm/s. It’s printed in Anycubic’s Cyan, Yellow, and Black PLA.
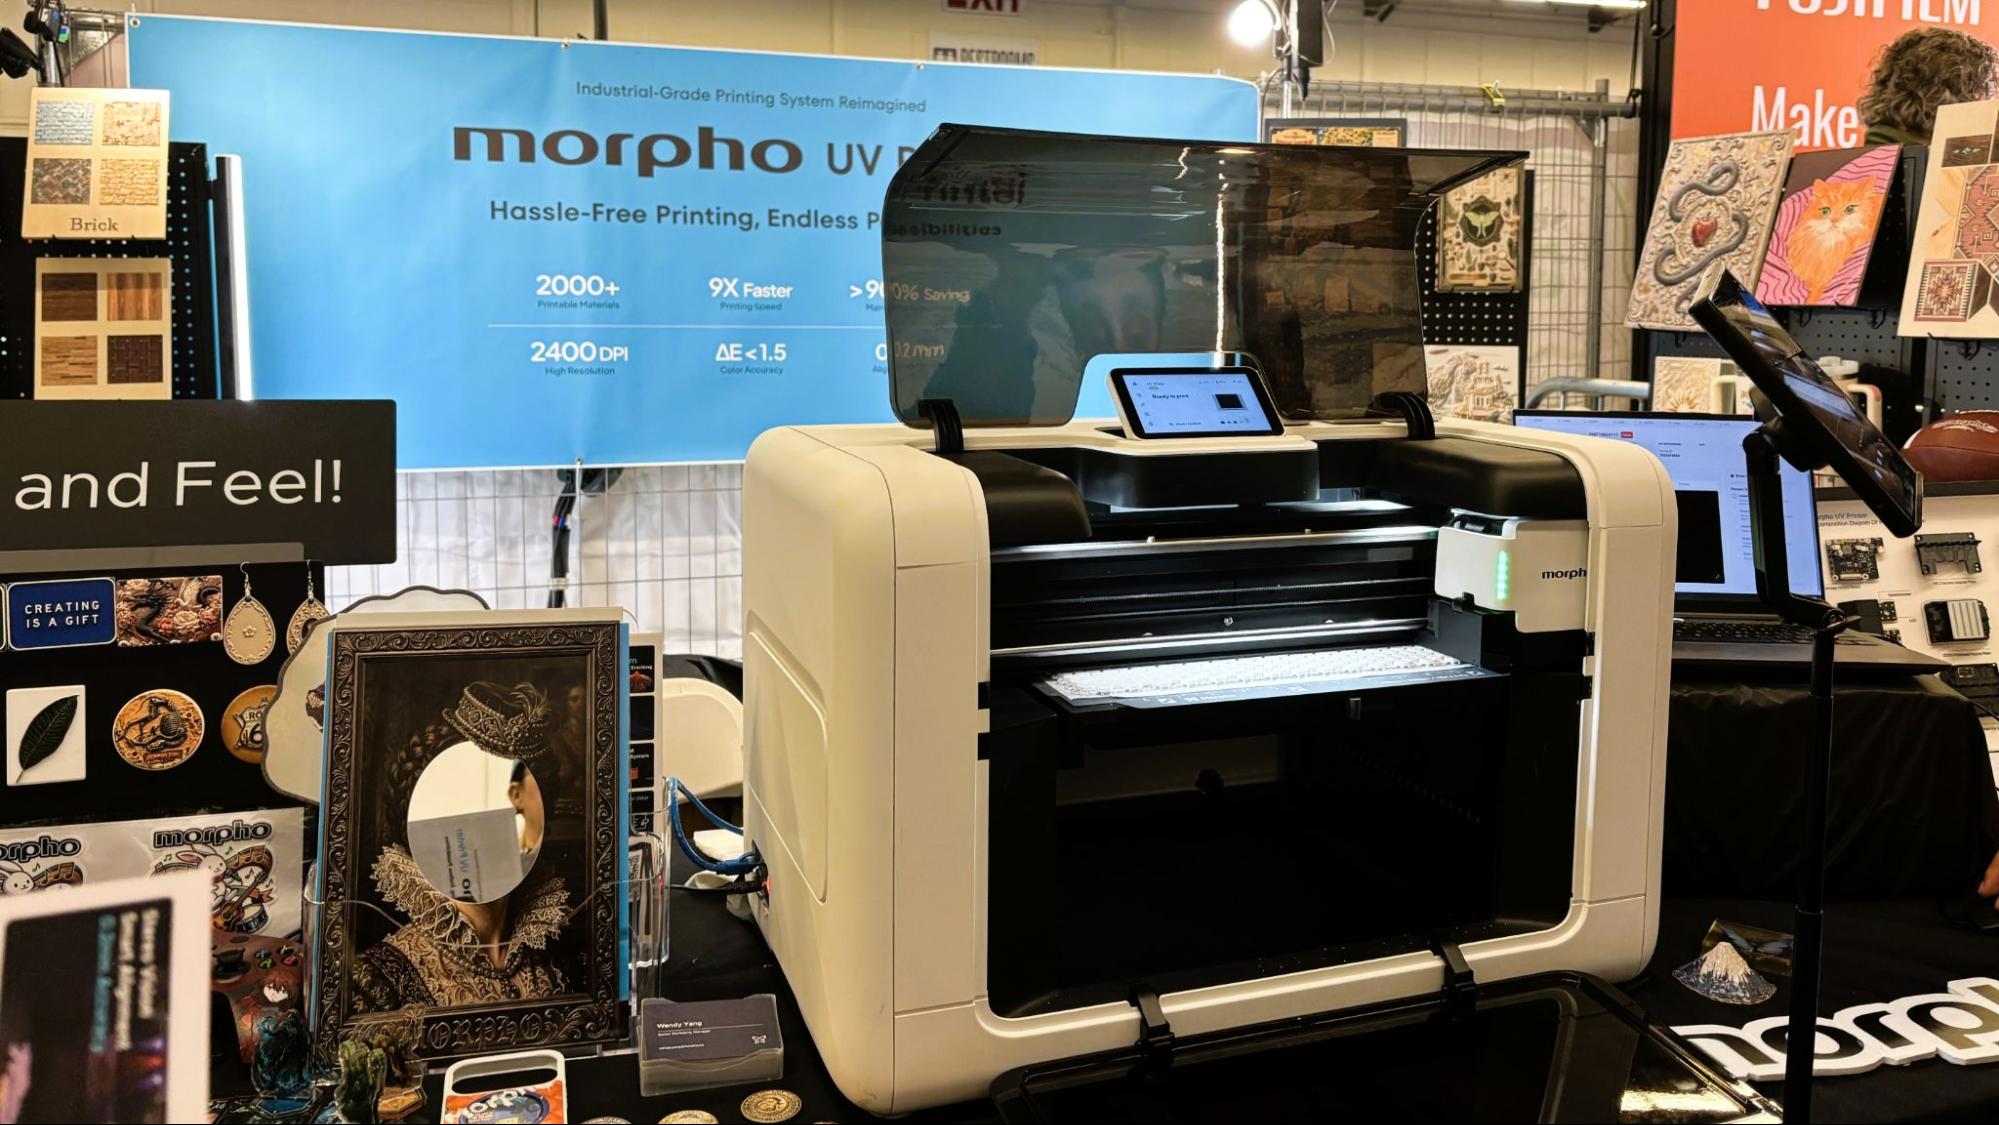
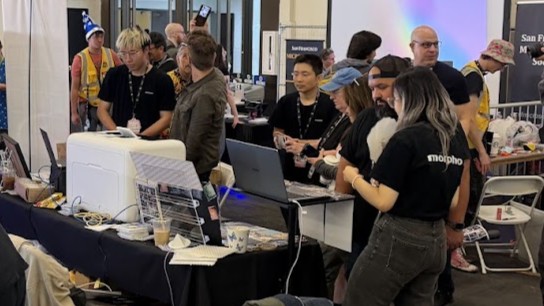
I did not change the default flushing volumes and ended up losing about 40 grams of filament in the filament purge. Due to a software bug, Anycubic’s slicer vastly underestimated the waste and even suggested it would flush negative values of yellow filament. This bug has been around since the Kobra X, and I really hope they have fixed it by now.

Anycubic Kobra 4 Combo
Zou3D GeckoTom's Hardware
Anycubic Kobra 4 Combo
Zou3D GeckoTom's Hardware

For PETG, I printed a plate of PentaClick balls from YosaNatural on Makerworld. With a .2mm layer height, four walls, and an average speed of 90 mm/s, they finished in 4 hours 38 min. The print looks great in Prusament Yellow Gold PETG, and the print-in-place hinges worked great with no hint of overextrusion. The model prints flat, then is folded and snapped into a ball shape. A small rubber band around the middle provides a spring action, so when you press the ball flat, it pops back into shape.

Anycubic Kobra 4 Combo

PentaClick by YosaNatural (Image credit: Tom's Hardware)

For TPU, I ran both hard 68D and soft 83A to make parts for our RC Deathracer, designed by Michael Baddeley.

While the smooth bumpers printed flawlessly, these spiked hubcaps, just based on their design, led to a fair amount of stringing. I’m confident this can be fixed by running with a bit more retraction. Using a .2 layer height and capping the speed at 50mm/s, the hubcaps took 5 hours and two minutes to print. This was printed using Microcenter’s TPU for MFS in black.

Anycubic Kobra 4 Combo

Tinkercad (Image credit: Tom's Hardware)

For softer TPU, I printed some tires I made in Tinkercad out of 83A TPE from Esun. This required removing the four bowden hub from the tool head and forcing the soft material directly into the extruder. It's annoying, but worth the effort as it ran the TPU beautifully. I used a .2mm layer height, two walls, and 10% concentric infill, with an average print speed of 50 mm/s. This took 1 hour and 35 minutes to complete. The tires are super soft and grippy and nearly perfect, with no stringing at all.

Anycubic Kobra 4 Combo

Tinkercad (Image credit: Tom's Hardware)

Bottom Line

The Anycubic Kobra 4 Combo is a step rather than a leap ahead of the Kobra 3 Combo, but it is a good value for an entry level 3d printer. It borrows the clean aesthetics of the popular Bambu Lab A1 and greatly improves the multimaterial handler from its first iteration. It’s a highly capable out-of-the-box experience for beginners.

However, it can’t quite compare to the Kobra X in value or space saving. I would only recommend the Kobra 4 over a Kobra X if you were seriously feeling the need for an all-in-one filament dryer solution.

The Kobra 4 Combo is only $20 cheaper than the Bambu Lab A1, which has a more established ecosystem, and $10 less than Creality’s SparkX i7 Combo, our pick for best beginner 3D printer.

❌