普通视图

发现新文章,点击刷新页面。
昨天以前Tomshardware

How to look better on webcam — tips for the average person to look better and more professional

2026年7月29日 19:32

You don't need a professional streaming setup to take work video calls and chat with friends and family — and, honestly, you don't want one. And webcams have a lot of limitations (most professional streamers use DSLRs to shoot content, not webcams), so there's only so much you can do. But it's not nothing.

Here are several things the average person can do to make their webcam streams look better.

Webcam

First of all, let me point out that the webcams on our list of best webcams are, for the most part, not 4K webcams. That's because you don't need a fancy, expensive 4K webcam to look good — and, in fact, a 4K webcam might end up working against you. Most video conferencing platforms, including Google Meet, Microsoft Teams, and Zoom, limit your outgoing stream to 1080p or 720p, depending on the type of account you have. So you basically can't stream in 4K even if you want to (and you probably don't want to). Plus, higher-resolution webcams often require more power and bandwidth, which can result in freezing, lagging, and choppiness (none of which are flattering) if your PC or your internet connection isn't up to speed.

Instead of looking for a high-res webcam, look for one with a relatively narrow field of view and/or digital zoom (which narrows the field of view). One of the reasons we love the Logitech Brio 500 is that it has the option for narrowing the field of view to 65 degrees, and a narrower field of view is more flattering to your face. Wide-angle lenses tend to distort the picture subtly, warping objects at the edges and making whatever's in the center look larger than it is.
How to look great on (web)cam
Elgato's Camera HubTom's Hardware
How to look great on (web)cam
Elgato's Camera HubTom's Hardware

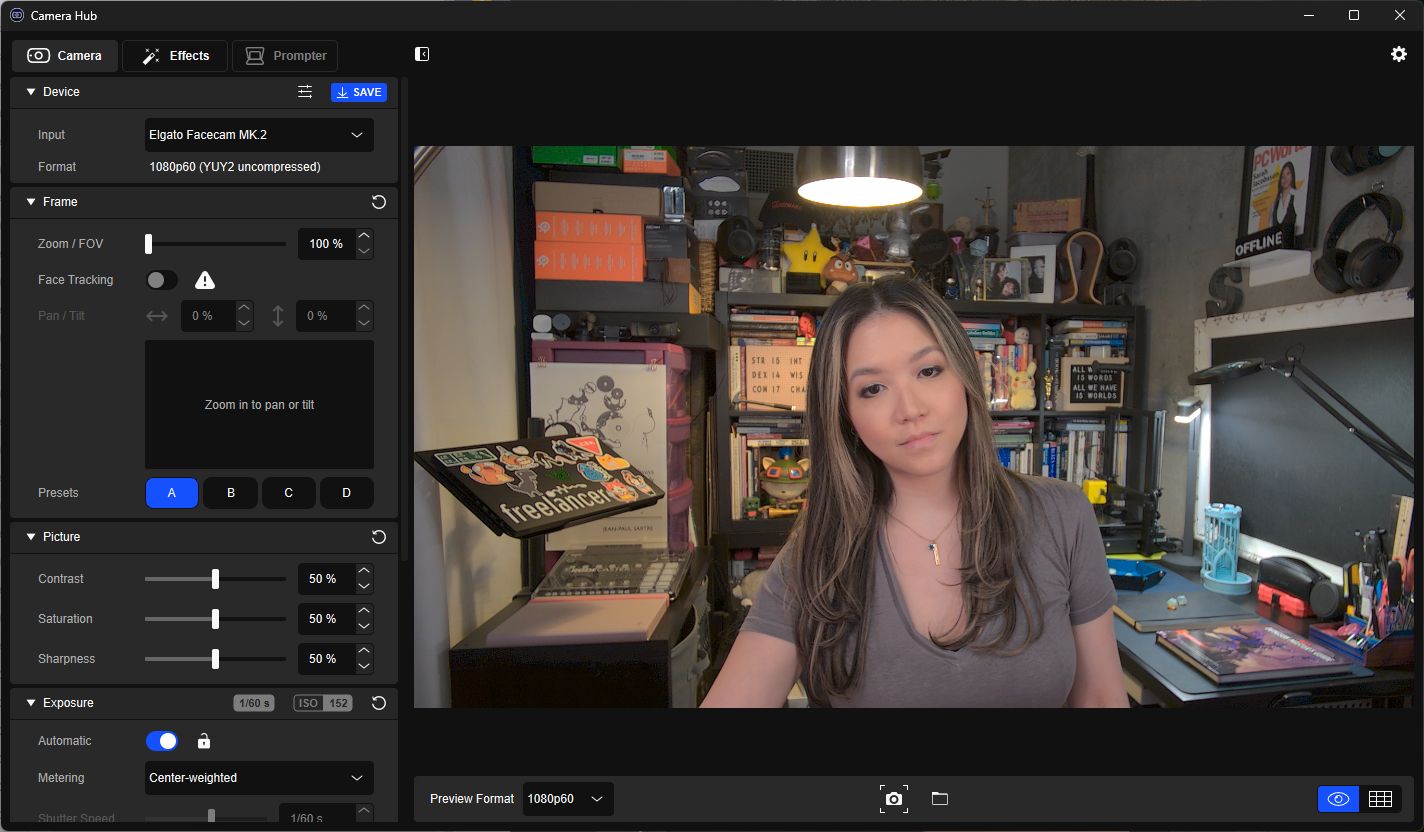
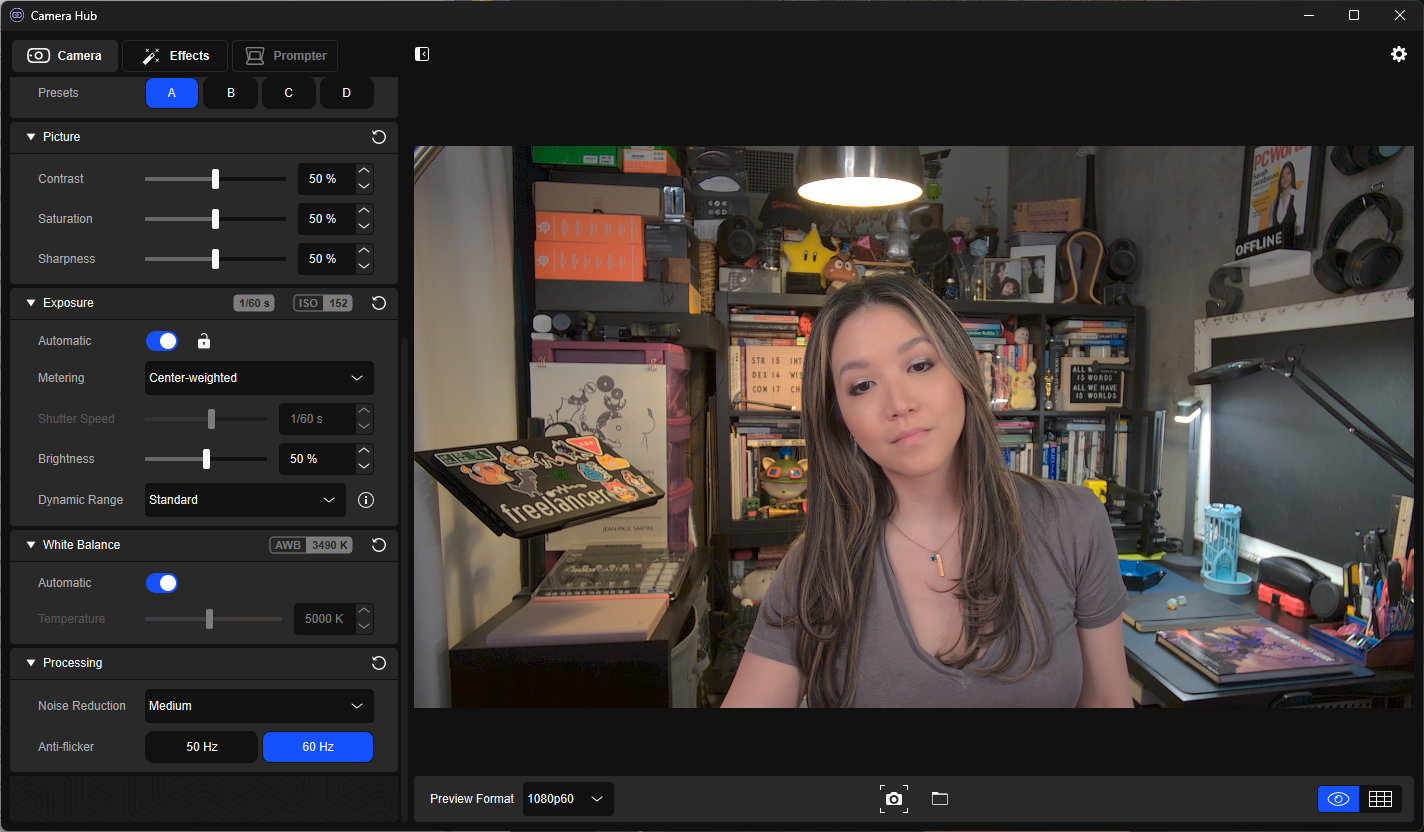
Larger sensors and lenses can also help, but what you'll find is pretty limited in the webcam market (they are, after all, webcams) — so instead of worrying too much about the hardware, look for a webcam with robust software support. I'm a big fan of Elgato's Camera Hub (which supports Elgato webcams, such as the Elgato Facecam MK.2 and the Elgato Facecam Neo), which gives you a lot of control over exposure, white balance, and picture adjustments, and also lets you zoom in and save presets so you can quickly switch between angles while you're streaming.

How to look great on (web)cam

Logitech MX Brio has some of the best auto-exposure and auto-white balancing we've seen. (Image credit: Tom's Hardware)

Needless to say, part of the reason you're looking for a webcam with good software is that you should be changing the settings in the software — webcam auto-exposure and auto-white balancing are notoriously terrible and should almost always be manually adjusted. But if you're the type of person who can't be bothered to go in and tweak software settings, you should pick up a webcam with decent auto-exposure and auto-white balancing — the Logitech MX Brio has excellent auto settings (though, at $200, you are paying for them).

Lighting

Lights shining down on you from above, such as those found in a typical office setup or, I don't know, in your kitchen, are designed to help you work more efficiently. They're not designed to flatter your face. In fact, this is probably some of the least flattering lighting around, thanks to the harsh shadows it creates. That said, you generally won't find a "naturally occurring" ideal webcam lighting setup, because most people do not place bright lights behind their already-bright, backlit monitors. But lighting is one of the most important elements when it comes to looking good on webcam, and it definitely makes a difference.

While there are some webcams that handle poor lighting situations slightly better than others, the difference is pretty minor. So instead of looking for a webcam that performs like a beast in the dark, just grab some lights.

You don't need to go overboard with a full studio setup, but basic three-point lighting is a classic for a reason. This consists of two lights on either side of you (at 45-degree angles) and one light behind you. At the very least, you should try to have two lights on either side of your face, and some sort of lighting (even overhead lighting) in the background so it doesn't look like you're sitting around in the dark. You can, of course, buy lights specifically for your webcam streaming setup — Elgato's Key Light is slim and comes with a desktop clamp mount designed to fit sleekly into your setup, while the brand's cheaper Key Light Neo features a monitor mount. Logitech sells the Litra Beam LX, which is dual-sided (colorful on one side, white on the other), as well as a monitor-mounted option, the Litra Glow.


How to look great on (web)cam
Three different lighting scenarios on the Razer Kiyo Pro Ultra — lighting in front, lighting behind/above, no lighting except monitor.Tom's Hardware
How to look great on (web)cam
Three different lighting scenarios on the Razer Kiyo Pro Ultra — lighting in front, lighting behind/above, no lighting except monitor.Tom's Hardware
How to look great on (web)cam
Three different lighting scenarios on the Razer Kiyo Pro Ultra — lighting in front, lighting behind/above, no lighting except monitor.Tom's Hardware

But you don't need a fancy, wirelessly-controlled webcam-specific streaming light — you can use a lamp, or even the sun. You just need two light sources, of which one is (ideally) dimmable. If you happen to have a multi-monitor setup, you can even use your monitor (or monitors, depending on how many you have). I use this whitescreen website to switch two of my monitors into lights when I'm taking pictures for webcam reviews. Just make sure the lights are off to the side of your face — straight-on lighting is more flattering than top-down lighting, but it does make your features look a little flat.

When you do have at least two lights in front of you, you'll want to make sure you turn off your webcam's auto-exposure and tune the exposure to work with the lights.

Height

Most webcams come with some sort of monitor mount for convenience. But your monitor — especially the top of your monitor — basically never sits at a height that makes for a flattering camera angle. If you've got a laptop, it's too low (even if it's not on your lap), and if you have a desktop monitor, it's probably too high. The best place for your webcam to be is at eye-level — not only does this give the most flattering, accurate view of your face, it also makes it easier for you to look into the camera (and making eye contact with the camera, not your screen, goes a long way in making you look good — or at least like you're paying attention).

There are a few ways to get your webcam to eye-level height:
How to look great on (web)cam

(Image credit: Tom's Hardware)

✔️ Get a separate camera mount

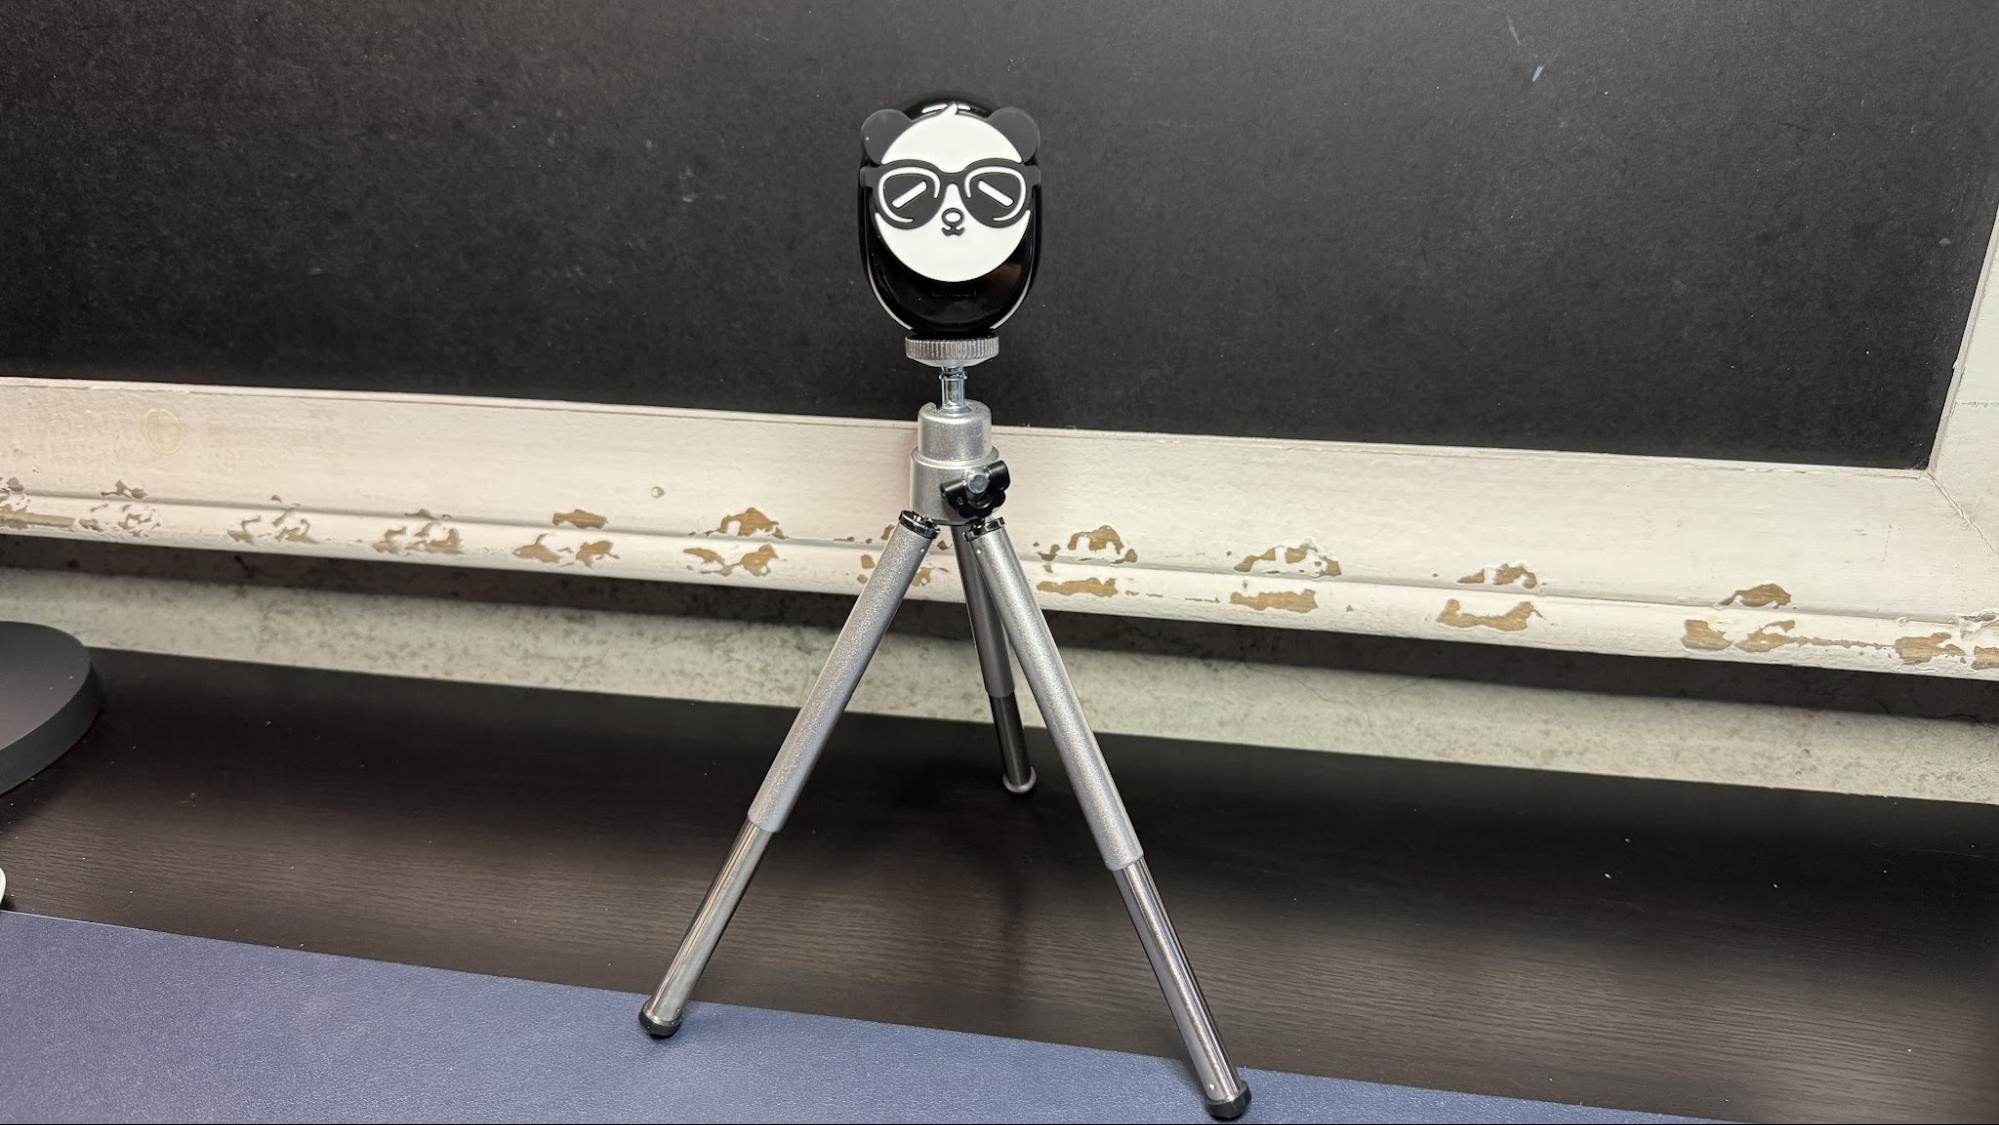
You don't have to mount your webcam on your monitor! Most webcams either have tripod attachment points built in or come with a monitor mount that has a tripod attachment point built in. This lets you mount your webcam on any standard camera mount, such as a tripod, a desktop tripod, or some other sort of desktop camera mount. A desktop tripod is probably the easiest way to get your webcam to an acceptable height, although it's perhaps not the most elegant, as you'll have to move it around when you're not using it. For a more permanent solution, I recommend a desktop clamp mount if you have somewhere to mount it — just make sure that the one you buy has enough adjustment options to get your webcam to where you want it to be.

✔️ Lift your laptop

If you're on a laptop and you happen to be using the built-in webcam, you can't exactly mount it separately, so you'll need to figure out how to get your laptop to eye-level height. The easiest way to do this is to just put your laptop on something: a box, a stack of books, or, if you're feeling fancy, a laptop mount. You'll also need to make sure that the screen is angled correctly — either straight on (90 degrees) or tilted slightly down.
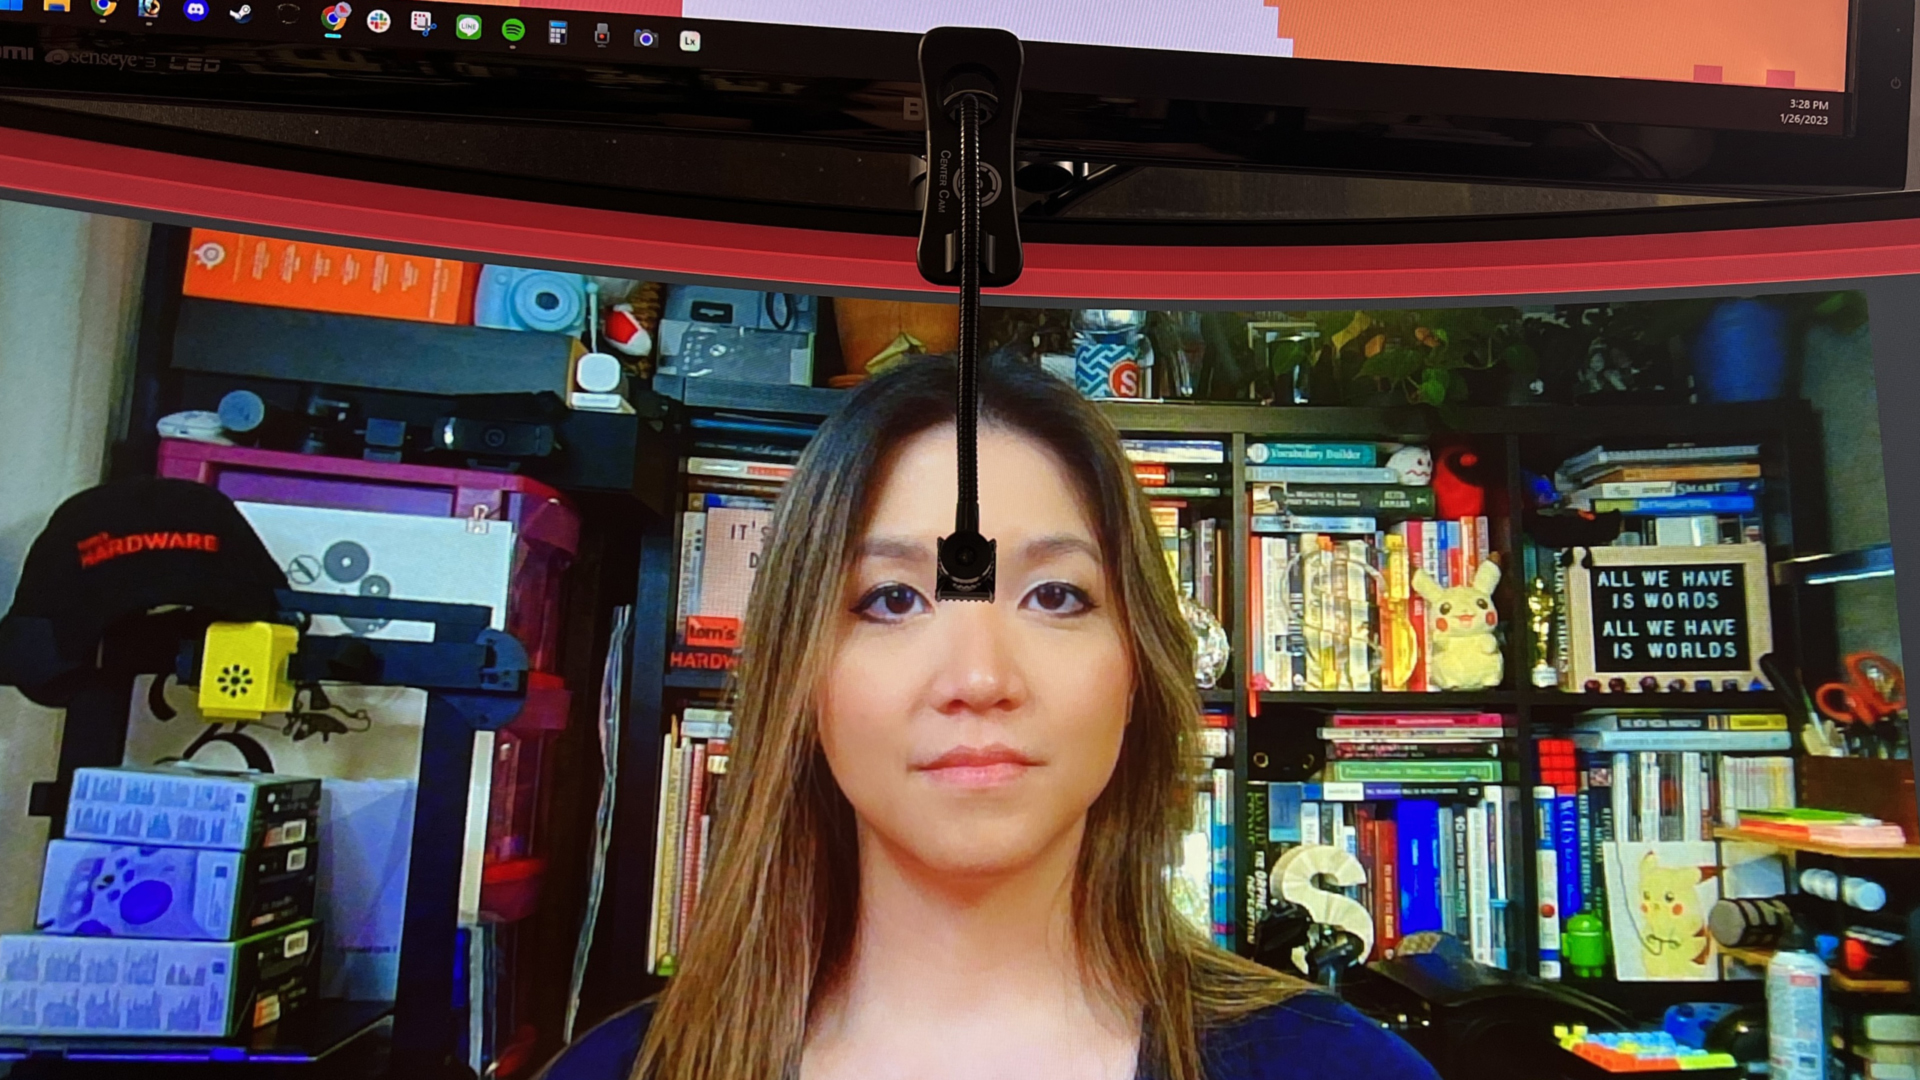
How to look great on (web)cam

(Image credit: Tom's Hardware)

✔️ Mount your webcam in the middle of your screen

Look, your webcam is probably going to end up in the middle of your screen in an ideal scenario anyway, so why not just... put it there to begin with? There are a couple of ways to do this — you can buy a webcam specifically designed to be mounted this way, such as the Center Cam, or you can get a mount that sits in the middle of your screen, such as the PlexiCam Pro V2, which is a clear, acrylic webcam mount that hangs on your monitor and puts the camera right in the center of your screen.

Background

This might seem obvious, but it's not just about how you look... it's about what people can see in the background. I know that not everyone has the space, resources, or willpower to set up some sort of perfectly curated streamer-ready background, and that's understandable. But there's probably some middle ground between showing off piles of laundry and unsuspecting roommates, and looking like you're ready to launch a Twitch partnership.

How to look great on (web)cam

(Image credit: Tom's Hardware)

✔️ Less is more

If you can't clean up your background before you get on a call, use the power of zoom and crop. Try to make the area directly behind you as neat and camera-ready as possible, and then use your webcam's software to zoom in and crop so that people just can't see what's just outside the frame.

✔️ But not... nothing

While you don't want everyone to see a pile of junk behind you, you also don't want to look like you live in an asylum. And that's what you look like when you just have a blank white wall behind you. If you have to be tucked up against a wall (and, turning your desk around to hide the mess is a completely valid strategy), just... put something on the wall. A picture, a painting, a sign, some of that stick-and-peel wallpaper, anything. It doesn't have to be fancy; it just has to look like you're anywhere that's not an endless void.

✔️ Use a greenscreen

Most video conferencing apps have an option to blur your background and/or replace it. I'll just come right out and say it: Blurring your background looks terrible. Yes, I know everyone does it, and it's generally accepted in workplace video calls, but that doesn't mean it looks good — that just means we're all willing to overlook how bad it looks. And replacing your background rarely works well, unless you're against a blank white wall (in which case you should just throw up some art and go with it). If you really can't make a real background work, consider a pop-up greenscreen for a more seamless background-replacing experience. And if you must blur your background, make sure you at least zoom in and crop so that people focus on you, and not whatever you're mysteriously hiding behind you.

This is not an exhaustive guide to how to look good on a webcam, but it's a start.

Why an MMO mouse isn’t just for gaming — make use of the myriad of buttons for enhancing your productivity workflows in popular software applications

2026年7月27日 23:39

What kind of mouse do you employ for your daily PC or laptop usage?

Is it a simple two-button mouse, or does it feature more buttons than you can shake a stick at?

Personally, I’m lucky enough to have a mouse for all occasions, as sometimes it’s great to have a peripheral that’s targeted to a specific task that it can excel at. An example of my personal usage is my Logitech G Superlight 2 - this is my current go-to mouse for when I get a little serious about playing my favourite FPS games. But this is the exception, as there are usually not that many buttons needed to be pressed and certainly no need for added functionality such as macros, although the software still supports it.

The main mouse I employ, though, has for years been an MMO/MOBA mouse of some description. For both gaming and a plethora of productivity applications, I’ve found that the intuitive functionality of a multi-button mouse offers me the best experience and streamlines my workflows, as well as saving my hand from cramping due to complex keyboard press combinations.

One of the first mice I started using this way was the Razer Hex when it first came out. This MOBA mouse had the usual left/right mouse buttons and a scroll wheel, but had an extra six buttons on the side panel nearest my thumb. There was a little changeable rubber nodule in the middle of the ring of six buttons to rest your thumb on and grip the mouse, so as not to accidentally press any of the side buttons. It took a while to get used to training the muscle memory of my thumb to use these extra buttons, but it was well worth the effort, as it freed up even more assignable buttons on my keyboard and also sped up my reaction times considerably in high-octane game sessions.

For games such as World of Warcraft and Final Fantasy XVI, the default spells and abilities start populating the number row on your keyboard from the 1 key to the =+ key (1-12), with further spells, abilities, and movement keybinds being assigned to other keys that are comfortable to reach with your non-mouse hand. There are also modifier key press combinations to double up on the number of things you can assign your buttons to on both the keyboard and the mouse, and that’s not even counting the fact that your free hand is also navigating WASD and the Space bar for movement.

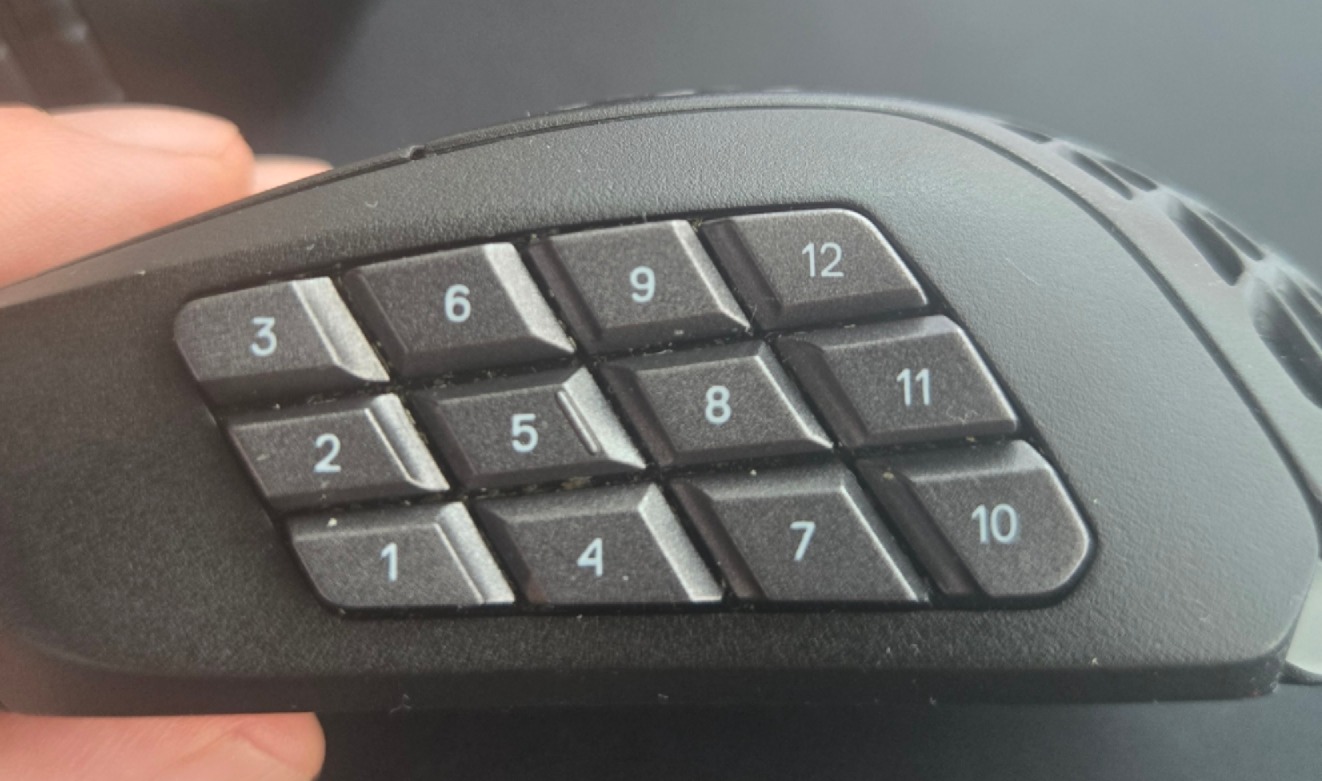
Although I persisted with the Razer Hex for a while, I soon desired more buttons and switched up to a Razer Naga, which sported the now-infamous 12-button side panel that's been imitated by almost every other MMO mouse since. Operating 12 buttons with just your thumb does take a lot of practice to commit the button positions to memory, with different manufacturers using slightly differing button design shapes to facilitate easier recognition.

A close up image of the 12-button grid on a SteelSeries Aerox 9 MMO mouse.

(Image credit: Future)

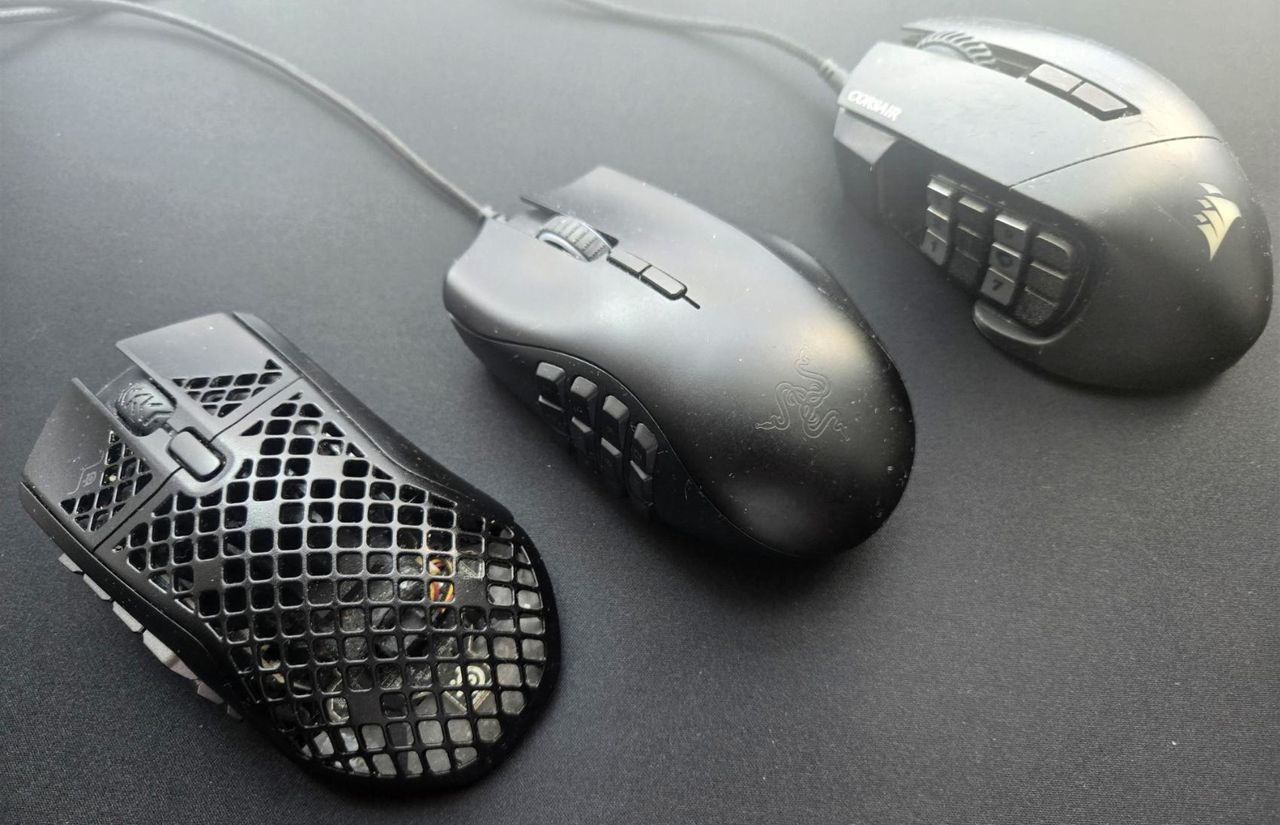
Some of the most popular MMO mouse models are Razer’s Naga, SteelSeries’ Aerox 9, Corsair’s Scimitar, and Redragon’s M908 and M913. An honorable mention goes to Logitech’s G600, which is no longer in production but was a great entry in the MMO mouse lineup and can still be found online, albeit at inflated prices due to its rarity.

Using accompanying software such as Synapse, iCUE, or SteelSeries GG, you’re able to reassign almost every button on a mouse, including DPI buttons. Apart from using an MMO mouse as an 18+button spell-slinger in gaming, these mice are super handy in other areas.

I use my SteelSeries Aerox 9 for video editing and some serious spreadsheet action. Yes, you can do the same with a number pad on a keyboard, but having all your favorite commands at your fingertips just speeds everything up.

How many times do you copy and paste? How often do you use a certain formula? Repetitive tasks can be simplified by making a macro or even recording a process and assigning it to one of the 12 side buttons. To make the most out of the mouse, you can set up application-specific profiles. The mouse software will then automatically detect when you're using a program such as Premiere Pro or DaVinci Resolve and instantly swap your thumb grid to the specific shortcuts you’ve set up for each application.

Remember, you can also set a modifier key so that you can increase the number of assignable buttons. The more buttons, the merrier, and once you’re completely familiar with your setup and workflow, you can edit an entire rough cut without your left hand ever touching the keyboard. Take a moment to think of your most-used tasks, what buttons you press to achieve them, and then program them onto the mouse, turning multiple buttons into just one. Ta-da!

If you’ve never dabbled in an MMO game, you may not be aware of how much of a game-changer a multi-button mouse can be. If you’re using multiple keyboards or macro pads like the Stream Deck for your workflow, you should definitely consider trying out an MMO mouse to improve your efficiency. It does take a little time to fully acclimatize yourself to using a mouse with a 12-button side panel, but it’s worth it, and I certainly recommend giving it a try. I can’t imagine going back, so I hope they keep making MMO mice for many years to come.

All of the mice I have mentioned in this article are available for purchase, with the Razer Naga V2 Hypserspeed Wireless available from Best Buy for $64.99, the SteelSeries Aerox 9 Wireless available from Amazon for $134.99, Redragon’s amazing value M908 Impact available for just $23.07, and finally Corsair’s Scimitar Wireless Elite SE at Amazon for $113.99.

The future of USB connectivity (2026) — How USB4 Version 2 and Thunderbolt 5 are bringing copper to its physical limits

2026年7月22日 23:40

The USB ecosystem is in the midst of another transition that will affect how laptops, desktops, storage devices, displays, and peripherals connect in the second half of the decade.

USB4 Version 2.0, Thunderbolt 5, and a refreshed certification program converge around higher throughput, expanded power delivery, and an attempt to simplify a standard that has accumulated layers of optionality over nearly three decades, which we've explained in our USB decoded explainer.

So, what's next? In 2026, USB4 Version 2.0 and Thunderbolt 5 are now actively being implemented in the premium laptop and desktop segments, shifting from the long-running 20 Gbps and 40 Gbps era toward links that can deliver 80 Gbps bidirectional bandwidth and 120 Gbps asymmetric modes for display-heavy workloads.

From 12 Mbps to 80 Gbps

USB began in the mid-1990s to replace a sprawl of legacy connectors — serial, parallel, PS/2 — with a single, self-configuring interface. USB 1.0 launched in 1996 at just 12 Mbps, fast enough for keyboards, mice, and early webcams.

The 2000 release of USB 2.0 raised that to 480 Mbps, enabling external optical drives and the first wave of consumer flash storage. But it was USB 3.0 in 2008 that marked the transition to high-bandwidth, general-purpose peripheral buses, pushing 5 Gbps over a new SuperSpeed signaling layer. USB 3.1 and 3.2 followed, expanding bandwidth to 10 Gbps and then 20 Gbps with dual-lane signaling, but also introducing a tangle of naming conventions that made it difficult for users to identify what a port or cable could actually do.

Throughout this evolution, USB retained backward compatibility by design. A USB 2.0 flash drive could still work when plugged into a USB 3.2 Gen 2x2 port, and a modern USB-C charger could power an old USB 3.0 hard drive. This interoperability helped USB become the default connector for consumer computing. That said, it also left the standard fragmented beneath the surface. Features such as power delivery, alternate modes for video output, and PCIe tunneling were added incrementally, and not all devices implemented them uniformly.

The introduction of USB-C in 2014 began to consolidate physical connectors, and the debut of USB4 in 2019 marked the start of a new architecture focused on integrated high-speed transport. But many of USB4’s promises, such as 40 Gbps throughput and universal power, depended on how thoroughly a given device implemented the spec. That complexity is still being worked through, even as USB4 v2 and Thunderbolt 5 push bandwidth and capability well beyond what USB 3.x ever attempted.

The state of USB4

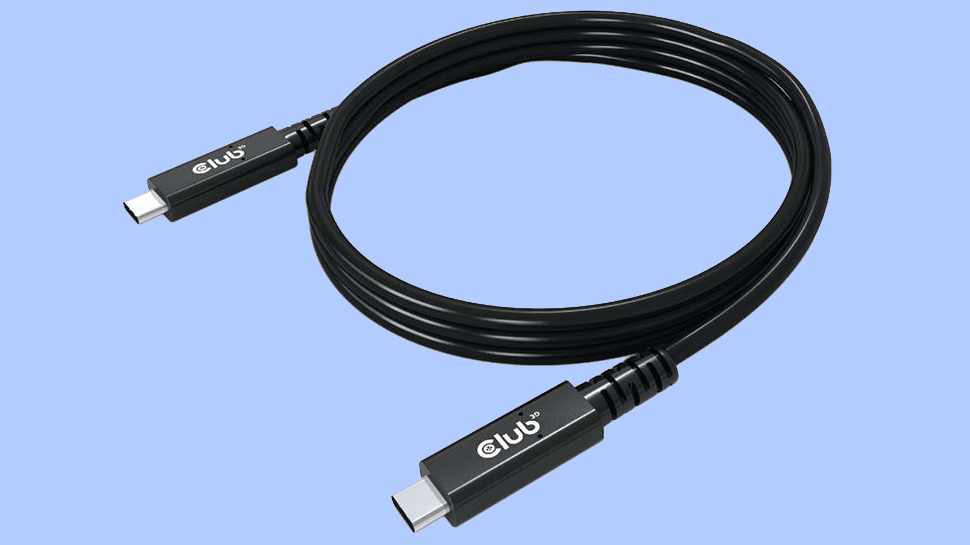
Club 3D

(Image credit: Club 3D)

USB4 has been positioned as the unifying successor to the fragmented USB 3.x family, but the reality of this is more nuanced. USB4 is a modular architecture built atop the Thunderbolt 3 transport specification that Intel contributed to the USB Promoter Group. The standard defines a tunnel capable of carrying DisplayPort, PCI Express, and USB packets simultaneously, distributing bandwidth dynamically across workloads. All USB4 ports use USB-C as the physical connector and require USB Power Delivery for negotiation, but beyond that baseline, implementations vary widely.

Most more budget-conscious laptops and PCs ship with USB4 20 Gbps rather than the full 40 Gbps mode. Many omit PCIe tunneling, which restricts the use of external NVMe enclosures, capture cards that require direct PCIe links, and eGPU housings. Others support only single-lane DisplayPort tunneling, capping multi-monitor configurations even when total bandwidth appears sufficient.

Thunderbolt 4 remains the most complete expression of USB4 Version 1.0, because it mandates 40 Gbps operation, PCIe tunneling with at least 32 Gbps of sustained throughput, dual 4K displays, DMA protection, and 15W of minimum port power. Intel platforms consistently meet this bar. Meanwhile, AMD systems vary by OEM and chipset, with only a subset of designs offering full USB4 40 Gbps with PCIe tunneling.

This implementation variability reflects the flexibility of USB4’s architecture. The specification allows device makers to scale features based on cost and power constraints, especially in thin-and-light systems. For users, however, the USB4 label alone does not guarantee any particular performance characteristic without checking controller documentation or certification badges.

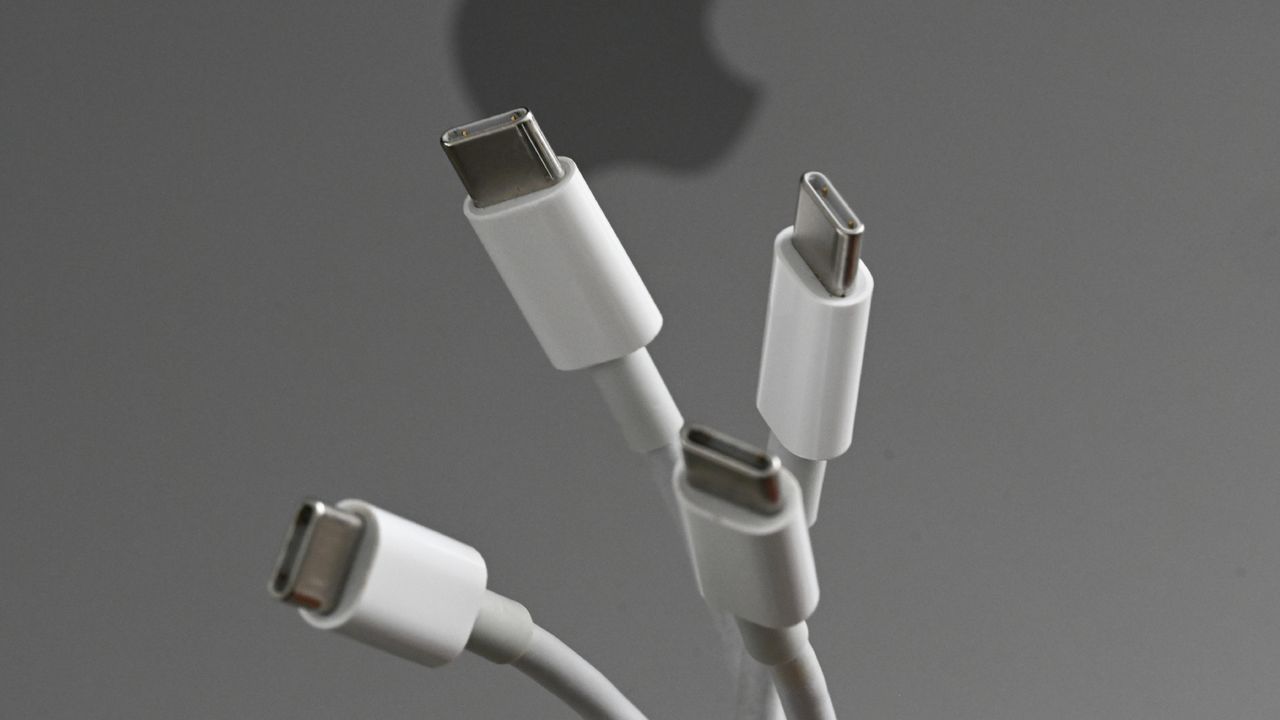
USB-C’s role has grown alongside this transition. The connector now consolidates power, data, and display signaling, and it is the required physical interface for USB4, Thunderbolt 3, Thunderbolt 4, and Thunderbolt 5. With Power Delivery 3.1, USB-C can negotiate up to 240W via 48V Extended Power Range modes across fixed 28V, 36V, and 48V power profiles. A single cable can power a high-end notebook, drive a high-resolution display, and host multiple data devices simultaneously because power negotiation occurs on the separate Configuration Channel, rather than the high-speed lanes.

Enter USB4 Version 2.0 and the shift to 80 Gbps

USB4 v2

(Image credit: USB-IF)

USB4 Version 2.0 marks the largest technical jump in USB signaling since the transition from USB 2.0 to USB 3.0. Instead of adding more lanes, the new specification doubles throughput by replacing NRZ signaling with PAM3 modulation. PAM3 encodes three amplitude levels per symbol, enabling 40 Gbps per lane across the same physical wires that carried 20 Gbps in previous generations. With two bonded lanes in each direction, USB4 v2 reaches 80 Gbps symmetrical bandwidth. An asymmetric mode increases this to 120 Gbps in one direction for display-oriented workloads, while the reverse direction can be reduced.

The transport layer receives several upgrades. PCIe tunneling now supports PCIe Gen4, which doubles per-lane throughput for external SSDs and eGPU boxes, relative to Gen3 tunneling in USB4 v1. DisplayPort tunneling advances to DisplayPort 2.1 with UHBR20 signaling, enabling dual 8K or a single 12K display with full chroma and high refresh rates. Backward compatibility with USB4 v1, Thunderbolt 3, and Thunderbolt 4 devices is retained, although those devices fall back to older signaling modes when connected.

Many certified passive USB-C cables up to one meter will support 80 Gbps, but anything longer typically requires active retimers. These active cables include embedded signal processing and sometimes operate directionally, which introduces design considerations for things like hubs and monitors. The USB-IF’s new labeling scheme identifies cables explicitly as USB 40 Gbps, USB 80 Gbps, or USB 240W to mitigate the long-standing ambiguity that accompanied earlier USB 3.x naming.

Thunderbolt 5 rides alongside USB4 v2 as its highest-fidelity implementation, with Intel’s specification guaranteeing features that USB4 v2 only defines as optional. These include mandatory 80 Gbps symmetrical operation, 120 Gbps asymmetric display mode, PCIe Gen4 tunneling with at least 32 Gbps of sustained throughput, and support for 240W charging. Thunderbolt 5 also mandates lane symmetry and strict latency targets to support high-bandwidth, low-jitter peripherals such as external GPUs, docked workstations, and multi-display gaming setups. We can see that in higher-end systems in mid-2026, the full-fat Thunderbolt 5 spec is rolling out, with our recently reviewed Razer Blade 16 (2026) coming fully equipped with the port.

Because Thunderbolt 5 builds directly atop the USB4 v2 physical layer, its cables and controllers are interoperable across the USB4 family, but with stricter certification criteria. In practice, Thunderbolt 5 functions as the version of USB4 v2 that guarantees complete feature exposure, similar to how Thunderbolt 4 served as the reference point for the USB4 v1 era.

The next decade of universal connectivity

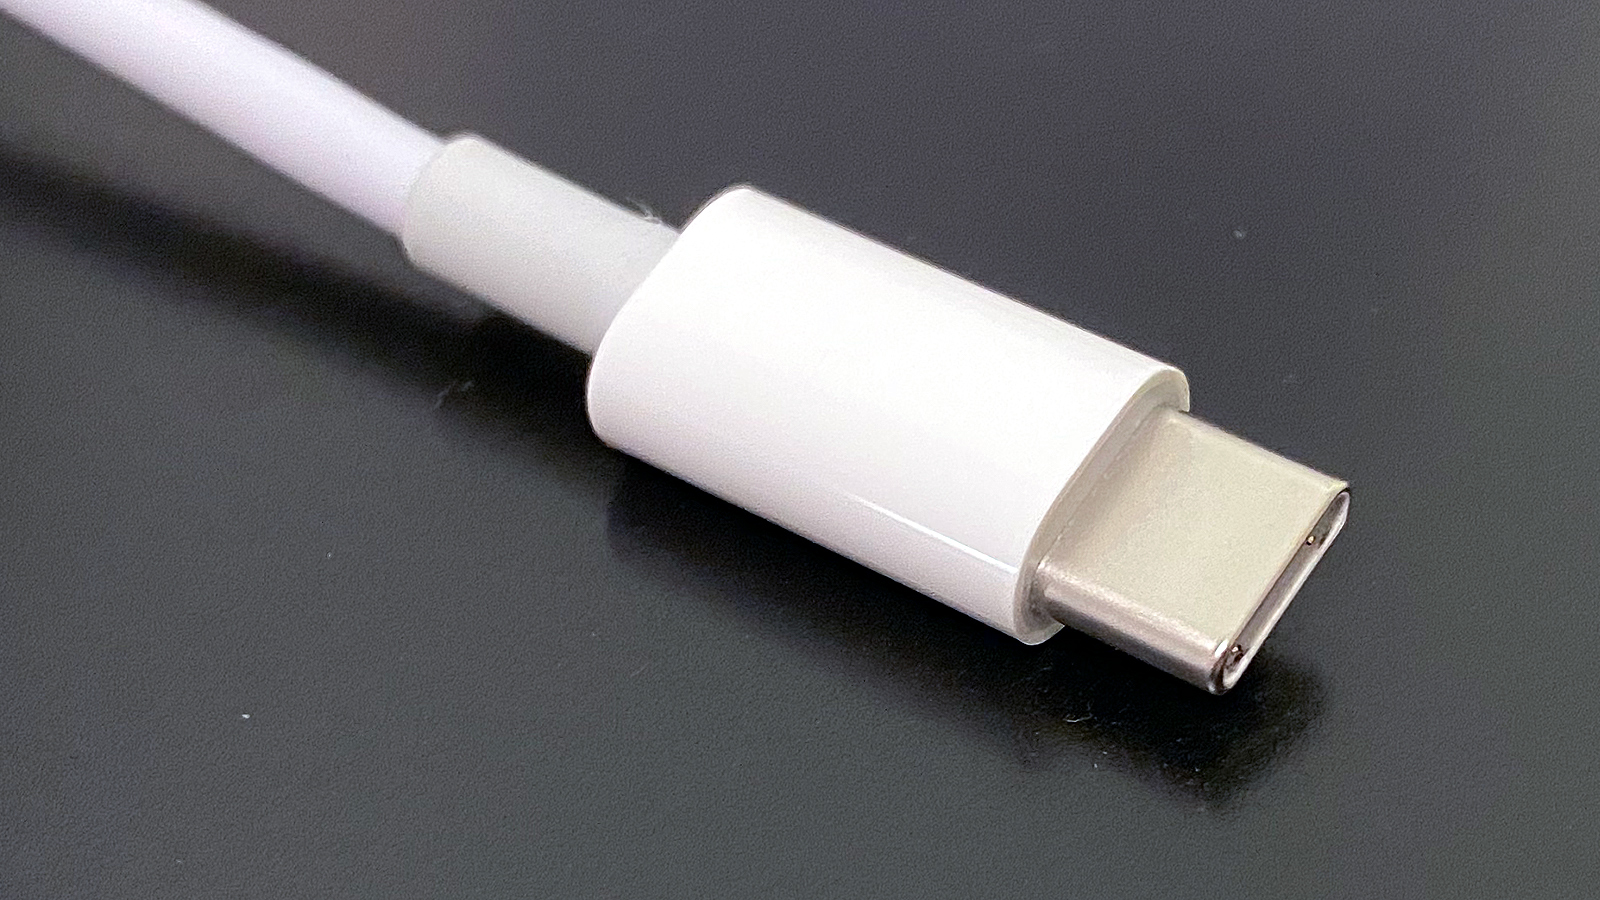
USB-C

(Image credit: Future)

There has been some discussion among users and industry analysts about what the future of USB might look like. A likely future USB5 standard might see schemes beyond PAM3, if USB-C’s electrical characteristics prove capable of sustaining higher speeds. PAM4 could be a candidate here. Meanwhile, copper links are approaching practical limits at these data rates, prompting the active commercialization of optical USB-C cables that embed fiber transceivers inside standard connectors. While expensive today, optical links could carry future USB4 v3 or USB5 signaling across tens of meters, without electromagnetic interference or the attenuation challenges of copper.

Power delivery beyond 240W is another open question. The 48V EPR ceiling aligns well with current mobile workstations and most gaming laptops, but heavier categories such as portable displays, desk-dock hybrids, and workstation replacements may increase pressure for higher wattage tiers. Whether USB-C remains the long-term vehicle for that expansion or yields to a successor connector will depend on thermal constraints and cable reliability at elevated voltages.

The USB-IF’s renewed emphasis on clear labeling may ultimately define how smoothly the transition unfolds. The shift from version-based branding to explicit “USB 40 Gbps,” “USB 80 Gbps,” and “240W Certified Cable” identifiers is intended to eliminate the ambiguity that has characterized the standard for nearly a decade. Adoption will, of course, depend on consistent enforcement by manufacturers and retailers.

USB has moved far beyond its origins as a peripheral interconnect. The convergence of USB4 v2, Thunderbolt 5, and expanded Power Delivery turns the USB-C port into a high-bandwidth, multi-protocol backplane for modern systems.

A single connector can now supply workstation-class PCIe bandwidth, high-resolution video, and sustained charging for devices that previously required dedicated power bricks. The next steps in the roadmap take USB into signaling regimes that challenge copper’s limits while retaining full backward compatibility with the ecosystem that grew around USB 2.0 and USB 3.x.

As the 80Gbps era proliferates, users will encounter hardware that behaves less like a simple peripheral port and more like an external extension of a system’s internal fabric. As we move through the second half of the decade, OEMs are now starting to standardize full-feature implementations rather than the partial configurations that marked the early years of USB4.

If that consolidation takes place, the connector that started as a replacement for serial and parallel ports will continue its evolution into one of the most capable physical interfaces in computing.

Logitech's G Pro X2 Superstrike gaming mouse is $125.99 after getting a massive $54 discount — hall-effect haptic switches, 8K polling, and 30 ms faster clicks for peak gaming performance

2026年7月20日 19:06

This is the first time that I can recall seeing a discount on Logitech's latest gaming mouse. It's a mouse I've been keeping a close eye on, as the launch price has not only stayed extremely stable but is also super expensive for a gaming mouse, making it very off-putting for the majority of gamers. However, if you want one of these high-tech gaming mice, then today at Amazon, you can grab $54 off the Logitech G Pro X2 Superstrike, bringing it to $125.99. The $54 discount is automatically applied when you click through to the checkout. This is the lowest price the mouse has ever been on Amazon.

Check out this deal at Amazon

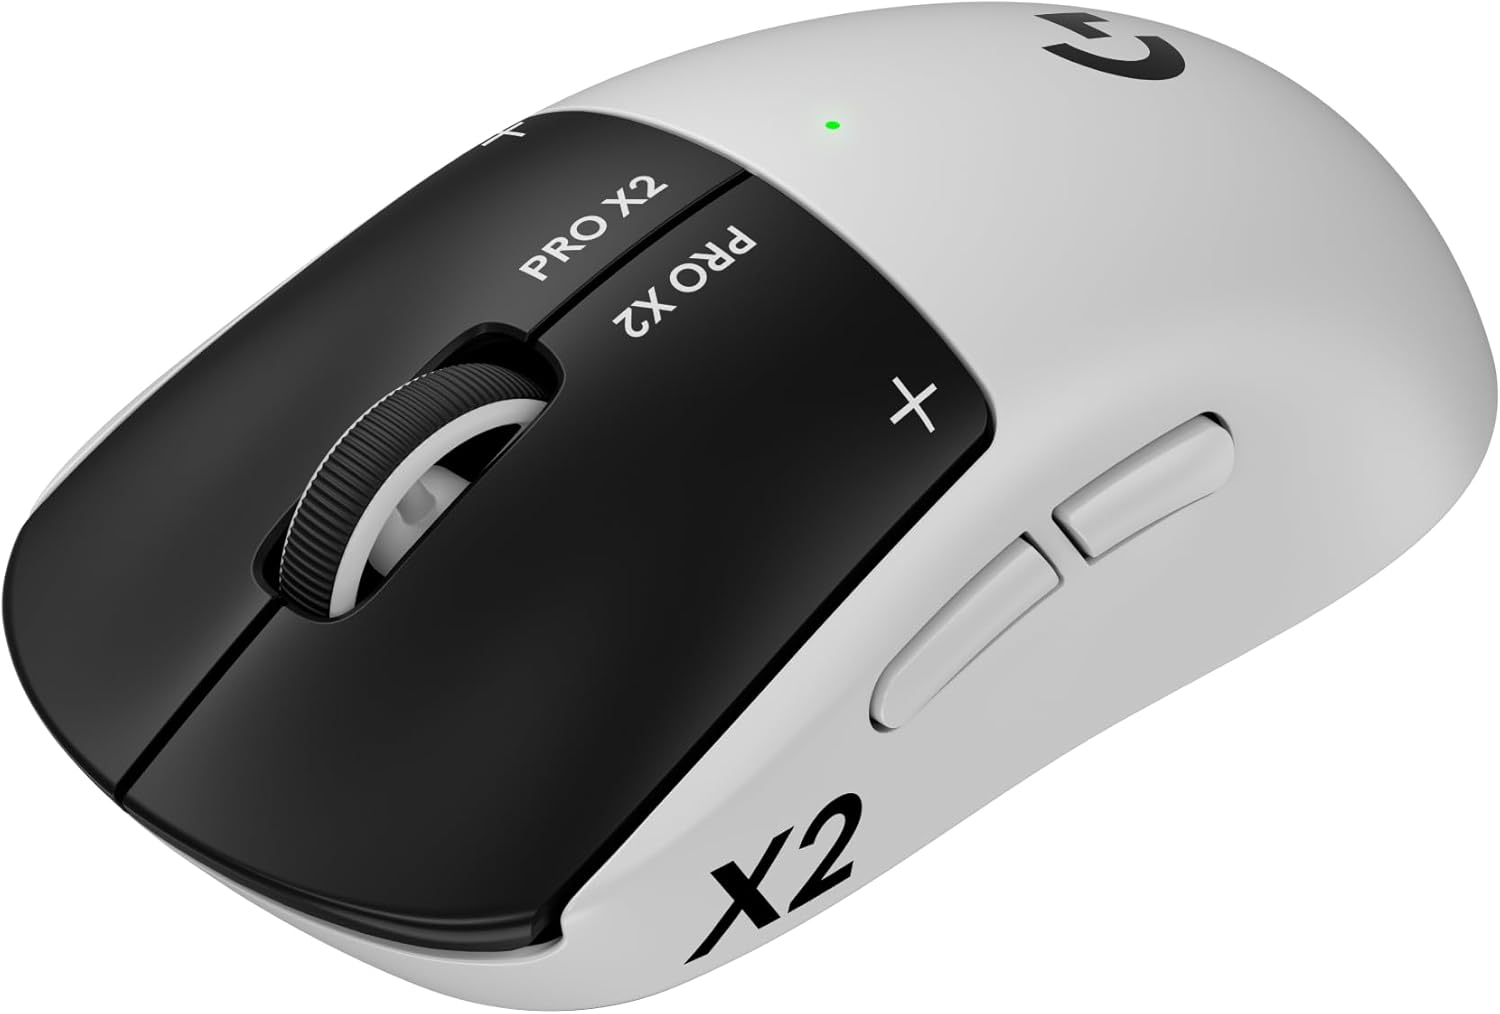
The Superstrike’s standout feature is that it blurs the lines between the worlds of gaming keyboards and gaming mice. It's done away with the traditional analog mouse switch, and as a side effect, has removed mouse clicks. With the latest hall-effect tech beneath the left and right mouse buttons, click feedback is now produced by a haptic engine that Logitech calls H.I.T.S. (Haptic Inductive Trigger System). It combines tiny haptic motors with inductive sensors to create a customizable rapid-trigger system that can cut up to 30ms off your response times.

Logitech's top-tier gaming mouse introduces gamers to H.I.T.S (Haptic Inductive Trigger System), a customizable trigger system using hall-effect magnetic switches. The mouse also sports 8K polling, a 44,000 DPI Hero 2 sensor, and a super light weight of only 61 grams.View Deal

The Logitech G Pro X2 Superstrike packs all the latest and greatest tech in a very familiar chassis. See our review of the Logitech G Pro X2 Superstrike for more details. Keeping the shape and size of previous Superlight mice. The G Pro X2 Superstrike weighs 61 grams and uses magnetic sensors with a haptic trigger system for the left and right mouse buttons. The sensor is the Logitech Hero 2 sensor, with a DPI of up to 44,000, 888 IPS, and 88 g-force acceleration. The wireless dongle supports a very fast, lag-free 8 kHz polling rate for the lowest latency possible. To use the adjustable H.I.T.S system to the full, you must use the Logitech G Hub software to alter and customize any mouse settings to your preference.

This is the cheapest I've ever seen this mouse, and having only been released in February of 2026, the $125.99 asking price for the Logitech G Pro X2 Superstrike makes it much more attractive.

If you're looking for more savings, check out our Best PC Hardware deals for a range of products, or dive deeper into our specialized SSD and Storage Deals, Hard Drive Deals, Gaming Monitor Deals, Graphics Card Deals, Gaming Chair, Best Wi-Fi Routers, Best Motherboard, or CPU Deals pages.

You can also join the Tom's Hardware deals Discord for up-to-the-minute hardware deals.

Nvidia CEO Jensen Huang’s trademark leather jacket raises nearly $1 Million at charity auction — bidding makes $60,000 valuation look like pocket change

2026年7月18日 21:22

‘The Jensen Jacket: Jensen Huang's Tom Ford Leather Jacket’ achieved a hammer price of $960,000 this weekend. High-end auctioneer Sotheby’s listed the leather garment, which was claimed to have been worn at least once by the Nvidia CEO, with a far lower price estimate of $40,000 to $60,000. Happily, the bountiful proceeds of the auction are going to charity.

Bidders could be quite confident that this Tom Ford jacket was genuinely worn by Jensen Huang at one or more landmark product launches, thanks to the work of the PSA [Professional Sports Authenticator]. Specifically, PSA photomatched this jacket and its unique leather wrinkles to the Hon Hai (Foxconn) Tech Day in Taipei on October 18, 2023, where Huang wore it on stage and met with other execs. Various close-up photos in the sales catalog showed telltale signs that this was/is the real deal. Separately, a signature on the garment was authenticated by James Spence Authentication.

Jacket worn by Jensen Huang at Hon Hai (Foxconn) Tech Day in Taipei on October 18, 2023.

(Image credit: Sotheby's)

The near $1M hammer price achieved is many multiples of the estimate. In our earlier reporting on the sale, we guessed this would happen for a number of reasons. Firstly, we thought Sotheby’s ‘low’ estimate was intentional to draw in the crowds and stoke excitement. Secondly, we mustn’t neglect the importance of the not-so-secret ingredient - Jensanity. And, right now, the AI boom with Nvidia at its center is still growing apace.

You can buy a brand new Tom Ford SS2023 menswear collection jacket, like the one shown, without any infusion of genuine Jensanity, for around $9,000. However, we can’t begrudge the success of this auction as the proceeds are earmarked for charity. The Sotheby’s page says that the auction was organized by Long Journey Ventures to benefit the Edge Institute, a non-profit that convenes people working at the frontiers of tech, science, culture, and society in pop-up villages (Edge Cities) to live together and experiment towards a brighter future. Fellowships, grants, and residencies for the next generation of young builders will be funded by this bumper lump of cash.

Asus ROG Xreal R1 Review: Gaming-focused AR glasses deliver 240 Hz performance and RGB style

2026年7月16日 20:00

Over the past several years, I’ve reviewed a growing number of augmented reality (AR) glasses. For the most part, these shades share the same mission: to give consumers a way to enjoy video content and even work on productivity tasks with a Mac or Windows device via a 150-inch (ish) virtual screen.

Most of these glasses top out at a 120 Hz refresh rate and weren’t designed specifically for a gaming audience (though many can be used for gaming). That is changing with the Asus ROG Xreal R1, which is a collaborative effort from two big names in tech. Not only does the R1 boost the maximum refresh rate to 240 Hz to appease hardcore gamers, but it also serves as a breakout box for gaming on your PC, Xbox, PlayStation, or Switch.

The R1 promises and delivers a lot, but it comes at an even higher price than Asus’ AirVision M1, which debuted at $700 two years ago.

Design of the Asus ROG Xreal R1

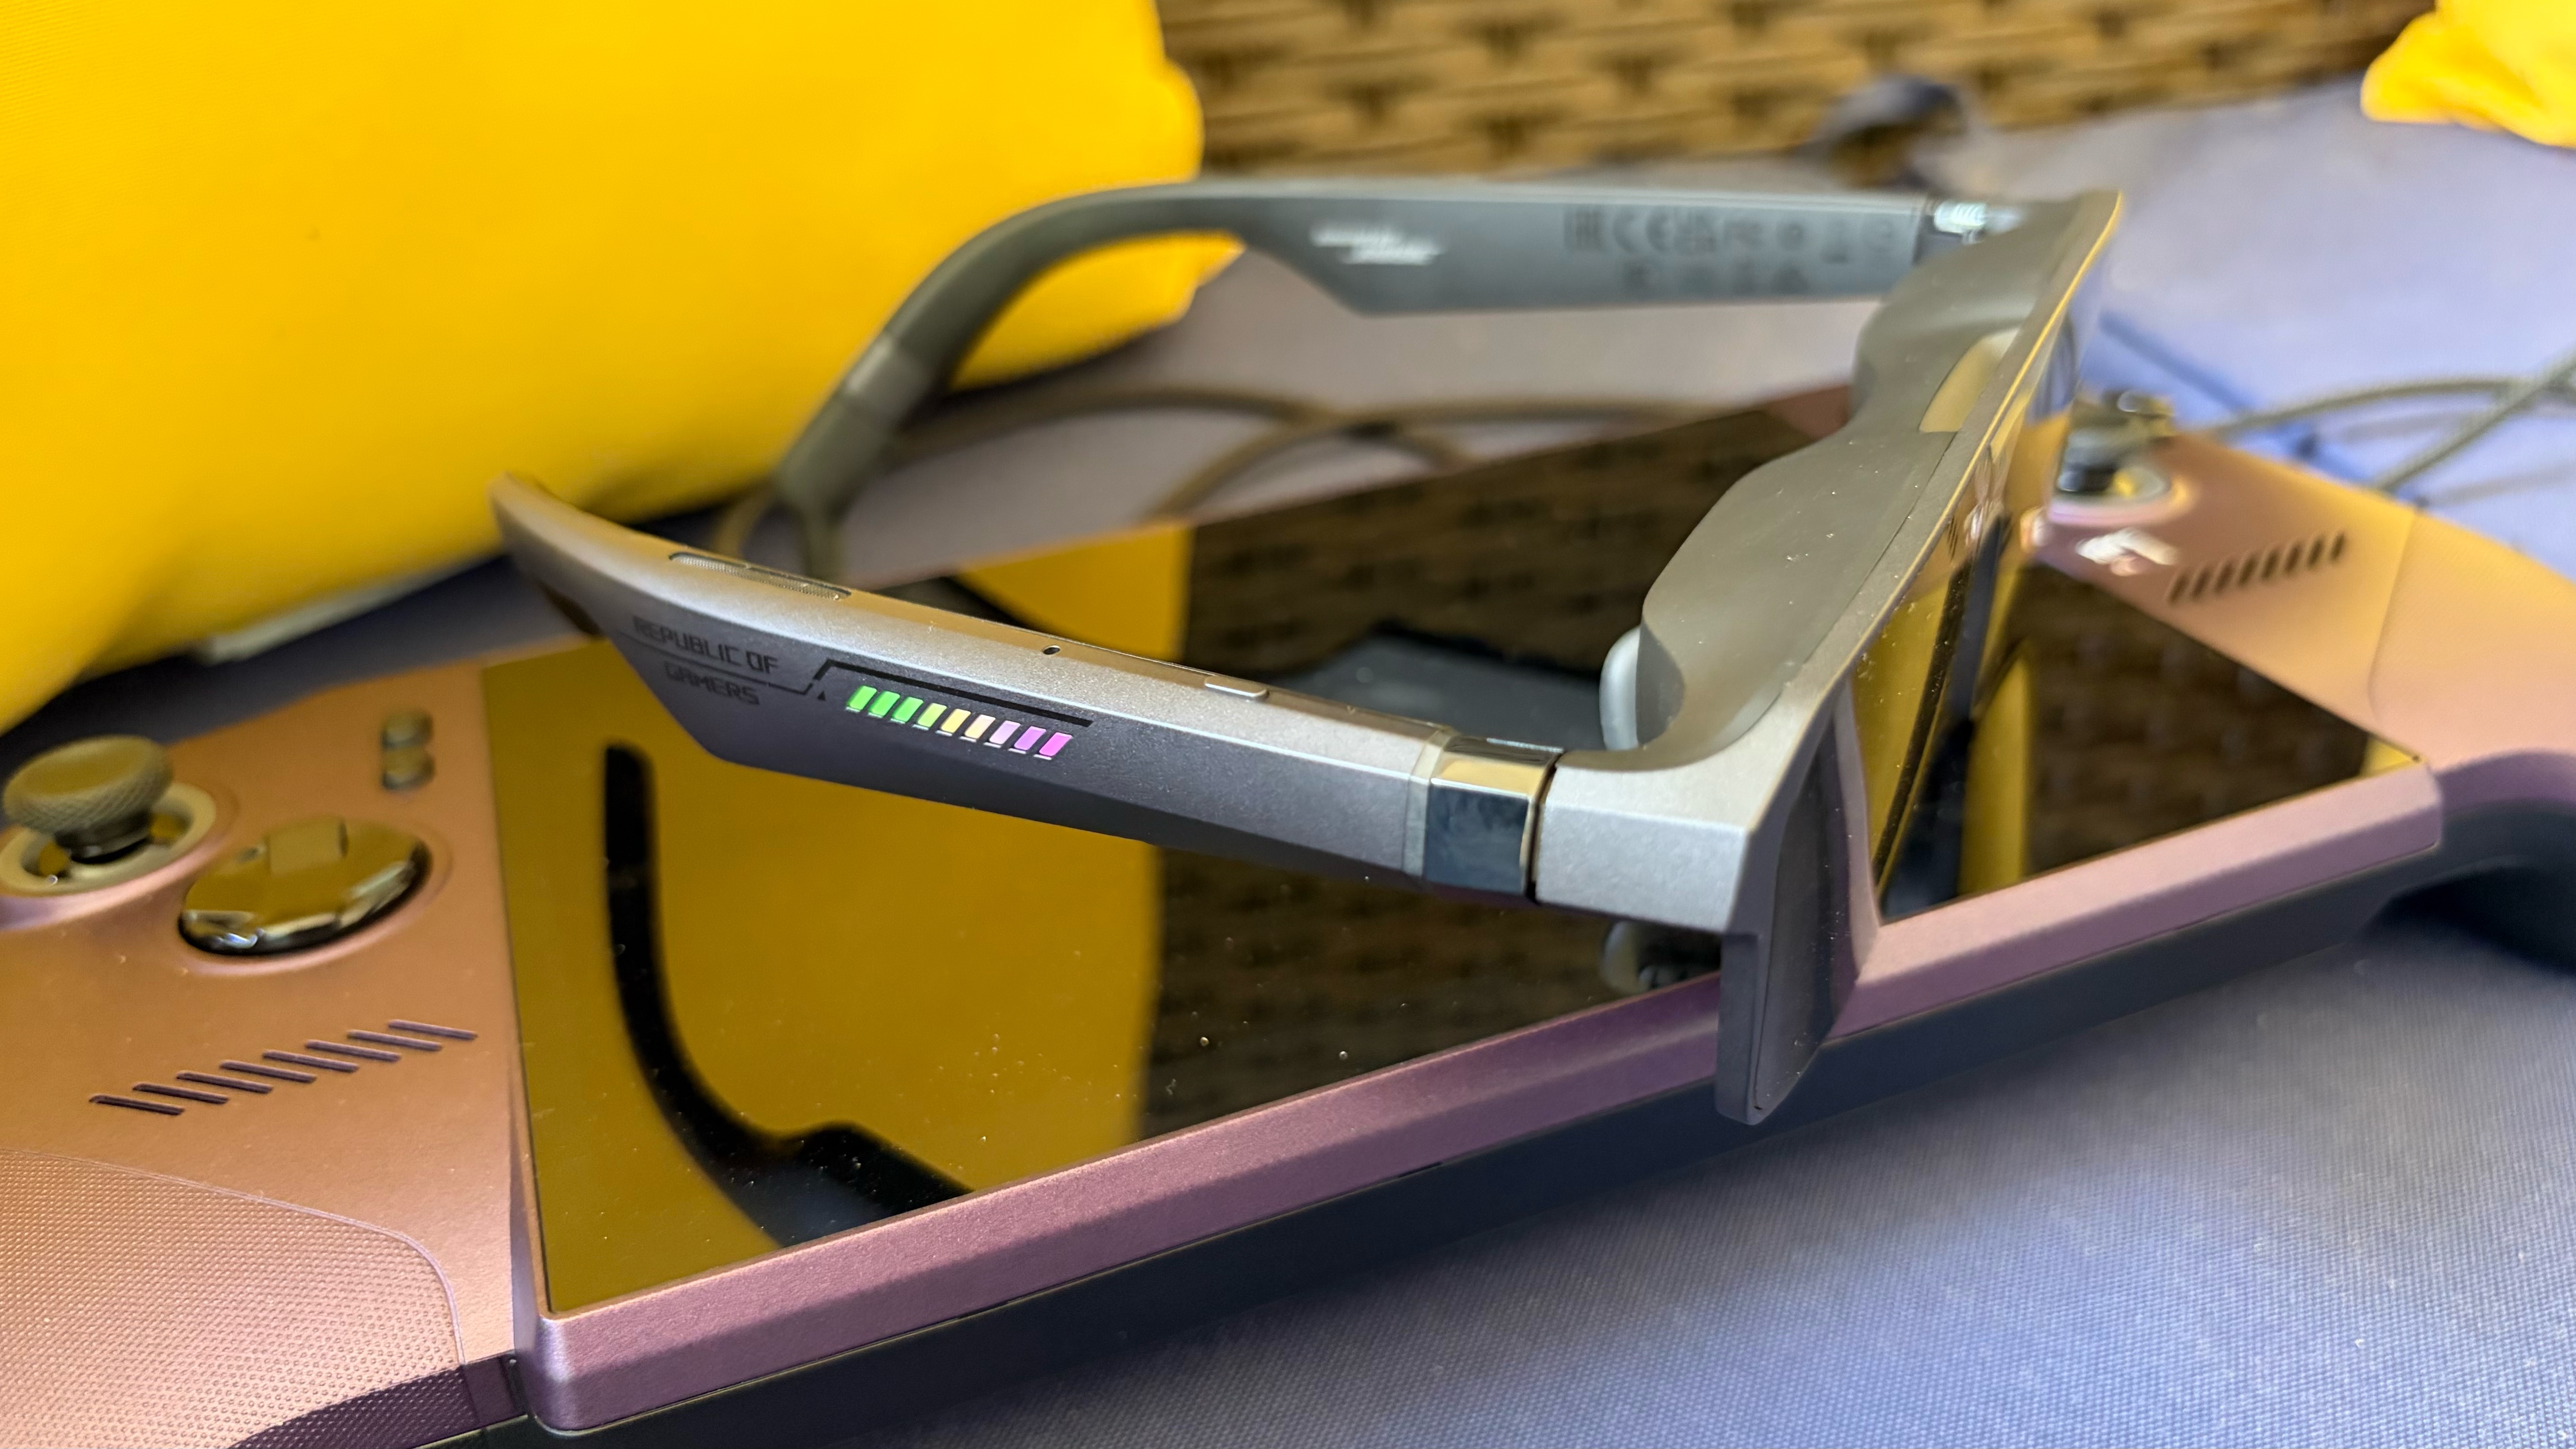
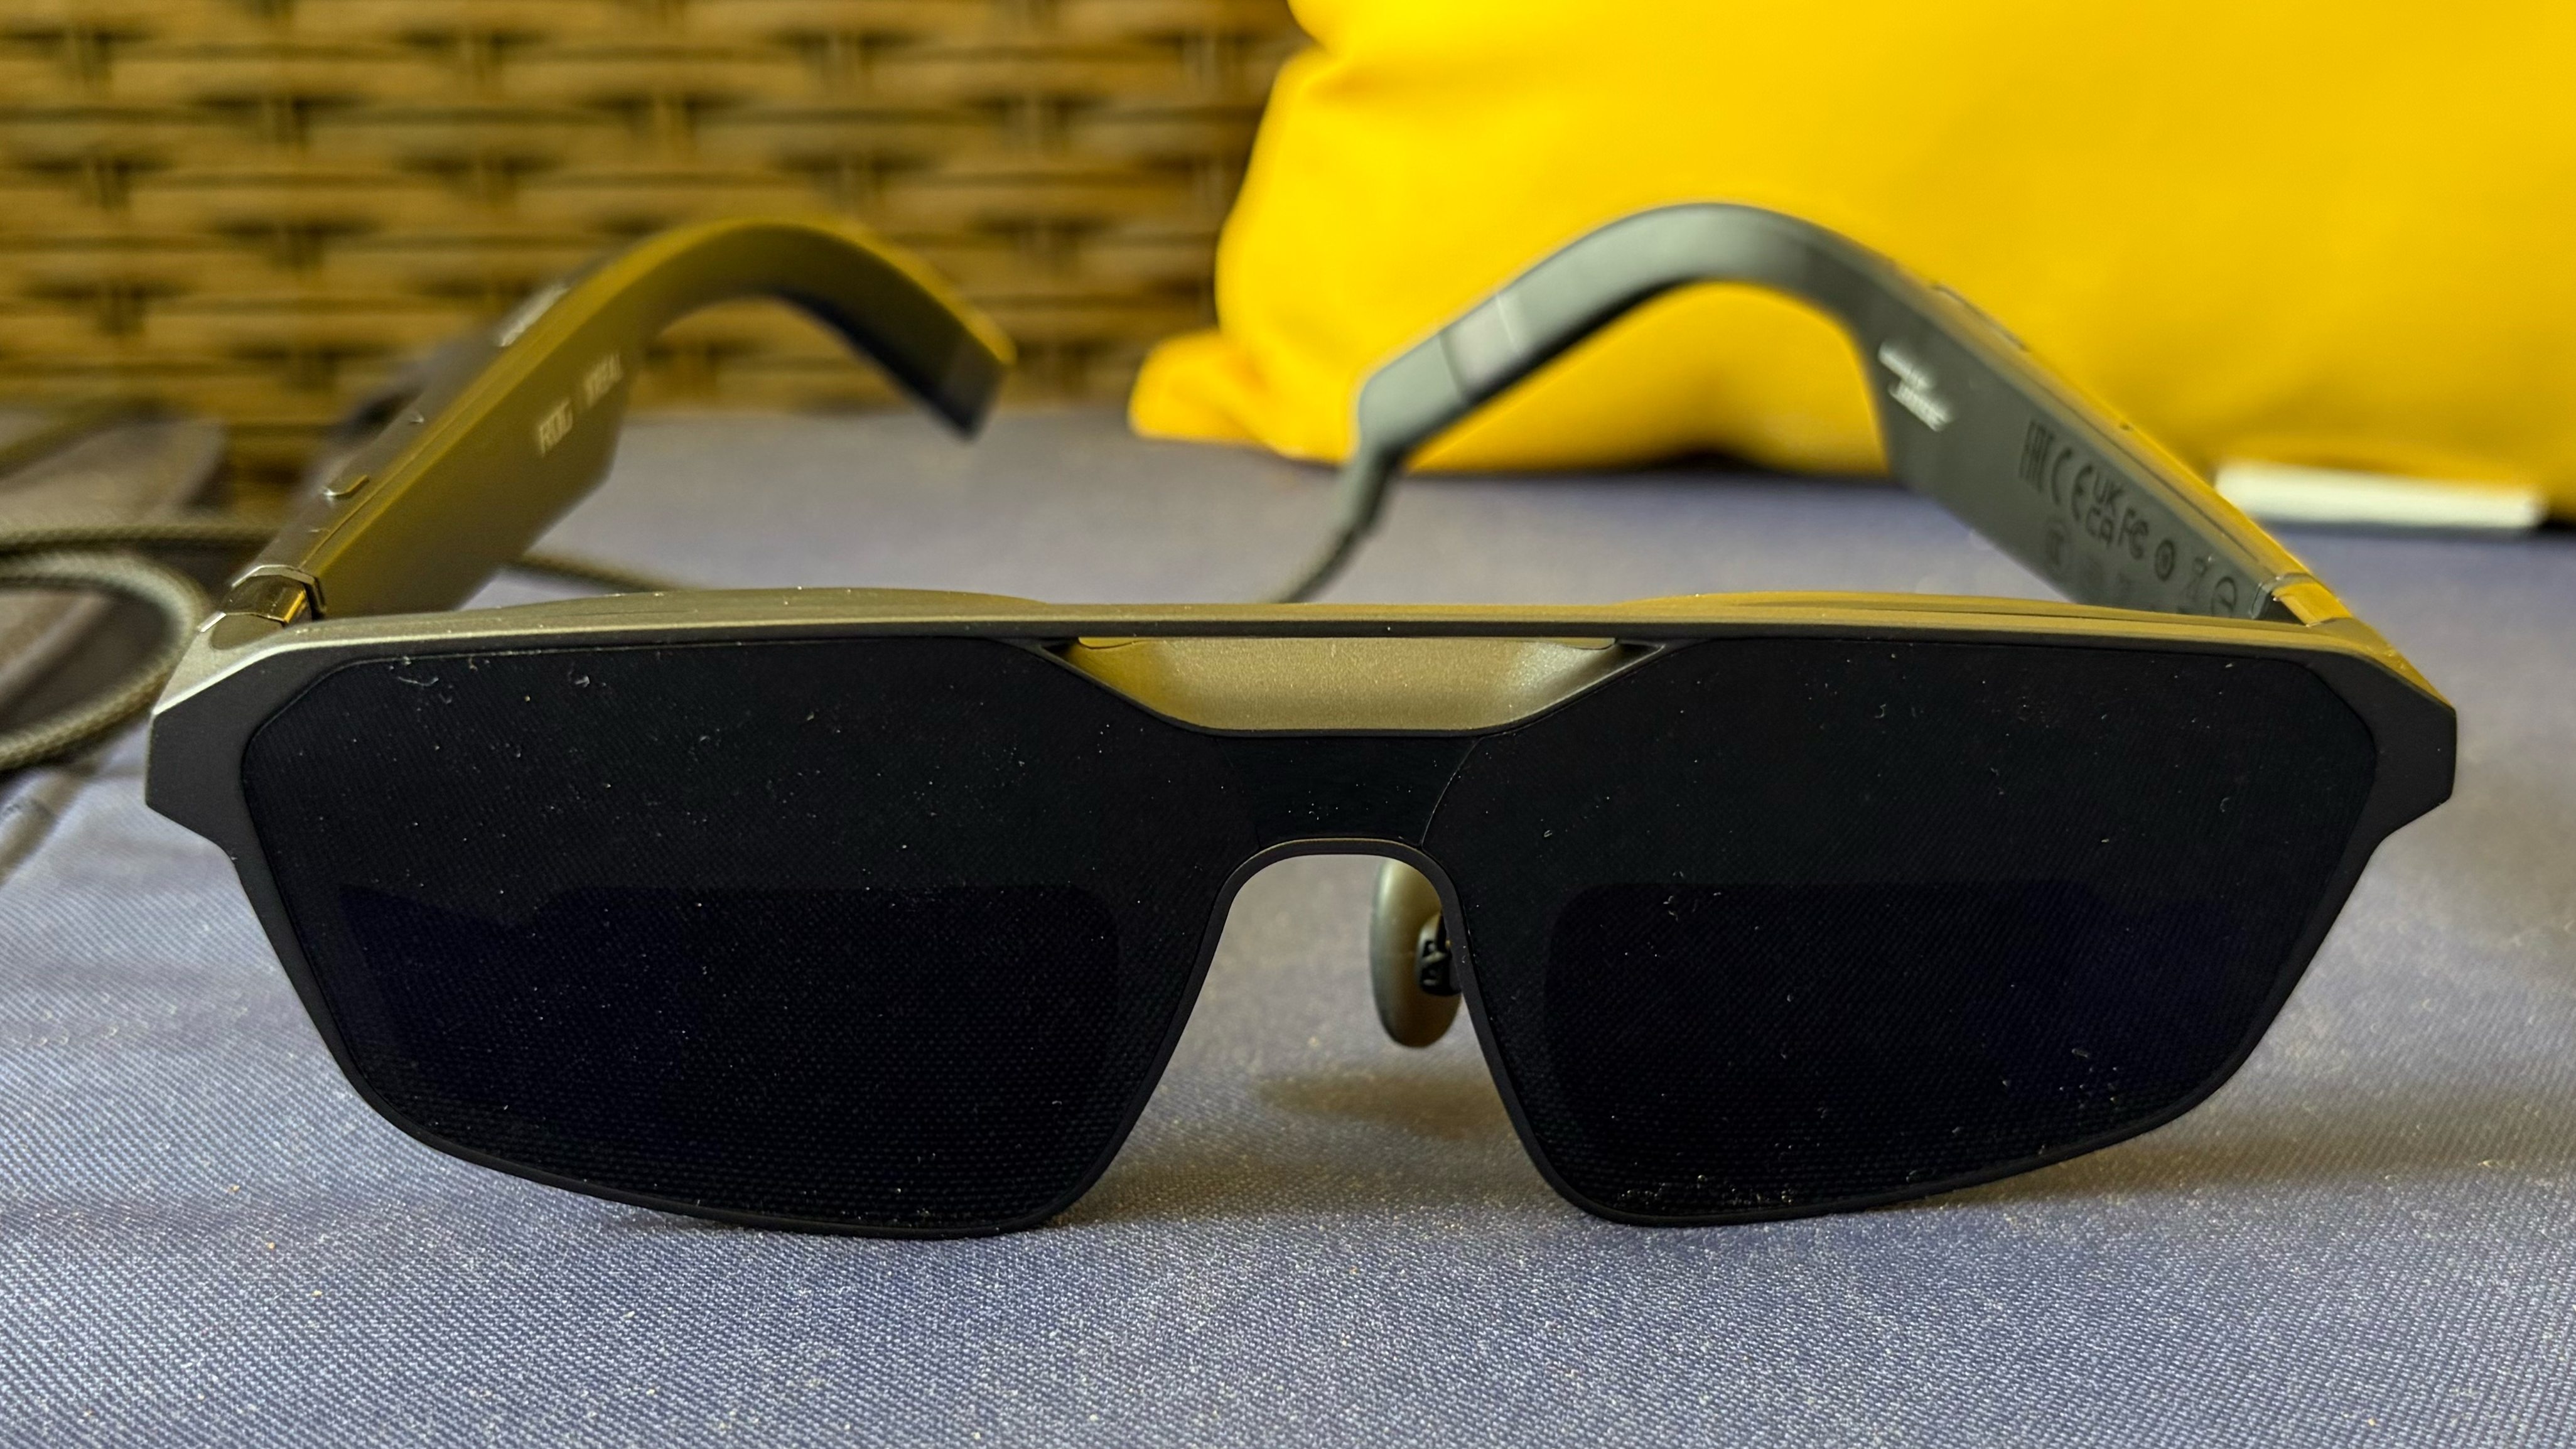
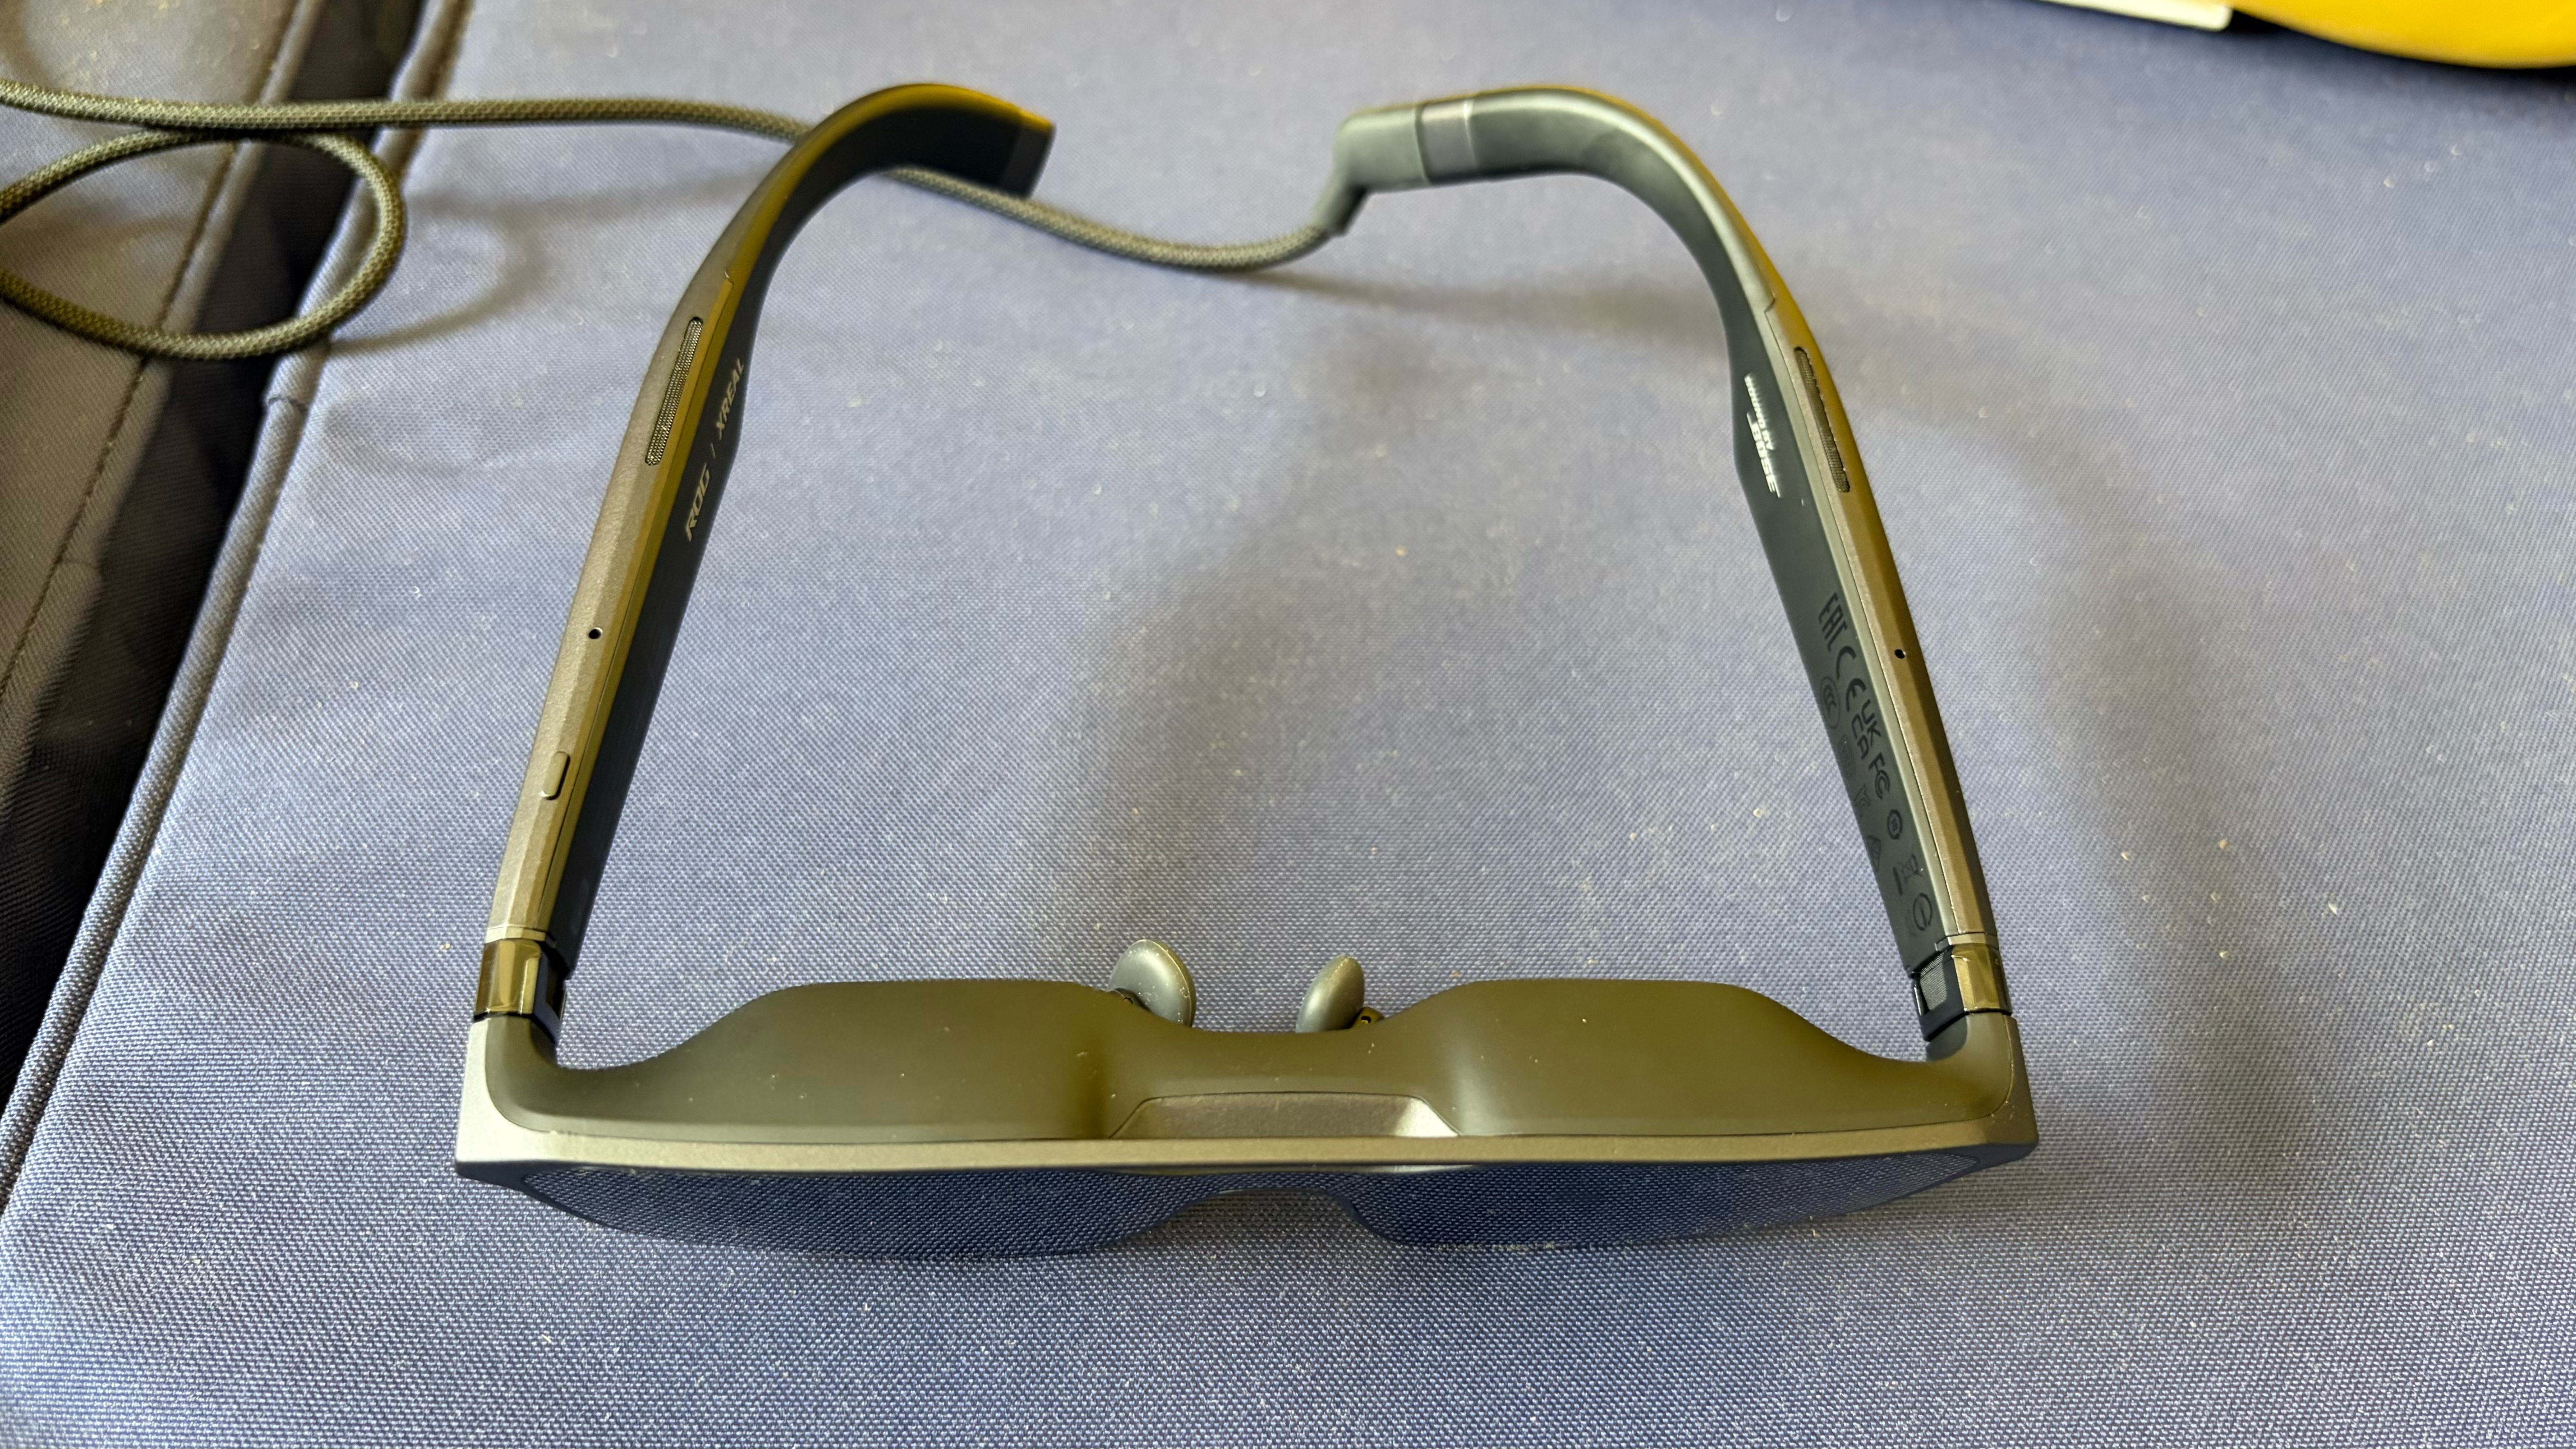
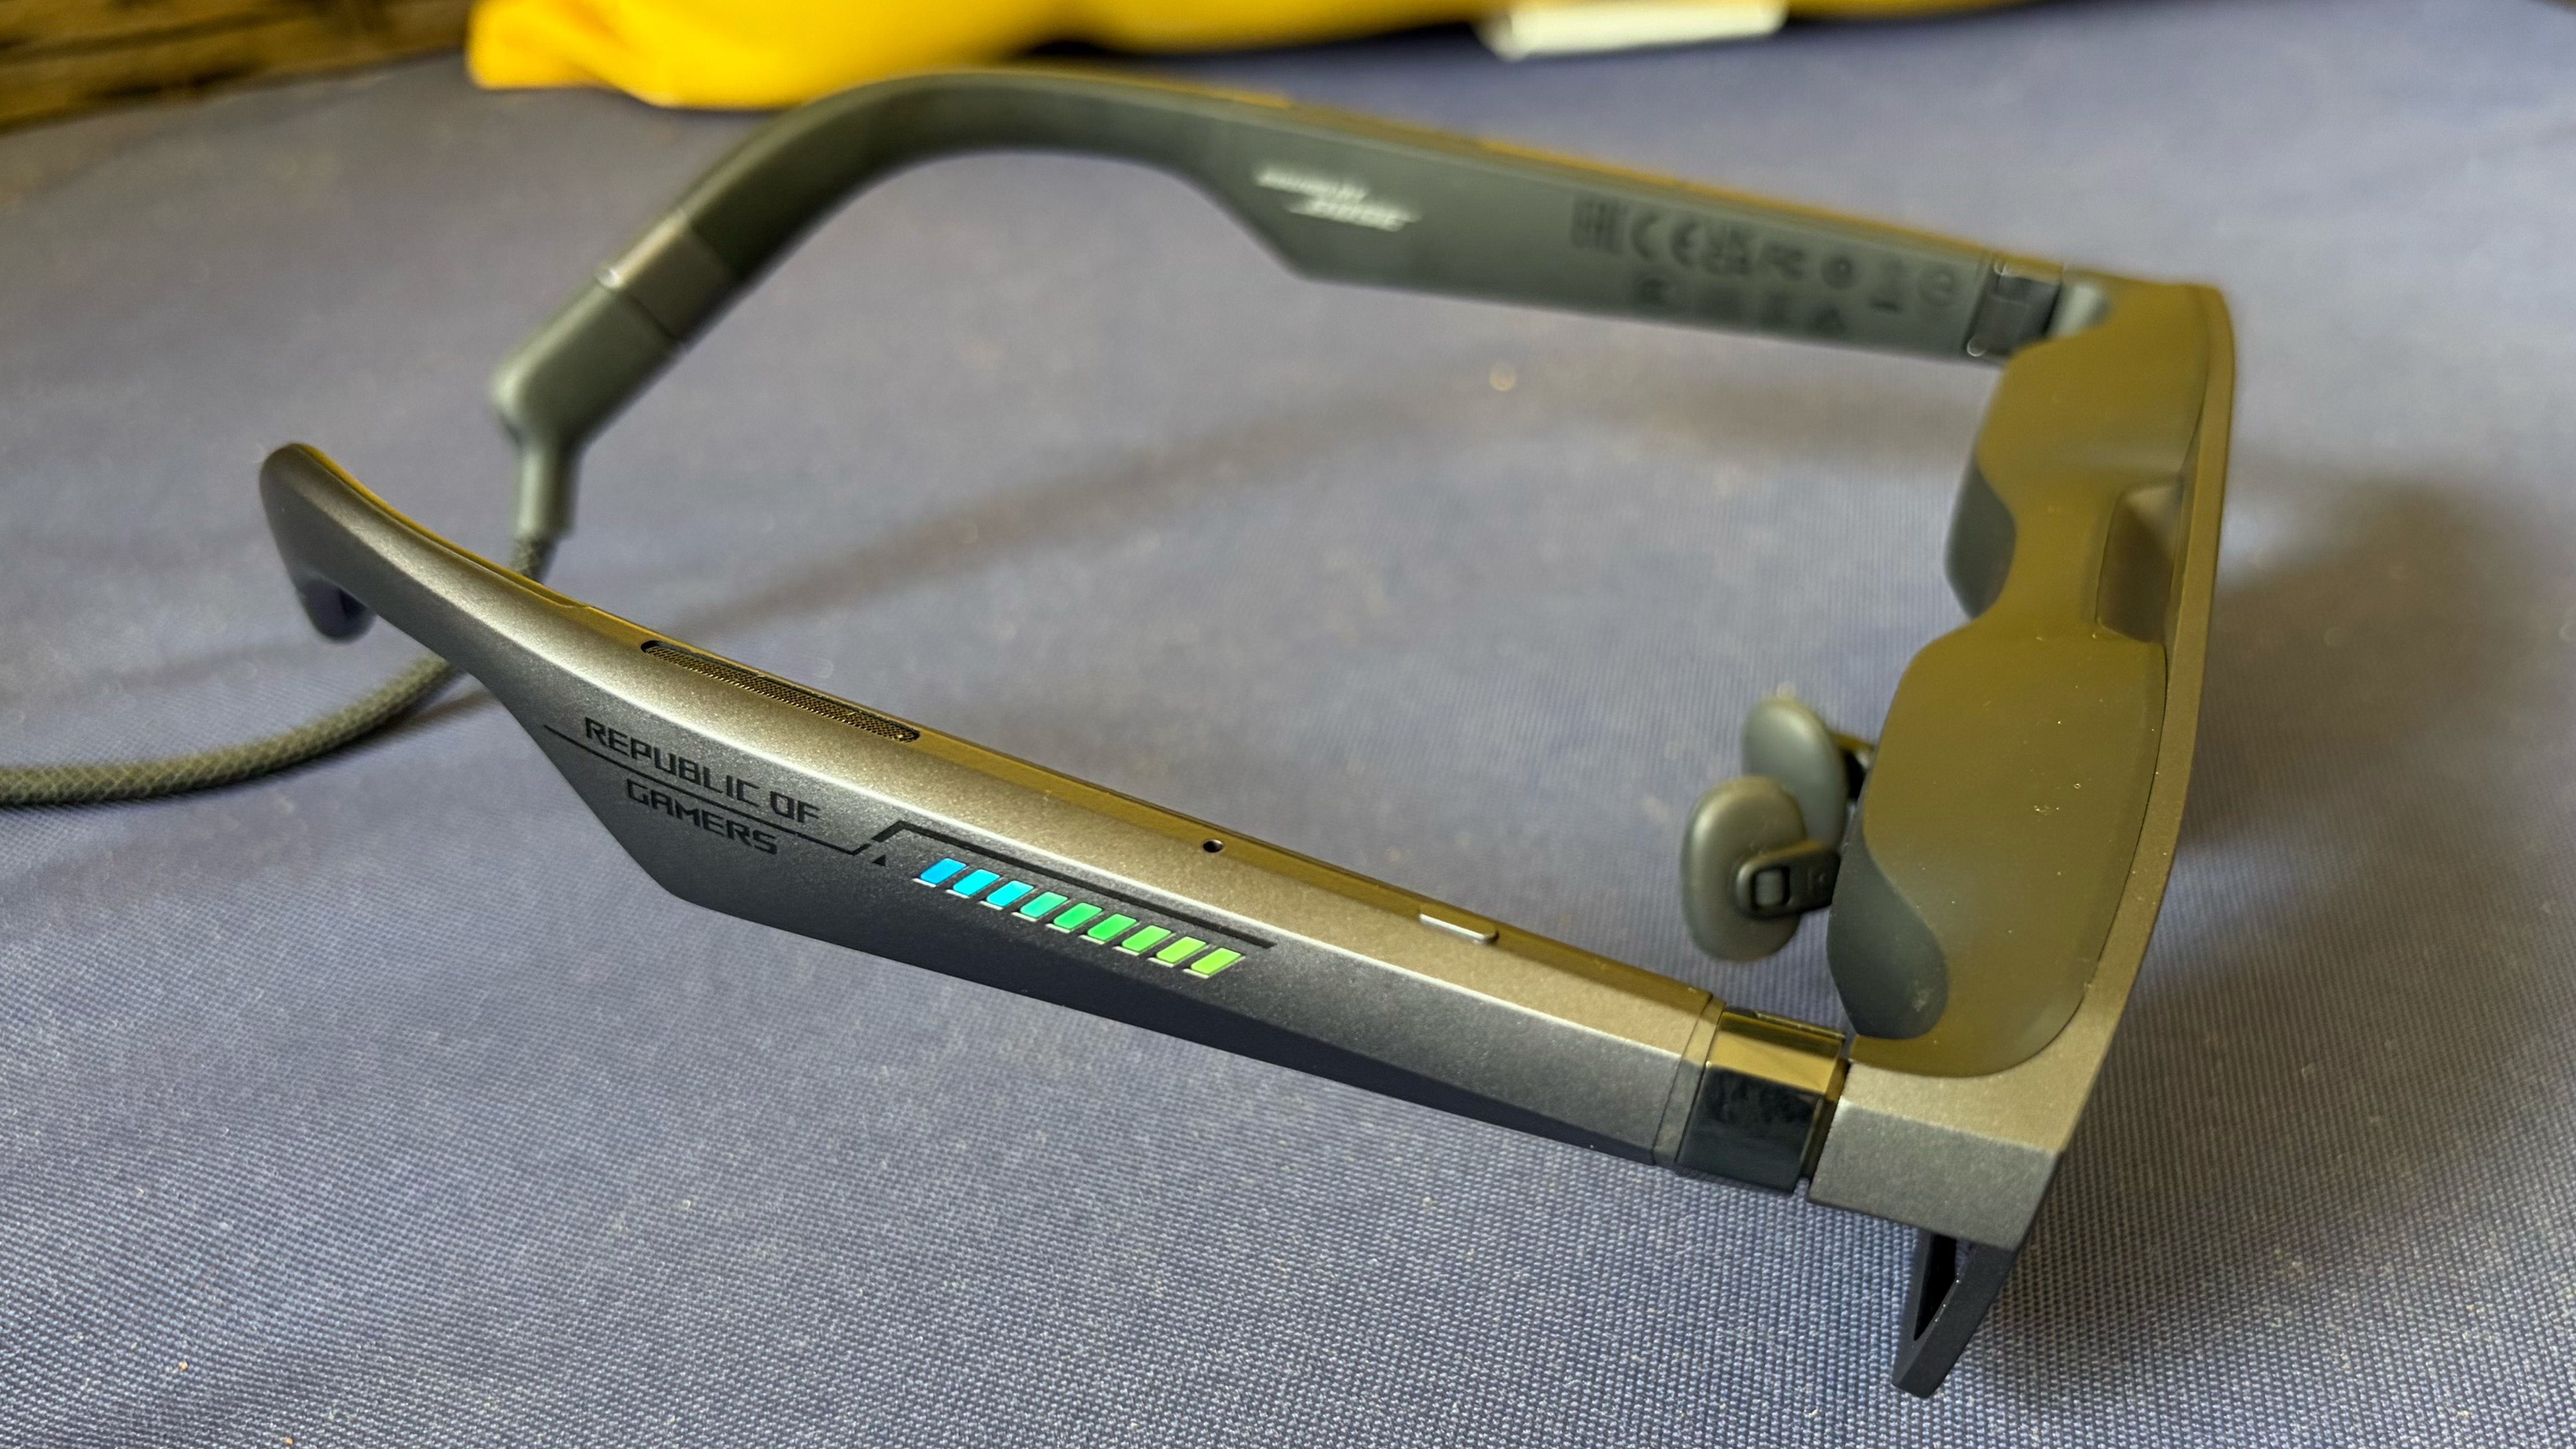
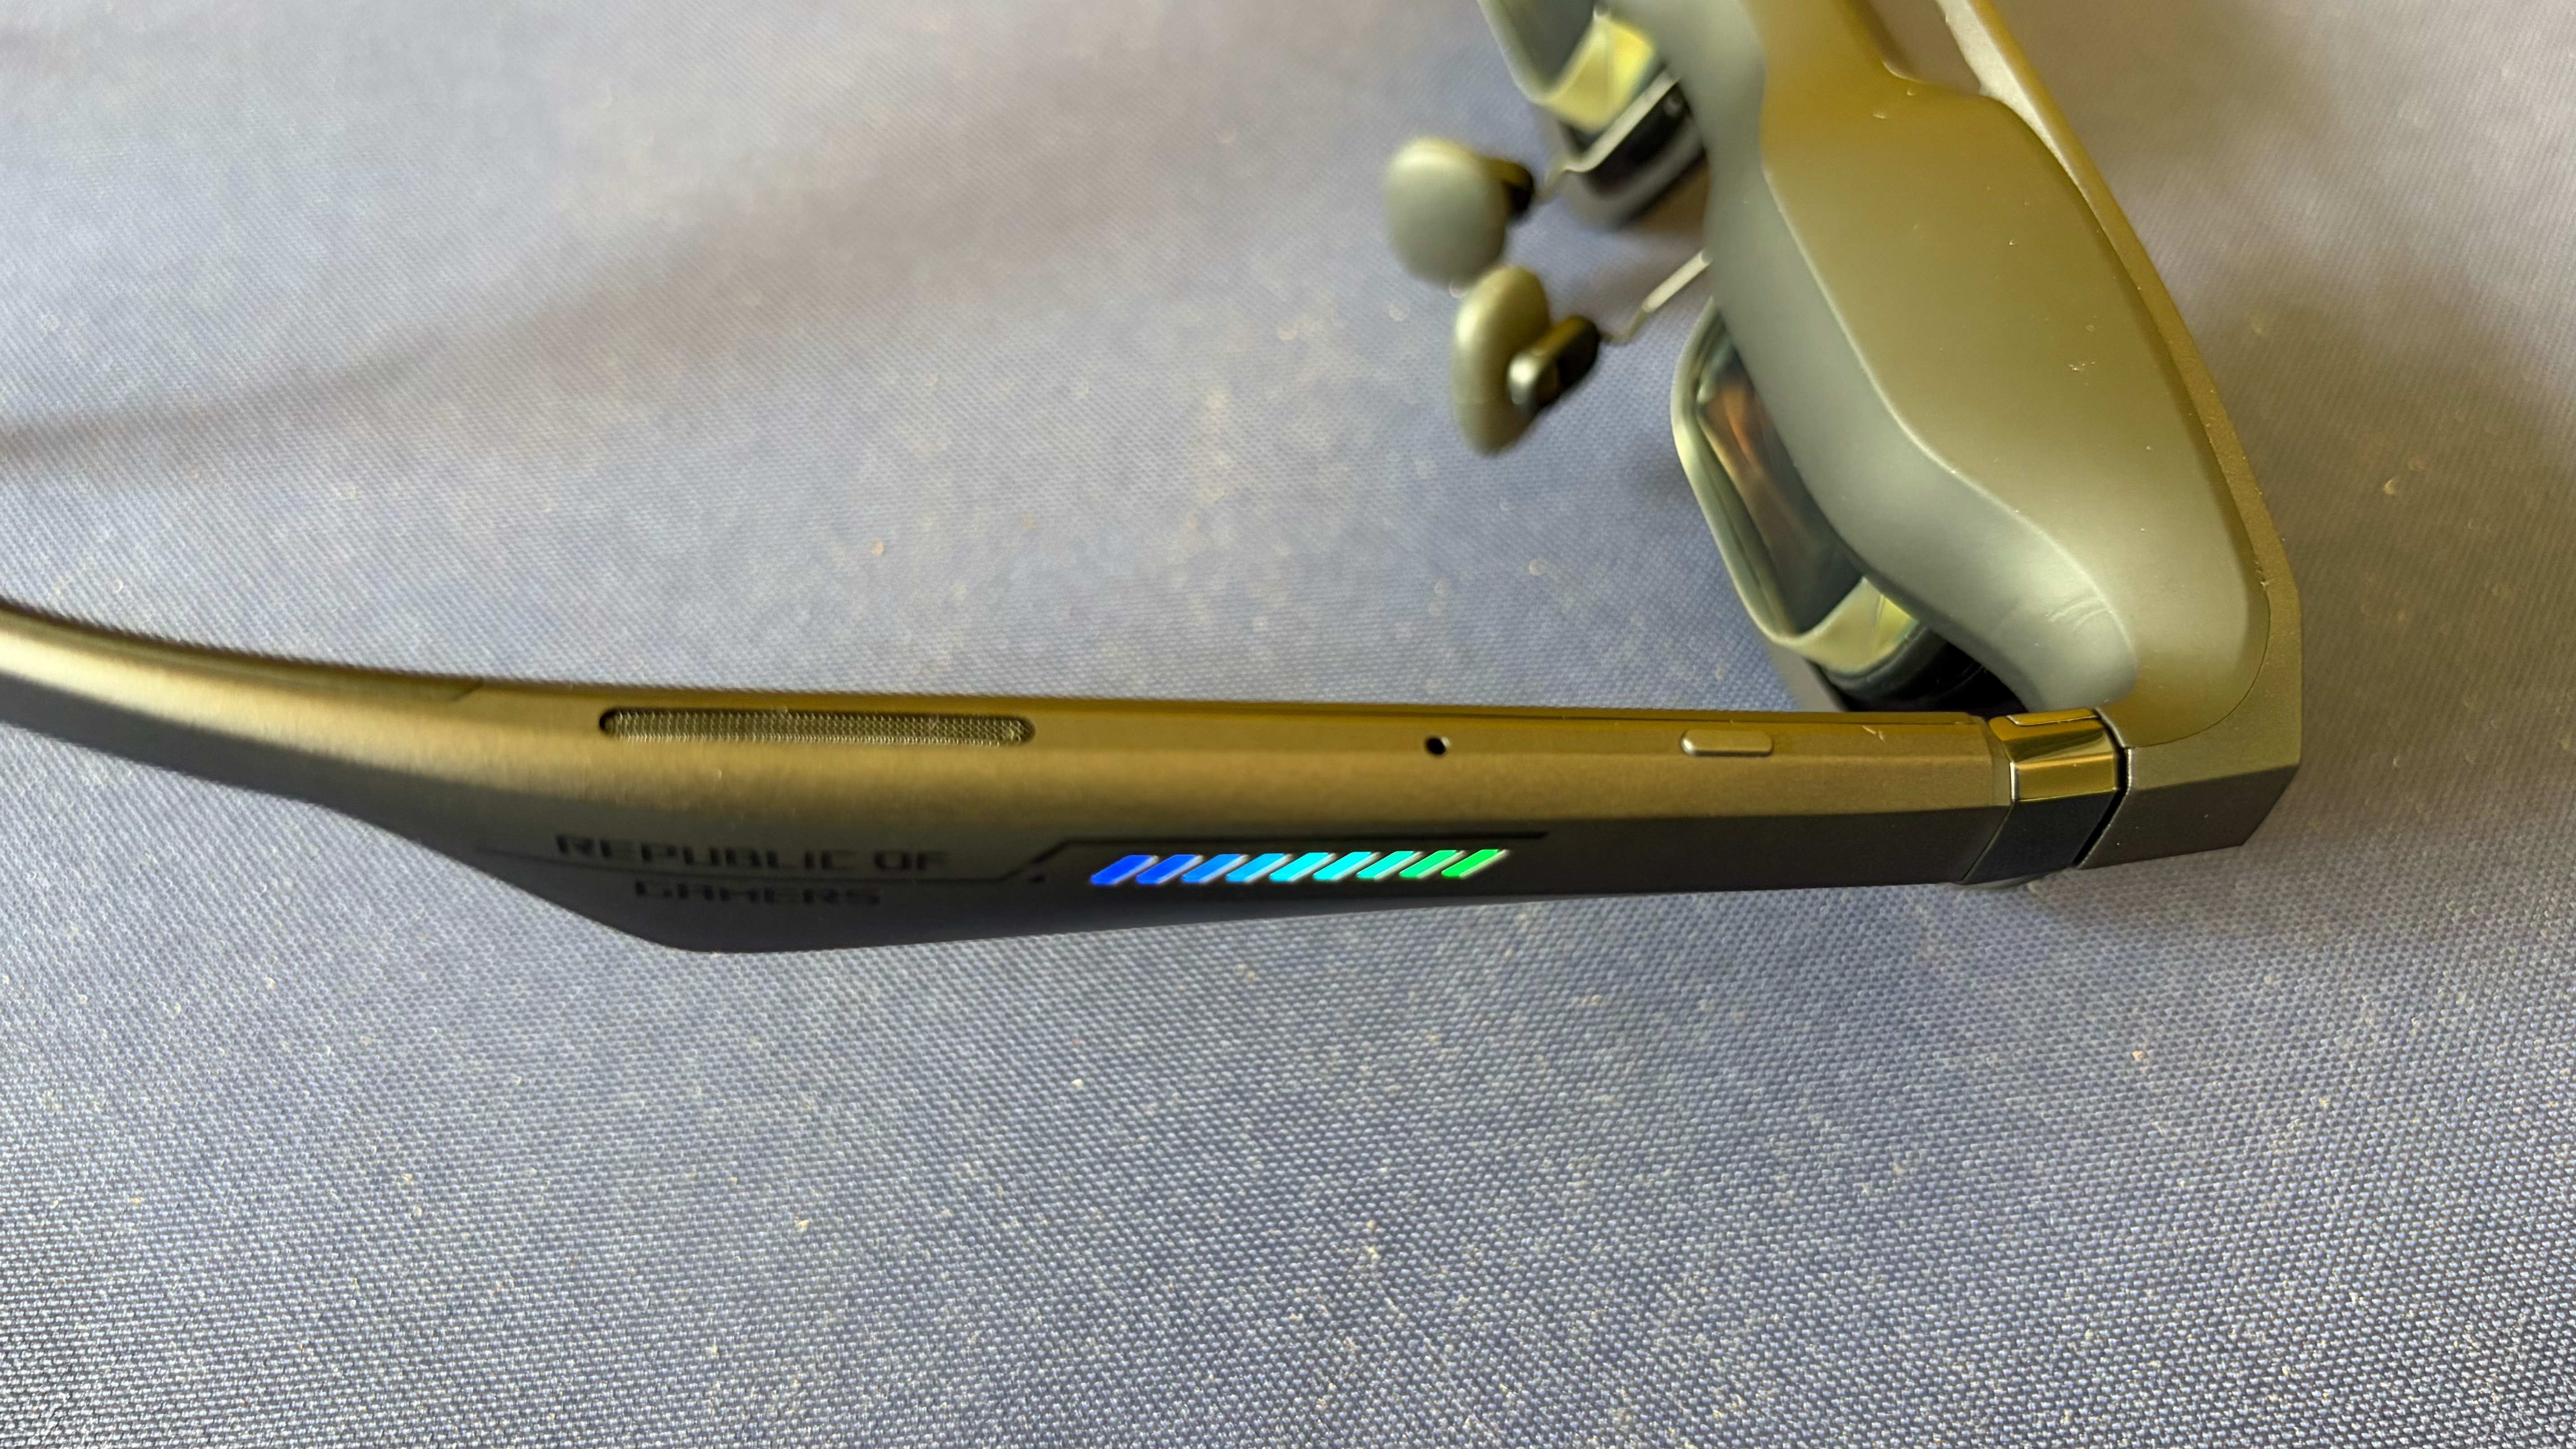
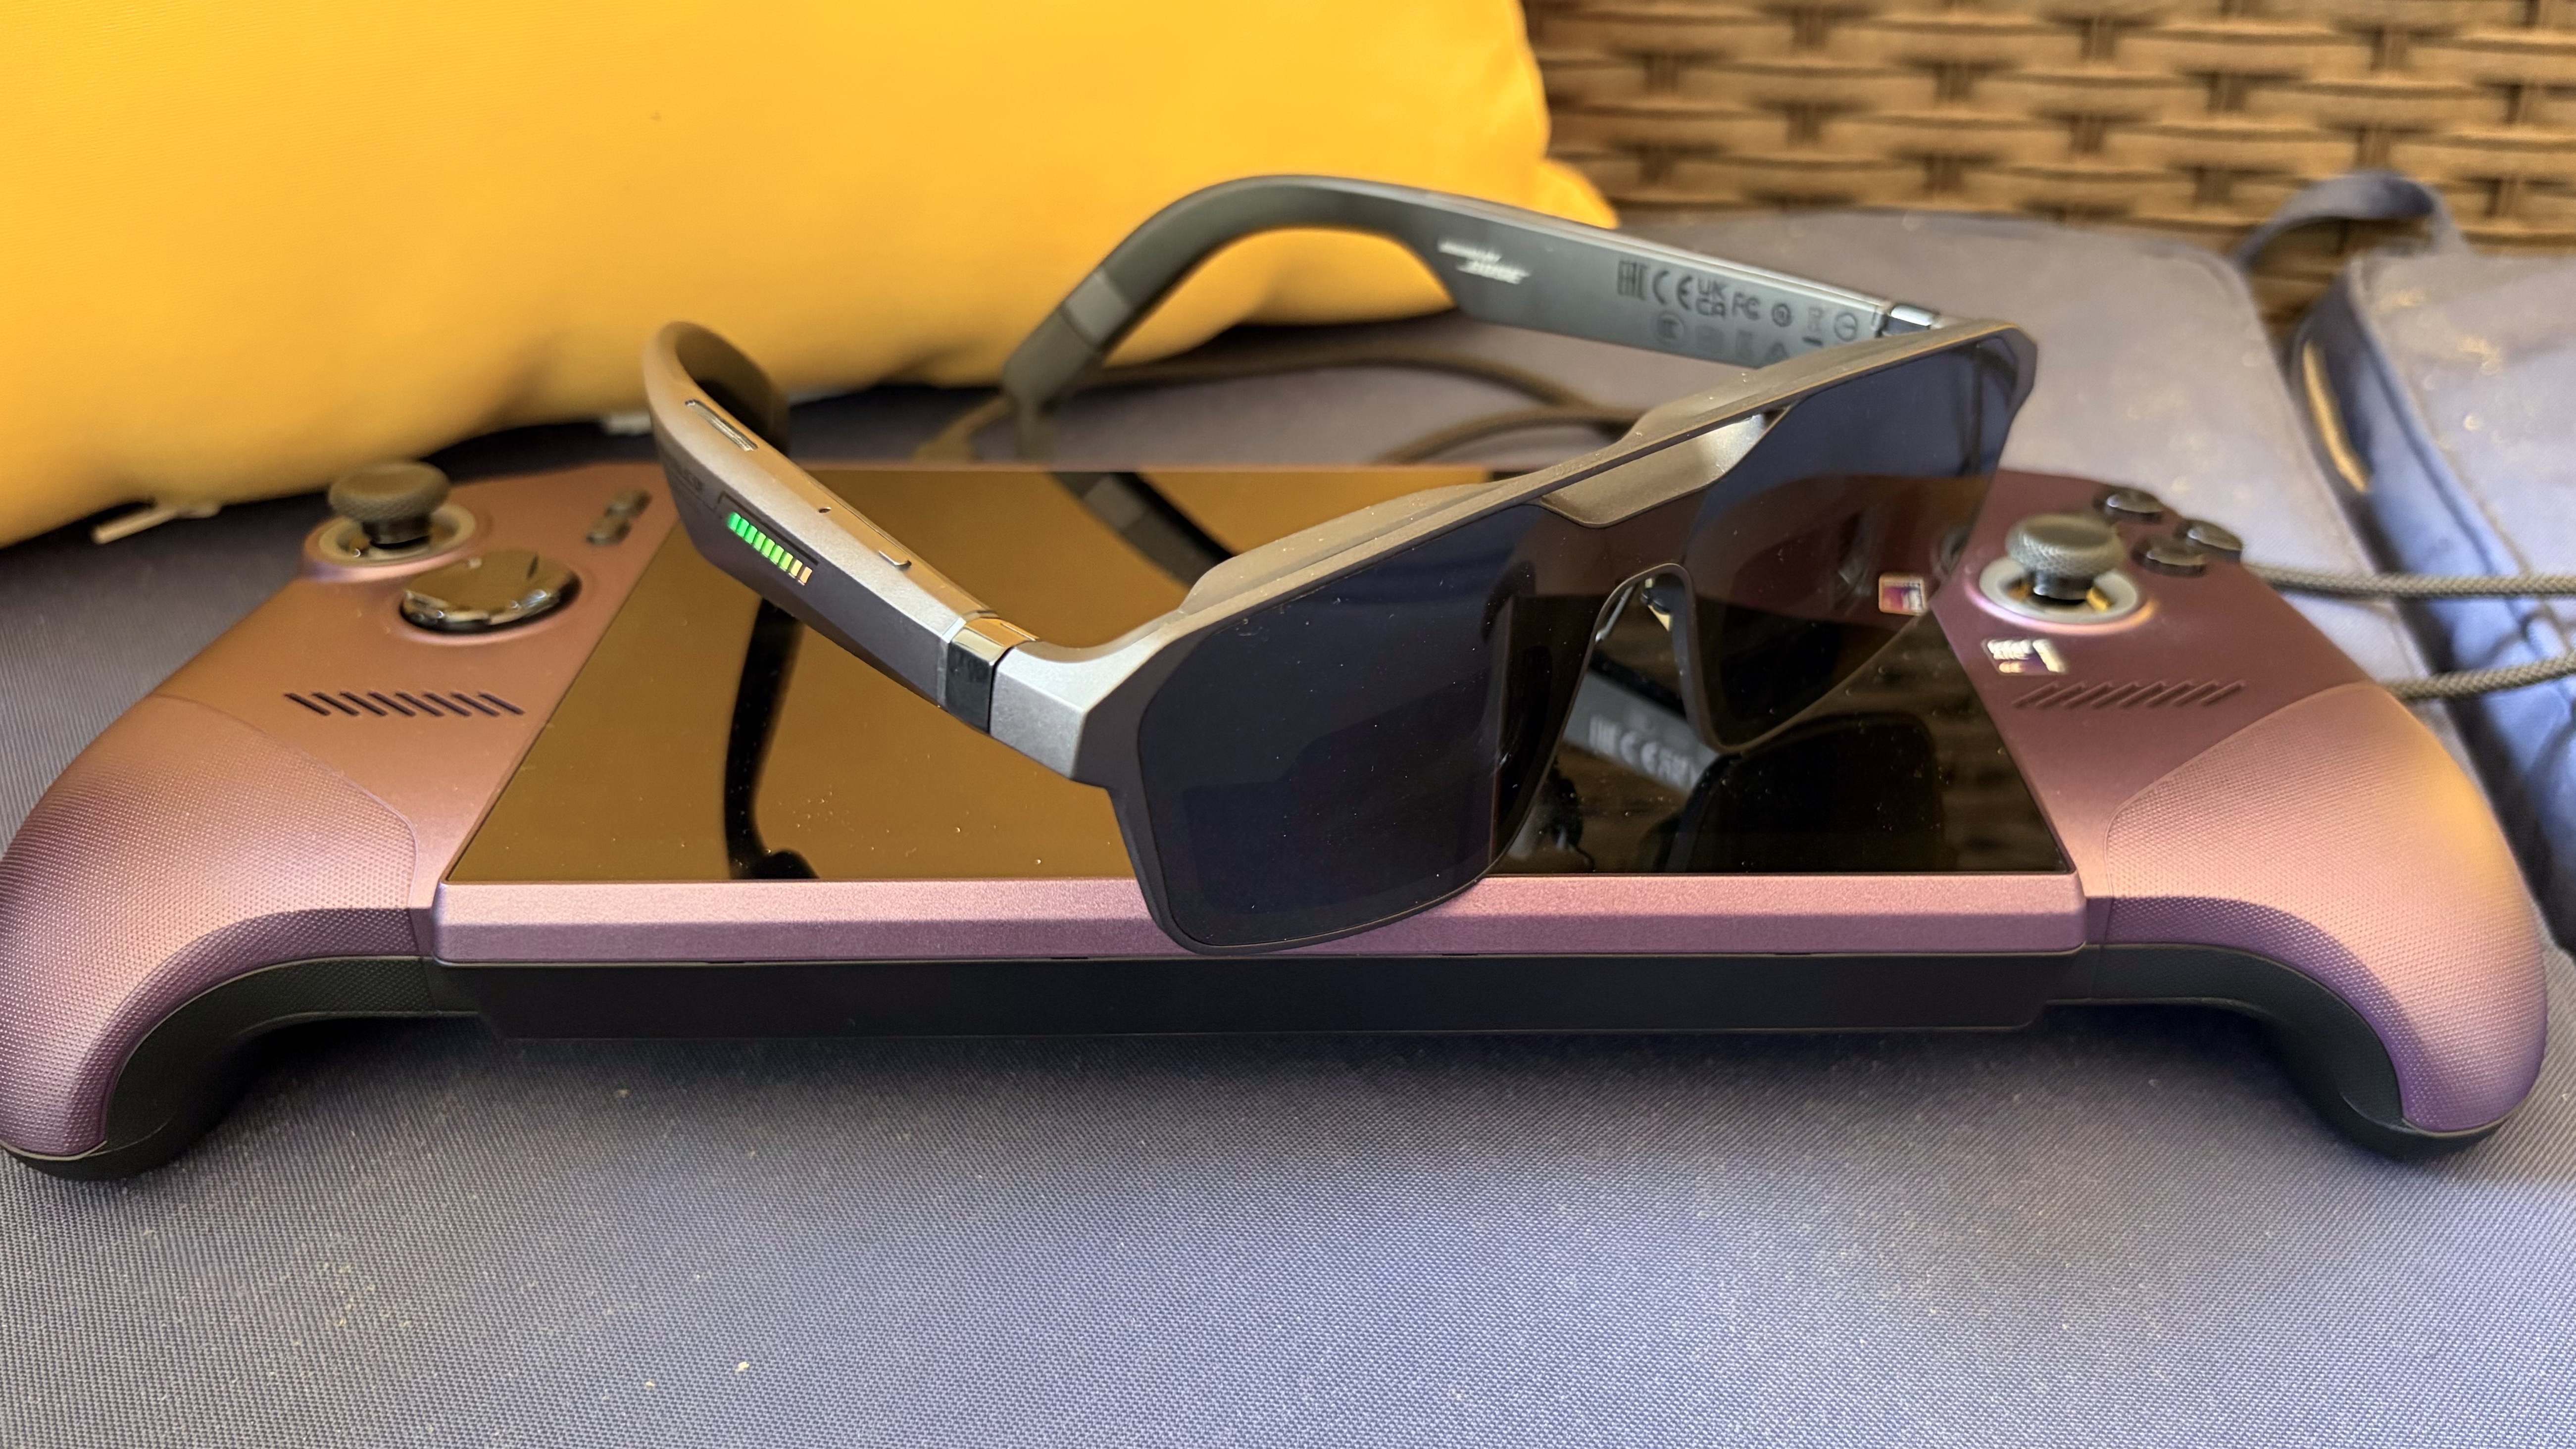
Although it shares many of the same internals as the Xreal One Series AR glasses, the R1 has an unmistakable ROG flair. Whereas the “One” glasses have smooth surfaces and rounded edges, the R1 has a more angular design and chamfers along the temples. And in keeping with ROG design ethos, there is a line of 9 LEDs along both temples, along with Republic of Gamers etchings.

The glasses are constructed from high-quality plastic, which feels similar to that of the Xreal One and One Pro. But whereas the Xreal glasses have a soft, matte finish, the R1 has a shimmering grey finish. Unlike the One glasses, the R1 doesn’t have a detachable front frame, which probably isn’t too much of a hindrance, as the glasses already have a clean, modern aesthetic when viewed from the front.

Asus ROG XREAL R1
Tom's Hardware
Asus ROG XREAL R1
Tom's Hardware
Asus ROG XREAL R1
Tom's Hardware

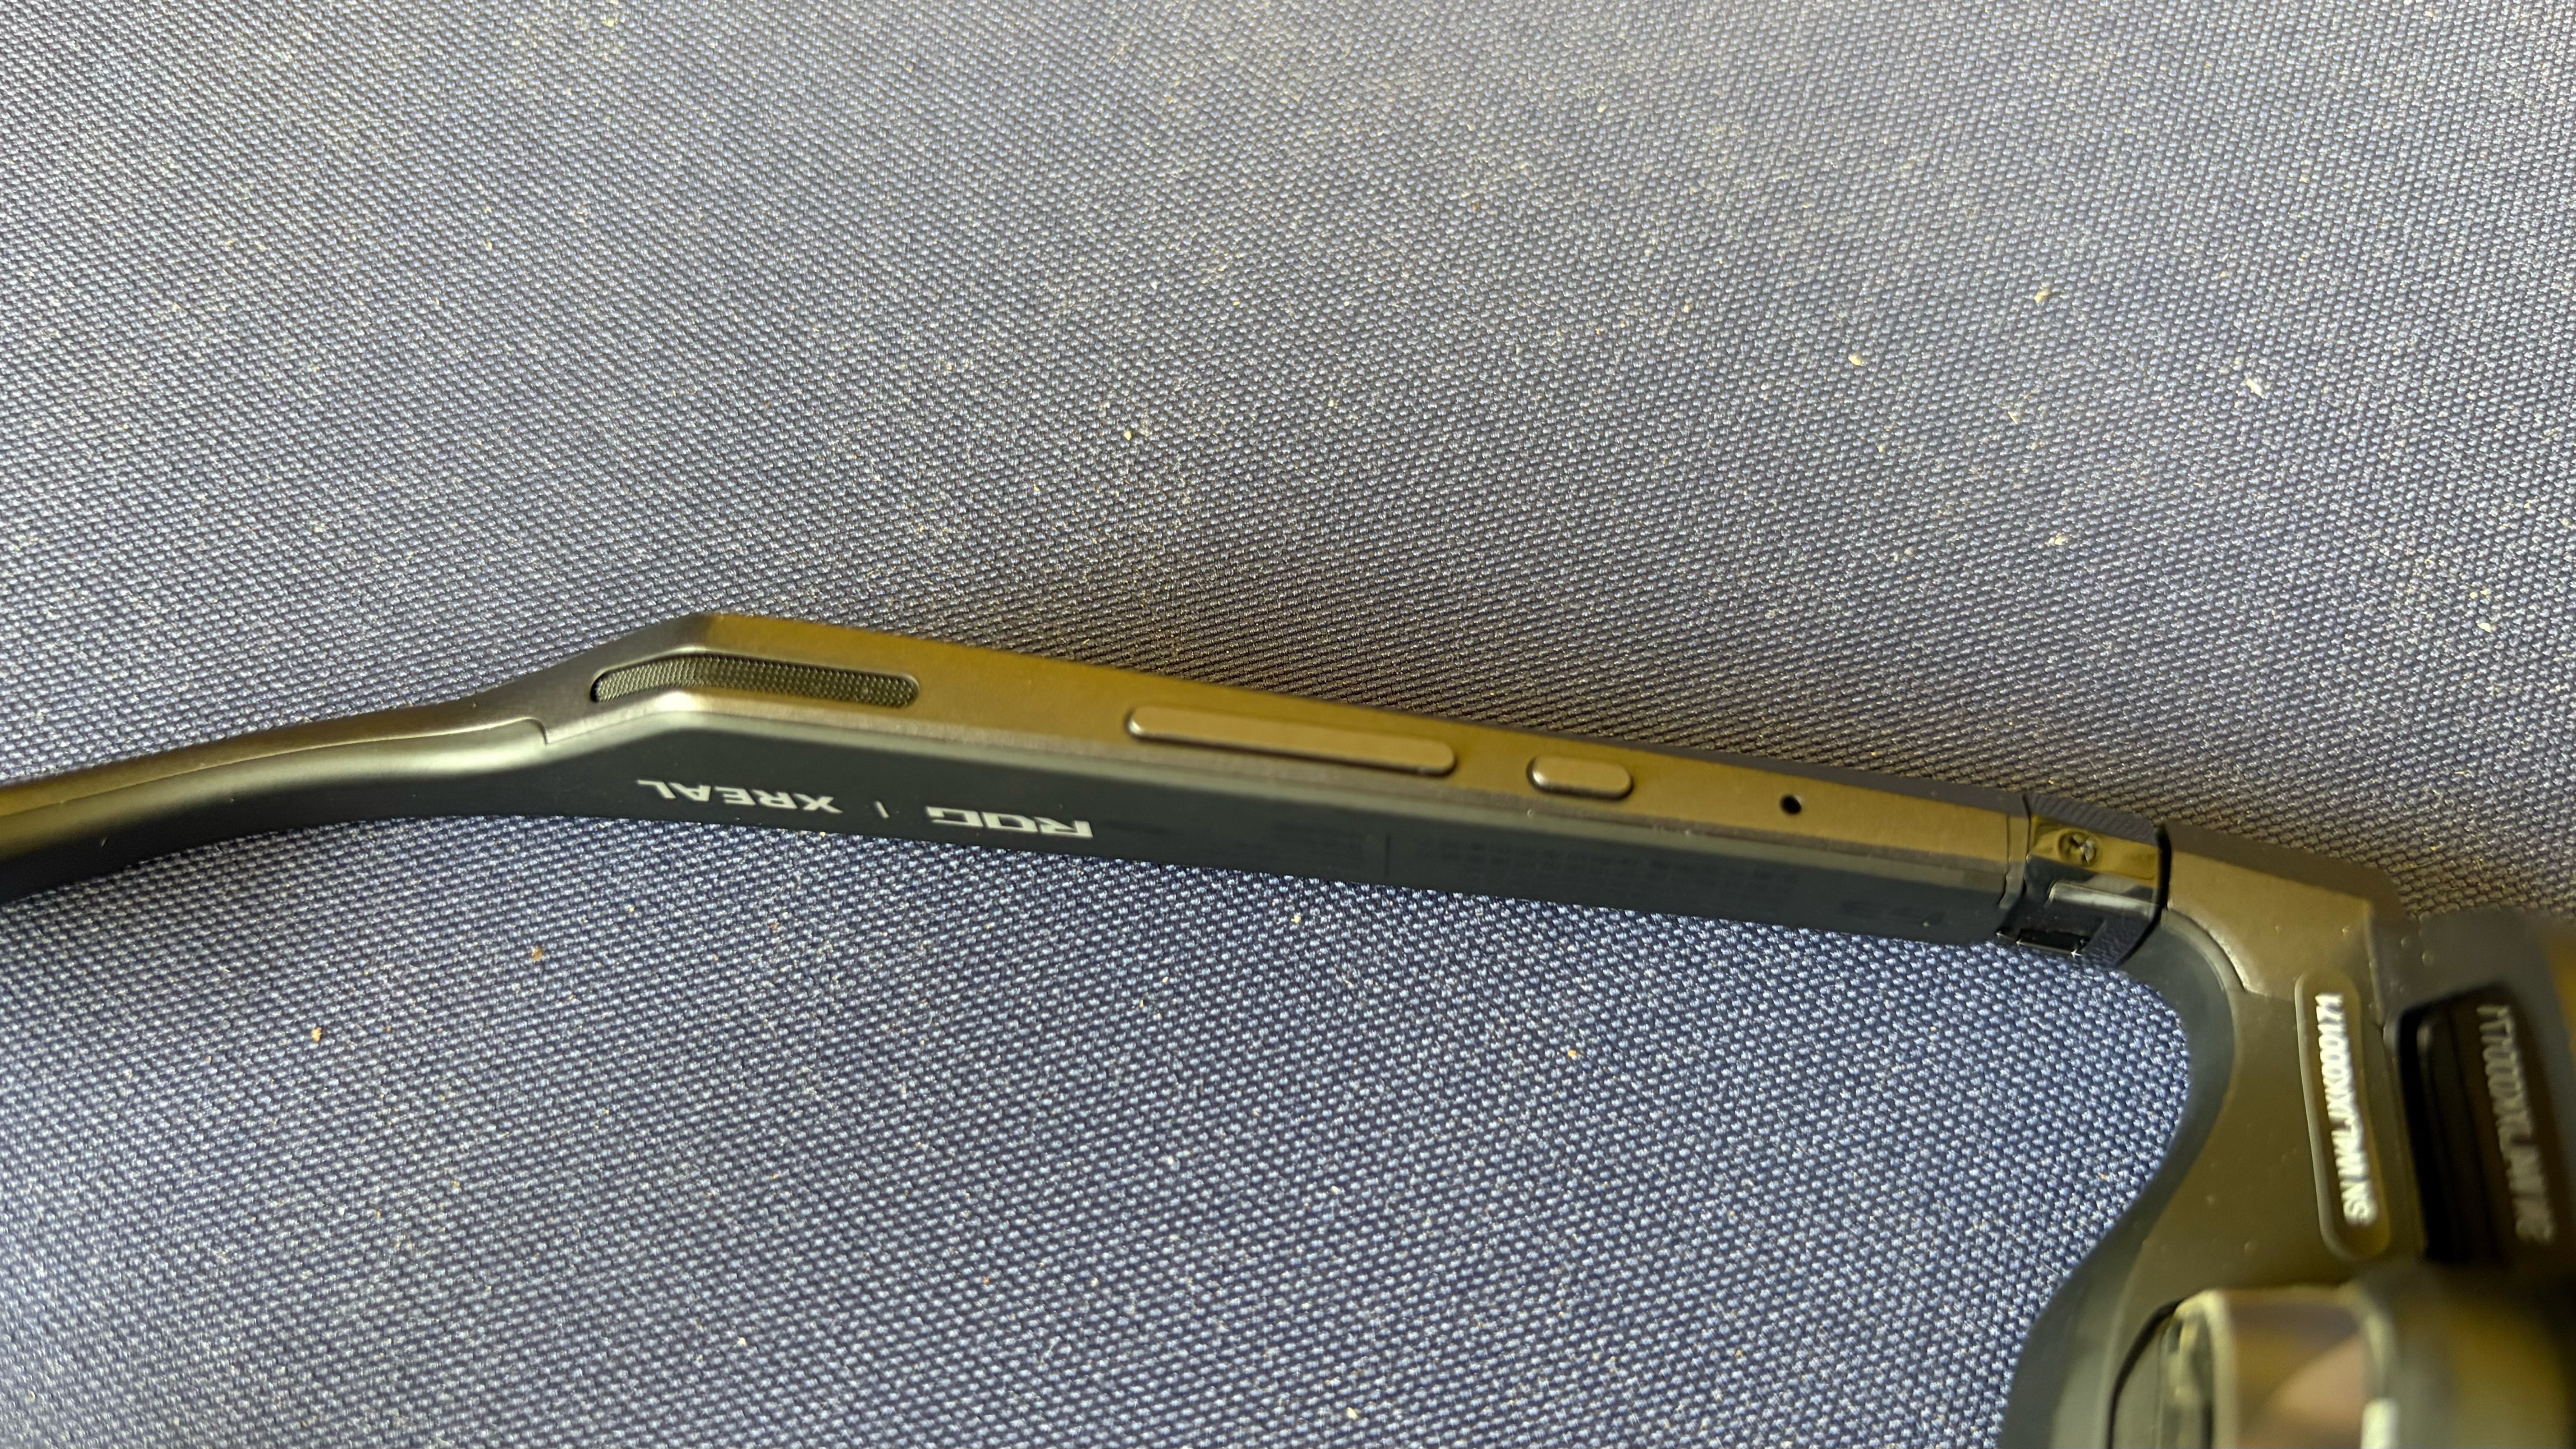
The R1 features open-air speakers along the temples, with a USB-C port at the rear of the left temple. The top of the right temple features a programmable Quick button. On the underside of the right temples, you’ll find a menu button and a rocker switch that navigates through the menu system. When the menu is inactive, that same rocker switch adjusts the display brightness.

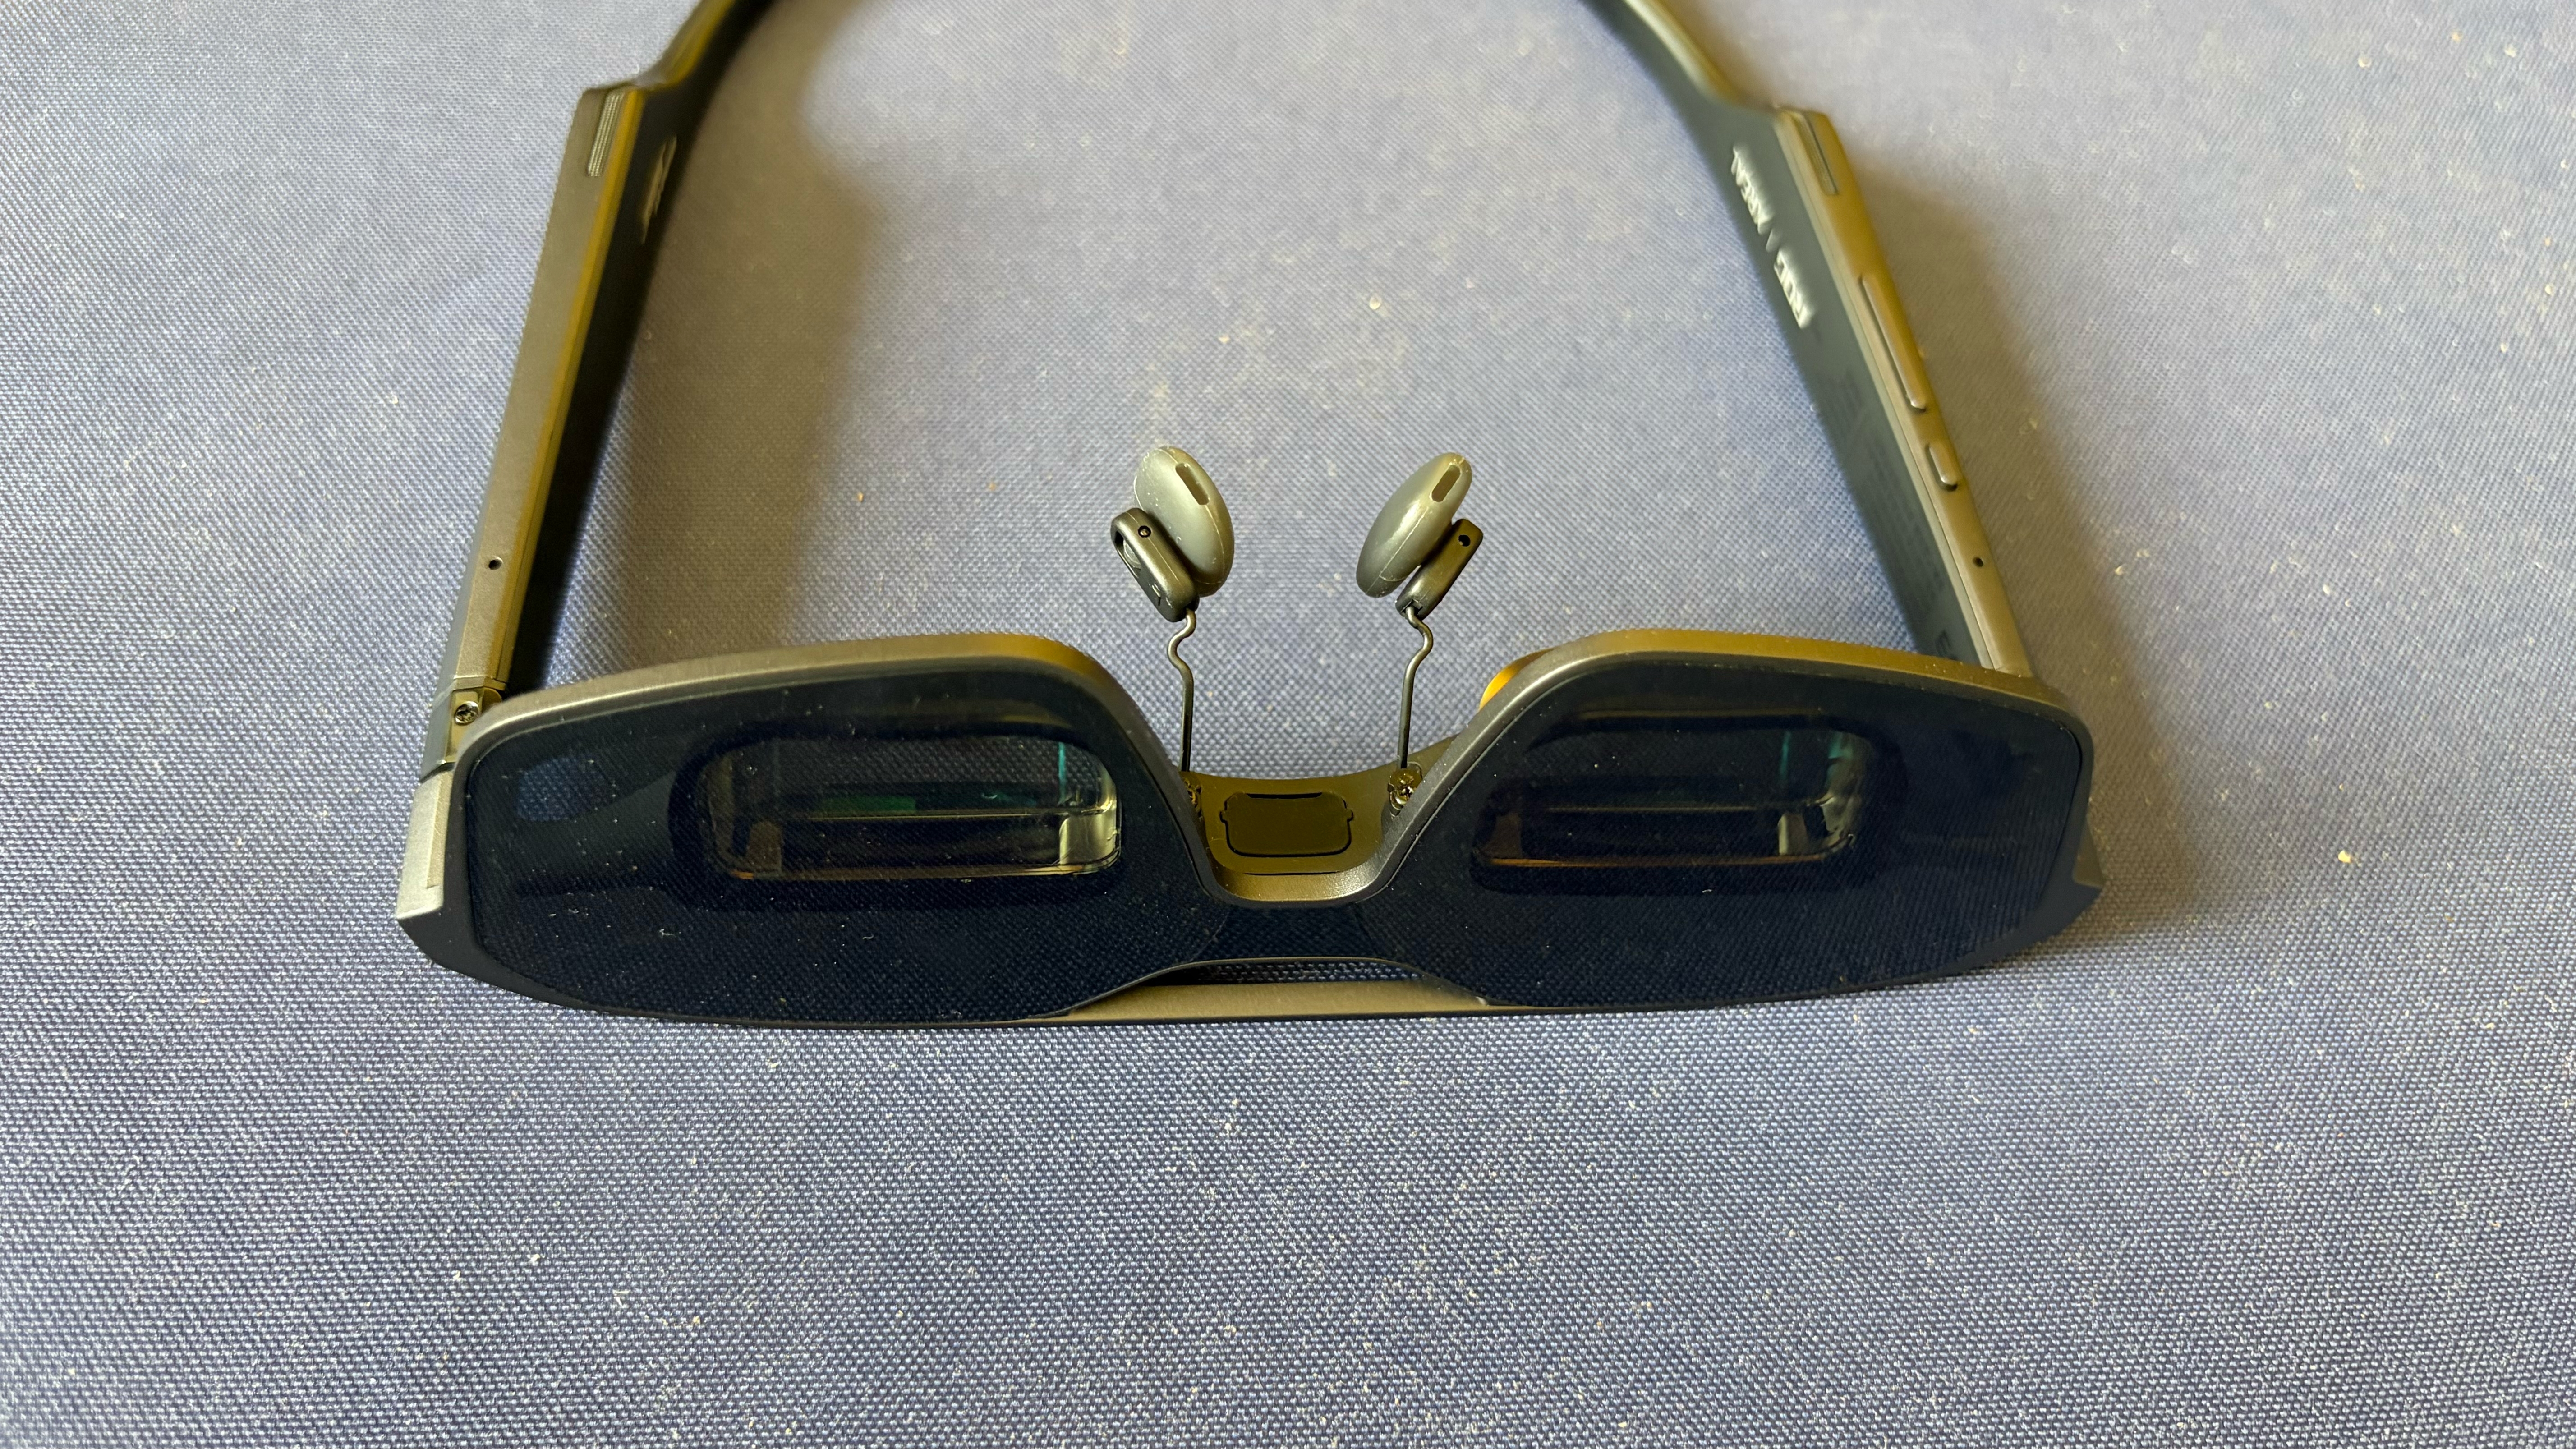
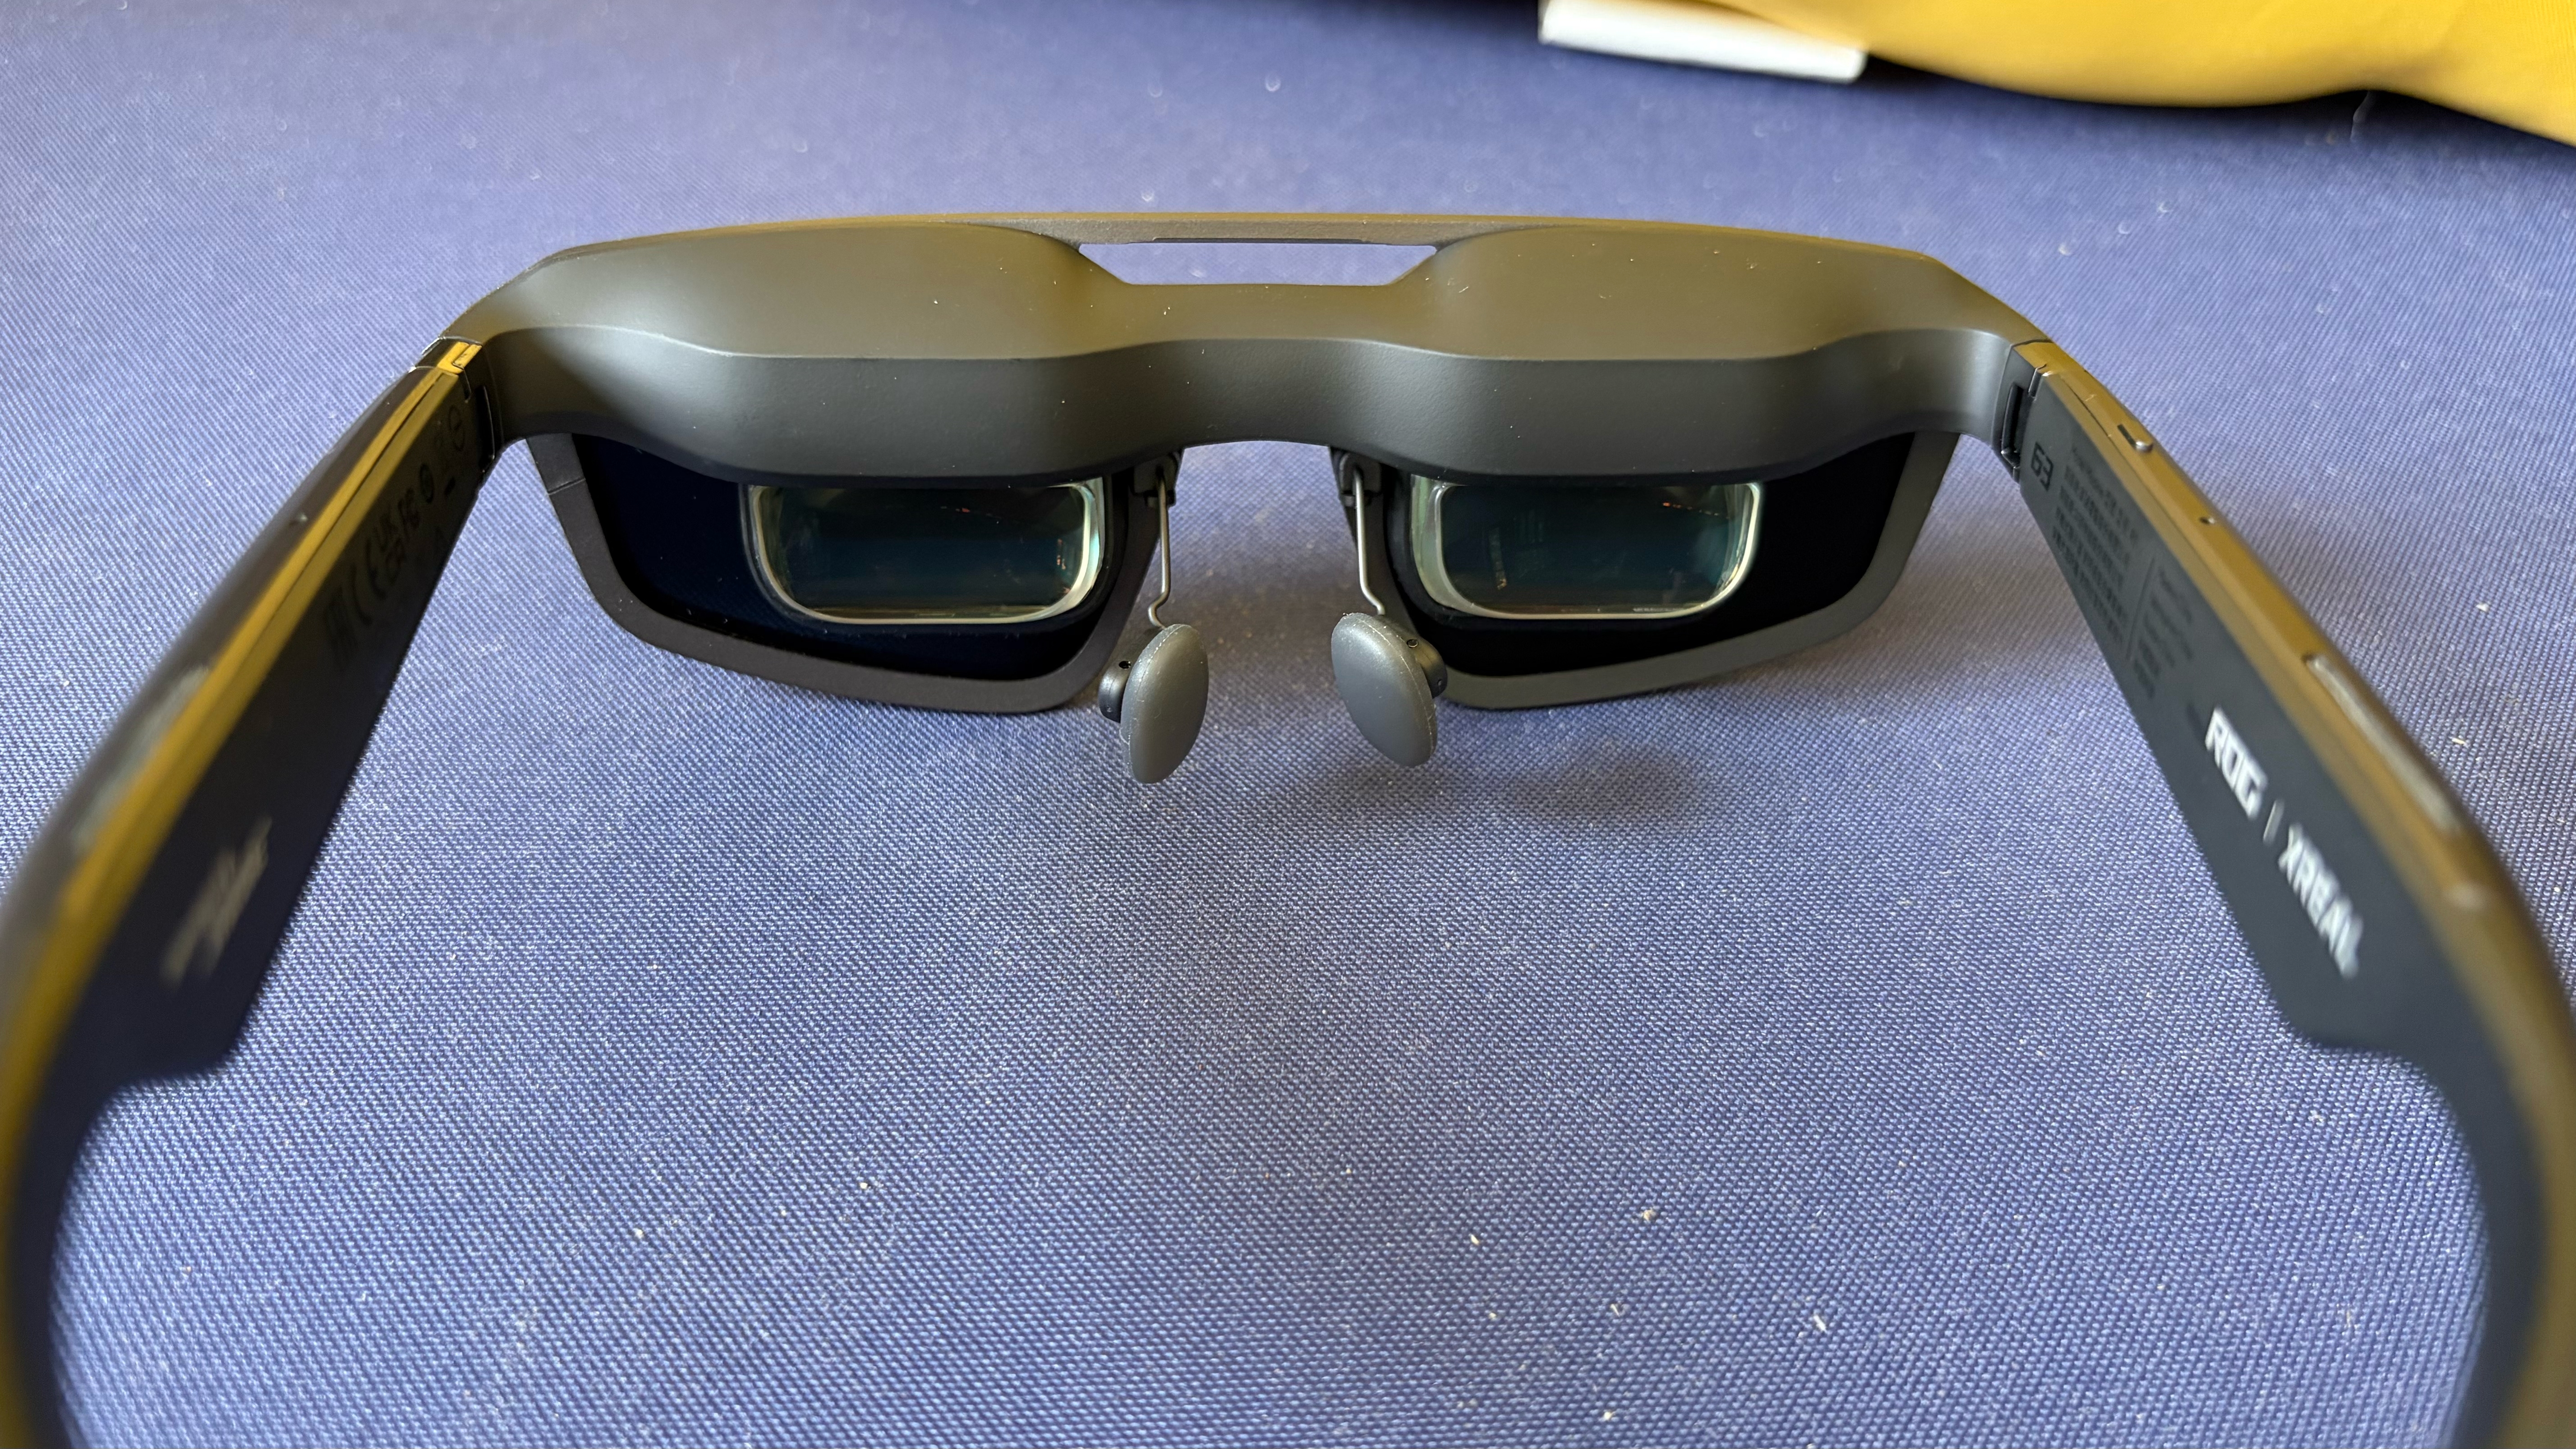
The R1 uses a flat-prism lens design, resulting in much less visual heft near your eyes than traditional bird bath lenses. This design also results in a 57-degree field of view, which is identical to the One Pro. Content is projected using dual 0.55-inch Sony Micro-OLED displays, featuring a 0.01 ms response time and a 240 Hz refresh rate (double that of competing AR glasses) with Frame Rate Boost enabled. The glasses can also project an image equivalent to up to 171 inches across at a distance of 4 meters.

Asus ROG XREAL R1
Tom's Hardware
Asus ROG XREAL R1
Tom's Hardware
Asus ROG XREAL R1
Tom's Hardware
Asus ROG XREAL R1
Tom's Hardware
Asus ROG XREAL R1
Tom's Hardware
Asus ROG XREAL R1
Tom's Hardware

Three levels of electrochromic dimming are offered on the R1. The darkest setting blocks most, but not all, environmental light to heighten the sense of immersion while gaming or viewing media content. Electrochromic dimming is a must at this price point, since less expensive glasses rely on cheap physical plastic light blockers to achieve the same effect. And the physical light blockers are an all-or-nothing affair, with no granularity in their light-blocking abilities.

One other item of note: The R1 features the same accessory port between the nose pads that accepts the Xreal 6 DoF camera module.

In addition to the R1, the retail box includes a hard carrying case, the USB-C-to-USB-C cable, a prescription lens frame, small and large nose pads, a polishing cloth, and the ROG Control Box.

Specifications for the Asus ROG Xreal R1

Display

1920 x 1080 per eye

Display Type

OLED

Refresh Rate

240 Hz

Brightness

700 nits

Field of View

57 degrees

Virtual Screen Size

171 inches

Degrees of Freedom

3 DoF

Audio

Dual open-air speakers

Connectivity

USB-C

Weight

3.06 ounces (87 grams)

Asus Xreal ROG Control Dock and the Asus DisplayWidget Center

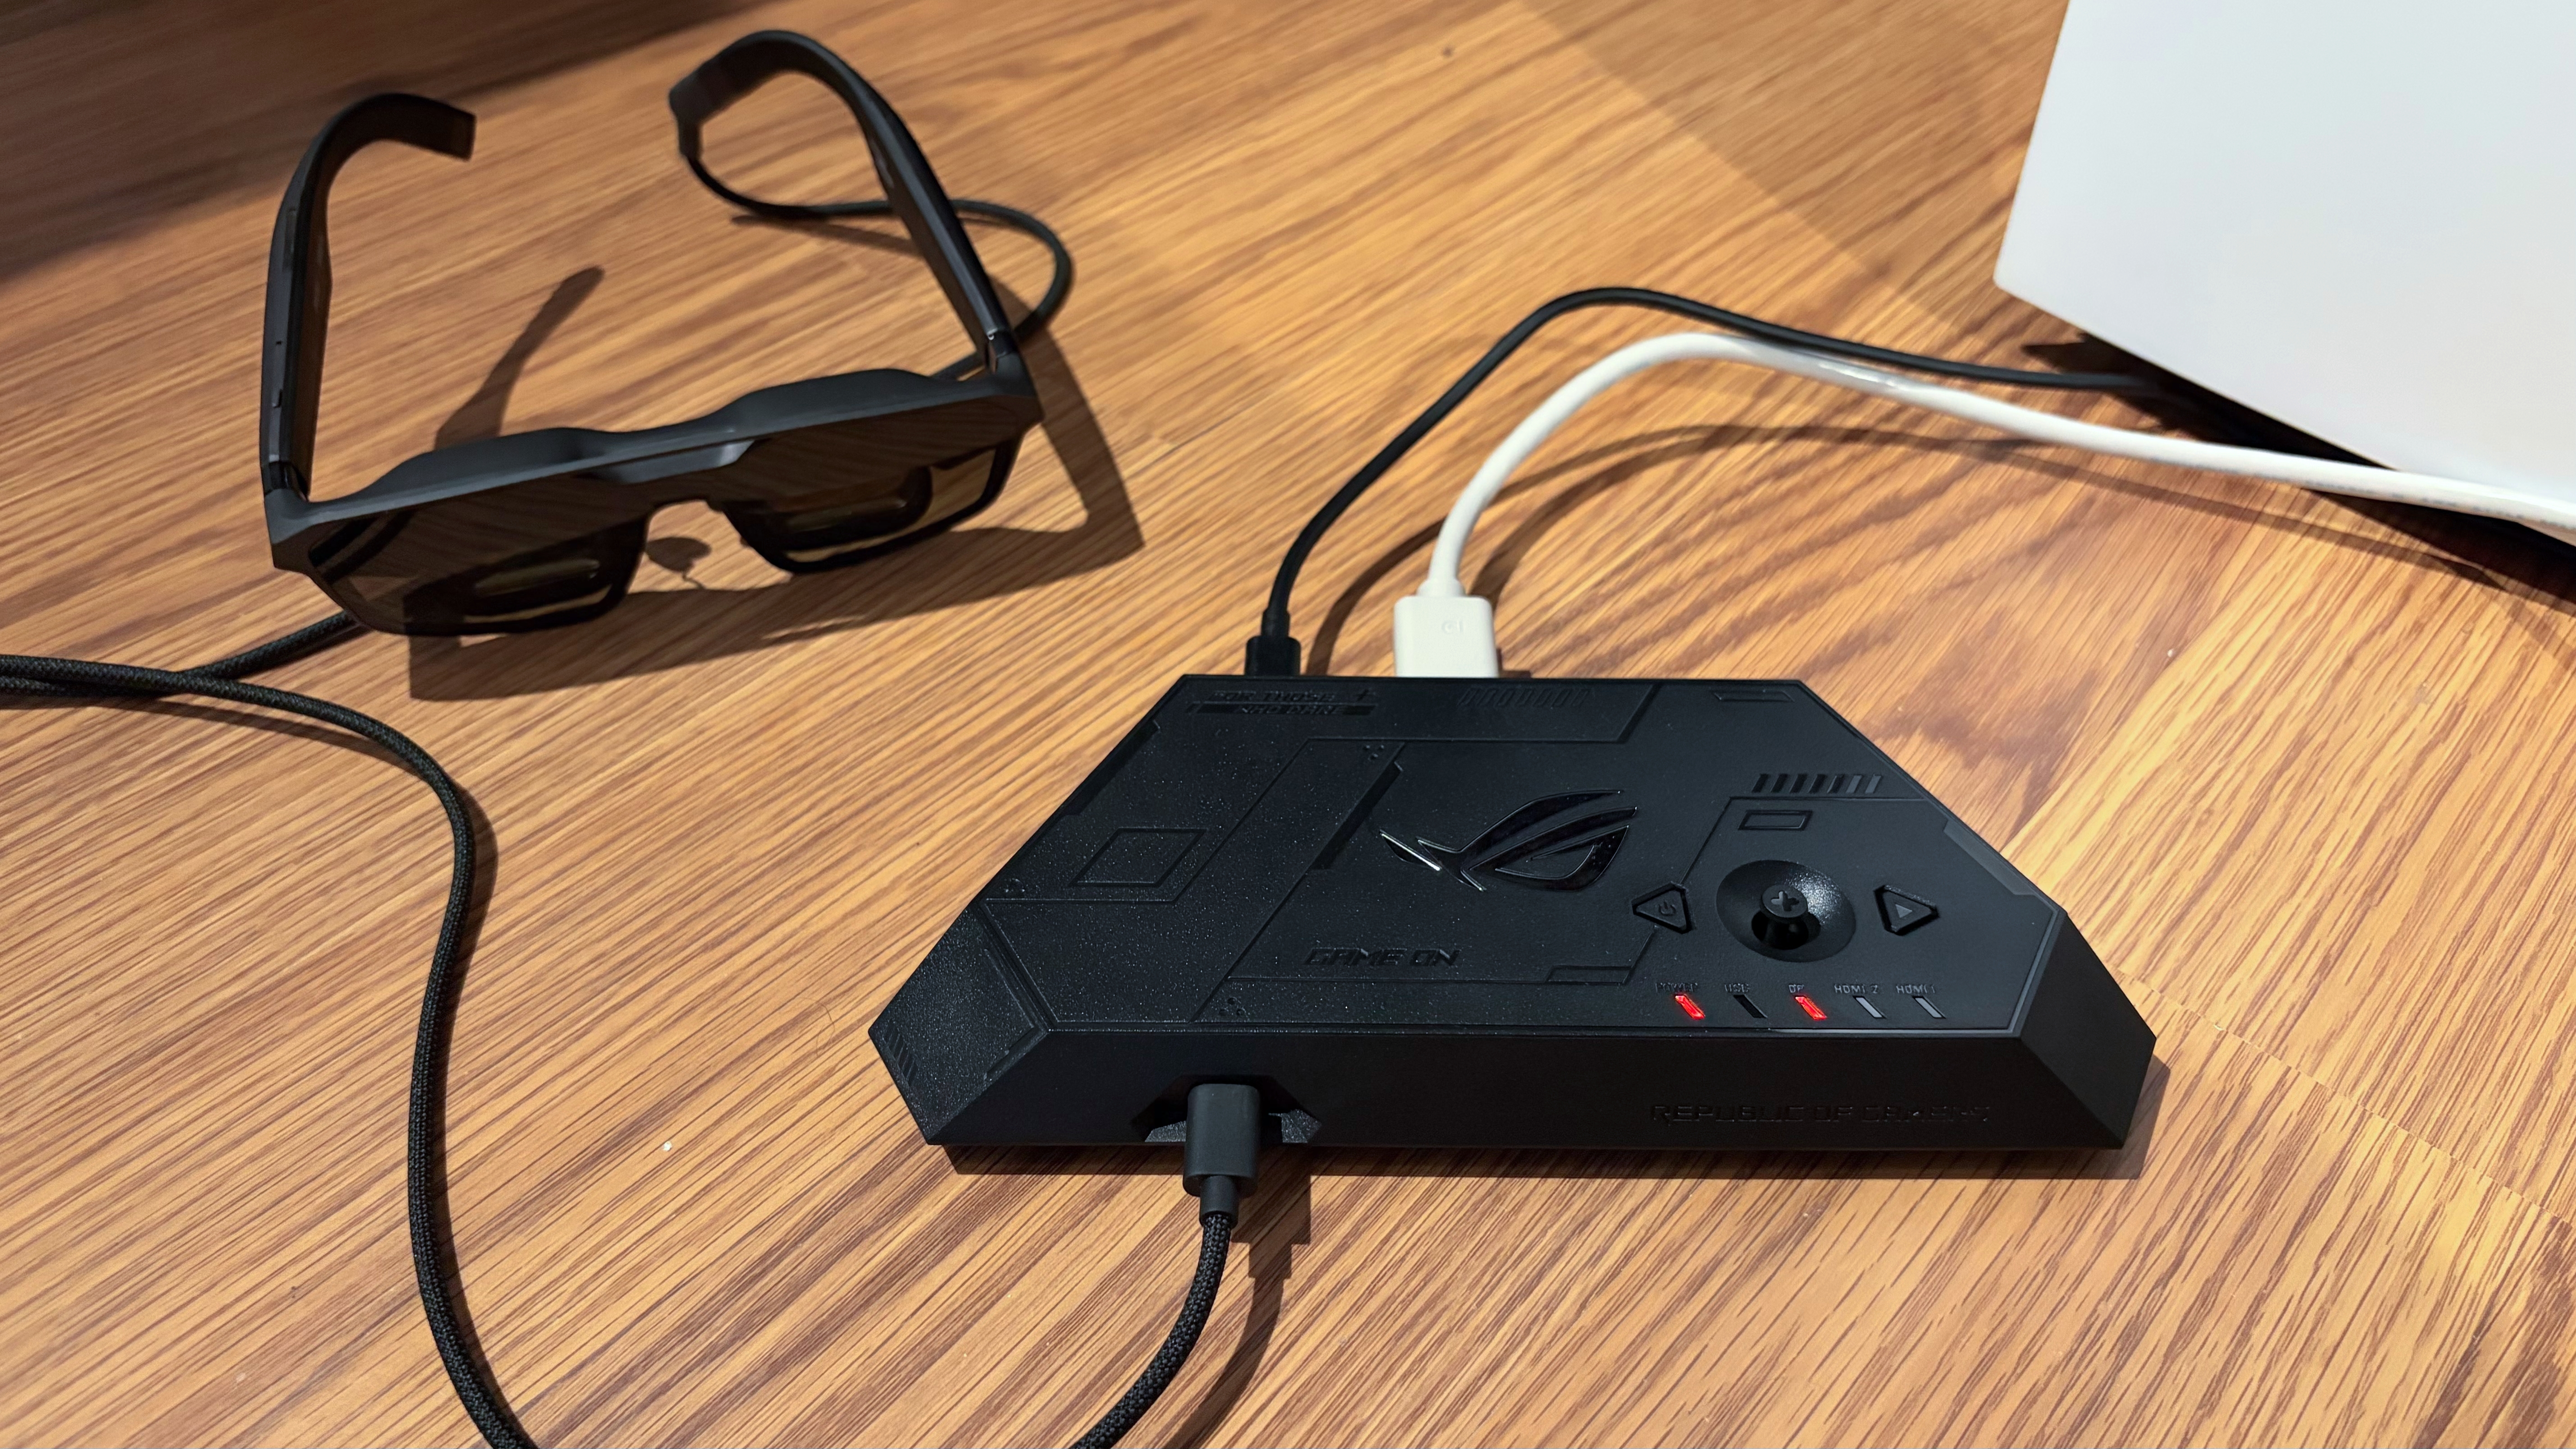
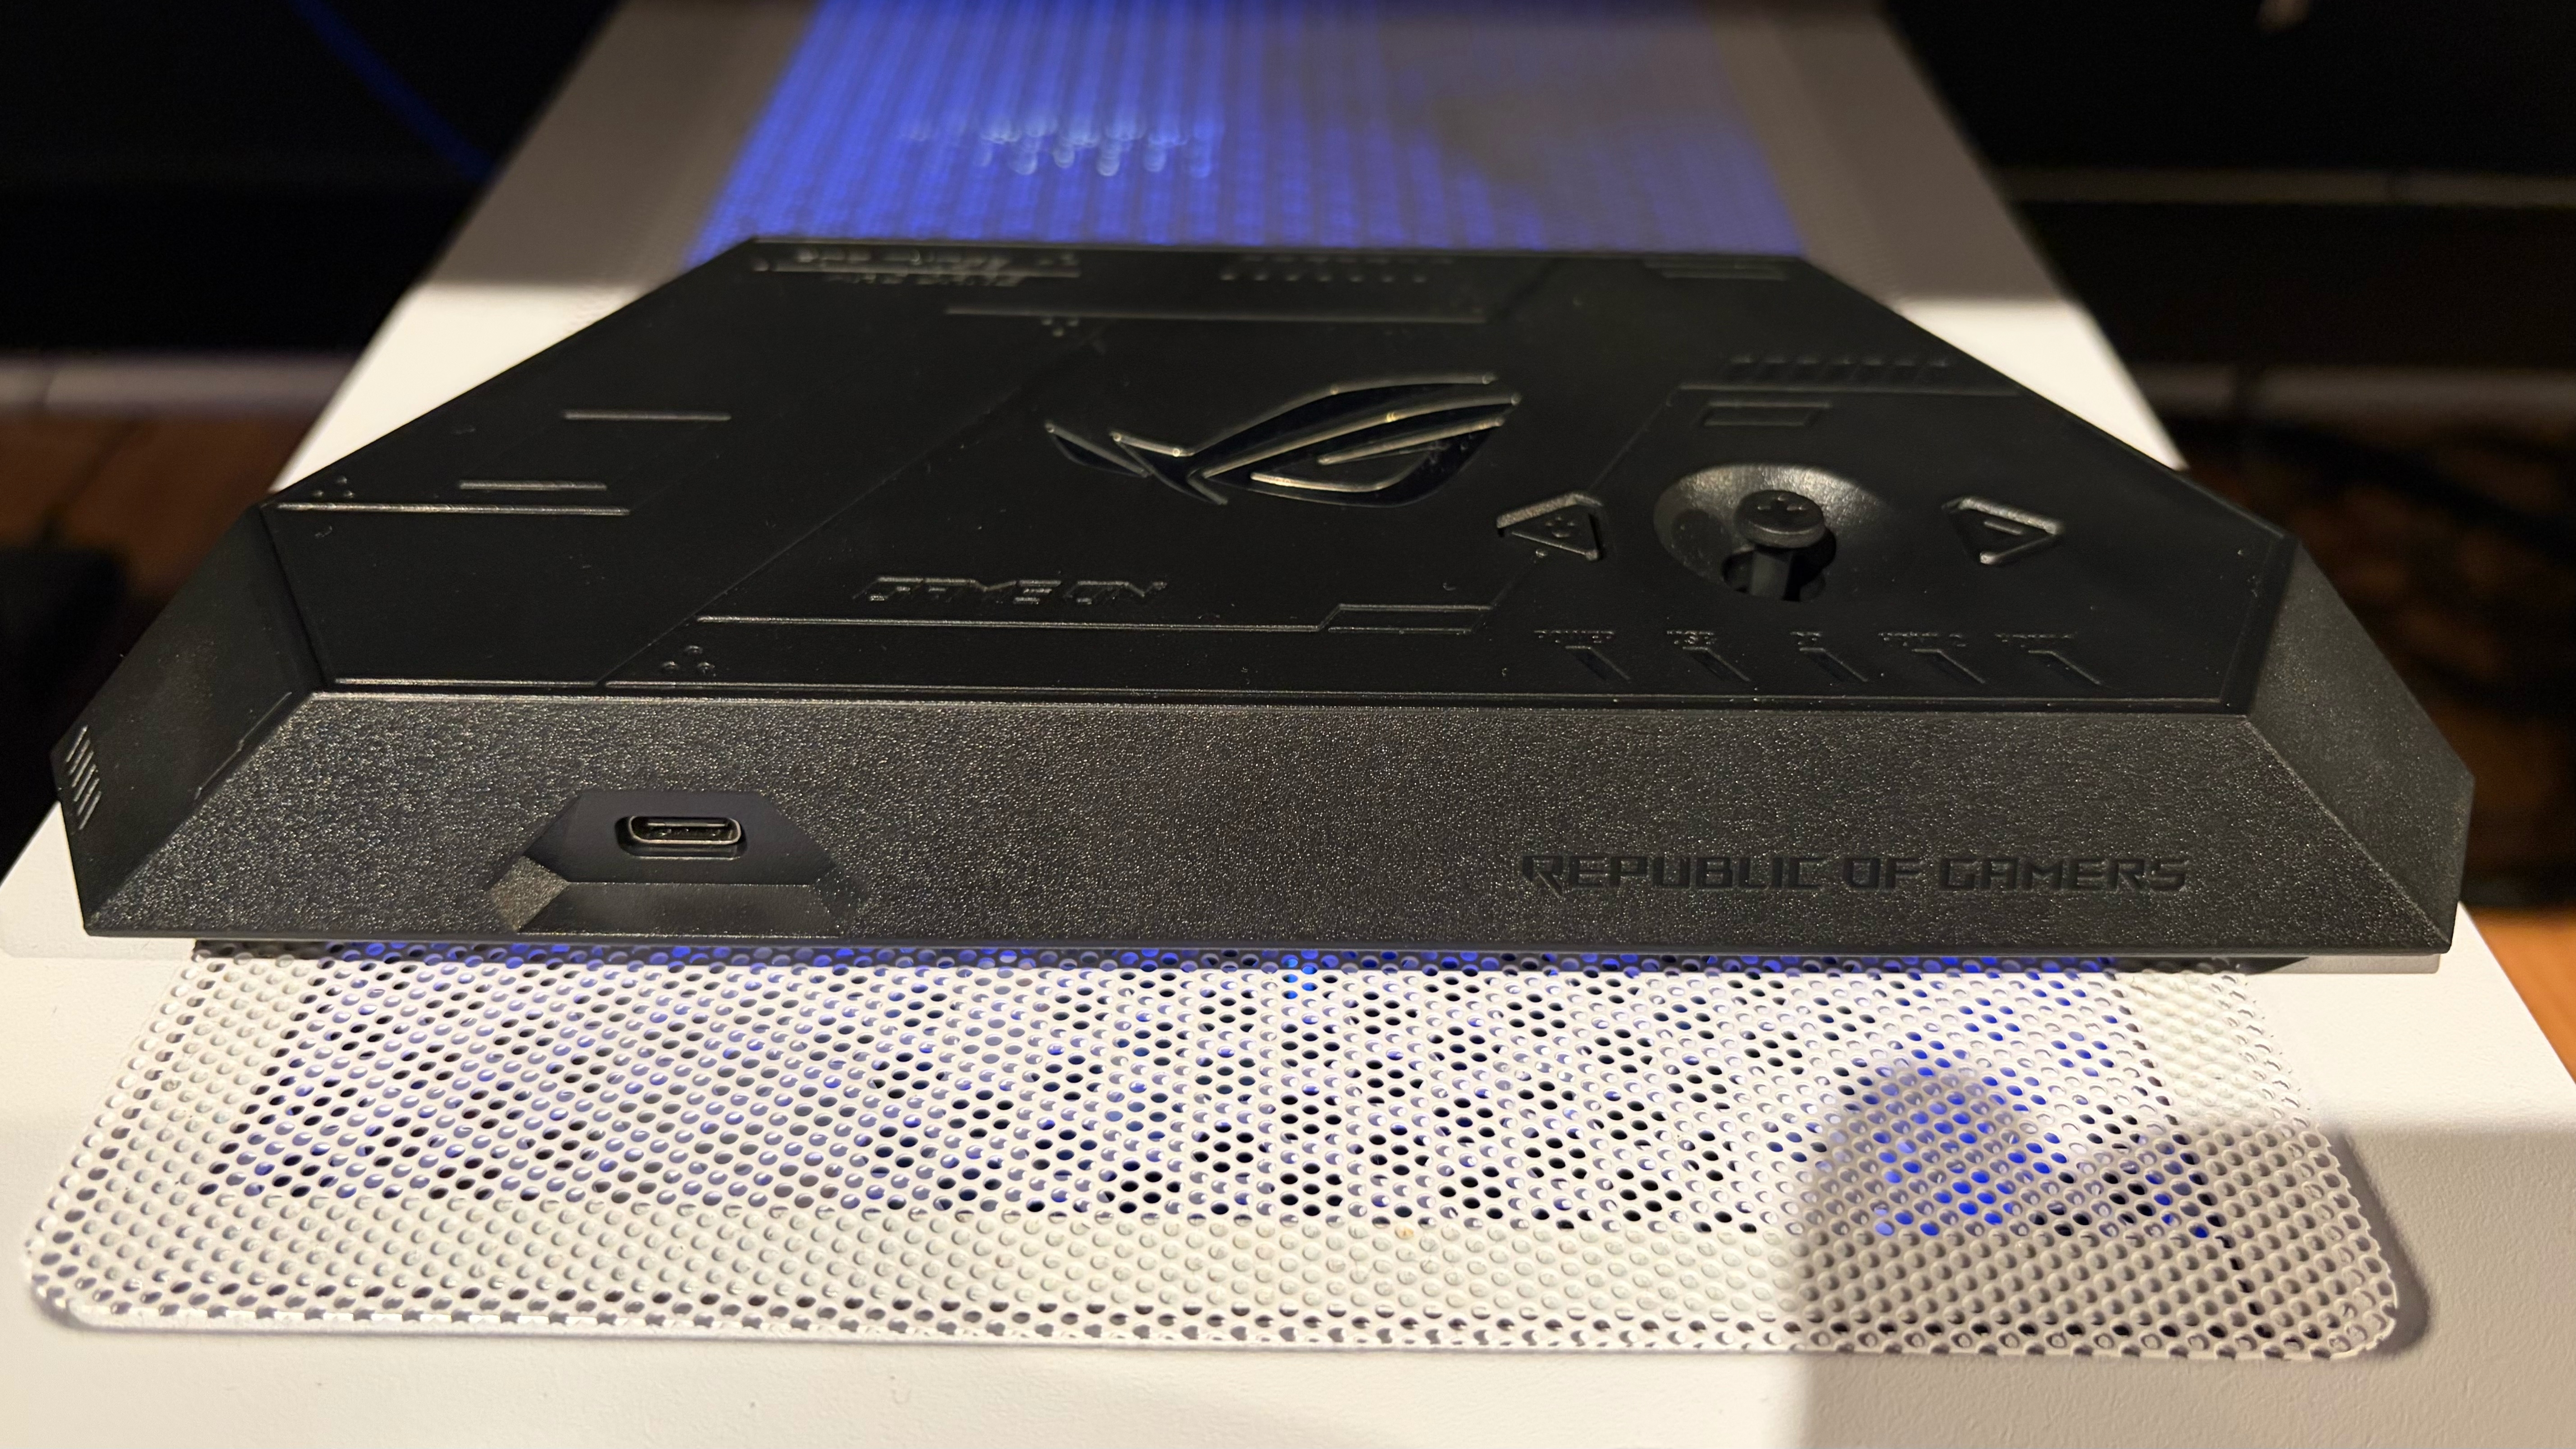
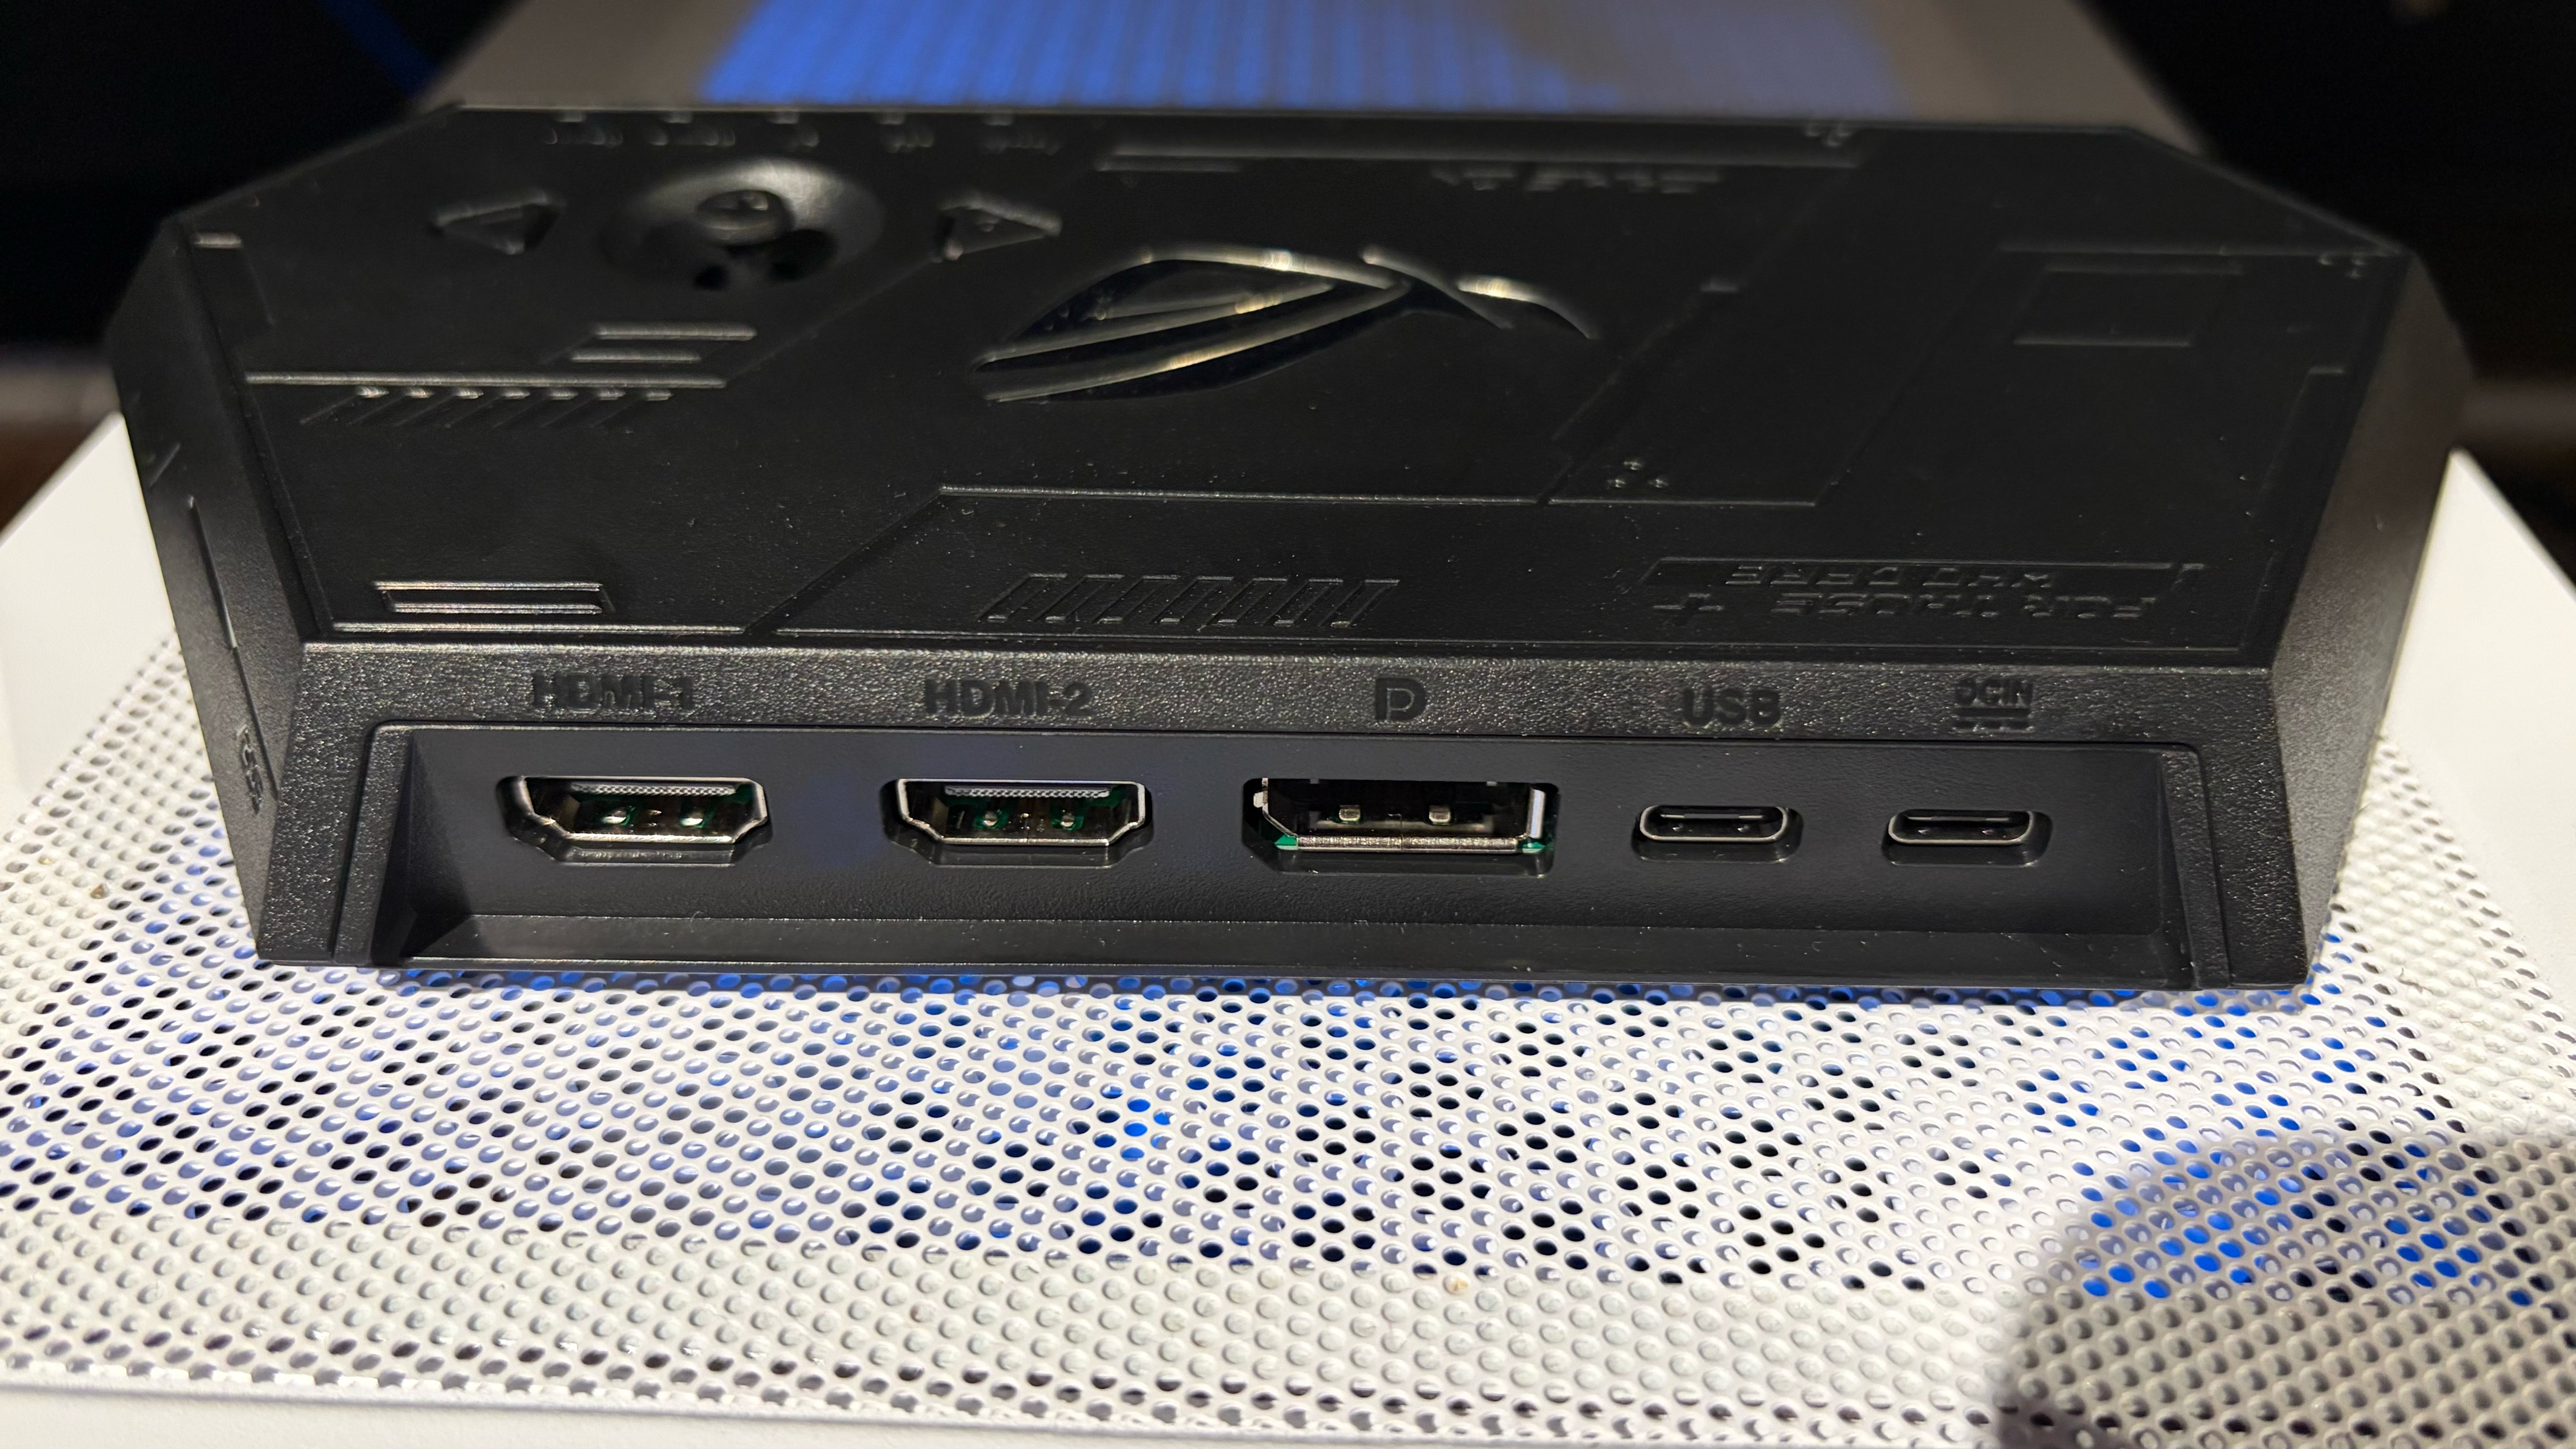
Our R1 review unit shipped with the ROG Control Dock. It’s a lightweight accessory designed to connect your R1 glasses to a PC or gaming console. The front of the unit has a single USB-C port for video out to your glasses. The back panel features two HDMI ports and a DisplayPort for video input. There are also two USB-C ports: one for power-in and one for power-in and data.

The dock ships with two USB-C-to-USB-A cables for connecting power and managing data throughput from your PC.

Asus ROG XREAL R1
Tom's Hardware
Asus ROG XREAL R1
Tom's Hardware
Asus ROG XREAL R1
Tom's Hardware

The top of the unit features a power button, an exit button, and a joystick to navigate the glasses' OSD. If you don’t want to install any additional software, you can control all R1 settings (including screen brightness, refresh rate, color modes, tint level, and more) using the joystick and the OSD.

Asus ROG XREAL R1
Tom's Hardware
Asus ROG XREAL R1
Tom's Hardware
Asus ROG XREAL R1
Tom's Hardware

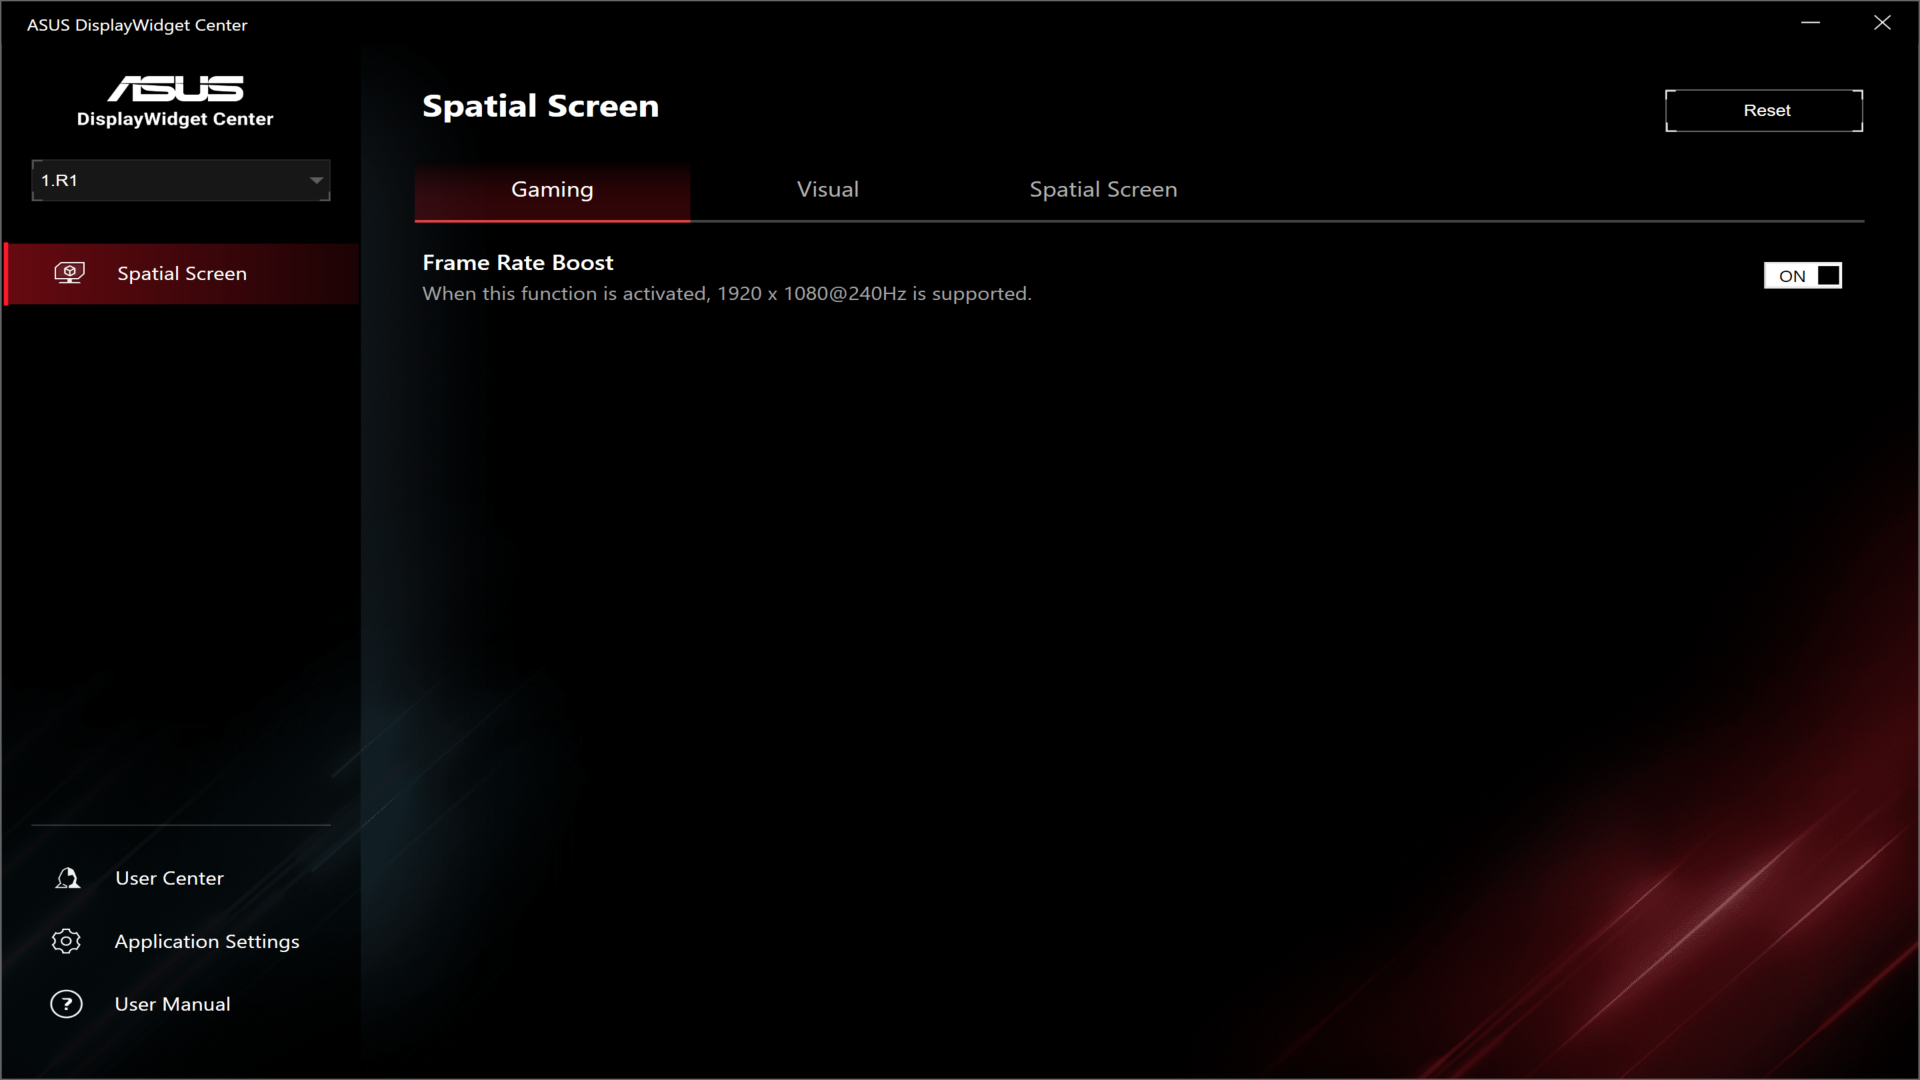
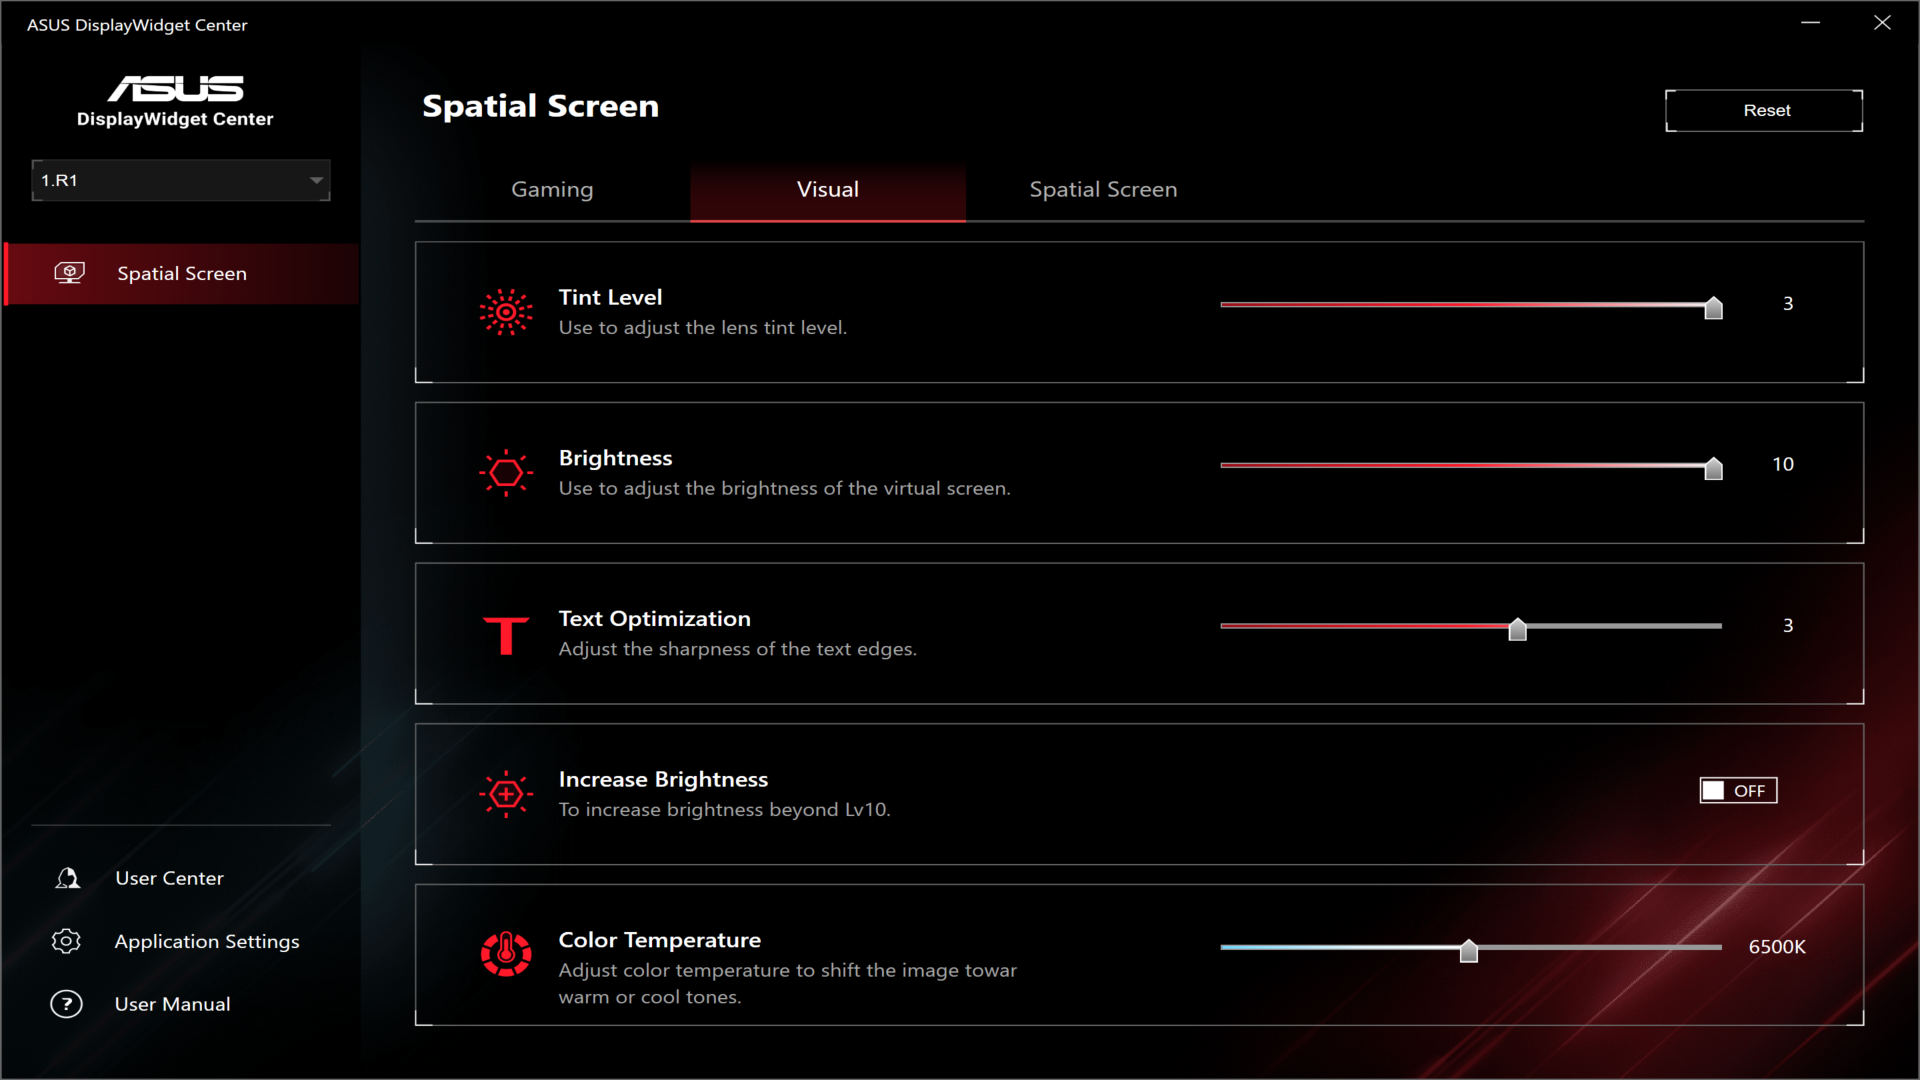
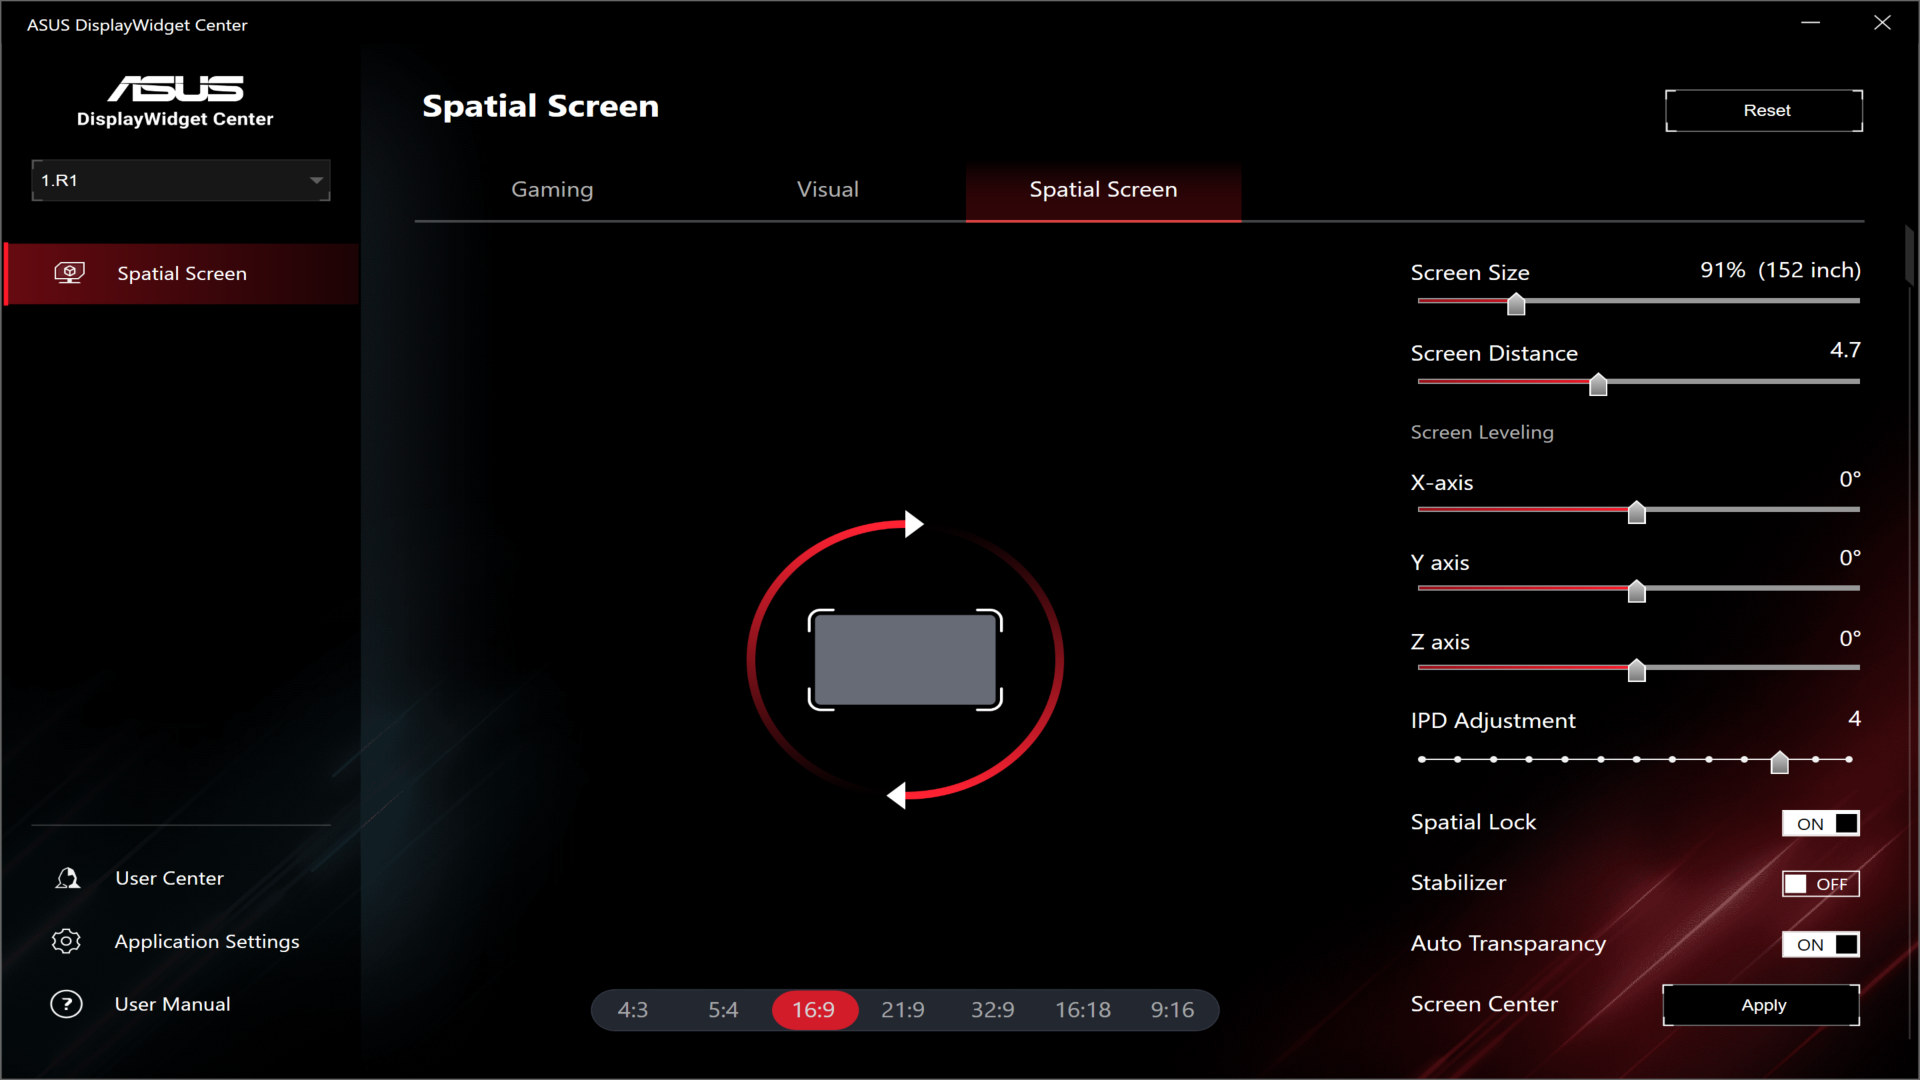
However, I found that the easiest way to control (most of) the R1’s settings is to use the Asus DisplayWidget Center. After installing the app, the R1 appeared as a controllable “display” within it. From there, I could control R1 settings via three menu tabs: Gaming, Visual, and Spatial Screen. The only option under Gaming is to enable Frame Rate Boost, which allows you to set a maximum refresh rate of 240 Hz (up from the default 120 Hz). From the Visual tab, you can control the tint level for the electrochromic lenses, brightness, text sharpness, and color temperature. In the Spatial Screen tab, you can adjust the screen aspect ratio, screen size, screen distance, IPD (57 to 66 mm), and control spatial lock.

Using the Asus Xreal ROG R1

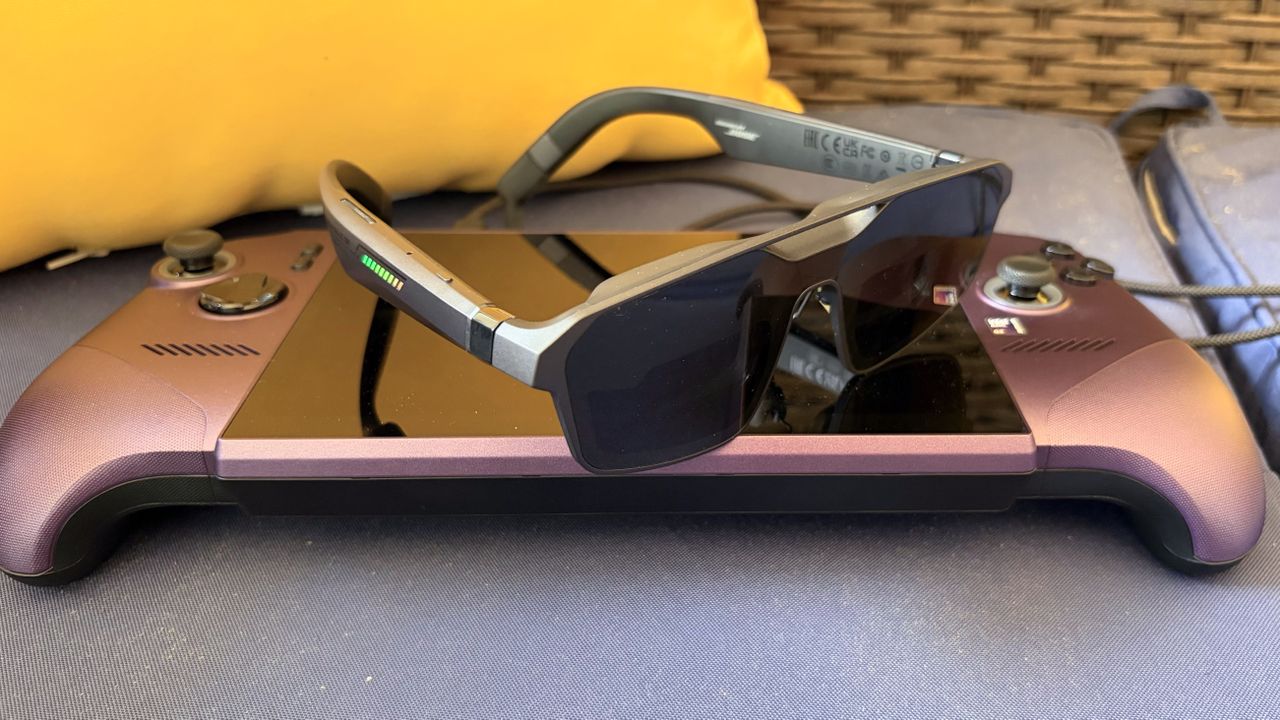
The R1 is designed with gaming in mind, so I dedicated most of my time to testing it in that environment. For my testing, I used two different gaming rigs: a desktop PC with a Core 7 Ultra 265k and an RTX 4060 Ti, and an MSI Claw 8 EX AI+ handheld gaming PC with an Arc G3 Extreme SoC.

Without question, working with the desktop system was the most involved, as it required using the ROG Control Dock with various wires going in and out for video and power. However, using the R1 with the Claw 8 EX AI+ proved to be the simplest, with me only needing to plug the glasses into a free Thunderbolt 4 port.

I’ll take the time here to talk about the much-ballyhooed 240 Hz refresh rate option. This mode is enabled by selecting Frame Rate Boost from the R1’s OSD. However, I found that switching to this mode resulted in worse image quality, with a blurrier image and some jitter (especially at the outer edges of the viewable area), which led to eye strain. The effect was noticeable when using the ROG Control Dock and when plugged directly into a Thunderbolt 4 port. This is the byproduct of Asus and Xreal using a software algorithm to “boost” the frame rate from its native 120 Hz.

Asus ROG XREAL R1

(Image credit: Tom's Hardware)

I experienced none of the visual anomalies in the native 120 Hz mode, so the 240 Hz mode was more of a novelty to me than something I’d rely on extensively for gaming. However, your experience may vary in this respect. The R1 supports an IPD range of 57-66 mm, and I’m just outside that range at 71 mm. So it could have been that my eyes were more sensitive to the 240 Hz mode.

While gaming on the desktop, I was able to play Battlefield 6 at 1080p and achieve over 100 FPS with DLSS Balanced enabled at High quality settings. Likewise, I easily hit similar FPS with details maxed out playing Lego Batman: Legacy of the Dark Knight.

The monitor I use for gaming is a 49-inch DQHD 240 Hz OLED, and I love the widescreen gaming aspect ratio. Being limited to 1080p resolution just didn’t seem to do the desktop gaming experience justice for me when using the R1. Yes, the image quality and response times are good, but if I’m sitting at my desk, I’d rather use my monitor.

That whole sentiment changes, however, when gaming on the Claw 8 EX AI+. Going from the 8-inch 1200p display to the simulated 171-inch 1080p display, with no limits on mobility, is an amazing experience. Since there’s only one cable to manage, going from the R1 to the handheld, you have great freedom in where you can game. From gaming on the couch, to the car, to your back porch, to sitting at the airport during a layover – the big-screen sensation that isthe R1 follows you anywhere.

Given the Xreal One Pro starting point, it’s no surprise that the R1 uses similar (or perhaps the same) Bose-tuned open-air speakers. As with the One Pro, the speakers are decent, with a respectable amount of bass and clarity at moderate to high volume levels. If you just want a low-impact, throw-on-and-go experience with the R1 and a gaming handheld, you’ll be more than pleased with the sound output. However, if you want the best mobile gaming experience, nothing is stopping you from also wearing a high-quality pair of wireless earbuds or headphones.

Bottom Line

The Asus ROG Xreal R1 glasses are a real testament to what’s possible when two companies at the top of their game work together on a singular product. Xreal is arguably the leader in modern AR glasses, while Asus is among the leading players in gaming peripherals, laptops, and handhelds. They’ve created an impressive product with a 240 Hz refresh mode, customizable RGB lighting effects, and support for the existing Xreal accessory ecosystem (namely the Xreal Eye camera).

The included ROG Control box lets you connect an HDMI or DisplayPort output from your graphics card to the glasses. It also provides quick access to the R1’s controls using the top-mounted joystick.

But the R1 really comes alive when used with a handheld gaming PC like Asus’ own ROG Ally, or a competing device like the MSI Claw 8 EX AI+. The R1 connects to these devices via a single cable and delivers a fully “mobile” gaming experience projected onto a virtual 171-inch display.

However, the primary sticking point with the R1, like many other high-end AR headsets, is the price tag. $849.99 is a tremendously high price, even with the ROG Control Box included. For example, the Xreal One Pro is $599, the Xreal One S is $449, while the RayNeo Air 4 Pro will set you back just $239. If you look past the 240 Hz mode (which can be hit-or-miss depending on the person), is the R1 really worth $250 more than the One Pro, or over $500 more than the Air 4 Pro? The objective answer is no on both counts.

OpenAI's first hardware device is an RGB macropod — 'Codex Micro' features 13 low-profile keys and a joystick for controlling AI coding agents

2026年7月16日 19:00

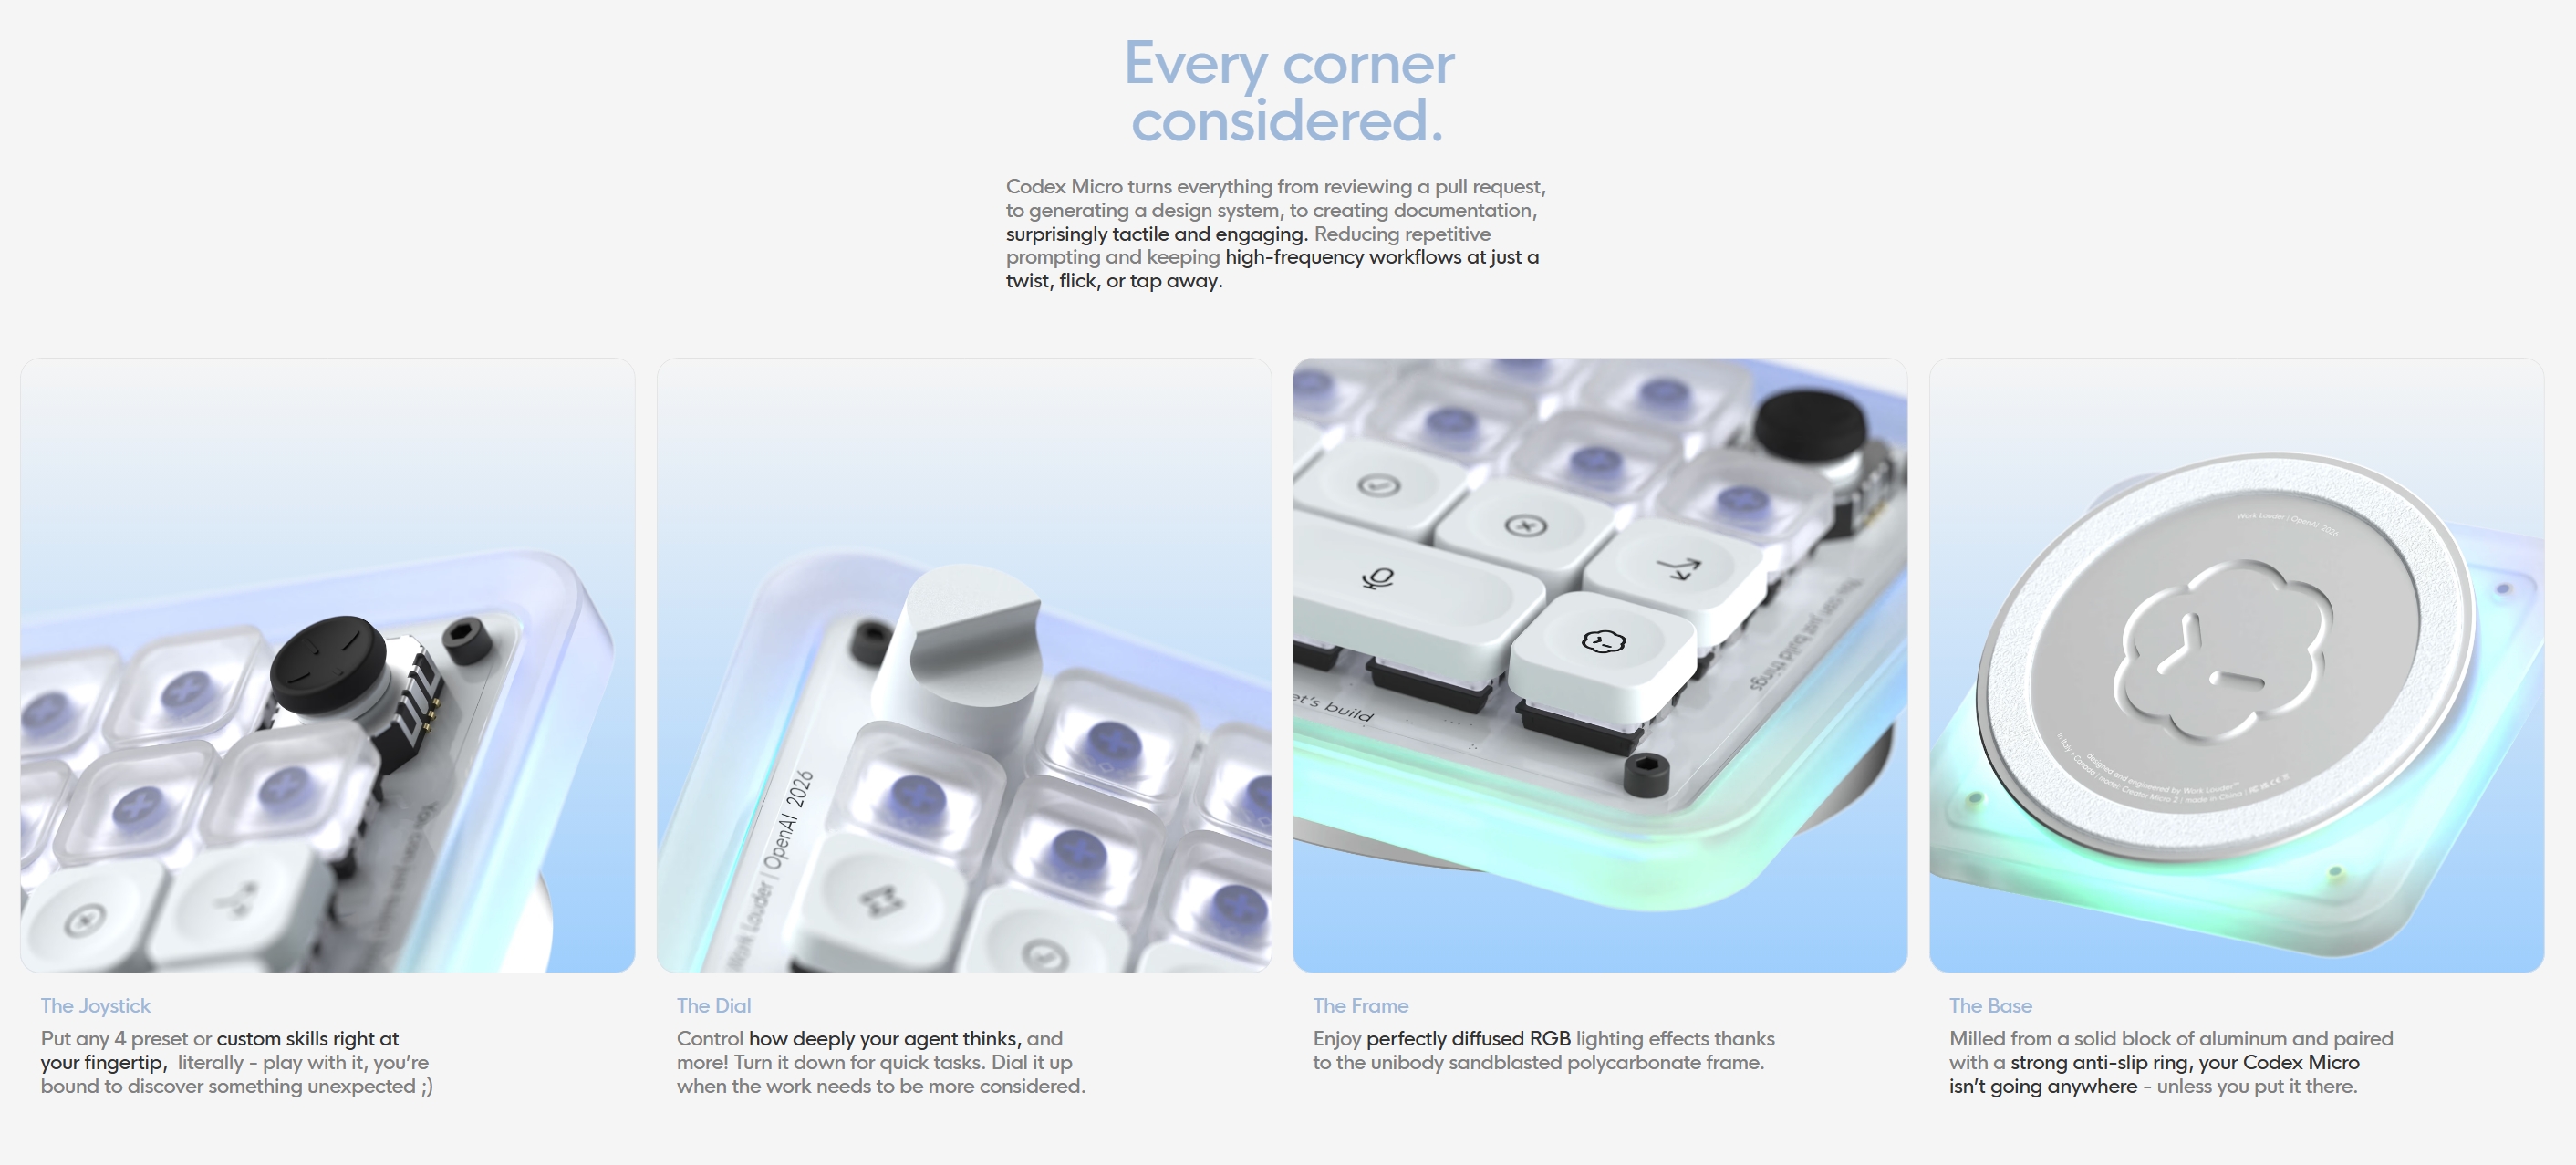
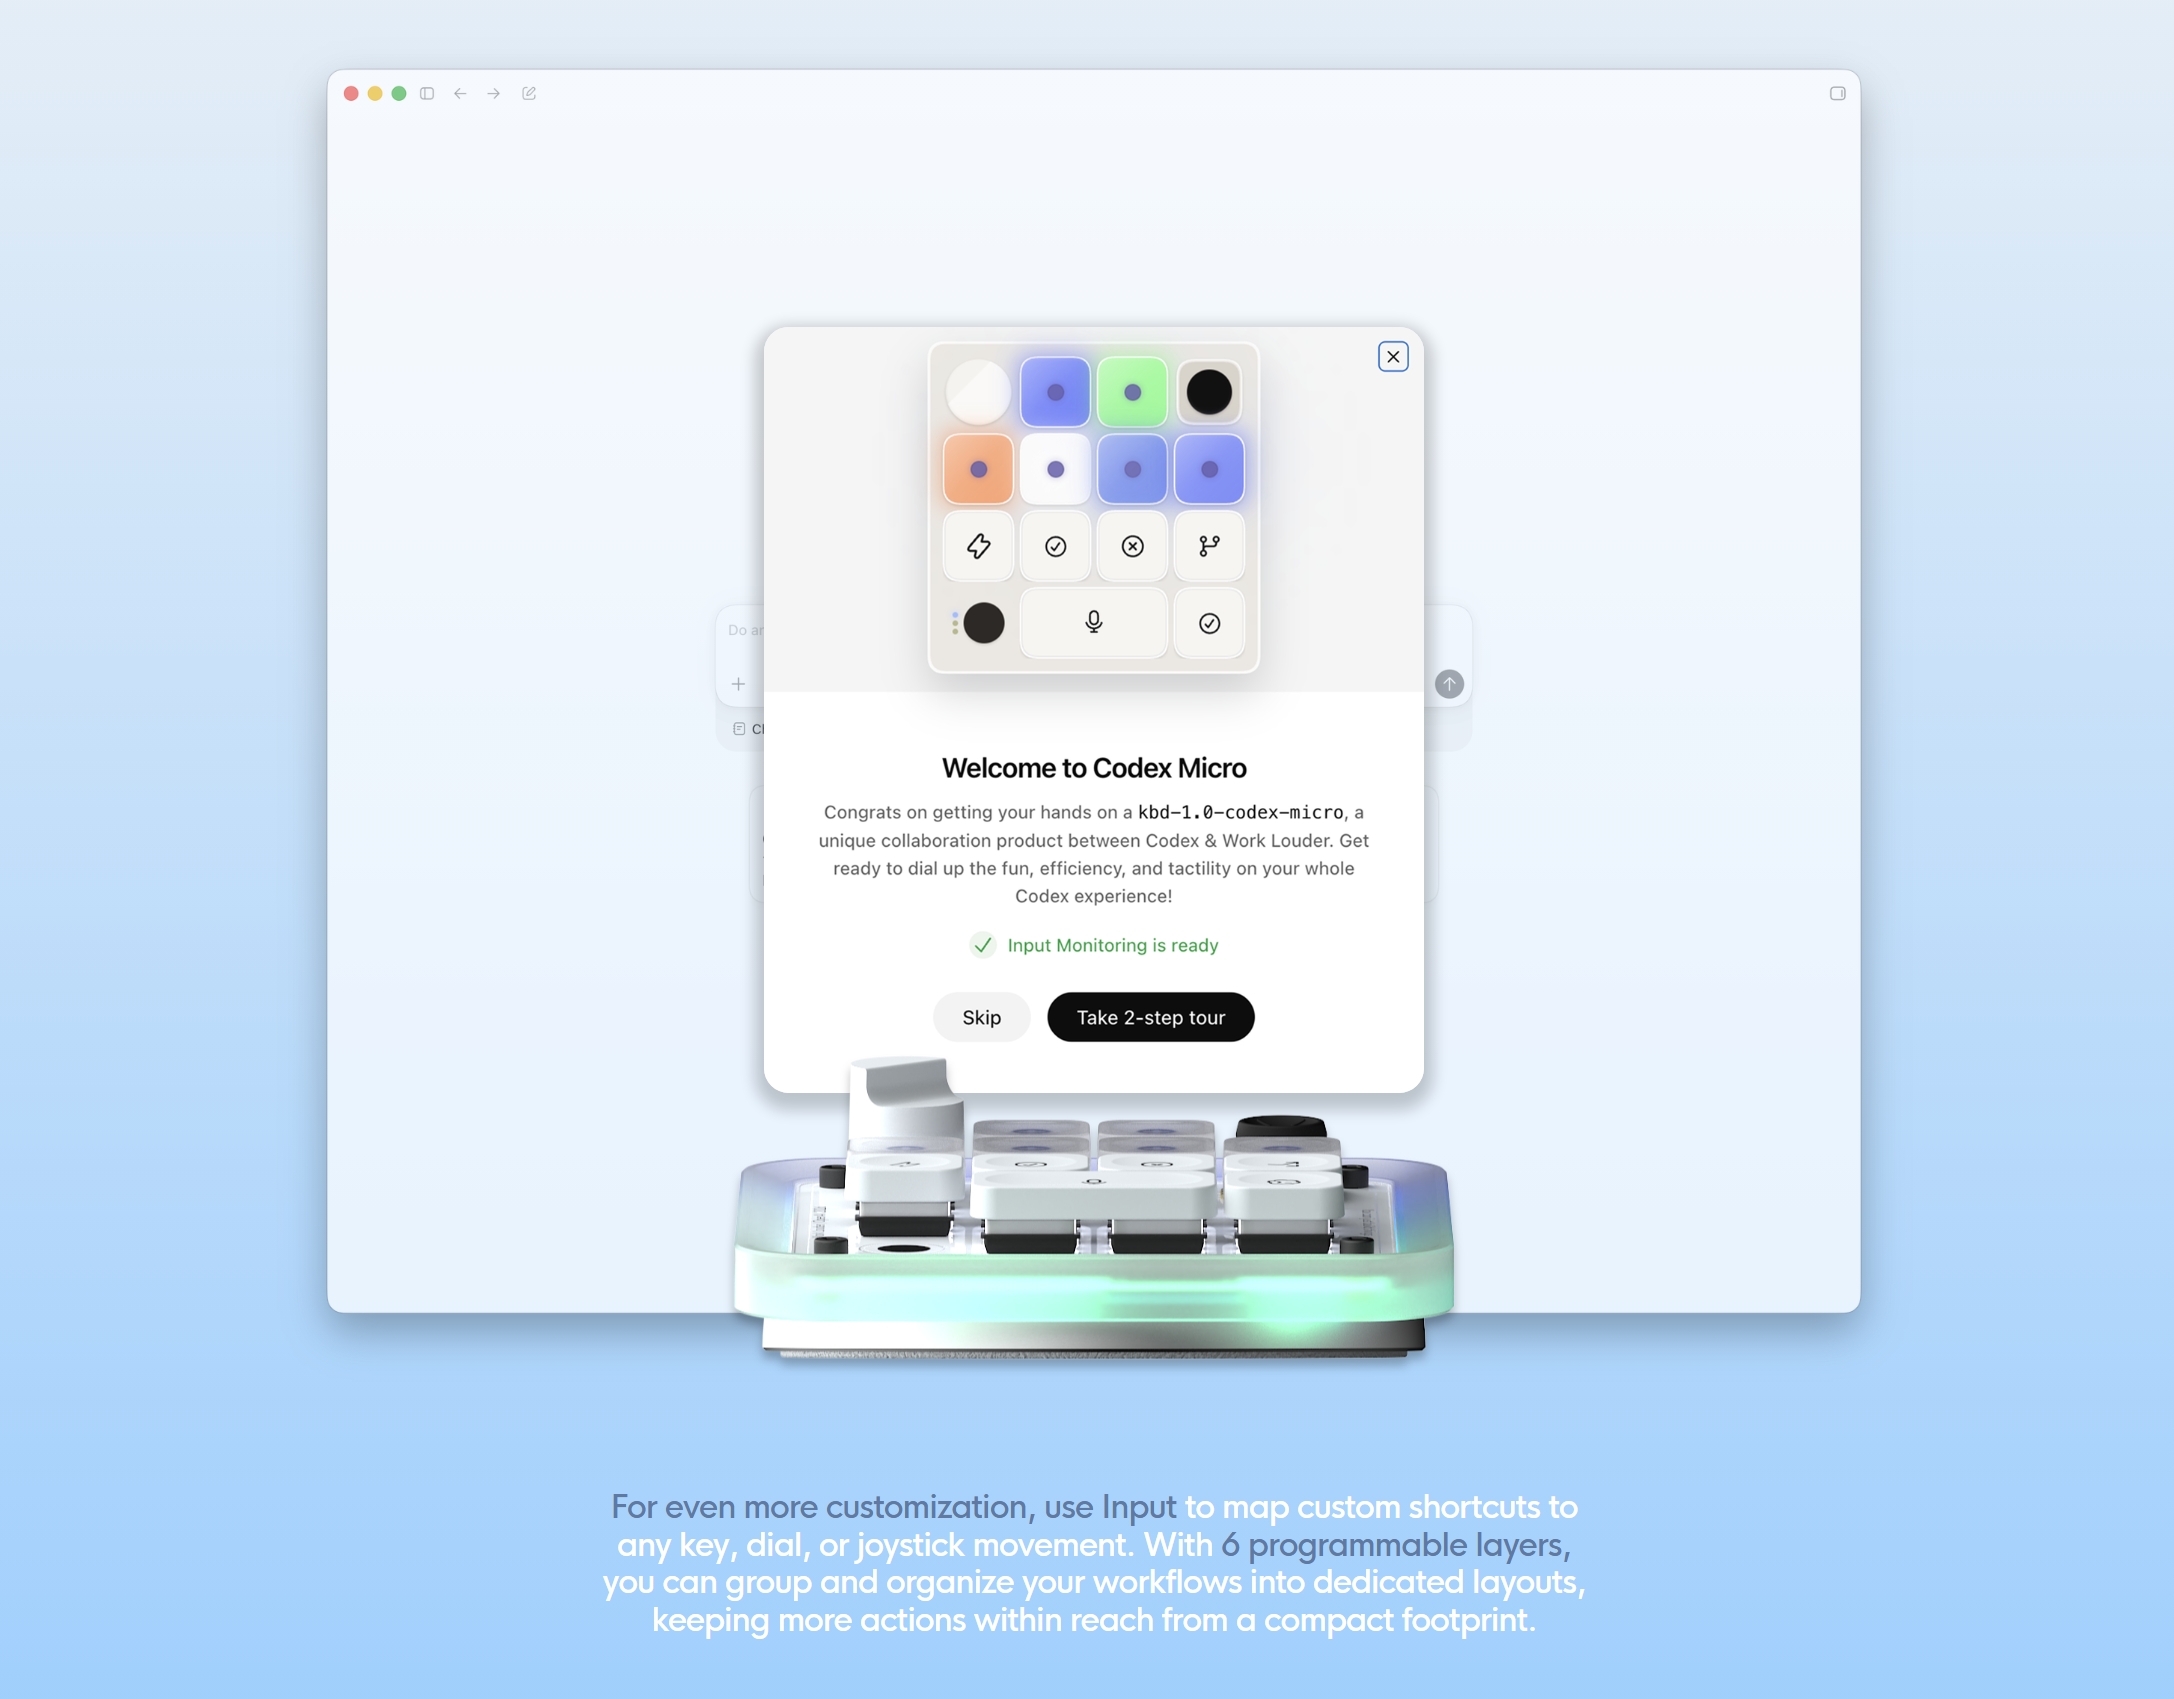
OpenAI has just entered the hardware market with its very first product — a glorified macropad called the "Codex Micro." As the name suggests, it's meant to be used with the company's agentic coding platform, Codex, offering tactile response for an otherwise software-only experience. It's made by luxury keyboard company Work Louder, built on its existing Creator Micro 2 platform, and will cost a cool $230.

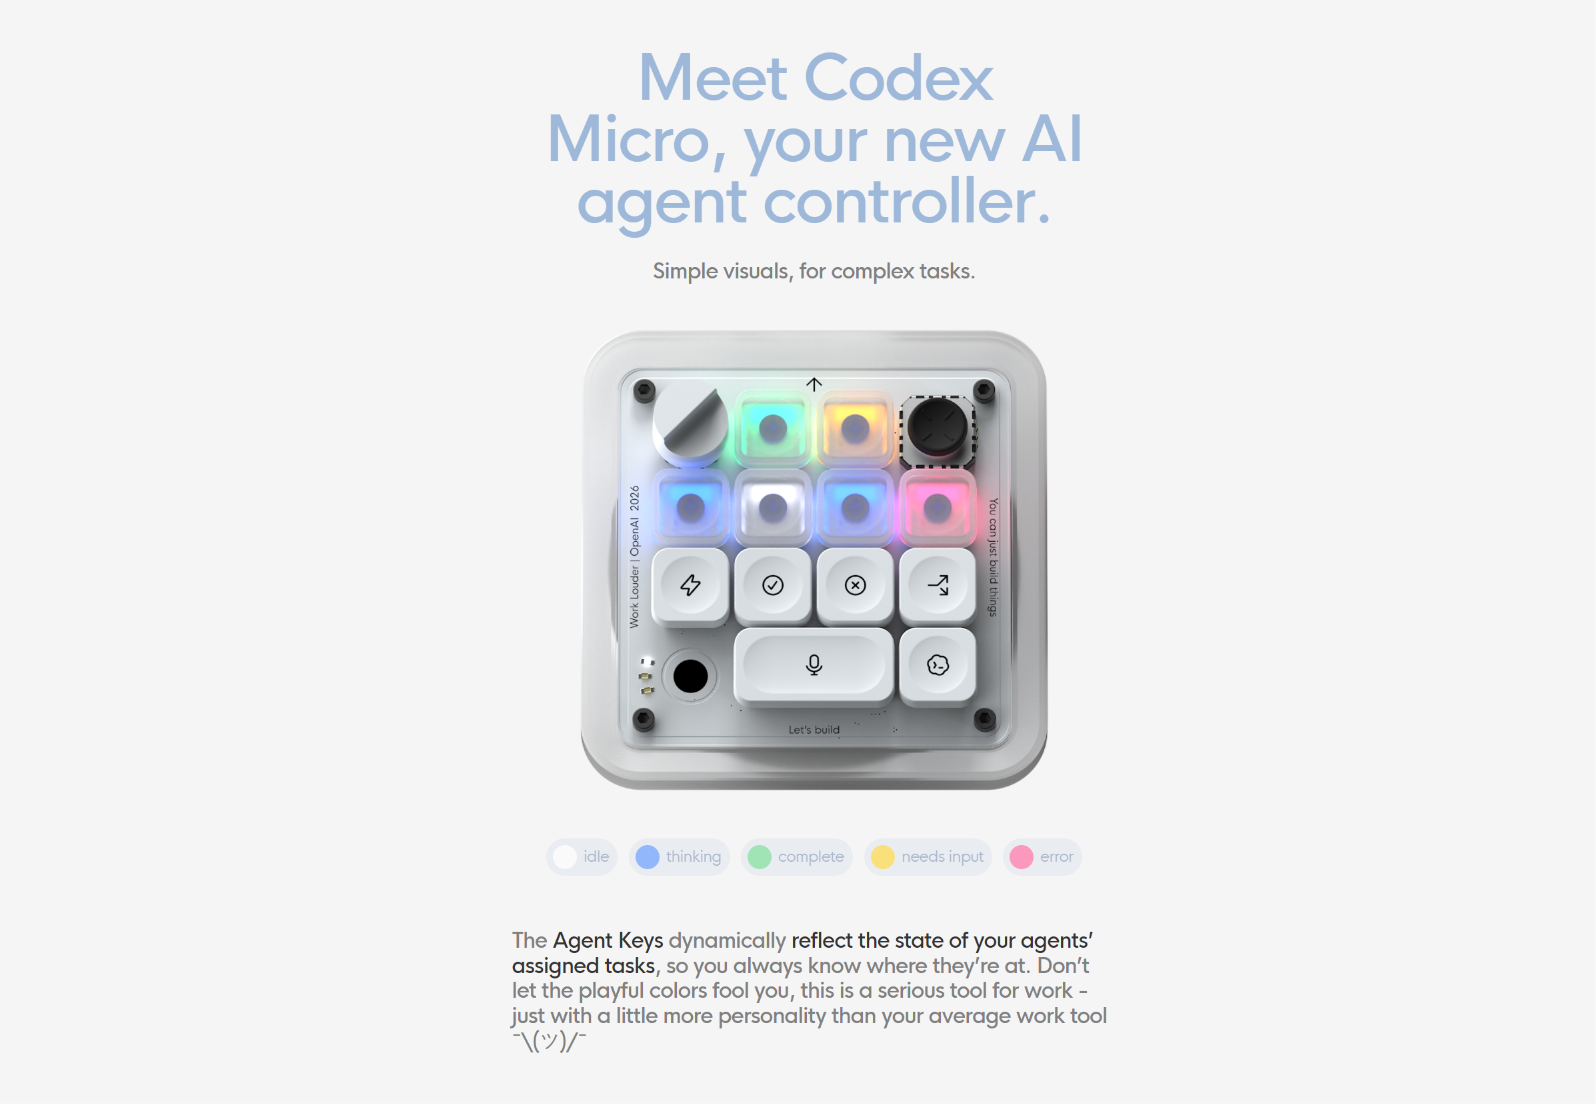
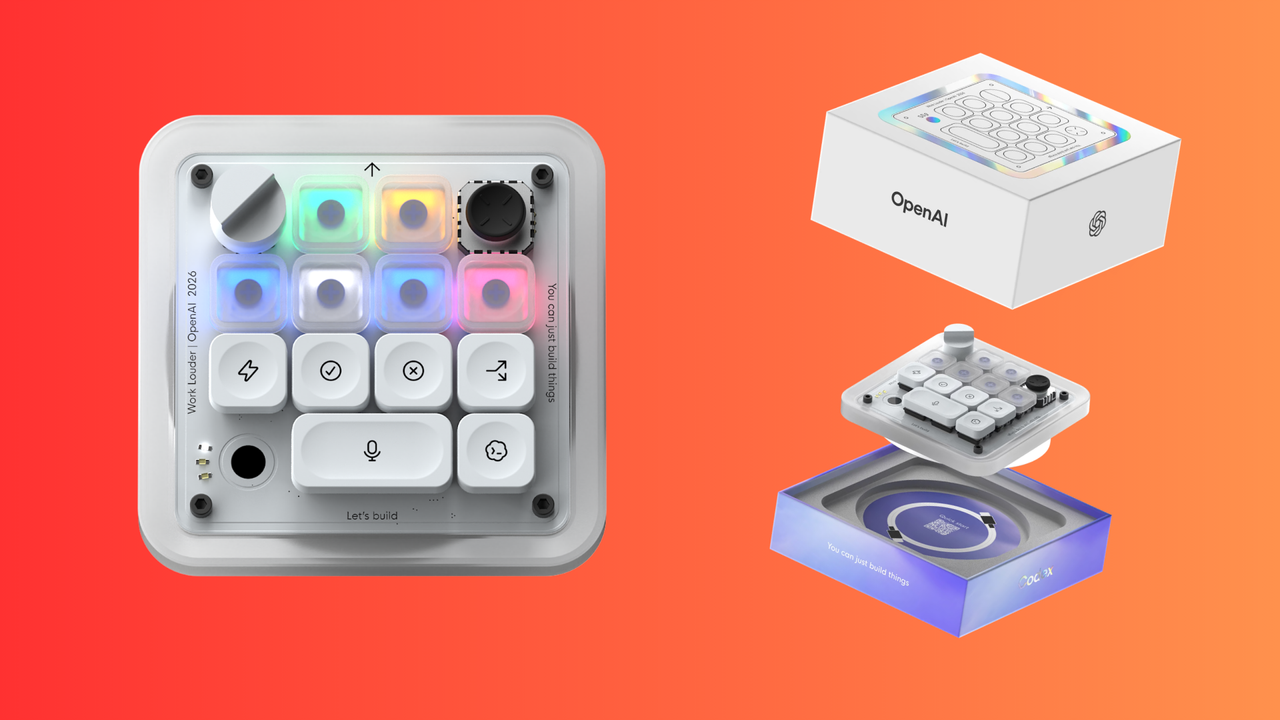
The Codex Micro, also dubbed kbd-1.0-codex-micro for some reason, comes in a frosted white color with a mix of translucent, legend-less keycaps and some opaque ones that serve as "command keys." There are thirteen mechanical keys, one rotary encoder, one joystick and a capacitive touch sensor running across the top of the device, The body is constructed out of CNC'd aluminum with some polycarbonate parts.

The see-through look of the Codex Micro is intentional because it relies on RGB (yes, you're reading this correctly) to convey responses. The six translucent keys up top have an integrated LED, and the entire perimeter of the device also lights up. According to Work Louder, the keys are supposed to provide a live view of your Codex threads, illuminating to signal different agents working.

OpenAI x WorkLouder Codex Micro

(Image credit: Future)

The LEDs can show different colors based on where the agent is in a loop at any given time — whether it's thinking, stuck with an error, or perhaps requires feedback. White is used to denote idle behavior; green for an unread chat; blue for thinking; peach for a question; and red for an error. The sides of the Codex Micro also glow in the same color to make sure it catches your attention without you having to check manually.

Then there's the joystick in the top-right corner that you can click to launch common Codex workflows like reviewing a PR, debugging the aforementioned error, or refactoring code. The joystick opens up a radial menu that can be customized to do a bunch of other things, sort of like a Fortnite emote wheel (sorry).

OpenAI x WorkLouder Codex Micro

(Image credit: Future)

Finally, there's a rotary encoder — a knob, if you will — that can be twisted to adjust the reasoning level in real-time or, you know, just adjust the volume or something. We've already mentioned the command keys, which are the white keycaps you see with Codex icons. You'll get a full set of those, including 32 unique keys, so you can swap each one out to suit your workflow.

As we mentioned earlier, the Codex Micro is based on the Creator Micro 2 platform, which Work Louder already built. In fact, this is just a reskin of that product as far as we can tell, and the price reflects that. You can buy a Creator Micro 2 for $174 and pay around $50 more for some icon keycaps, so the $230 pricing for the OpenAI-branded Codex Micro 2 lines up almost perfectly.

It's safe to say that unless you're a diehard vibecoder, the Codex Micro is probably overpriced for what's essentially just a really nice macropad. The deep integration with Codex is impressive and certainly useful for some people, but much of it is just a few minutes of (third-party) customization away on other keypads, too. Anyhow, the Codex Micro is available on Work Louder's website right now, and you can choose to buy it with either clicky or silent switches.

OpenAI x WorkLouder Codex Micro

(Image credit: Future)

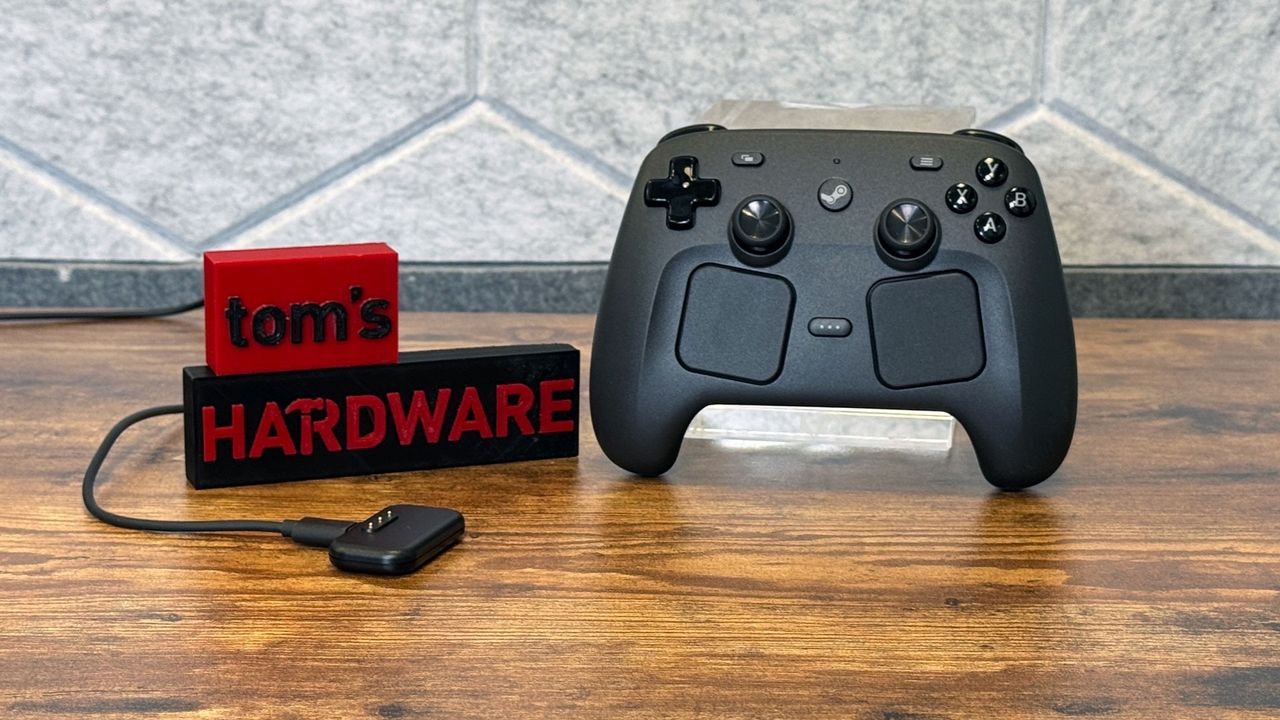
Enthusiast reverse-engineers Steam Controller 2 puck, creates DIY 'OpenPuck' that works without Steam Input — custom firmware can emulate Nintendo, PlayStation, and Xbox controllers

2026年7月14日 18:30

Valve's new Steam Controller lacks native XInput support, but you can still emulate it as long as Steam is running in the background. An enthusiast named Safijari has just engineered a more seamless solution, creating his own DIY "OpenPuck" that lets the Steam Controller emulate other gamepads on the fly. It can emulate Xbox, PlayStation, and even Nintendo layouts, and do so away from your PC.

OpenPuck serves as open-source firmware for a microcontroller, allowing you to easily flash and convert that dev board into a DIY Steam Controller puck. The firmware intercepts raw data from the Steam Controller and translates it on-device, enabling fully-fledged, real-time emulation without the need for Steam Input.

There are other options out there, but the creator used a Pro Micro NRF52480 from Amazon that has the appropriate Bluetooth and 2.4 GHz radios. Once primed in DFU mode, all you need to do is plug the board into your computer via USB-C, drag and drop the Arduino sketch onto it, and the microcontroller turns into an OpenPuck right away. You can 3D print a case to make the assembly look more polished, too.

Valve Steam Controller

The original Steam Controller 2 puck (Image credit: Tom's Hardware)

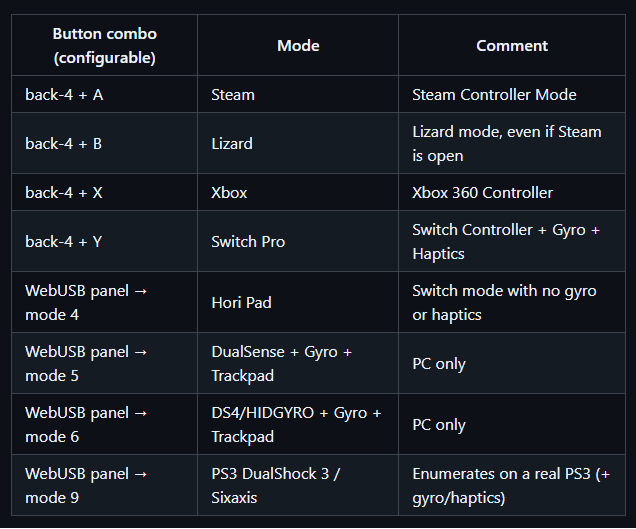
The sketch is available on the project's GitHub page. Once you've flashed your controller, head to the configurator to manage the puck. It's a simple website that uses the WebUSB API to manage the controller, allowing you to switch between the different modes, which include Switch Pro, Xbox, DualSense (PS5), and DualShock 4 (PS4). The project description claims the puck only has a 1ms latency.

The Switch mode works natively on a Switch console with gyro and haptics support, but you can also emulate a Hori Pad that disables those extra features. The PlayStation modes only work on PC, but there's a special DualShock 3 mode that can work natively on a PlayStation 3 console as well, with gyro and haptics (Sixaxis). Of course, the default Steam Controller mode is also there.

You can switch between some of these different controller modes by pressing all four back buttons together and hitting either A, B, X, or Y, but the PlayStation modes require you to use the web configurator. Once everything is set up, however, the Steam Controller runs just like an official Switch, Xbox, or PlayStation controller without Steam even being open in the background.

The different emulation modes of the OpenPuck

(Image credit: Future)

There's even a bonus "ReversePuck" sub-project that allows a Steam Deck to act as an external controller, supporting all of the Steam Controller's features (except grip). If you flash a second NRF52840 Pro Micro and plug it into a Steam Deck, you can stream the Steam Deck's built-in controls across the room over 2.4GHz to your OpenPuck-equipped PC, giving you access to essentially another Steam Controller.

Razer Soma Chroma Gaming Chair Review: Light on adjustability, but heavy on RGBs

2026年7月11日 20:05

I've reviewed several Razer gaming chairs over the years and have come to appreciate their style, adjustability, and overall comfort. Now, Razer is introducing a new line of gaming chairs that leans heavily into styling.

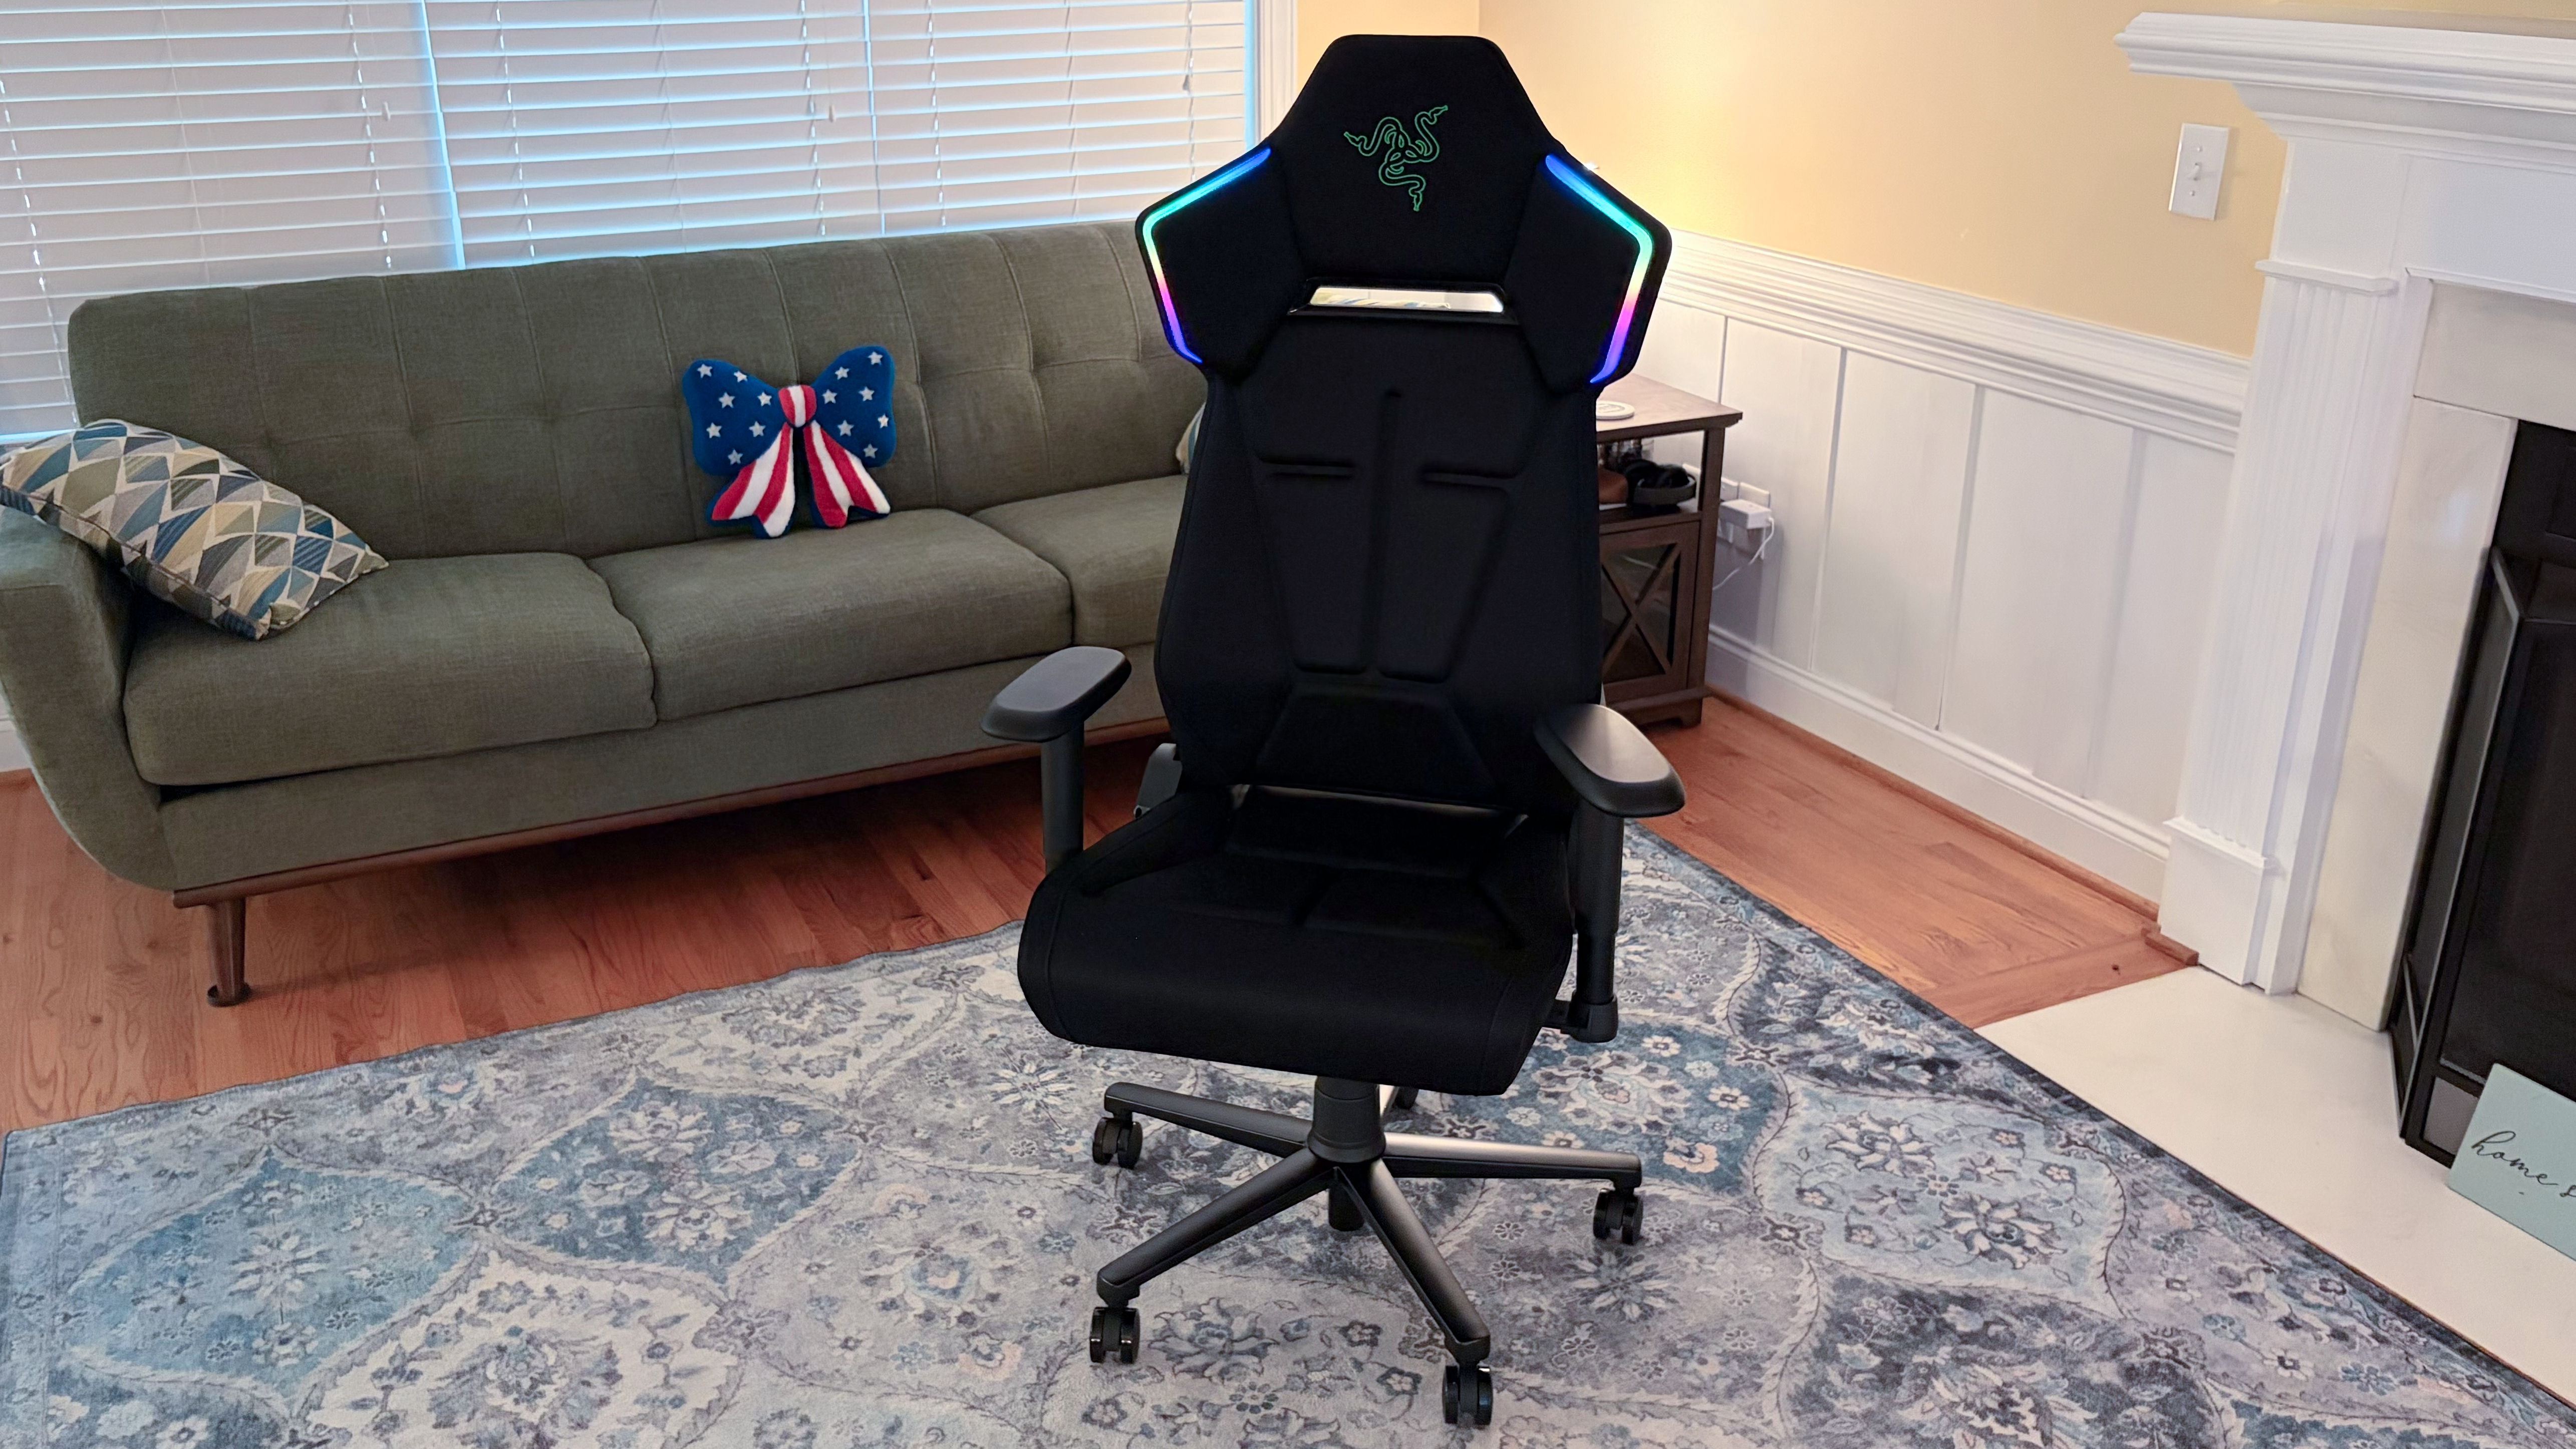
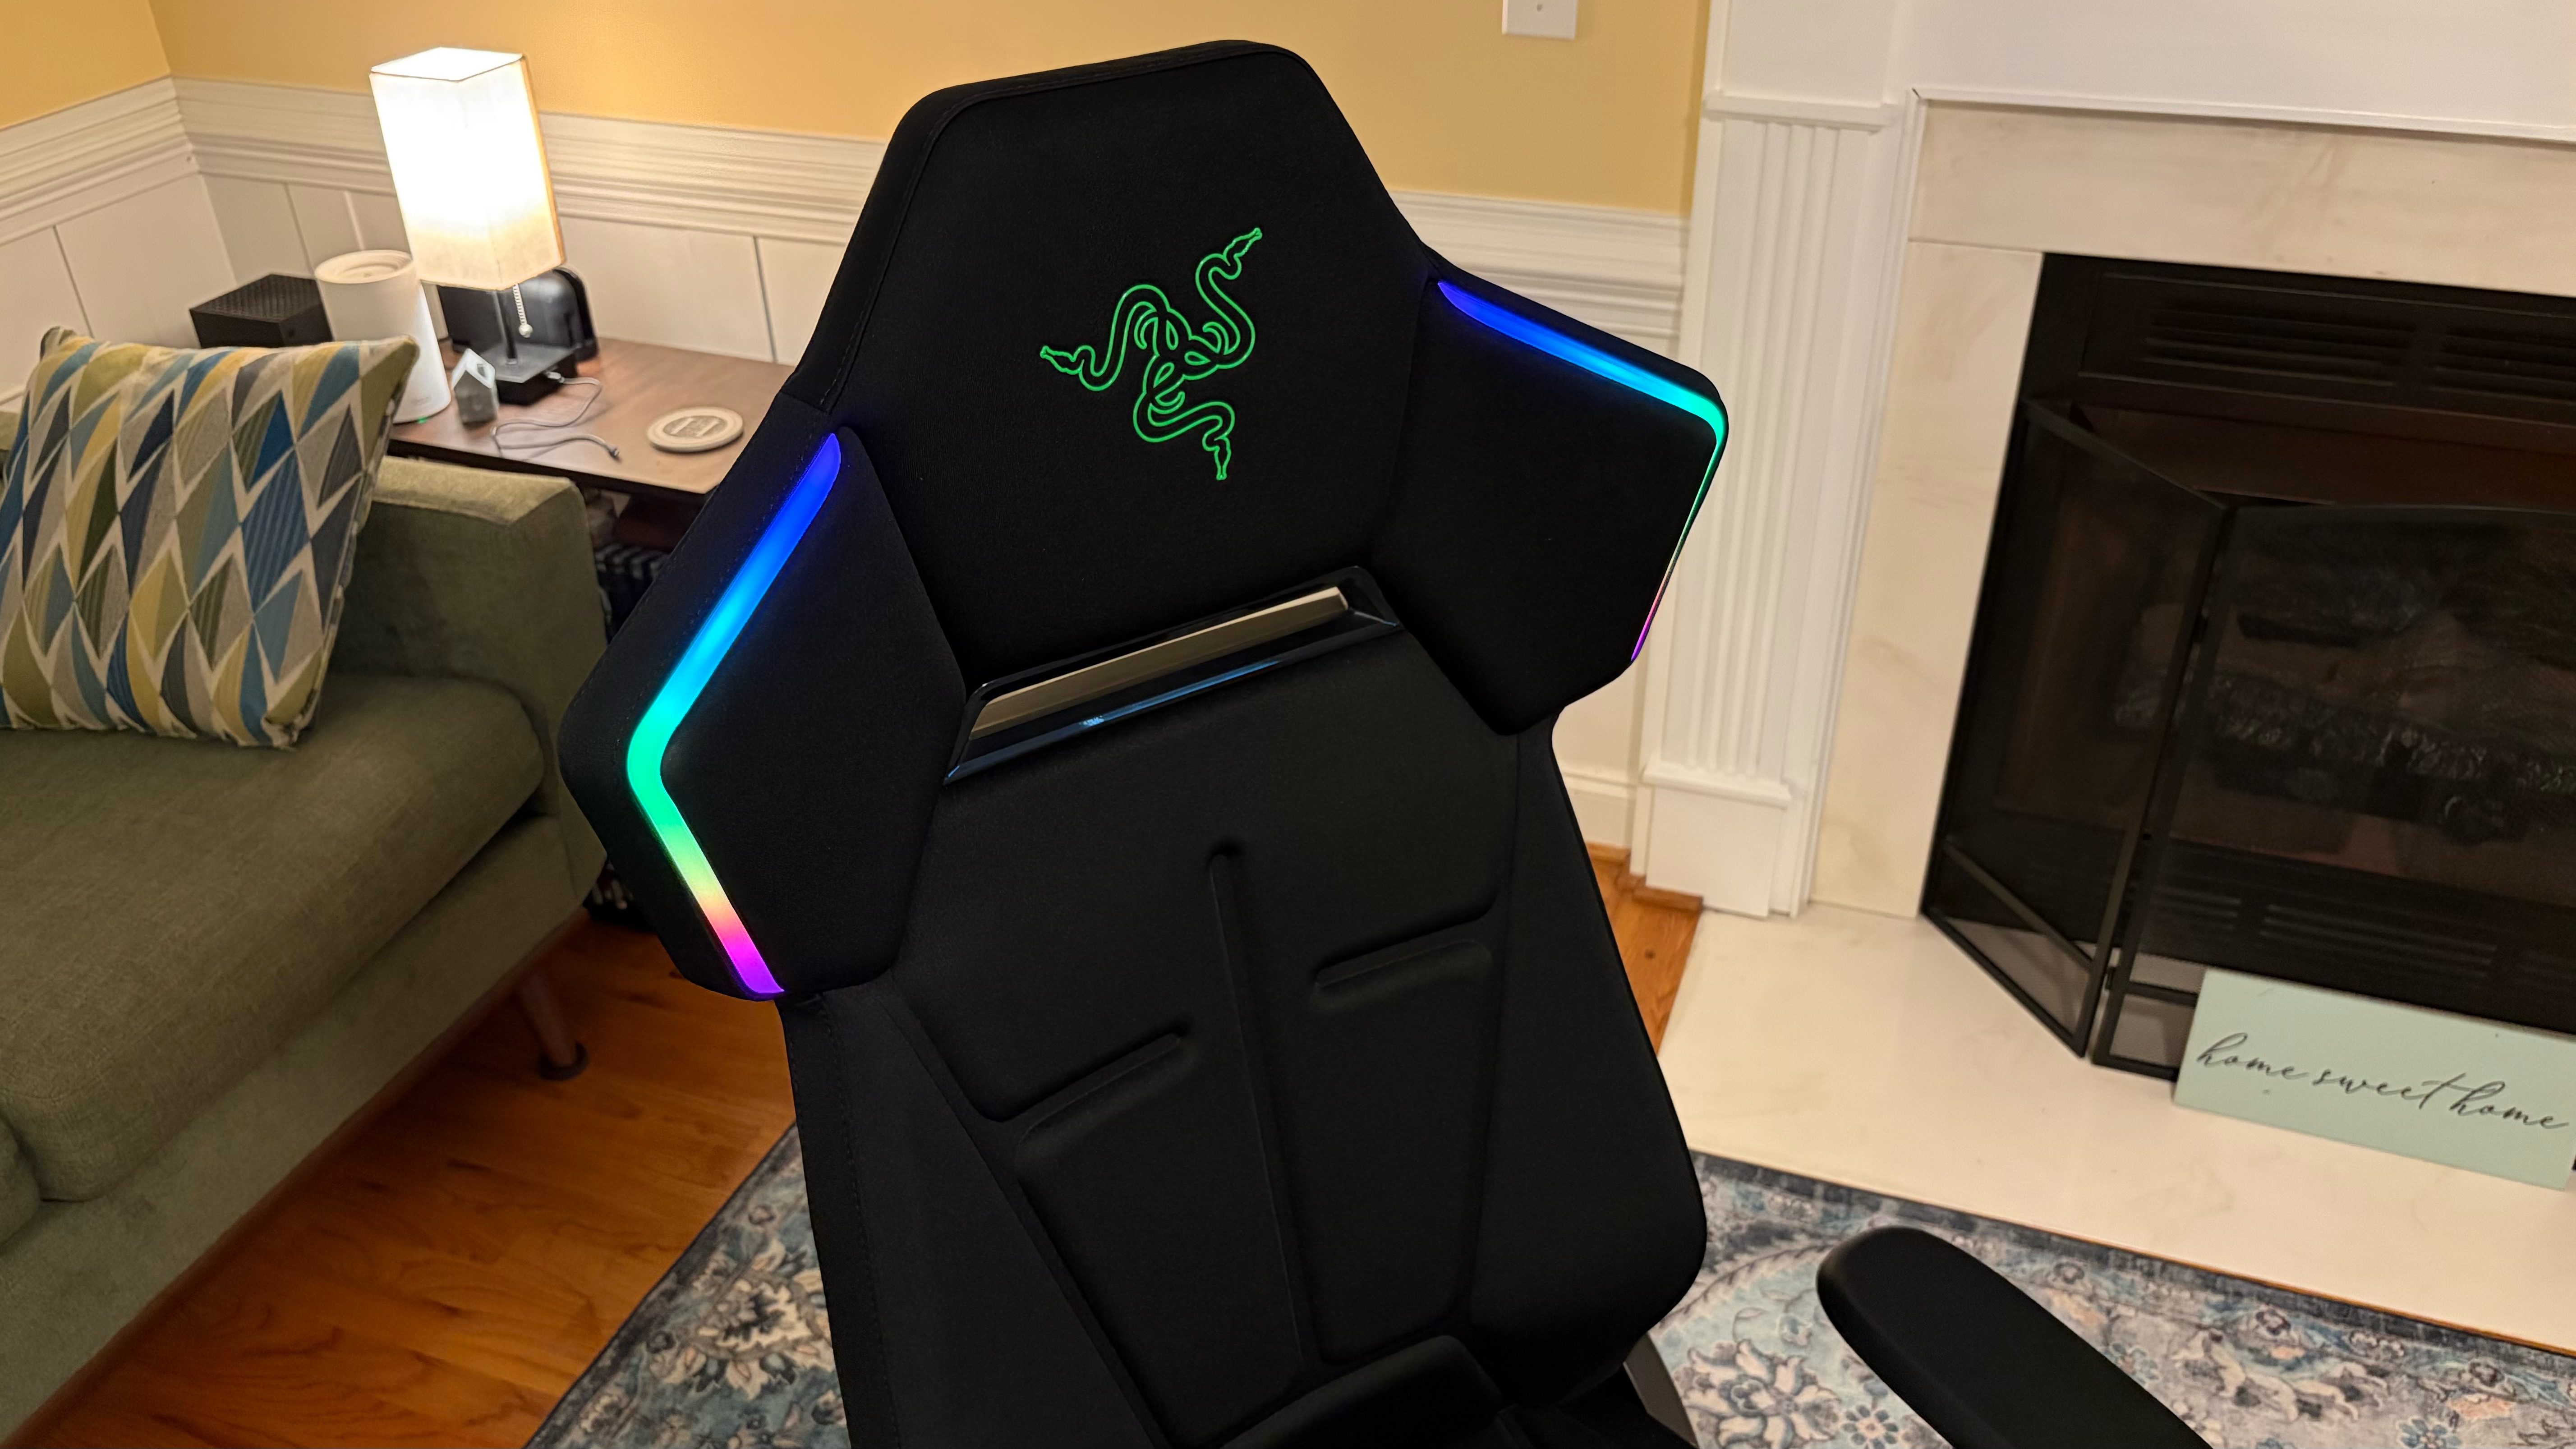
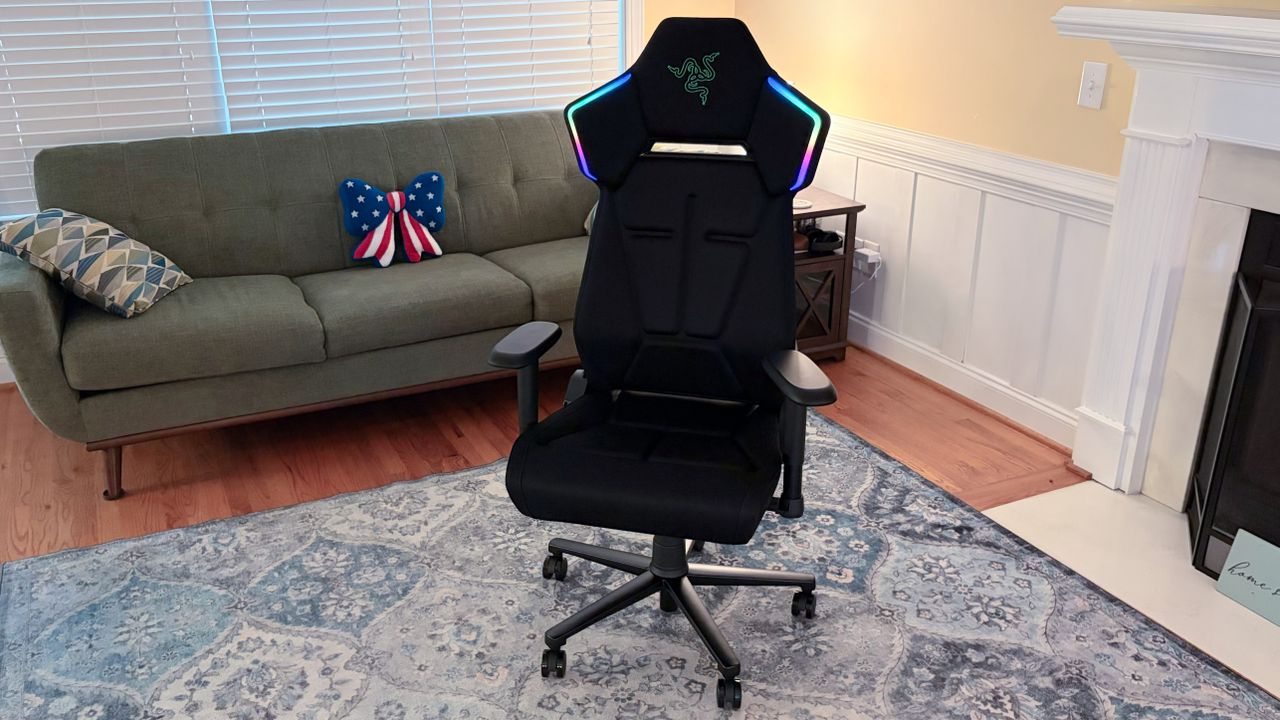
Meet the new Soma Chroma, a mid-range gaming chair with a racing-style design and integrated RGB lighting customizable via Razer Chroma software. The chair can be powered via a USB-C cable or a portable power bank, and it connects to your PC via an integrated Bluetooth connection or a 2.4 GHz wireless USB dongle included in the box.

But is beauty more than skin deep? Let’s take a deep look at the Soma Chroma to see if there’s more to see other than its flashy design to make it a contender among the best gaming chairs.

Razer Soma Chroma Specifications

Upholstery

Black Fabric

Total Height (with base)

49.2 to 53.1 inches / 125 to 135 cm

Floor to Seat Height

16.1 to 20.1 inches / 41 to 51 cm

Armrest Adjustments

2D

Recline

Backrest adjustability 90 - 155 degrees

Backrest Length (not including headrest)

33.1 inches / 84 cm

Backrest Width (Shoulder Level)

23 inches / 58.5 cm

Seating Area Width (total)

21.5 inches / 54.5 cm

Seating Area Depth

18.5 inches / 47 cm

Armrest Width

4.1 inches / 10.4 cm

Armrest Depth

10.6 inches / 26.8 cm

Armrest Height (from floor)

23.2 to 31.1 inches / 58.9to 78.9 cm

Castors

2.4 inches / 5 cm PU

Max Recommended Weight

331 lbs / 150 kg

Weight

54 lbs / 24.5 kg

Warranty

3 years

MSRP / Price at Time of Review

$499

Release Date

Available Now

Assembling the Razer Soma Chroma

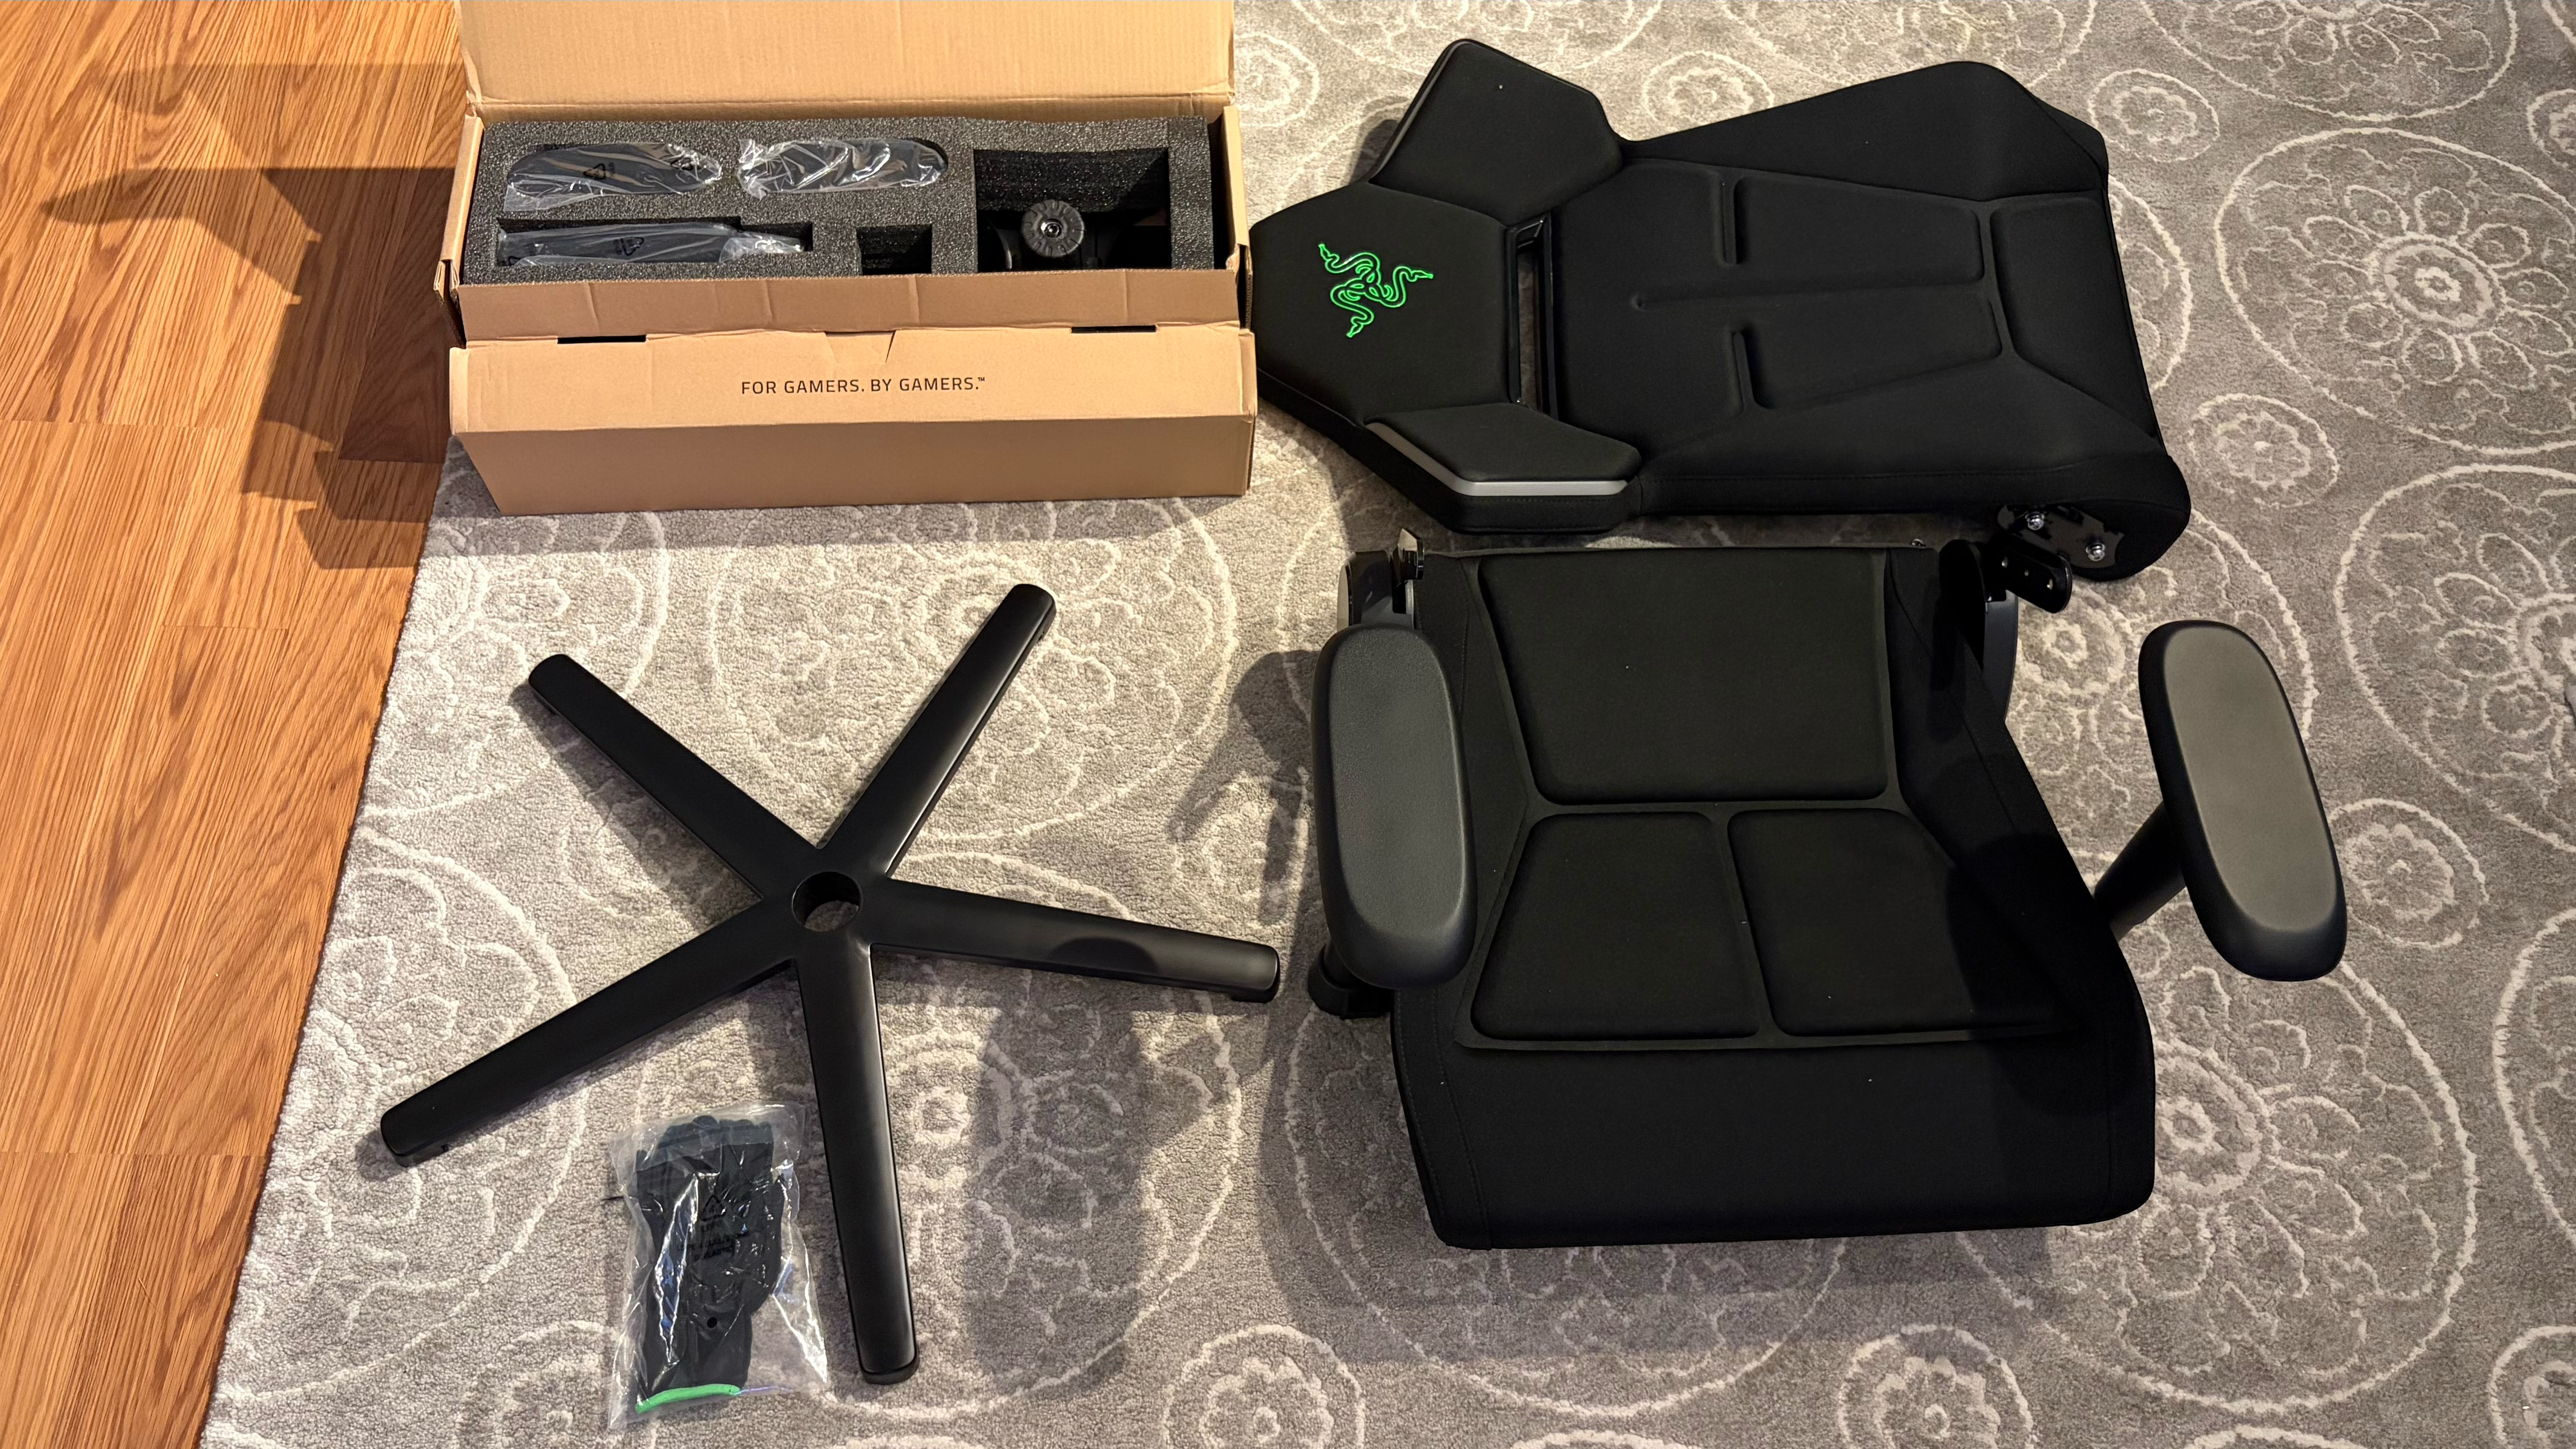
This is the fourth Razer gaming chair that I’ve reviewed, so I could pretty much put one together blindfolded. From the packaging to the tools/accessories included, not much has changed. Inside the box, you’ll find:

  • Fabric gloves for assembly (glued to the inner flap)
  • Backrest and seat base (left and right arms pre-attached)
  • Metal, 5-arm base
  • Casters 5x
  • Gas lift, tilt mechanism
  • Allen wrench, screws, and plastic covers for left/right side arms
  • 2.4 GHz USB dongle (attached to assembly guide)

The chair arrived in a massive box, and the actual weight listed on the shipping label as 70 pounds. Upon opening the box, I was greeted by a familiar sight: a pair of black-and-green work gloves for assembling the chair. It’s a nice touch, but I always toss the gloves aside because I prefer to work with my bare hands for a relatively simple task like this.

Razer Soma Chroma
Tom's Hardware
Razer Soma Chroma
Tom's Hardware
Razer Soma Chroma
Tom's Hardware
Razer Soma Chroma
Tom's Hardware
Razer Soma Chroma
Tom's Hardware

A large green cardstock assembly guide sits atop the components, with a tiny box containing the 2.4 GHz wireless USB dongle attached to it.

The seat base, seatback, and 5-arm base were all wrapped in clear plastic bags to protect the metal and fabric on the components during shipping. The first step was to insert the castors into the 5-arm base, and then to insert the gas lift cylinder into the base.

The next step was to remove the four screws that are preinstalled from the factory from the bottom of the seat base with the included Allen wrench tool. Once removed, I attached the tilt mechanism, reinserted the same four screws, and placed it on the 5-arm base. The seatback has two screws on each side that must be removed before you attach it to the seat base.

Once the seatback was attached, I reinserted the four screws and slipped on the plastic cover to hide the screws and attachment mechanism. I'll note that on Razer Iskur chairs, the plastic cover is secured with a single screw on either side, and the screw is covered with a tiny plastic plug. The cover on the Soma Chroma simply slides and locks into place.

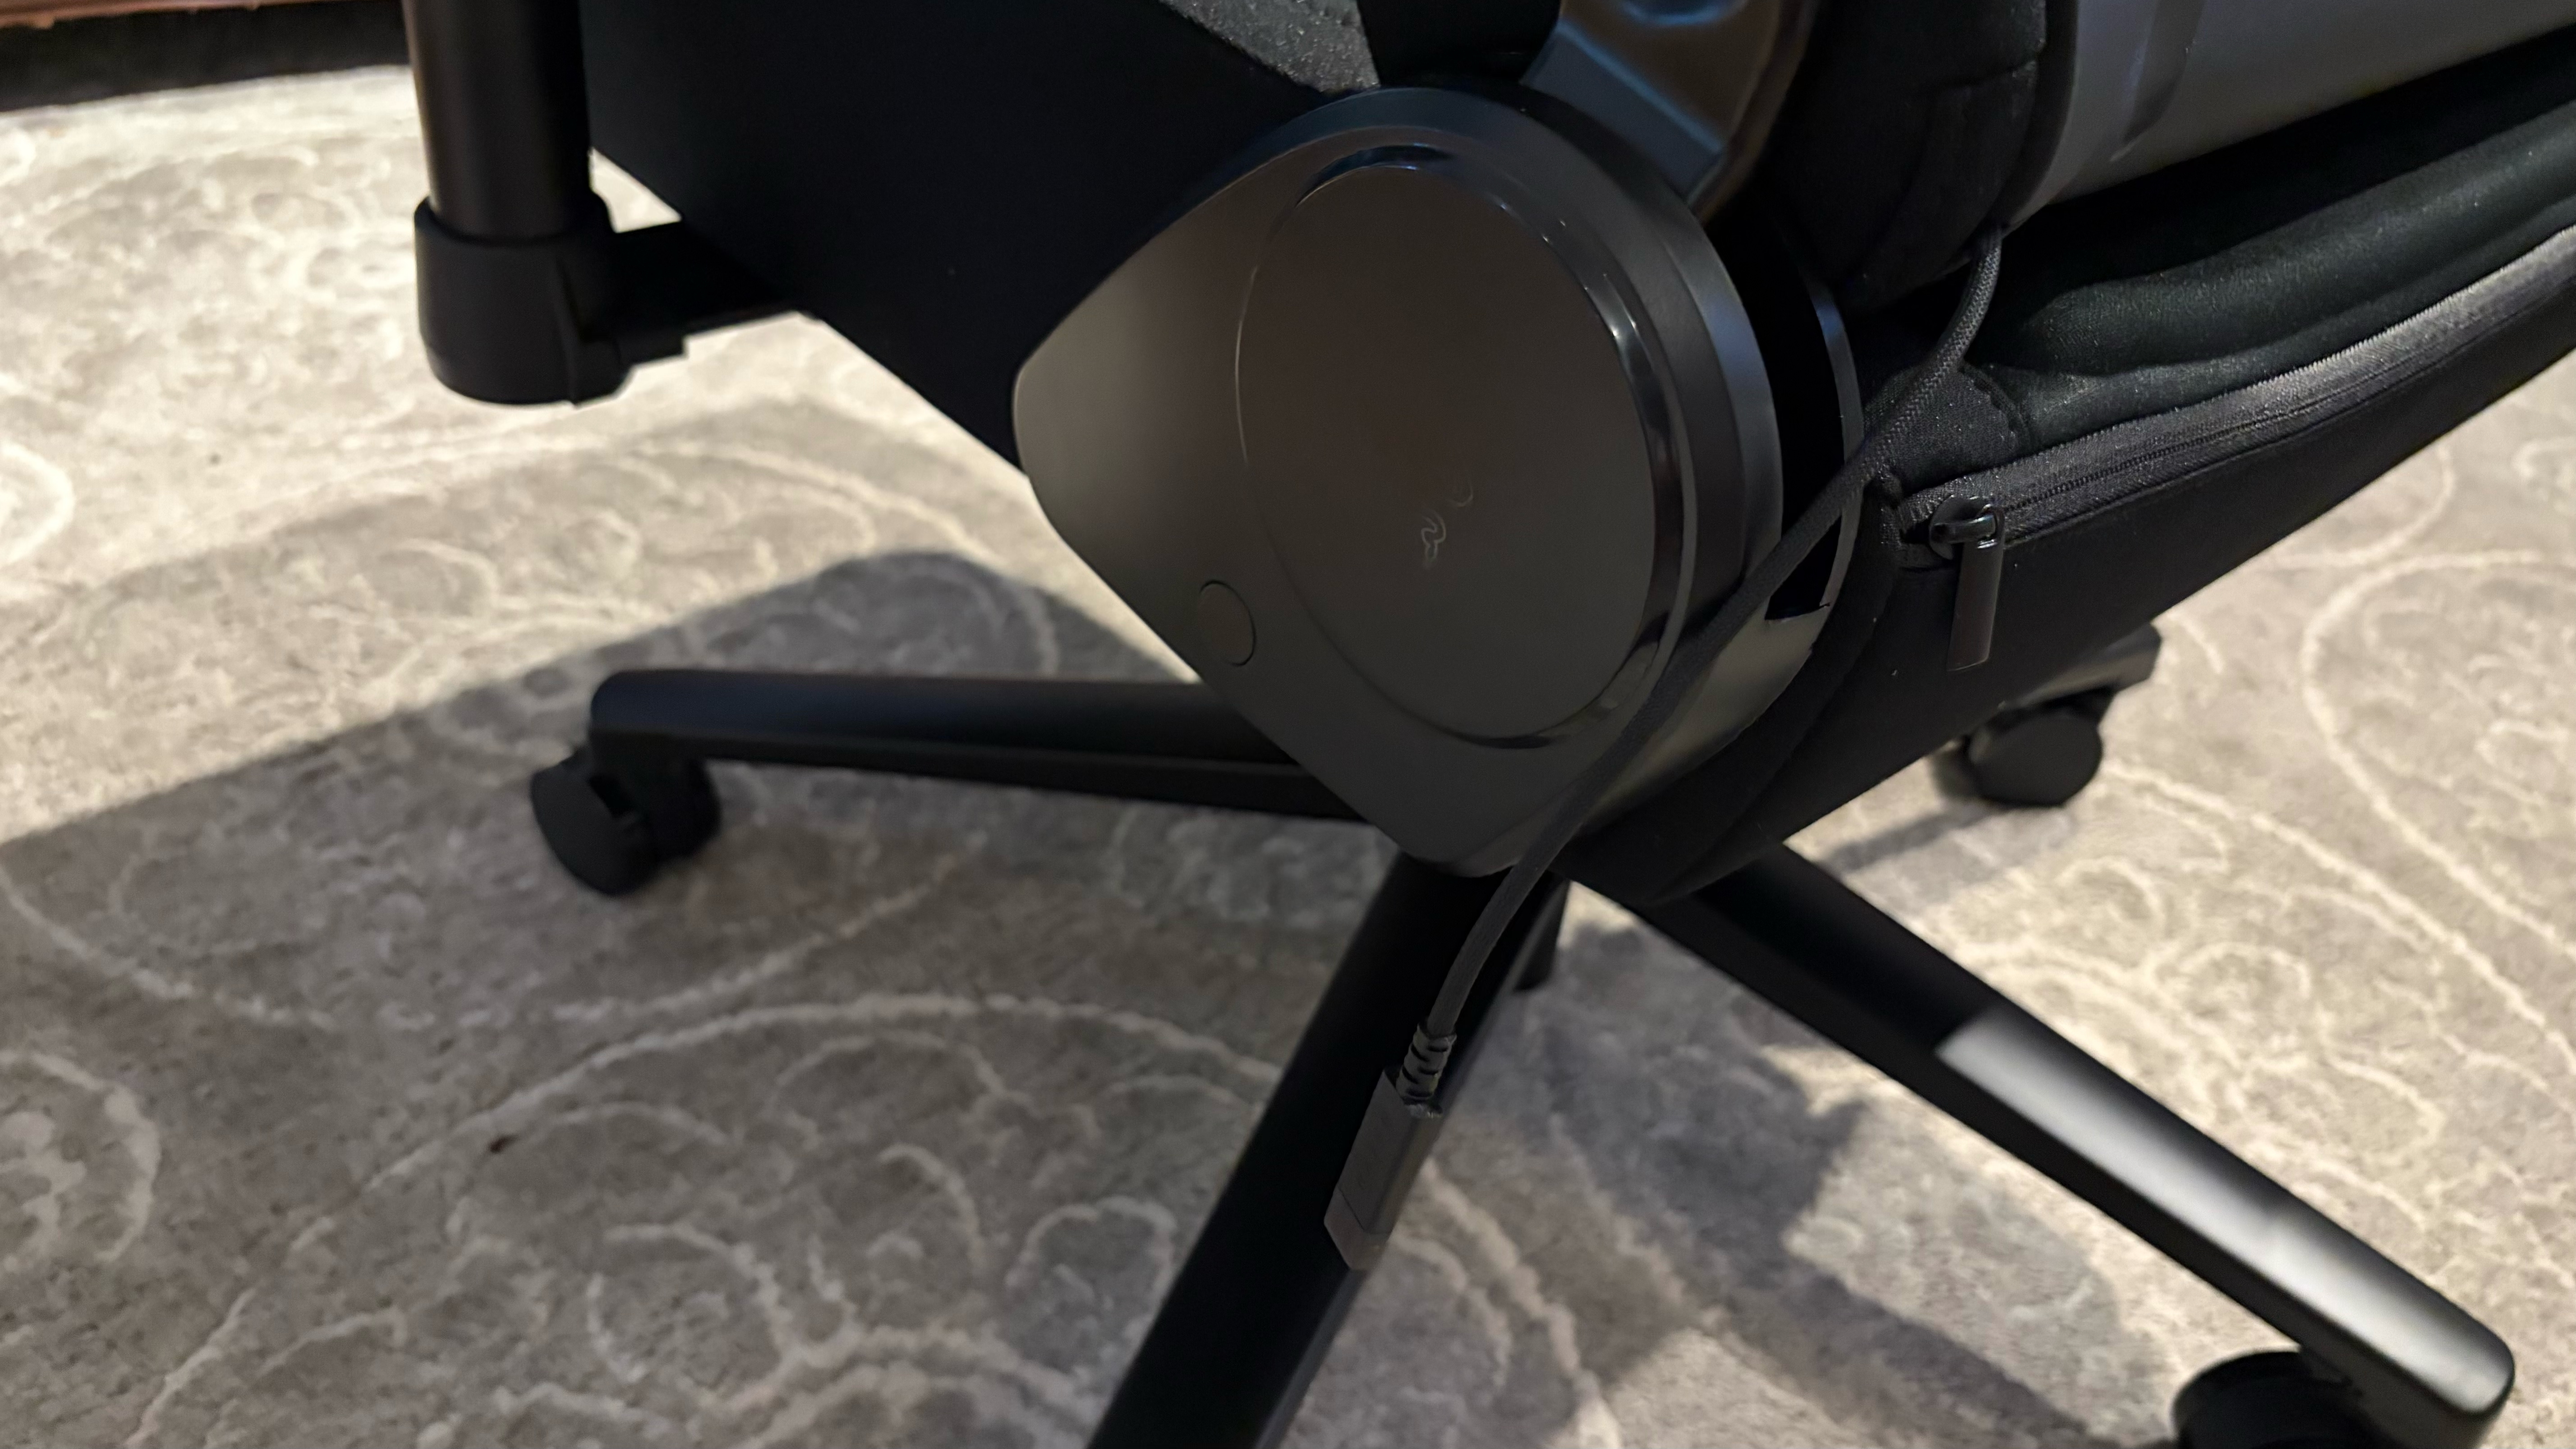
Once the chair is fully assembled, you’re not quite done yet. You still need to get power to the chair for the RGB lighting to work. The chair includes a relatively short USB-C cord that hangs out the back. Razer also supplied me with a 10-foot USB-C-to-USB-C extension cable, which I used to connect to my desktop PC. However, this setup is rather cumbersome and requires continually fighting the cable as you move around your workspace.

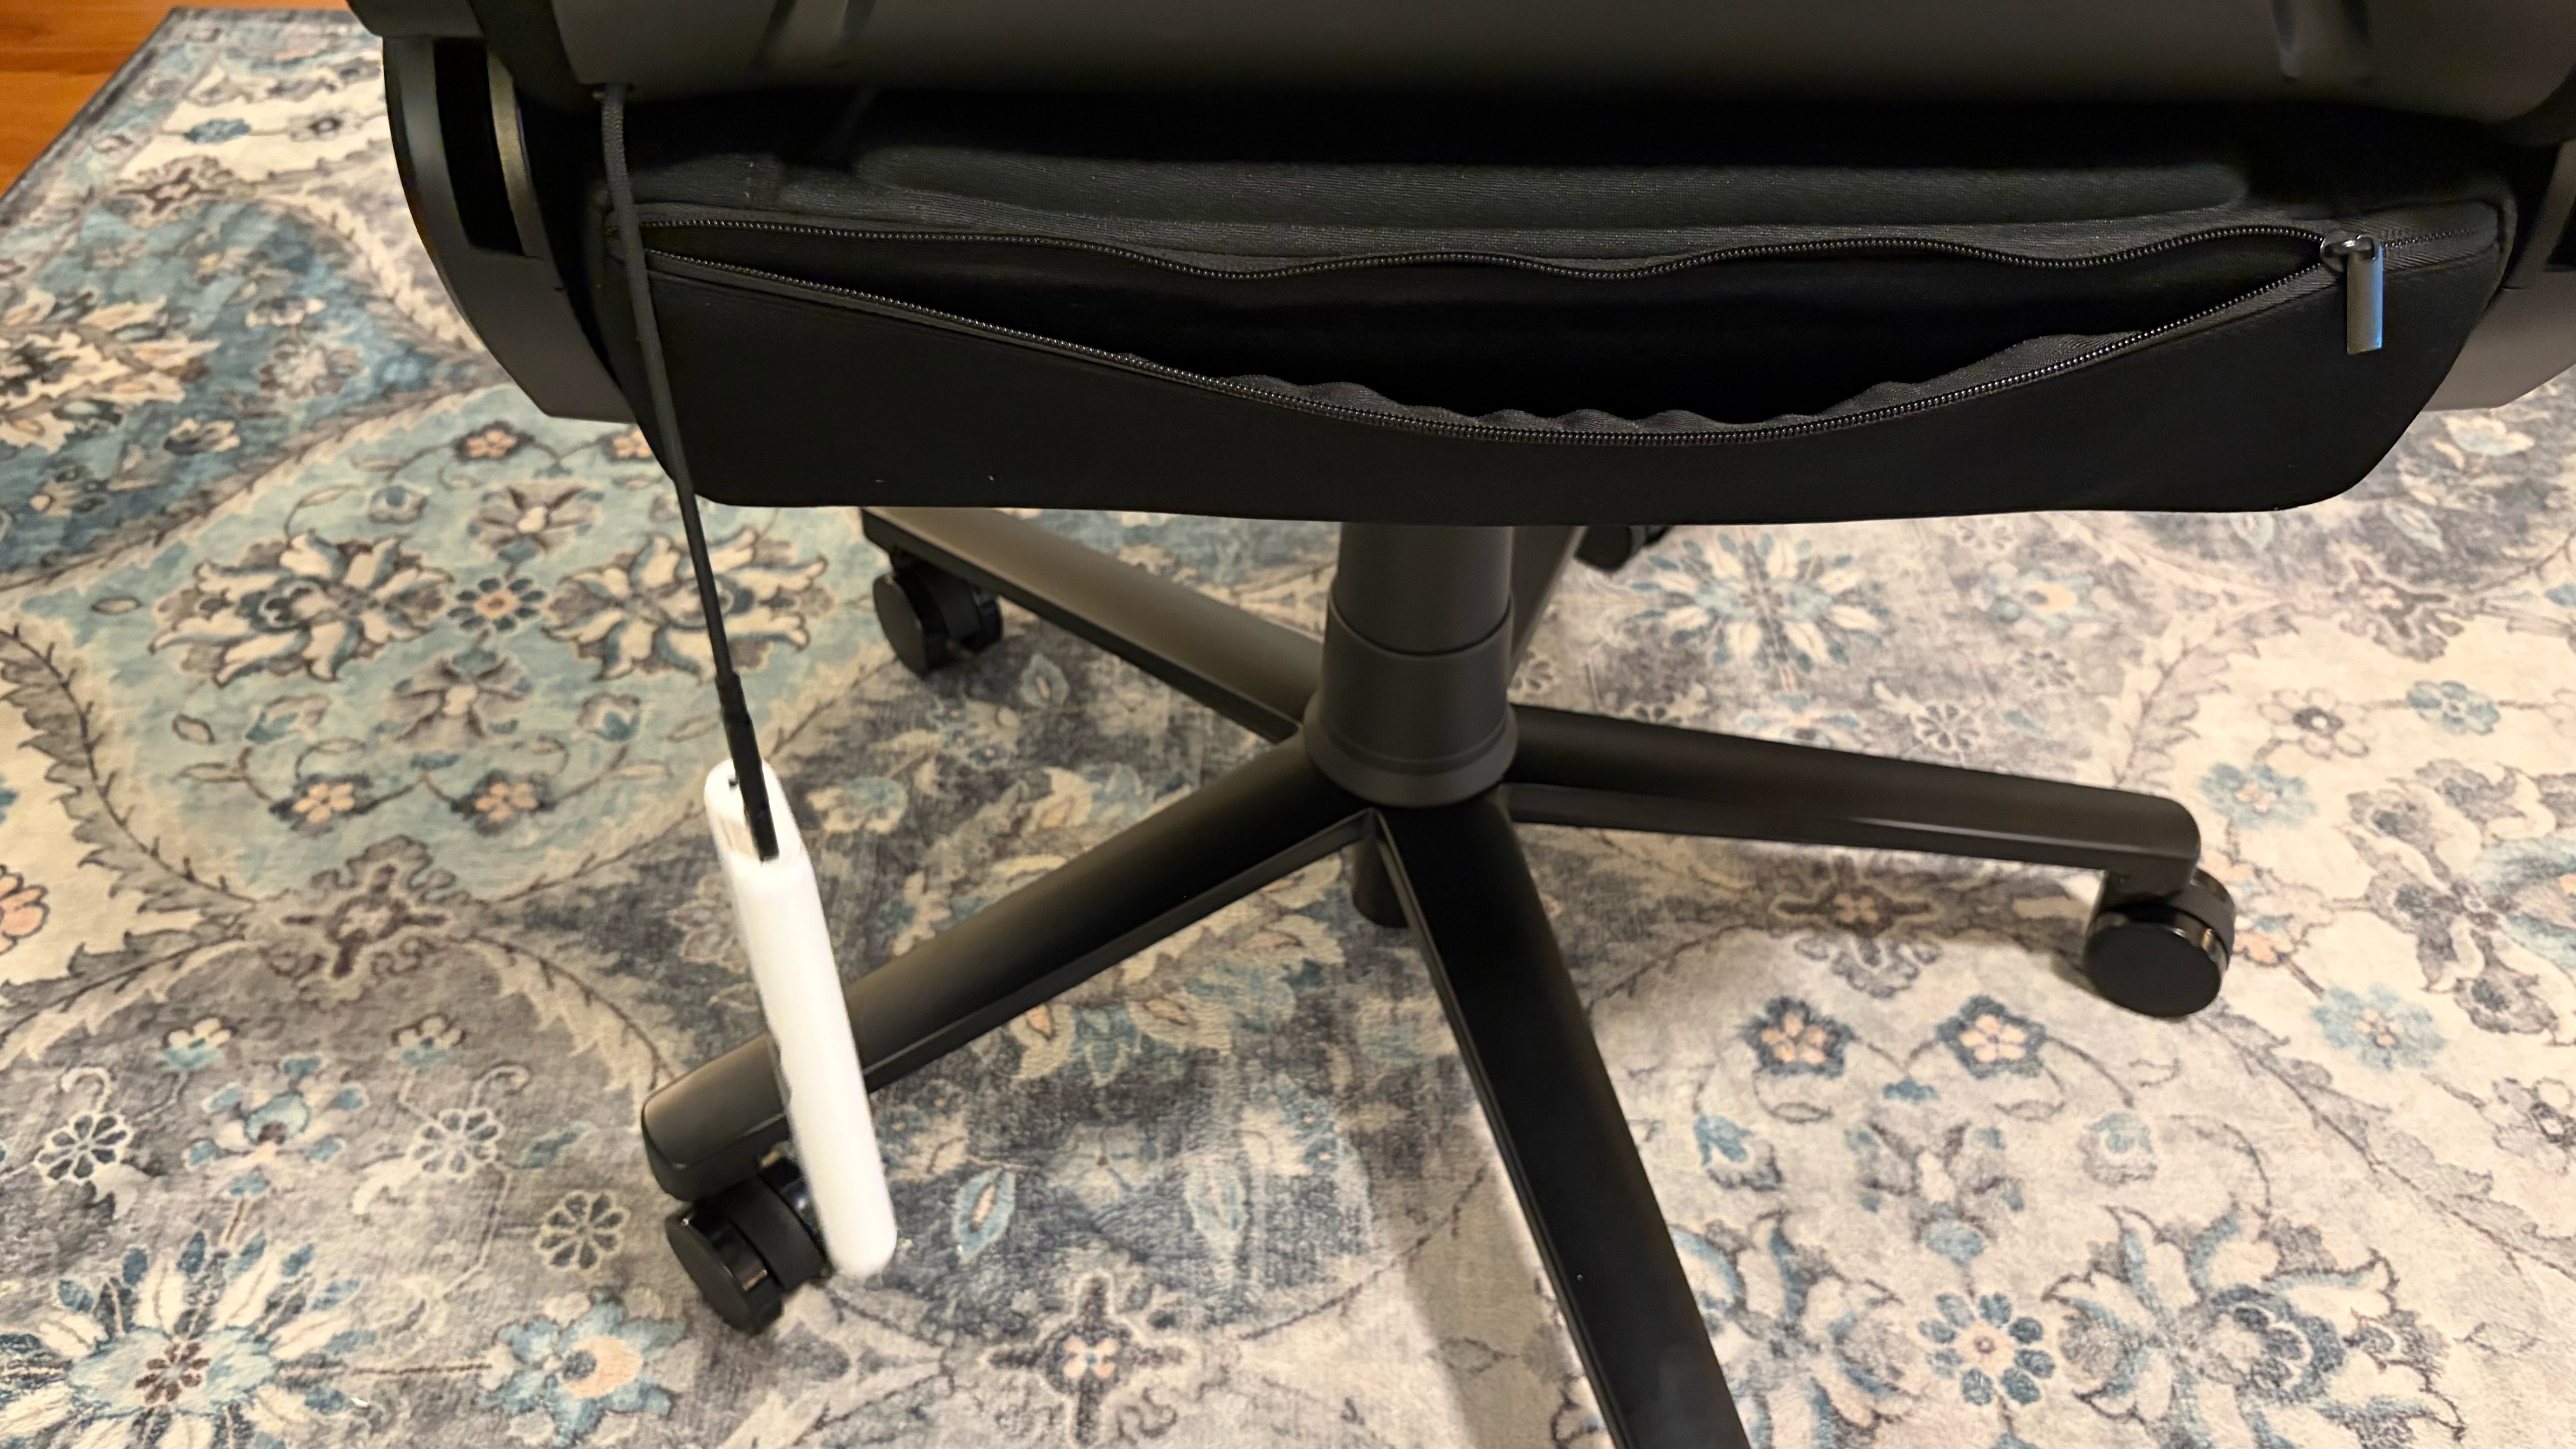
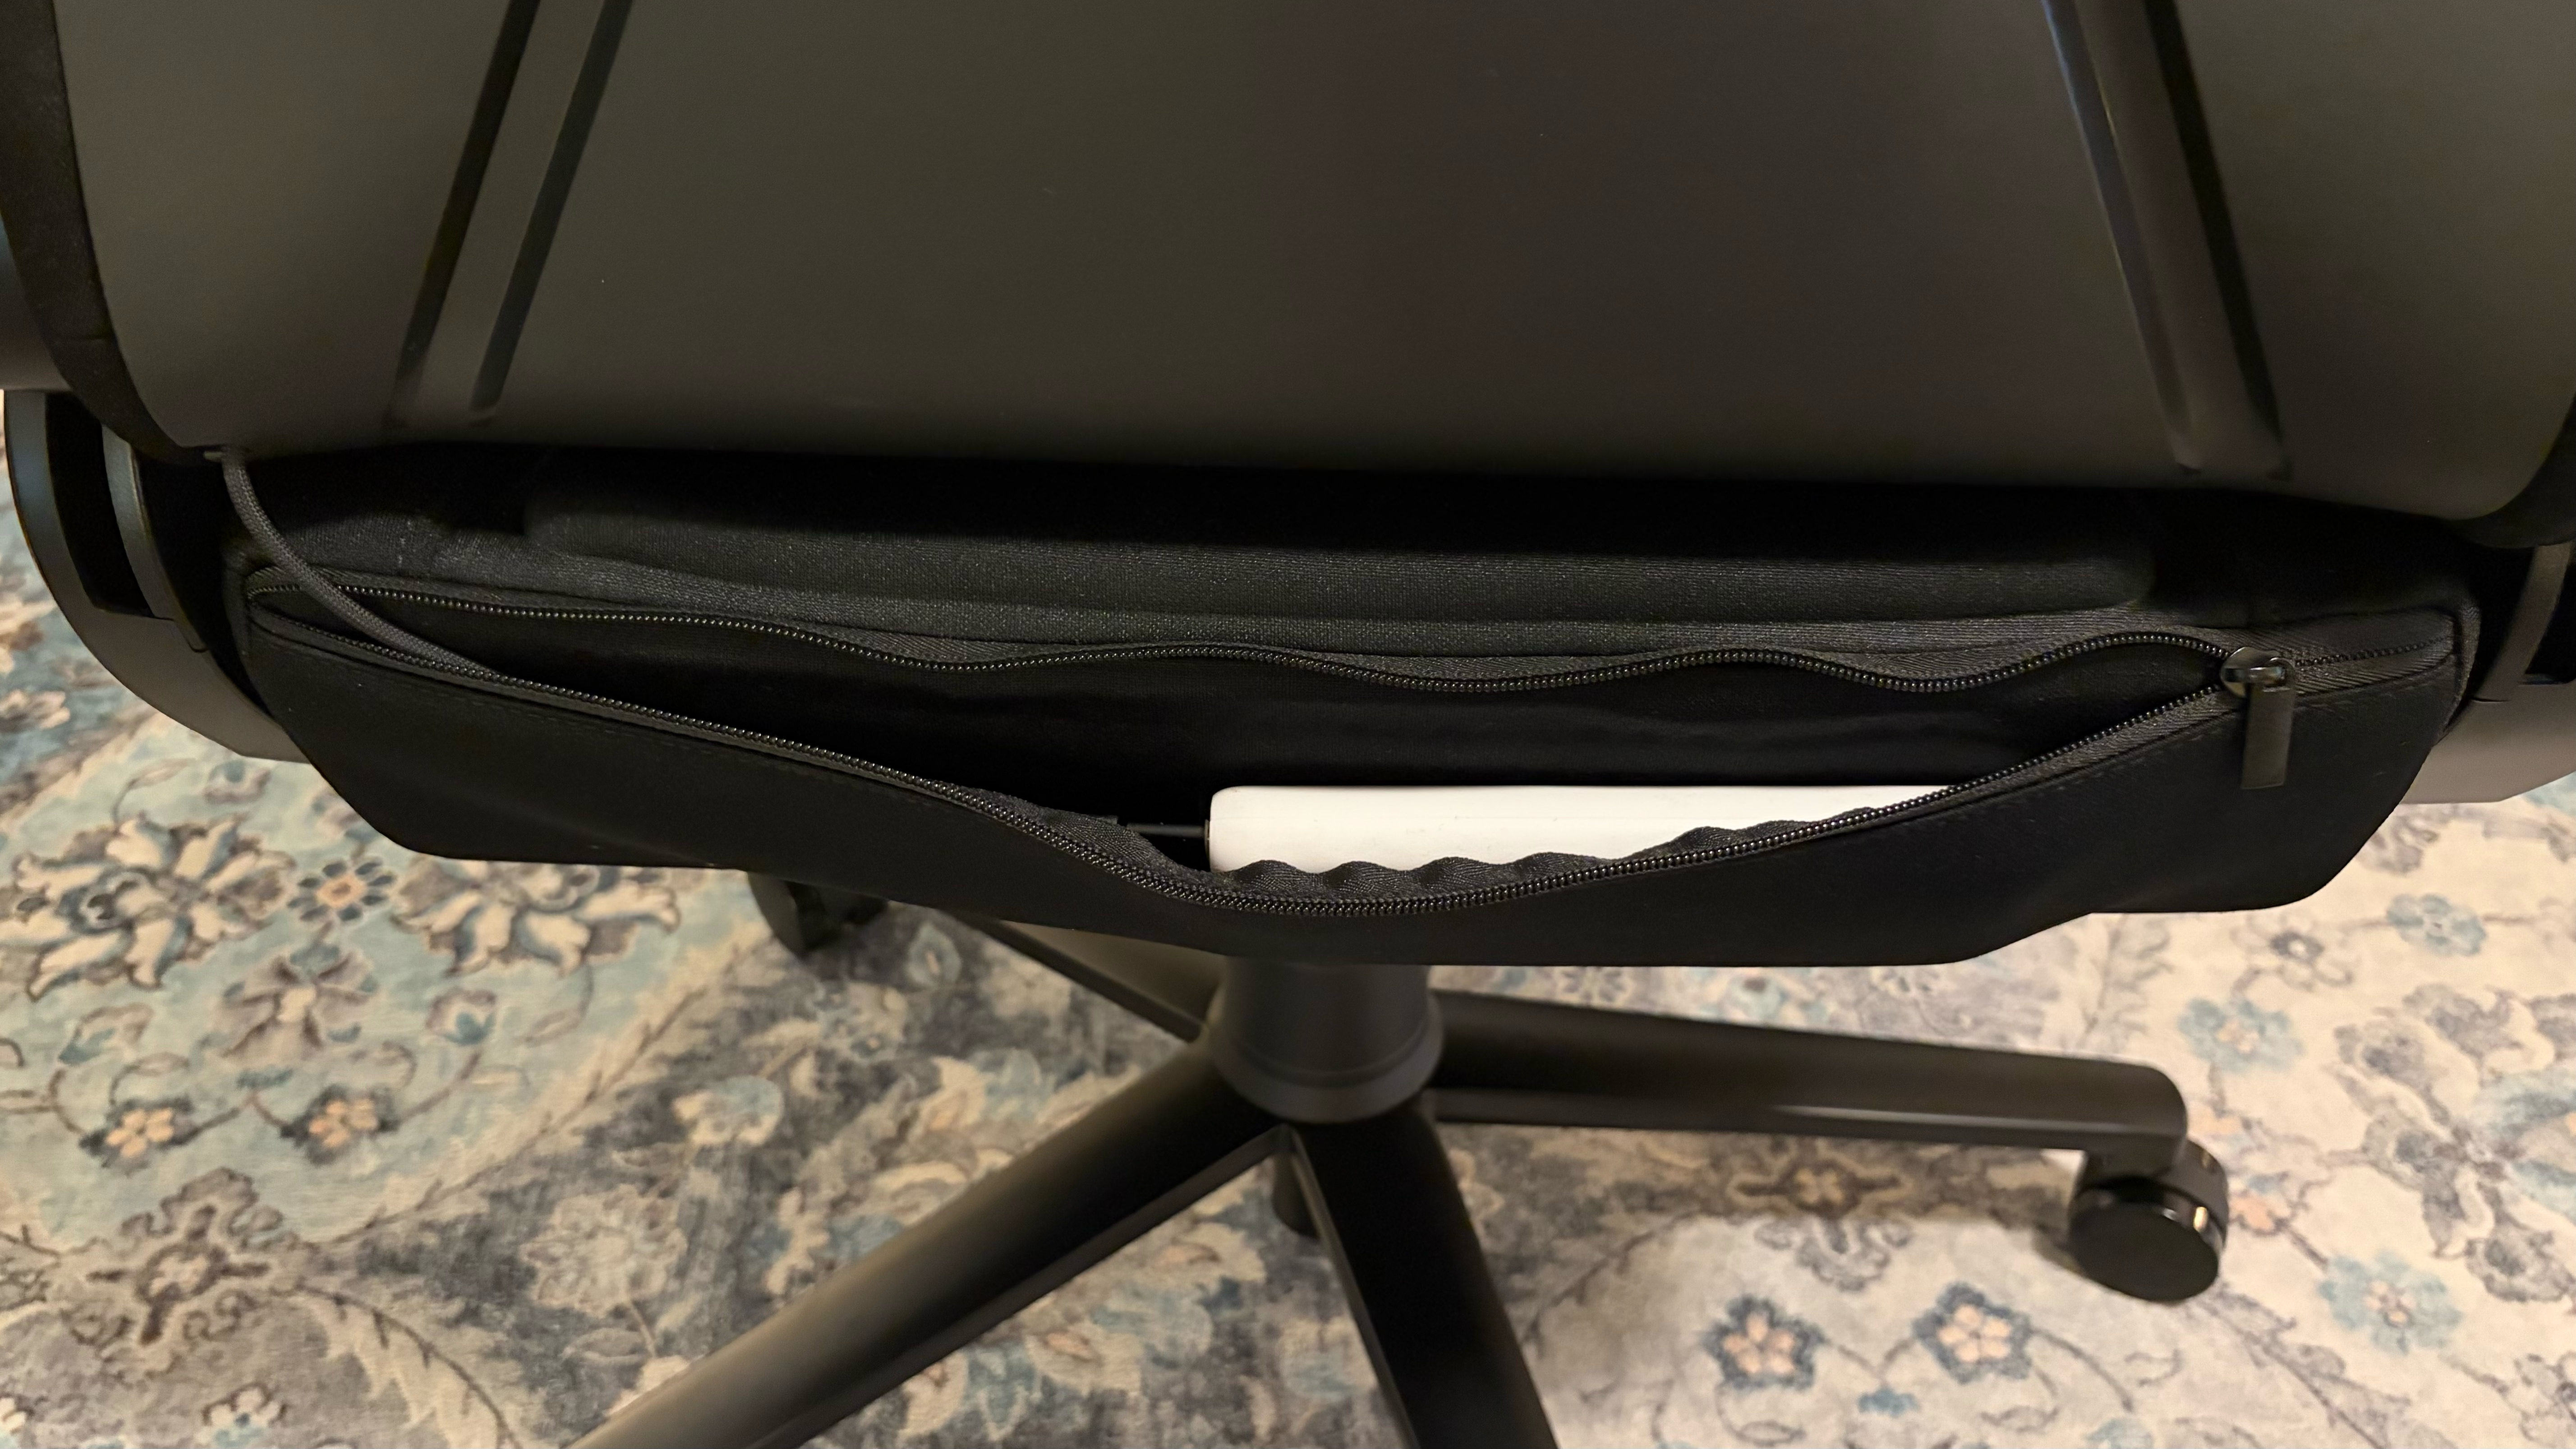
My solution was to plug the USB-C cable from the back of the chair into a portable power bank, and then tuck it into the zippered pouch at the bottom of the seatback. This worked well, and is clearly how the chair is intended to be used — however, it does not ship with a battery pack, nor does it ship with an extra-long cable (Razer sent that separately). So you'll need to invest in a battery pack or an extension cable to use the RGB on this chair.

Razer Soma Chroma Design

The Soma Chroma introduces an entirely new design language for Razer gaming chairs. Whereas the Iskur line has a more organic design, with softer curves and radiused edges, the Soma Chroma is more angular—especially on the seatback.

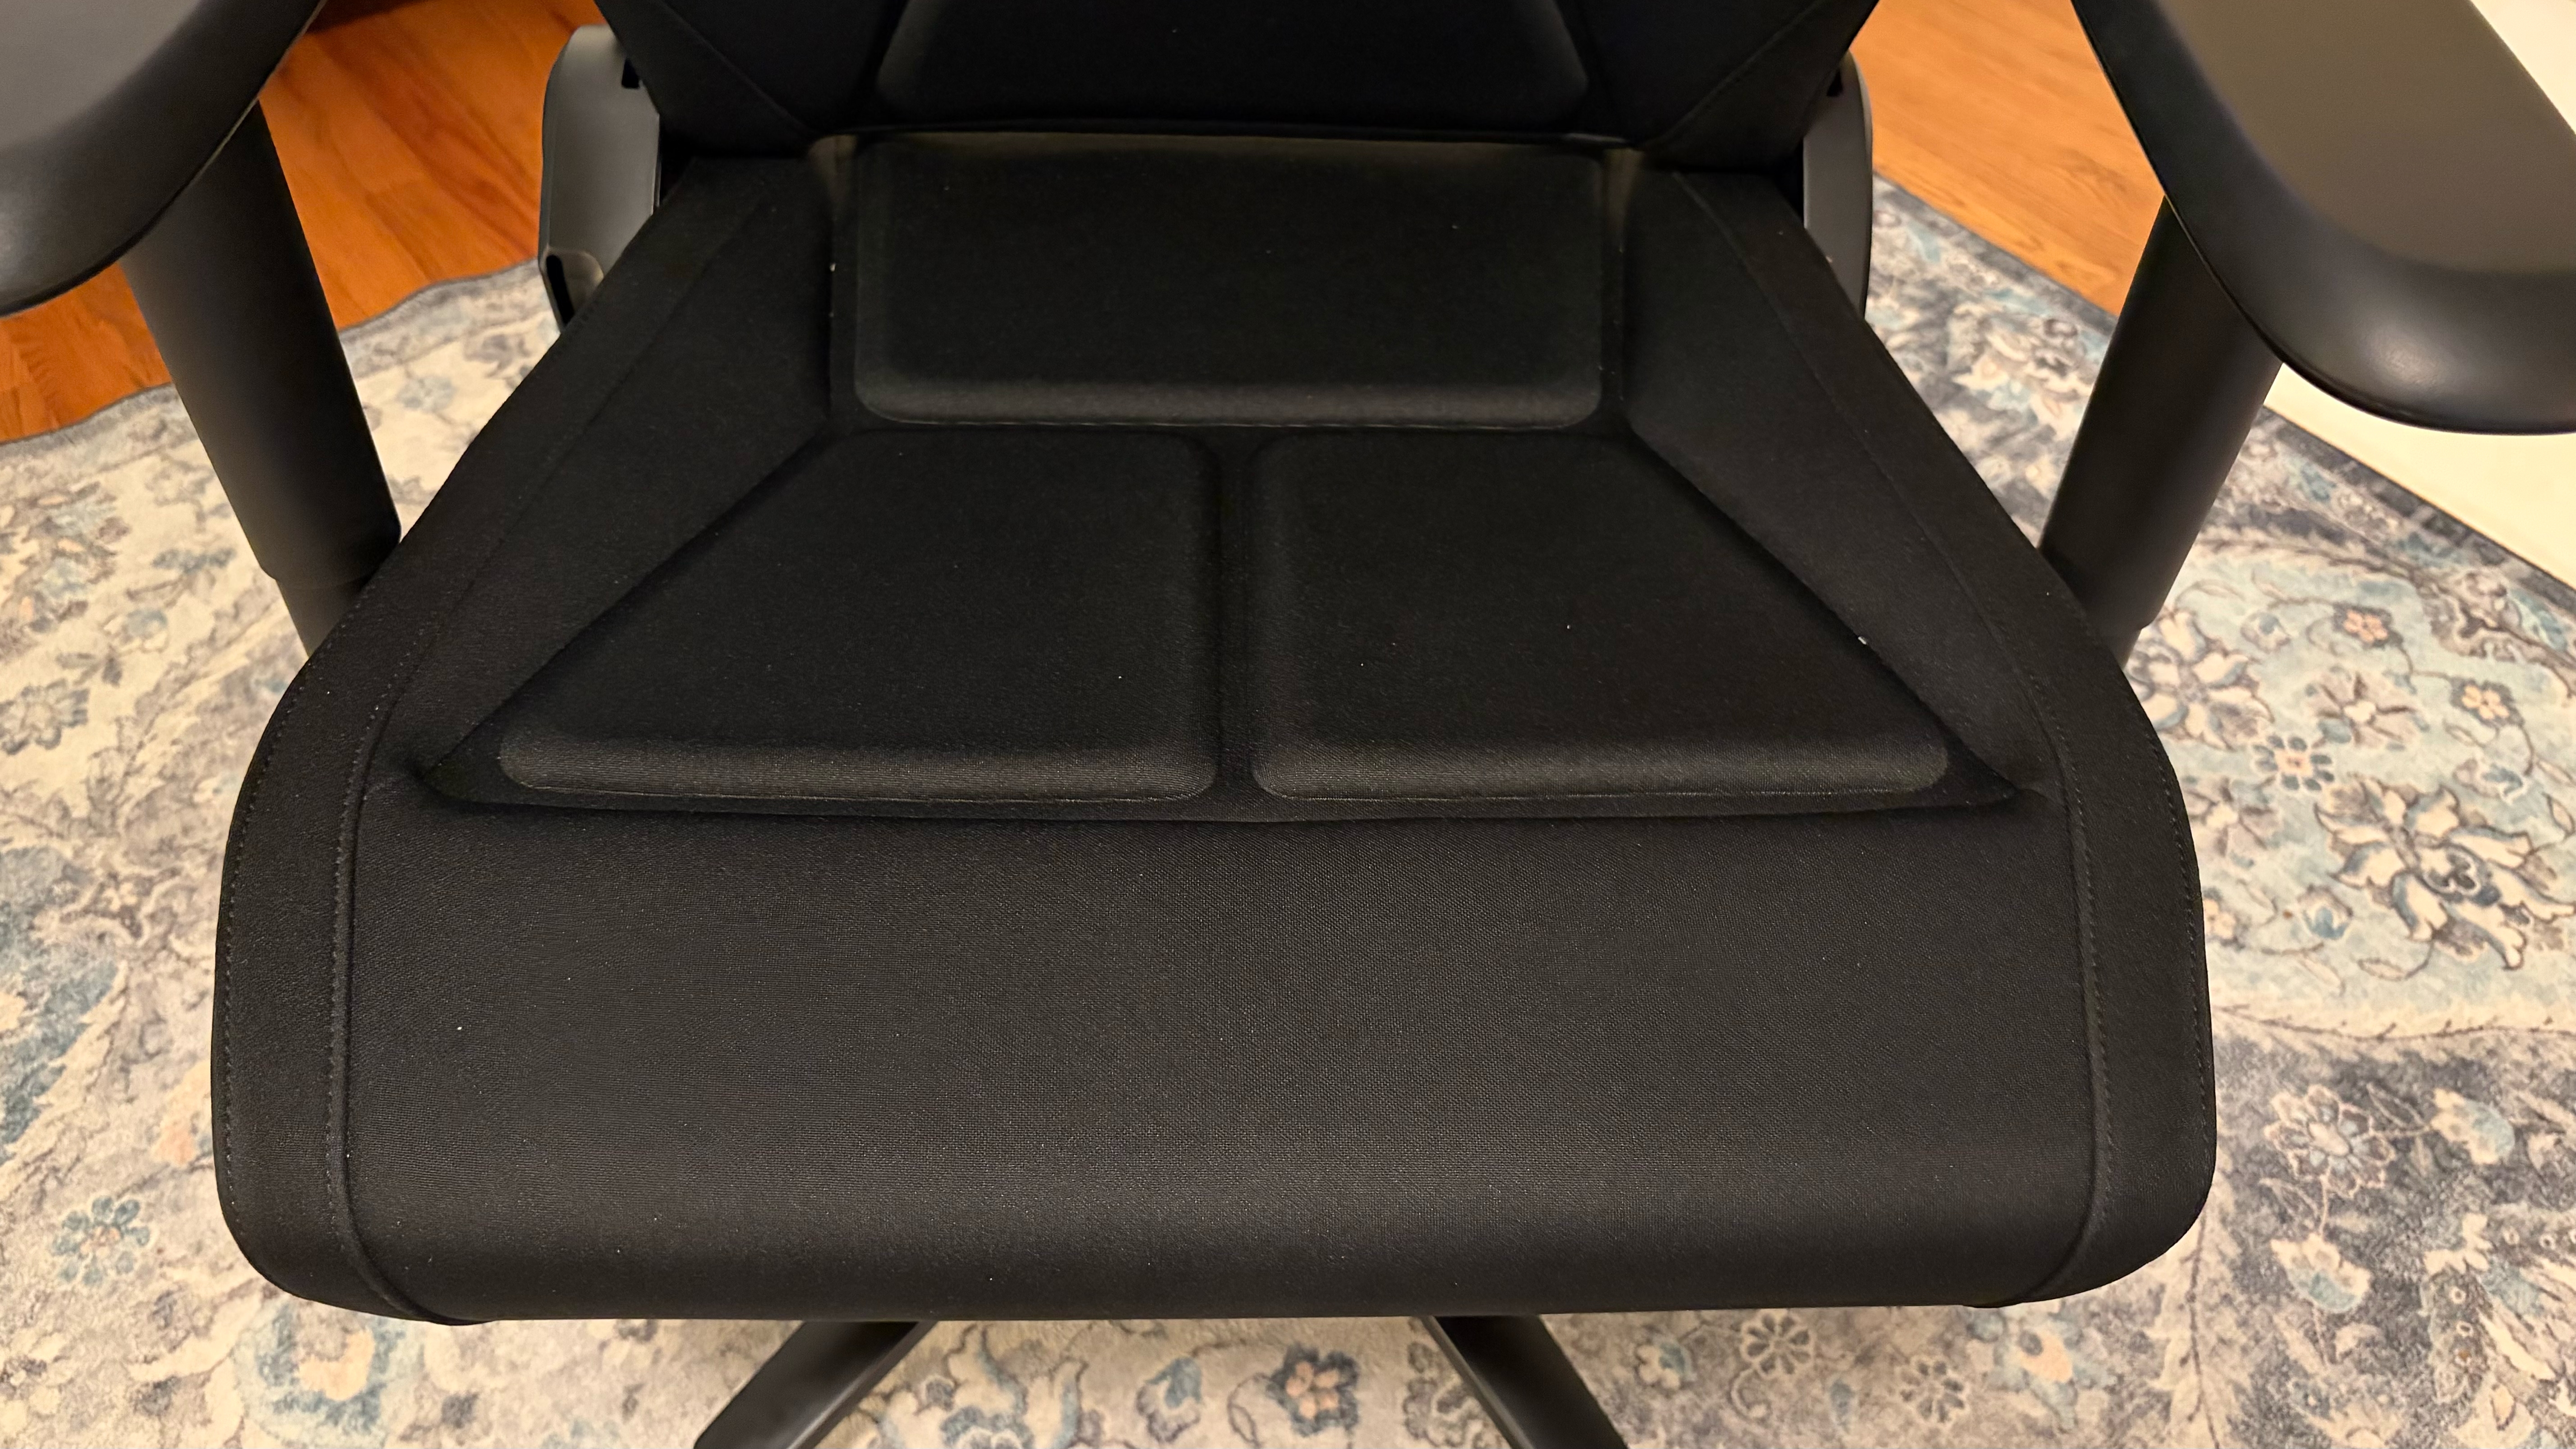
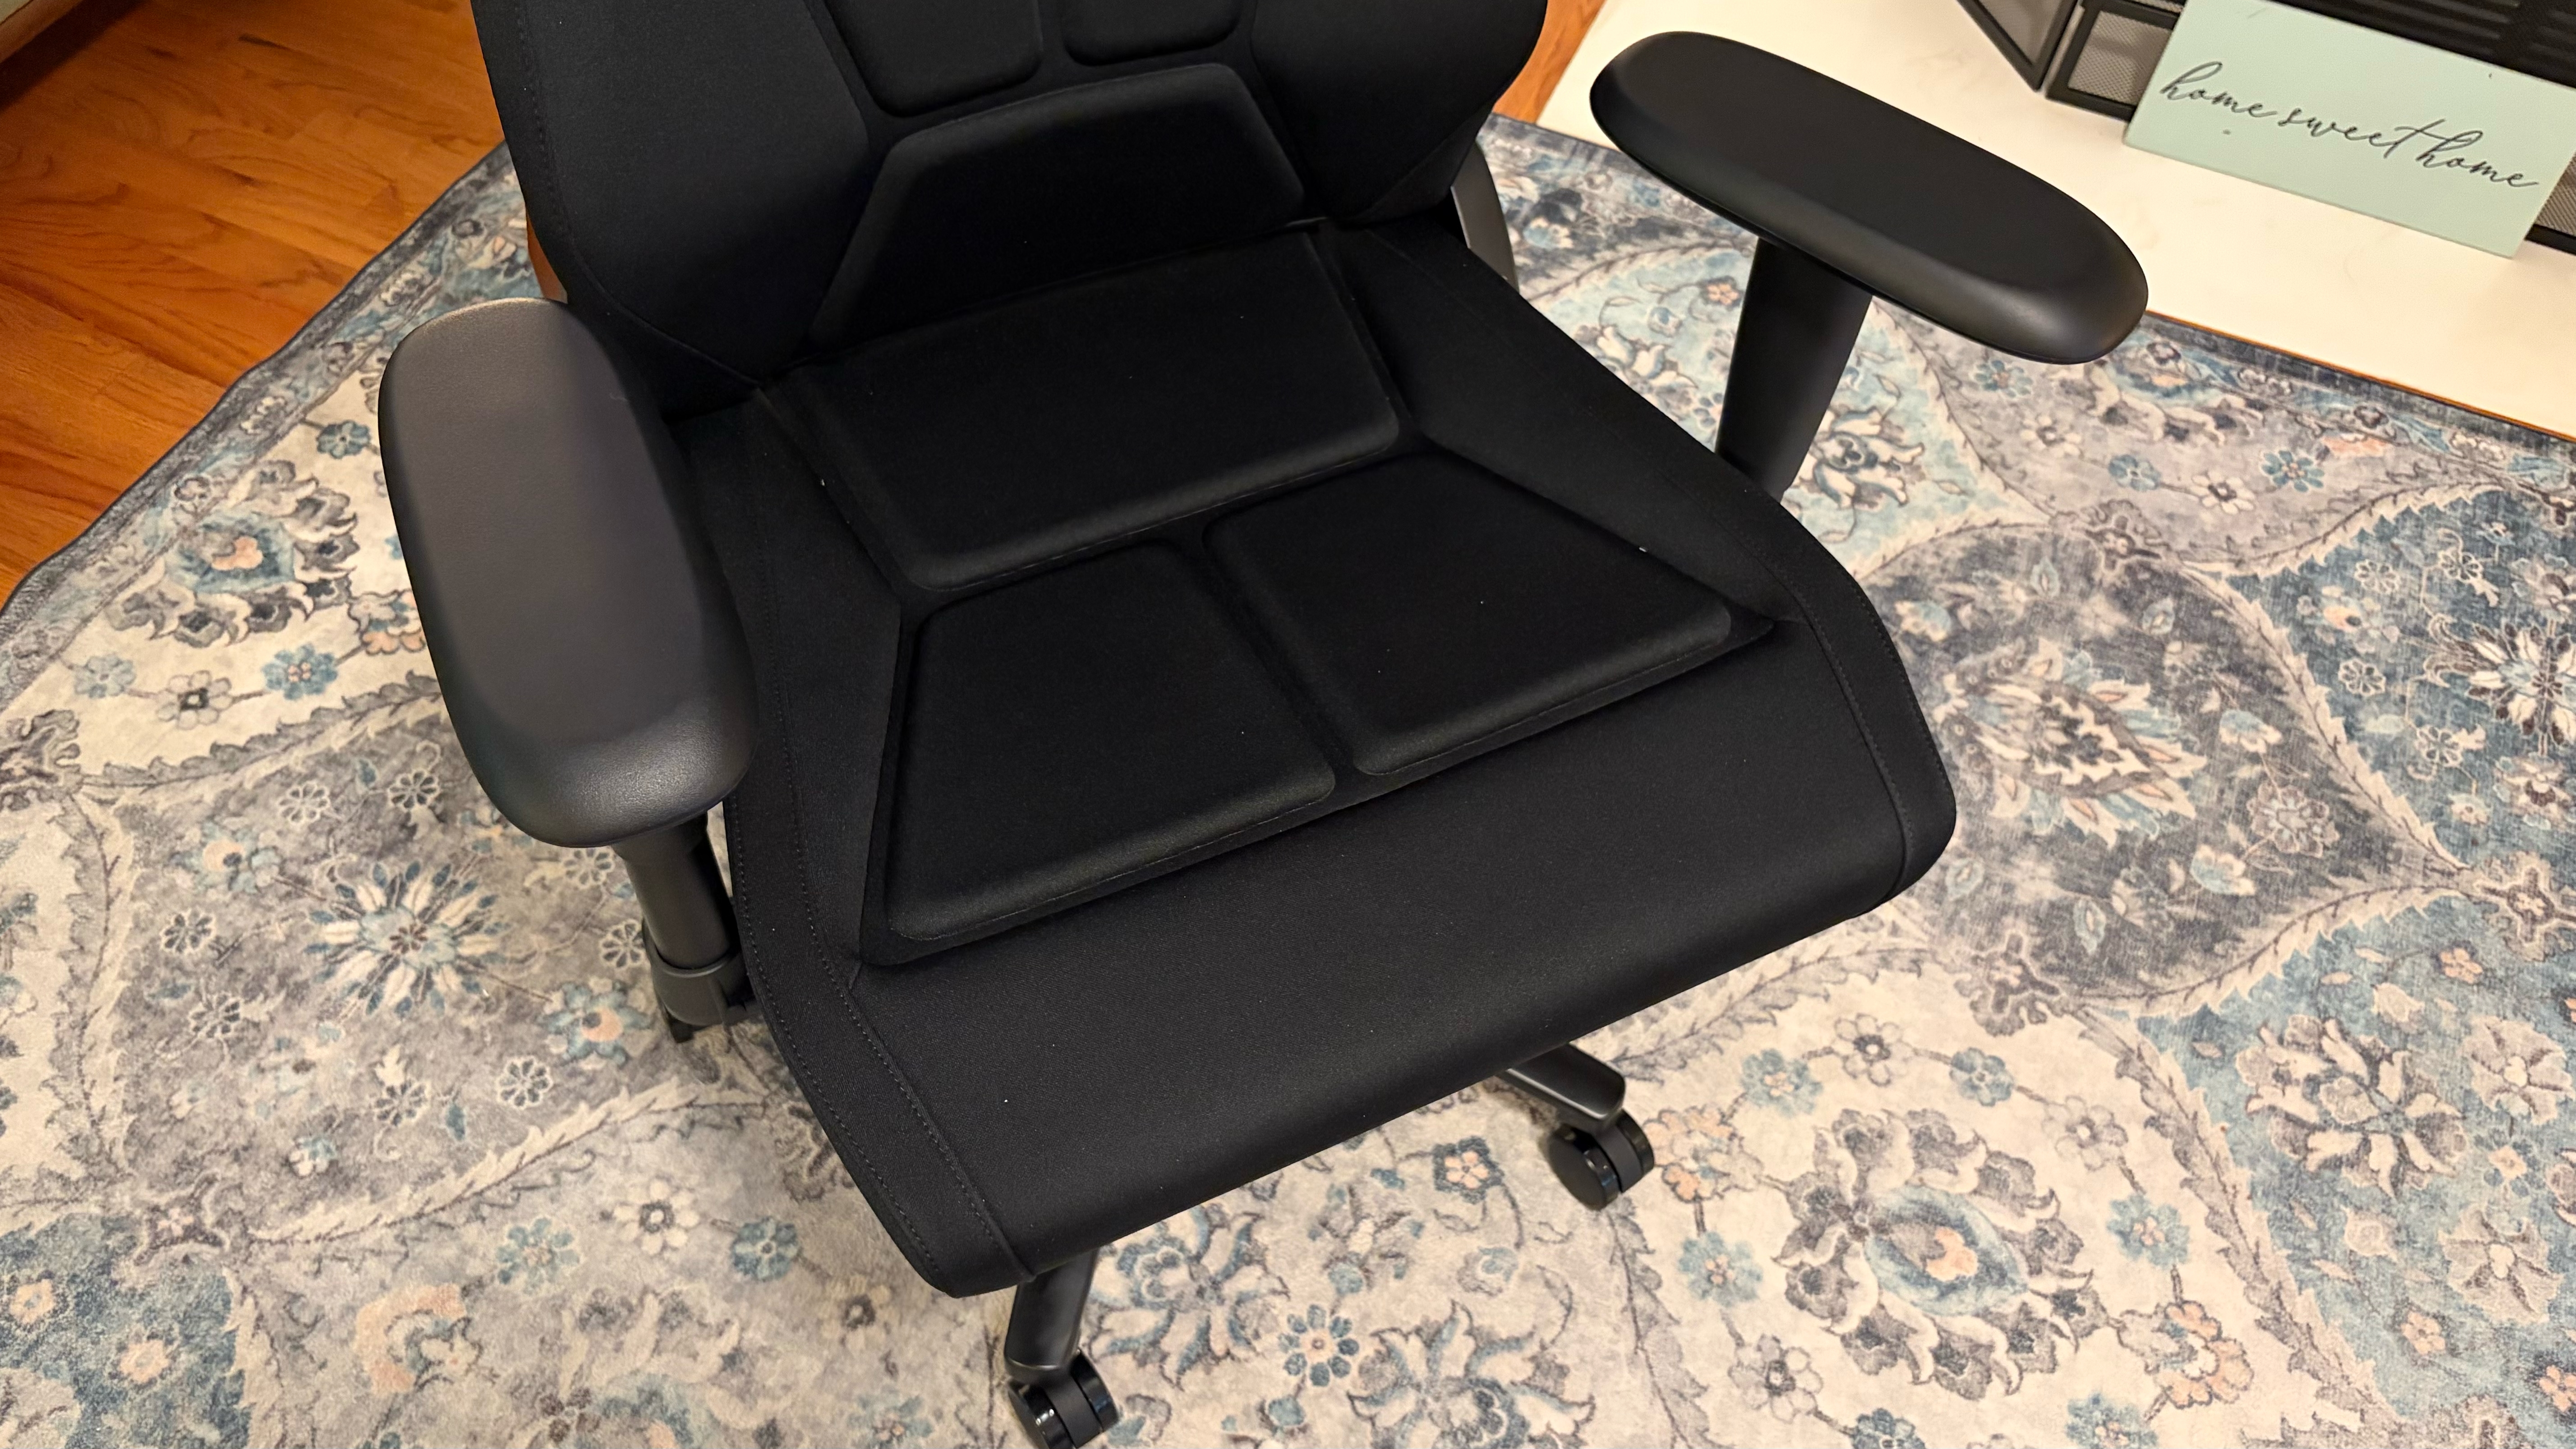
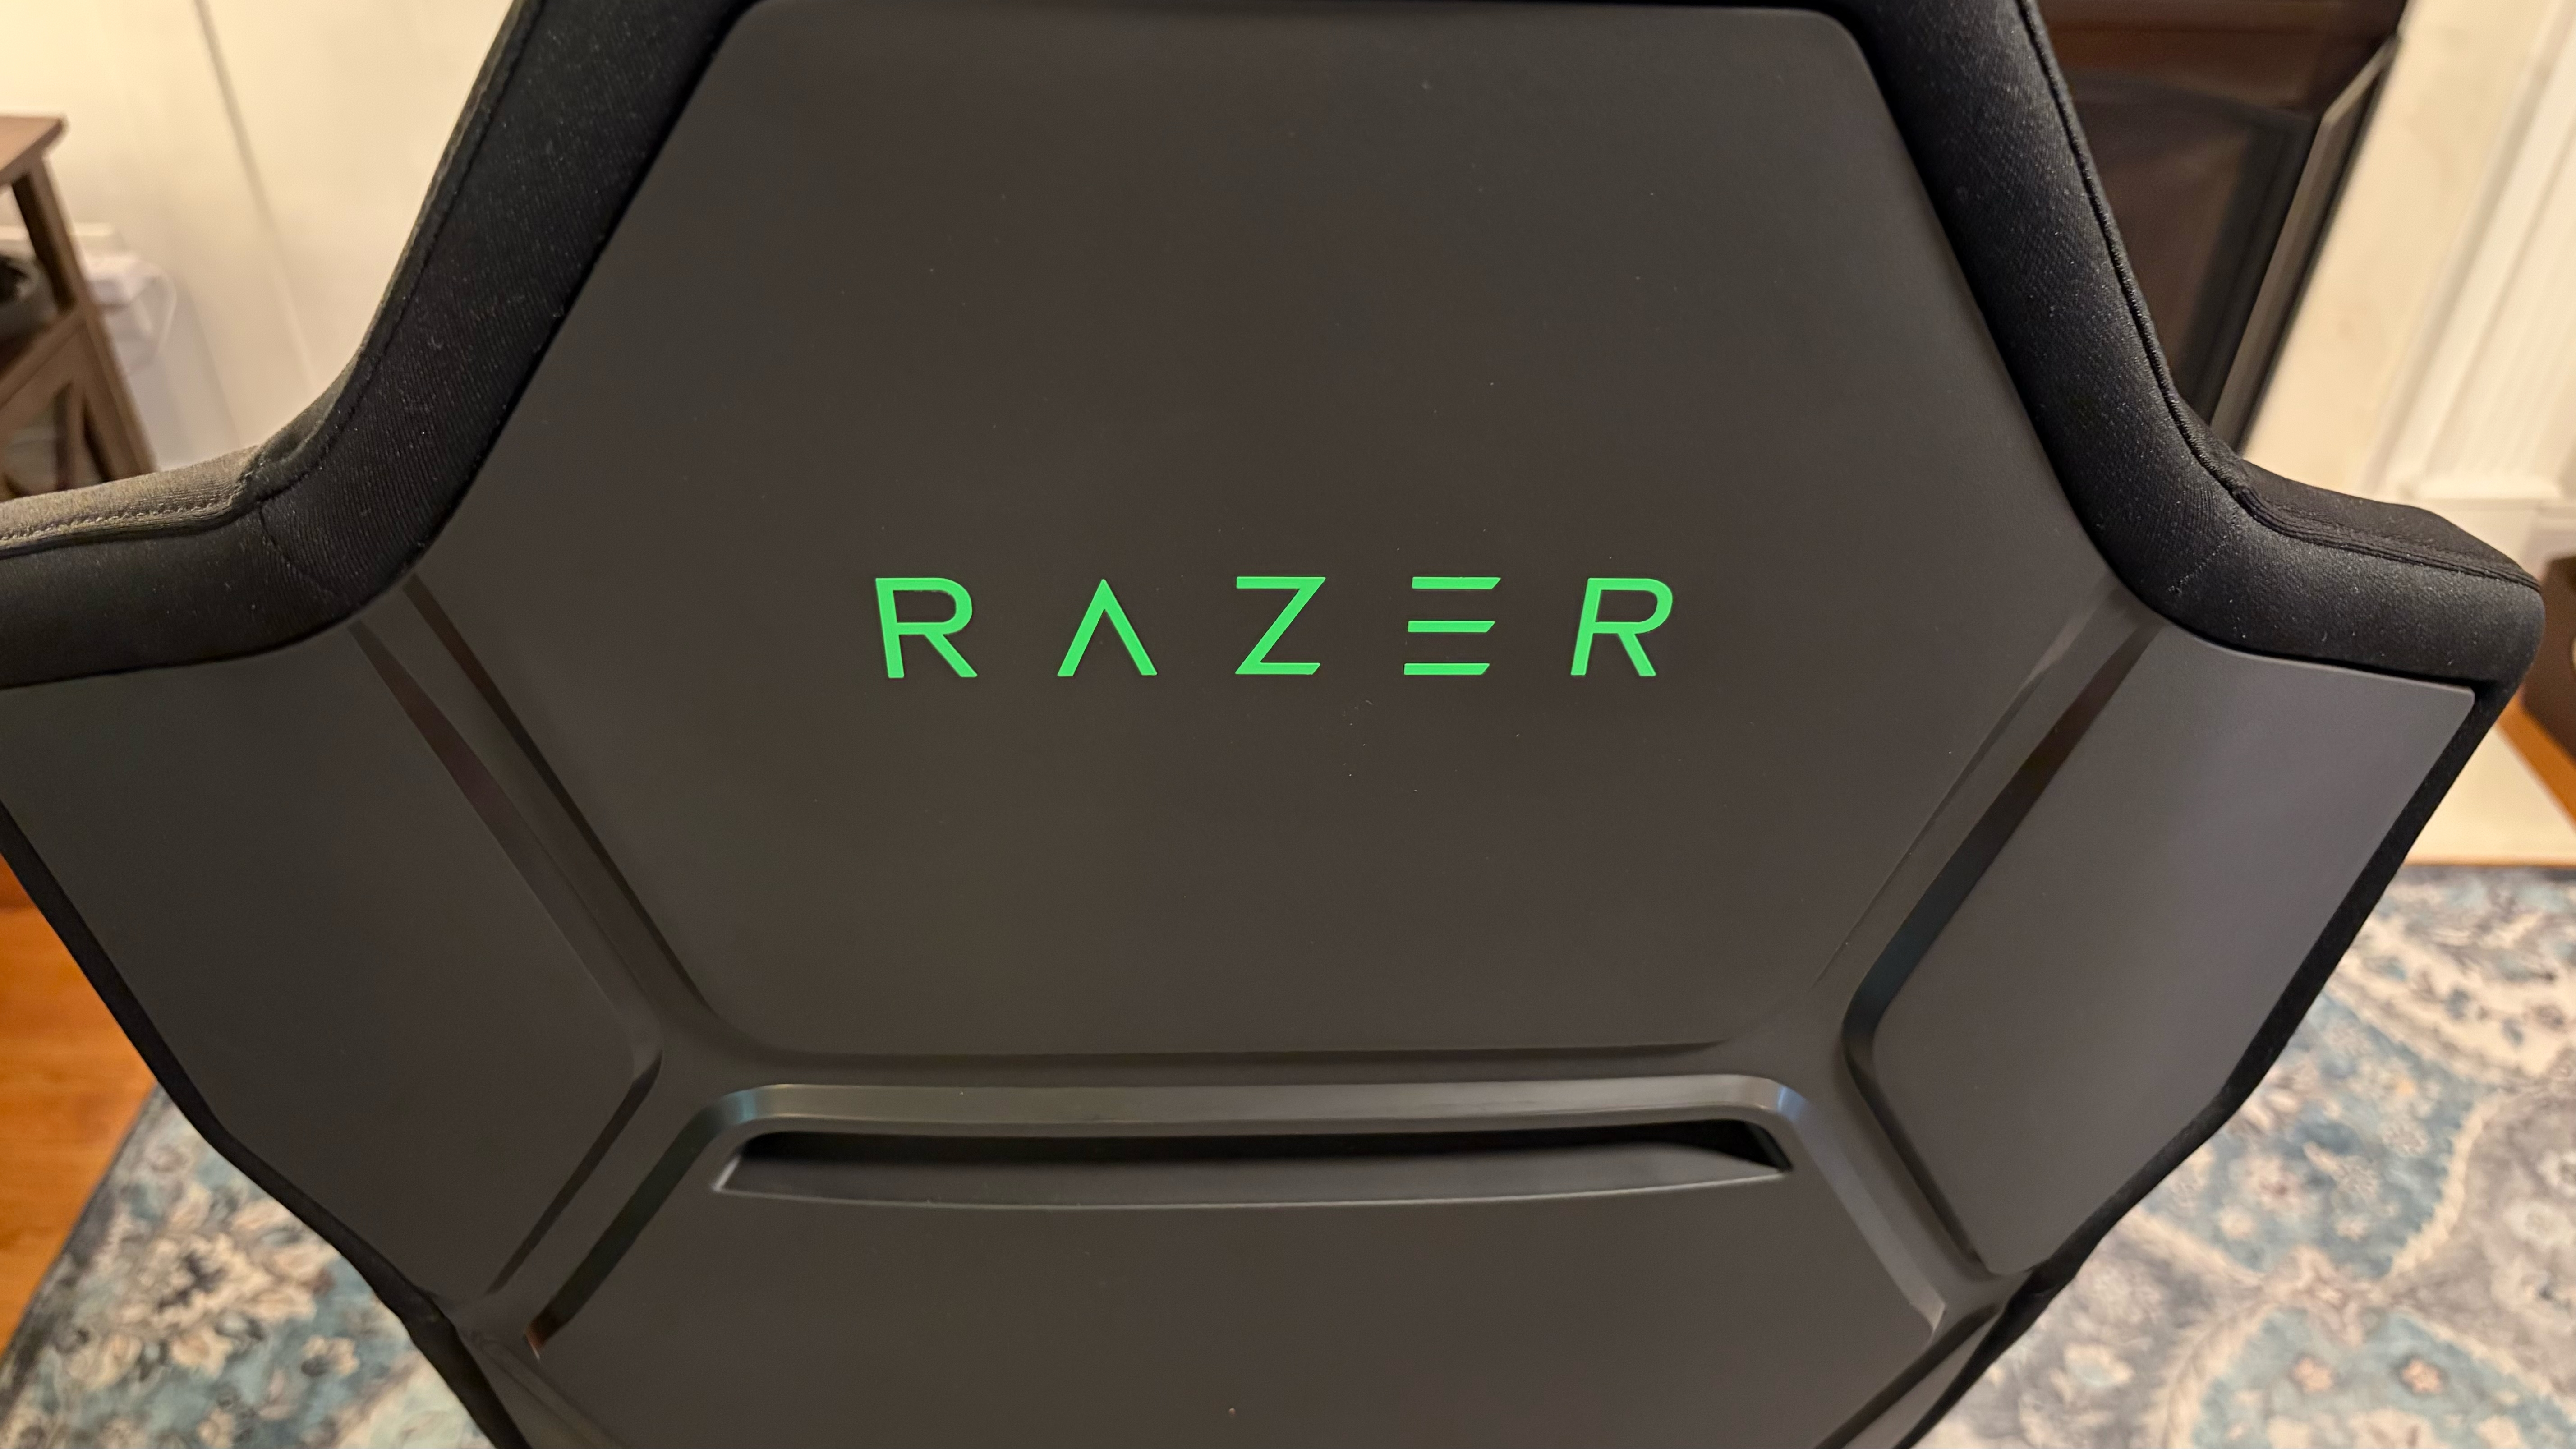
The seat back and the base have recessed channels, which I assume would help to improve airflow under your buttocks and around your back. It's an interesting design choice, though I imagine the recessed channels in the seat base will also quickly fill with dirt, dust, and food crumbs. The same design is mirrored on the back of the chair. While previous Iskur chairs have used the same material on both the front and back, the back of the Soma Chroma is constructed of hard plastic.

Razer Soma Chroma
Tom's Hardware
Razer Soma Chroma
Tom's Hardware
Razer Soma Chroma
Tom's Hardware
Razer Soma Chroma
Tom's Hardware
Razer Soma Chroma
Tom's Hardware
Razer Soma Chroma
Tom's Hardware
Razer Soma Chroma
Tom's Hardware
Razer Soma Chroma
Tom's Hardware
Razer Soma Chroma
Tom's Hardware

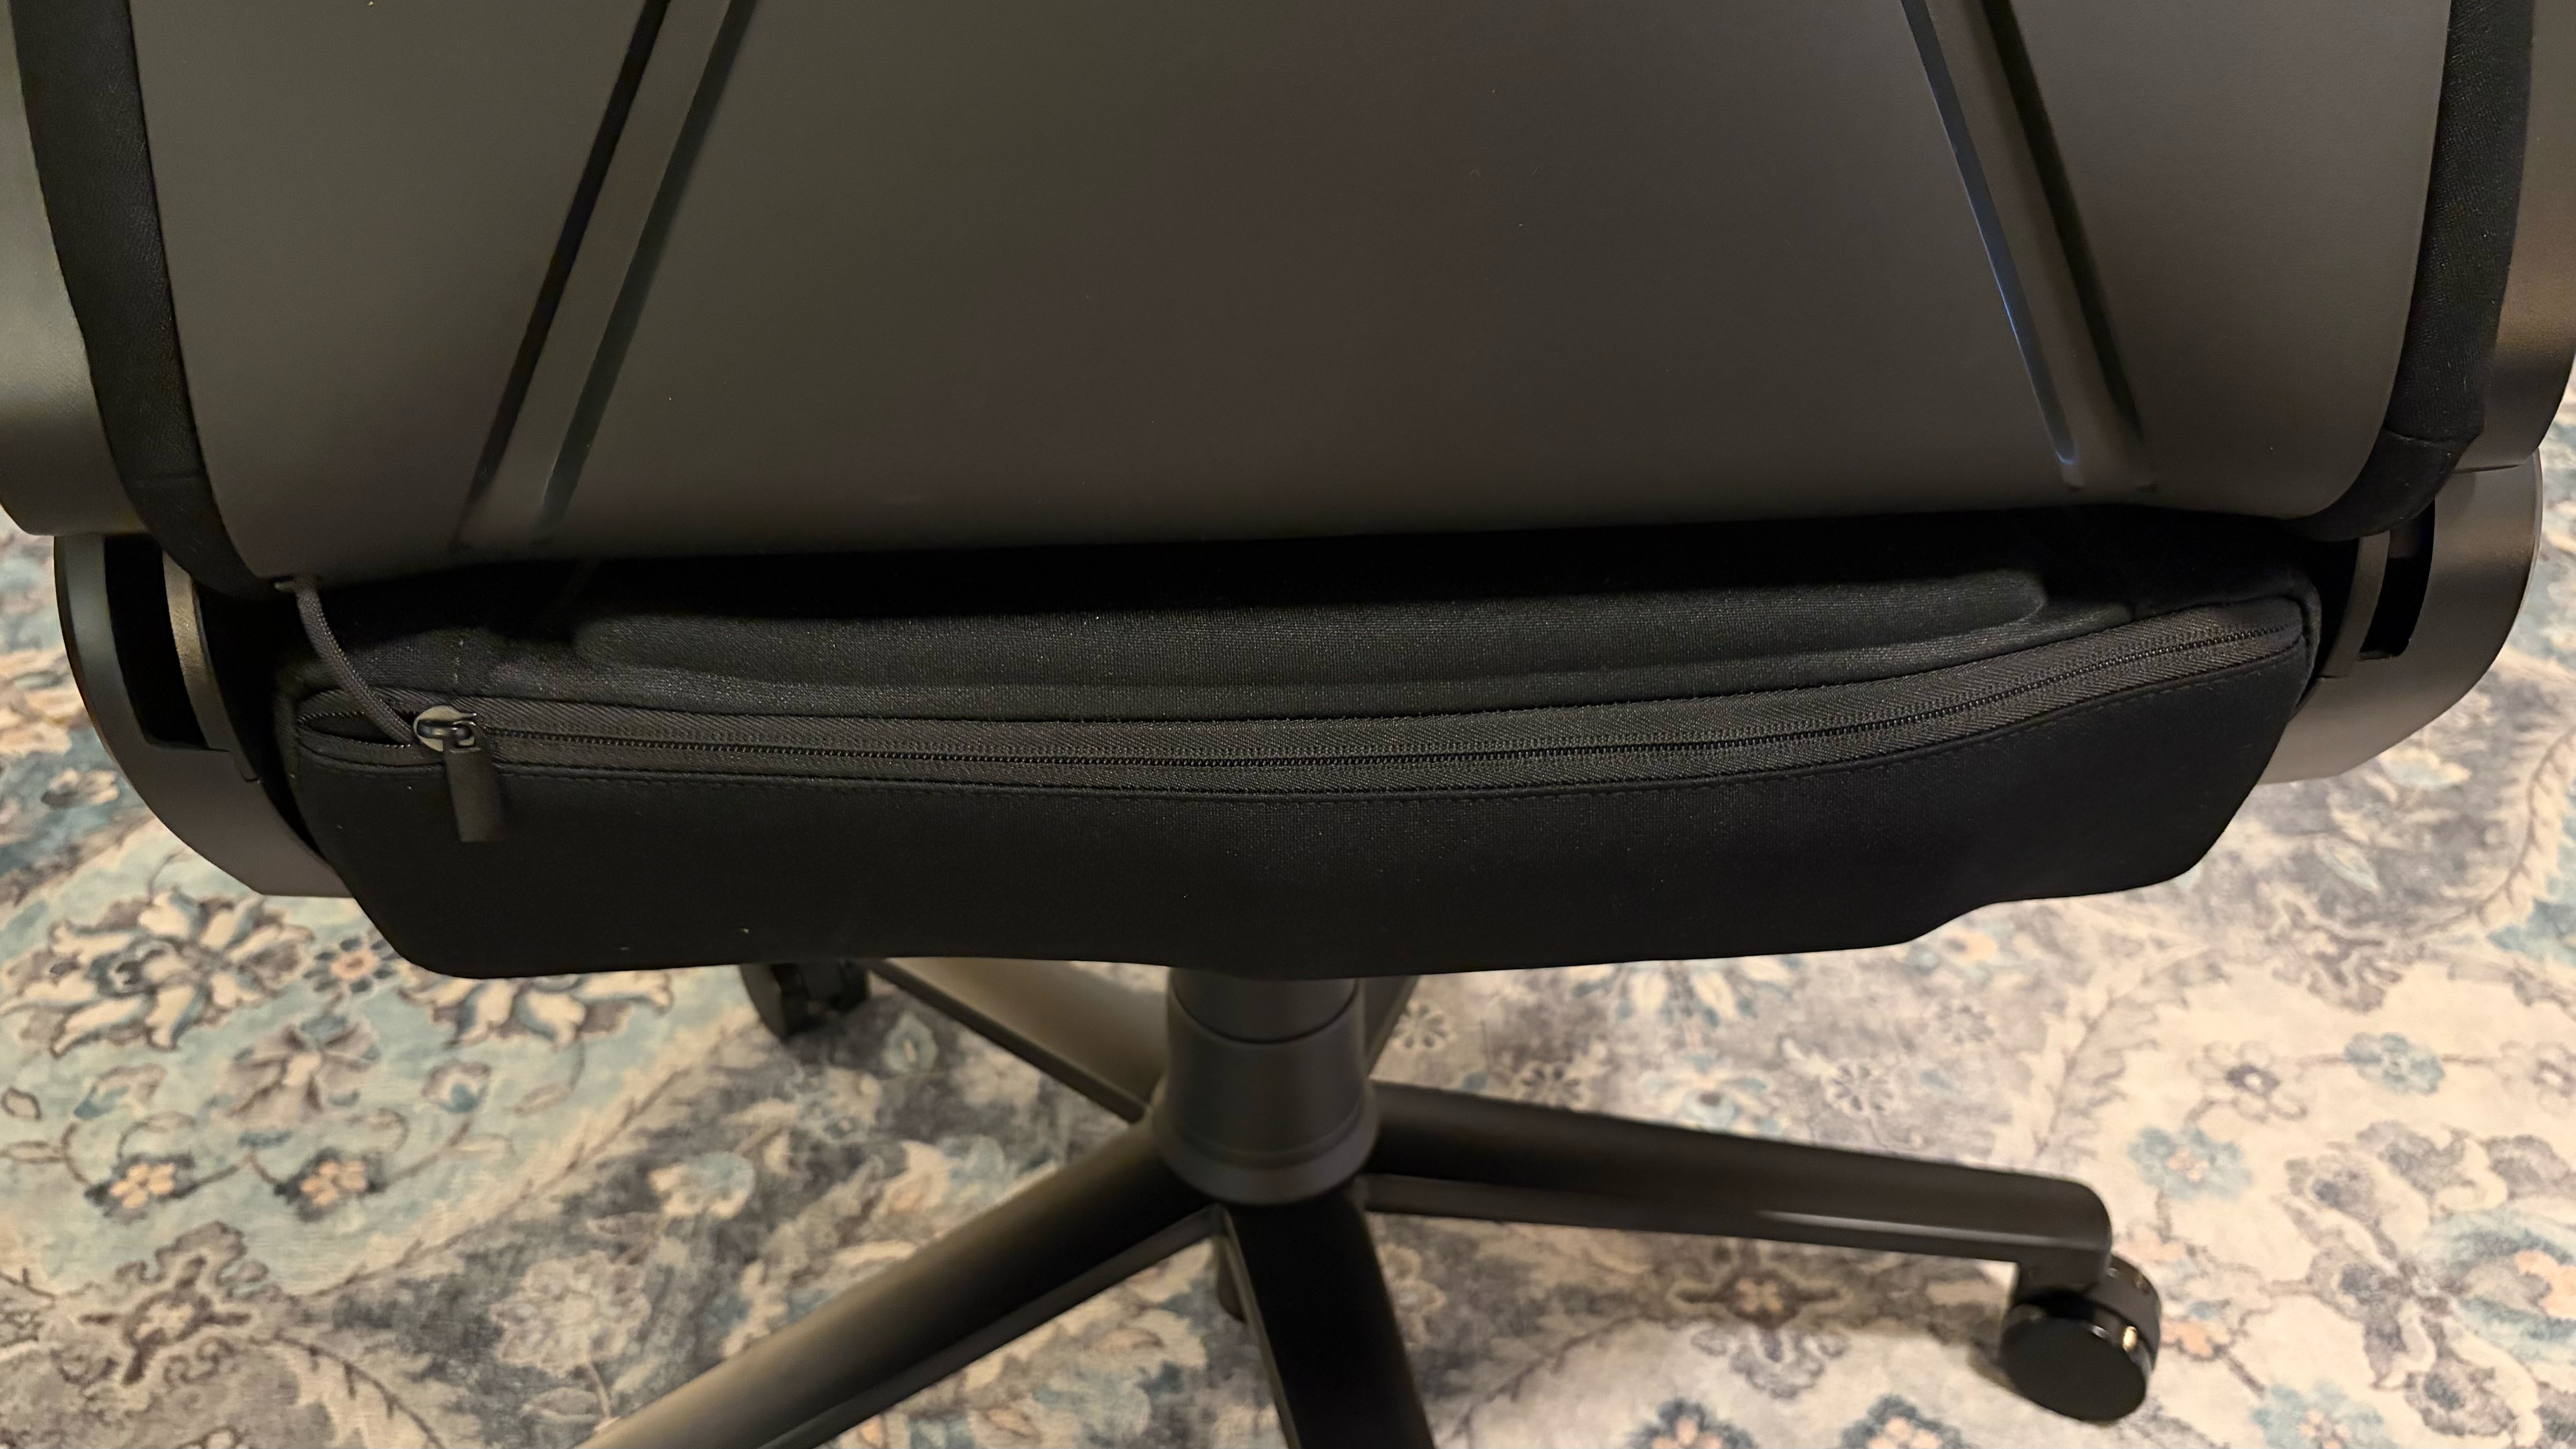
You'll find a zippered pouch at the back of the seat base, which runs the full width. It's large enough to accommodate a portable power bank, so you don't have to be tethered to a long extension cord to power the RGB lights.

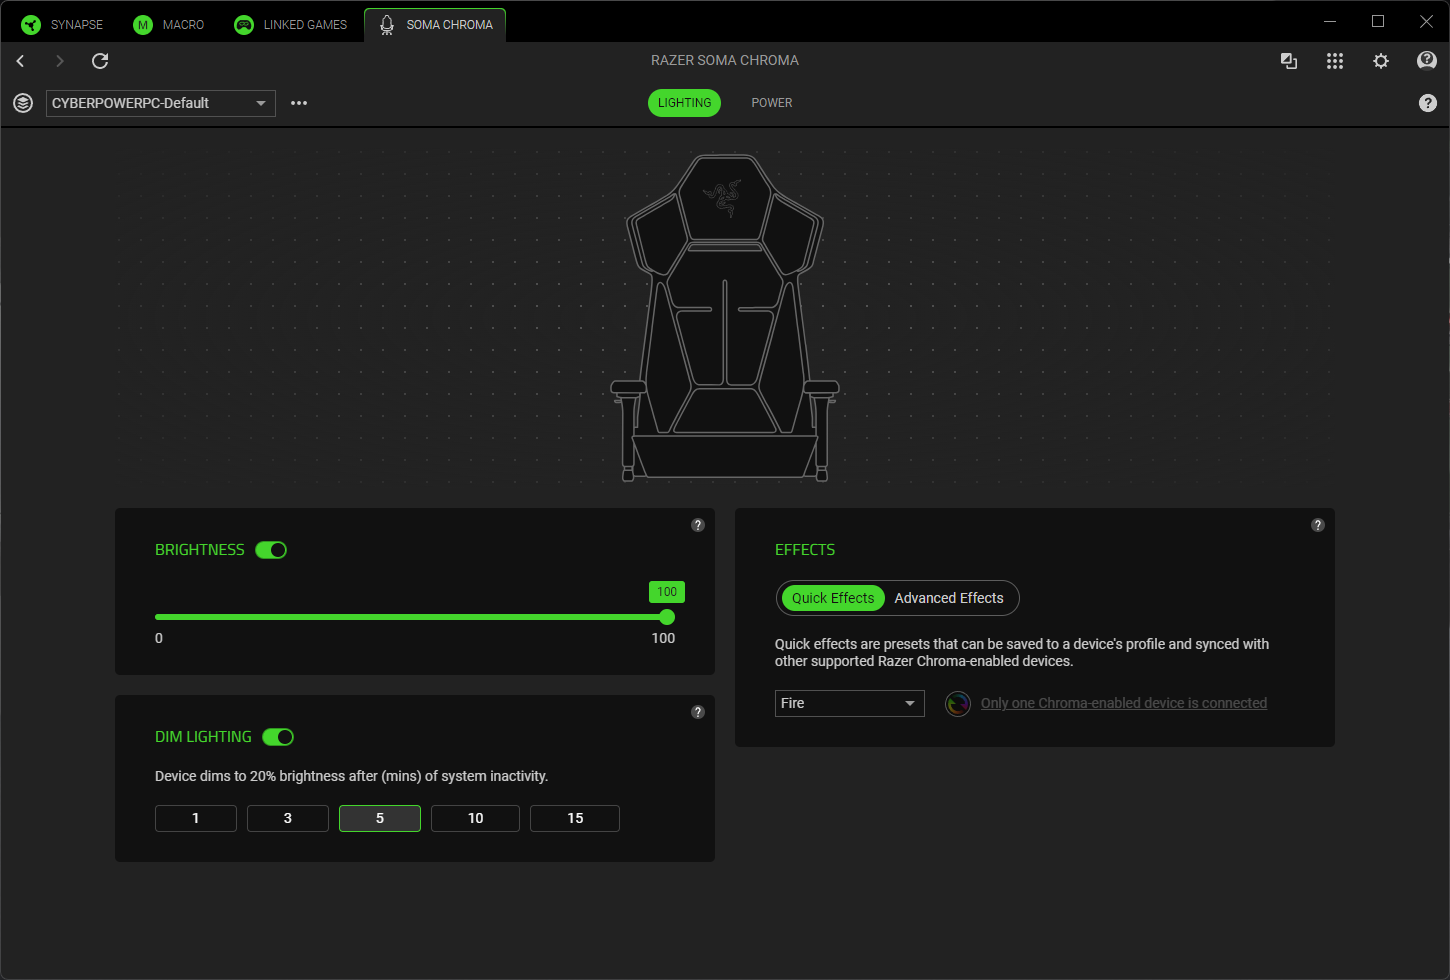
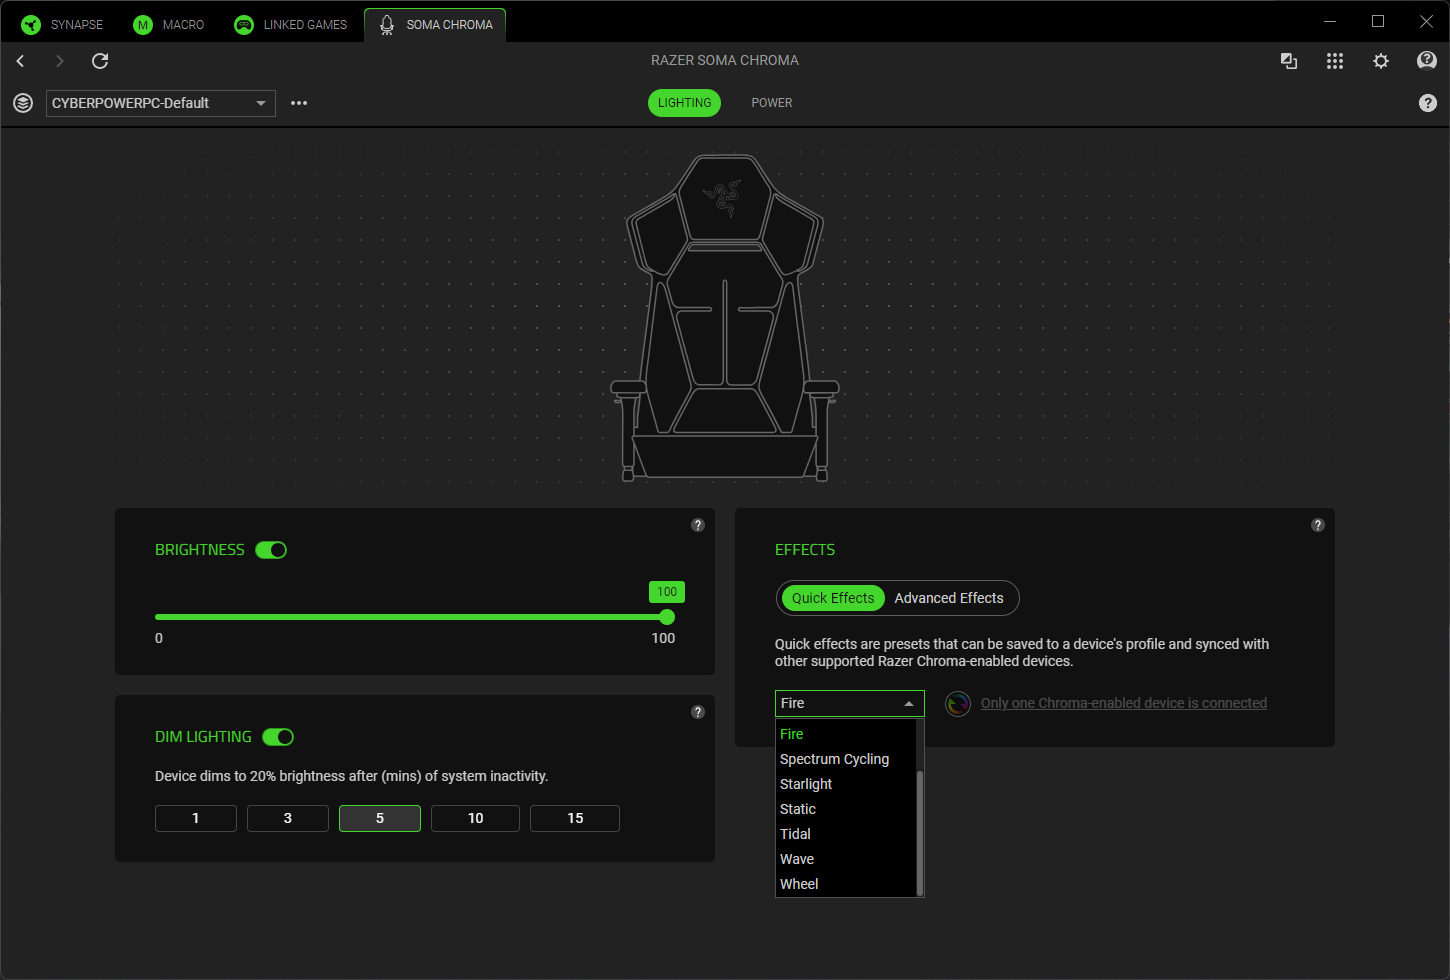
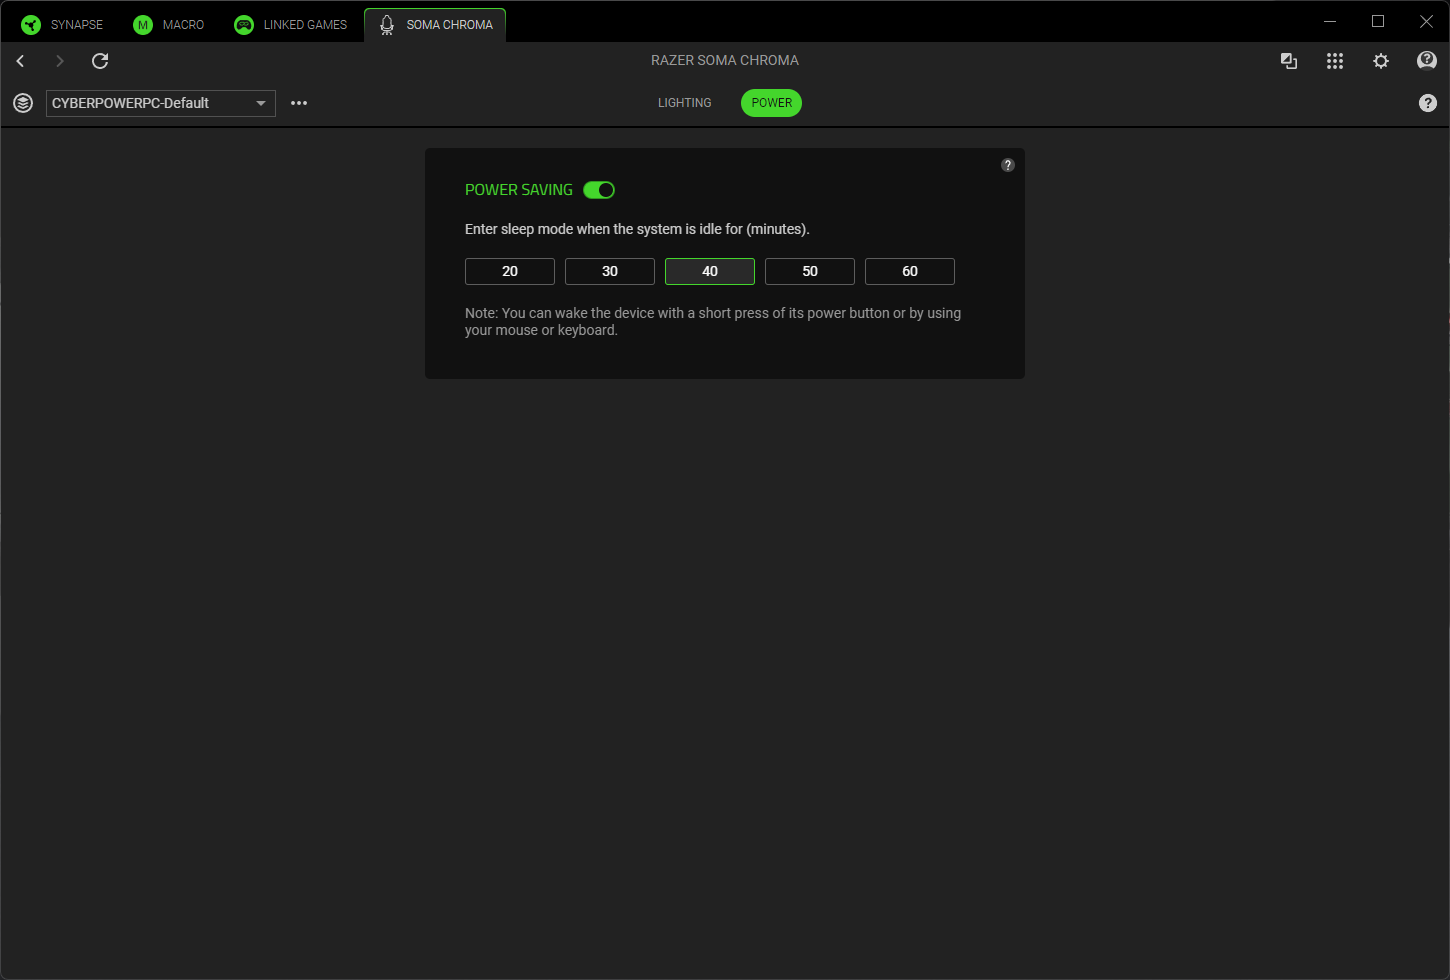
Speaking of the RGB lights, they are controlled using Razer’s Synapse software. I installed the Synapse app on my desktop computer and then plugged in the 2.4 GHz wireless USB dongle (the chair also has integrated Bluetooth LE, if you prefer to go that route). The Soma Chroma then showed up in the app, allowing me to configure it.

Razer Soma Chroma
Tom's Hardware
Razer Soma Chroma
Tom's Hardware
Razer Soma Chroma
Tom's Hardware

There’s a brightness slider and an option to dim the lights after a period of inactivity on the right panel. In the right panel, there are options to change the default effects pattern. You can configure more advanced effects using the Chroma Studio. As you might expect, you can sync the RGBs with your games, although the effect is not evenly remotely noticeable unless you’re in a dark room.

During the daytime, you’re not going to notice the lights at all, and the only people who will notice are your coworkers on Google Meet/Zoom/Teams calls.

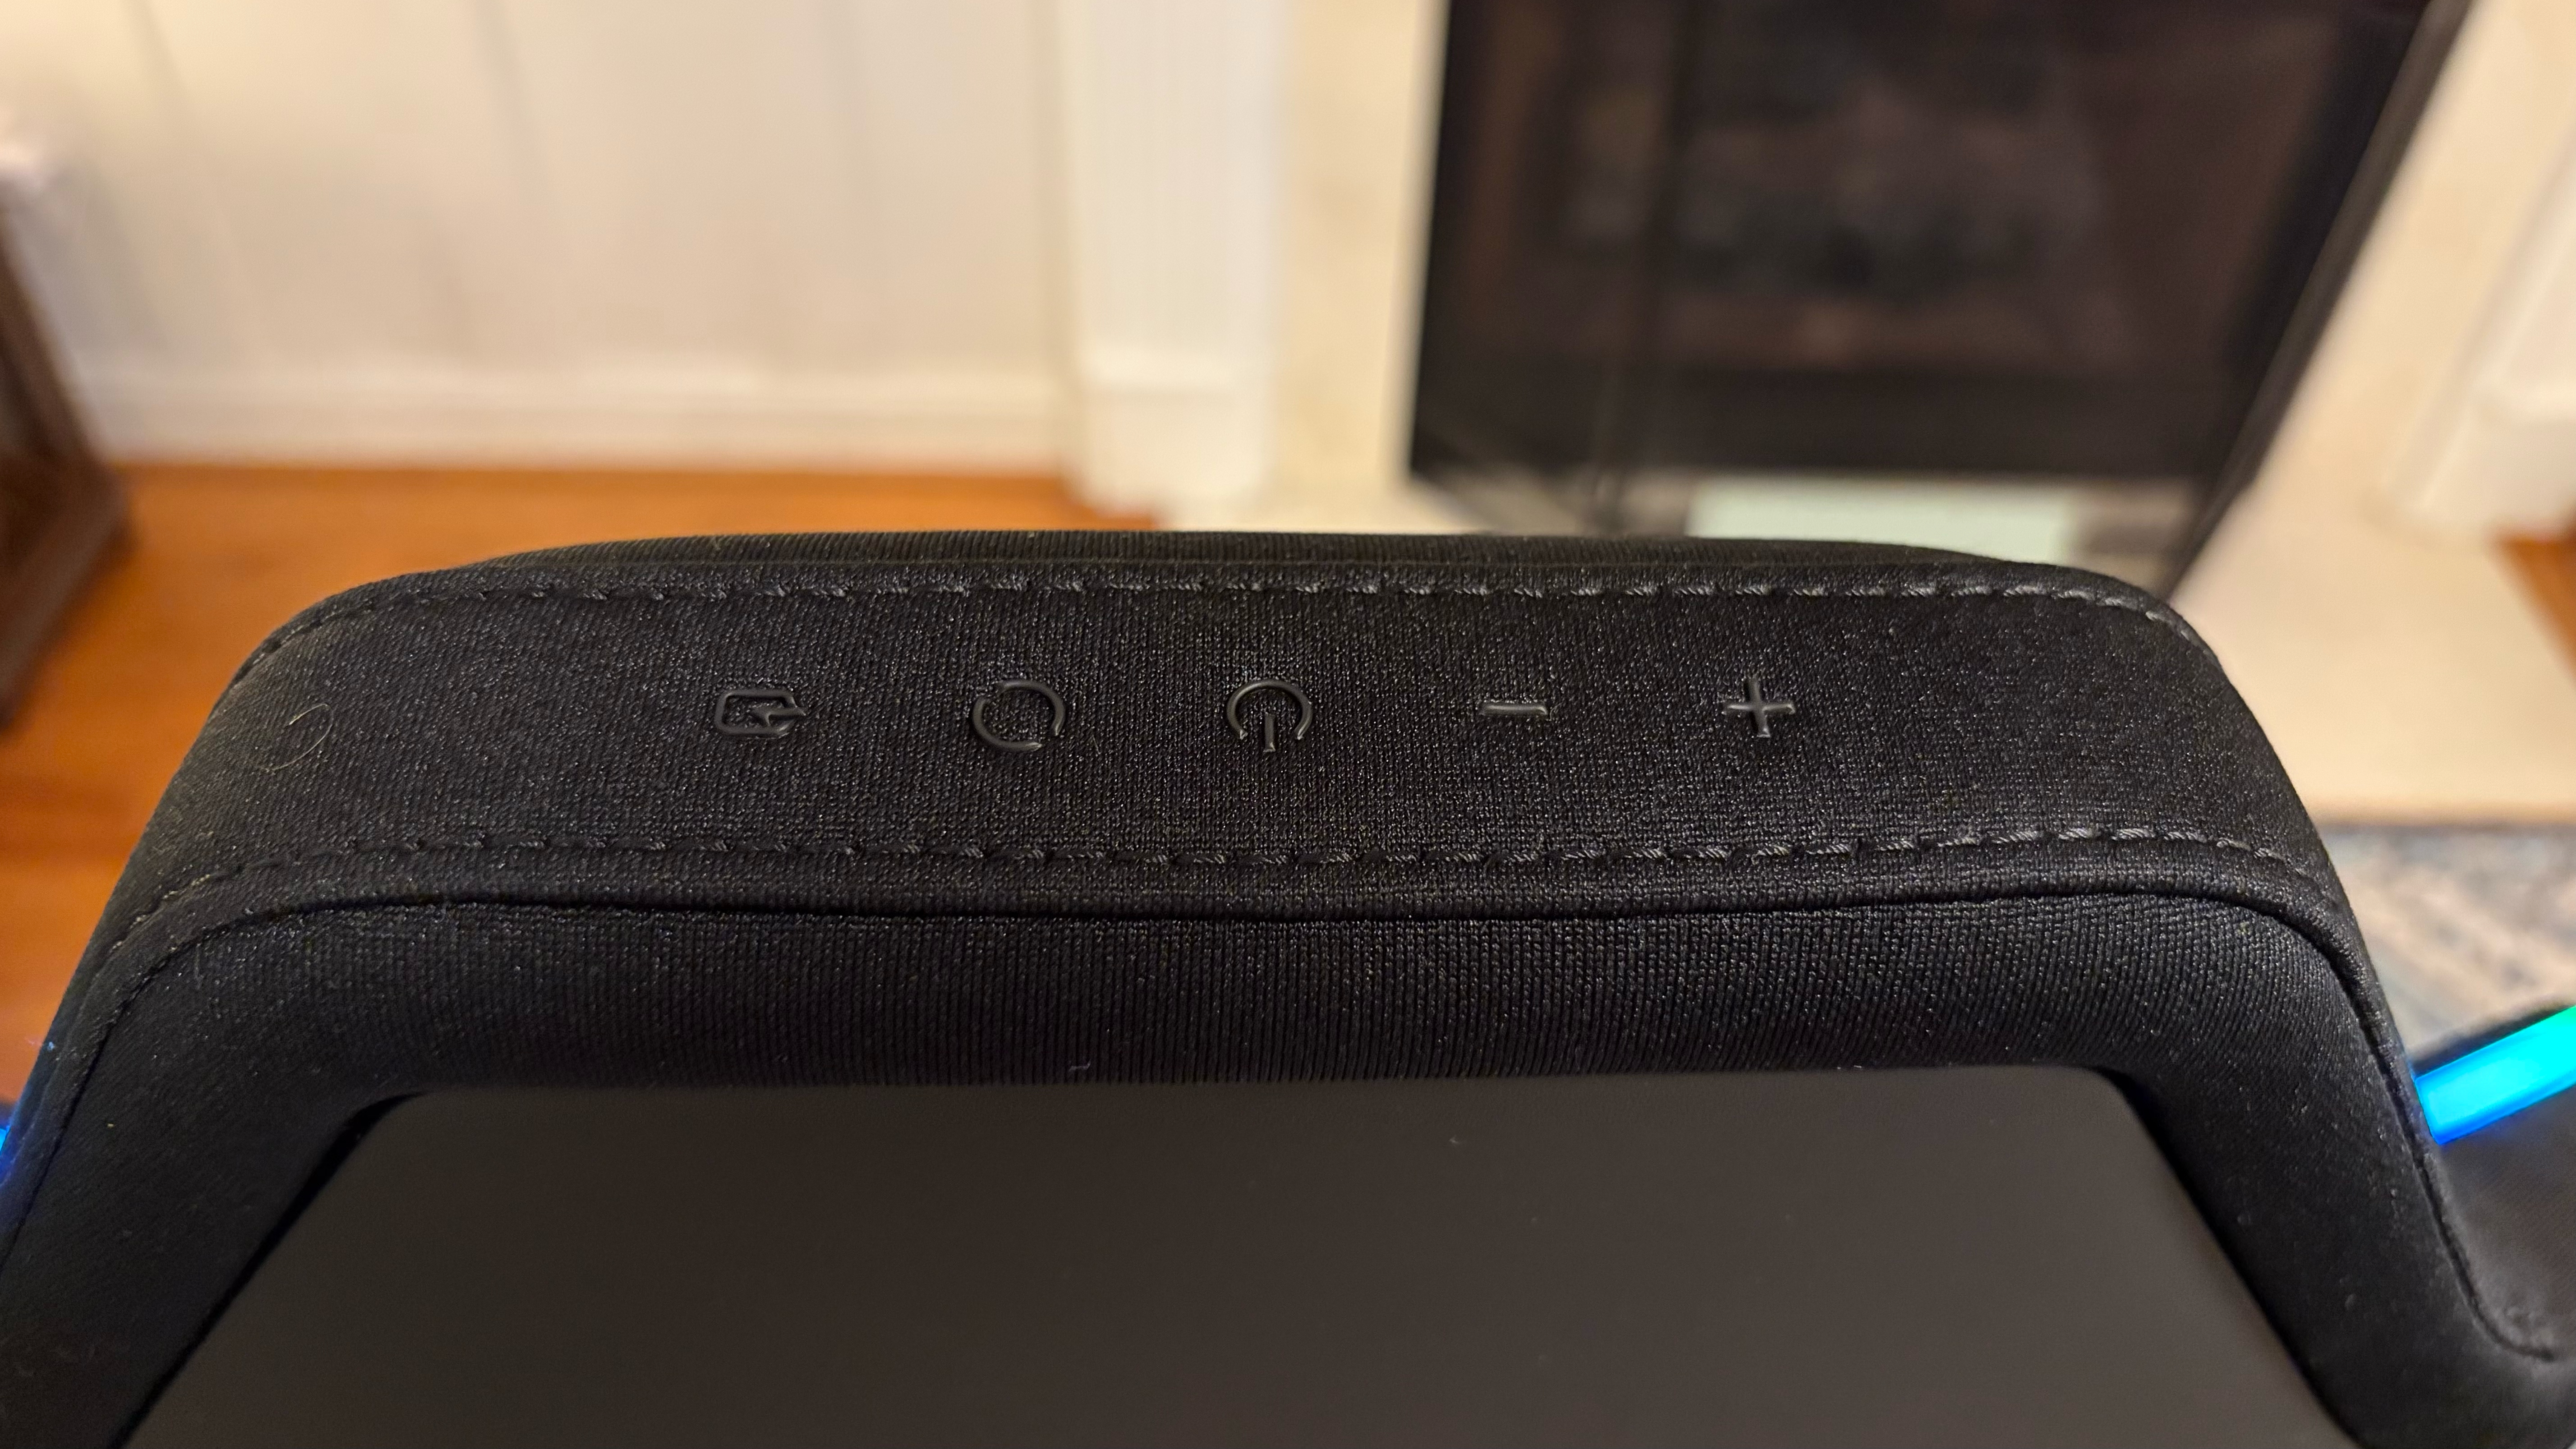
Although you can control the RGB effects in software, there are also physical controls at the top of the headrest.

Razer Soma Chroma Adjustments and Comfort

The Soma Chroma features dual-density cold-cured foam for the seat cushion. It did a good job of conforming to my buttocks, as it's specifically designed to relieve pressure points. There's good thigh support for my 5-foot-10-inch and 161-ish-pound frame.

What you gain in RGB goodness, you lose in adjustability. There's no adjustable lumbar support — what you see is what you get. Razer said that the lumbar curve is designed to encourage a neutral position and reduce fatigue after long-term use. That may be true in theory, but my lower back begged to differ after sitting in the chair for 6 hours straight in an upright and "ergonomically-correct" position. This was never an issue for me with the Iskur V2, with its 360-degree lumbar support — or even with the Iskur V2 X, which has no lumbar controls.

Razer Soma Chroma
Tom's Hardware
Razer Soma Chroma
Tom's Hardware

The backrest is adjustable from its default 90-degree upright position all the way back to 155 degrees. I spent the majority of my time either fully upright or slightly reclined at about 100 degrees. Anything more than 100 degrees just doesn't feel natural to me in any gaming chair.

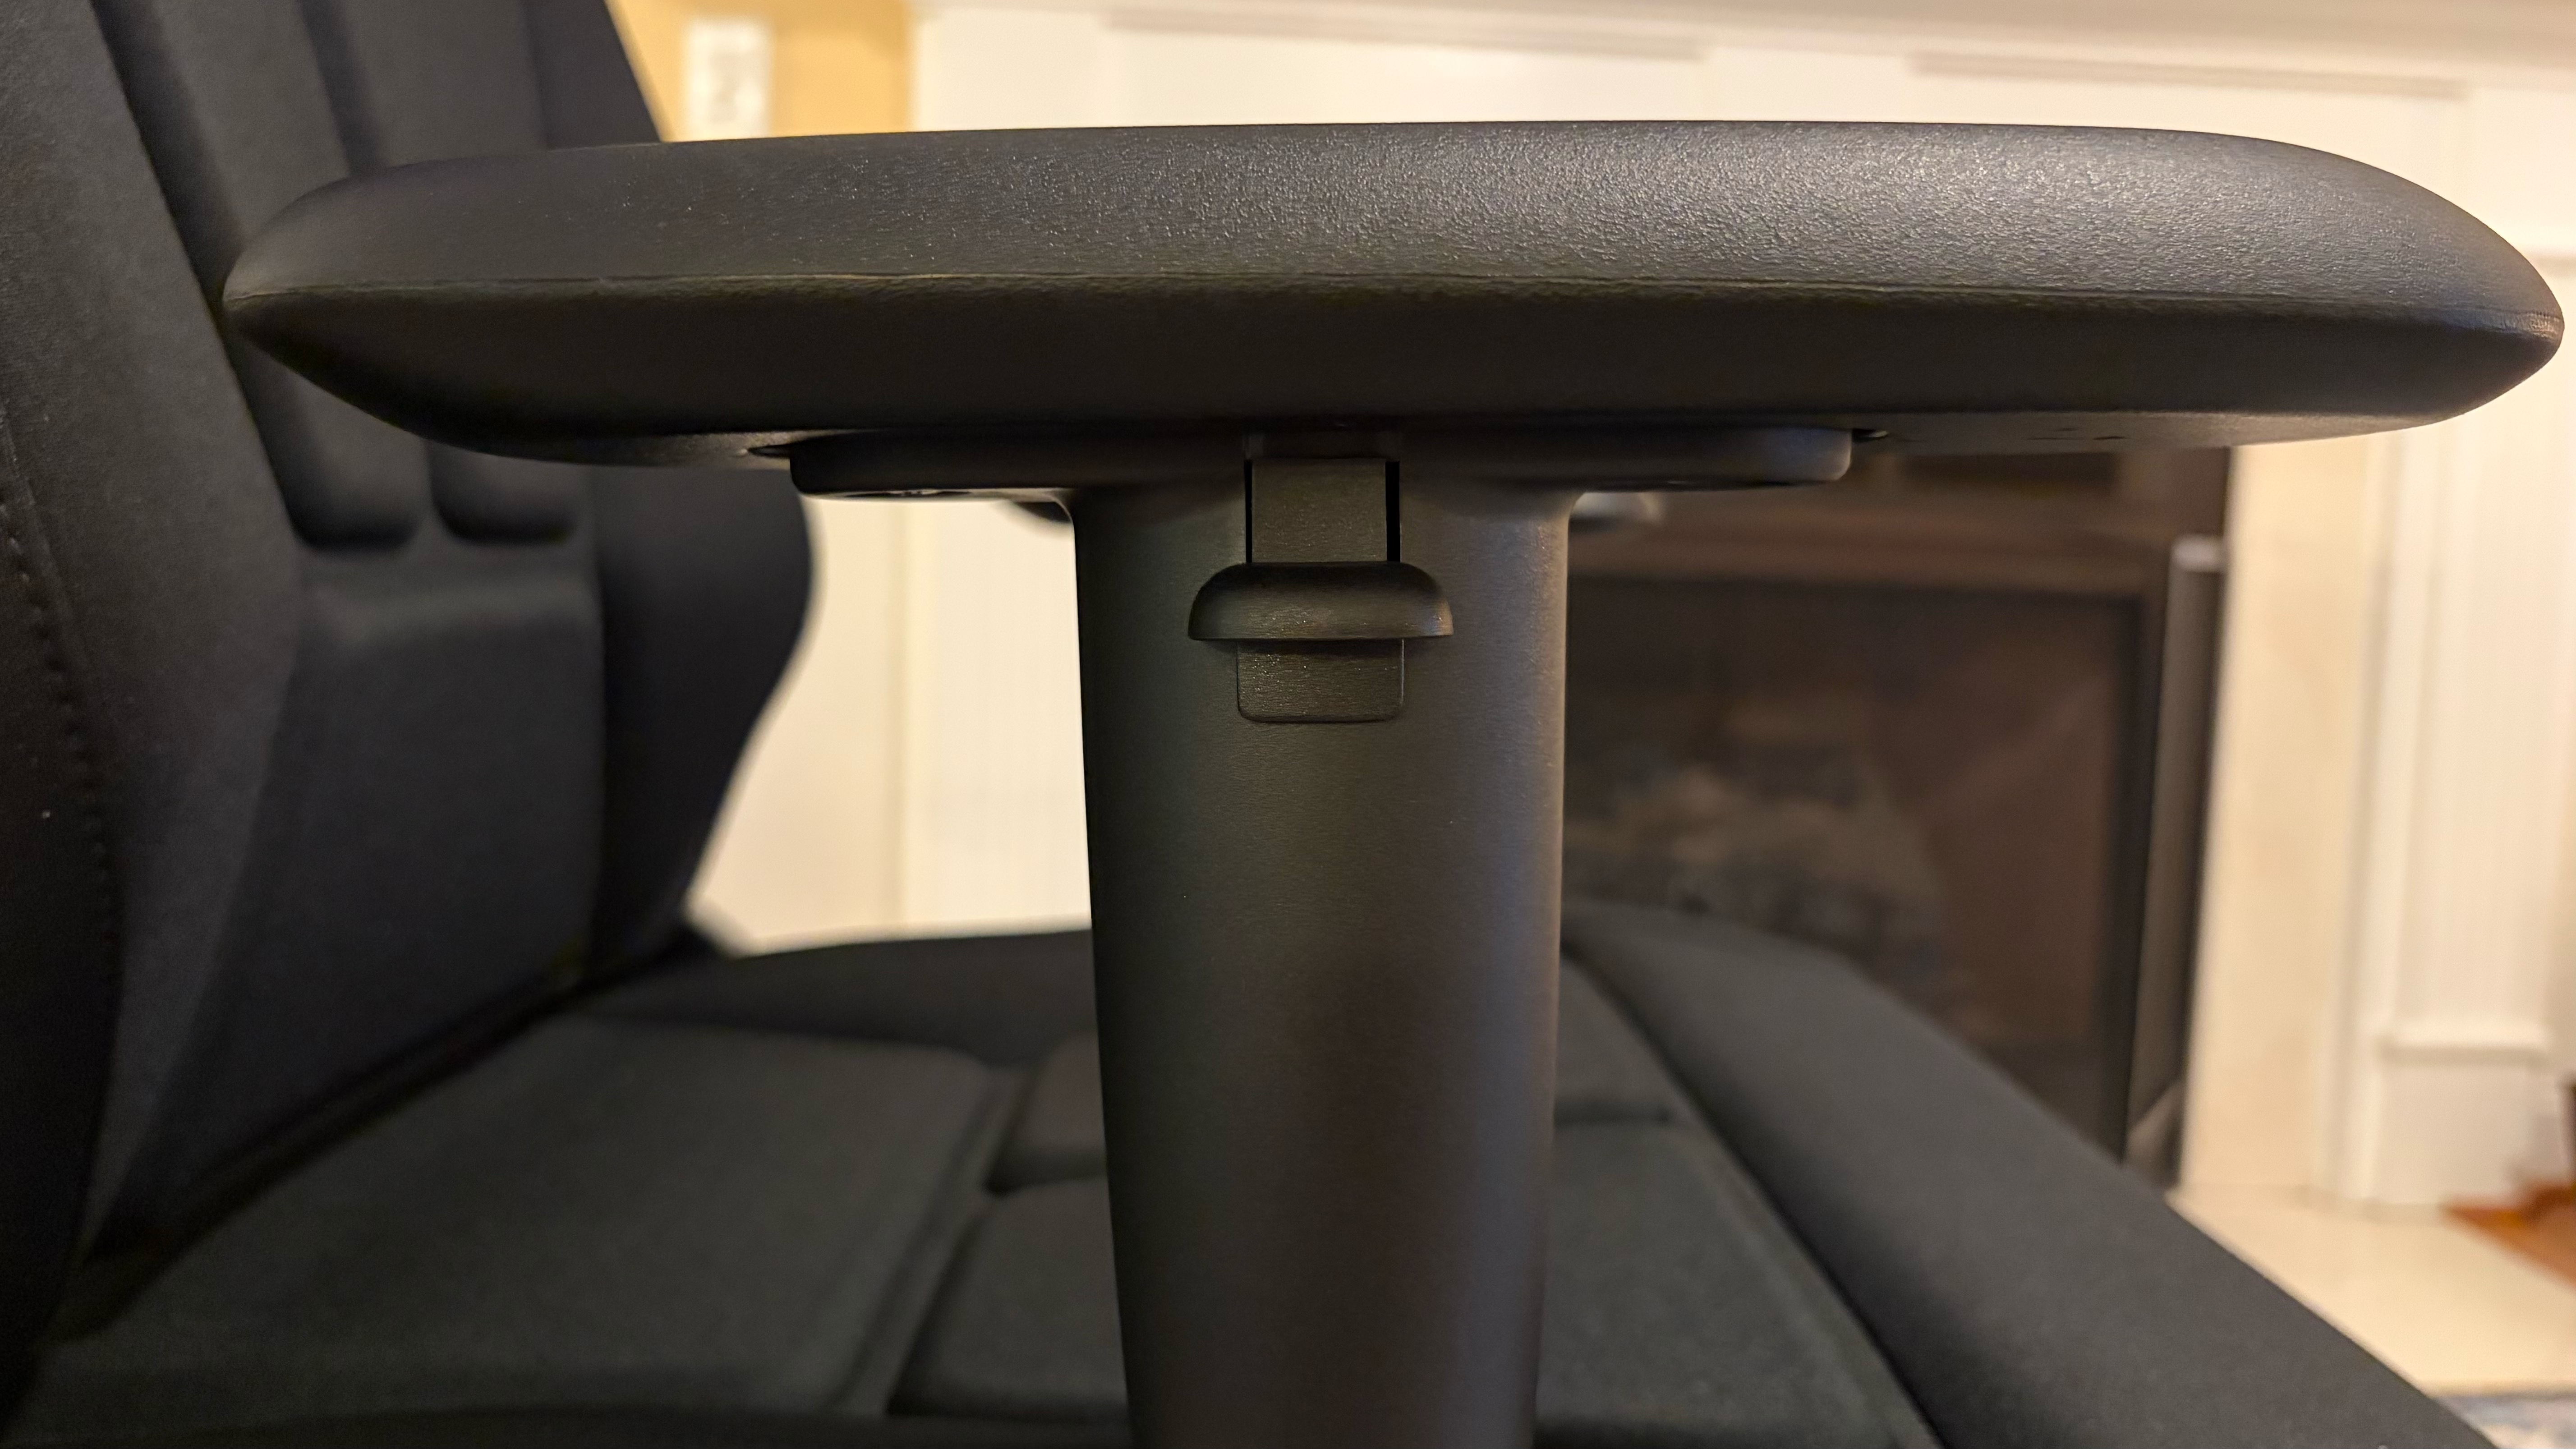
The Soma Chroma features 2D armrests, which are adjustable for swivel and height. The armrests have an up/down travel of 4 inches and can swivel in or out by up to 25 degrees. They're densely padded and were a comfortable home for my elbows during extended sessions.

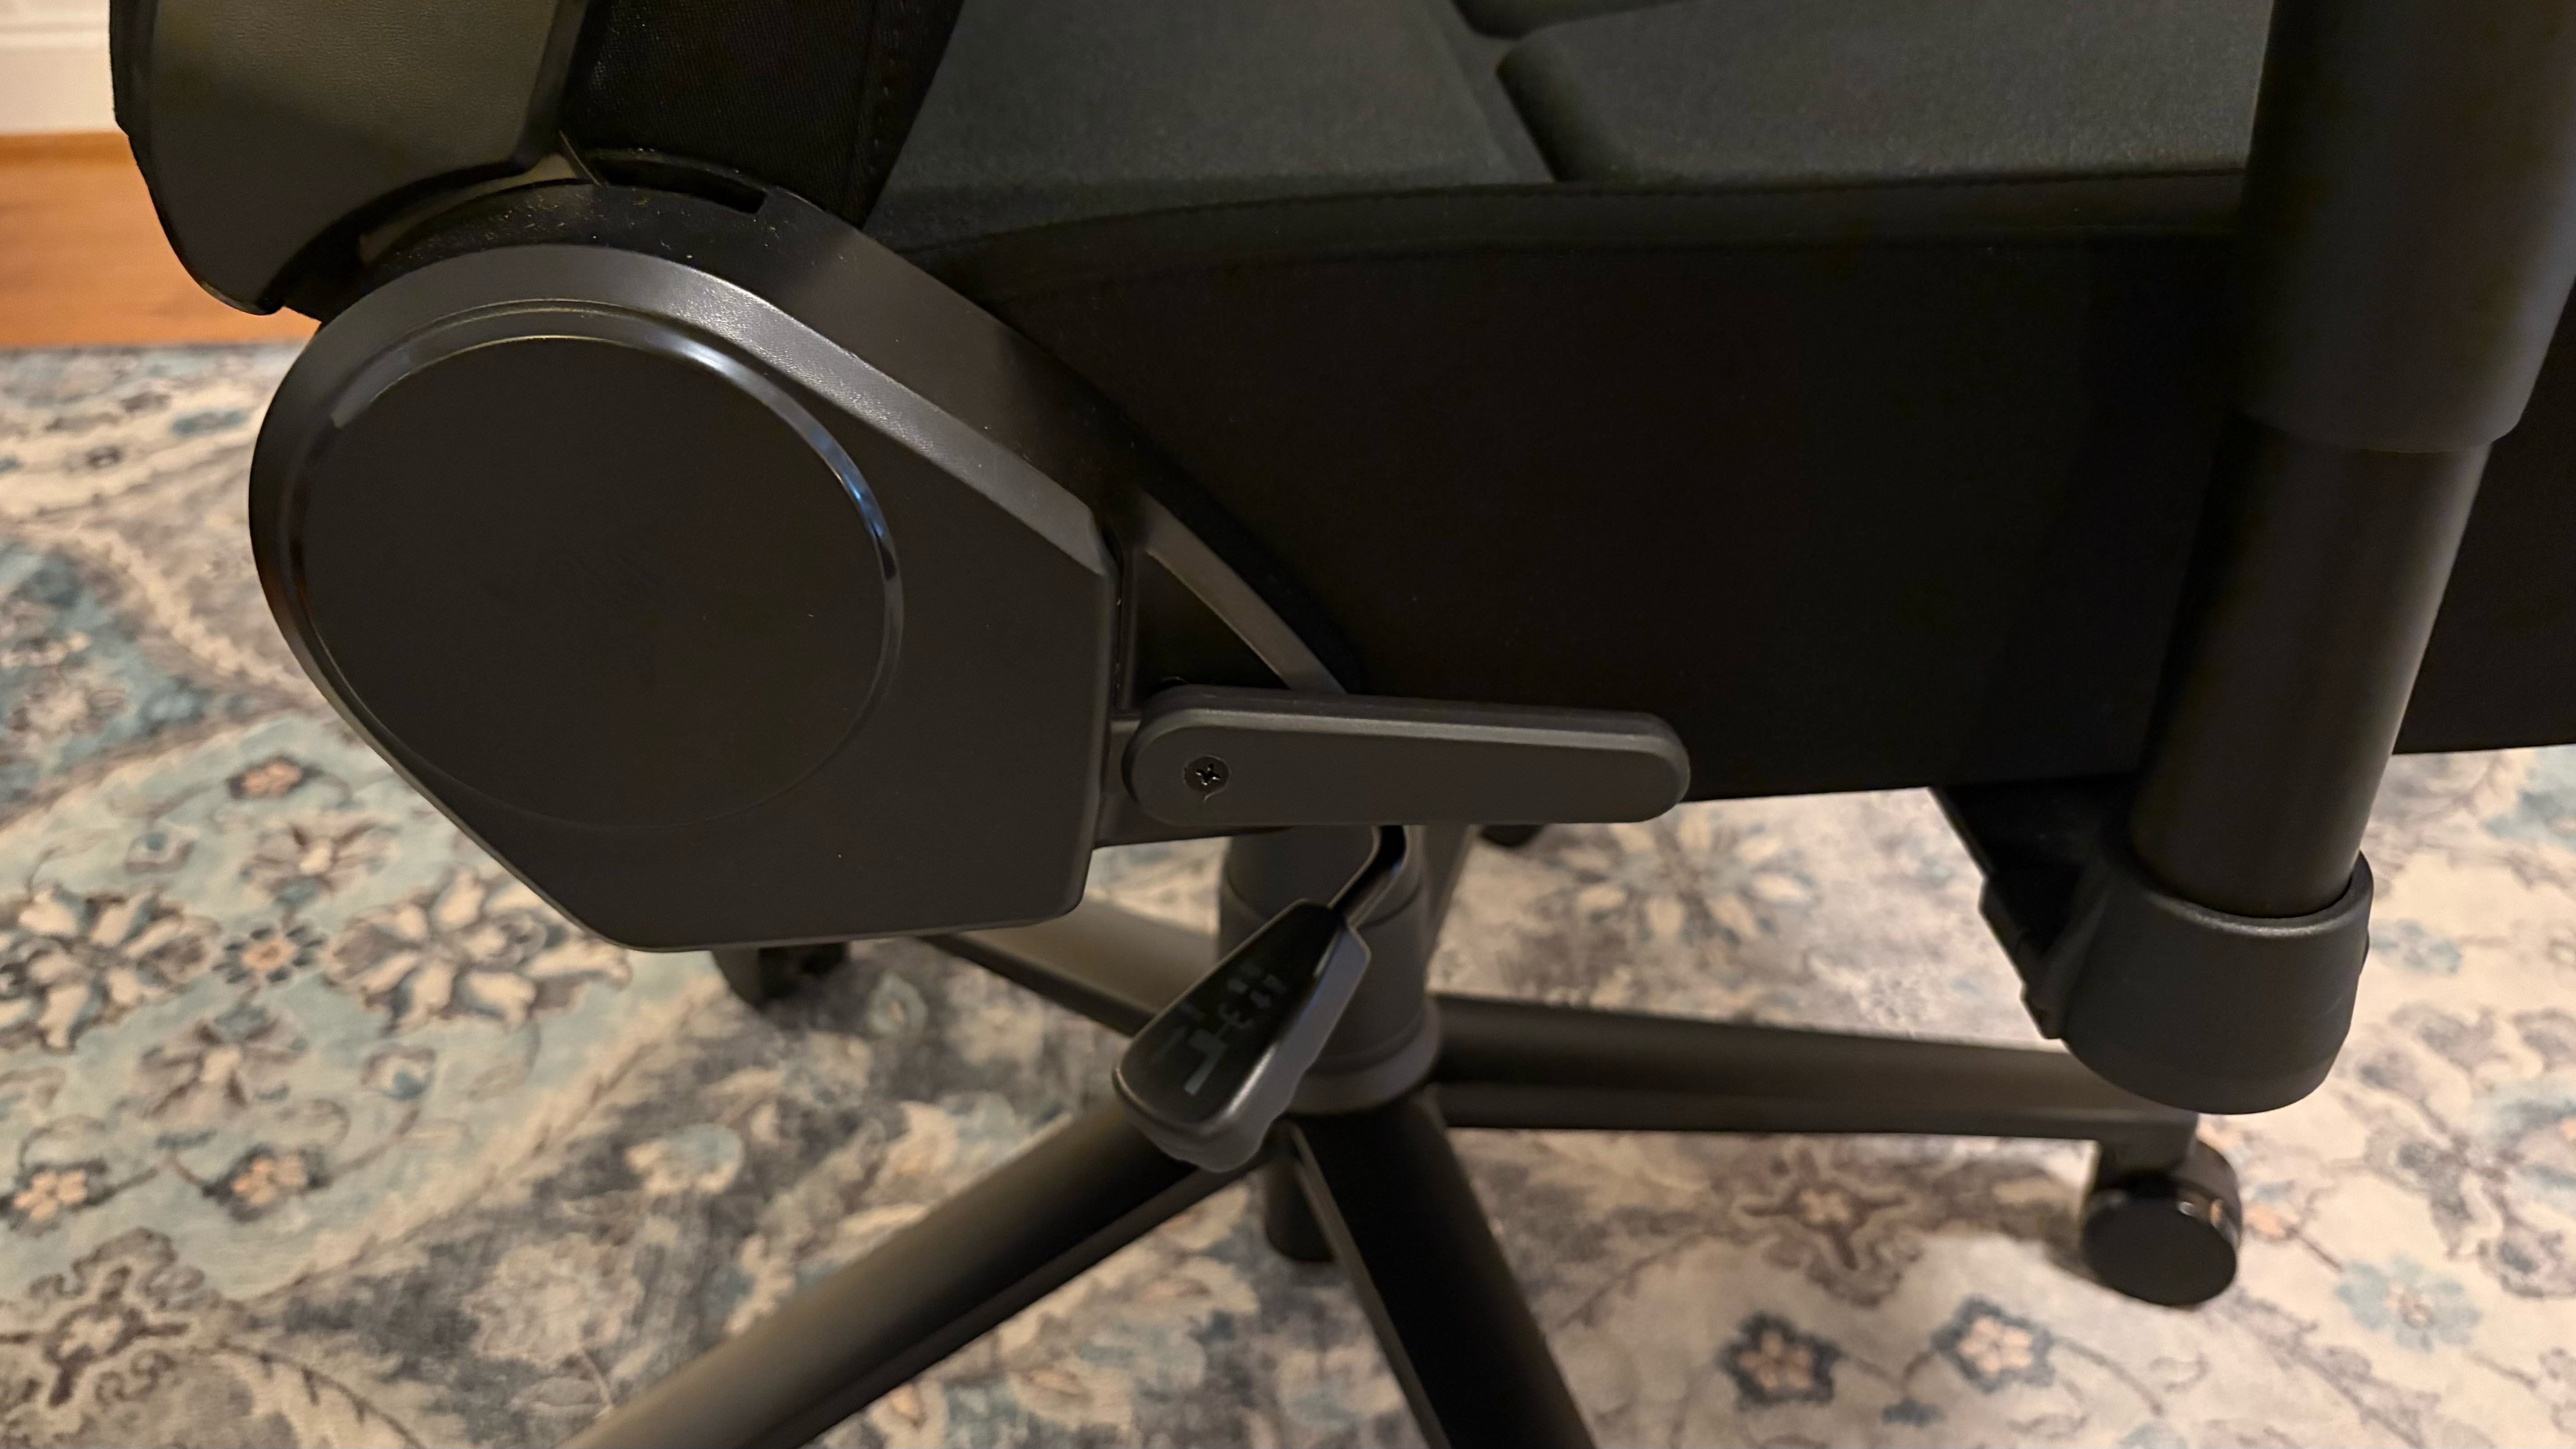
The chair has a height adjustment mechanism via a handle located on the right side of the seat base. I preferred to leave the seat at its maximum height of 20.1 inches.

Bottom Line

The Razer Soma Chroma is an interesting chair for gamers who are already fully entrenched in the Chroma ecosystem. The Soma Chroma has full access to Razer’s software suite, so you can sync all your devices to suit your gaming (or other media) needs. The chair also features built-in Bluetooth LE and includes a 2.4 GHz wireless USB dongle.

The RGB integration is also well-done, with support for portable power banks and a zippered pouch on the back to discreetly hide it. You can also use a USB-C extension cord to connect the Soma Chroma to your PC, but it is a nightmare for ergonomics. Of course, the chair ships with neither a portable battery pack or an extension cord, so you'll need to purchase these separately.

On the flip side, the Soma Chroma isn’t as adjustable as some of Razer’s other chairs, as it lacks 3D armrests and lumbar controls. I also found that I had some minor lower back pain when using the chair for hours in my preferred seating position. Of course, your mileage may vary, but I haven't experienced this with previous Razer chairs.

And the other matter to consider is the $499 price. If you don’t need RGB wizardry, the Razer Iskur V2 X is $200 cheaper and just as good on chair fundamentals.

Logitech's MX Master 4 hits $102 at Lenovo — up your productivity game with haptic feedback and effortless scrolling

2026年7月10日 19:34

Logitech's current flagship productivity mouse, the MX Master 4, is available for just $102.59 at Lenovo when you stack codes EXTRAFIVE and SUMMERLIVE26 in the shopping cart. This adds a discount of $17.40, bringing the price down from the $119.99 list price and saving you 15% off this amazing mouse. It's not often that we see noticeable price drops on this model, as it's a particularly in-demand peripheral for productivity users.
This discount applies to the black version of the MX Master 4. It succeeds the MX Master 3S, which is still our top pick for the best overall wireless mouse. The new MX Master 4 model keeps many existing features from the previous MX Master 3S, including the dual-mode MagSpeed scroll wheel on the top and a horizontal wheel on the side, but adds a brand-new haptic experience.

Check out this deal on Lenovo

The Logitech MX Master 4 uses an 8K DPI sensor, quiet click switches for almost silent operation, and better 2.4GHz wireless connectivity. The mouse offers both 2.4GHz wireless via the included USB transceiver and Bluetooth connectivity, with support for both Windows and macOS, as well as Linux and ChromeOS.

The MX Master 4 is the latest in Logitech's MX Master lineup, maintaining a similar ergonomic design along with dual MagSpeed scroll wheels and a new haptic feedback feature for those who prioritize productivity.View Deal

Logitech has added haptic feedback to the MX Master 4, which is located next to the thumb rest area of the mouse. Featuring four intensity settings to monitor your mouse, the haptic feedback feature is used to inform you when the mouse connects or disconnects from a device, during low battery, and for certain app-specific purposes.

Another new feature is the addition of the Action Ring, which is available via Logitech's Options+ software. It can be activated by pressing a dedicated button placed within the mouse's thumb rest, which brings up a circular menu giving users quick access to commonly used tasks. The ring is fully customizable through the Logitech software, so you can assign your favorite functions or actions for quick access.

If you're looking for a superb mouse for doing your work, getting creative, or for school, then the Logitech MX Master 4 at this $102.59 price is the best deal currently available from a major tech retailer.

If you're looking for more savings, check out our Best PC Hardware deals for a range of products, or dive deeper into our specialized SSD and Storage Deals, Hard Drive Deals, Gaming Monitor Deals, Graphics Card Deals, Gaming Chair, Best Wi-Fi Routers, Best Motherboard, or CPU Deals pages.

You can also join the Tom's Hardware deals Discord for up-to-the-minute hardware deals.

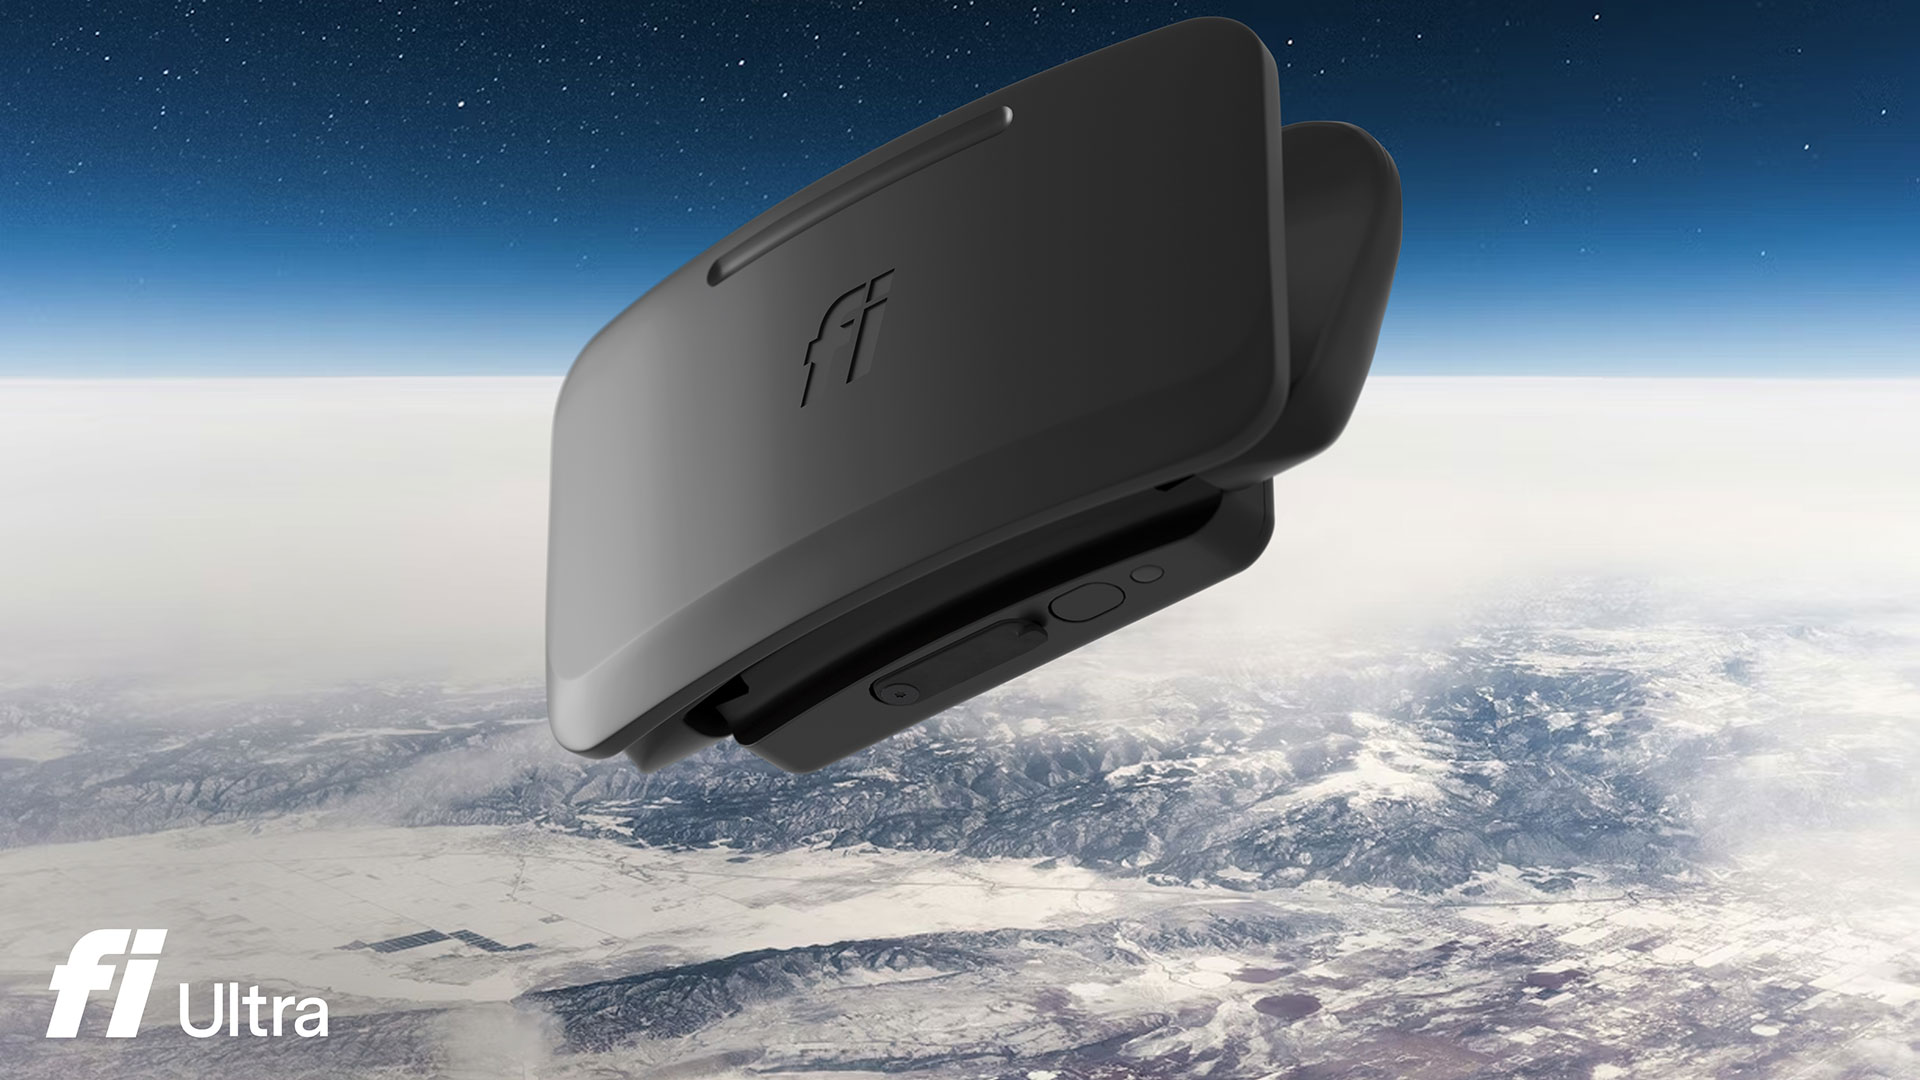
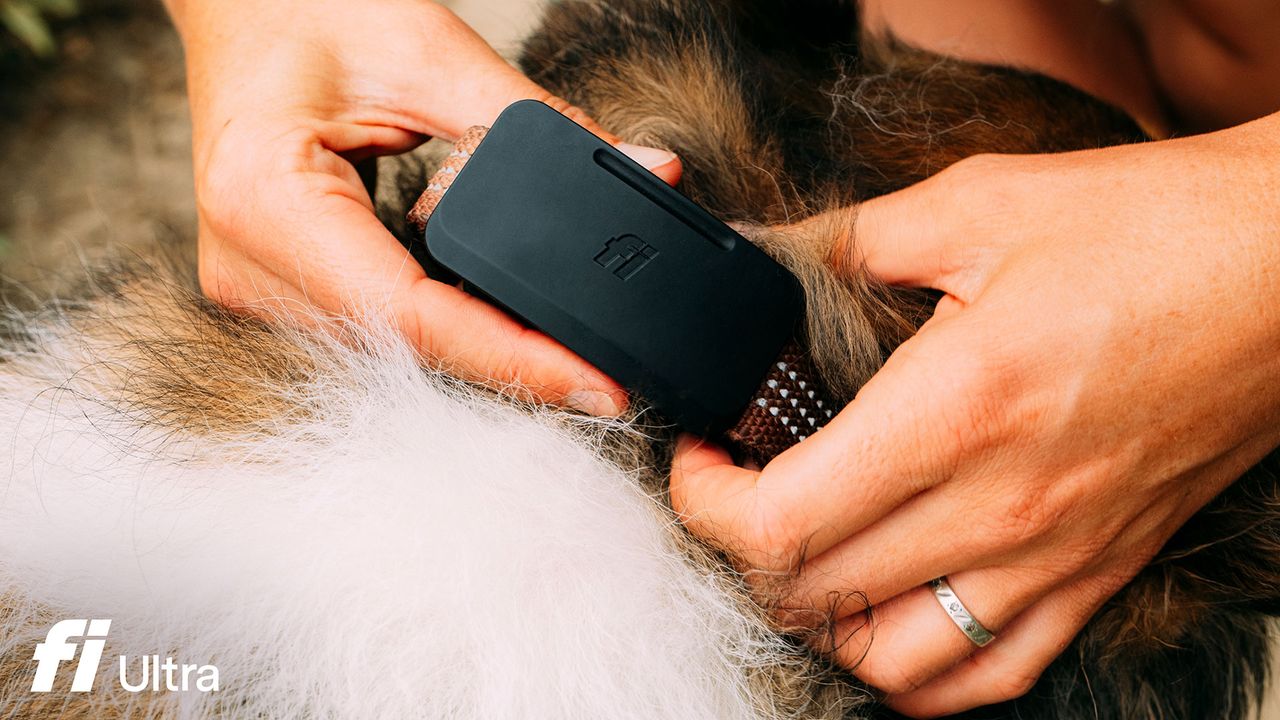
Fi Ultra becomes first dog tracker powered by Starlink satellites – the Fi Ultra Dog Tracker makes Fido trackable via satellite, onboard GPS, and LTE connectivity

2026年7月8日 21:11

Smart pet technology firm Fi has launched the Fi Ultra Dog Tracker today. This new wearable device is claimed to be “the world’s first consumer wearable powered by T-Satellite with Starlink.” There seem to be a few qualifications in that statement, but they should not be necessary, as, according to our searches, this is indeed the first dog tracking wearable with Starlink integration. To be clear, the dog wears the Fi Ultra, not the owner.

Getting a collar-worn device for your faithful friend, integrating T-Satellite with Starlink, could deliver an important additional layer of security for dog owners. Previous products available in the pet tracker market could be of limited value in areas with spotty or absent LTE or GPS coverage. Satellite-grade dog tracking may therefore be a boon to adventurous dogs and owners who live and explore beyond the reach of traditional networks.

"Fi Ultra has transformed what's possible for dog owners," said Jonathan Bensamoun, co-founder and CEO of Fi. "Our mission has always been to strengthen the human-animal connection via data, to give dogs more freedom while keeping them safe, and with the power of T-Satellite with Starlink behind Fi Ultra, that mission now extends to every corner of the country and soon, every corner of the world."

Fi Ultra key specifications

Satellite tech

T-Satellite with Starlink GPS: Track a dog's location nearly anywhere in the US, including areas entirely without cellular coverage.

Other tracking tech

Dual-band high-accuracy GPS: Deliver precise location data continuously, whether connected via satellite, LTE, Wi-Fi, or Bluetooth.

User interface

Real-time location updates in app: Deliver accurate, continuous location data whether the dog is in a city park or miles from the nearest cell tower. Safe zone alerts when the dog returns to predefined area(s). Visual walk tracking. Haptic motor and piezo speaker.

Come home signal training

Fi Callback: A proprietary training system based on sound and vibration that uses no static electric shock to bring dogs back to their owners on command.

Battery

Fri Ultra lasts two days on a single charge, supporting extended trips and off-grid exploration. USB-C charging.

Physical

Measures 75 x 40 x 25mm, weighs 68g, water resistance IP68 and IP66K rated.

The Fi Ultra Dog Tracker
Fi Ultra Dog Tracker
The Fi Ultra Dog Tracker
Fi Ultra Dog Tracker

Fi Ultra also features automatic switching between LTE and satellite coverage for continuous location tracking in remote areas. This new tracker can work in concert with the previously launched Fi Series 3+ and Fi Mini dog tracker devices.

Now, to what some will feel is a drawback, Fi Ultra is bundled with a subscription service. This might be inevitable due to the use of partner satellite and cellular connectivity, though. The scale of the fees is said to be $199 plus a $189 per year membership for new customers. Established Fi tracker customers can buy in for a flat $299 fee. The bottom line is, with a tracker like this, your dog should never have to face the perilous journey dramatized in Lassie Come Home.

8Bitdo's wireless Pro 2 gaming controller falls to all-time low price — hall-effect gamepad is 38% off, just $37.19

2026年7月8日 19:18

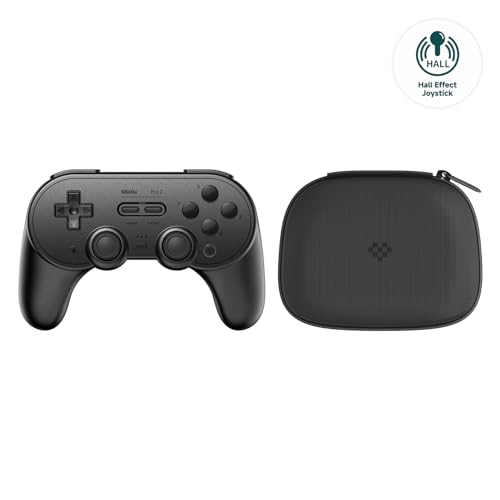
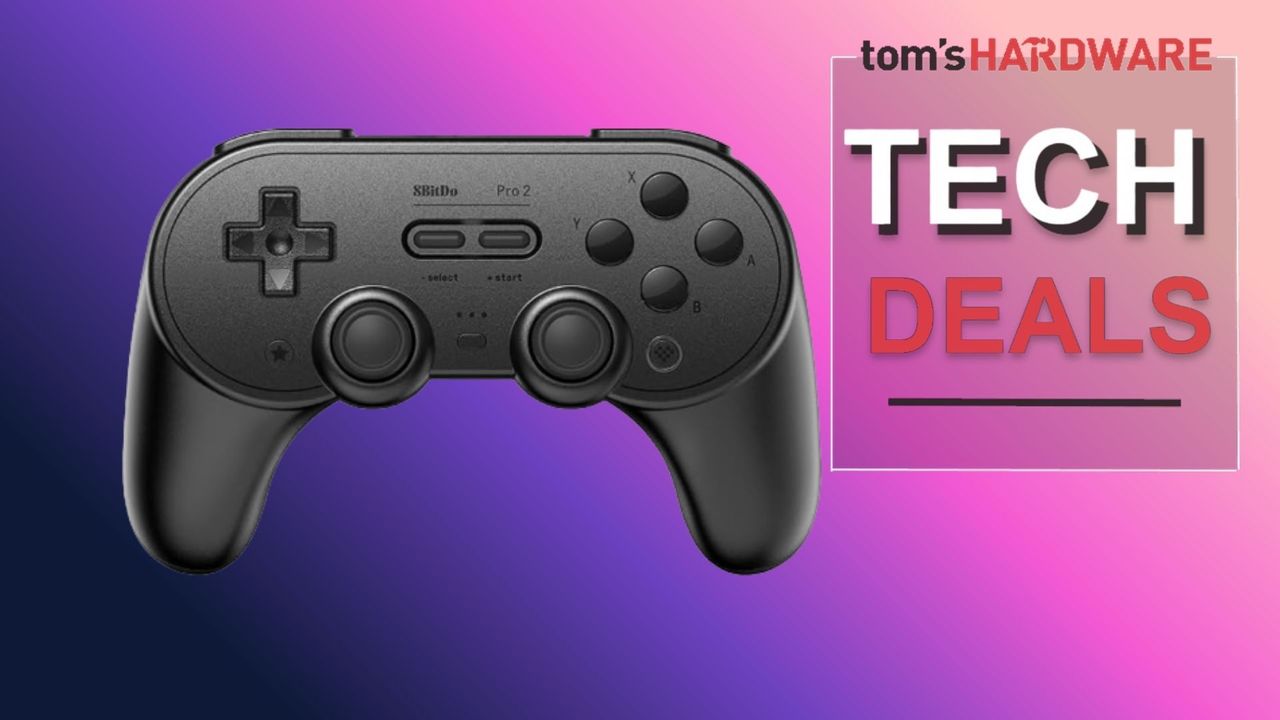
Peripheral maker 8Bitdo makes some seriously good controllers, and for very respectable prices in comparison to the competition. You can currently pick up their popular Pro 2 Wireless Controller for just $37.19, a saving of $22.80 (38%) from its $59.99 list price. You do, however, have to be an Amazon Prime member to get this discount. Not only is this an all-time low price for this controller, but it also comes with a convenient travel case to help protect the controller when you take it on the go. Perfect for pairing with a Nintendo Switch when traveling or going on holiday.

Check out this deal on Amazon

One of the reasons you can pick up the 8Bitdo Pro 2 wireless on the cheap is that there is a newer version of the controller available from 8Bitdo - the Pro 3. Don't let that put you off, though. The Pro 2 features stick-drift-free hall-effect joysticks for accurate gaming and up to 20 hours of continuous play over Bluetooth. There are also many other great features, such as 6-axis gyro, somatosensory, and motion control functions, 4-way mode switching between devices, and amazing compatibility with various devices. Upgrade to the latest firmware, and you can use the controller with the Nintendo Switch 2. It's also great for the Steam Deck and is easily recognized when using Steam on the PC.

8Bitdo's wireless Pro 2 controller features hall-effect joysticks for zero stick drift. This retro-looking gamepad is compatible with Nintendo's Switch/Switch 2 consoles, Windows PC, and Android devices. The controller comes with a handle travel case for on-the-go use.View Deal

You can also use 8Bitdo's Ultimate Software to fully configure your Pro 2 controller to your personal tastes. Adjust the level of rumble your controller generates, create macros for your favorite games, adjust trigger sensitivity, alter joystick zones, and fully map every button on the controller.

The controller comes paired with a protective travel case and a USB-C cable for charging and to also continue playing should the battery run dry. Don't forget, you have to be an Amazon Prime member to get this deal.

If you're looking for more savings, check out our Best PC Hardware deals for a range of products, or dive deeper into our specialized SSD and Storage Deals, Hard Drive Deals, Gaming Monitor Deals, Graphics Card Deals, Gaming Chair, Best Wi-Fi Routers, Best Motherboard, or CPU Deals pages.

You can also join the Tom's Hardware deals Discord for up-to-the-minute hardware deals.

Working prototype of open-source printer that promises user-repairability and no subscriptions appears in first video — DRM-free 'Open Printer' inkjet still has no announced price, ship date, or print speed, nine months after it first appeared

2026年7月6日 23:30

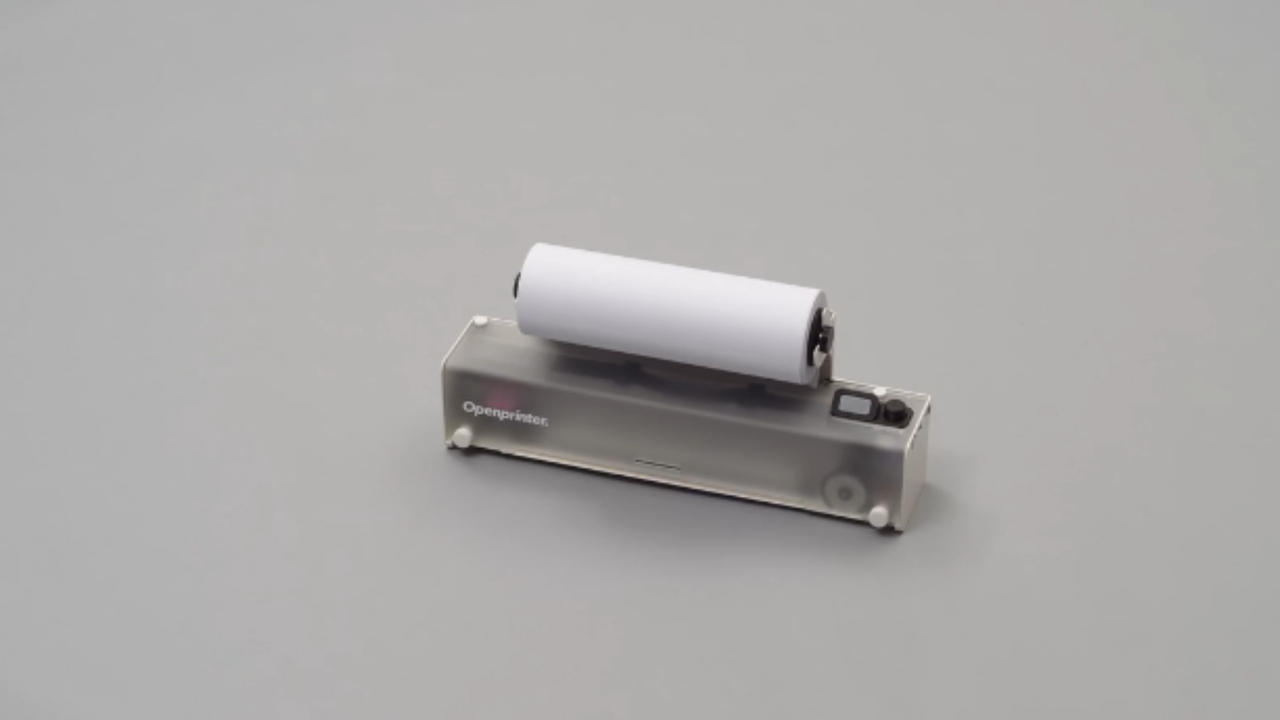
Nobody loves their printer. Decades of DRM chips, subscription ink, and firmware that bricks non-branded cartridges have made sure of that. But now, Paris-based Open Tools wants to hand the hardware back to the people who paid for it. The start-up has shared its first video of a working prototype and announced that its 'Open Printer' has been nominated for two French Design Awards, though the repairable, open-hardware inkjet still carries no announced price, ship date, or print speed, roughly nine months after it first appeared on Crowd Supply.

The machine runs on a Raspberry Pi Zero W, takes refillable HP cartridges with no DRM, and prints to cut sheets or paper rolls through an integrated cutter, with its design files available under a Creative Commons license that prohibits commercial reuse.

A Raspberry Pi Zero W runs the print server, while an STMicroelectronics STM32 microcontroller drives a separate cartridge board. Control comes from a 1.47-inch TFT LCD and a jog wheel, with USB-C, USB-A, Bluetooth 4.1, and a 24V DC input. The manufacturer's recent progress update reported that the prototype can now print in both black and full color.

In terms of printing, that runs through CUPS, the open-source Common Unix Printing System, meaning the hardware works with Windows, macOS, Linux, Android, and iOS without any vendor drivers. Open Tools quotes resolution at 600 dpi for black and 1200 dpi for color, with the machine accepting HP 63 cartridges in the U.S., HP 302 in Europe, and HP 803 in Asia. Each is refillable, and black and color run independently rather than blocking printing entirely when one of the tanks empties.

Open Tools licenses its electronics, firmware, mechanical files, and bill of materials under Creative Commons BY-NC-SA 4.0, a noncommercial term that allows owners to repair, modify, and share the design, but bars anyone from building and selling the printer.

However, Open Printer only uses HP cartridge bodies with integrated printheads, so its refill freedom will only last for as long as HP keeps selling those cartridges in a form that accepts third-party ink. It's an odd choice for Open Tools, given that HP is the vendor that's by far the most associated with cartridge lockouts, having tied cheaper printers to its HP+ and Instant Ink programs before discontinuing those online-only models in 2024 after a backlash.

Wi-Fi and Ethernet are still being integrated, according to the update, alongside work on ink drying, printhead cleaning cycles, paper insertion, and dithering algorithms. The spec sheet lists Wi-Fi 5, which exceeds the 802.11n radio built into the Raspberry Pi Zero W, so networking will probably rely on an added module, but that remains to be seen.

Open Tools has published no funding goal to date, and says the final price depends on production volume, component costs, certification, and remaining engineering, with the figure to be revealed when the crowdfunding campaign opens in the coming months.

Turtle Beach Command Series KB7 Review: A keyboard with a touchscreen and a lot of potential

2026年7月5日 20:10

I don't think I need a keyboard with a built-in touchscreen, but I also didn't think I needed a keyboard with a built-in Stream Deck (and I was, apparently, wrong). Turtle Beach's take on the customizable-macro-pad-on-your-keyboard is its recently-launched Command Series, which includes a handful of ultra-customizable peripherals with fancy touchscreen inputs — two keyboards, a modular numberpad, and three mice.

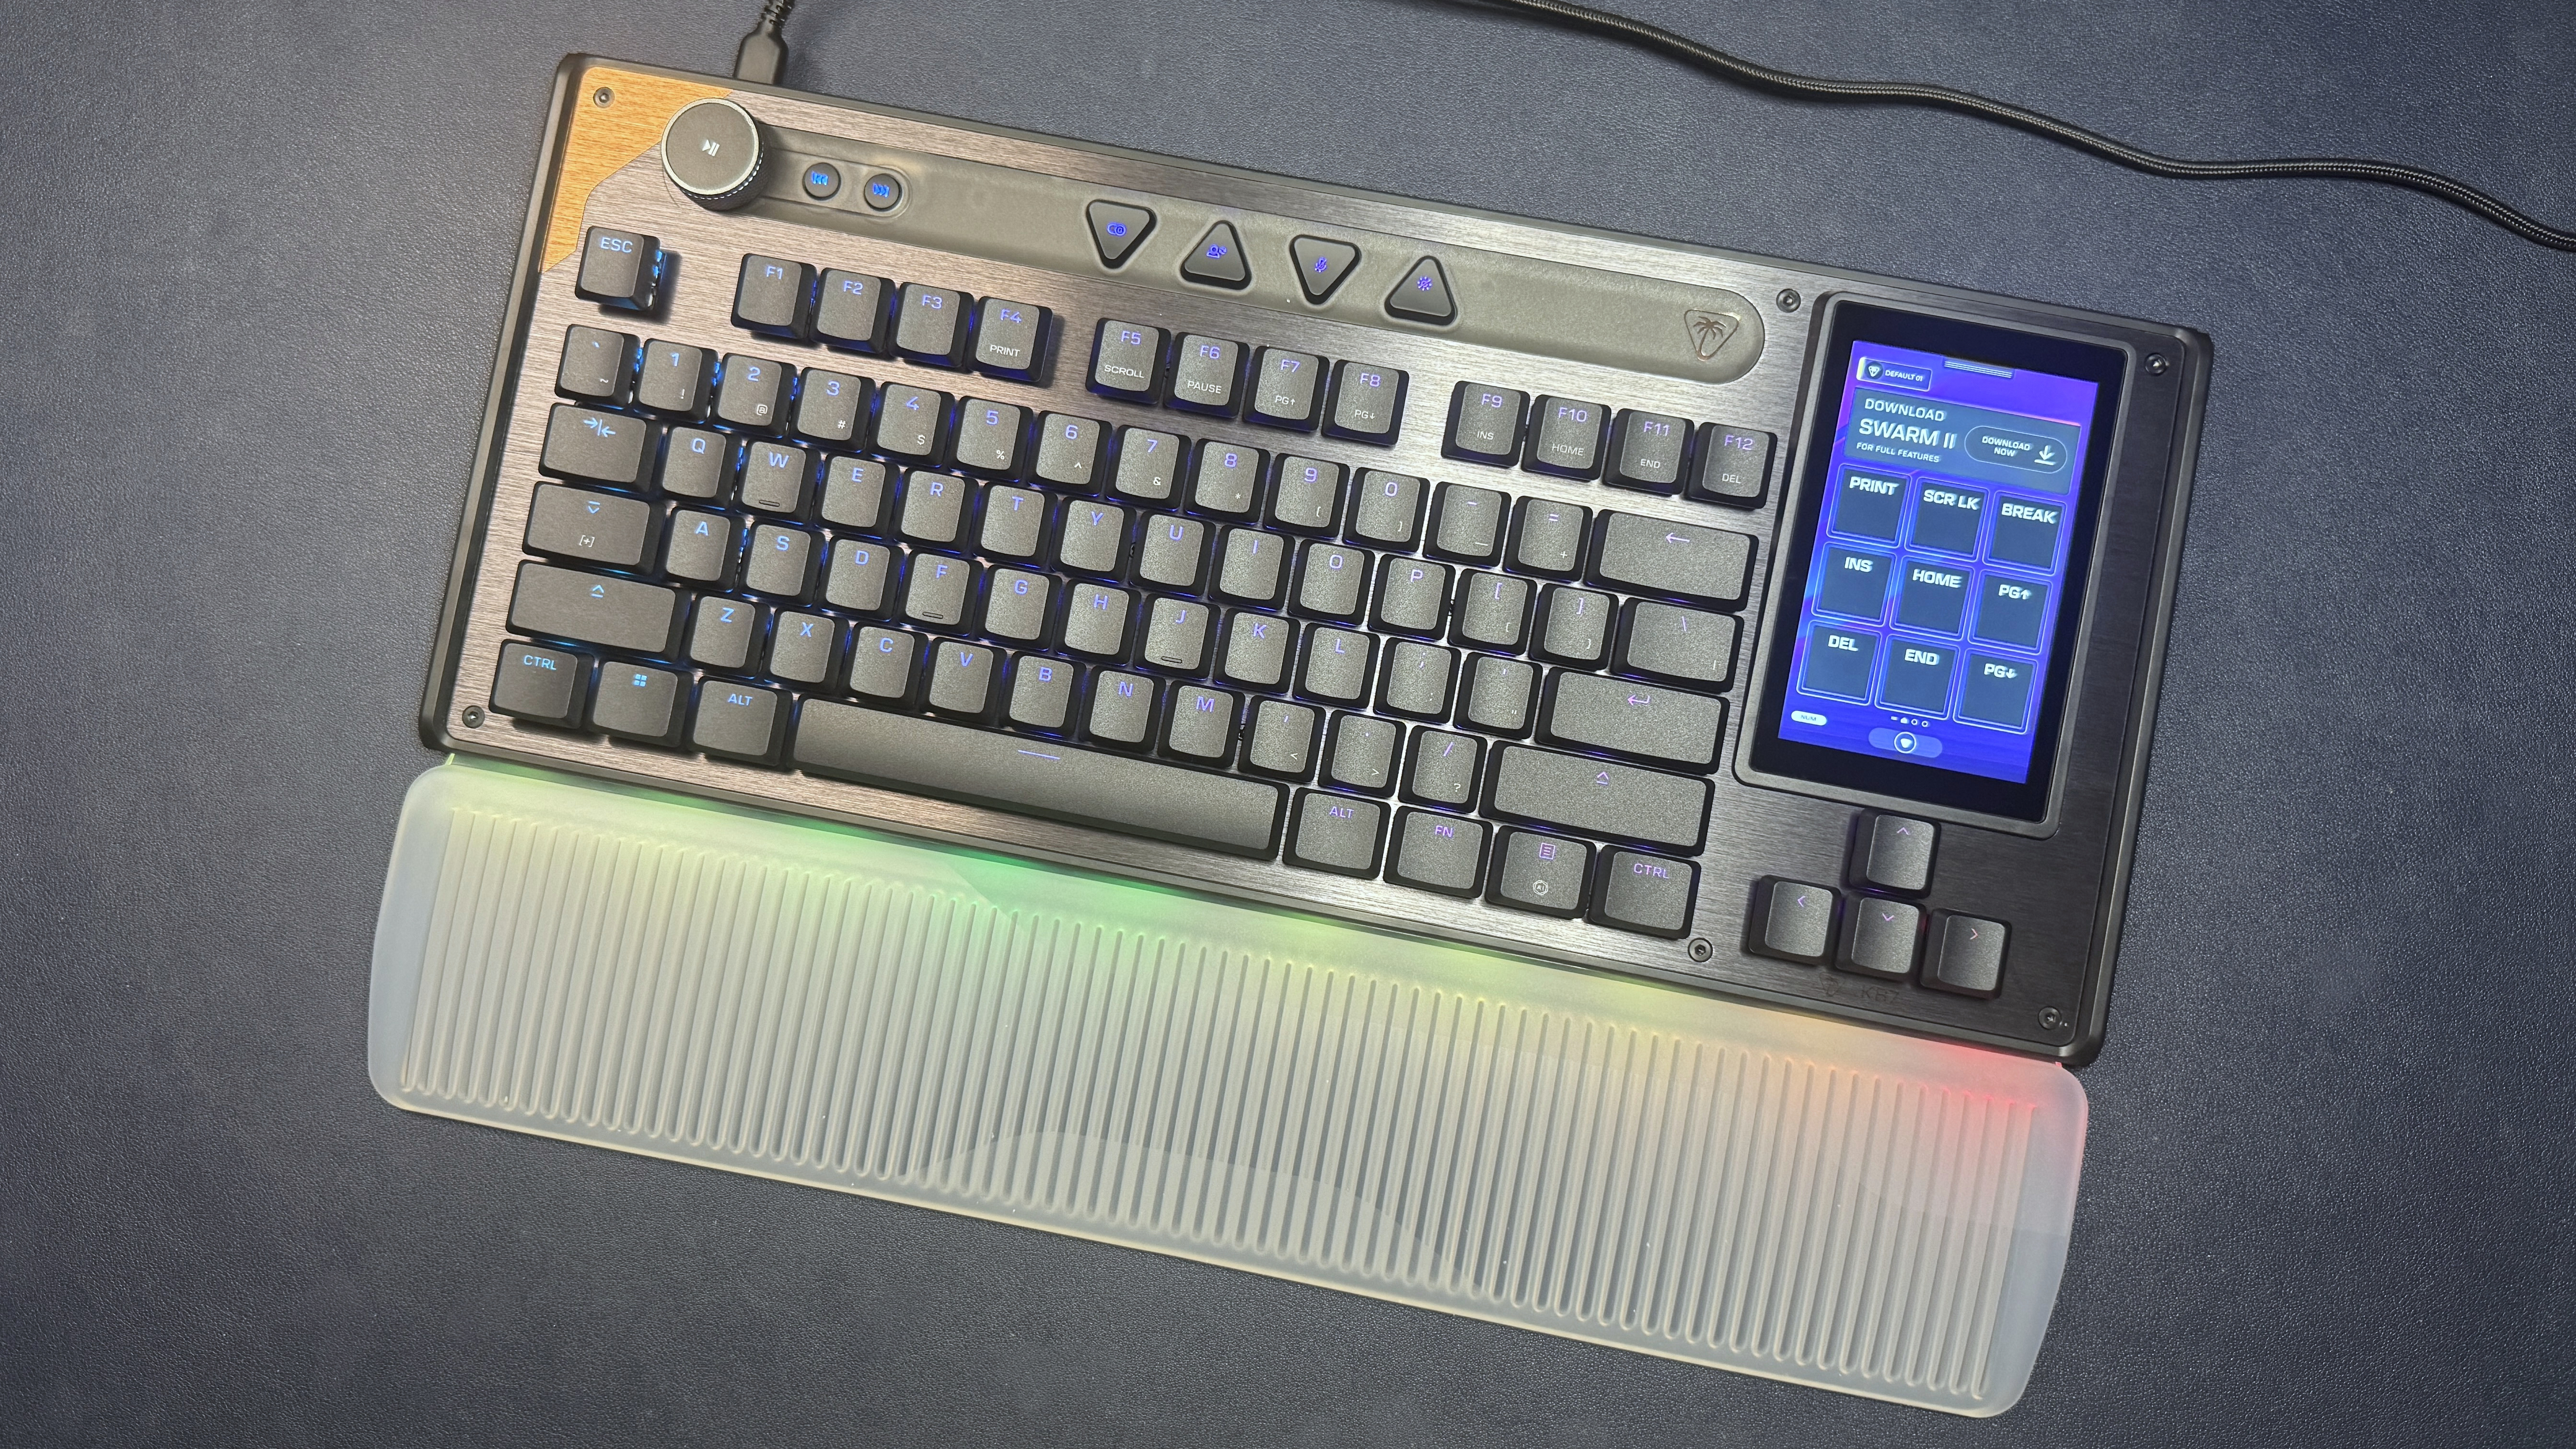
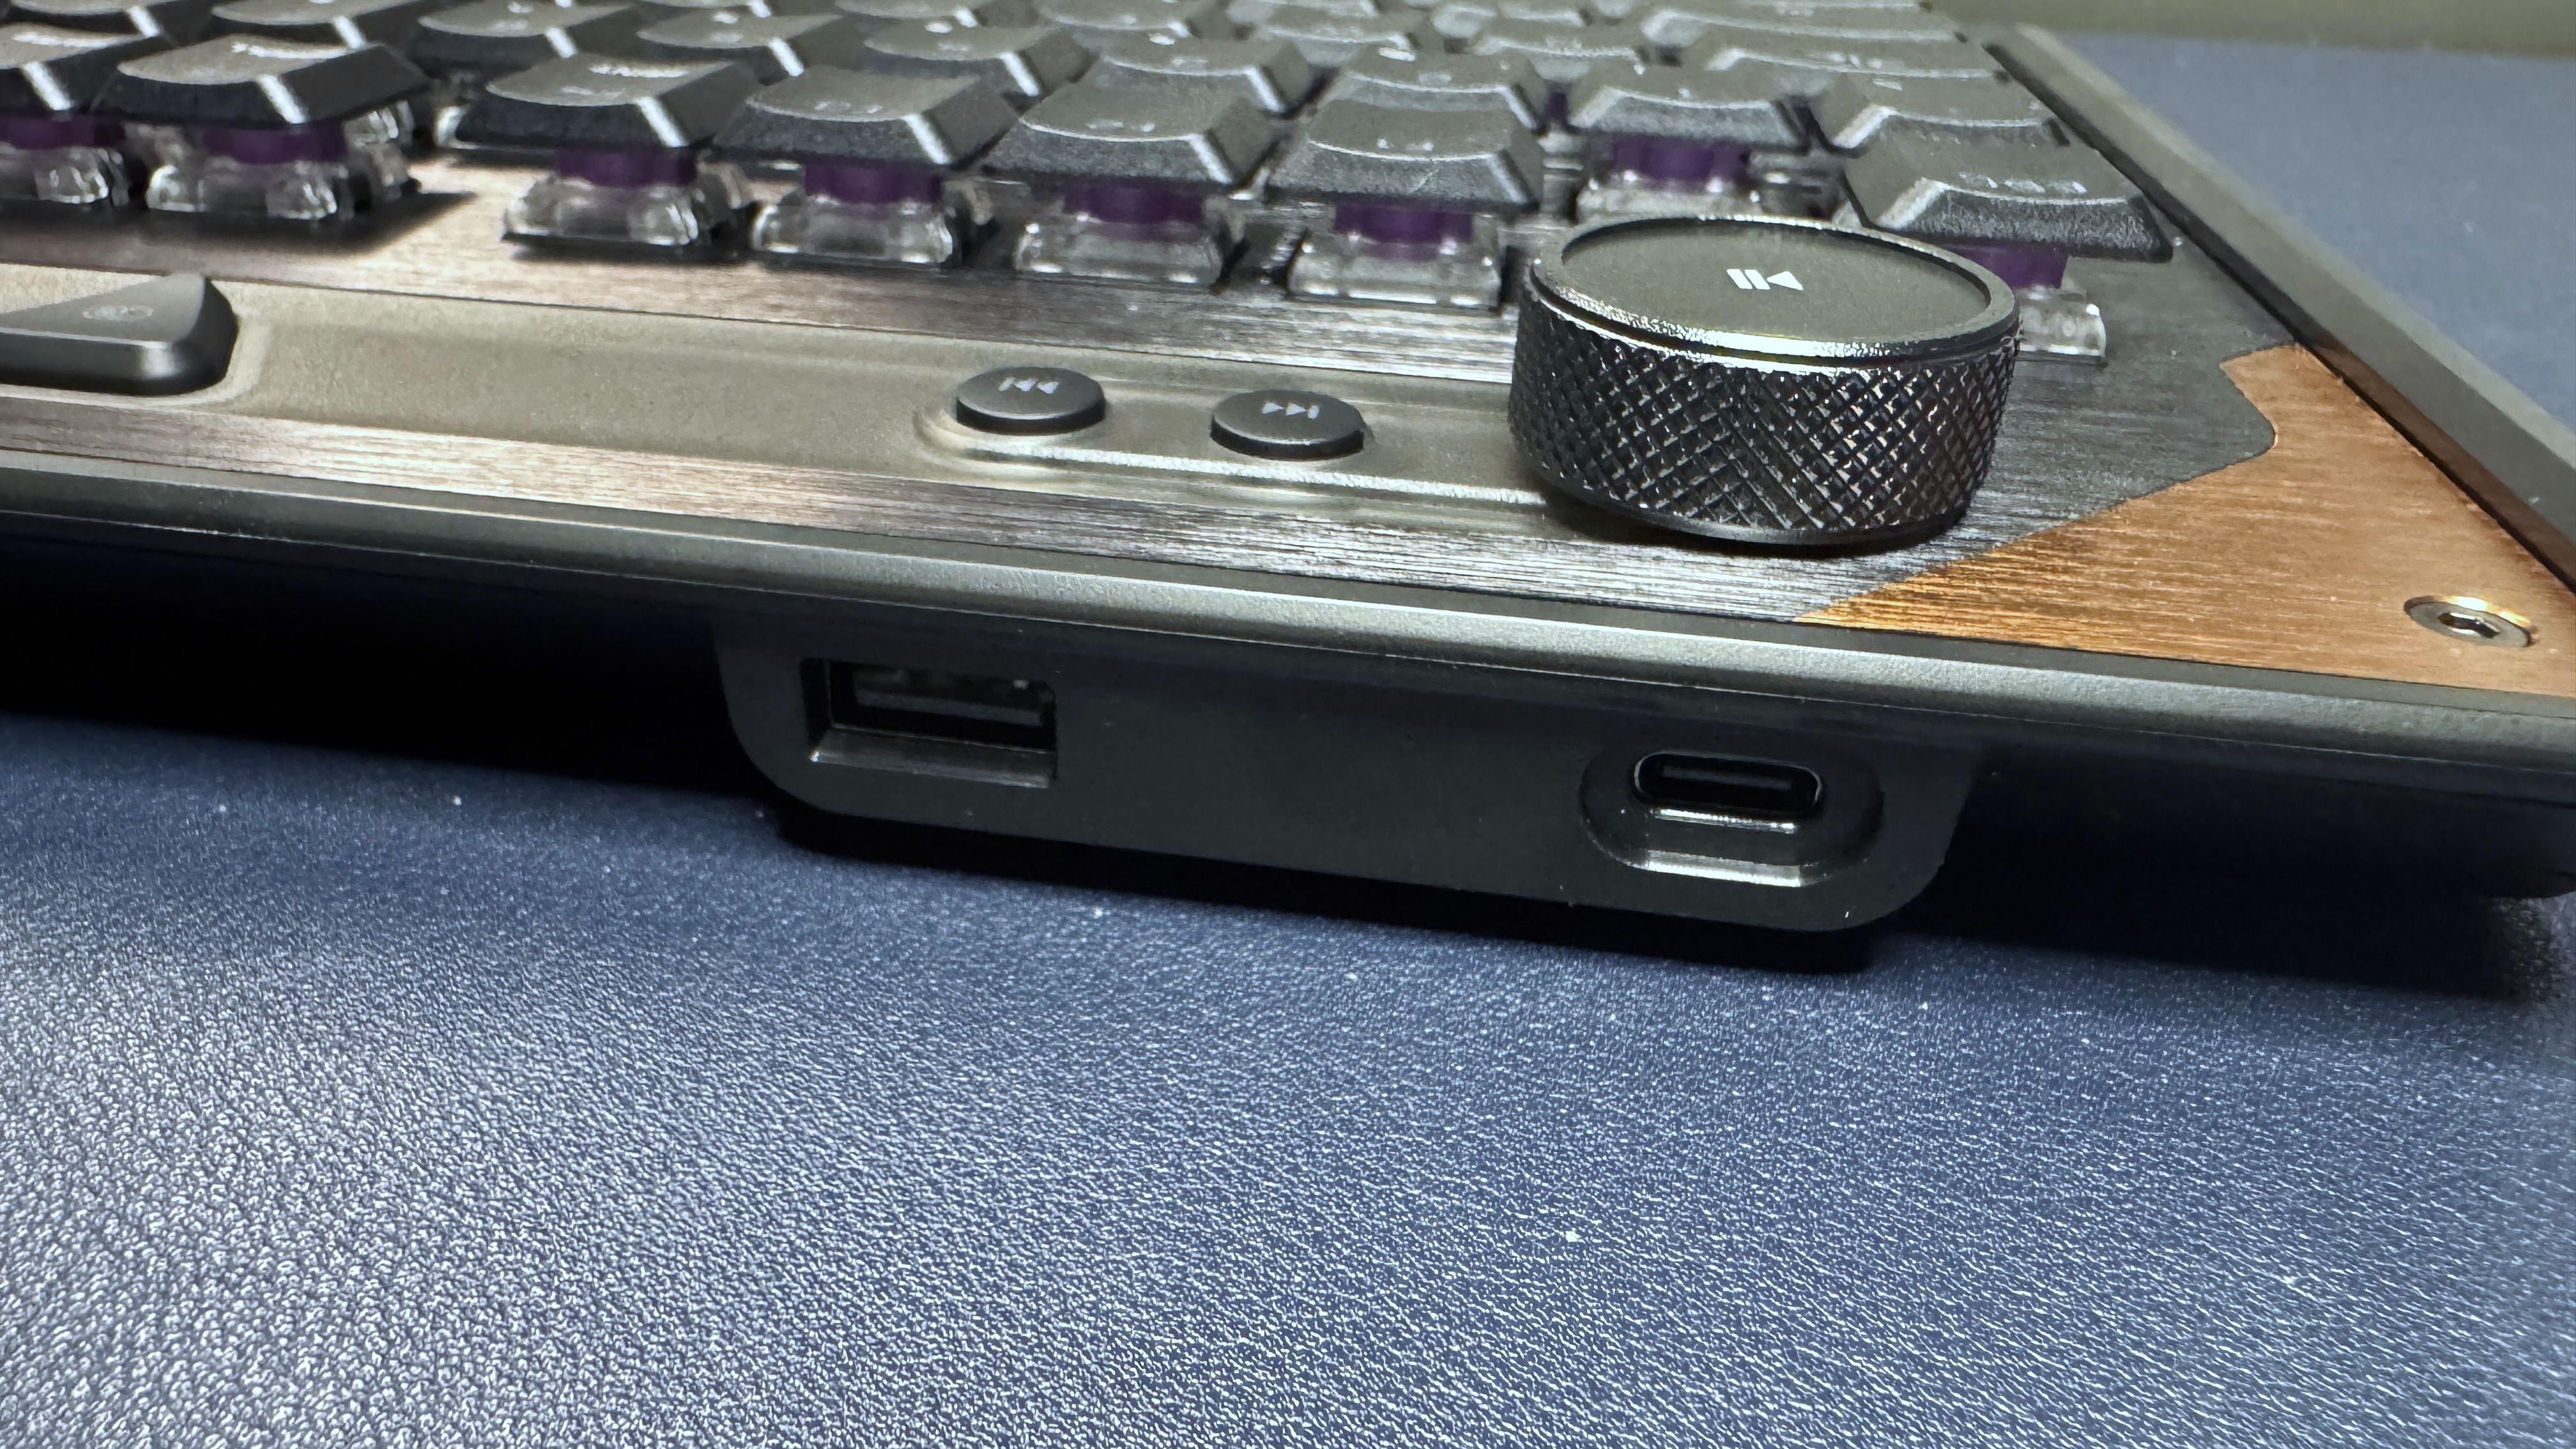
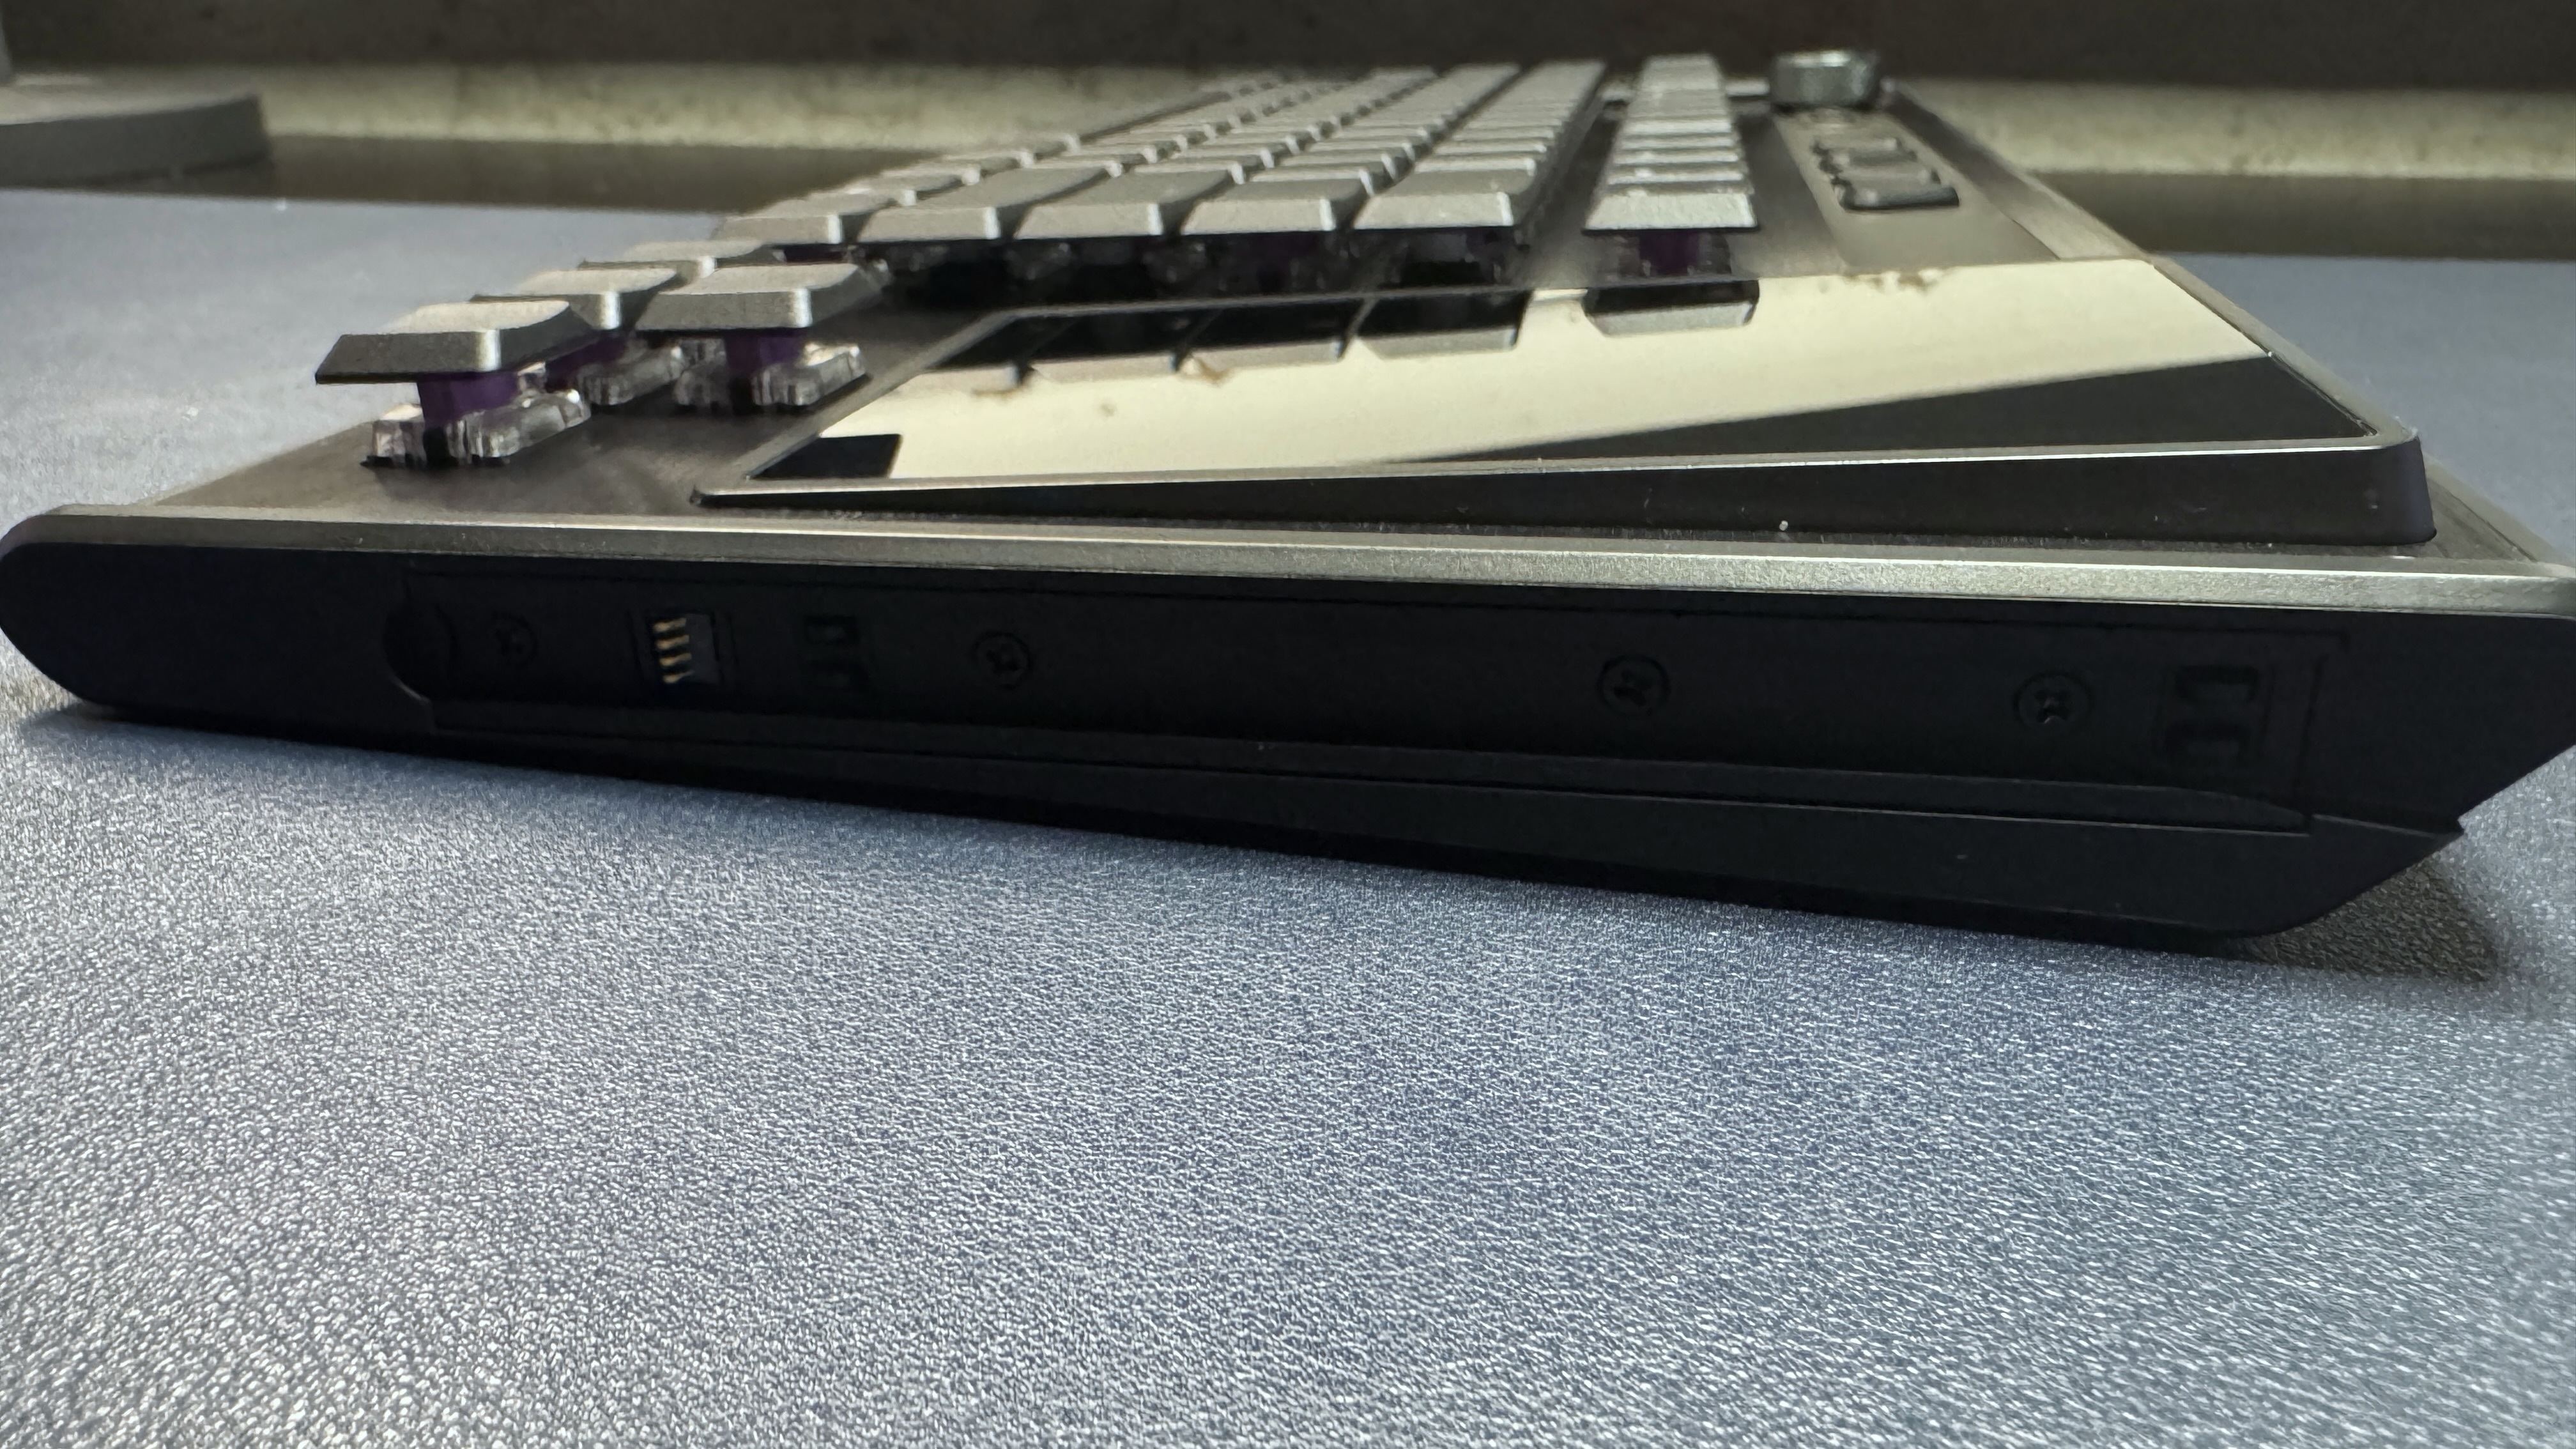
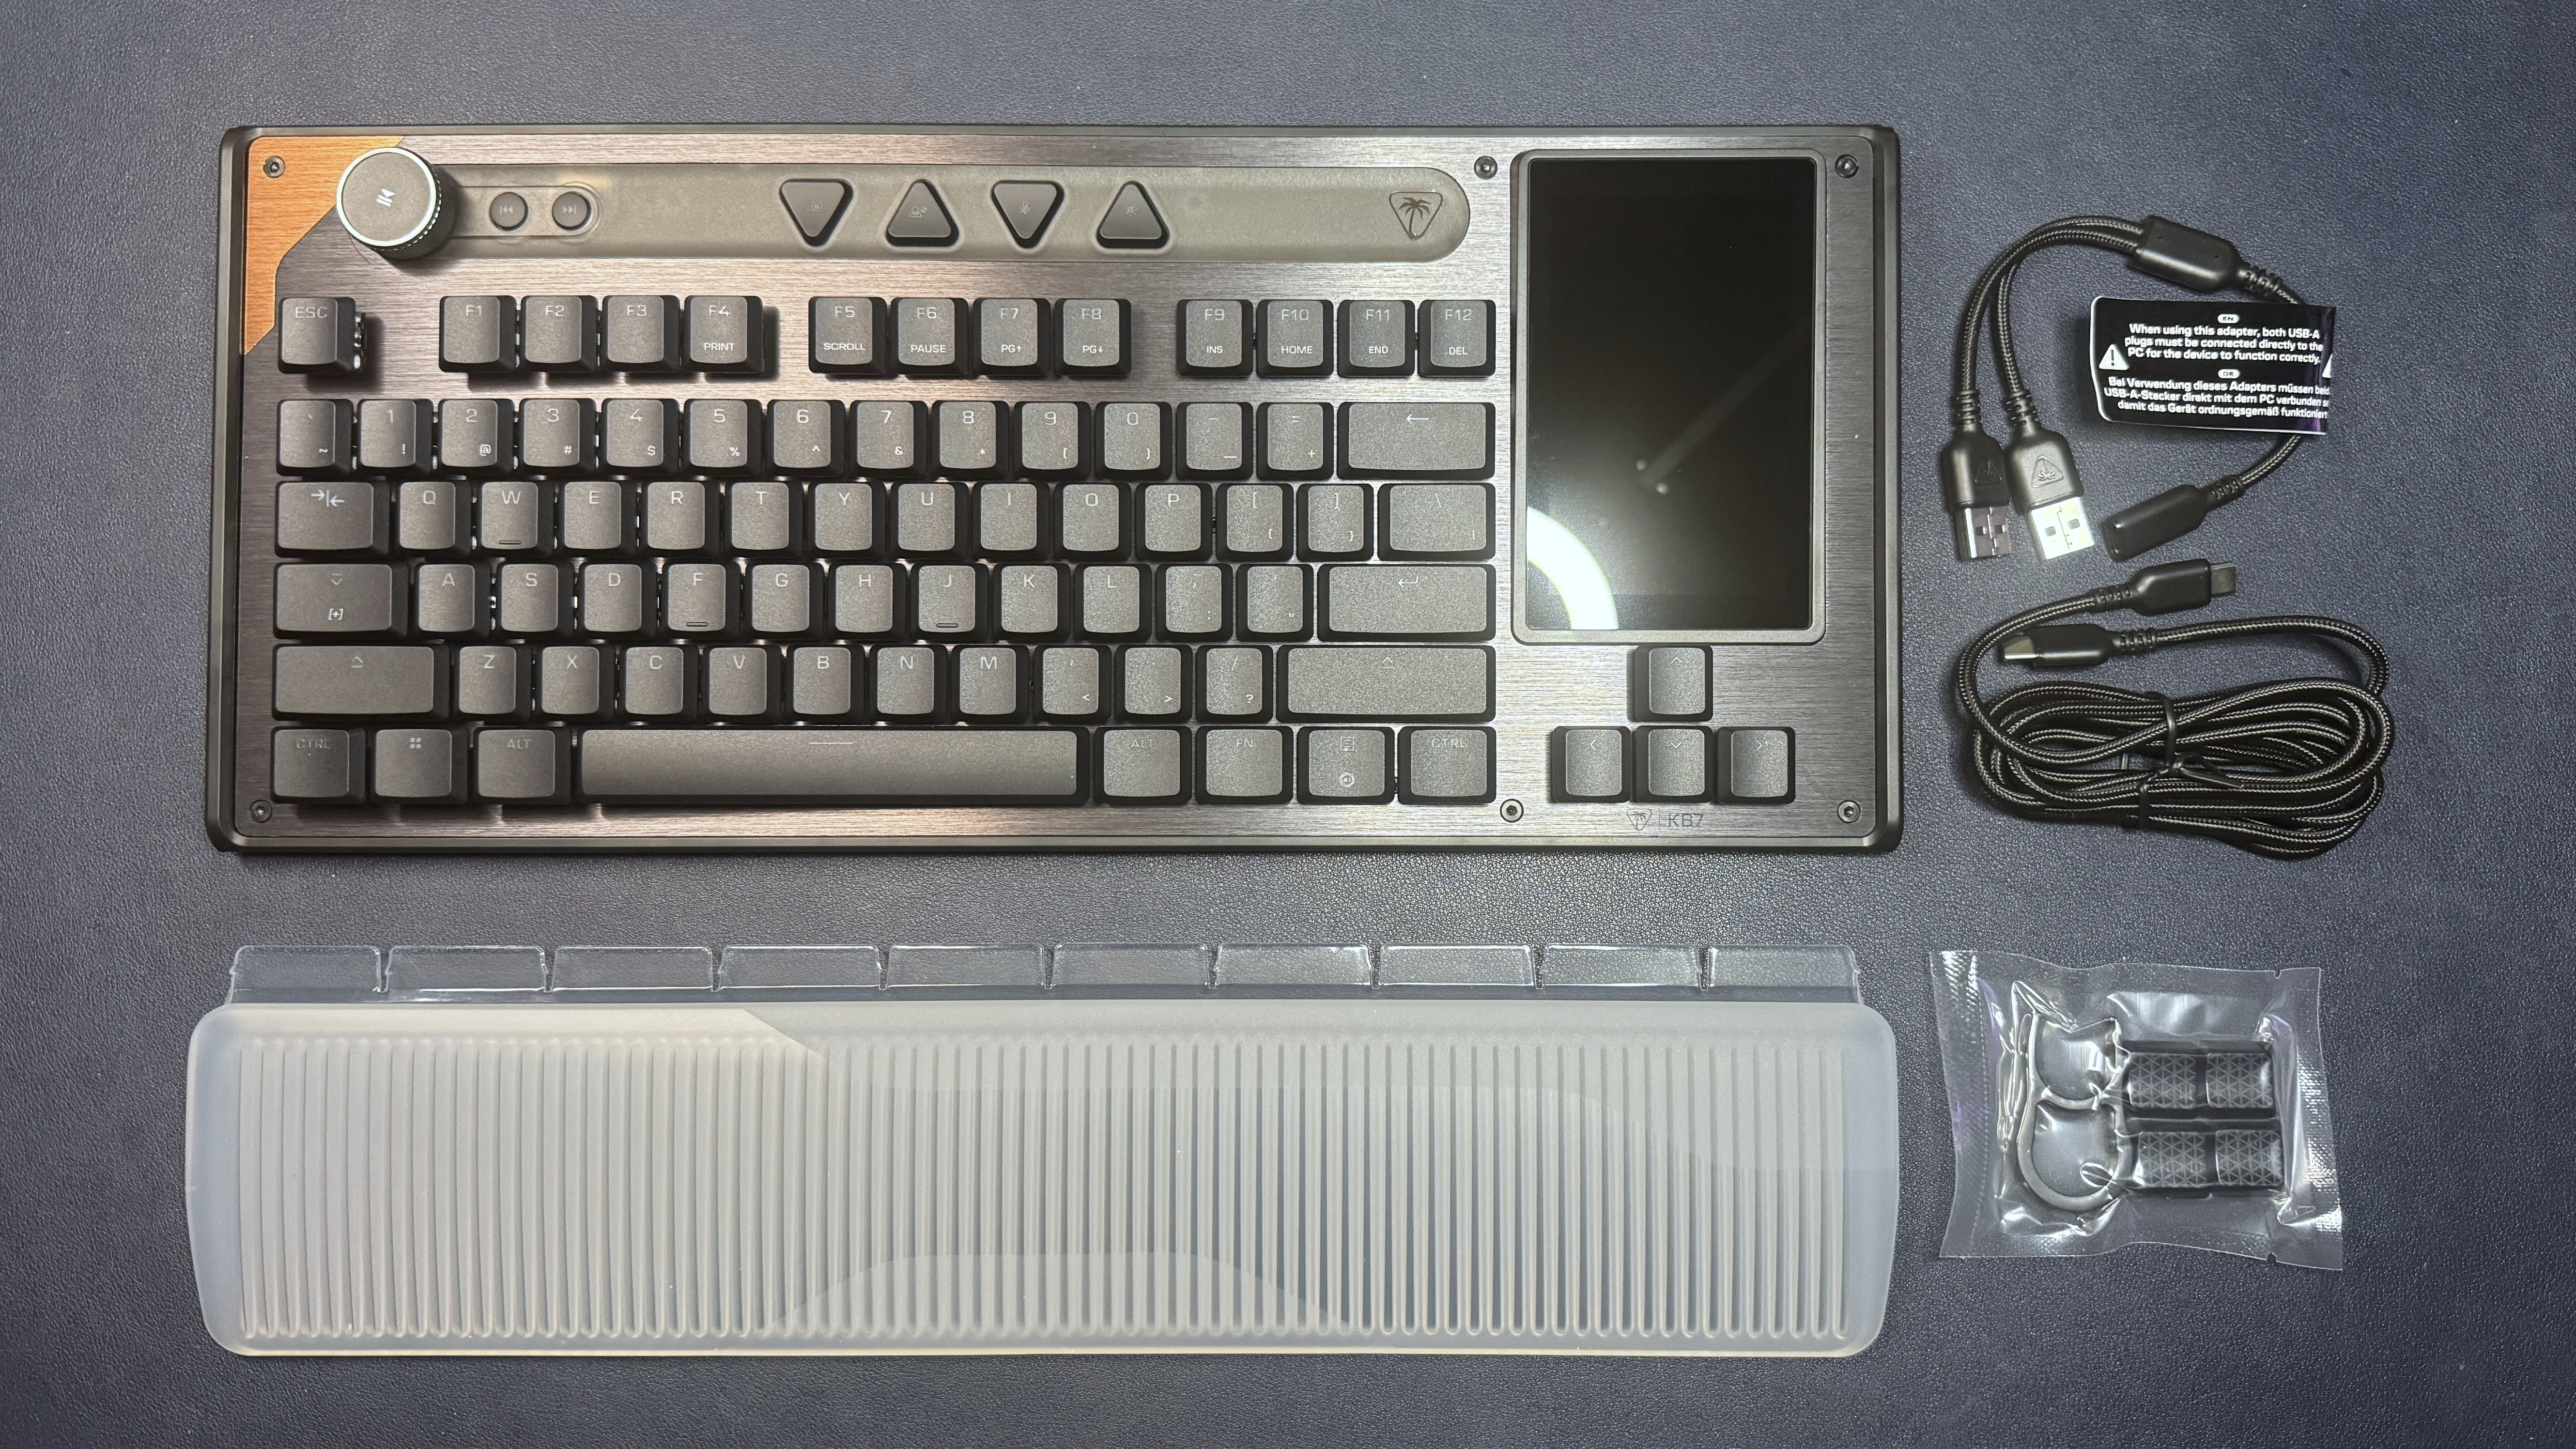
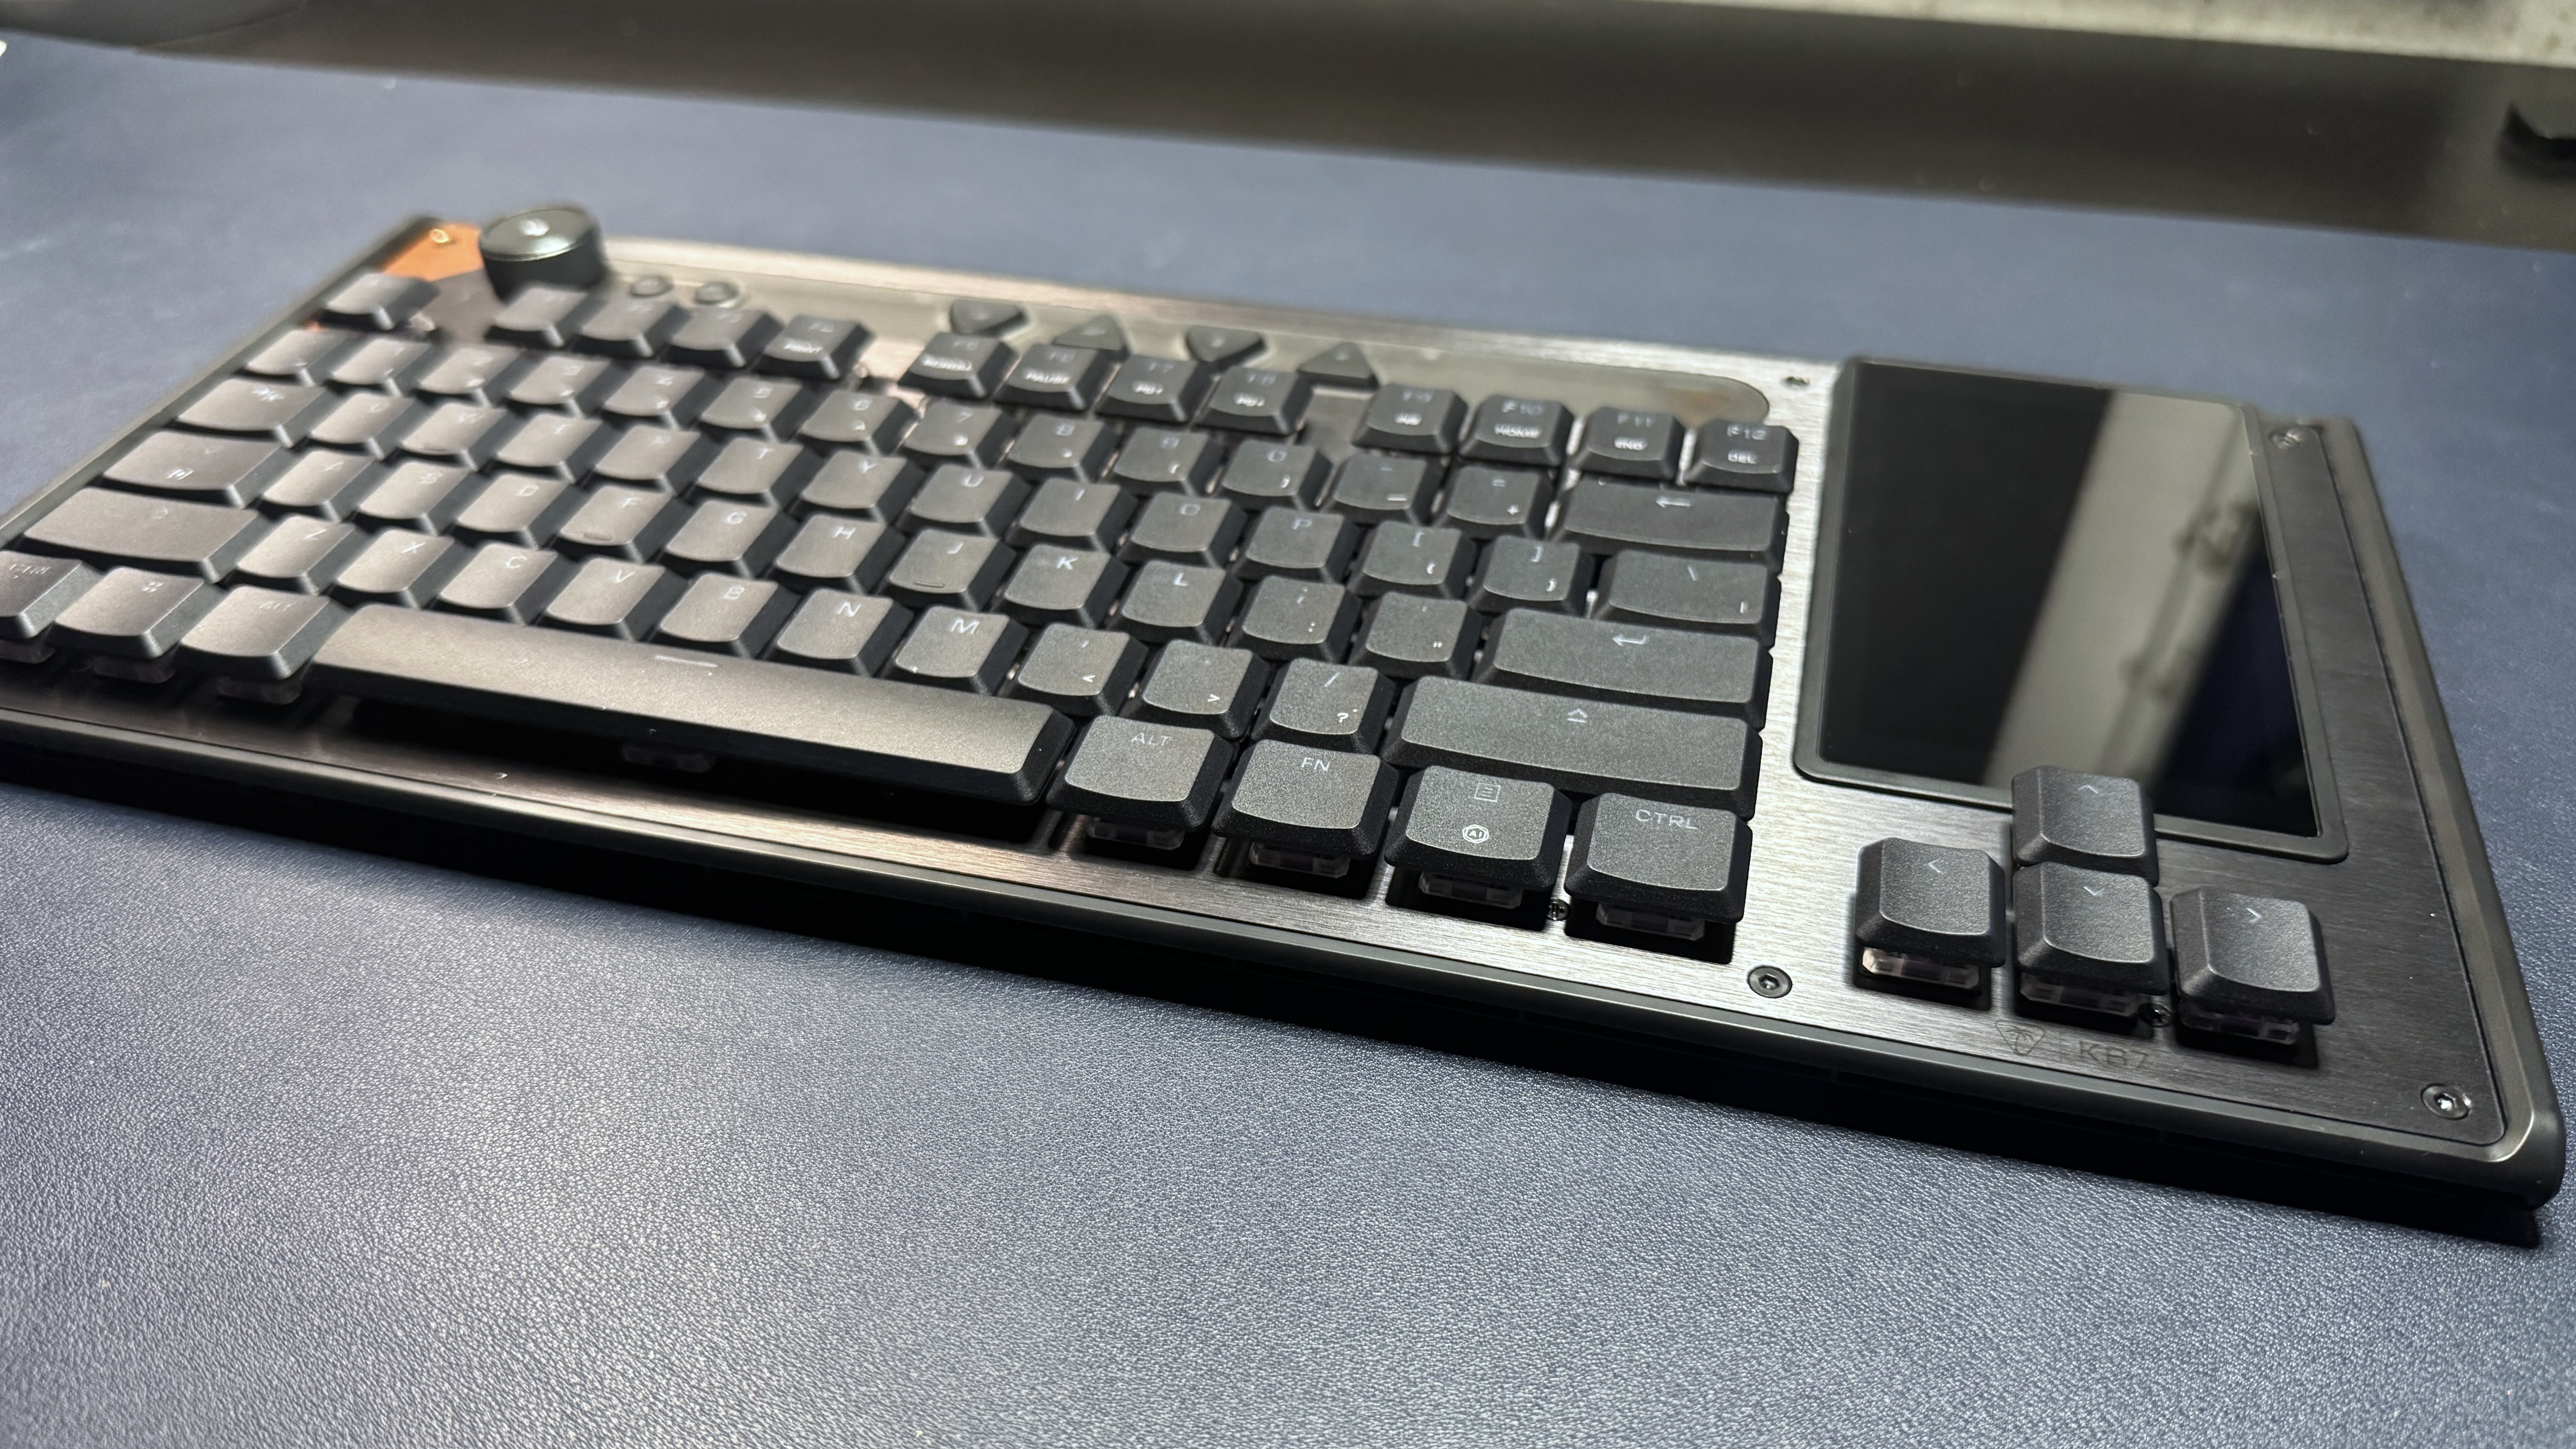
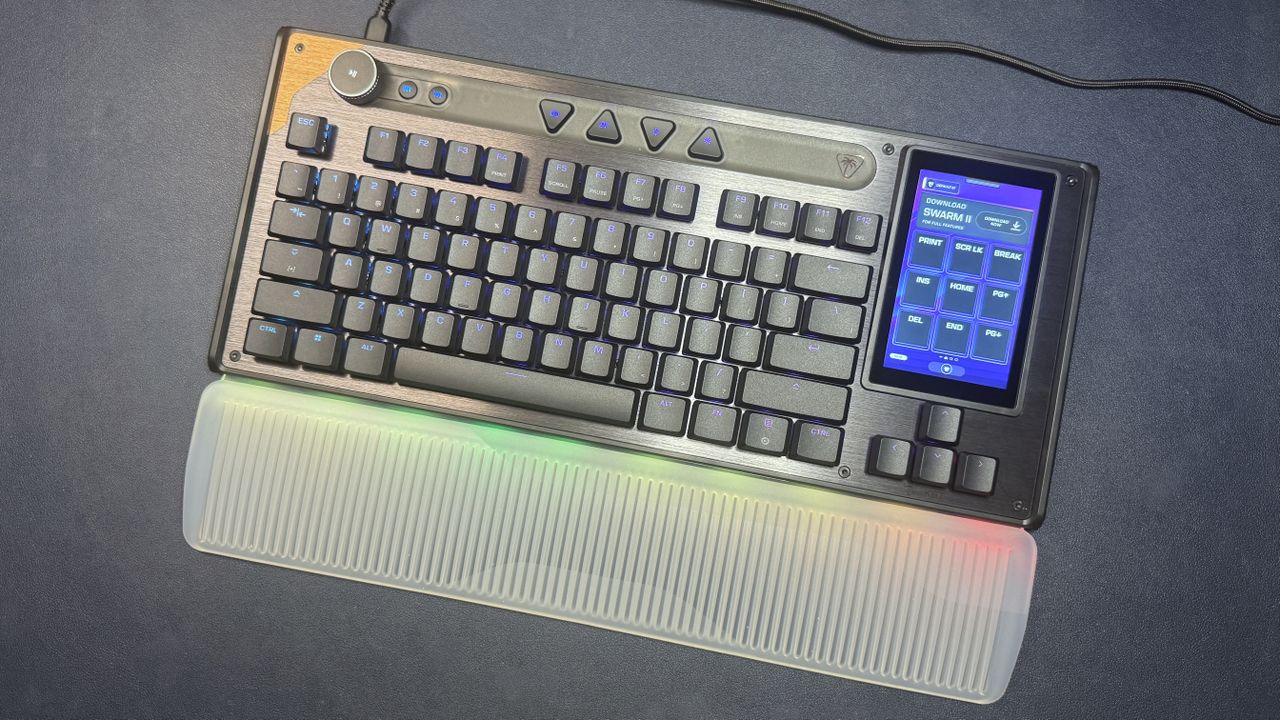
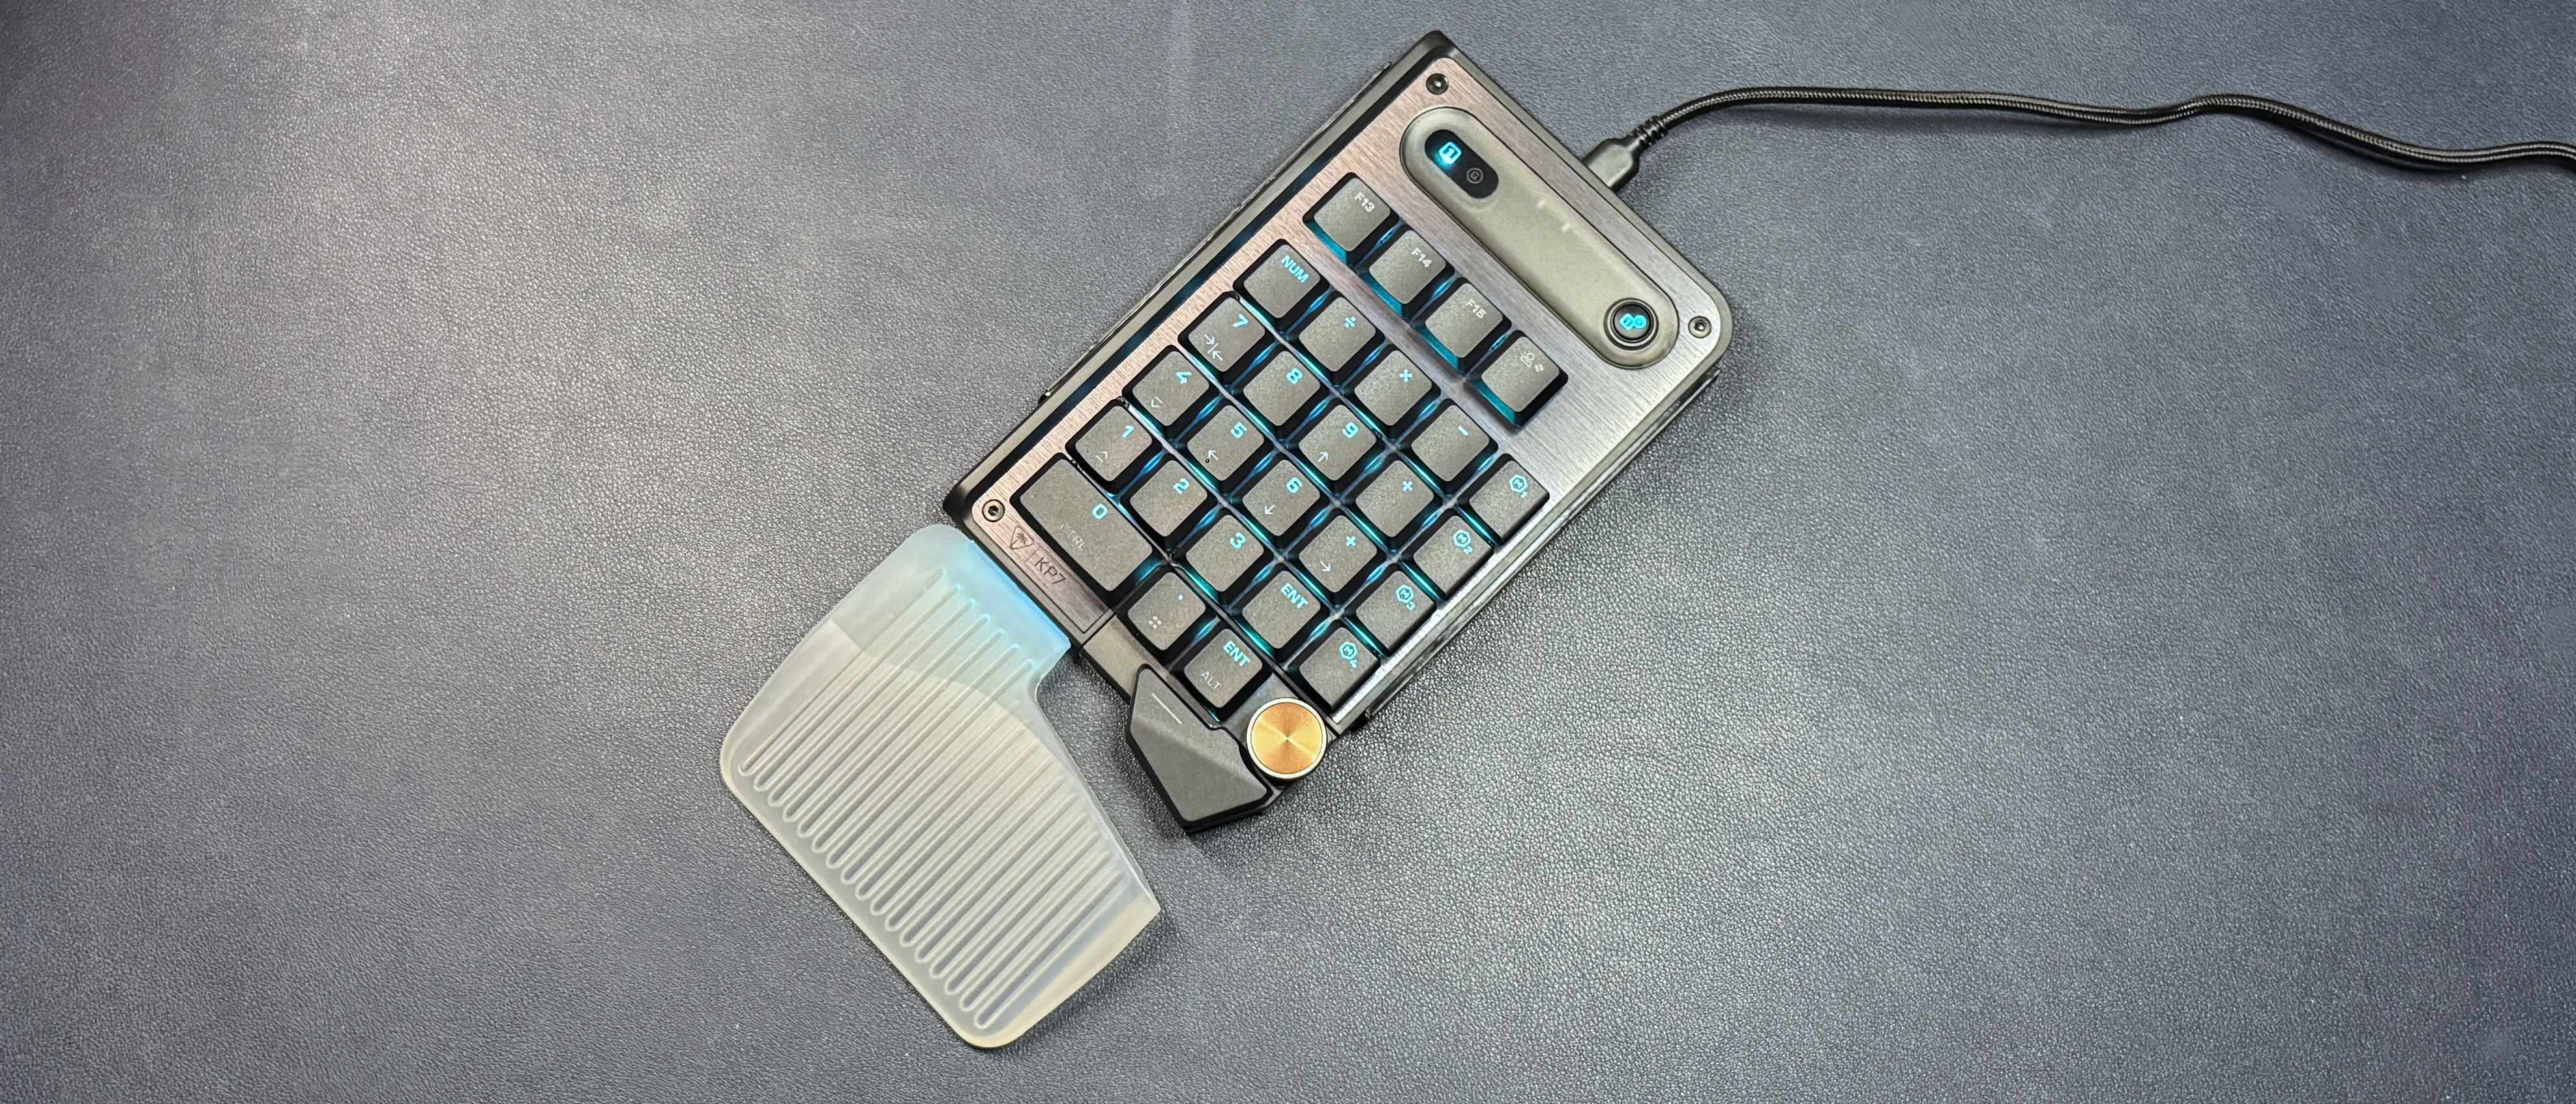
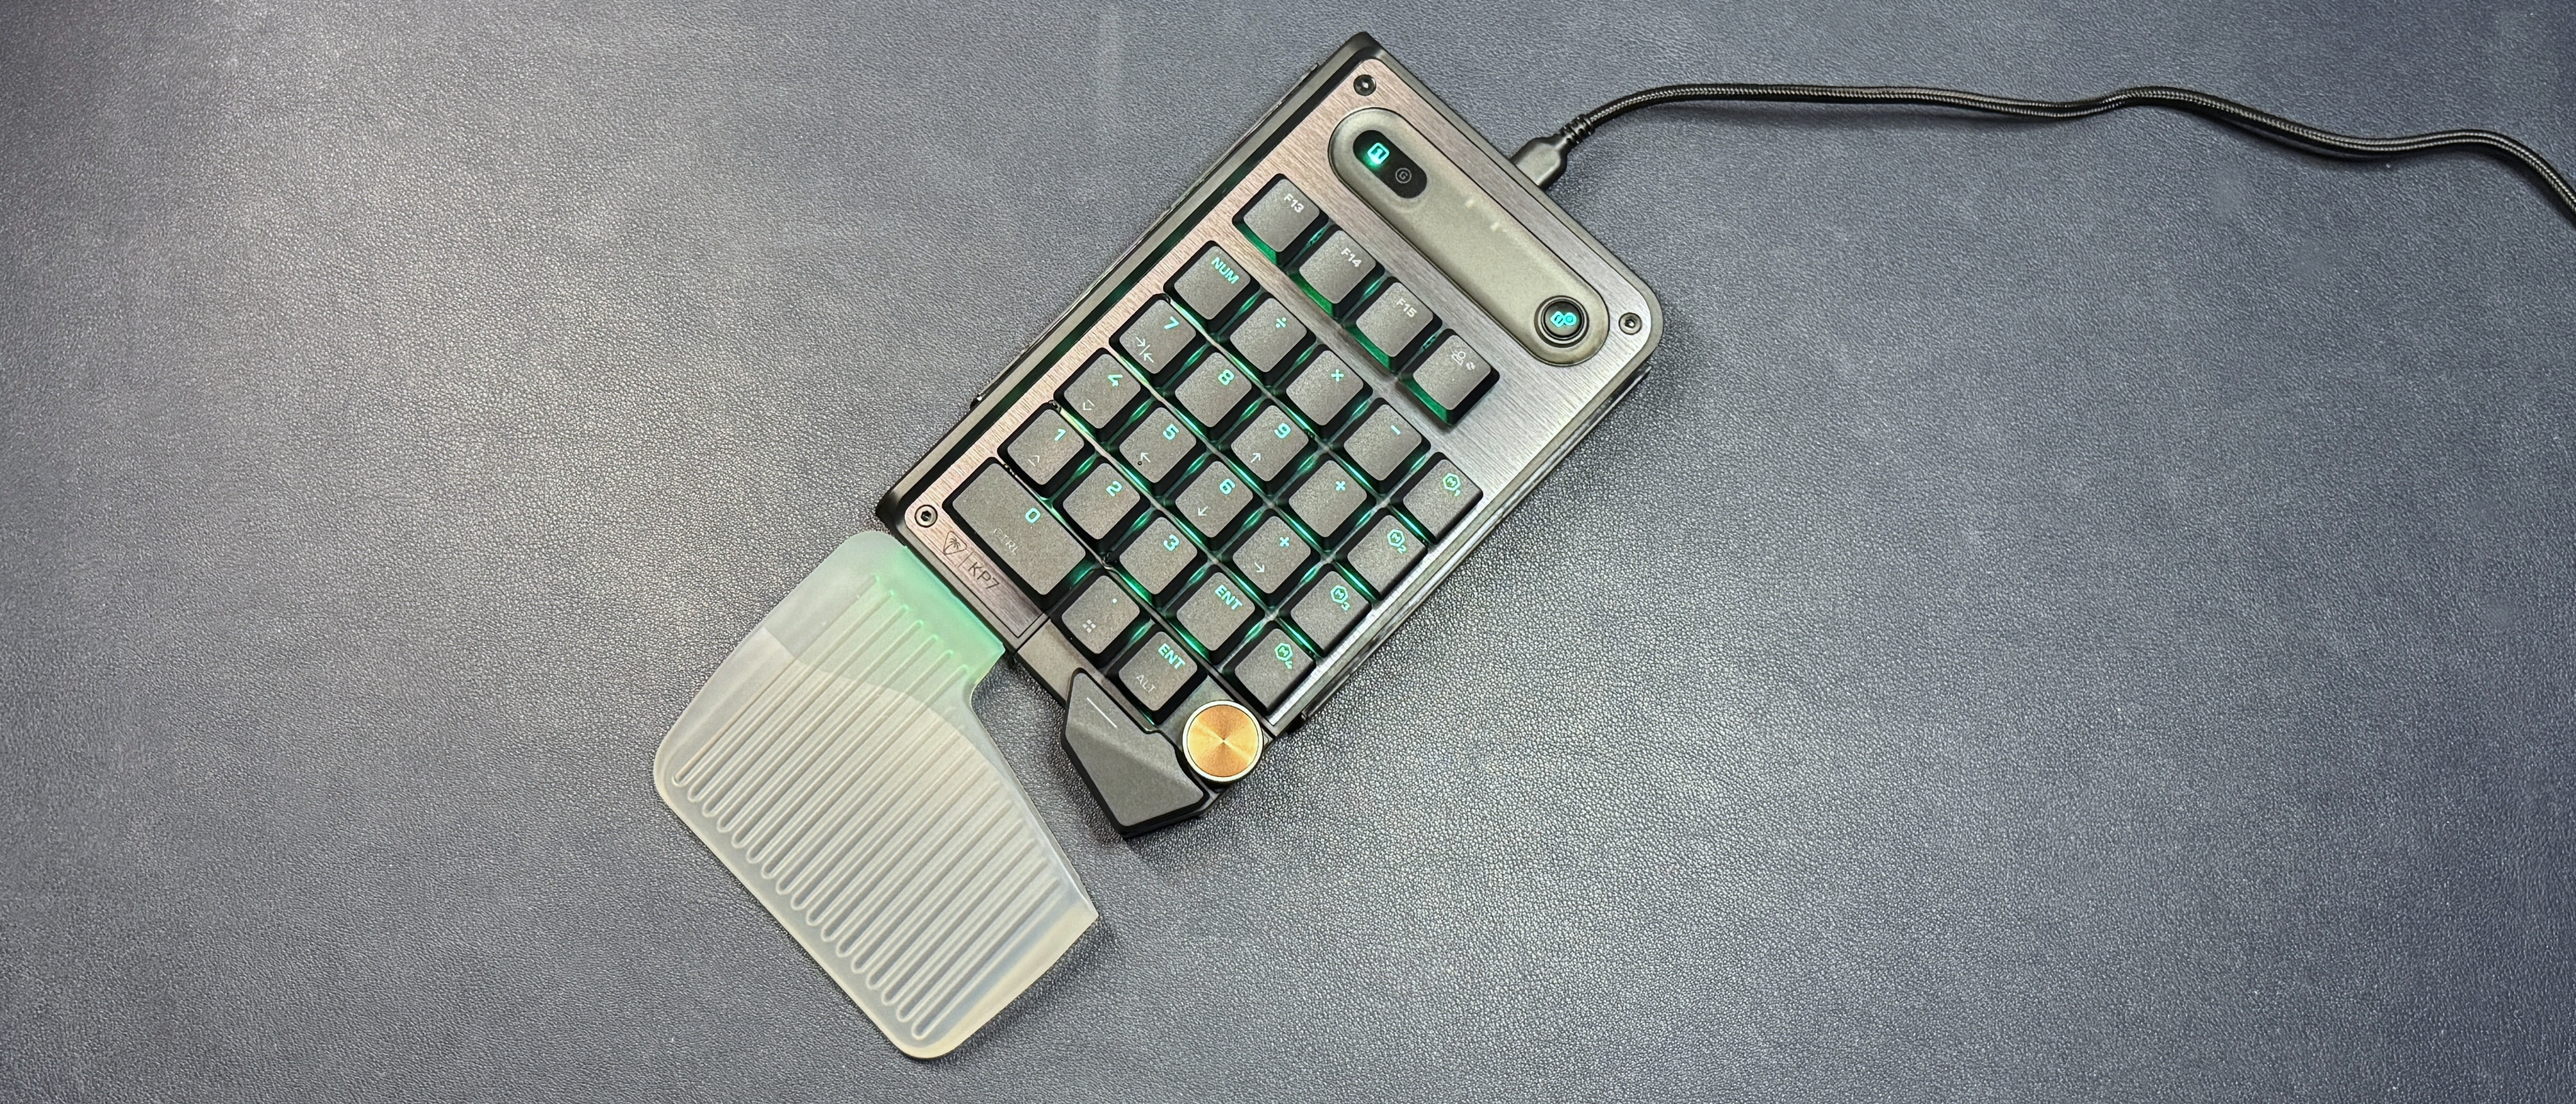
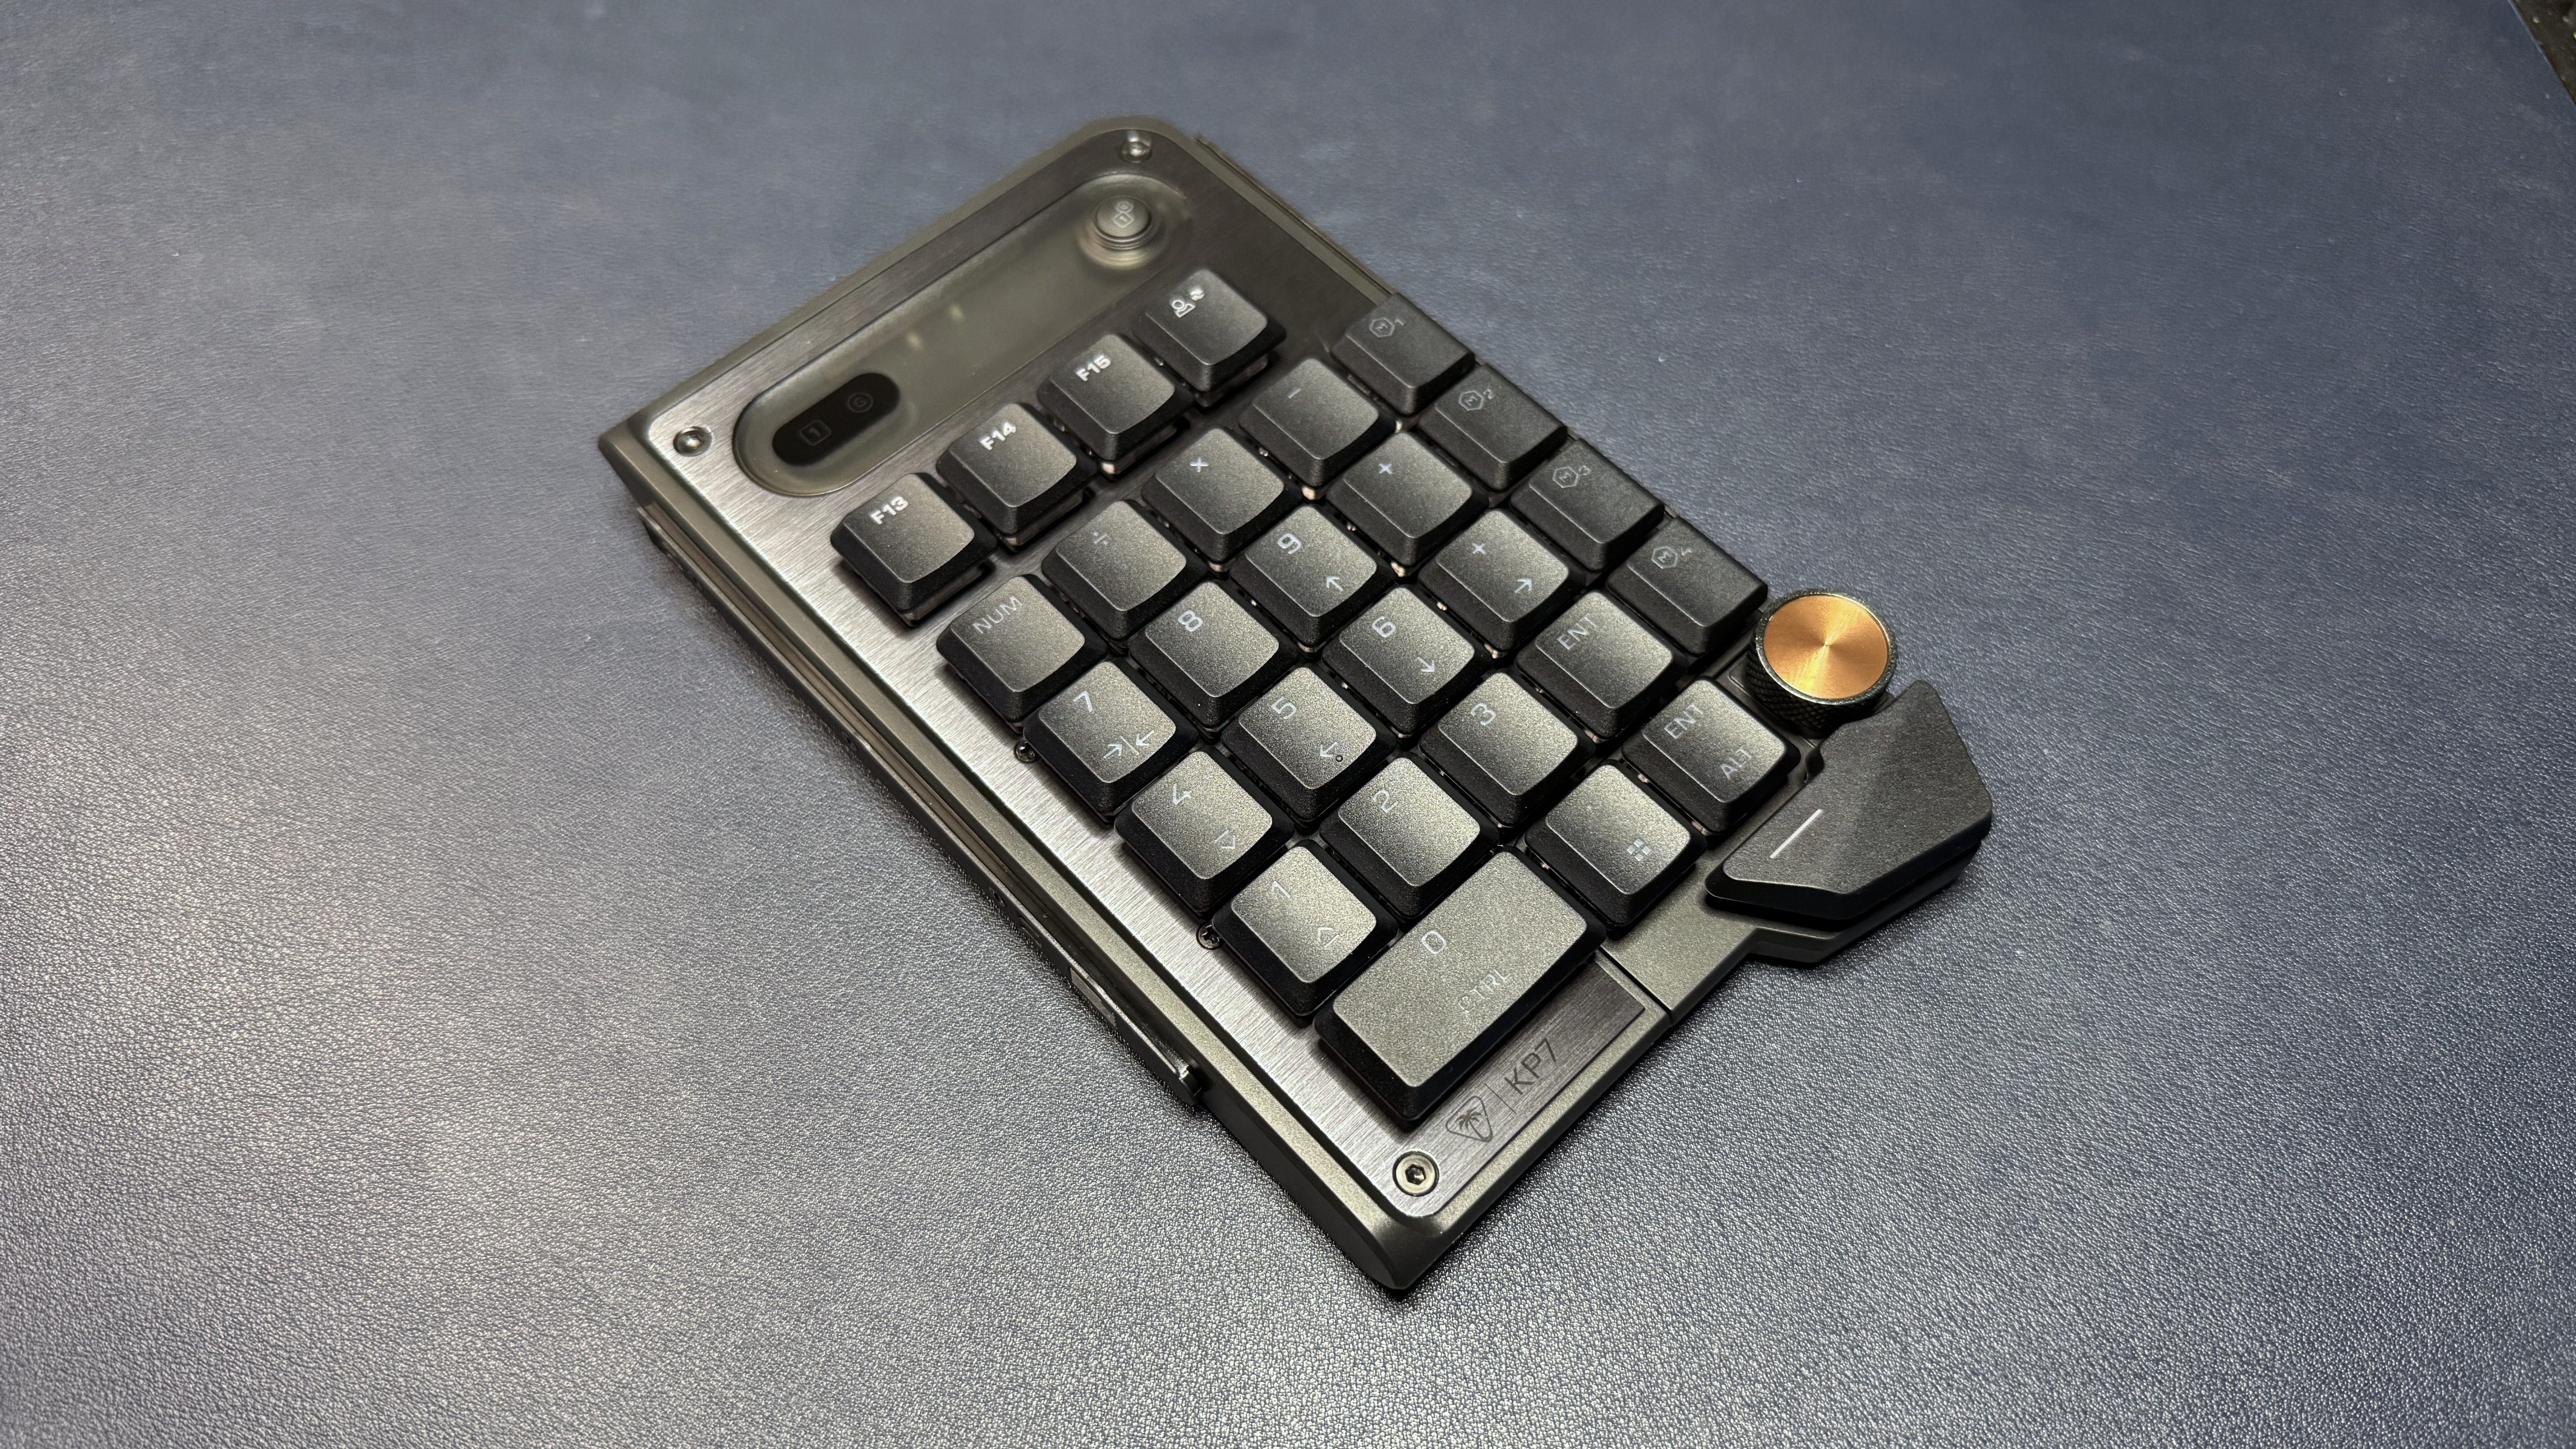
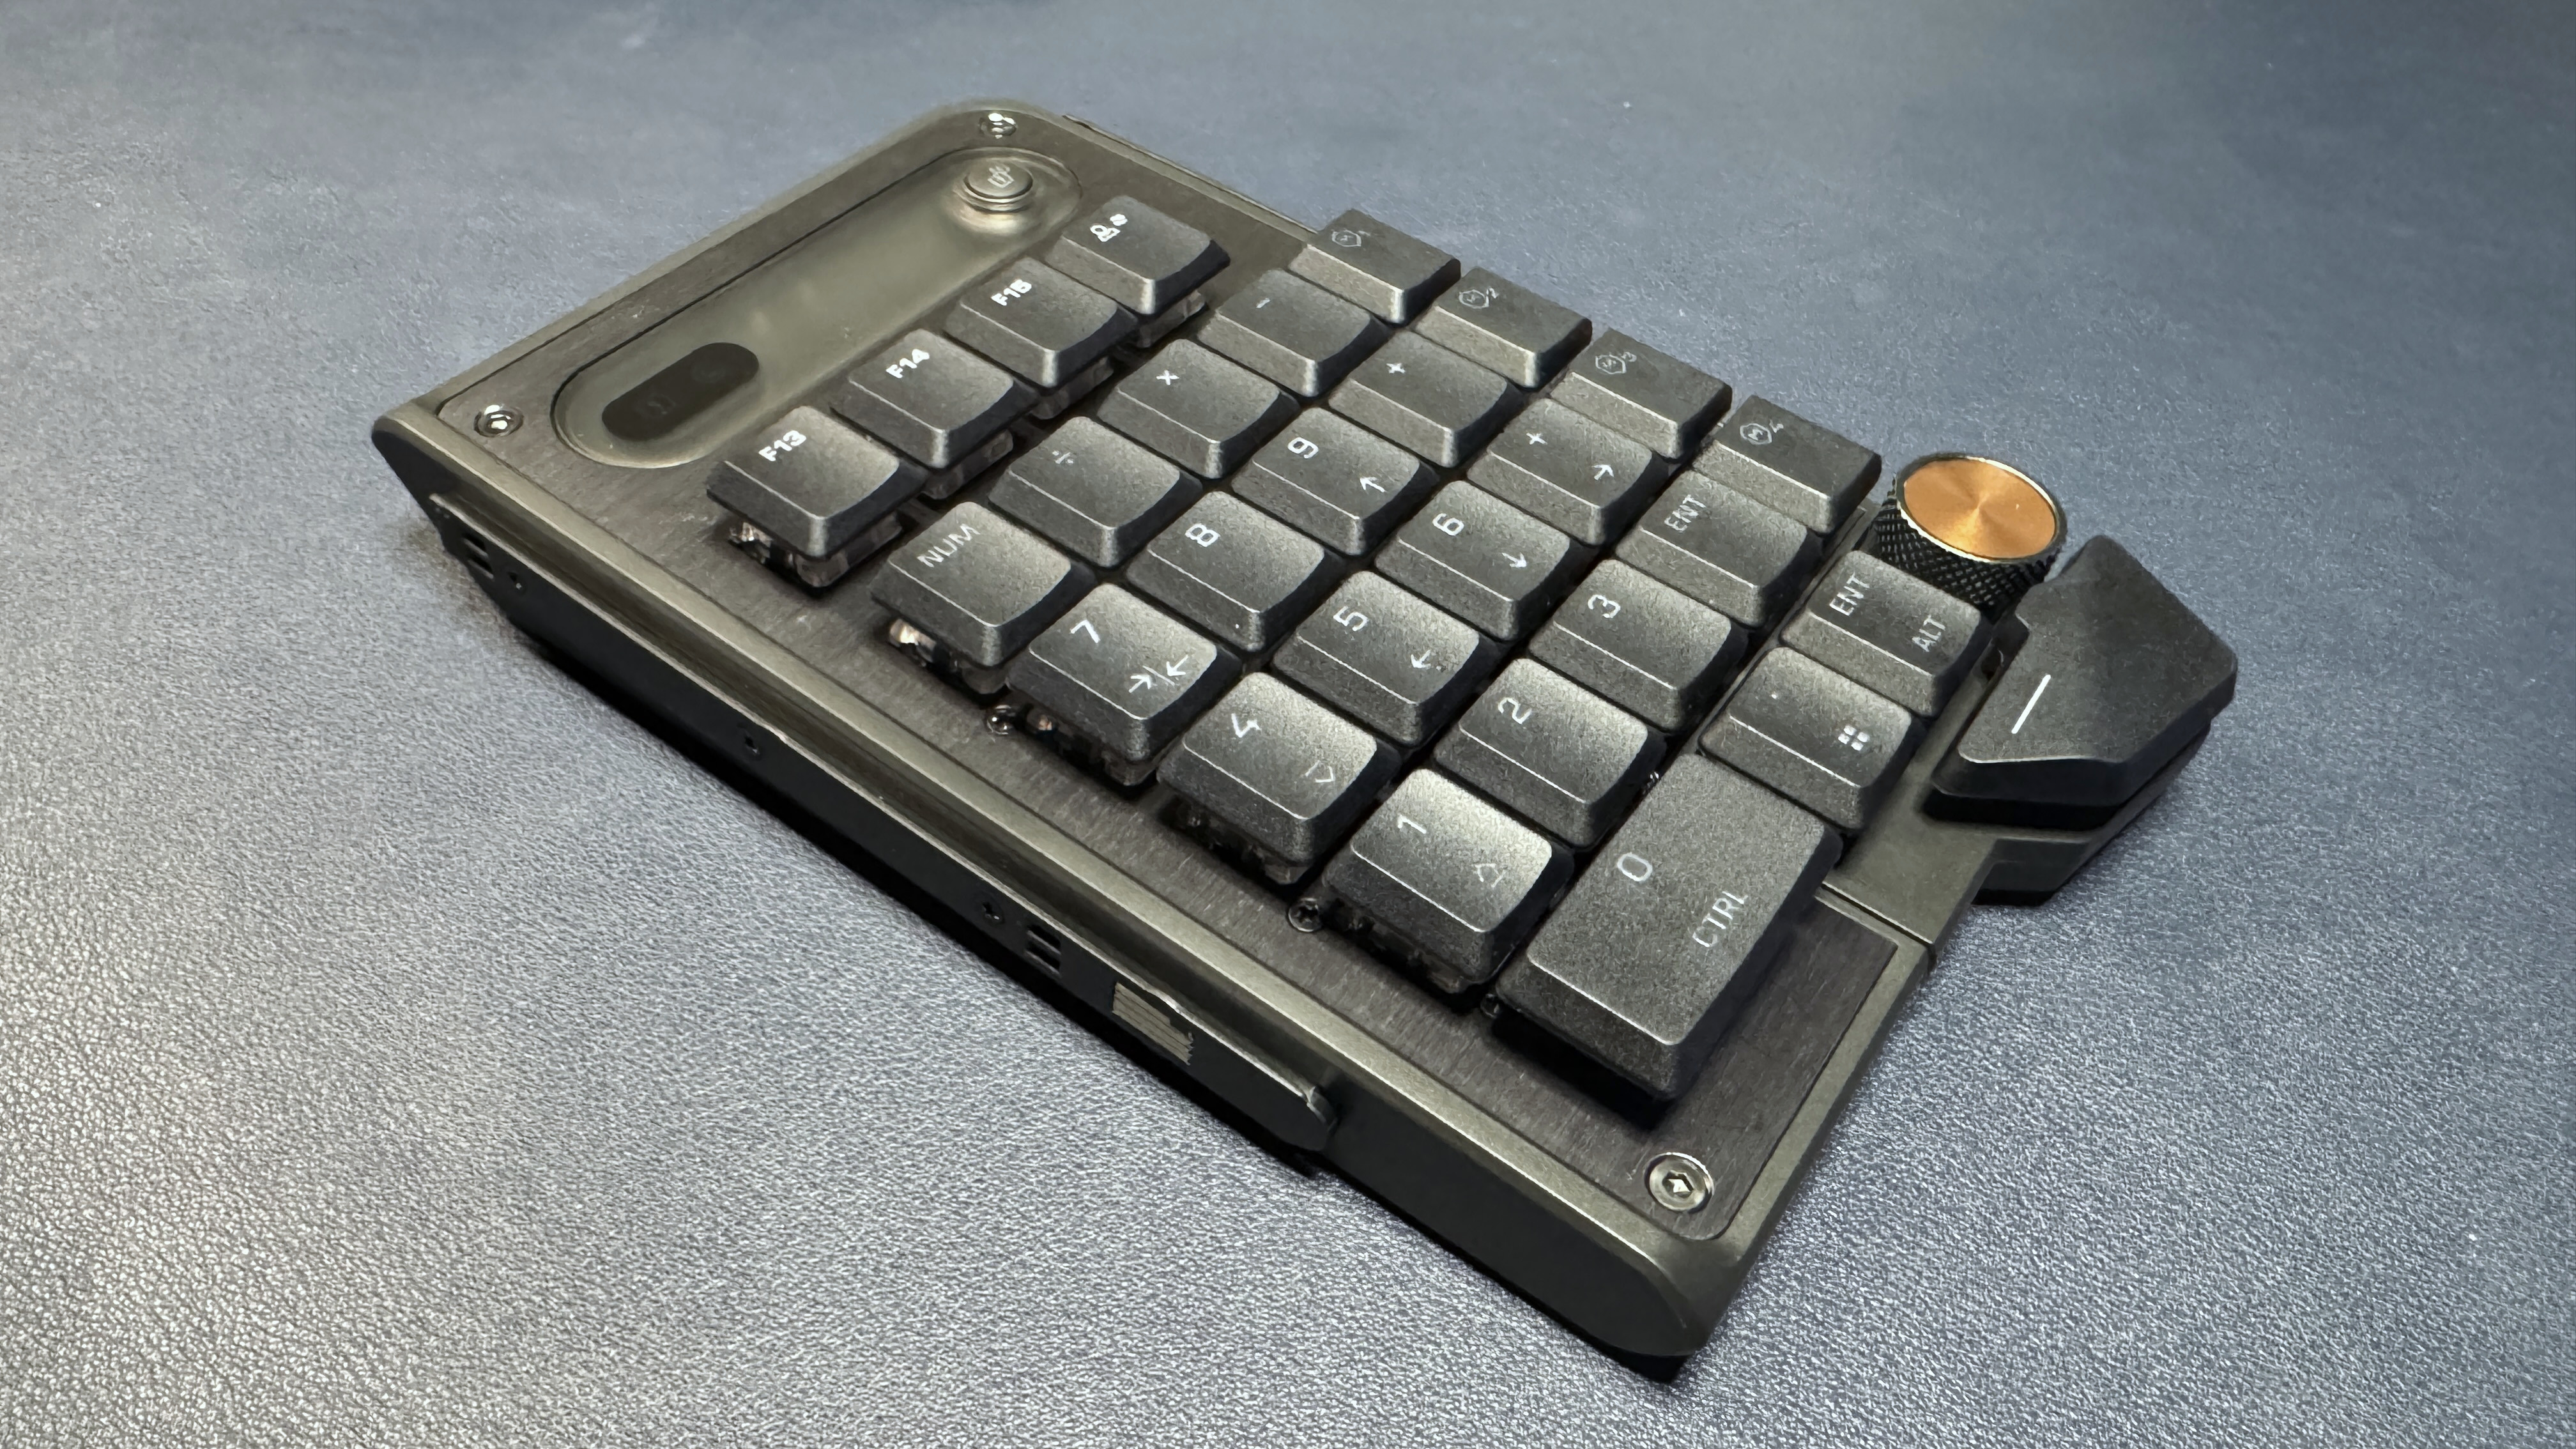
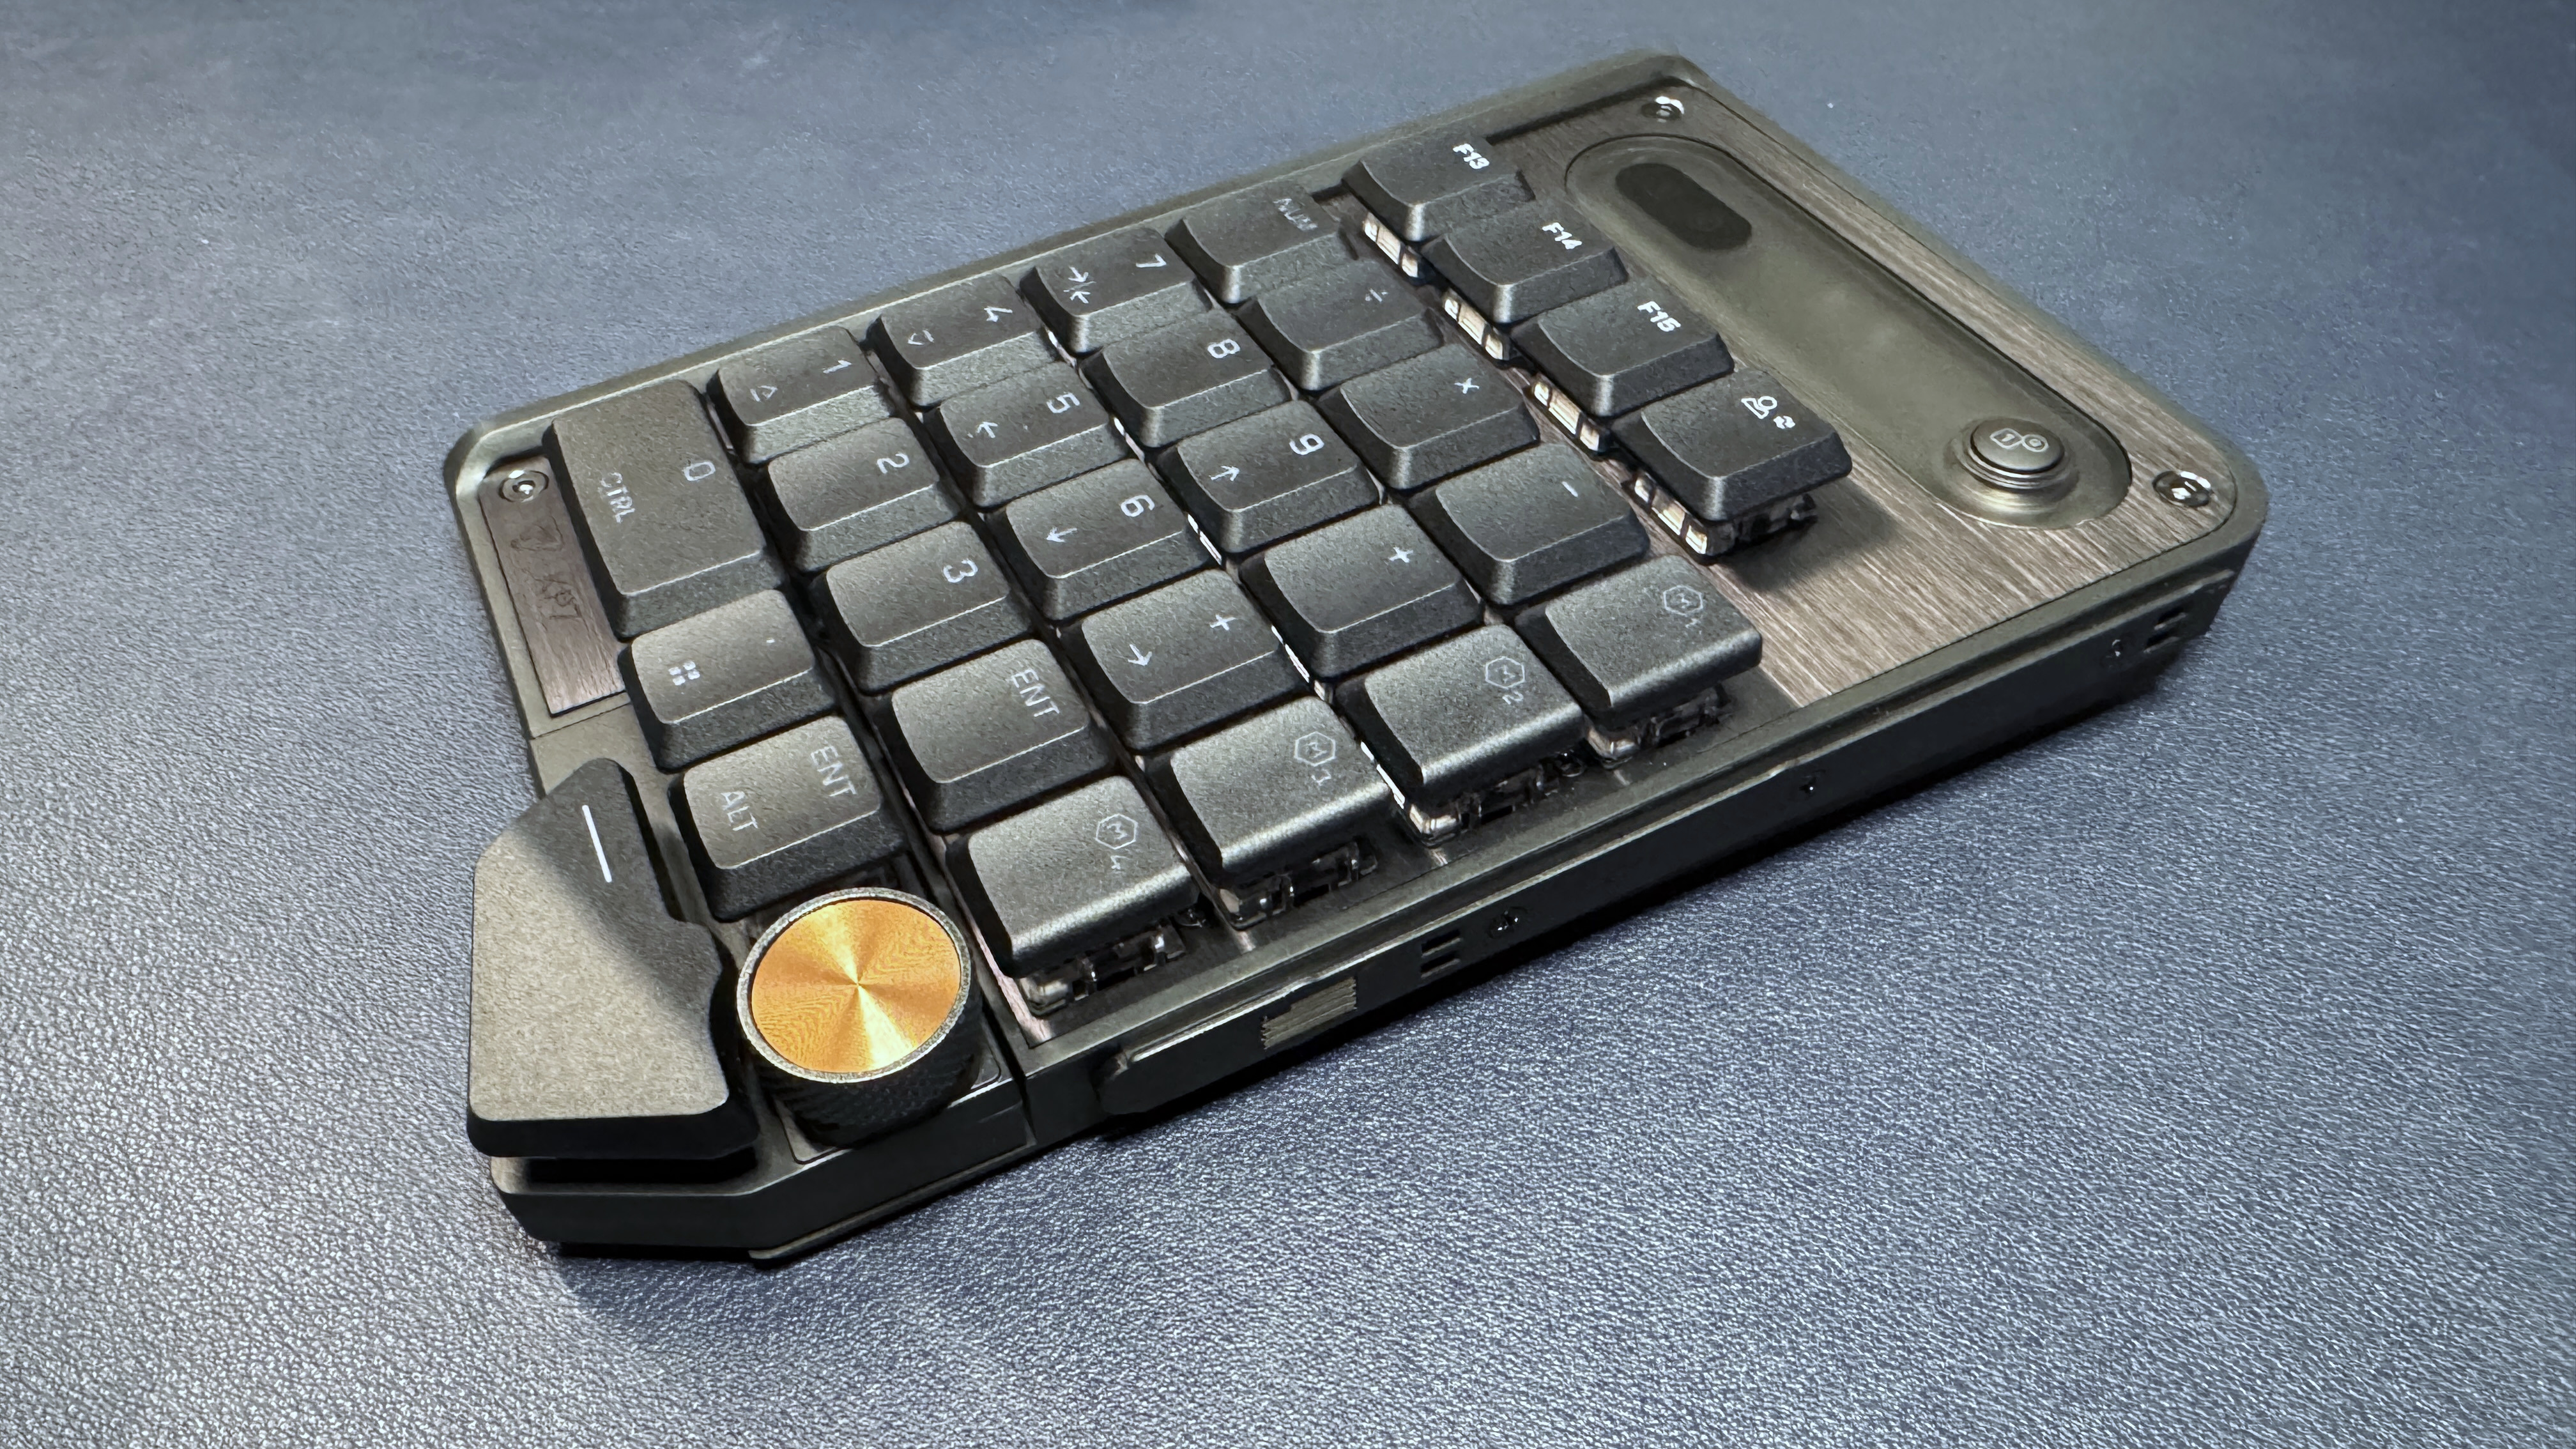
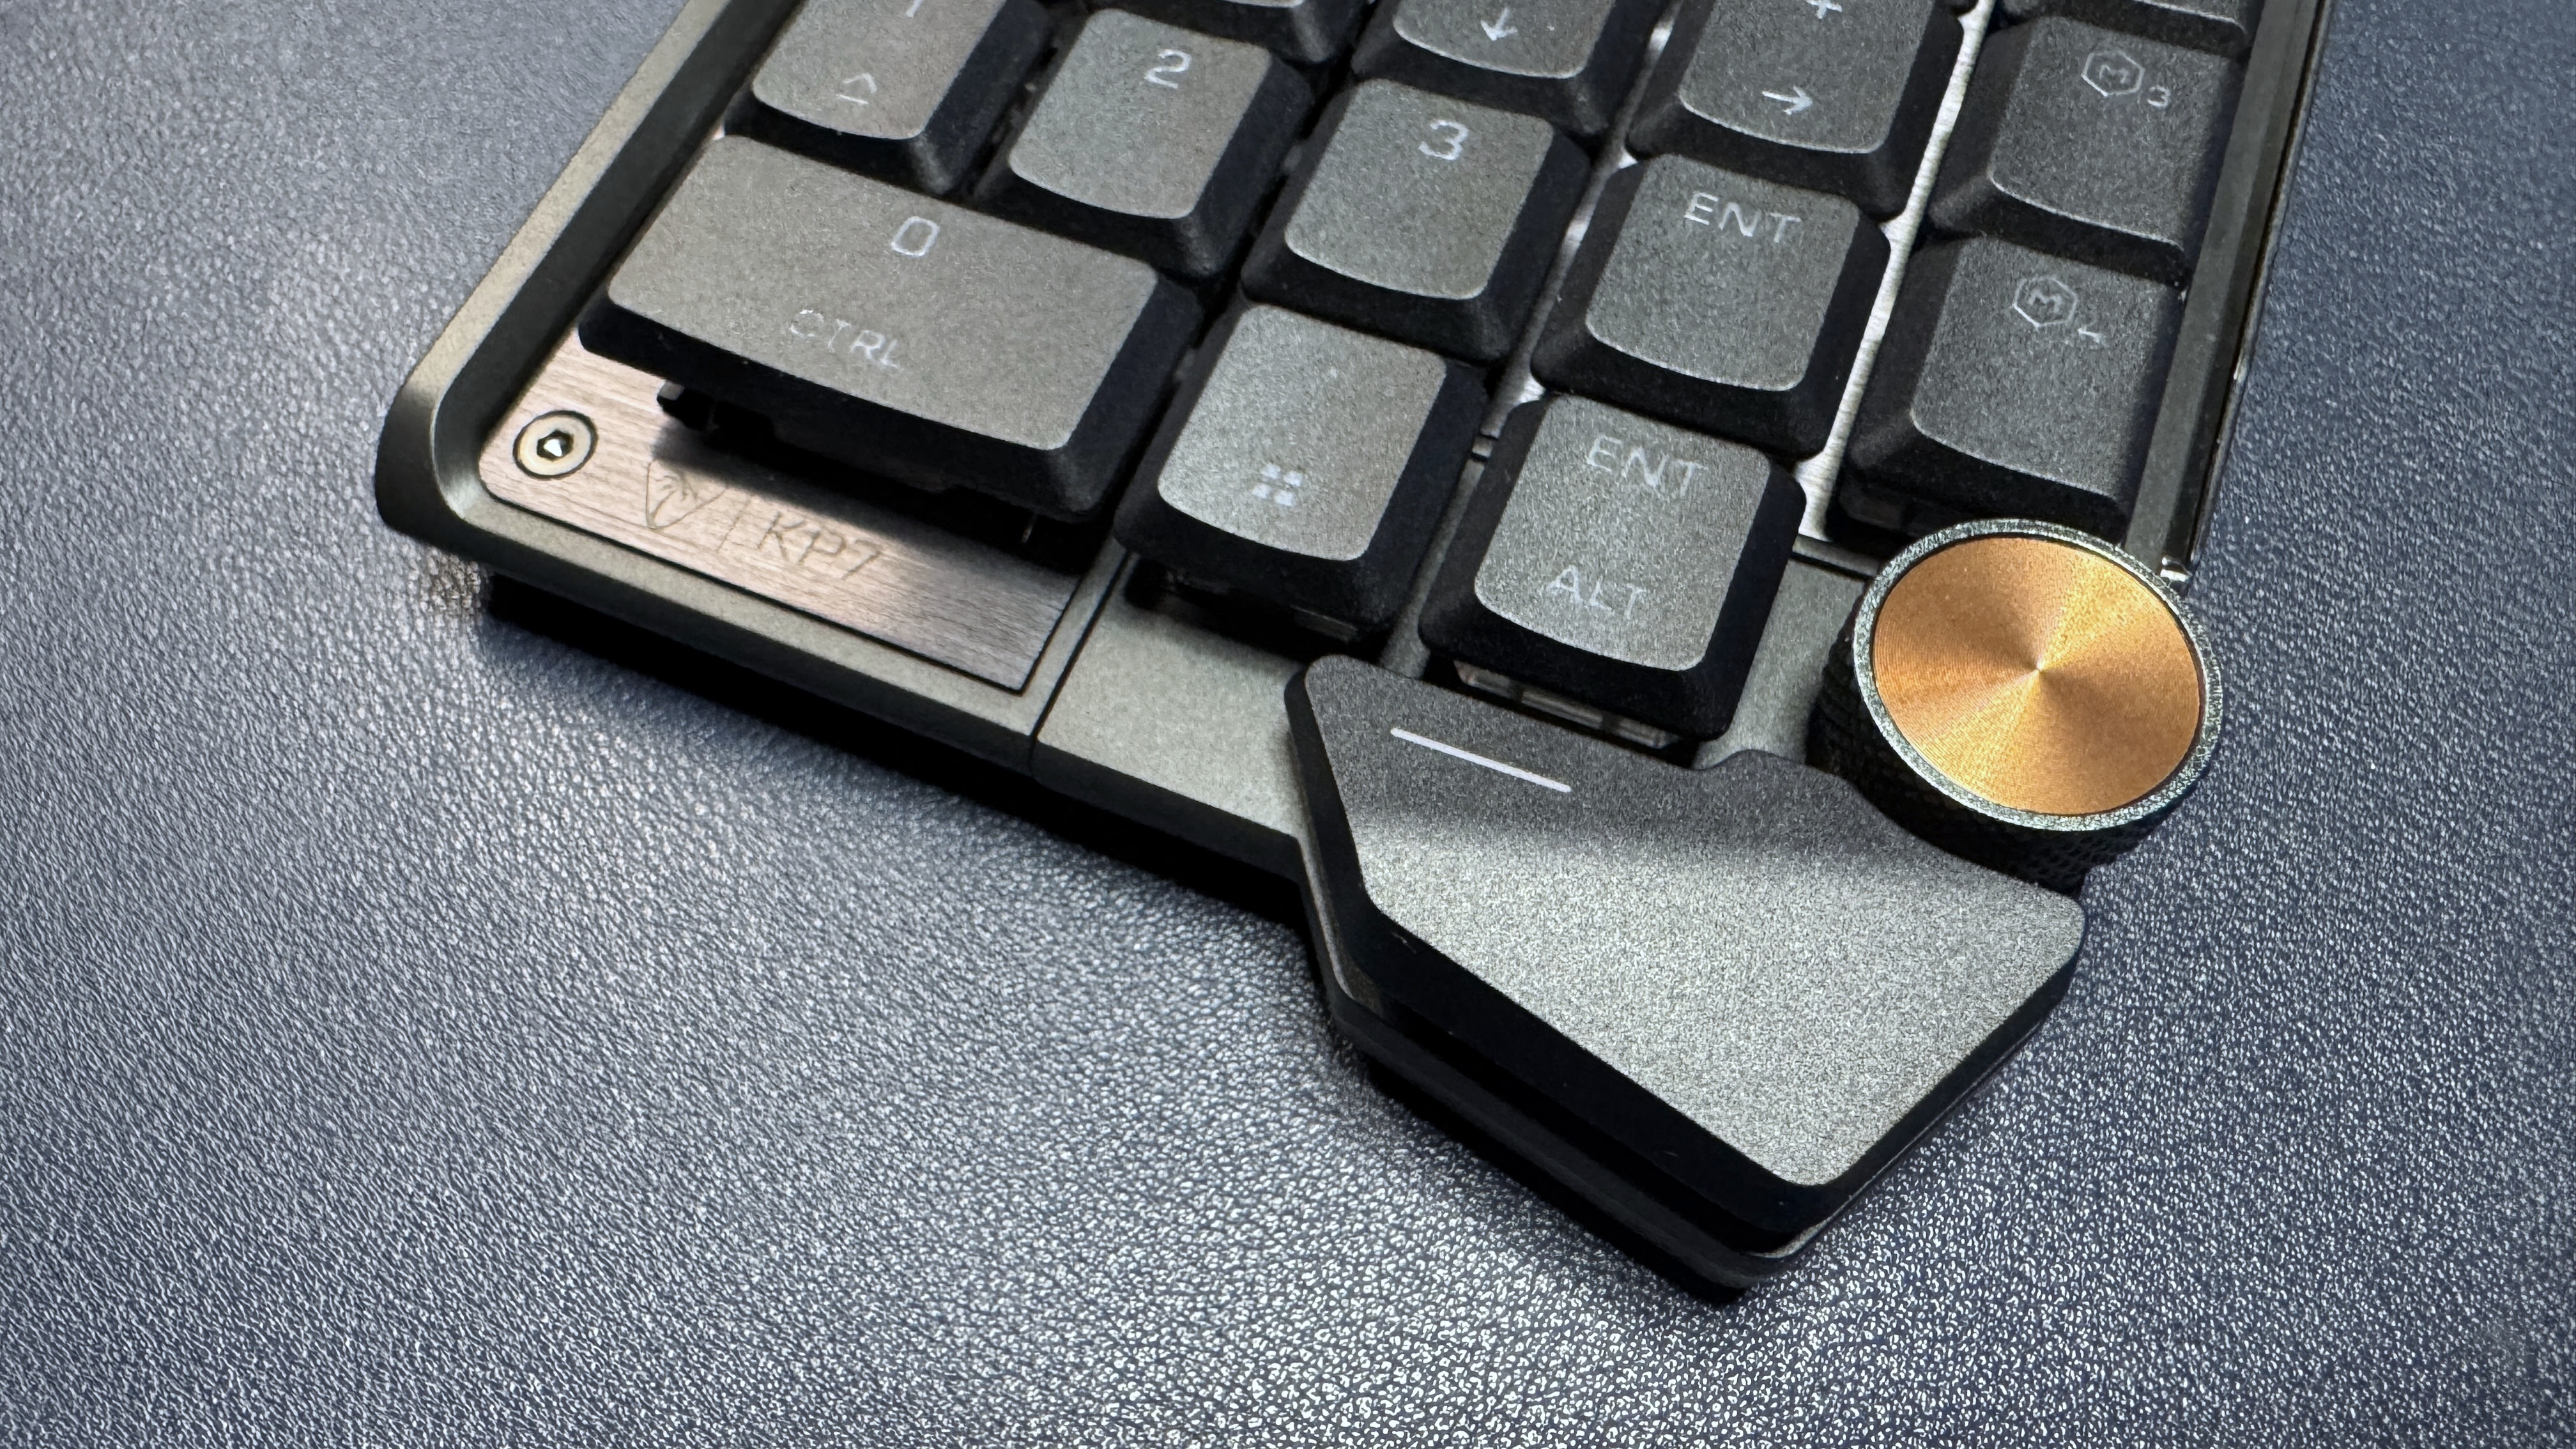
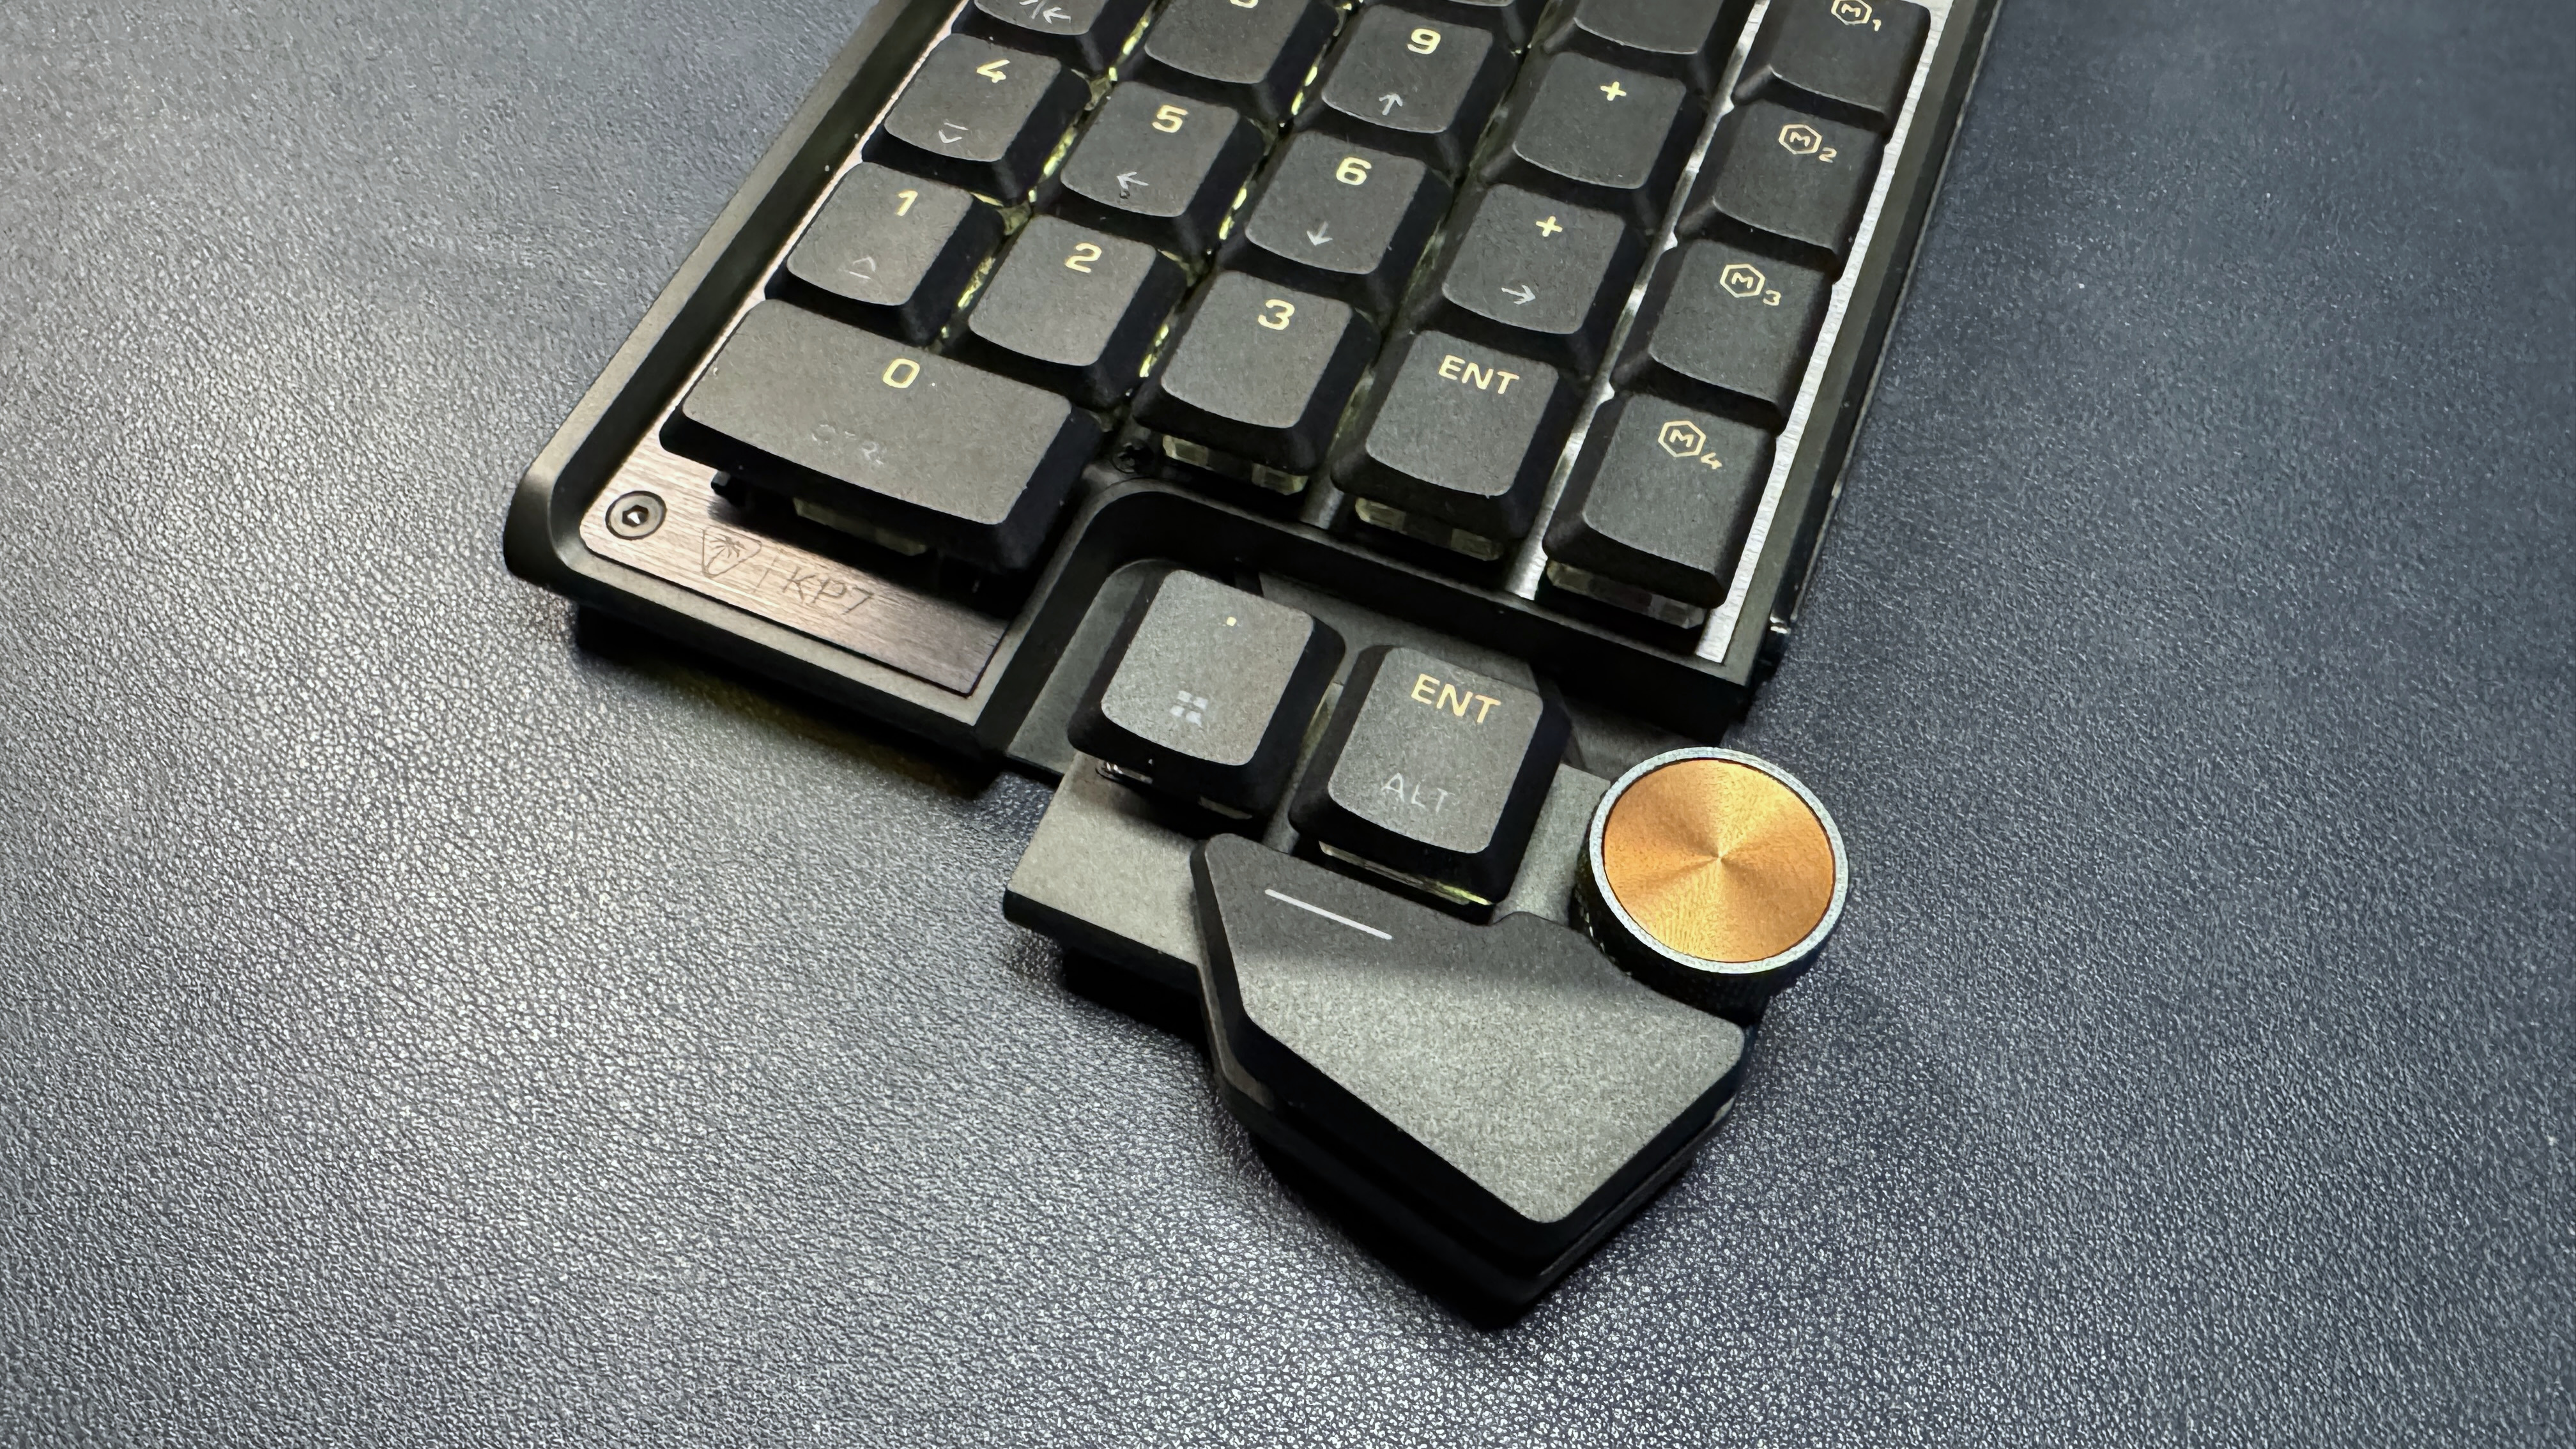
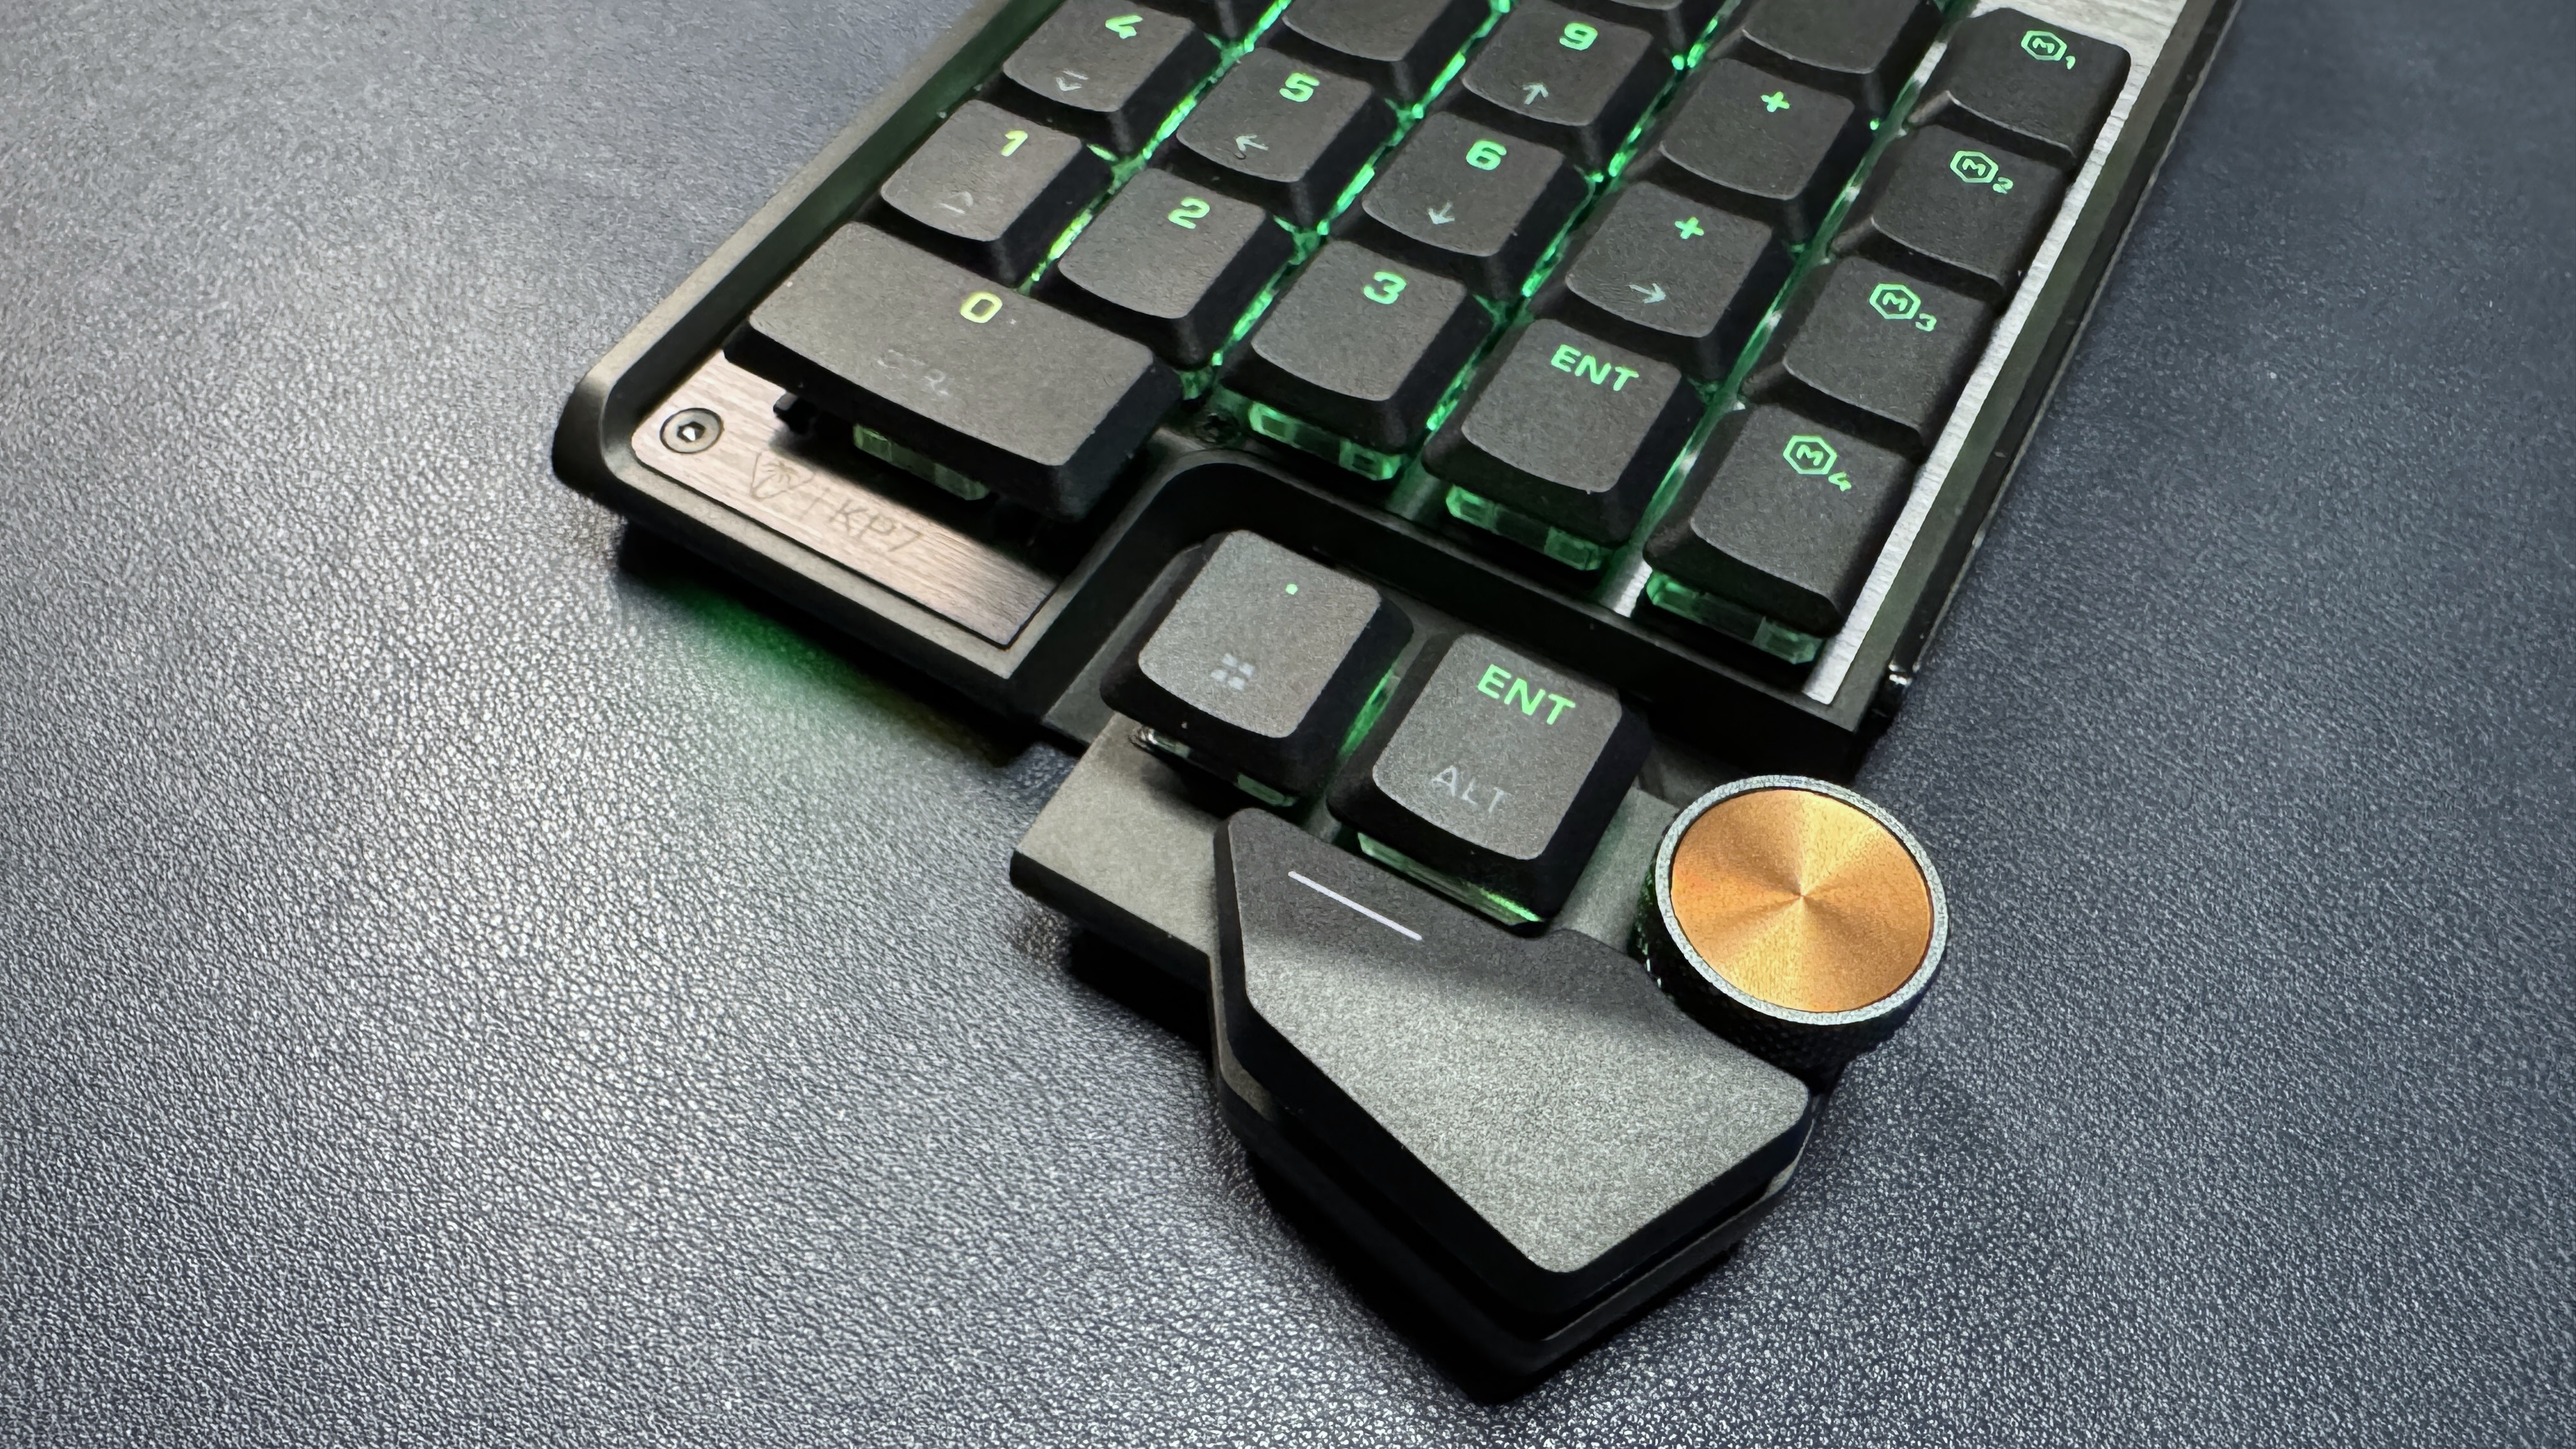
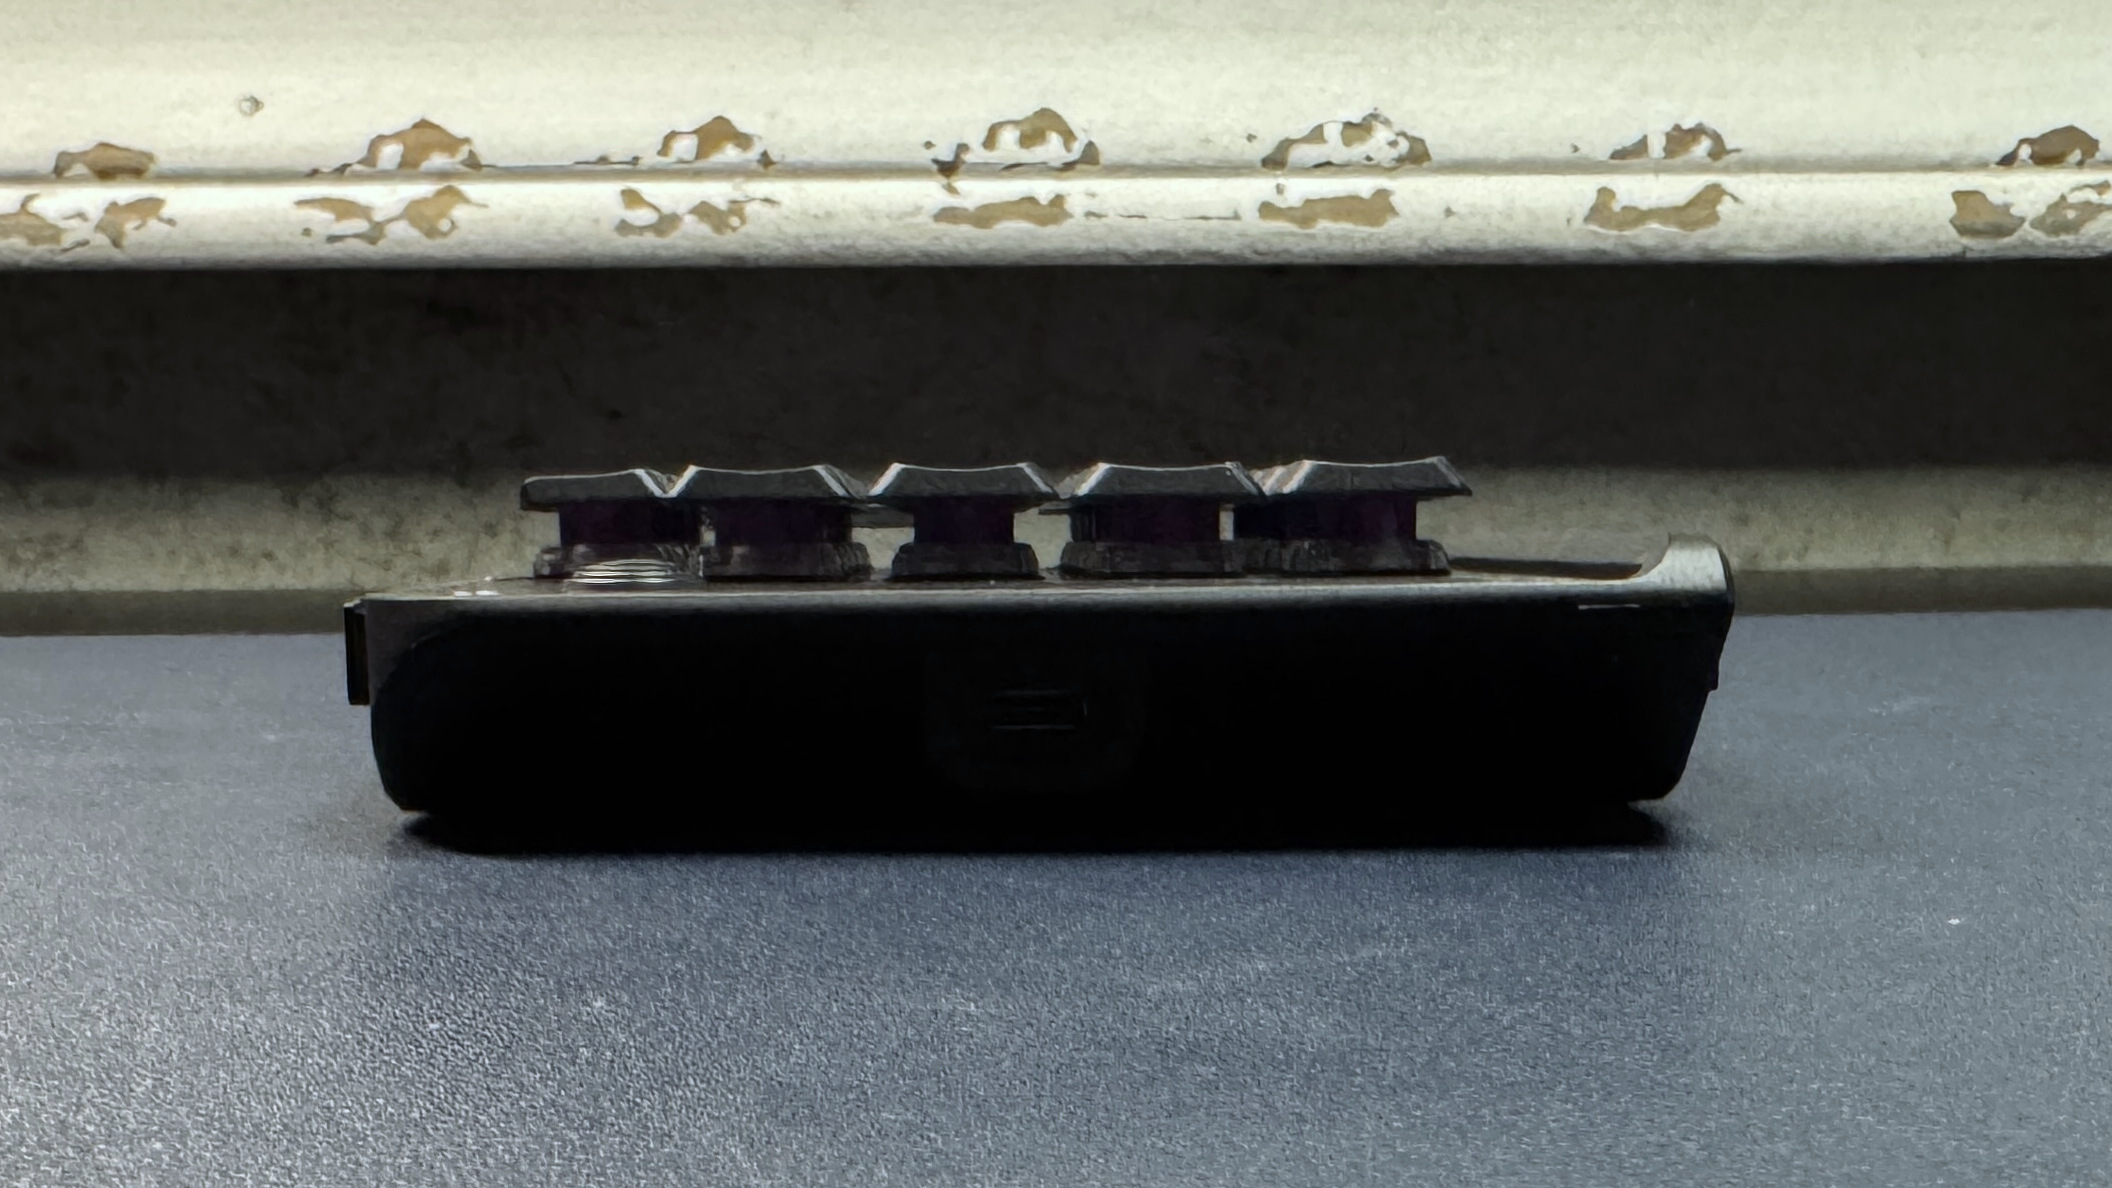
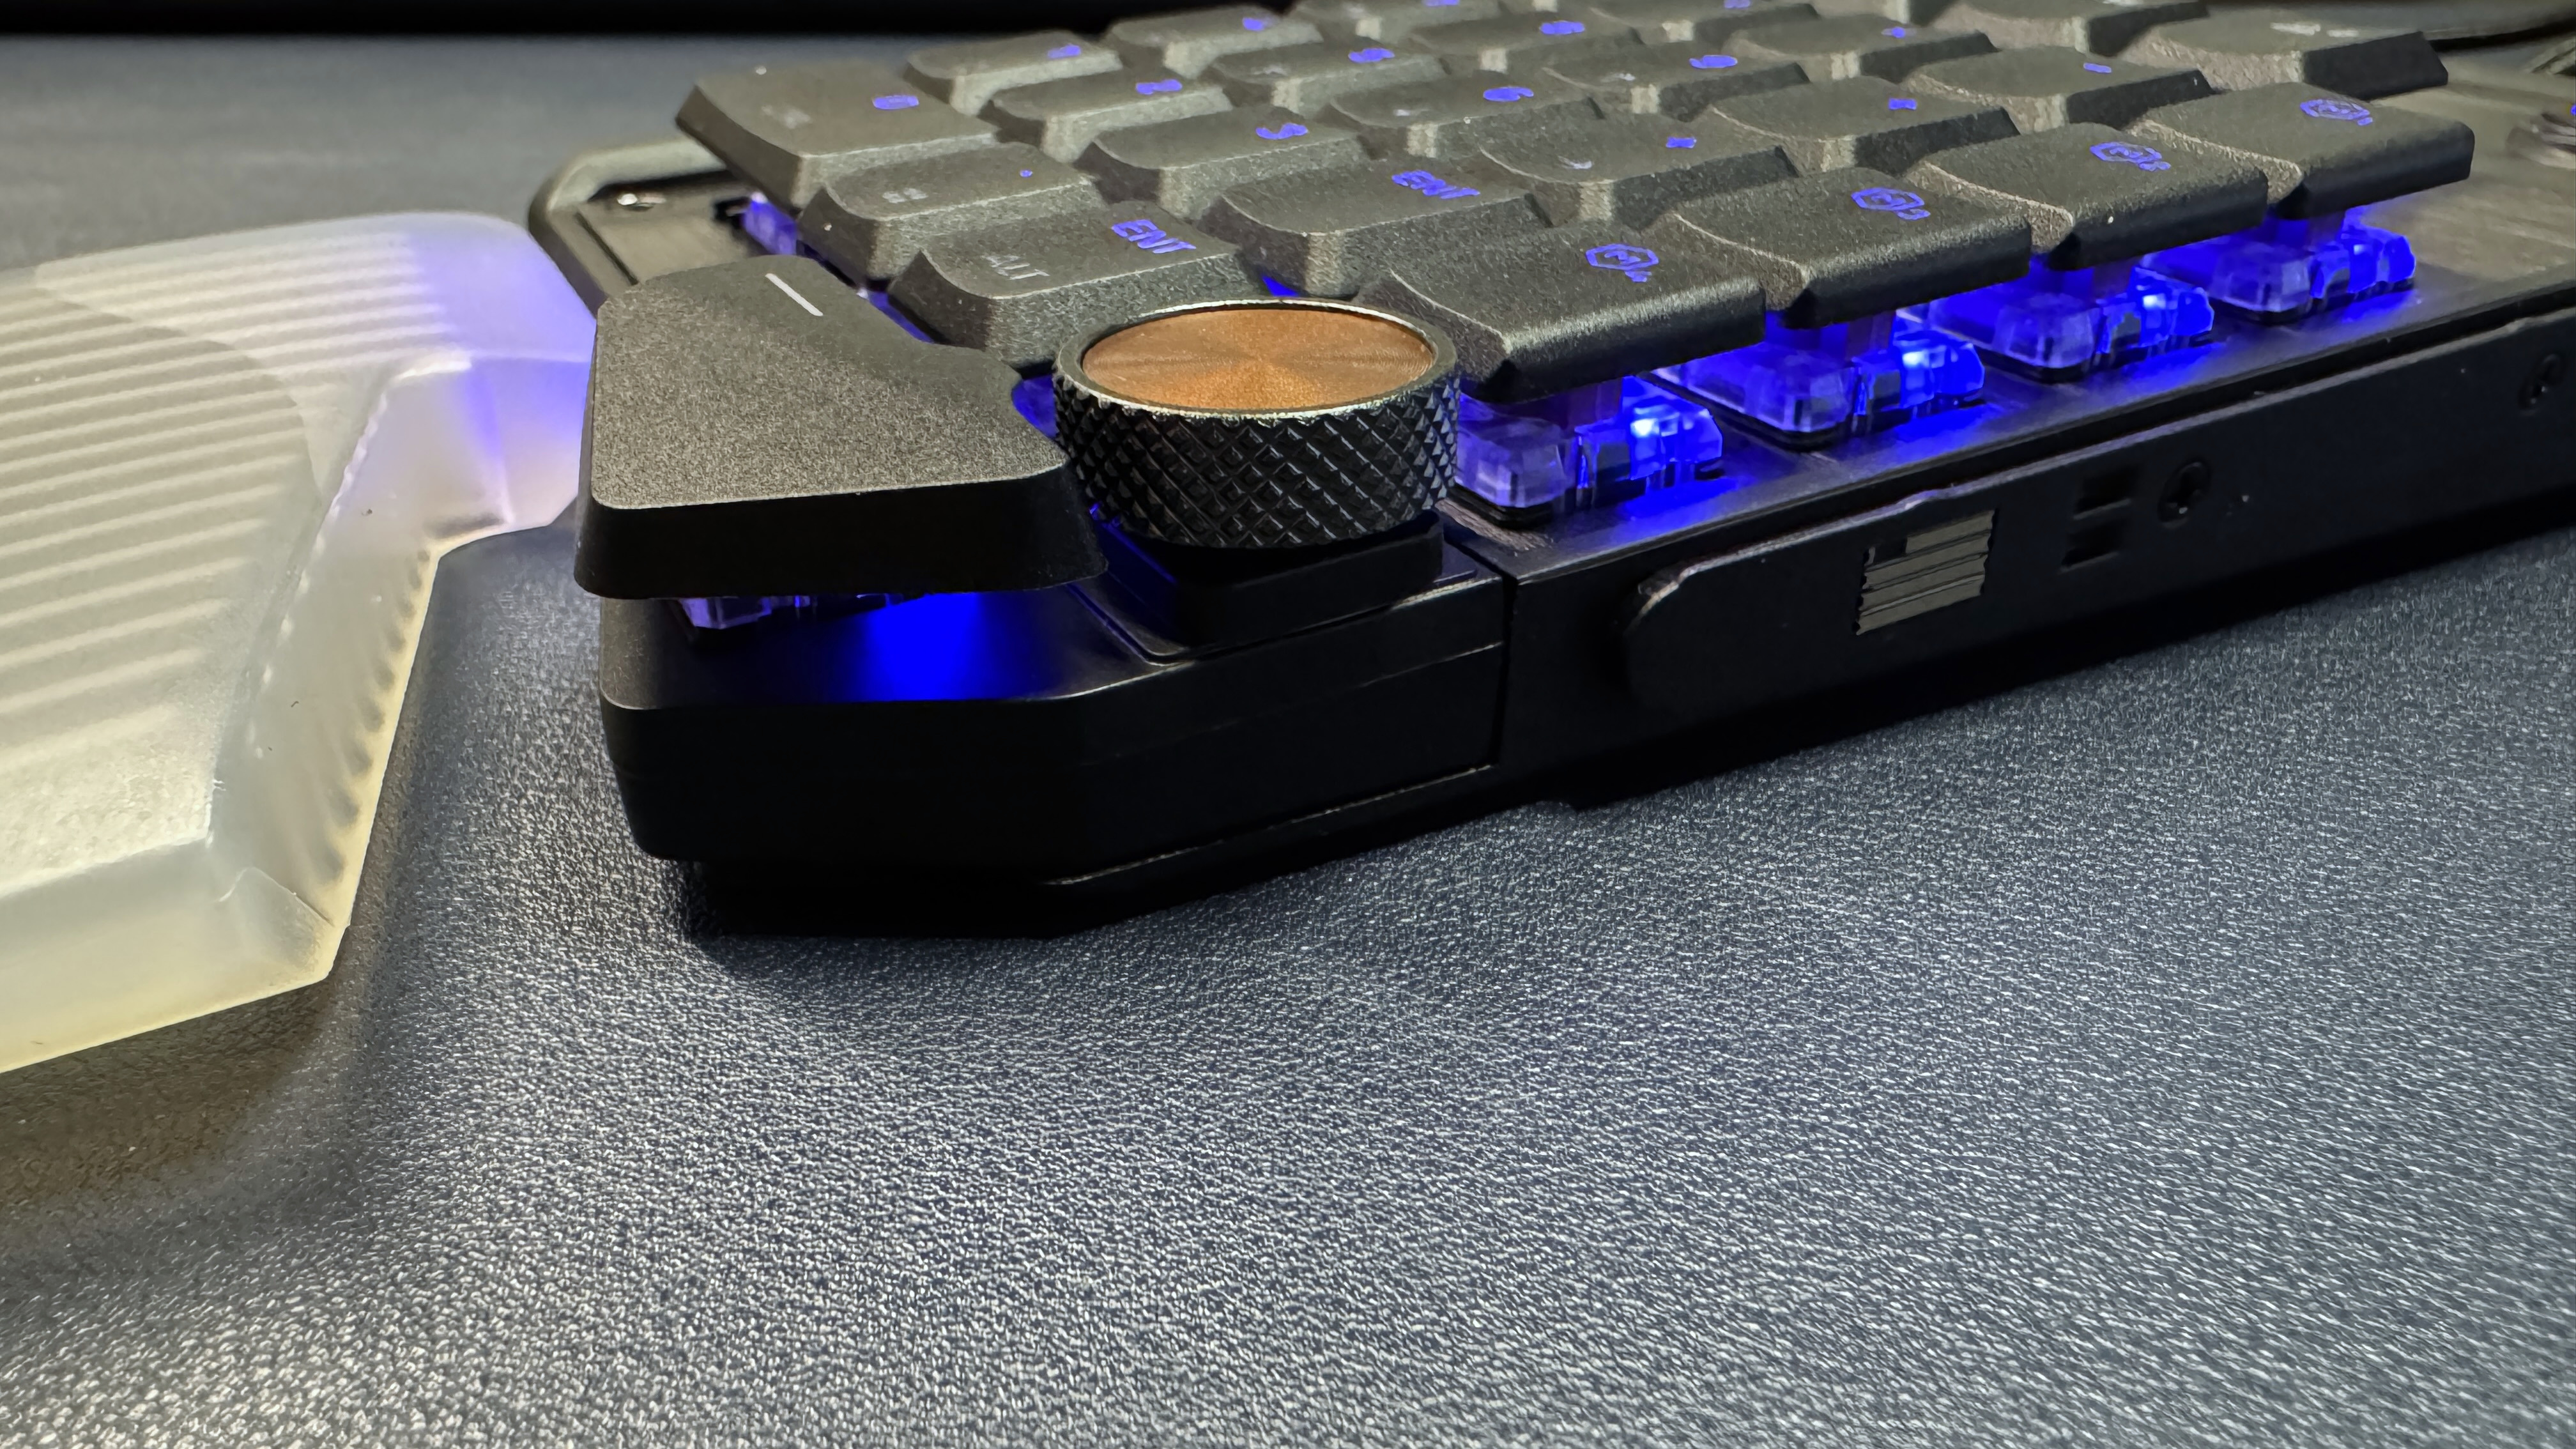
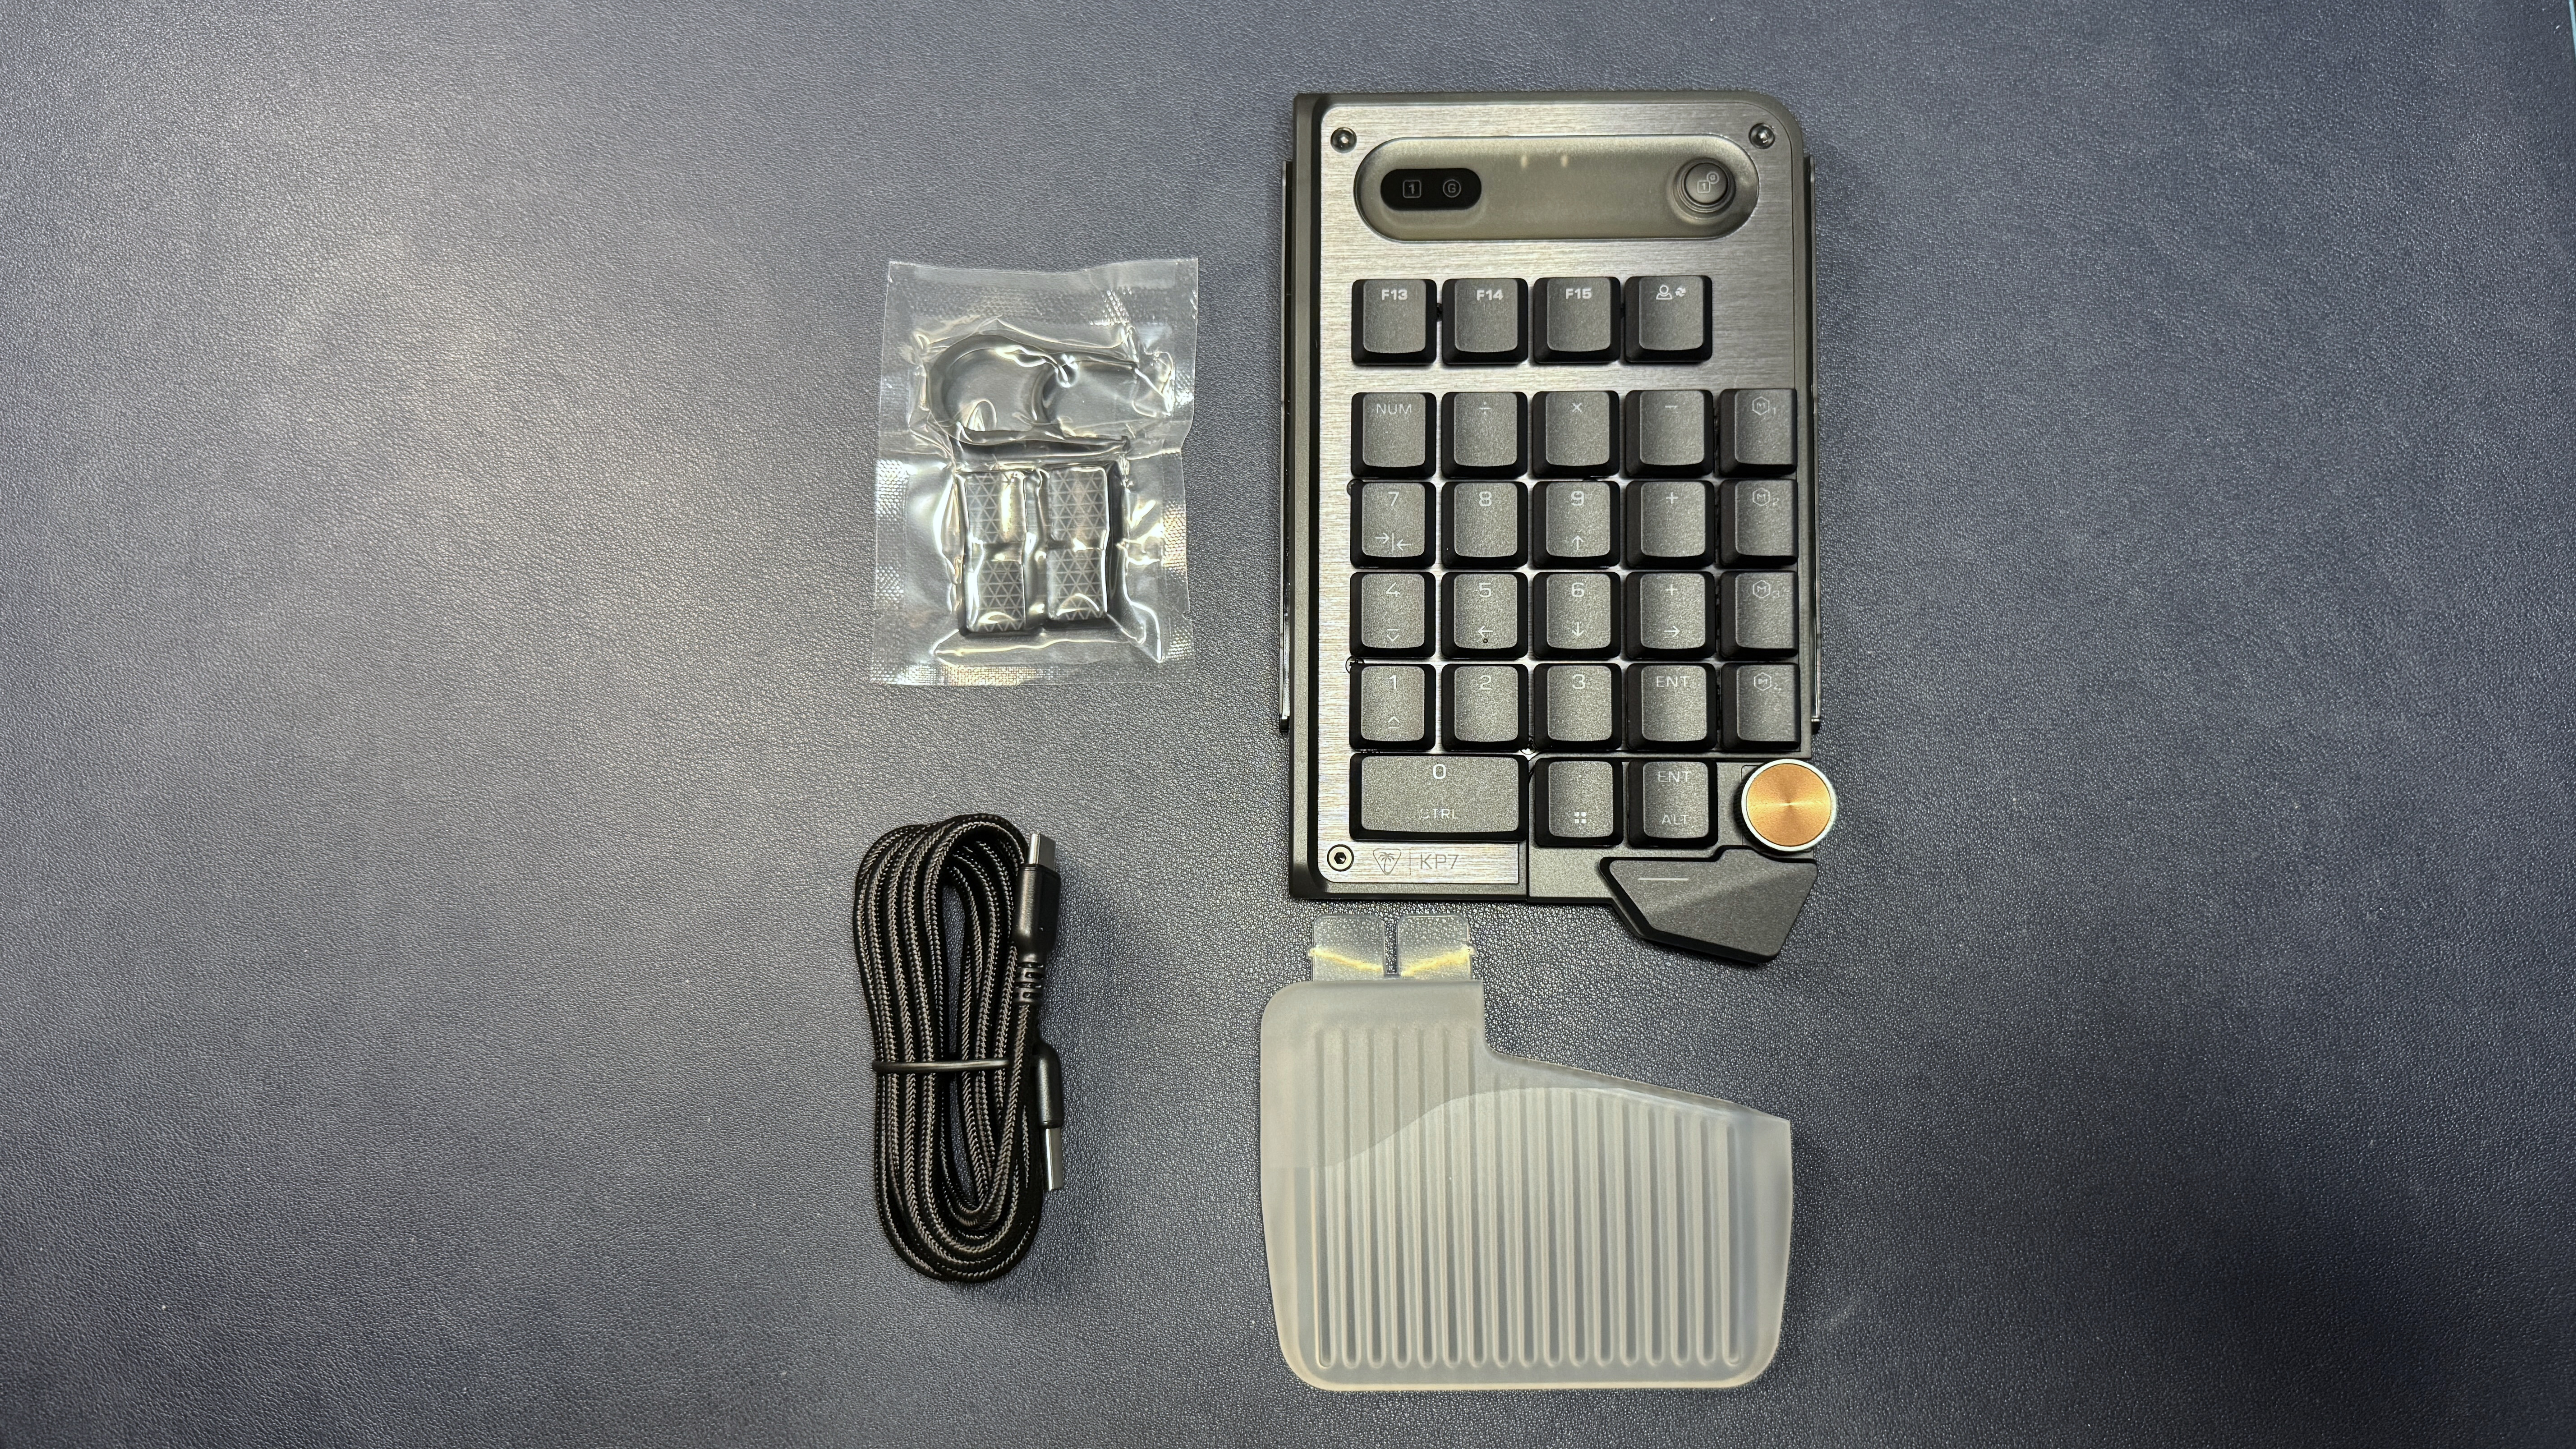
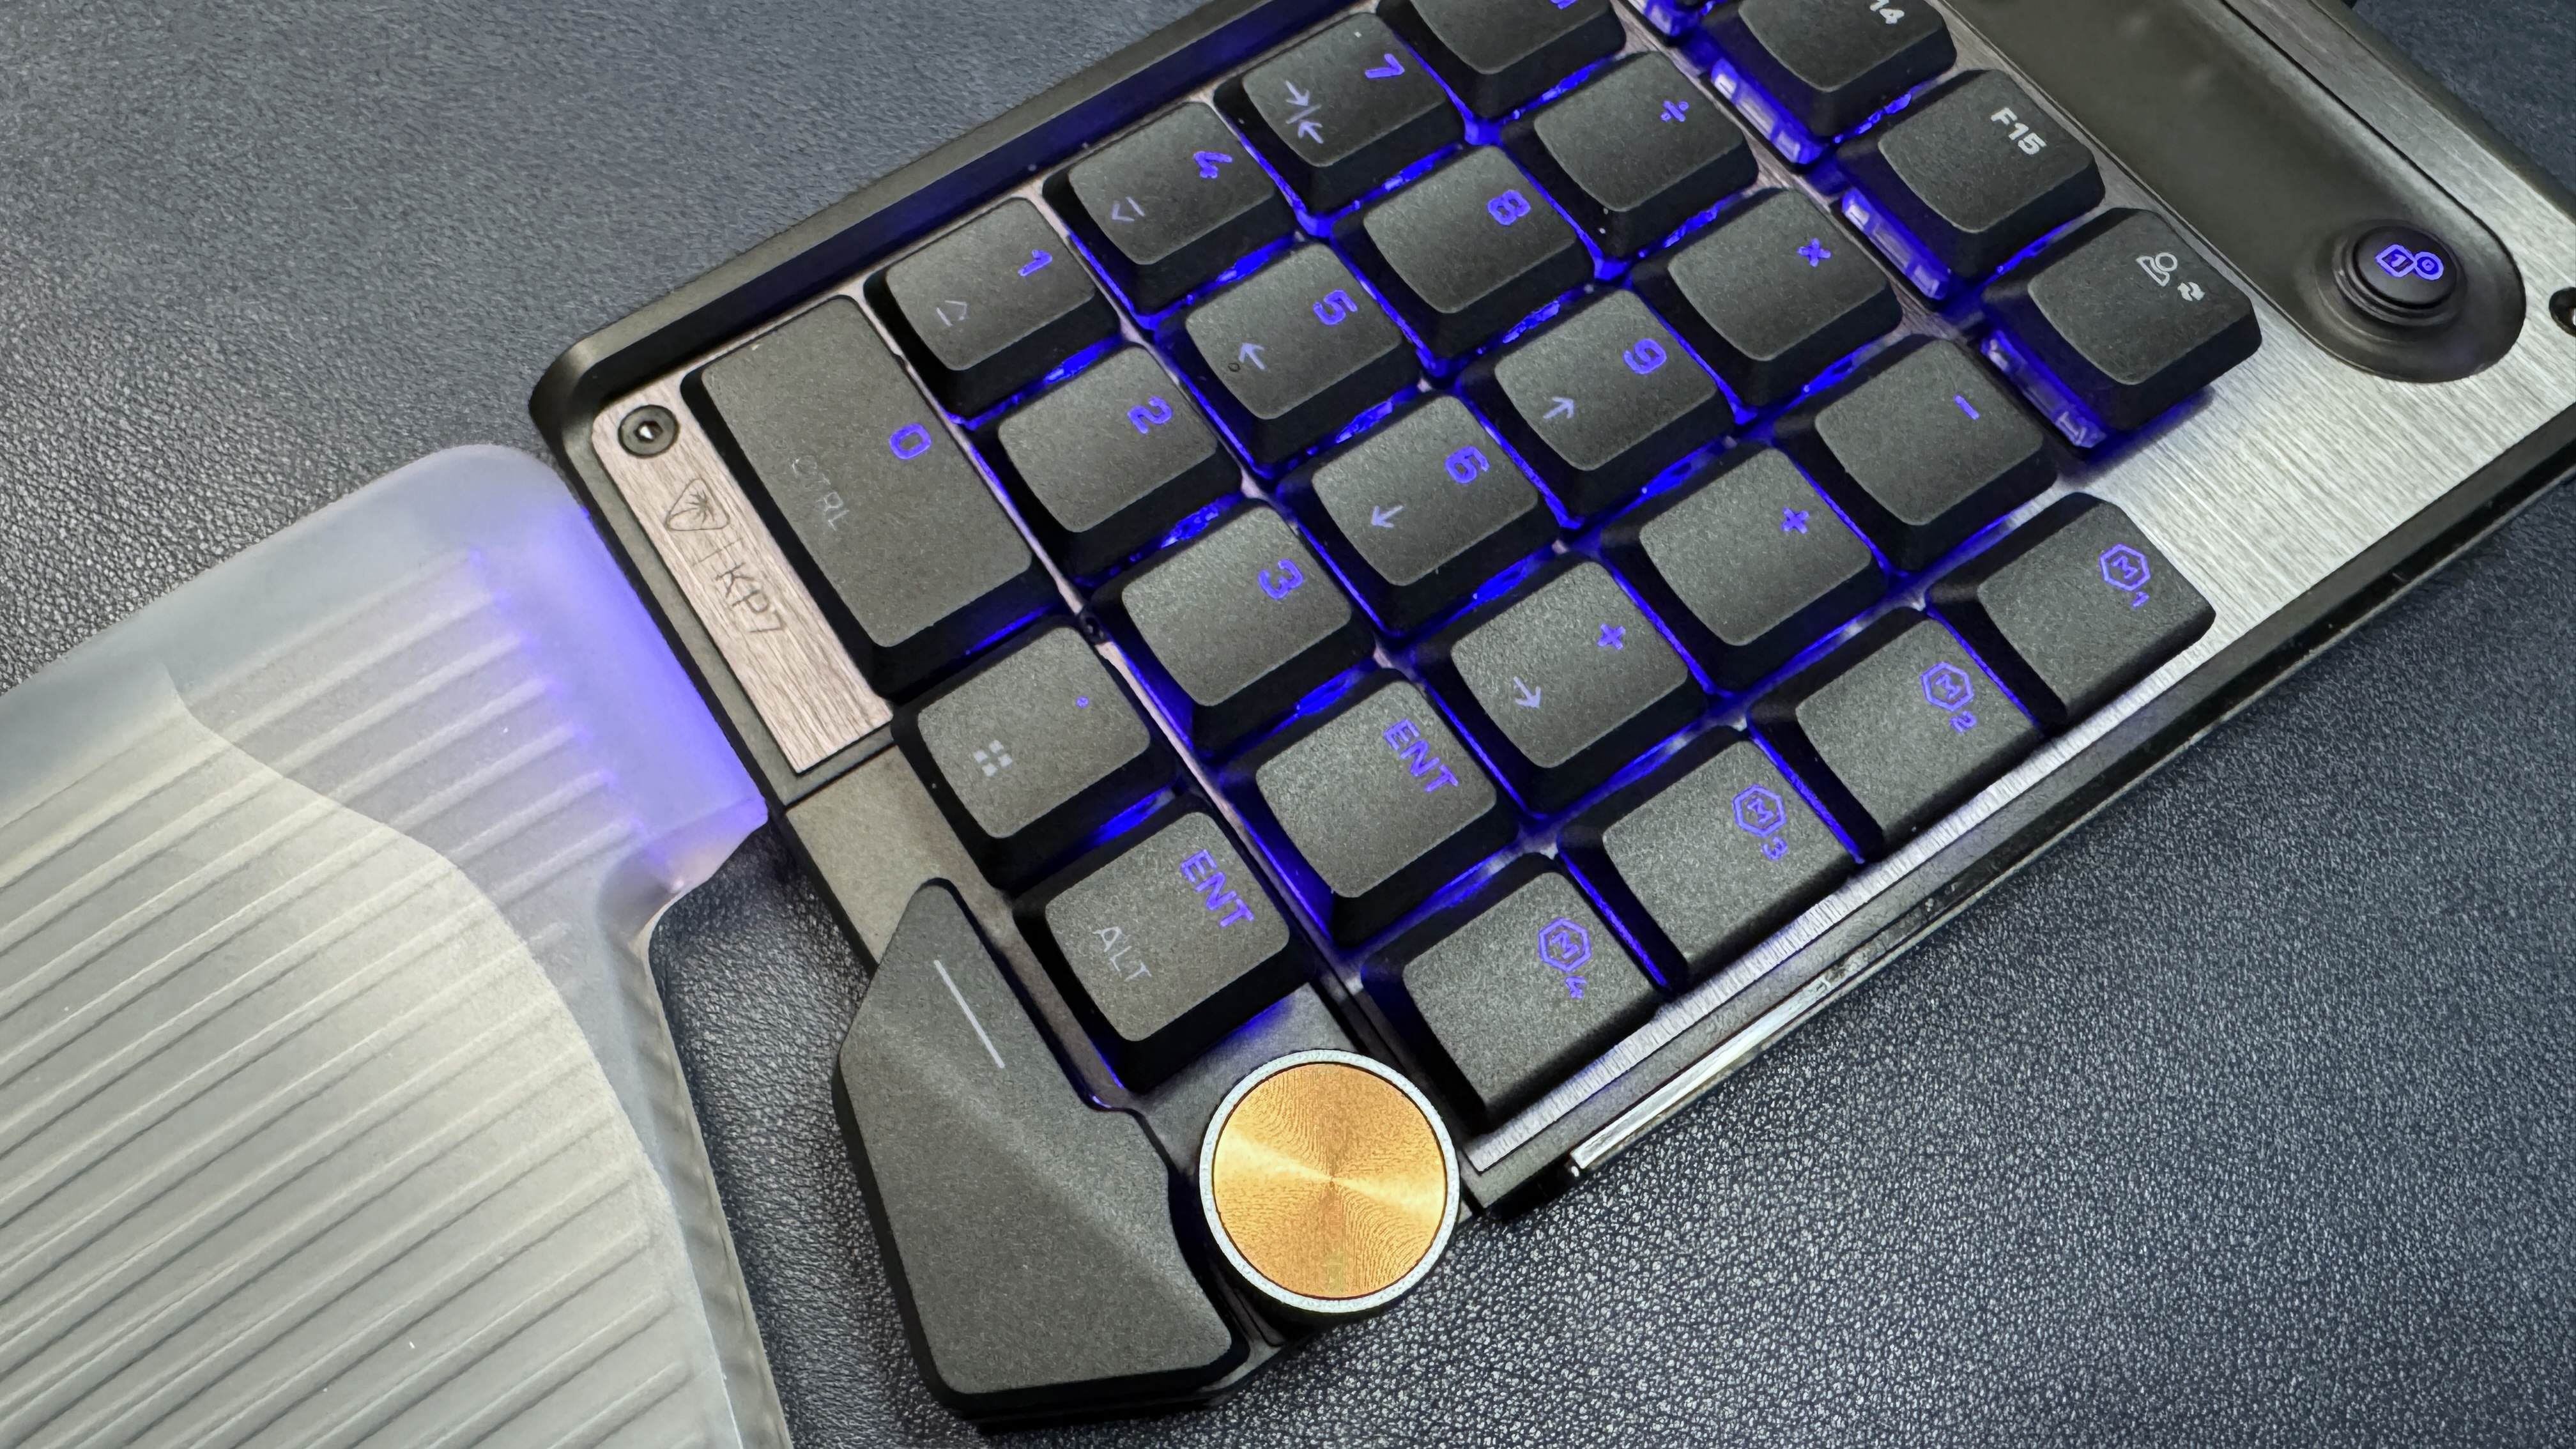
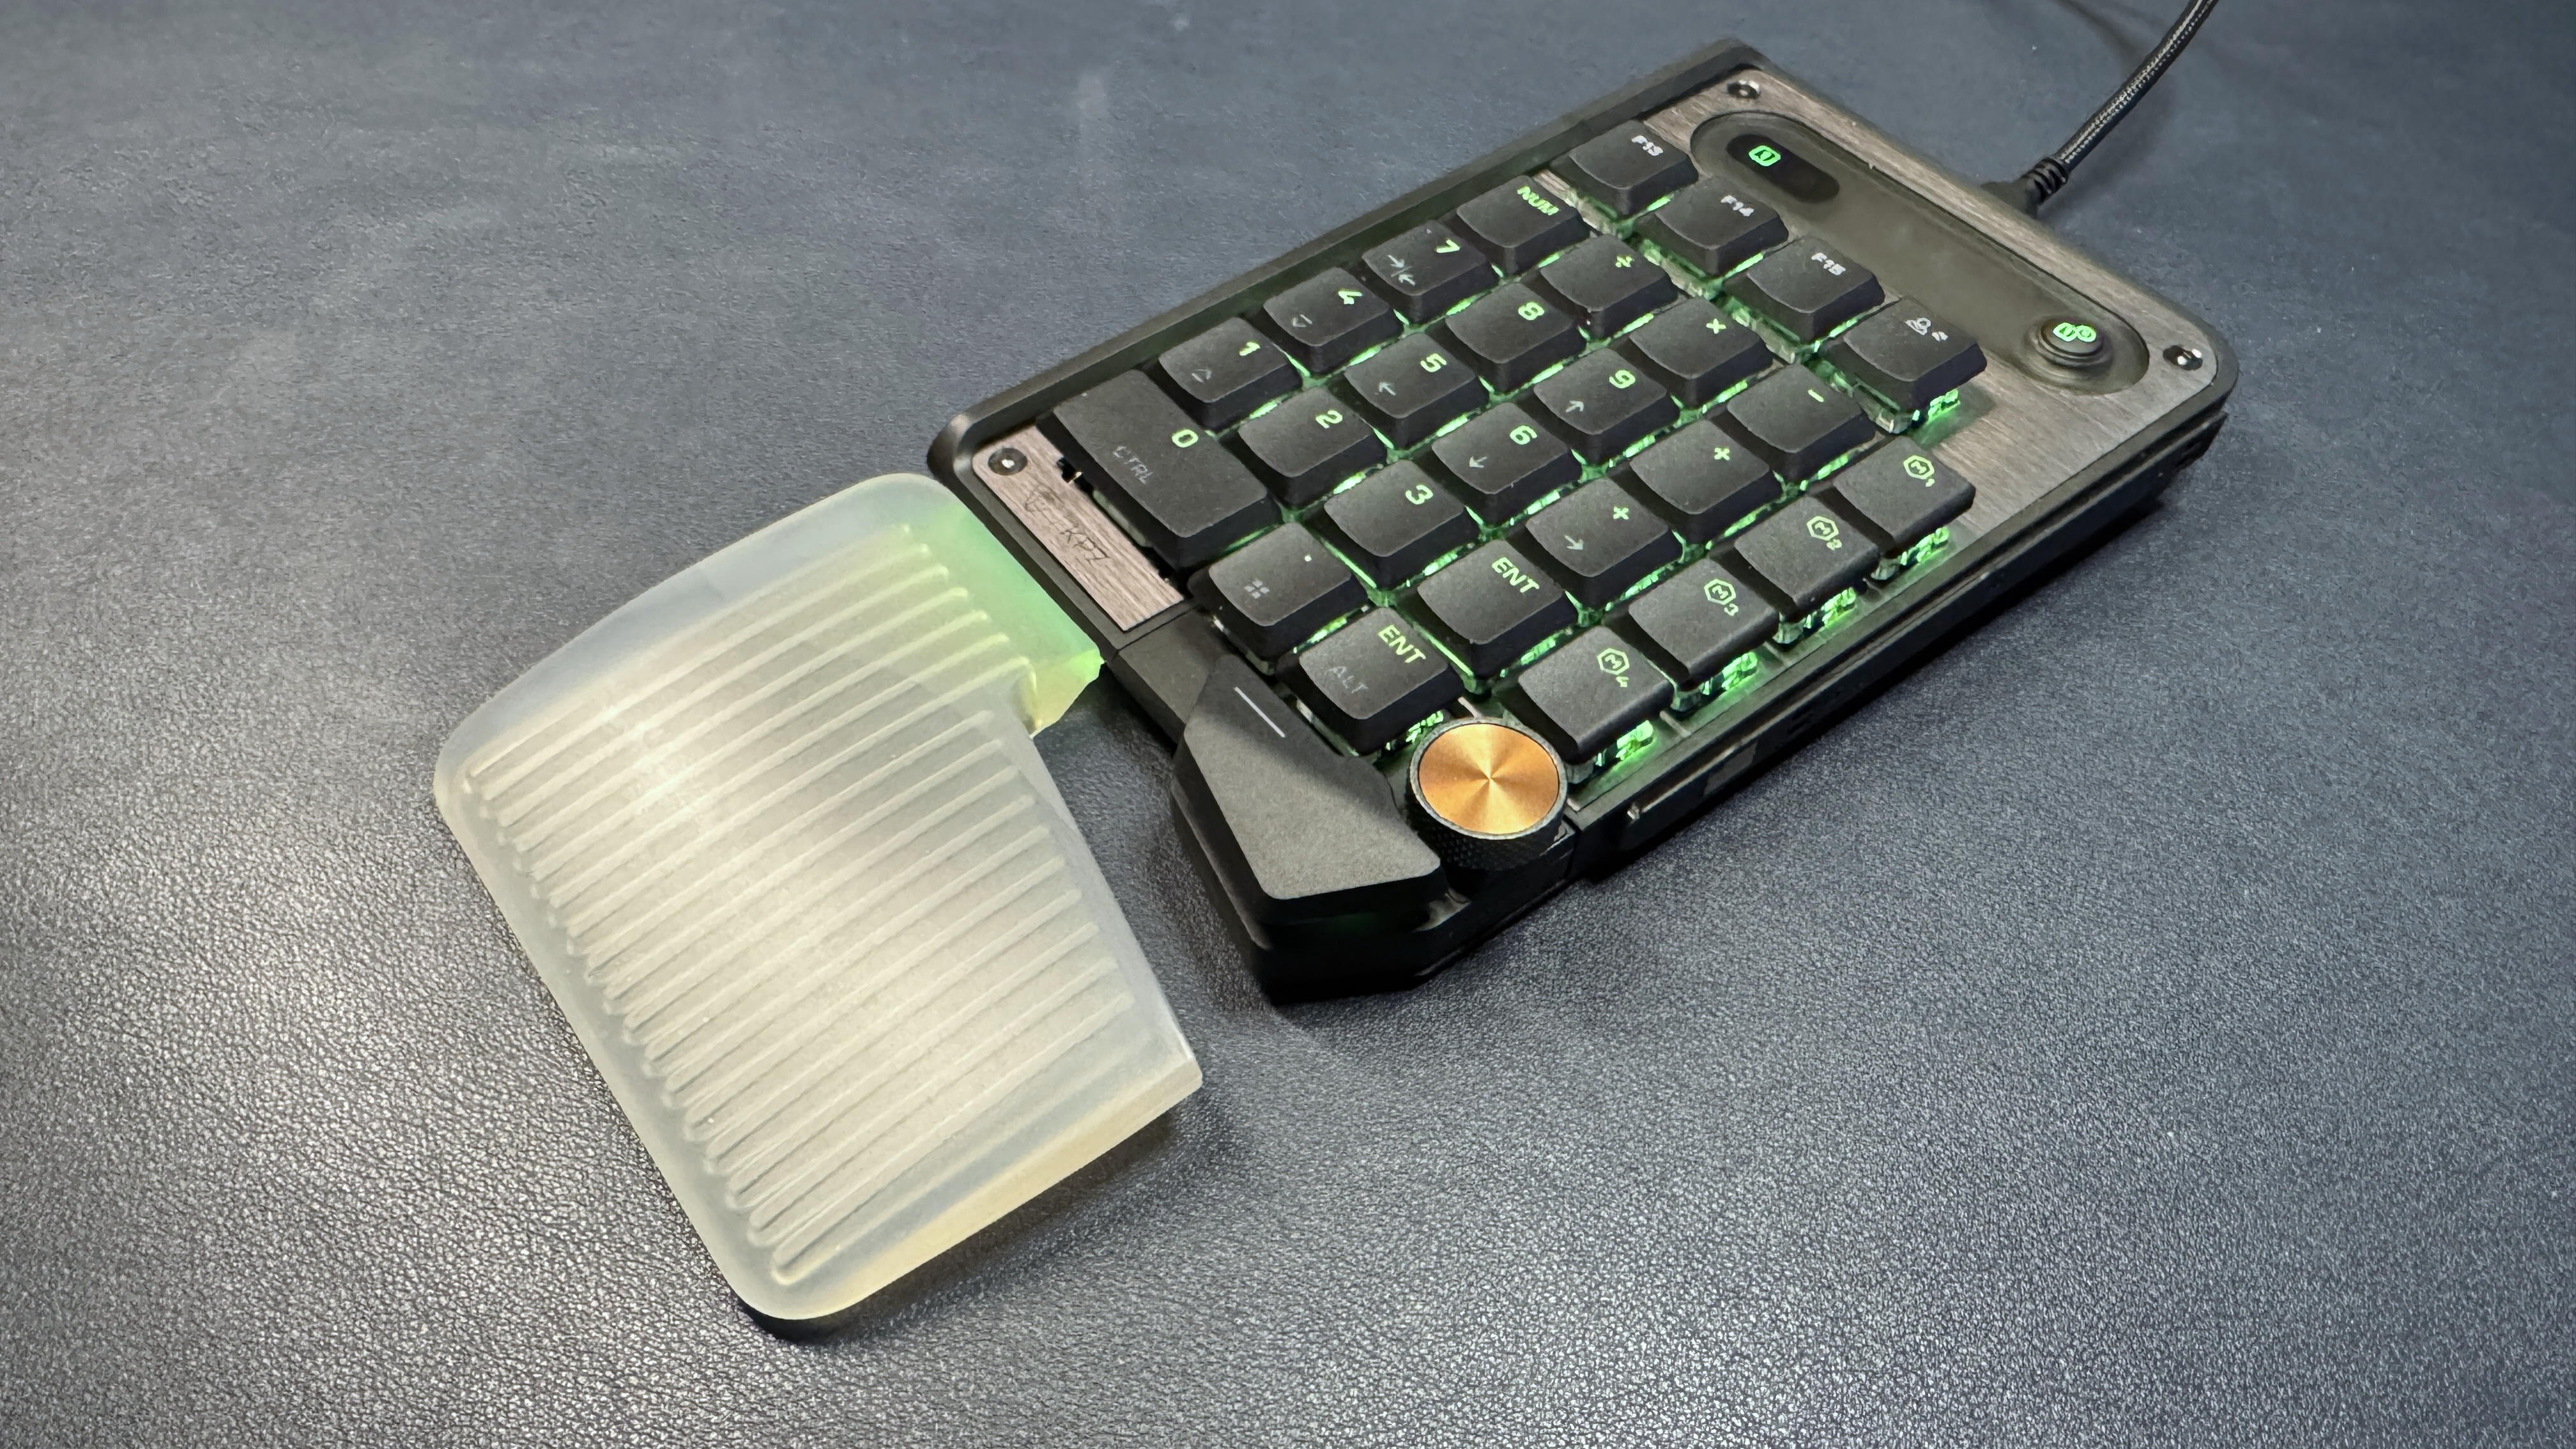
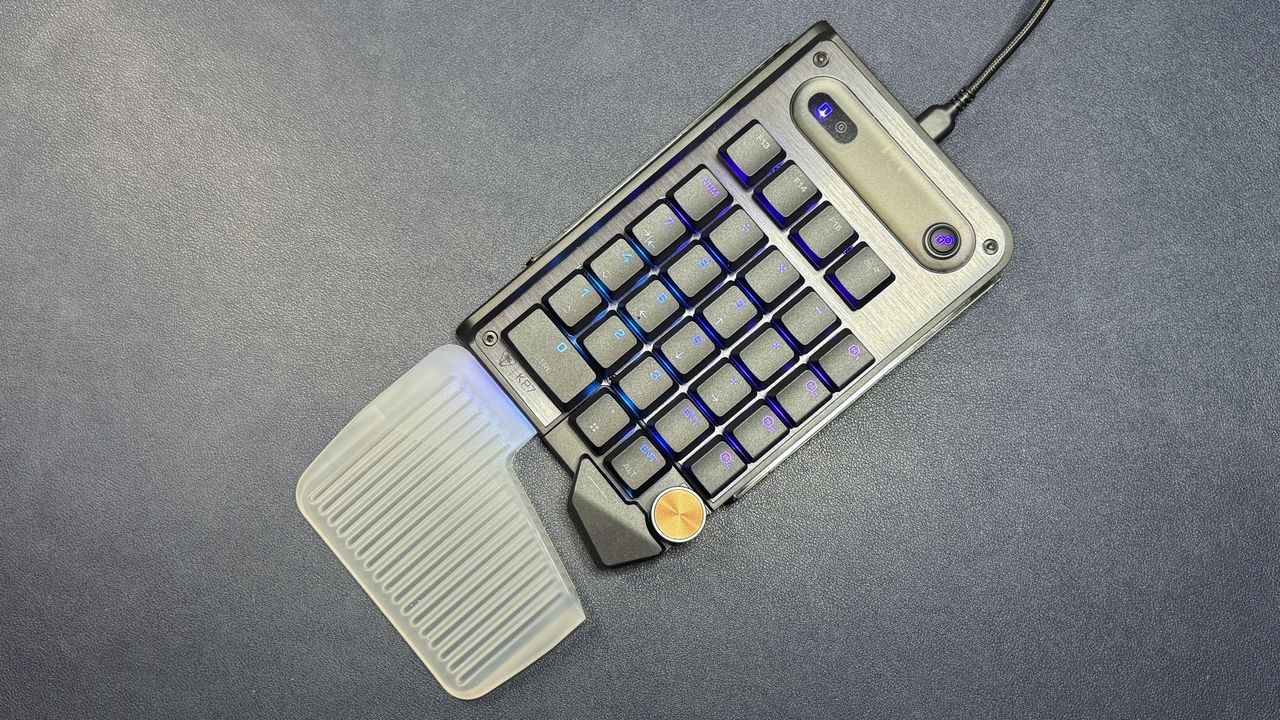
The flagship product is the Turtle Beach Command Series KB7 TKL: a low-profile, wired keyboard with magnetic Hall Effect switches and a built-in "Command Center" touchscreen. It features a modified TKL layout (the touchscreen is where the navigation cluster would normally be), dedicated media and macro keys, a light-diffusing silicon wrist rest, and connection points on either side for the KP7 — a modular, standalone 10-key numberpad with a bunch of extra keys, buttons, and a programmable knob (it's actually so fancy we're going to give it its own review). The KB7 is basically the Corsair Galleon 100 SD, but modular and touch...ier. And it's about as pricey — it's available now, in black, for $199.99 (not including the KP7 — that's a separate $99.99 purchase).

Design and Construction of the KB7

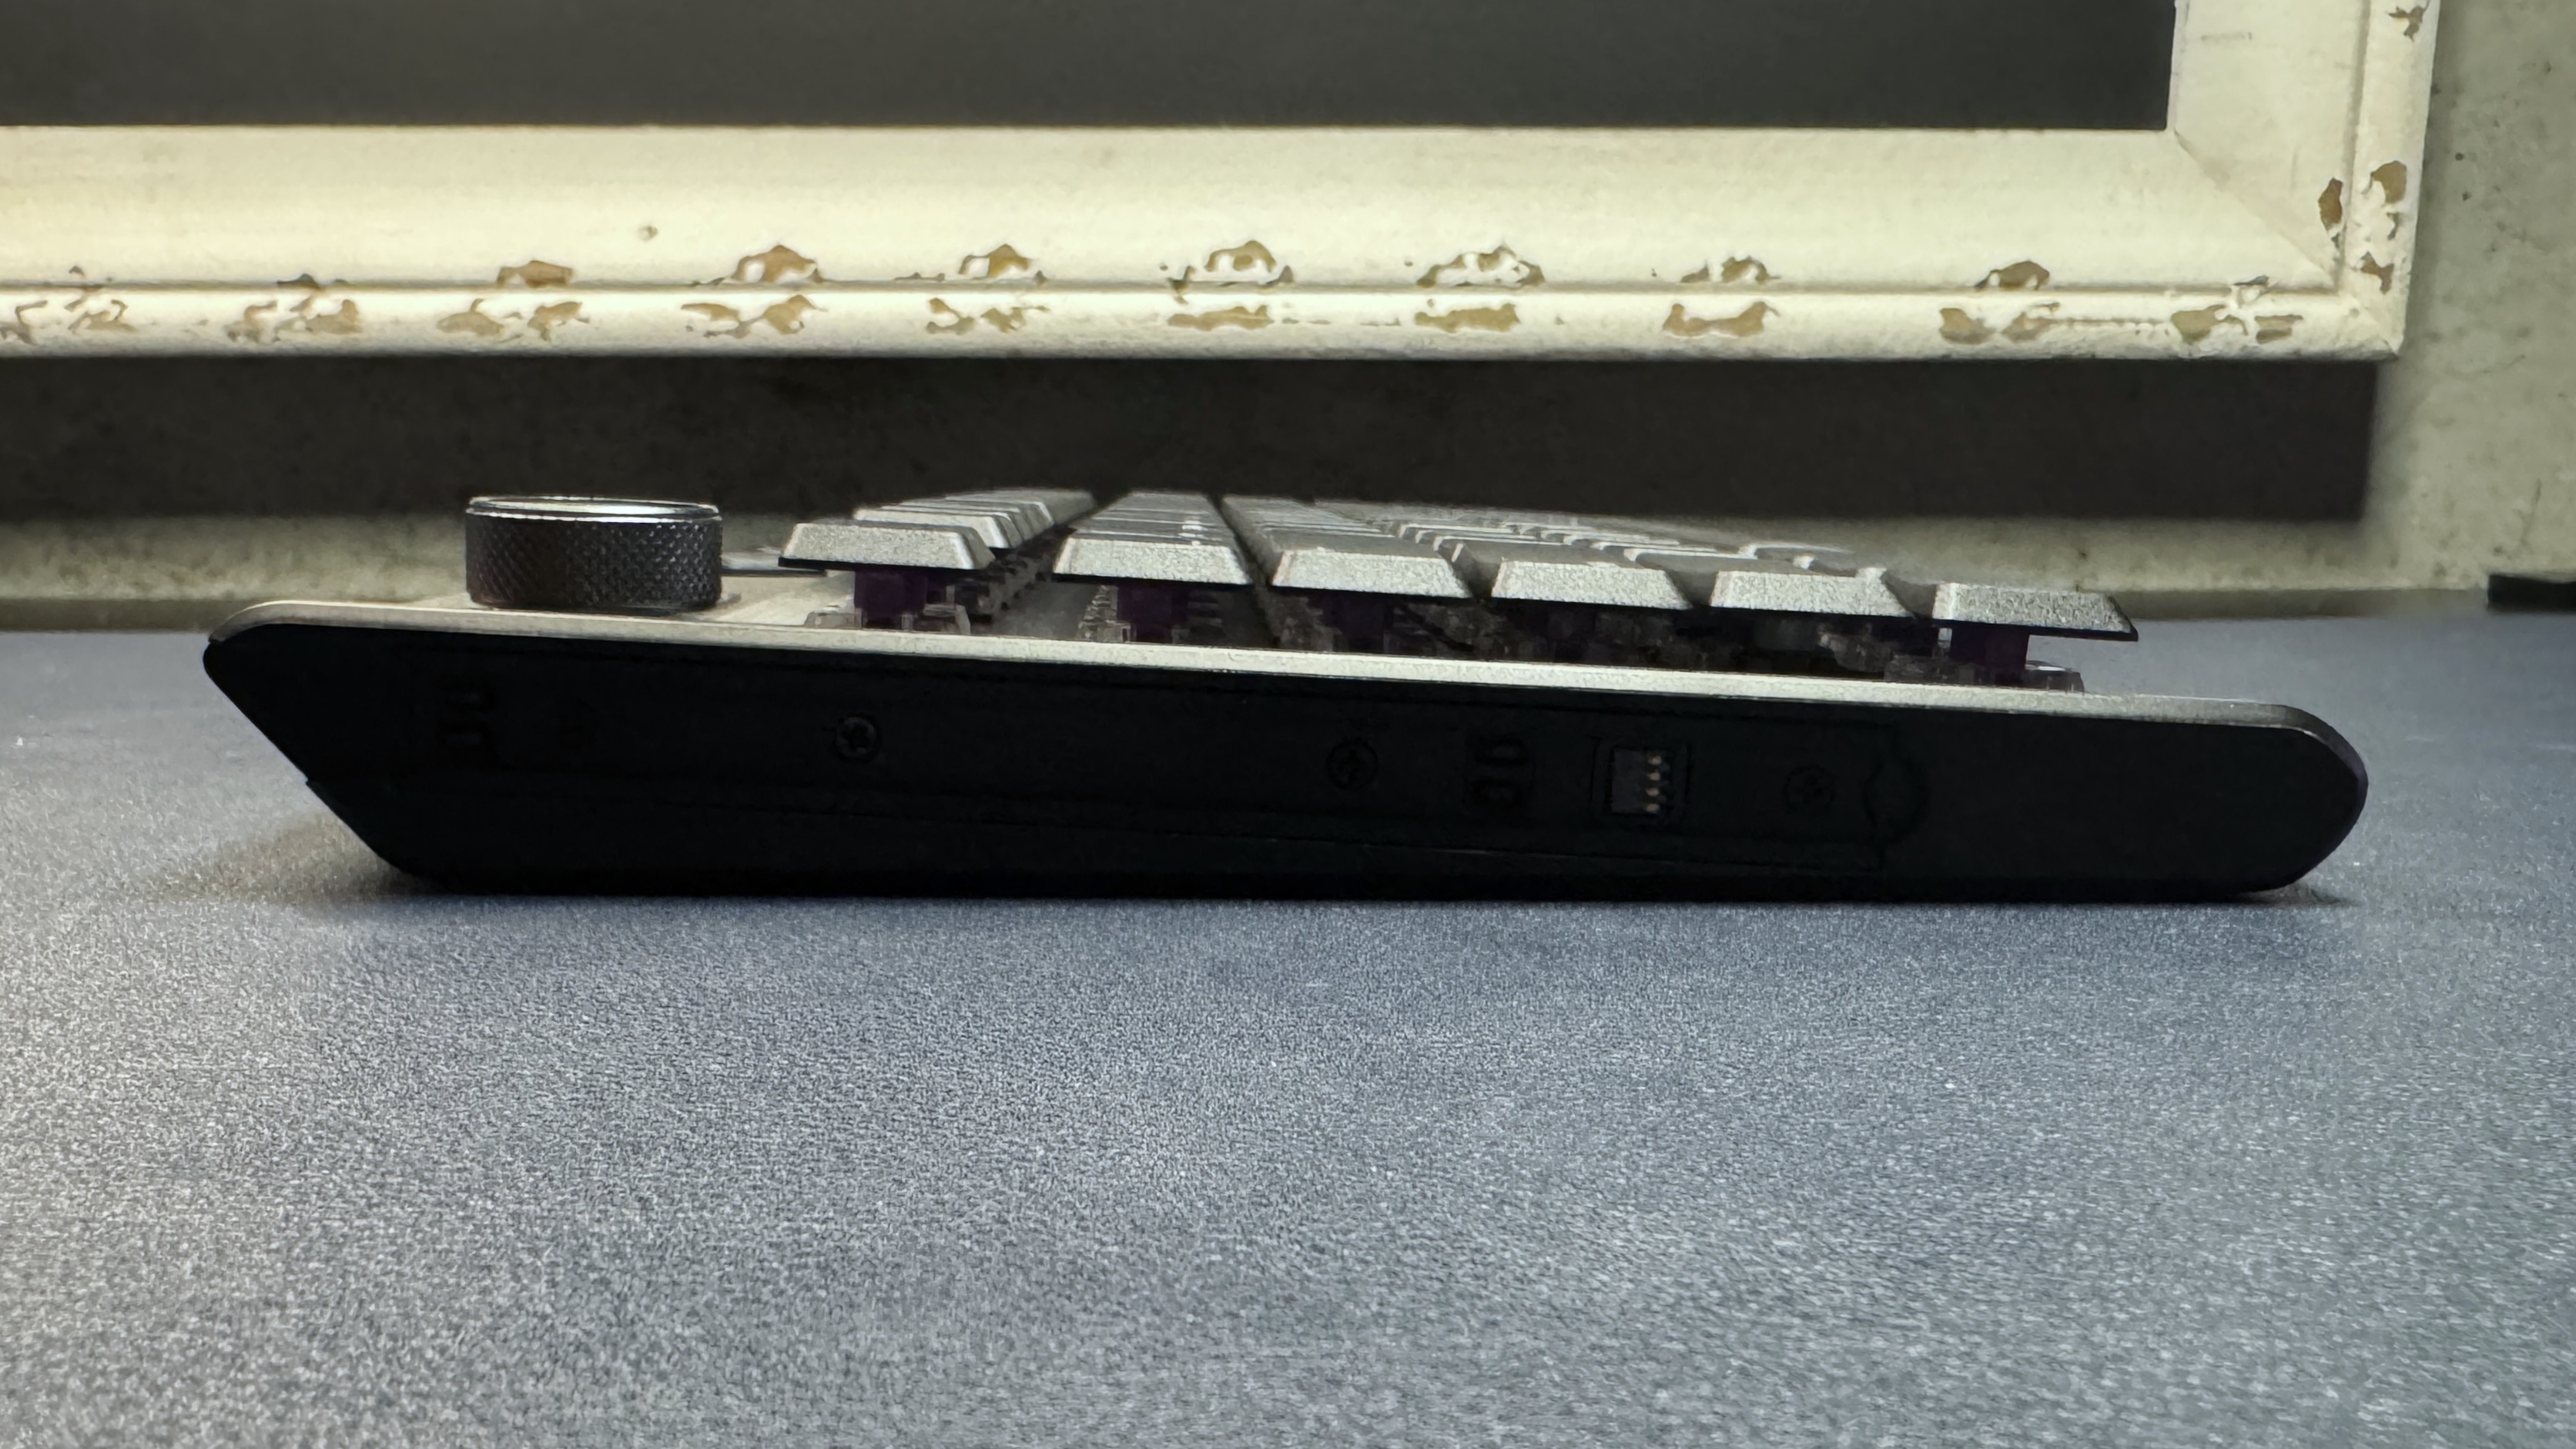
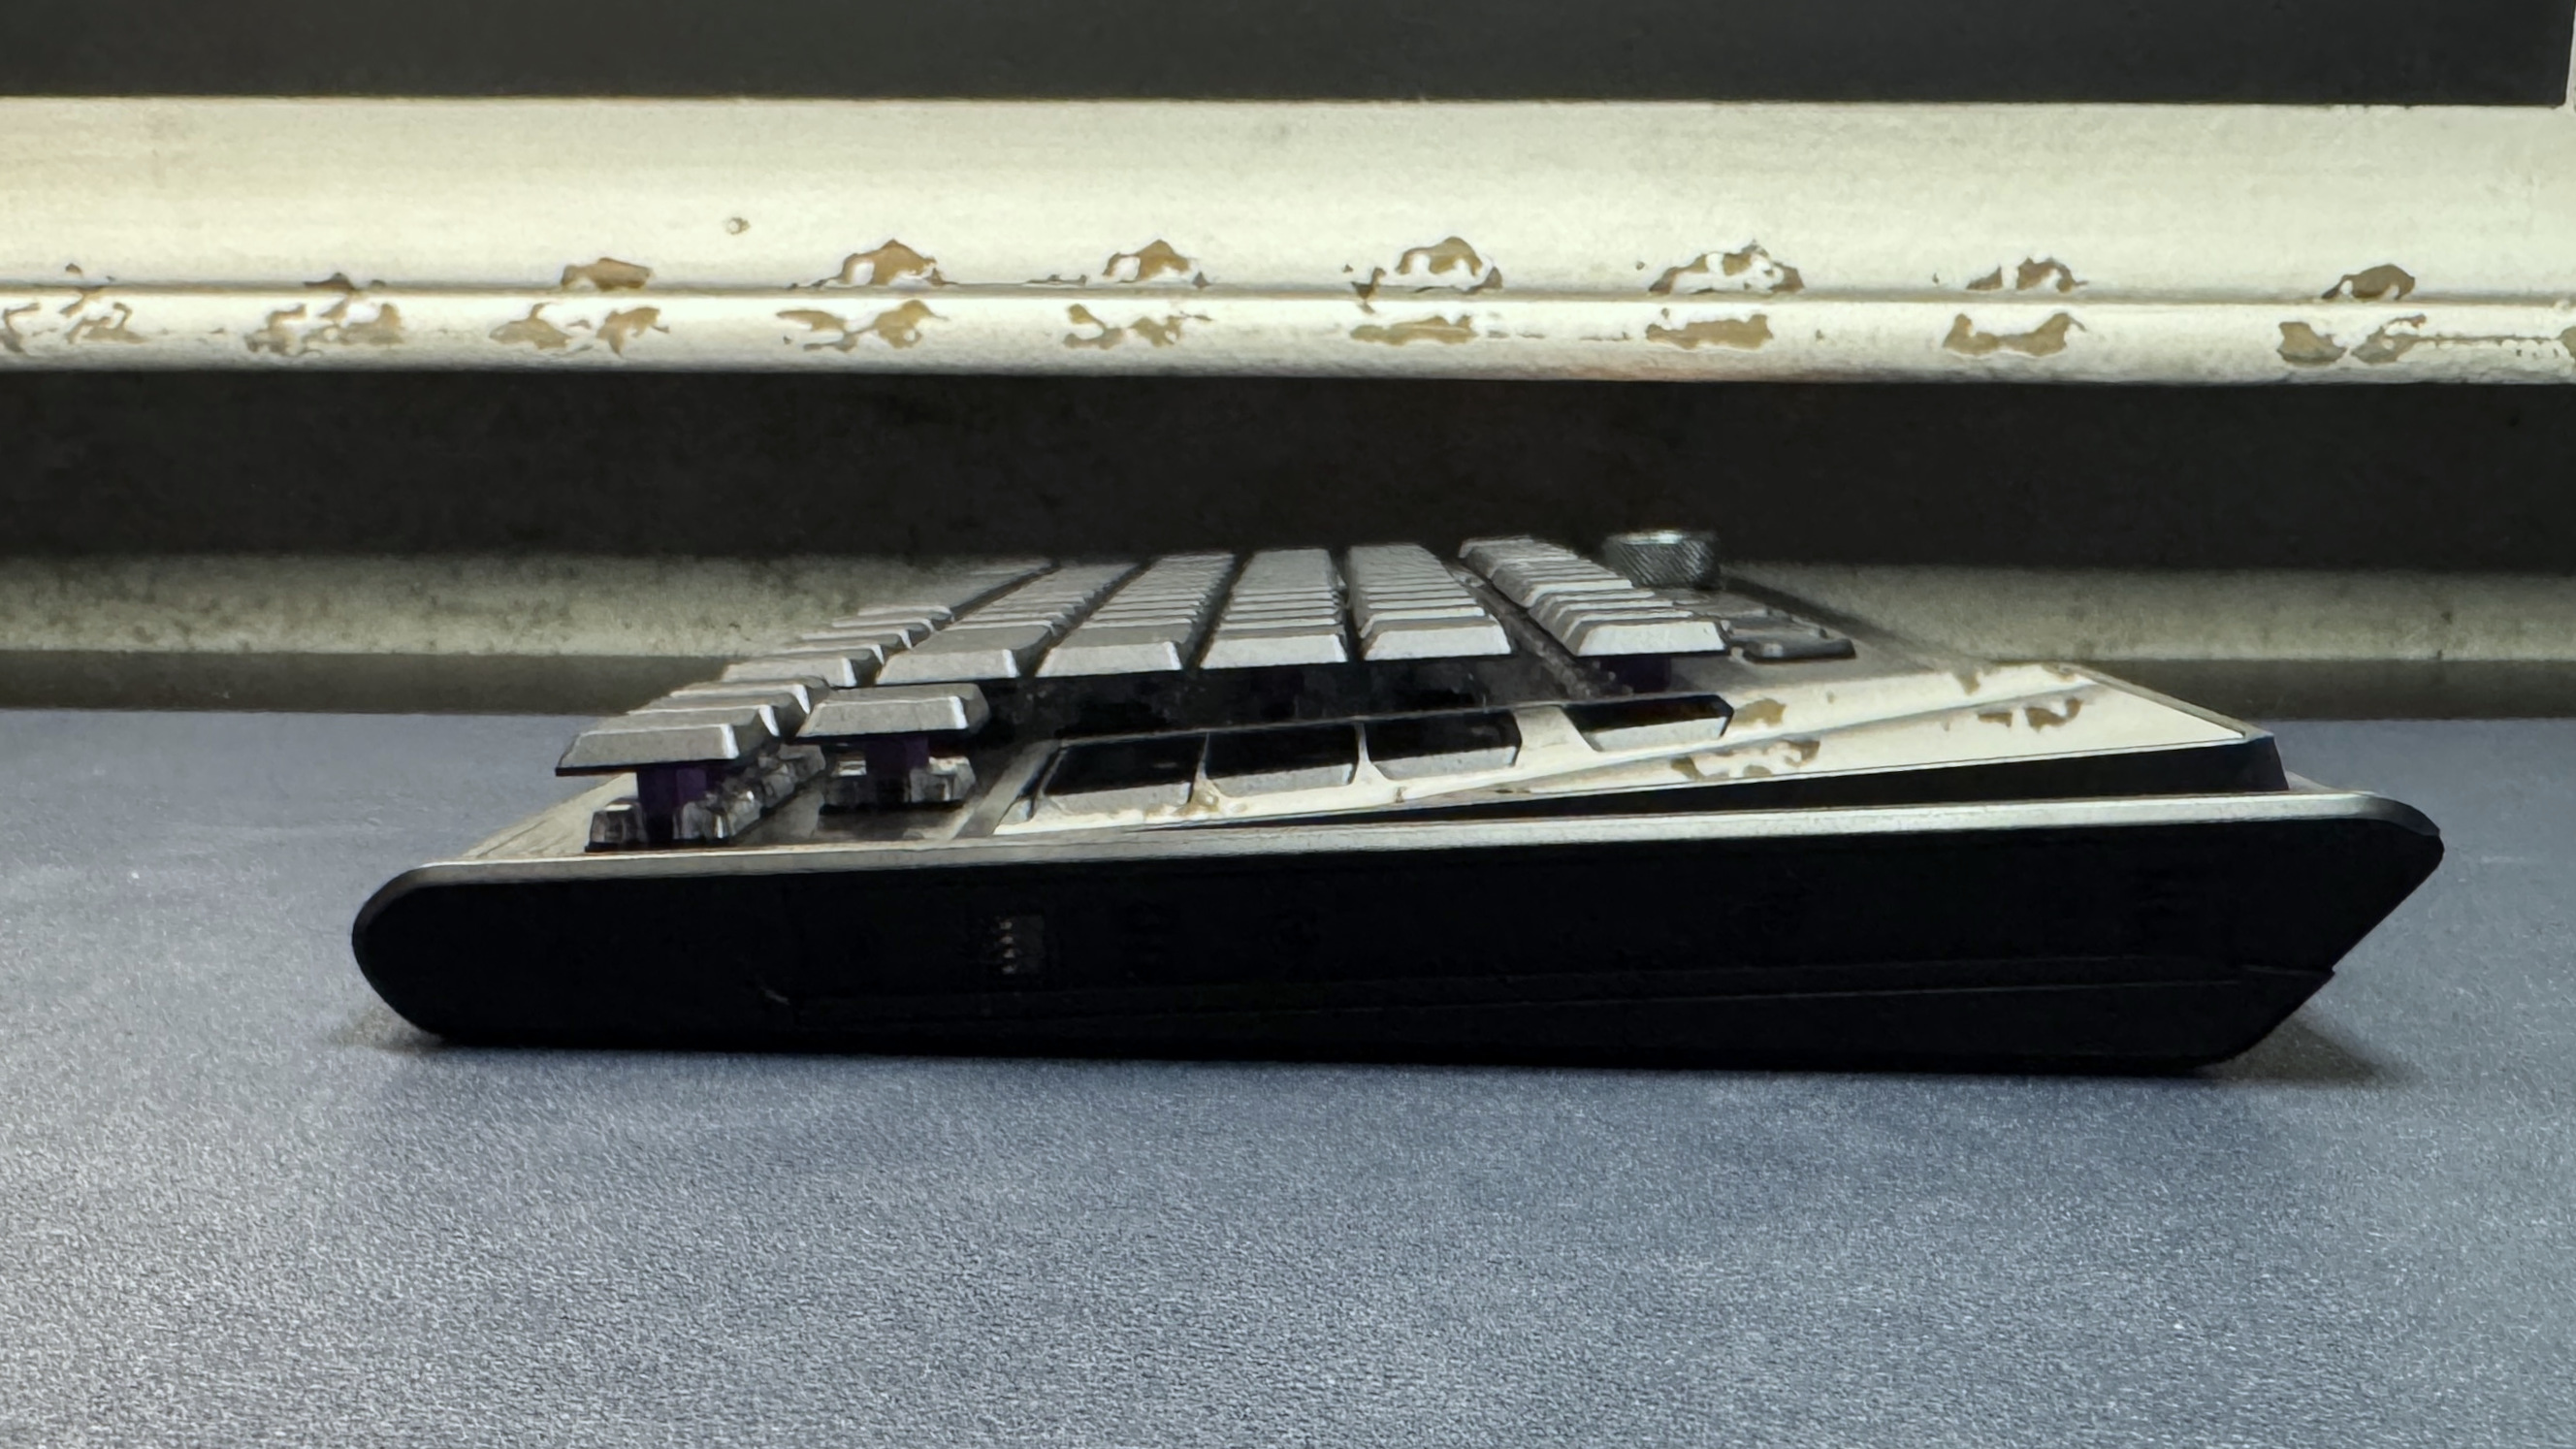
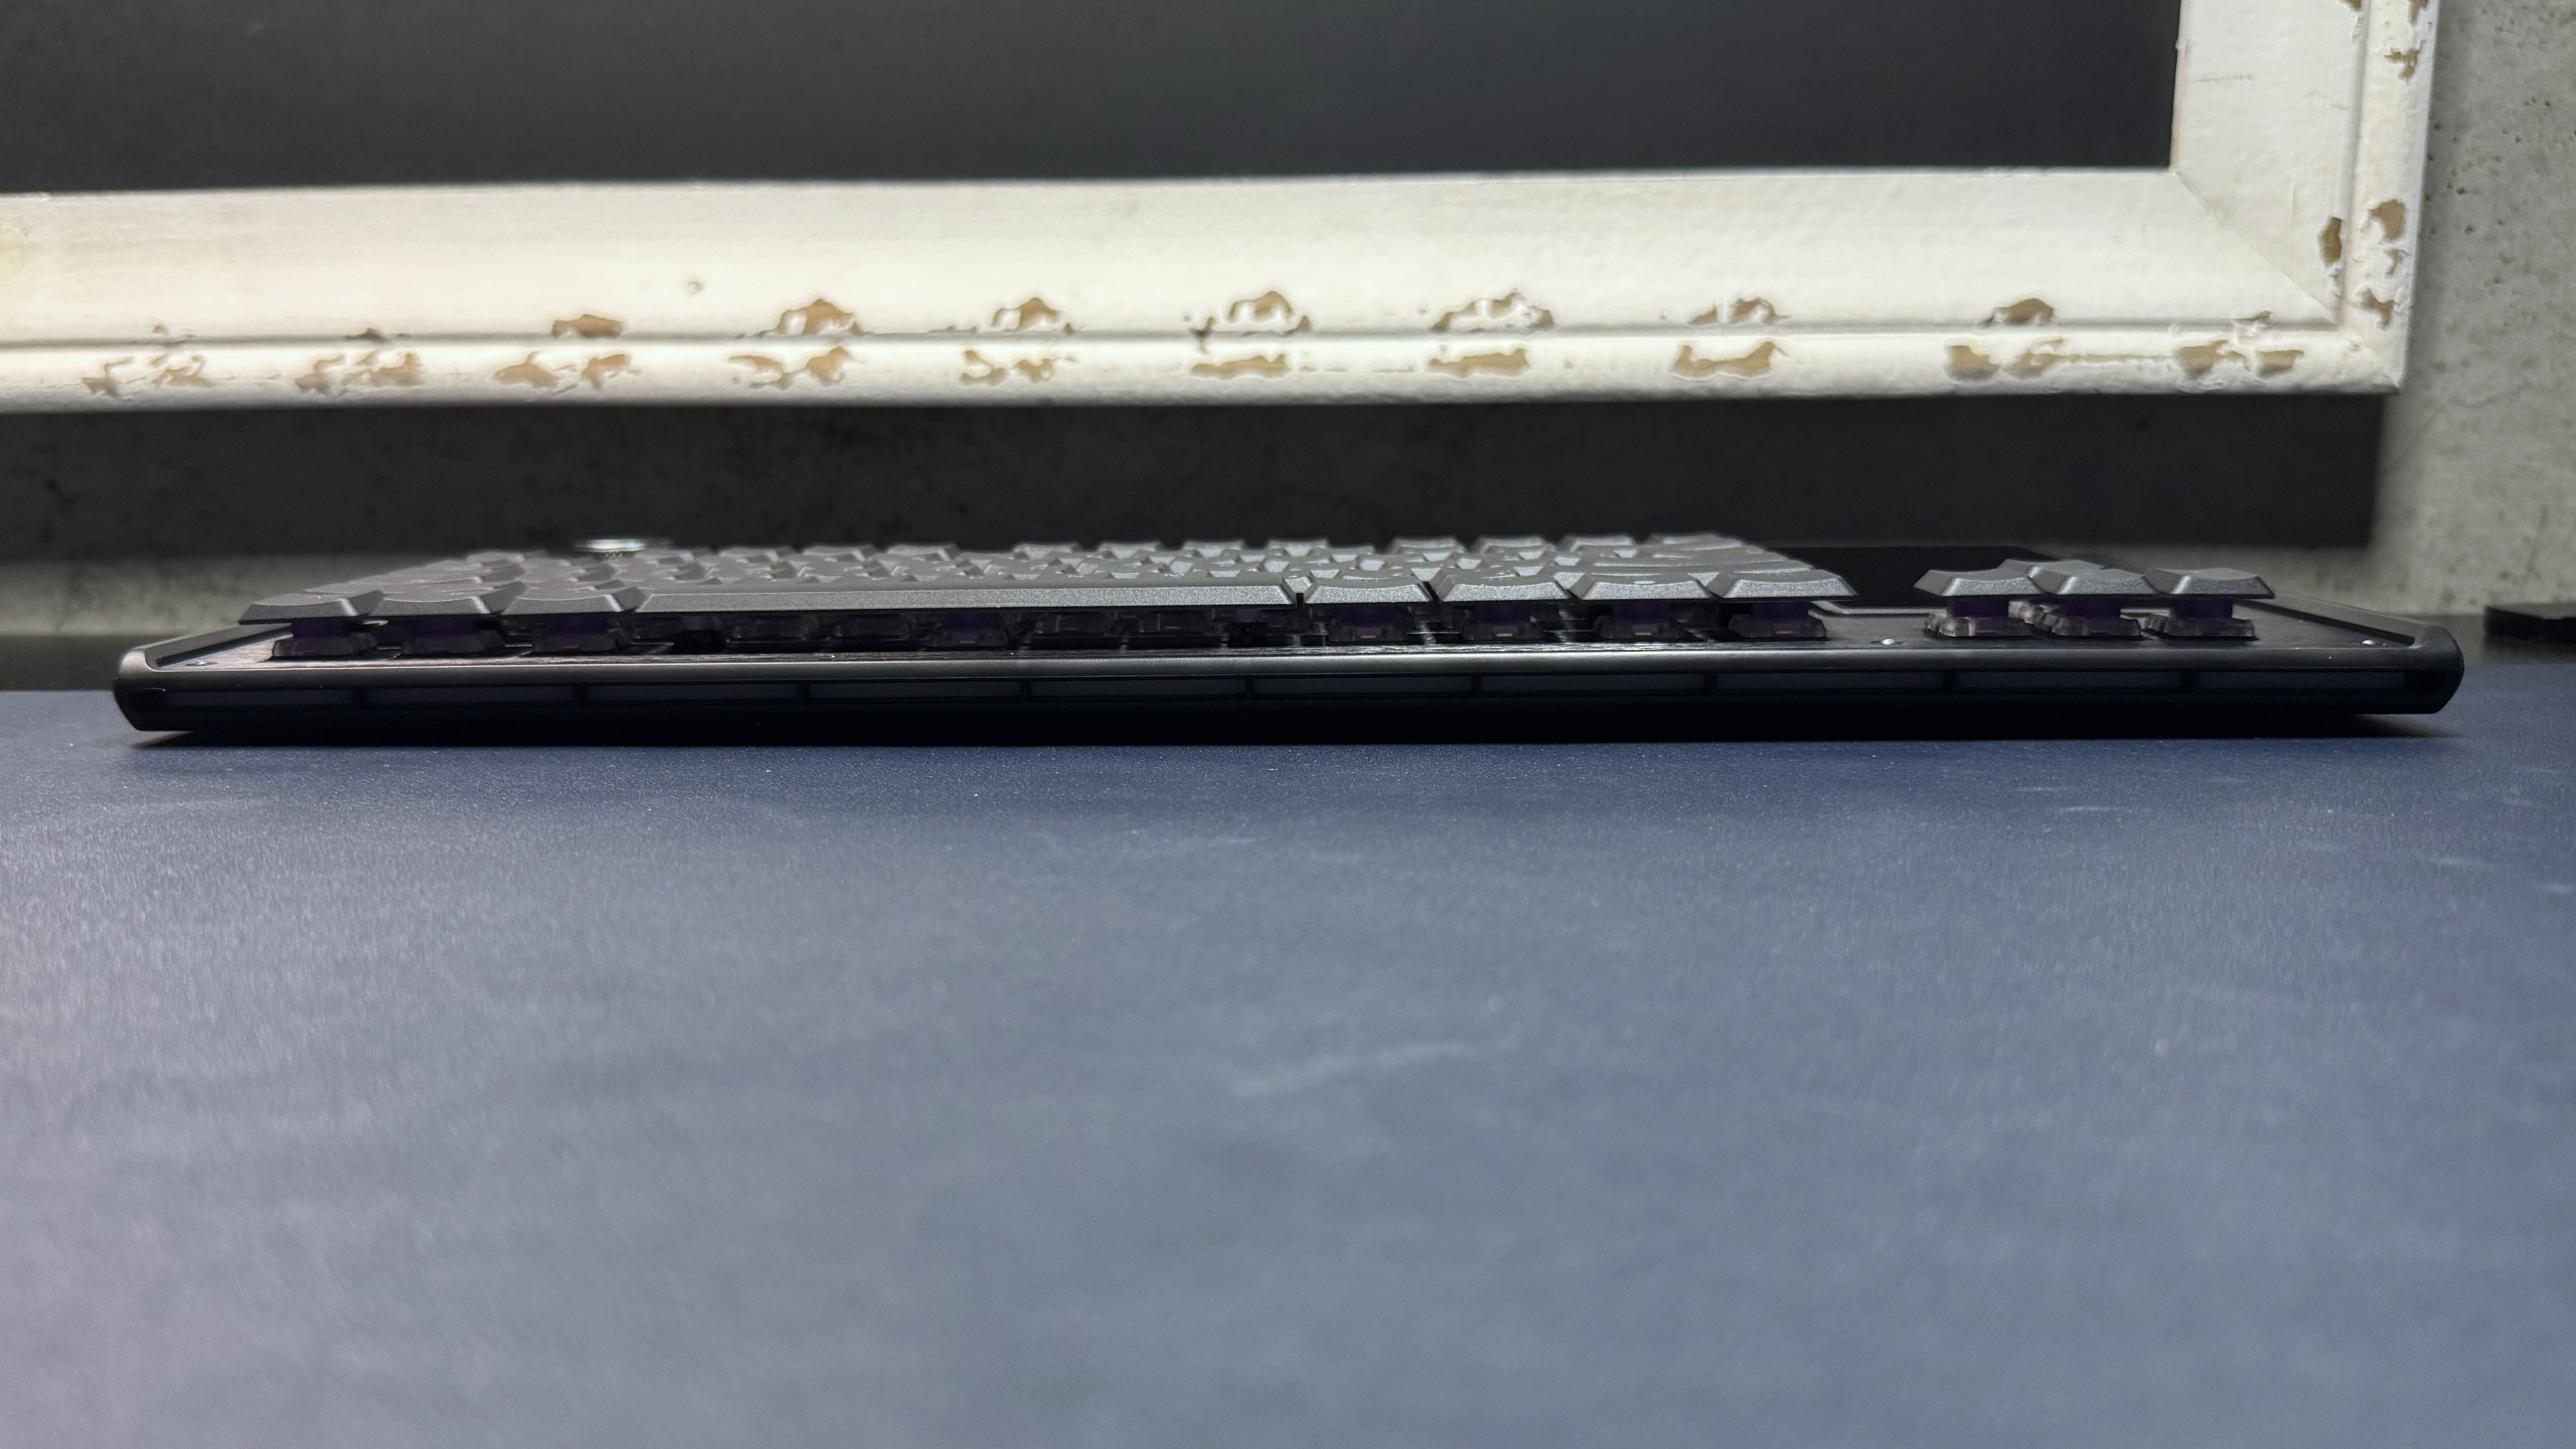
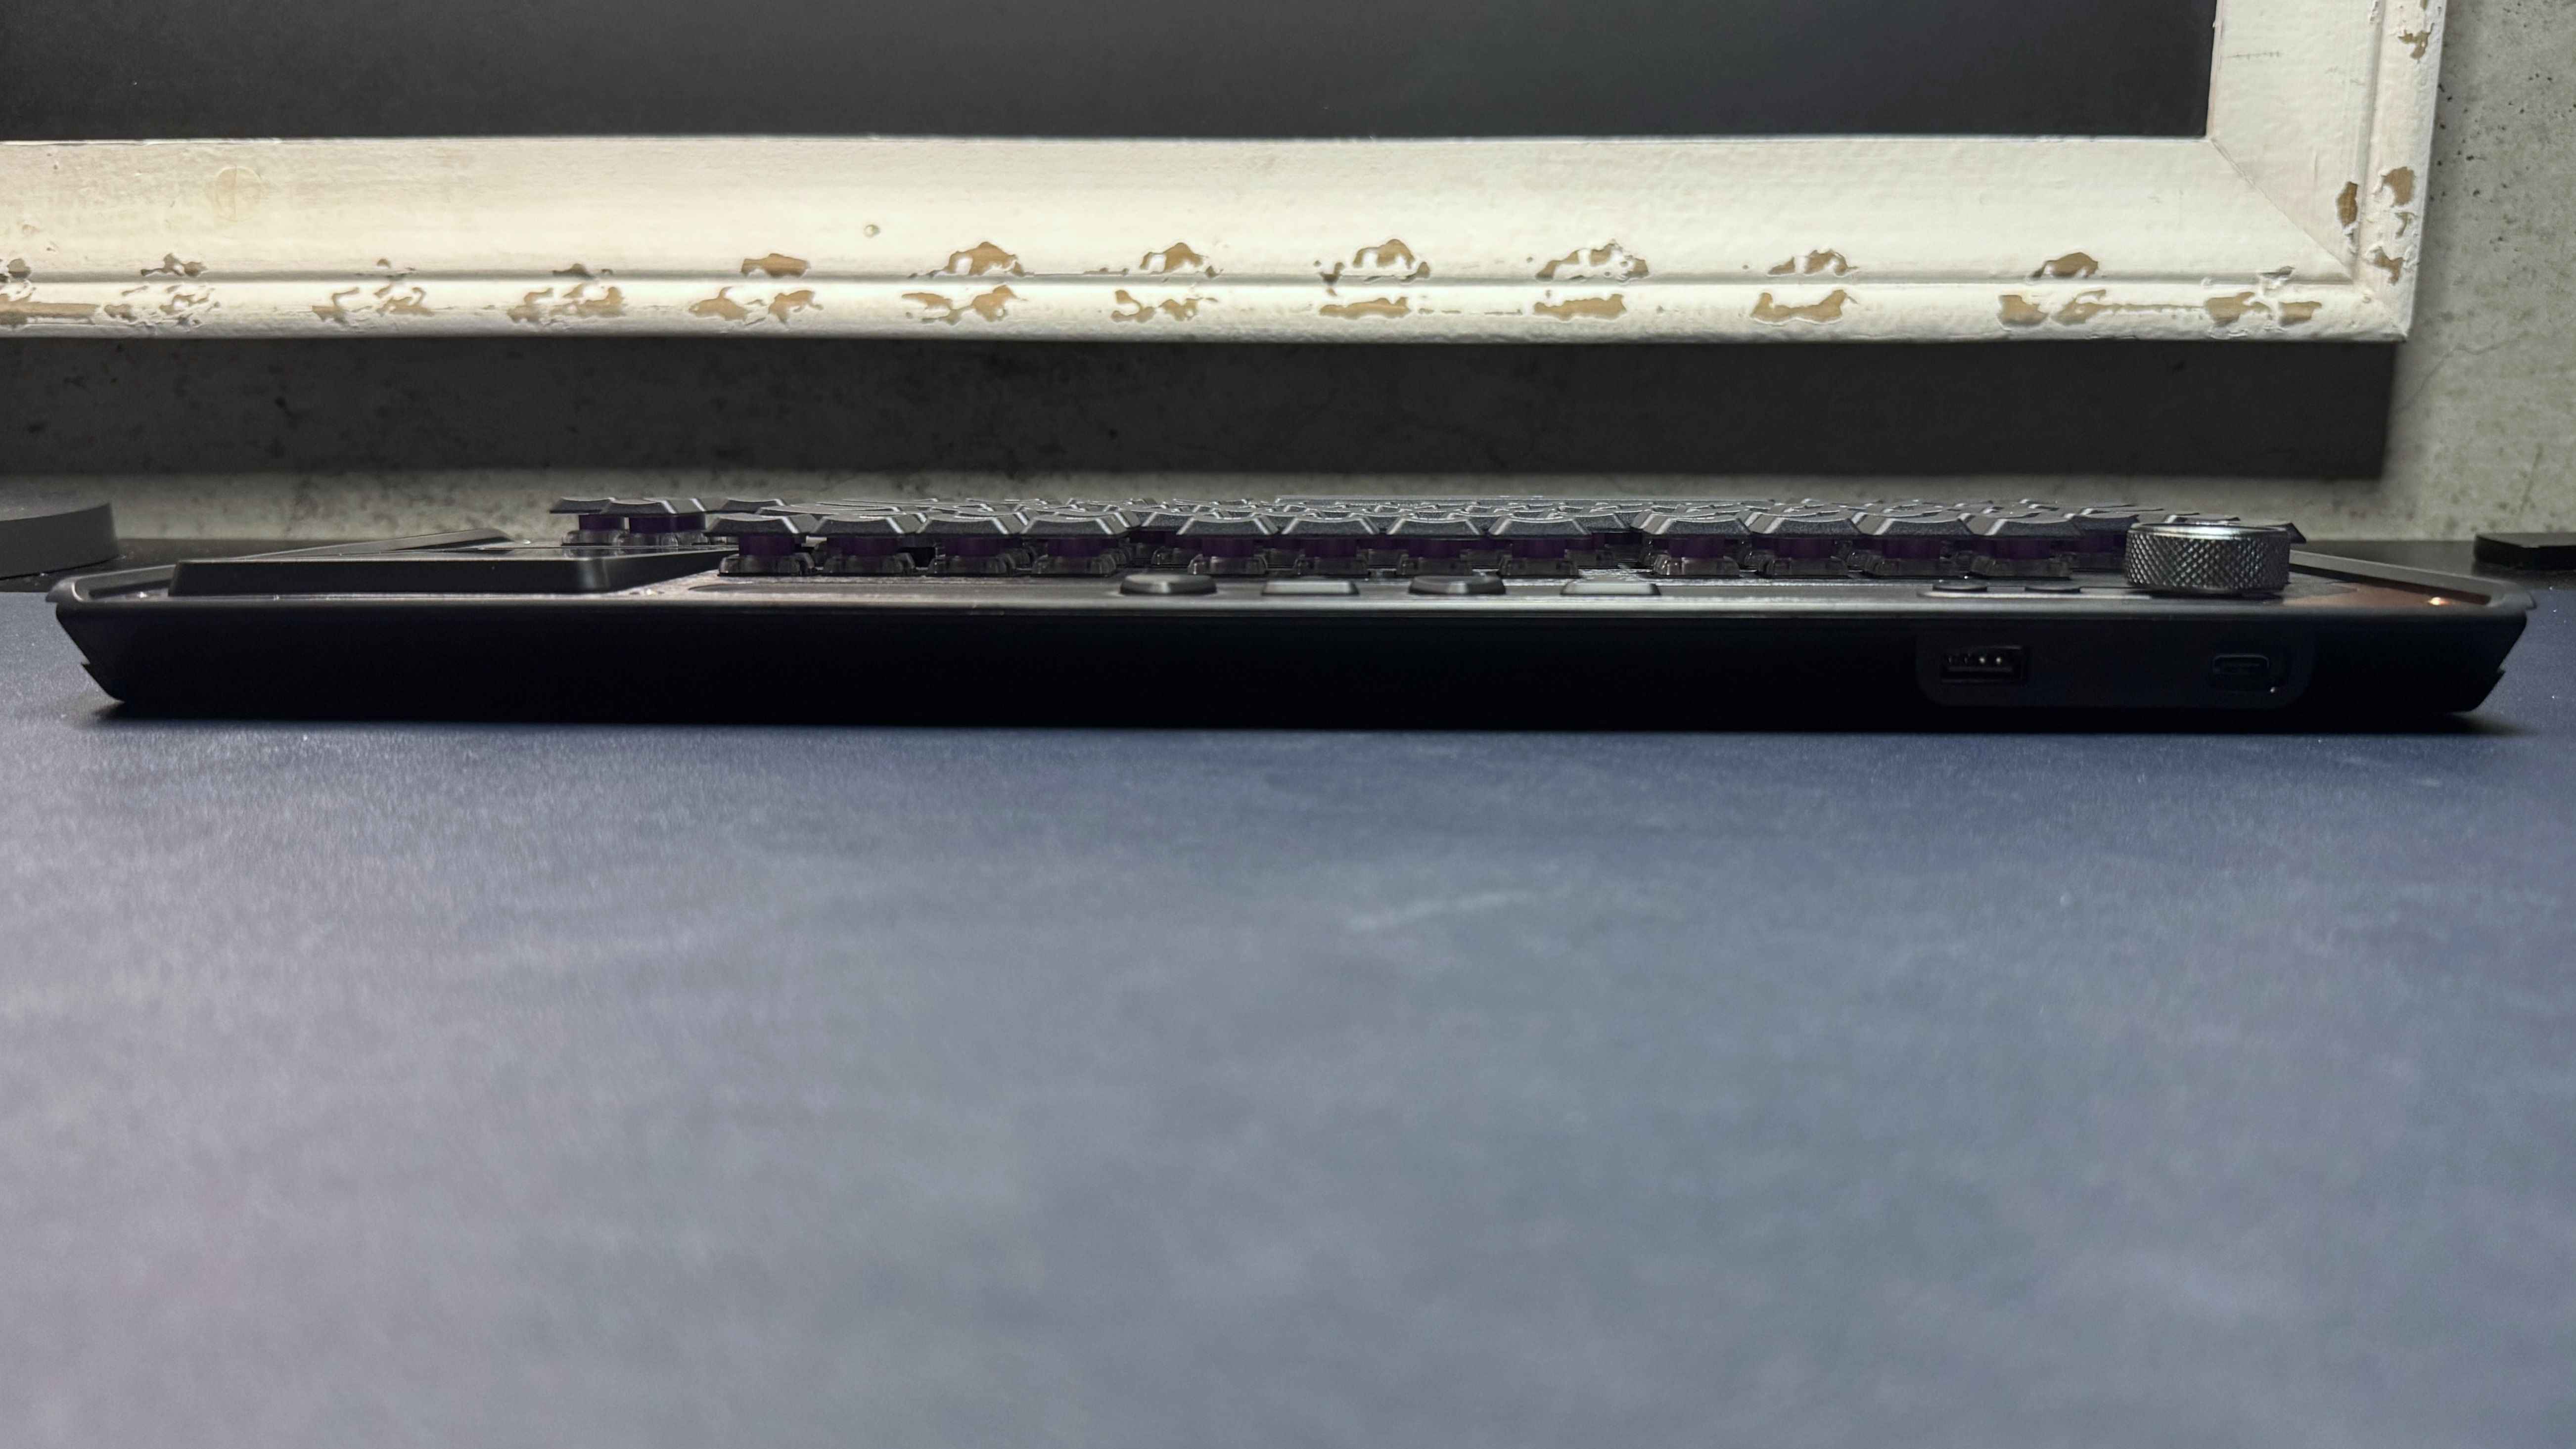
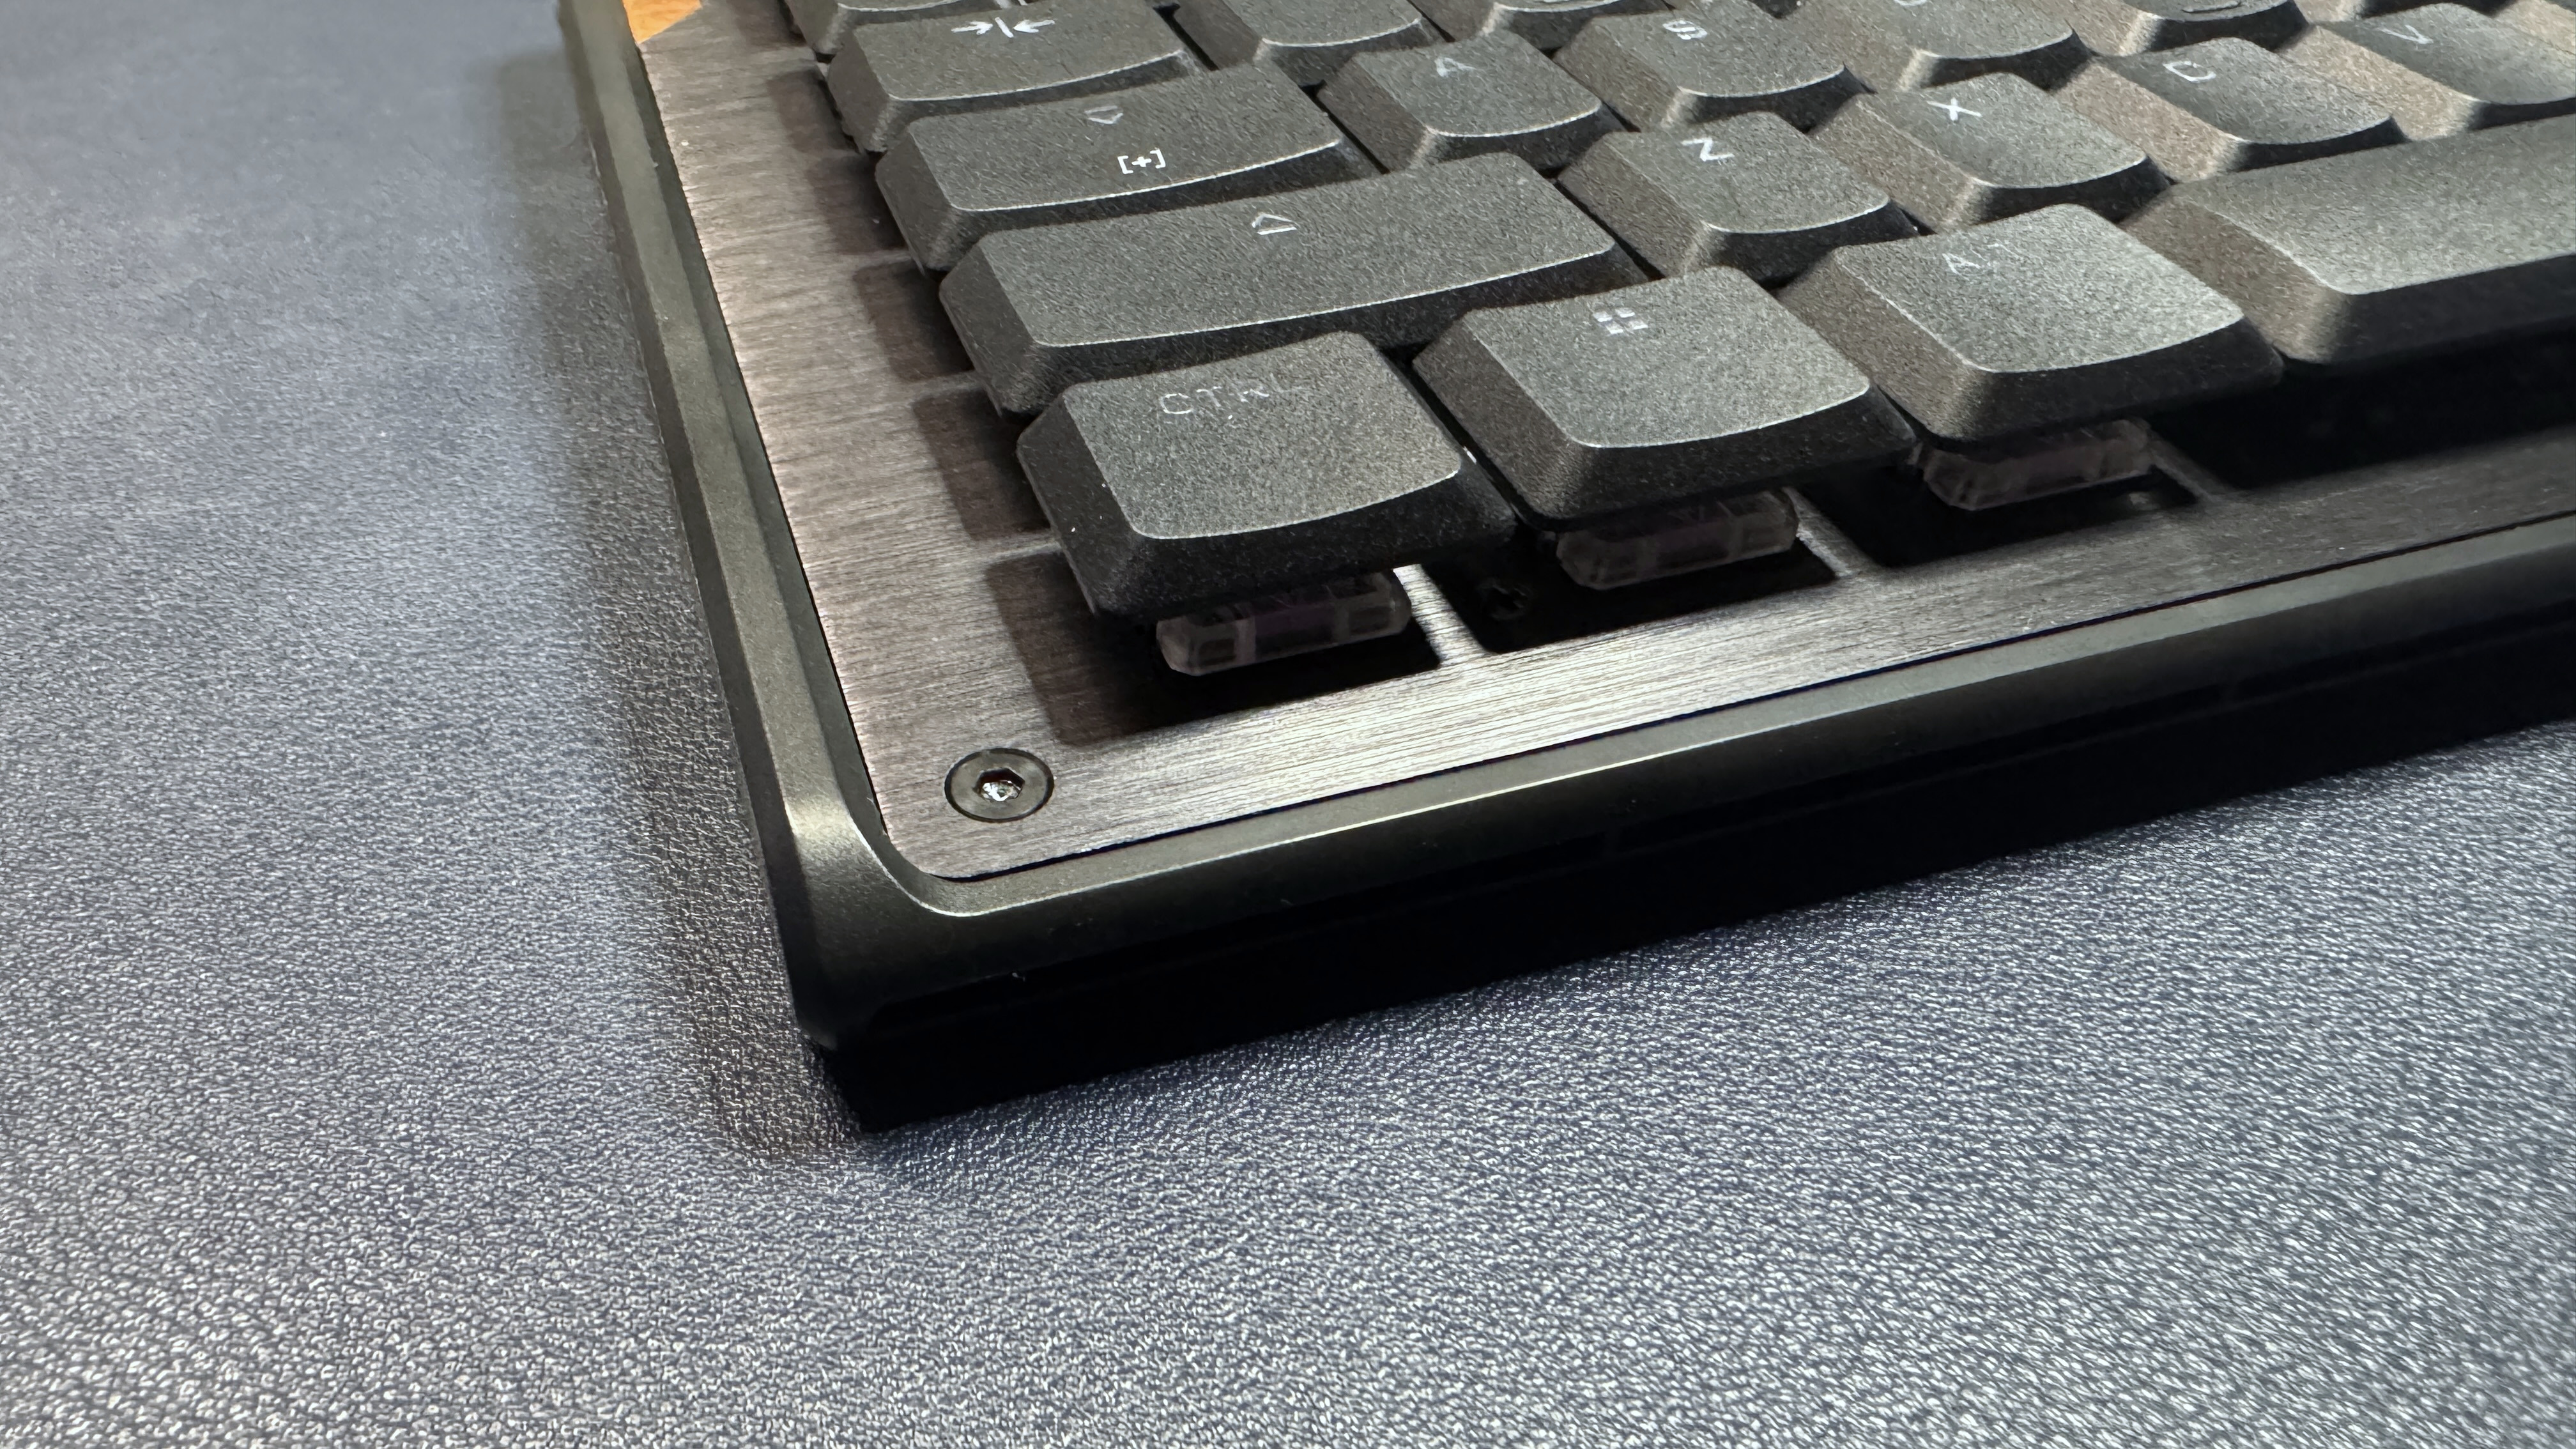
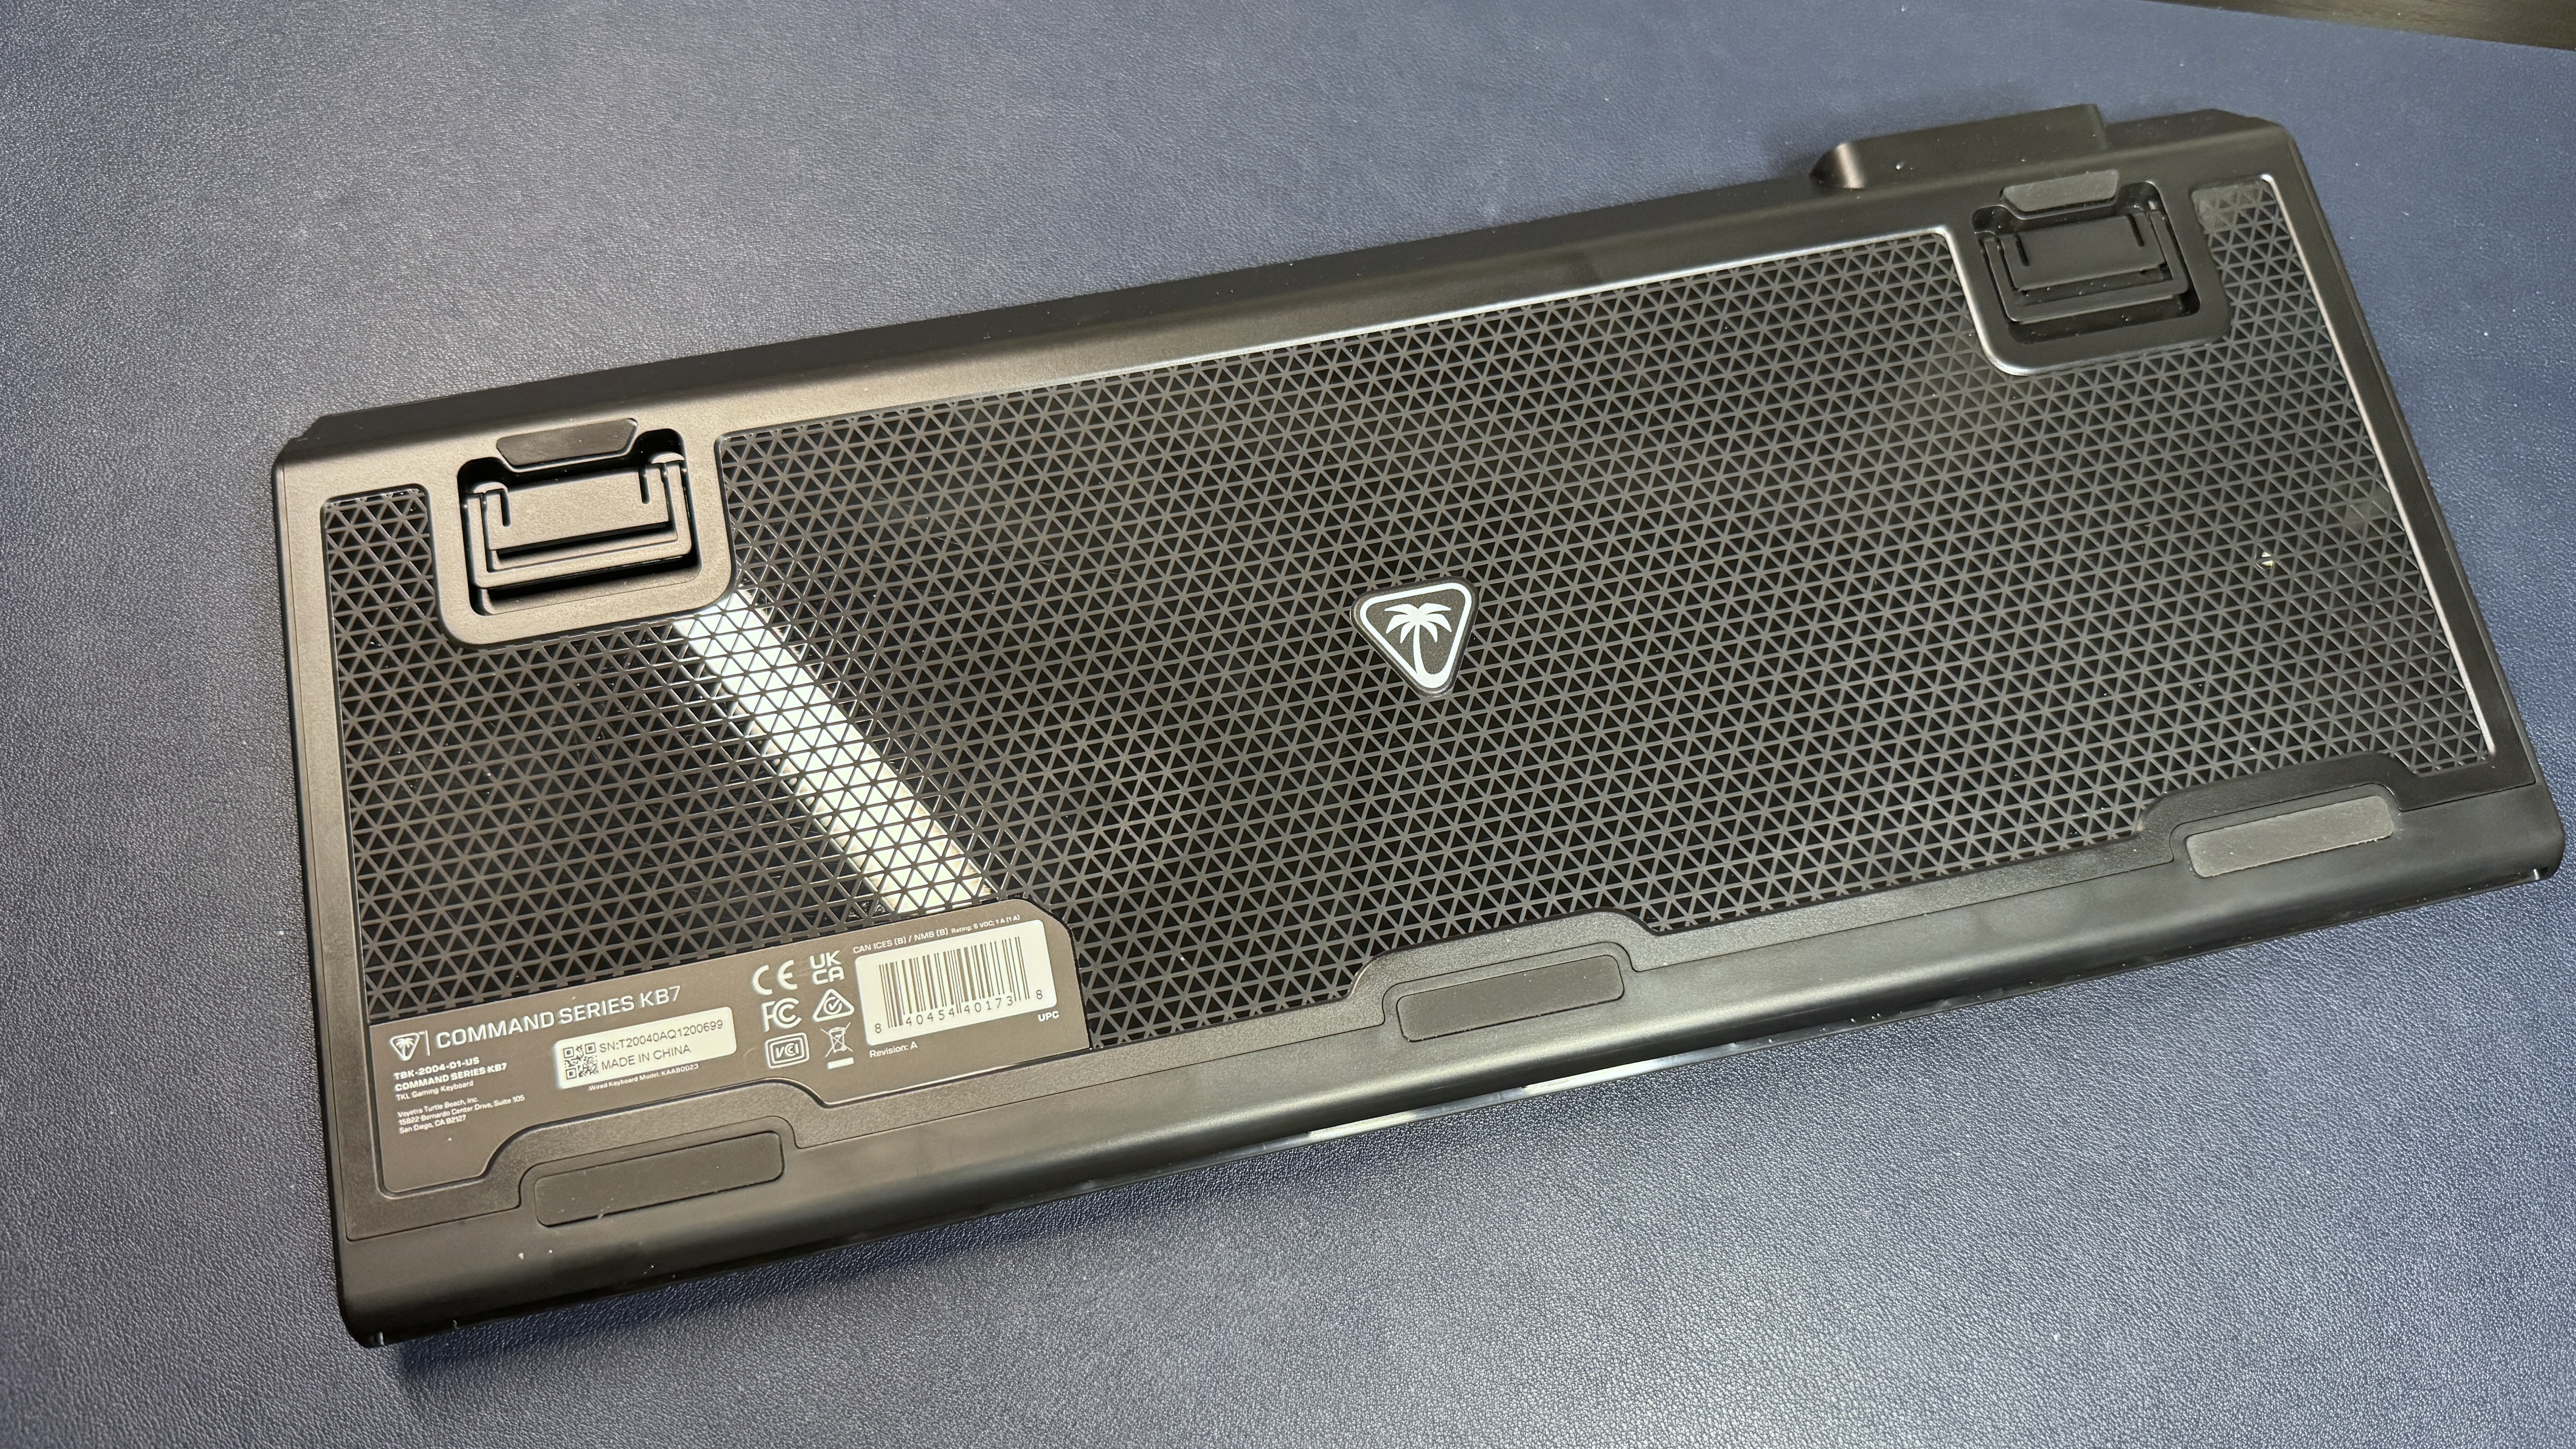
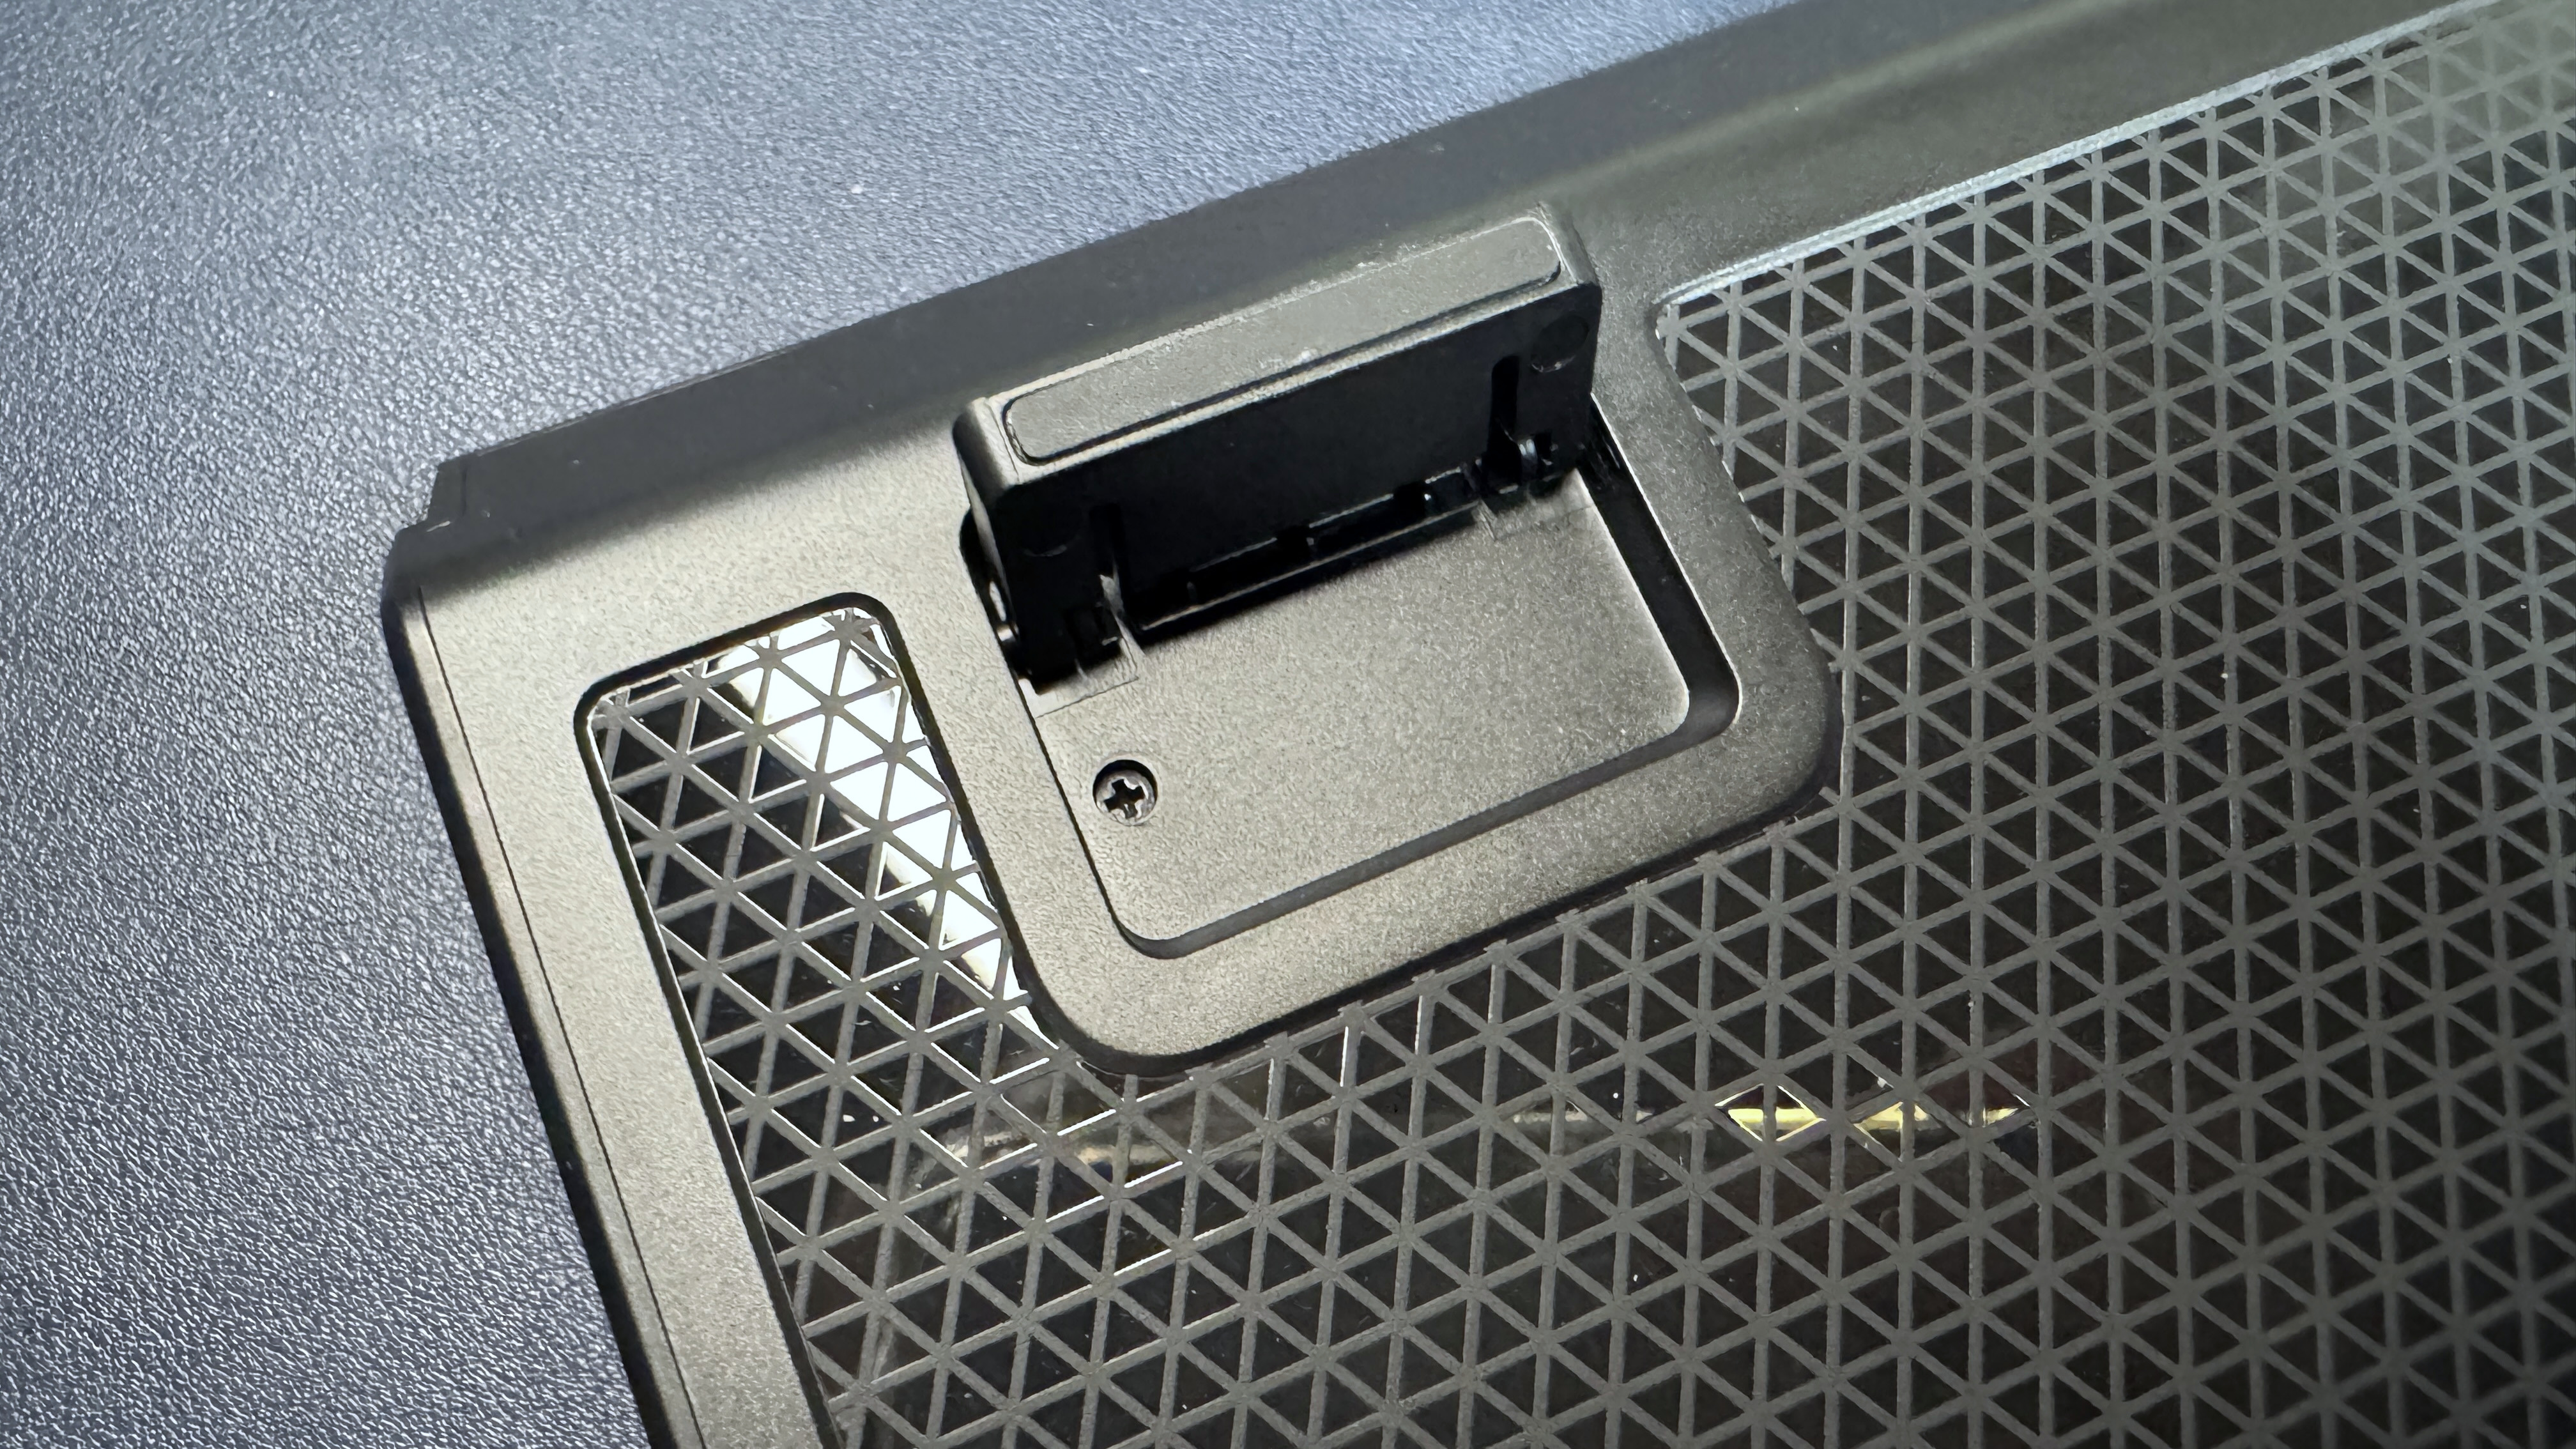
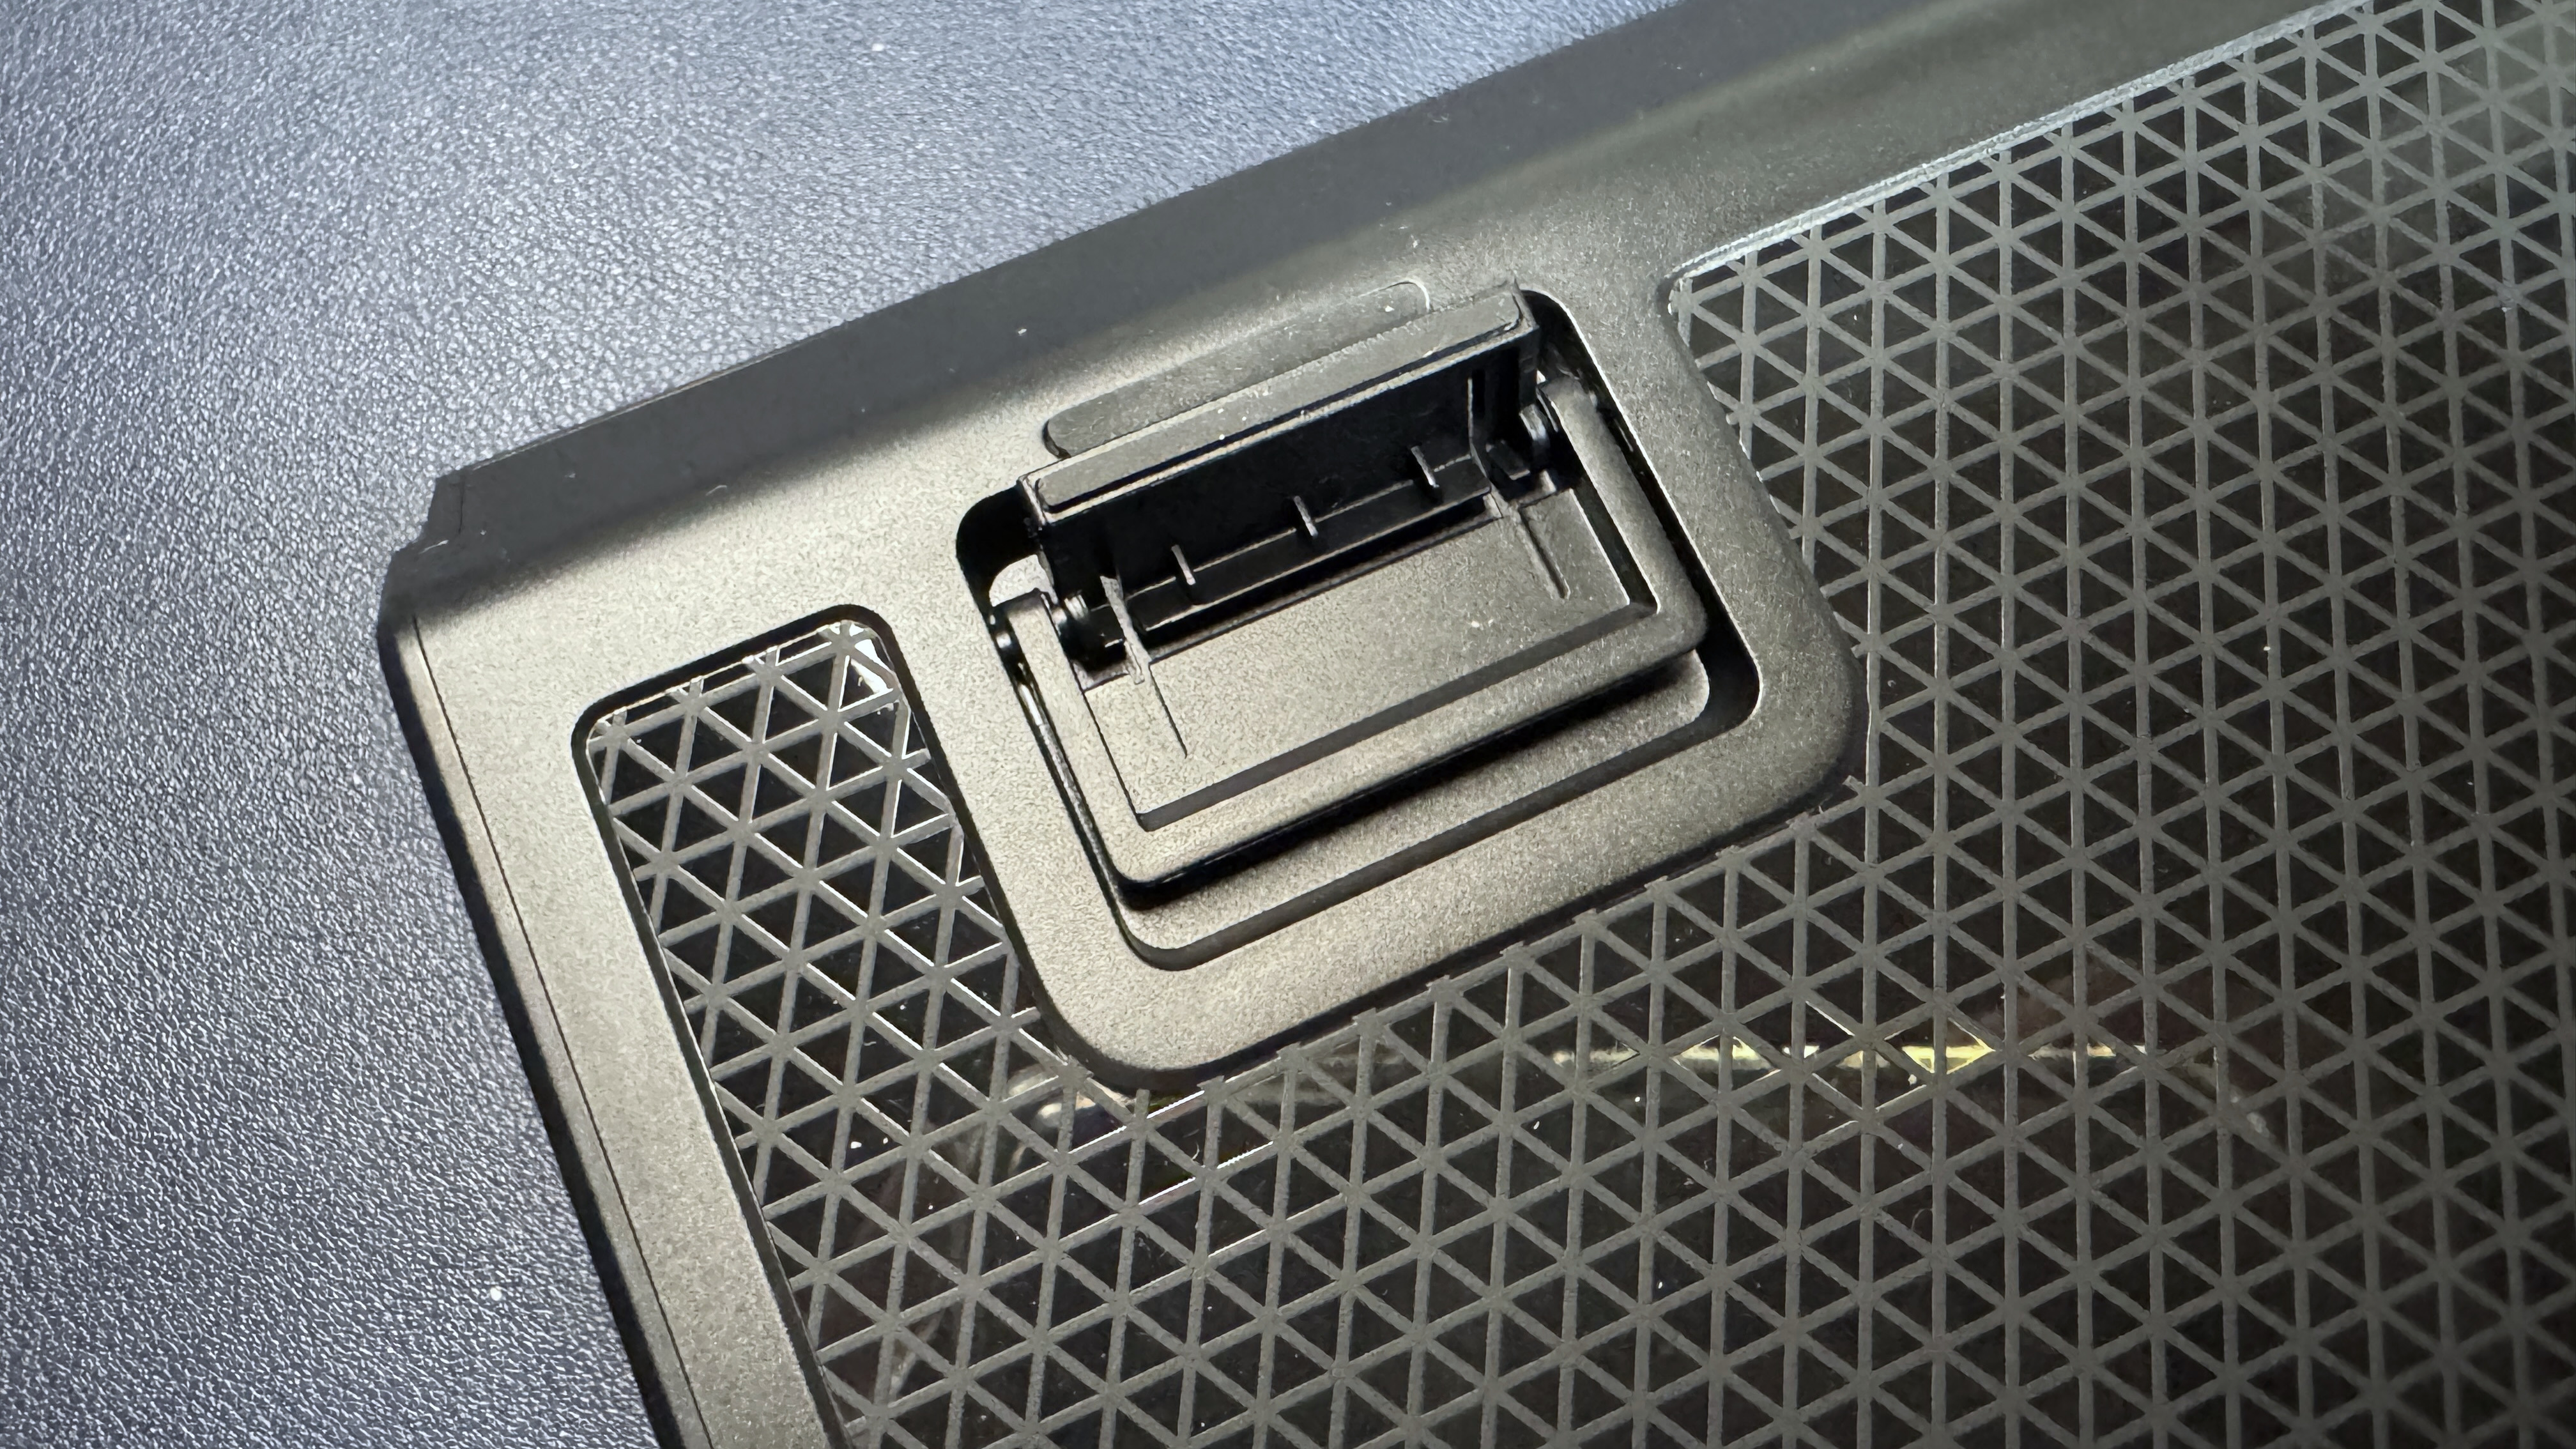
The KB7 has a TKL layout — sort of. It has a full function row and arrow keys, but it has a 4.3-inch touchscreen where the navigation cluster would normally be. It's a slim, well-built keyboard with a brushed aluminum top plate and a plastic chassis. Size-wise, it's pretty standard for a TKL, measuring 15.71 inches (399mm) wide by 6.85 inches (174mm) deep, and it's 1.22 inches (31mm) thick at its thickest point (including keycaps/knobs). It's not particularly heavy — it weighs 1.89 pounds (858g) without the wrist rest, which weighs an additional 9.24 ounces (262g). That's nowhere near as hefty as my current favorite TKL — the 5.25-pound (2,380g) Wobkey Crush 80 Reboot Pro — and it's even a little lighter than Logitech's budget-friendly low-profile wireless G515 TKL, which weighs 1.94 pounds (880g). So, yeah, if you're looking for a keyboard with weight... this isn't it.

Turtle Beach Command Series KB7

(Image credit: Tom's Hardware)

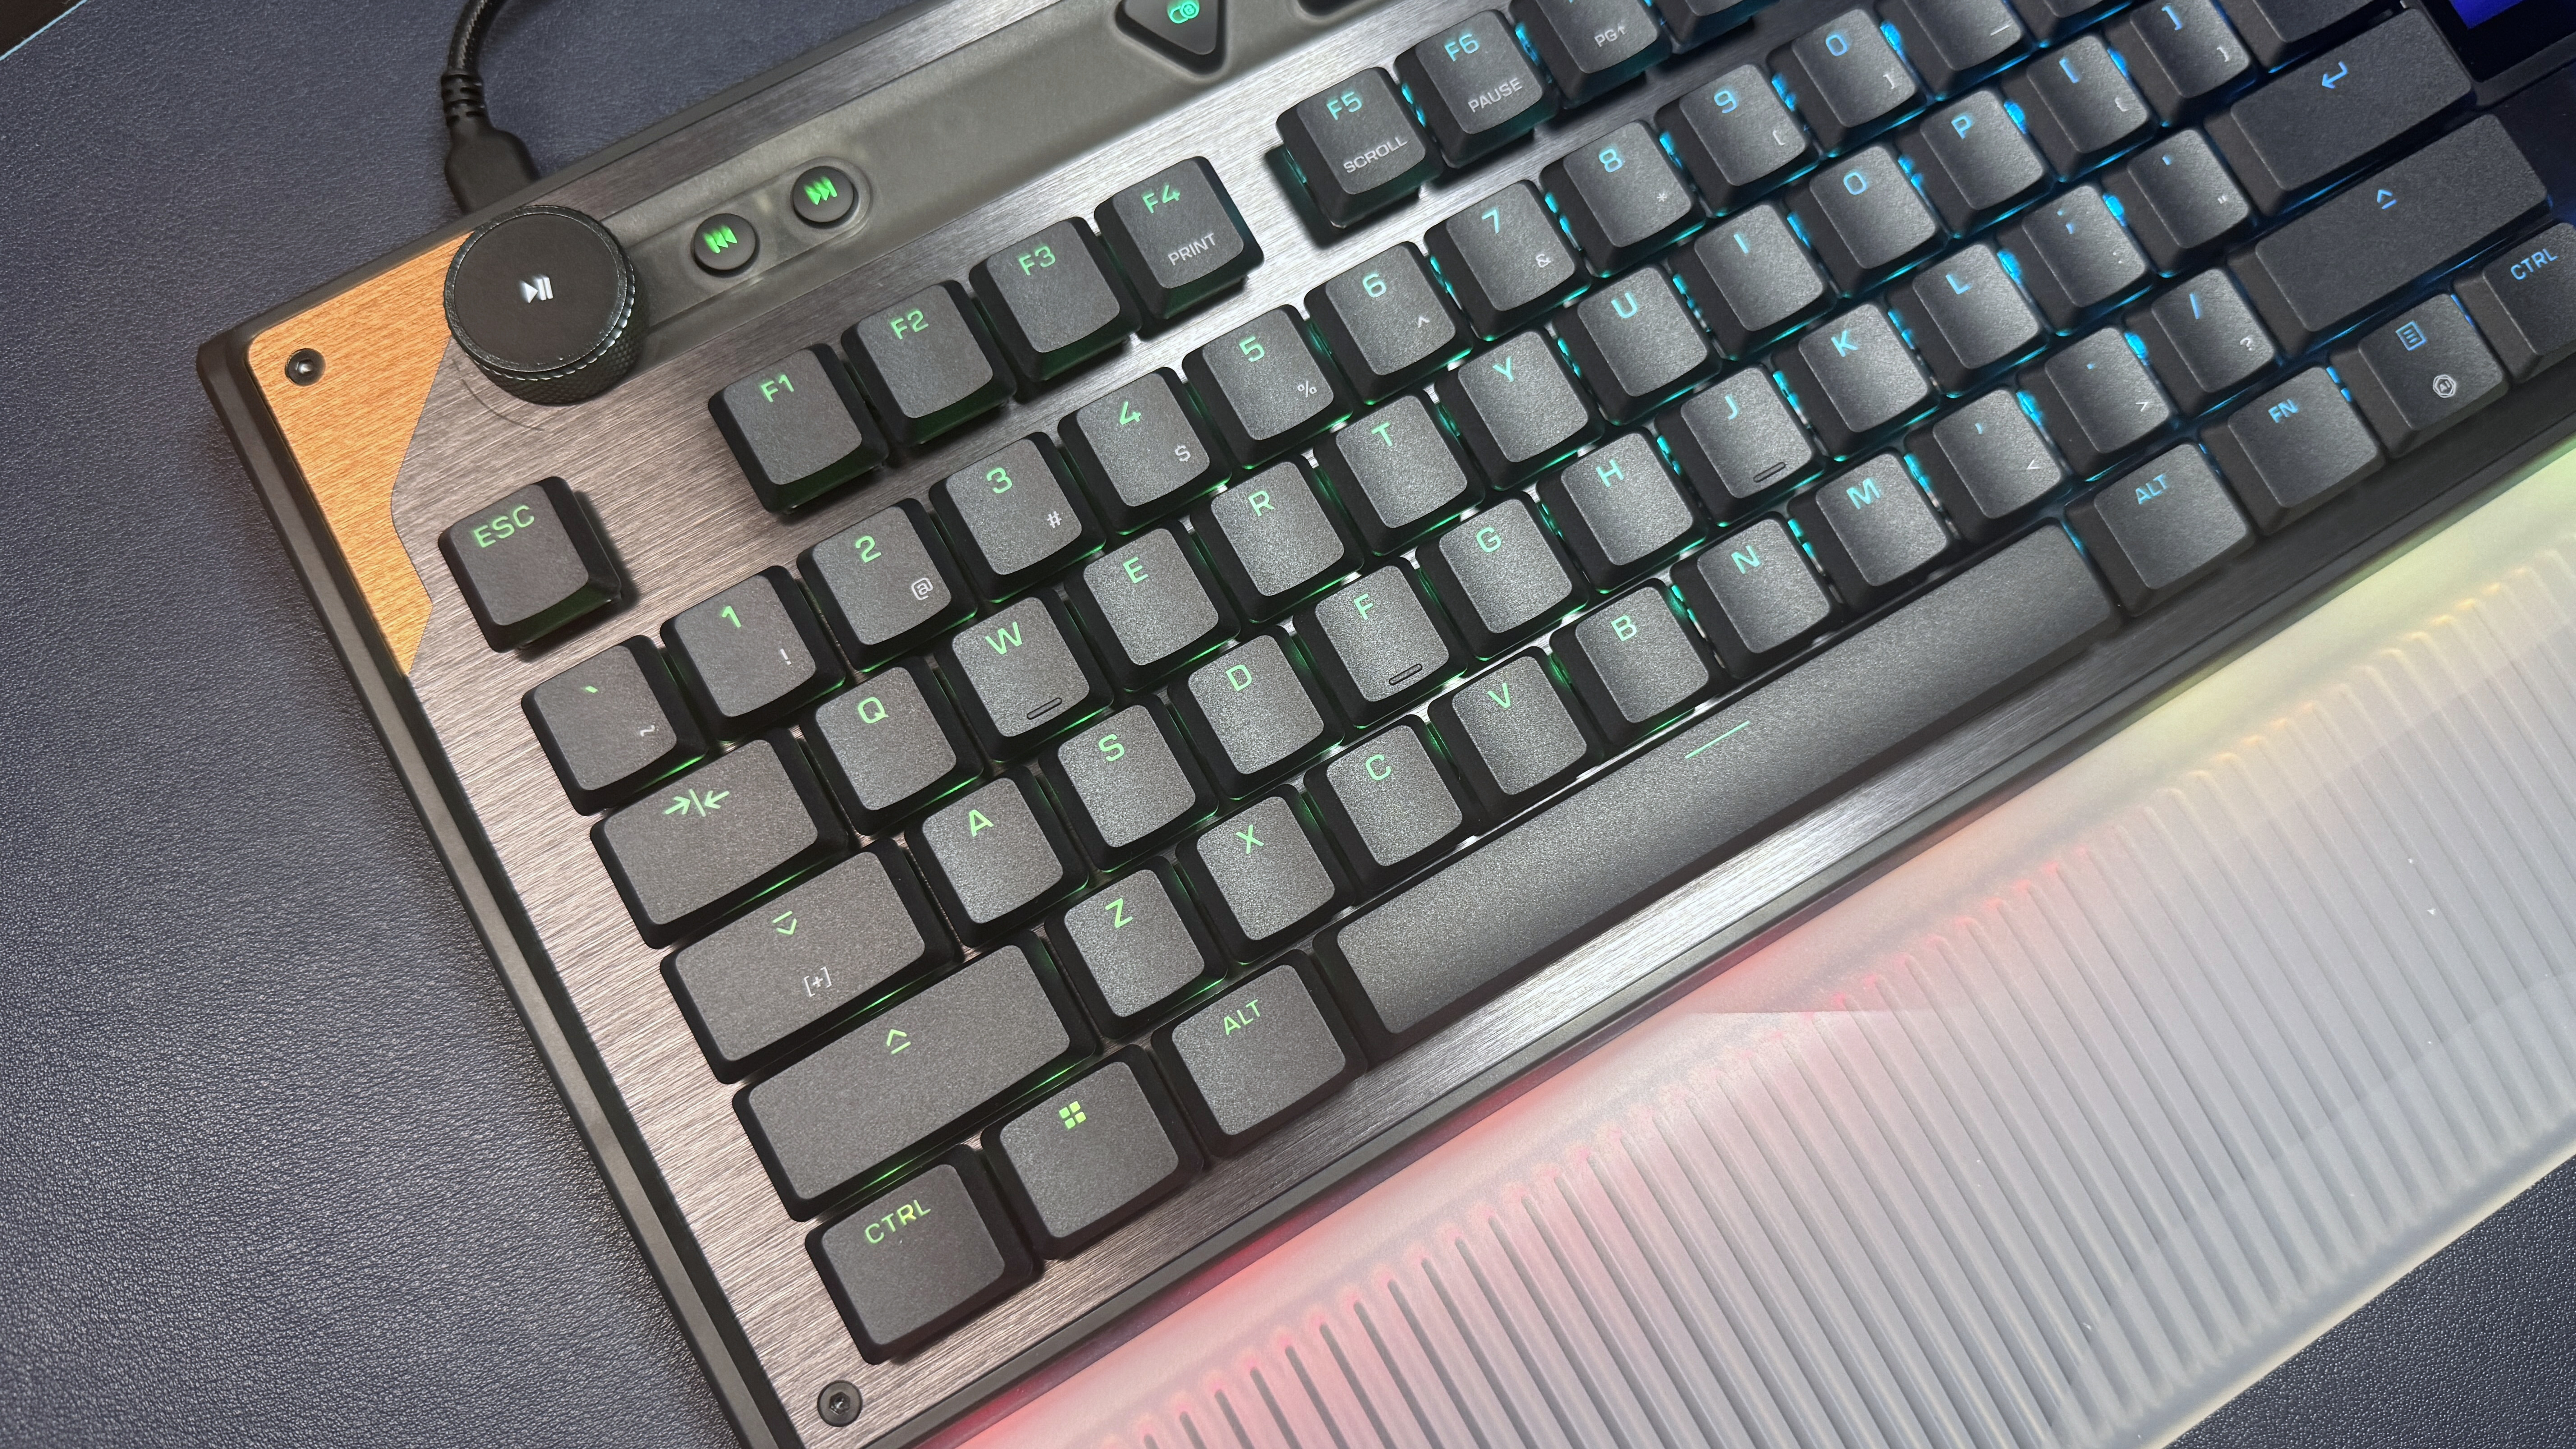
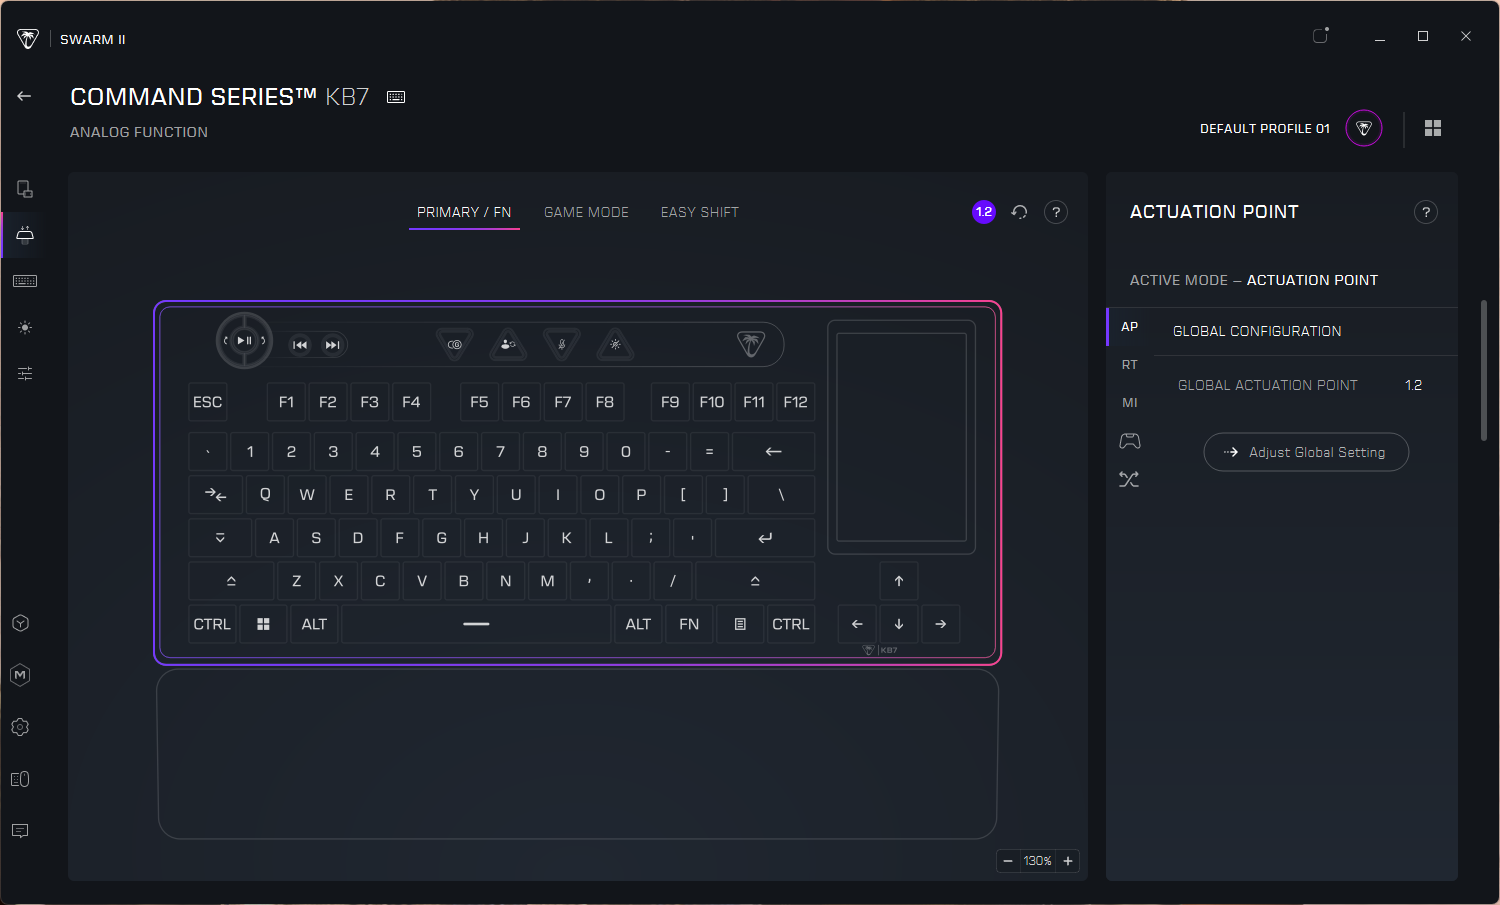
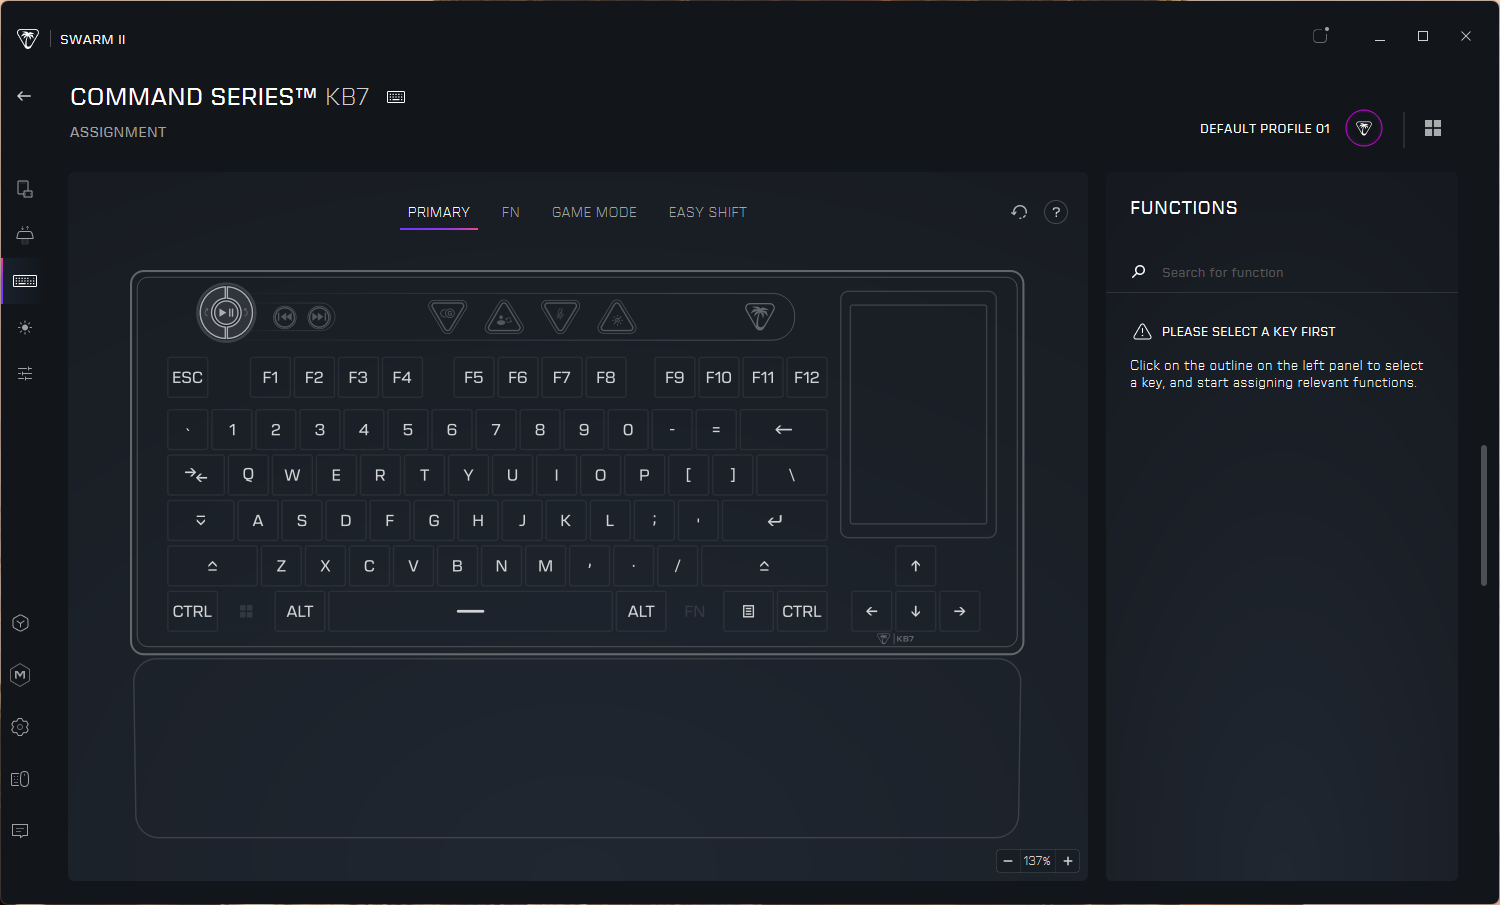
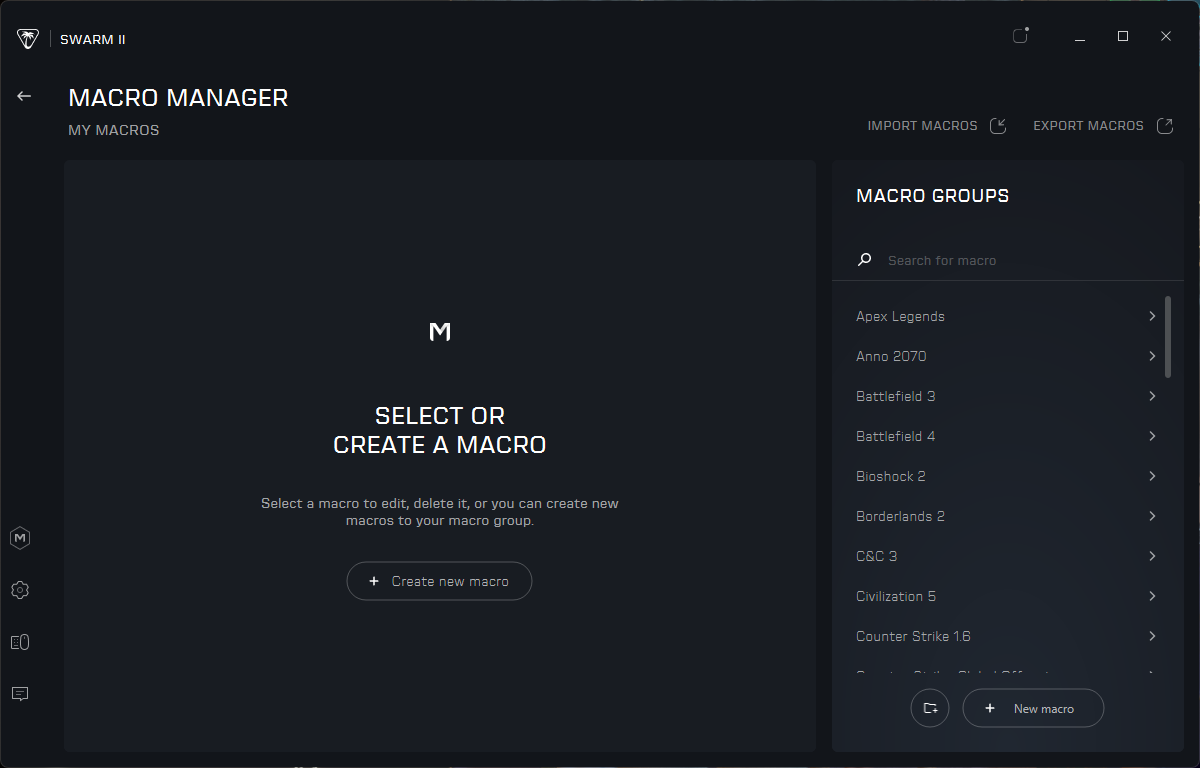
The KB7 has a nice spacious setup for a TKL — there's plenty of room above the function row for extra controls, including a dedicated volume knob, two media keys, and four triangular shortcut keys. The keys come with presets programmed in — from left to right, there's a game mode button, a profile switch button, a mic mute button, and a lighting toggle button — but all of these keys, including the clickable volume wheel and the two dedicated media keys, can be remapped in Turtle Beach's Swarm II software. The volume knob is notched and features metal textured edges for a premium feel, but the rest of these extra media/shortcut keys are mediocre at best. Pressing them gives cheap, plasticky feedback — but at least they're easy enough to press thanks to all the extra space around them.

Turtle Beach Command Series KB7
Tom's Hardware
Turtle Beach Command Series KB7
Tom's Hardware
Turtle Beach Command Series KB7
Tom's Hardware
Turtle Beach Command Series KB7
Tom's Hardware

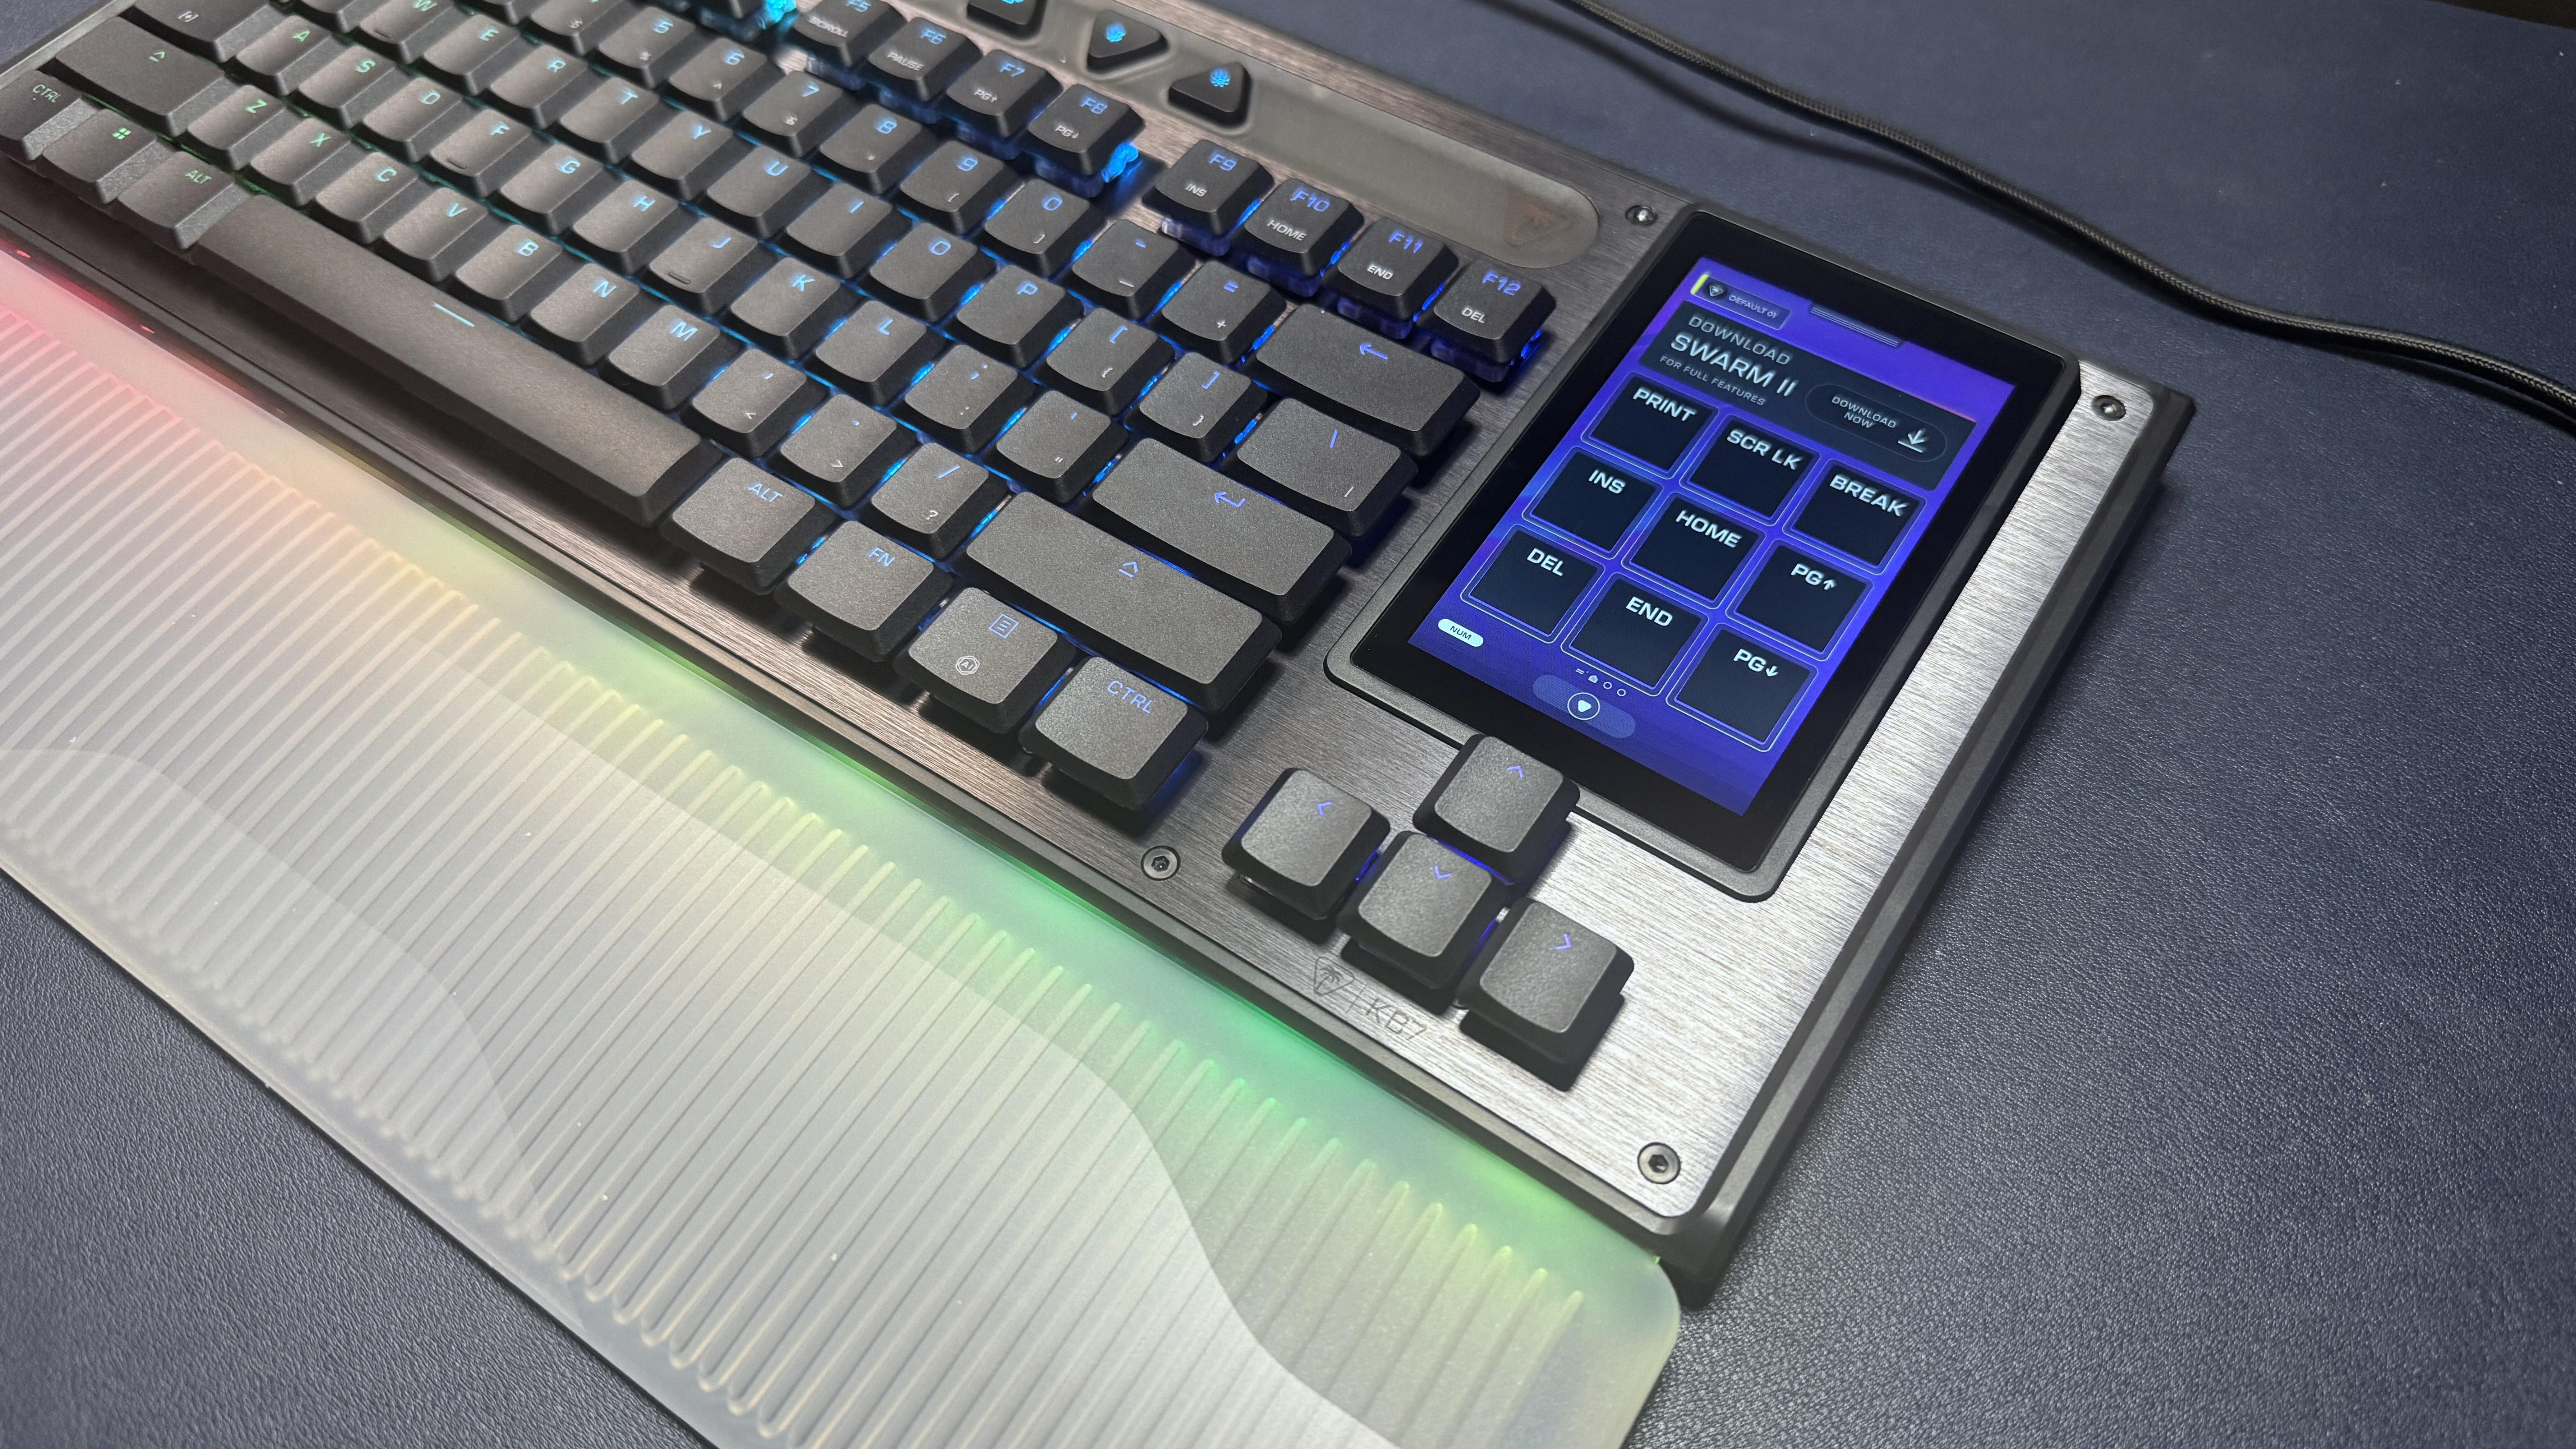
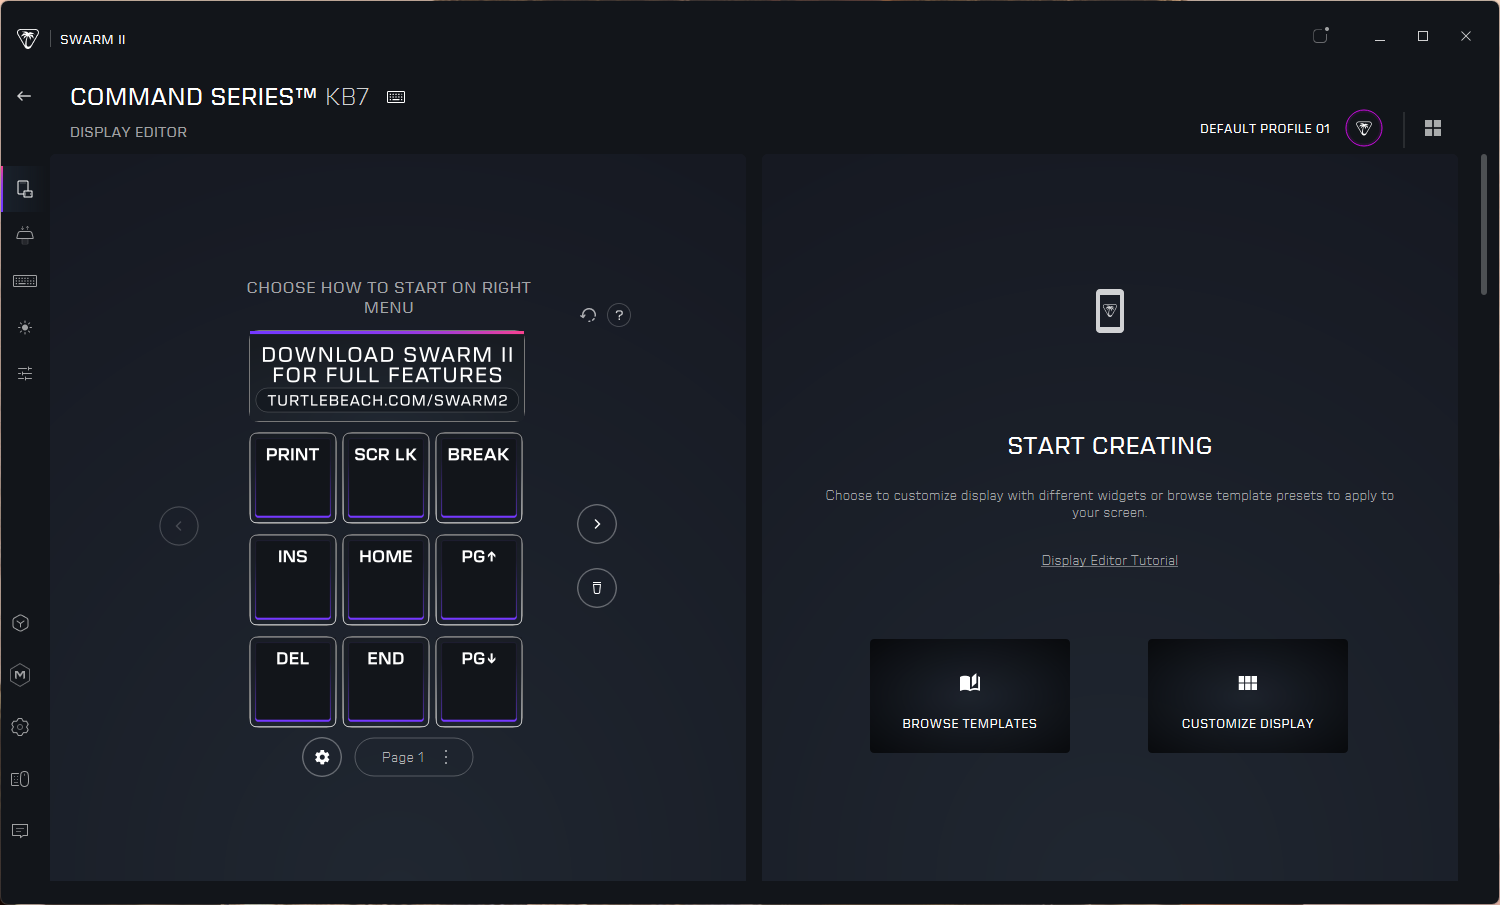
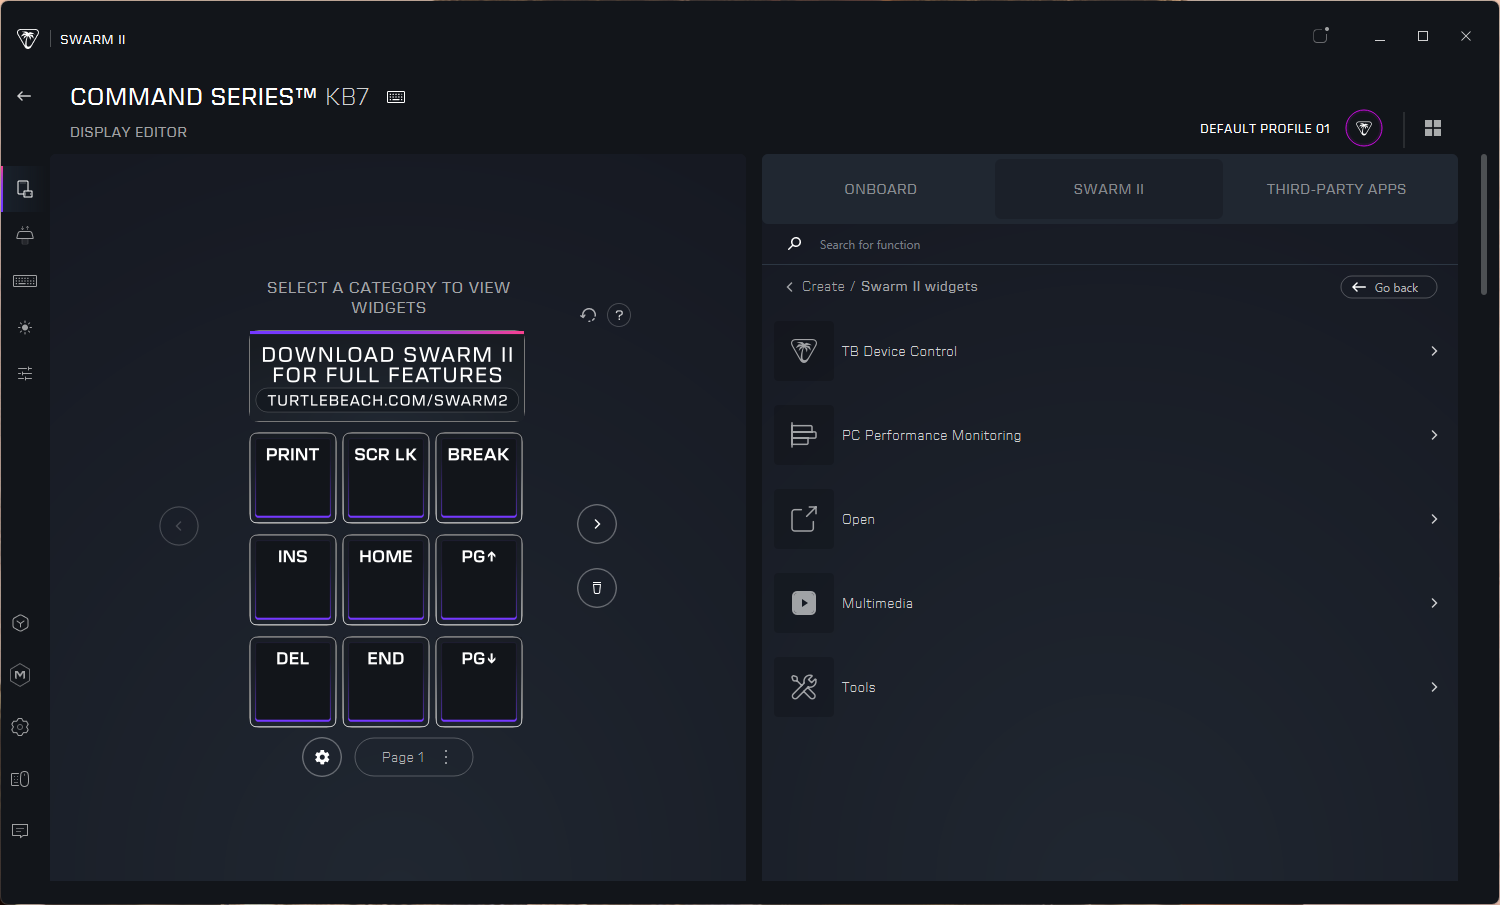
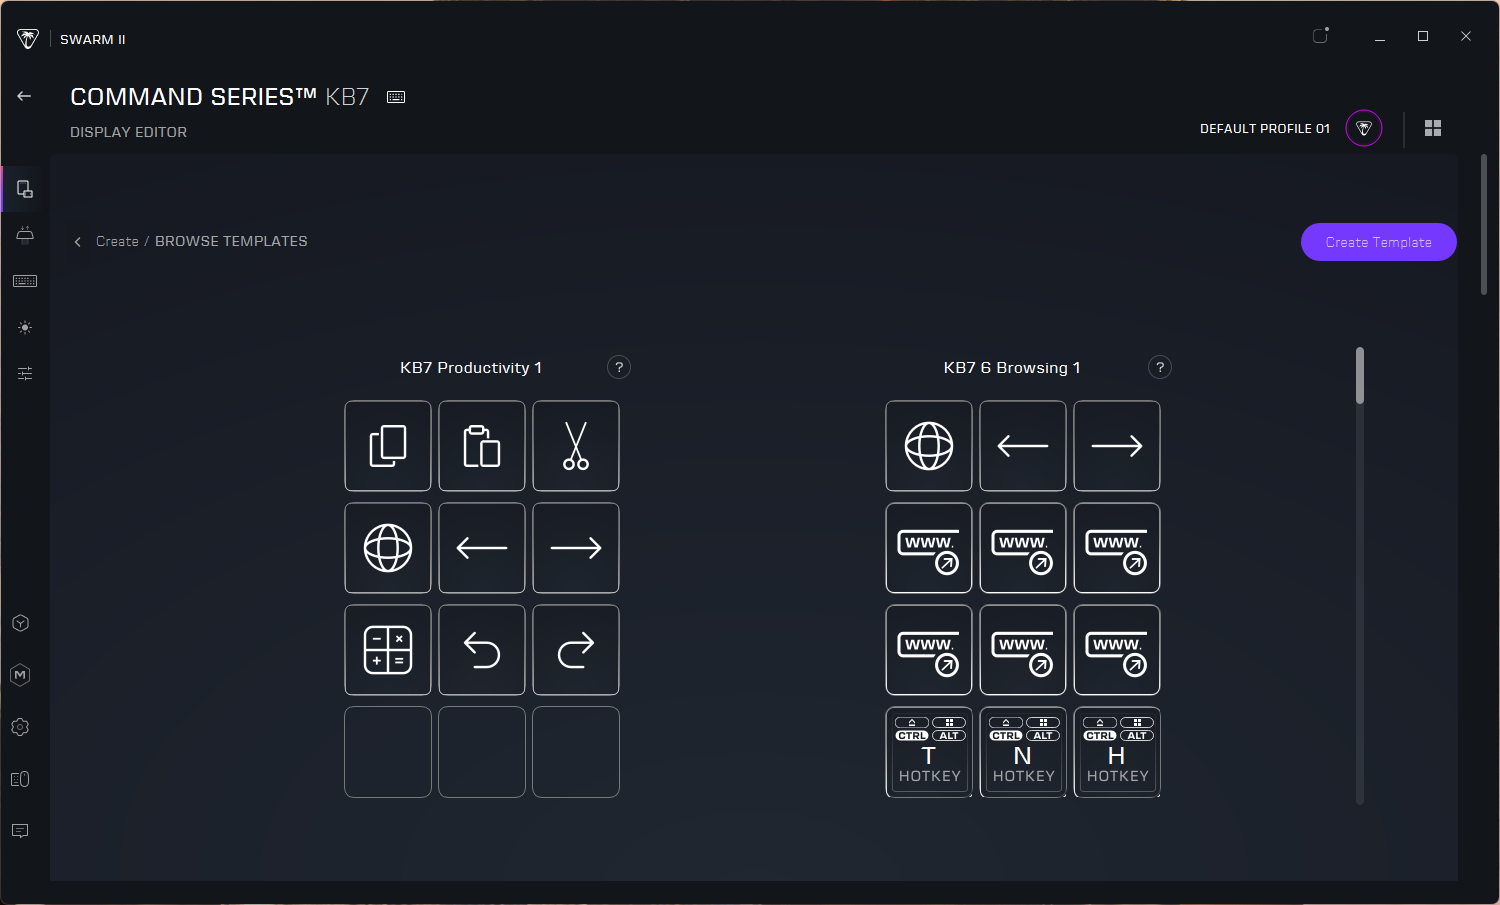
The KB7's standout feature is its 4.3-inch full-color "Command Center" touchscreen, which is located on the left side of the board where you'd normally find the navigation cluster. The touchscreen comes with the navigation cluster programmed in, of course — a full 3 x 3 grid, as well as a link at the top that directs you to download the Swarm II software for full functionality. Once you download Swarm II, you can replace this link with three additional touch-buttons, for a full 12-button grid — similar to the physical LCD key setup of the Corsair Galleon 100 SD.

Turtle Beach Command Series KB7

(Image credit: Tom's Hardware)

Of course, the KB7's touchscreen doesn't have the extra knobs that the Galleon 100 SD has, but it is a touchscreen, so you can swipe left and right to switch "pages" of button layouts (most of my dial usage on the Galleon 100 SD is, admittedly, moving between layouts). The touchscreen also features a few non-remappable "buttons," including a home button at the bottom, a profile switch button in the top left, and a settings menu at the top, which drops down to let you change settings such as keyboard and touchscreen brightness, set the actuation point, toggle ReacTap and Rapid Trigger, record macros, and remap keys. (There's also yet another button for lighting adjustment, as well as one for profile switching — functions that are extra-redundant, given that the shortcut keys are also pre-mapped with them.)

Turtle Beach Command Series KB7

(Image credit: Tom's Hardware)

The KB7 comes with an accompanying silicon wrist rest that's virtually identical to that of the Roccat Vulcan II Max, which is still one of the prettiest keyboards we've tested to date. The wrist rest is made of soft, smooth translucent silicon with a grooved design that showcases the keyboard's bright, customizable RGB lighting when it's hooked into the bottom of the board. It isn't powered, like the wrist rest that comes with Razer's BlackWidow V4 Pro, it just diffuses the lighting from the board onto the silicon. It's a cool feature that still makes for one of the prettiest keyboard lightshows around. The wrist rest itself isn't particularly plush, but it gives you a nice, gradual slope to the keyboard (which is low-profile, anyway, so you probably don't strictly need it), and it's durable and easy to clean.

Turtle Beach Command Series KB7
Tom's Hardware
Turtle Beach Command Series KB7
Tom's Hardware

Along the top of the keyboard, in the upper left corner, you'll find a USB-C port and a USB-A passthrough port. The passthrough port is nice — and it's also practically necessary, because this keyboard needs a lot of juice. It can connect to your PC through one USB-C port, or it can connect to your PC through two USB-A ports — again, similar to the Roccat Vulcan II Max, which also required two USB-A ports' worth of power to run. I guess that's the price of pretty lighting (and 4.3-inch touchscreens). But at least you get one USB-A port back as a passthrough port, I guess.
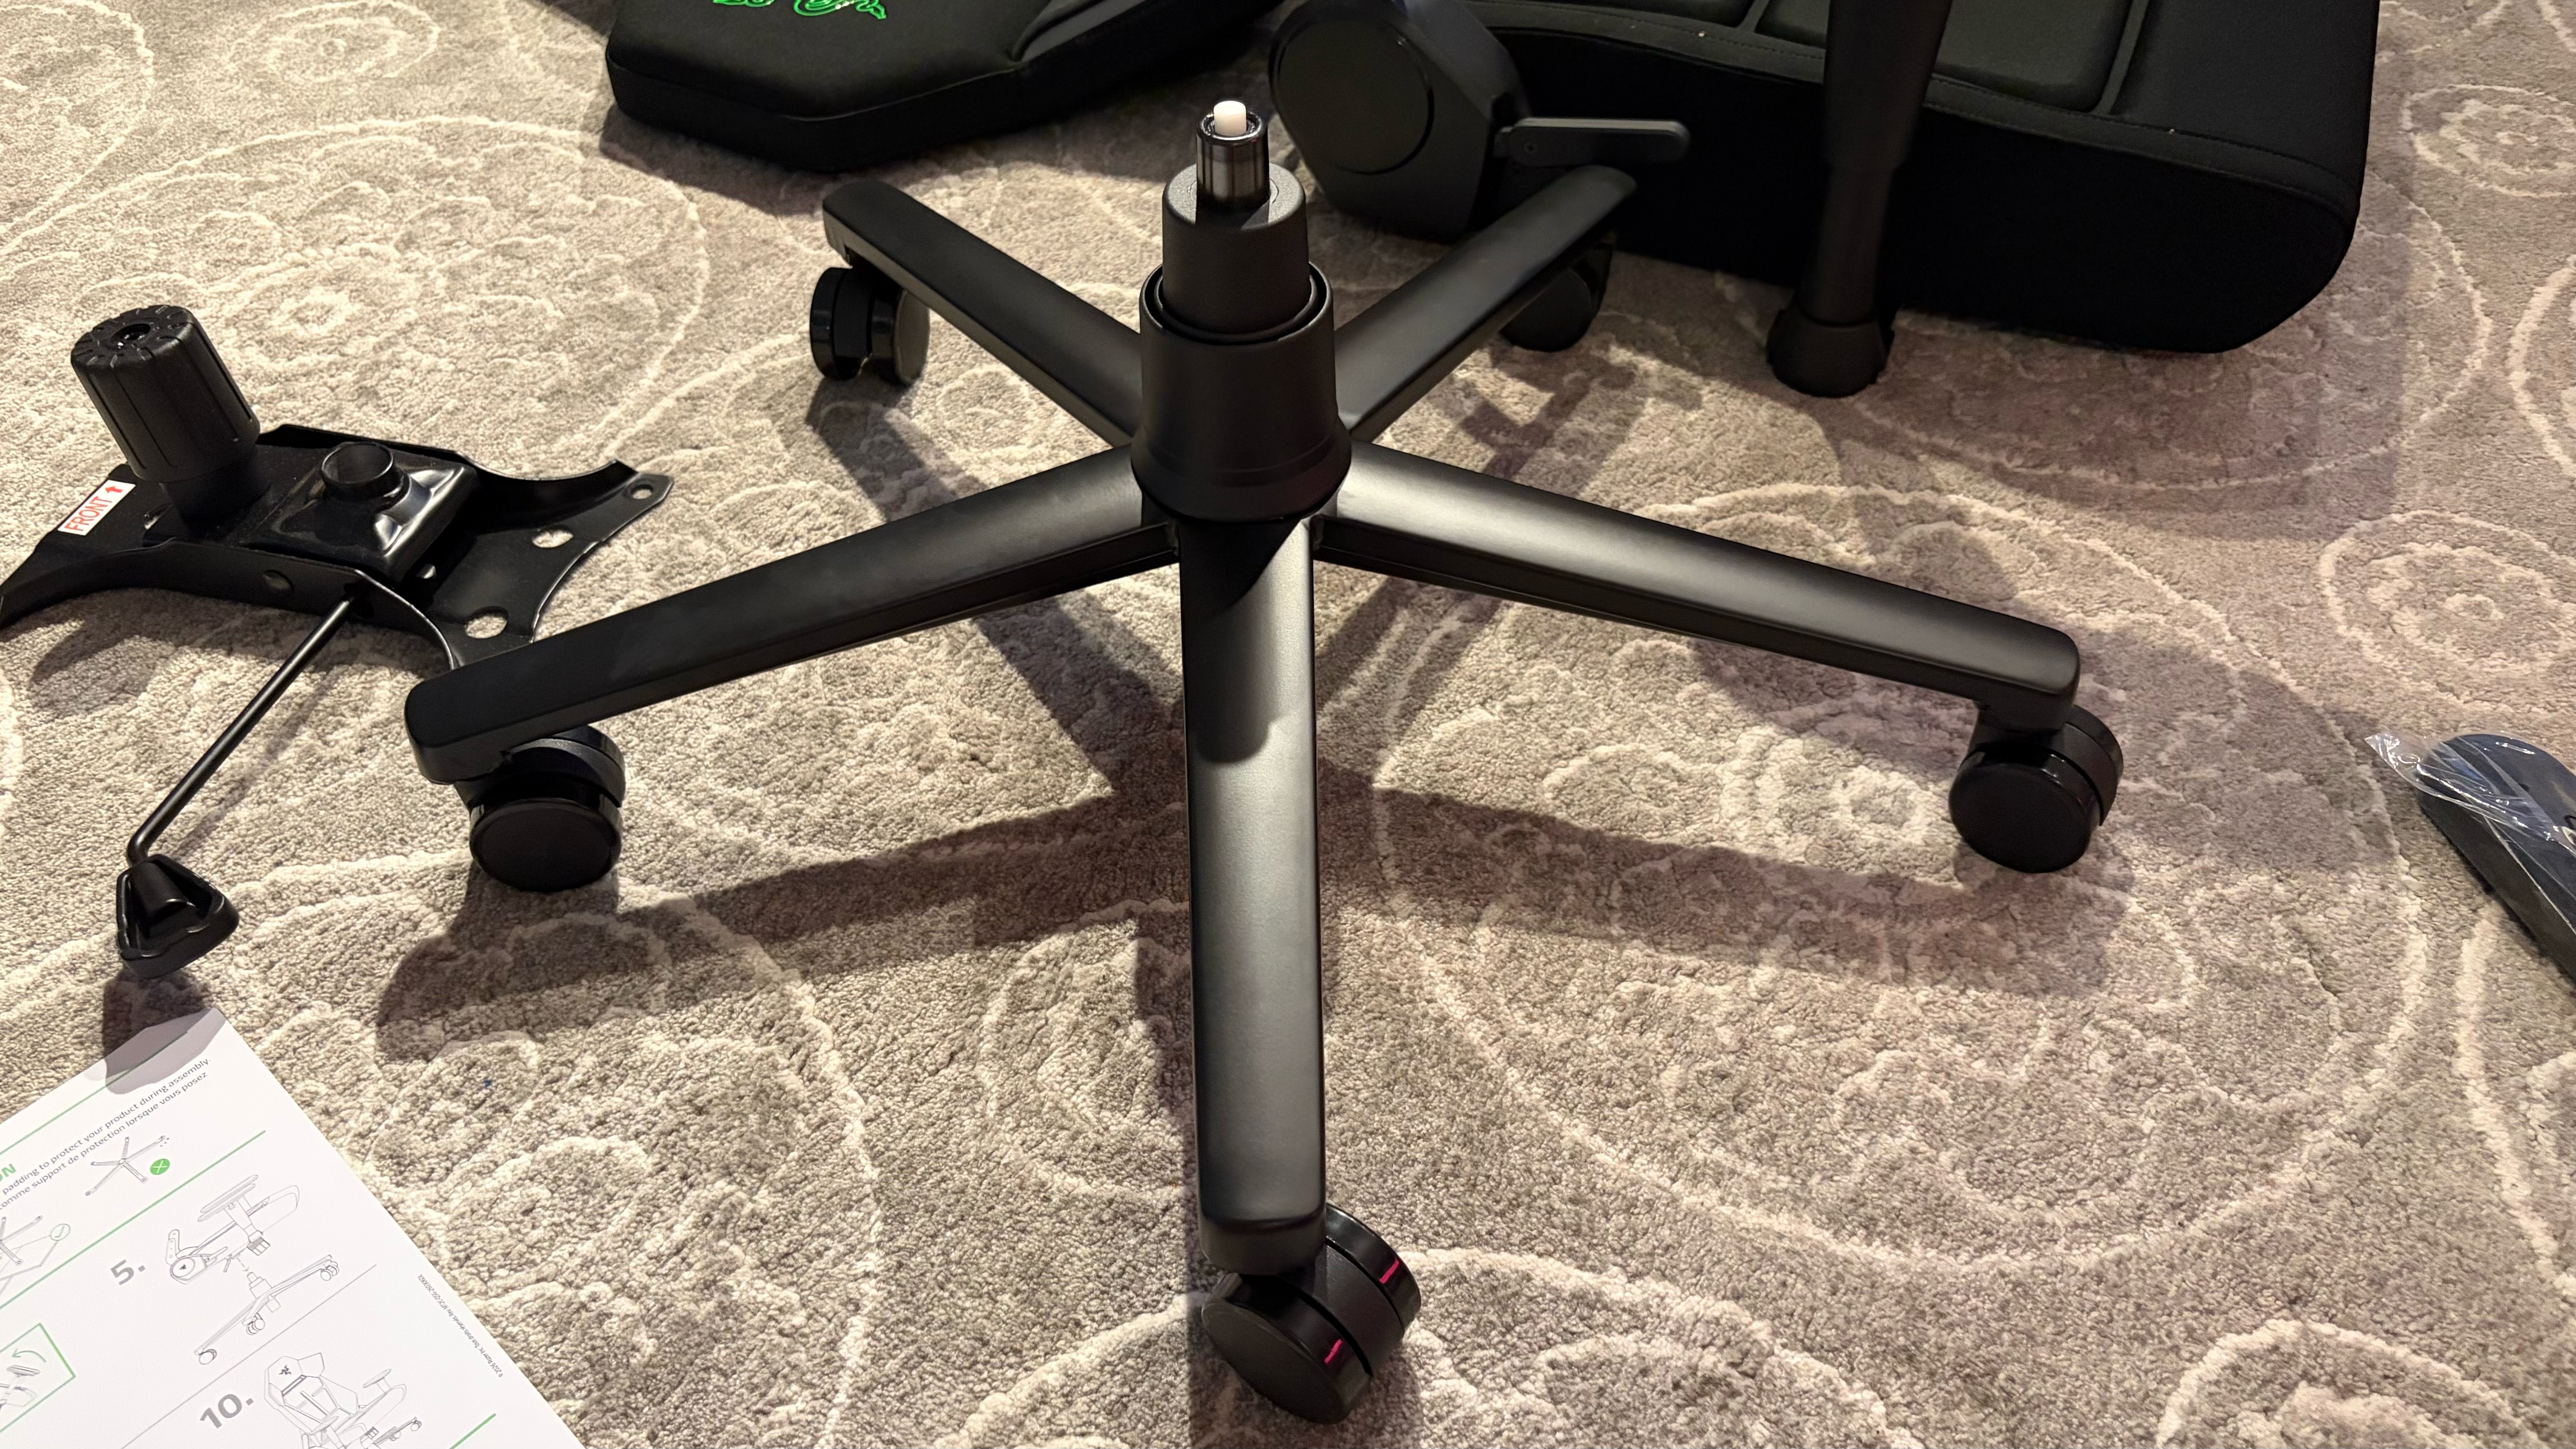
Turtle Beach Command Series KB7
Tom's Hardware
Turtle Beach Command Series KB7
Tom's Hardware
Turtle Beach Command Series KB7
Tom's Hardware

The back of the keyboard has two sets of flip-out feet, which raise the typing angle from basically flat to 5 and 7 degrees, respectively. It also features rails on both sides for connecting the KP7 modular keypad — just slide the keypad onto the rails, and you basically have a full-size keyboard (now with a touchscreen in the middle). It's nice that the rails are on both sides, even though I suspect that left-handed numberpad users make up a minuscule percentage of the population.

Turtle Beach Command Series KB7

(Image credit: Tom's Hardware)

In the box, the KB7 comes with a few accessories: the silicon wristrest, a 6-foot (1.8m) braided USB-C to USB-C cable, a USB-C to dual-USB-A adapter, a keycap puller, and four shiny, textured keycaps (designed for the W/A/S/D keys, but they can be used on any standard-sized key).

Specs

Size

TKL (sort of)

Number of keys

78

Switches

Titan Low-Profile HE switches

Backlighting

Yes

Onboard Storage

Yes (5 profiles / 32MB)

Dedicated Media Keys

Yes (volume knob, fast-forward, rewind)

Game Mode

Yes

Additional Ports

0

Connectivity

Wired (USB-C)

Cable

6ft. / 1.8m USB-C to USB-C (comes with USB-C to USB-A x 2 adapter)
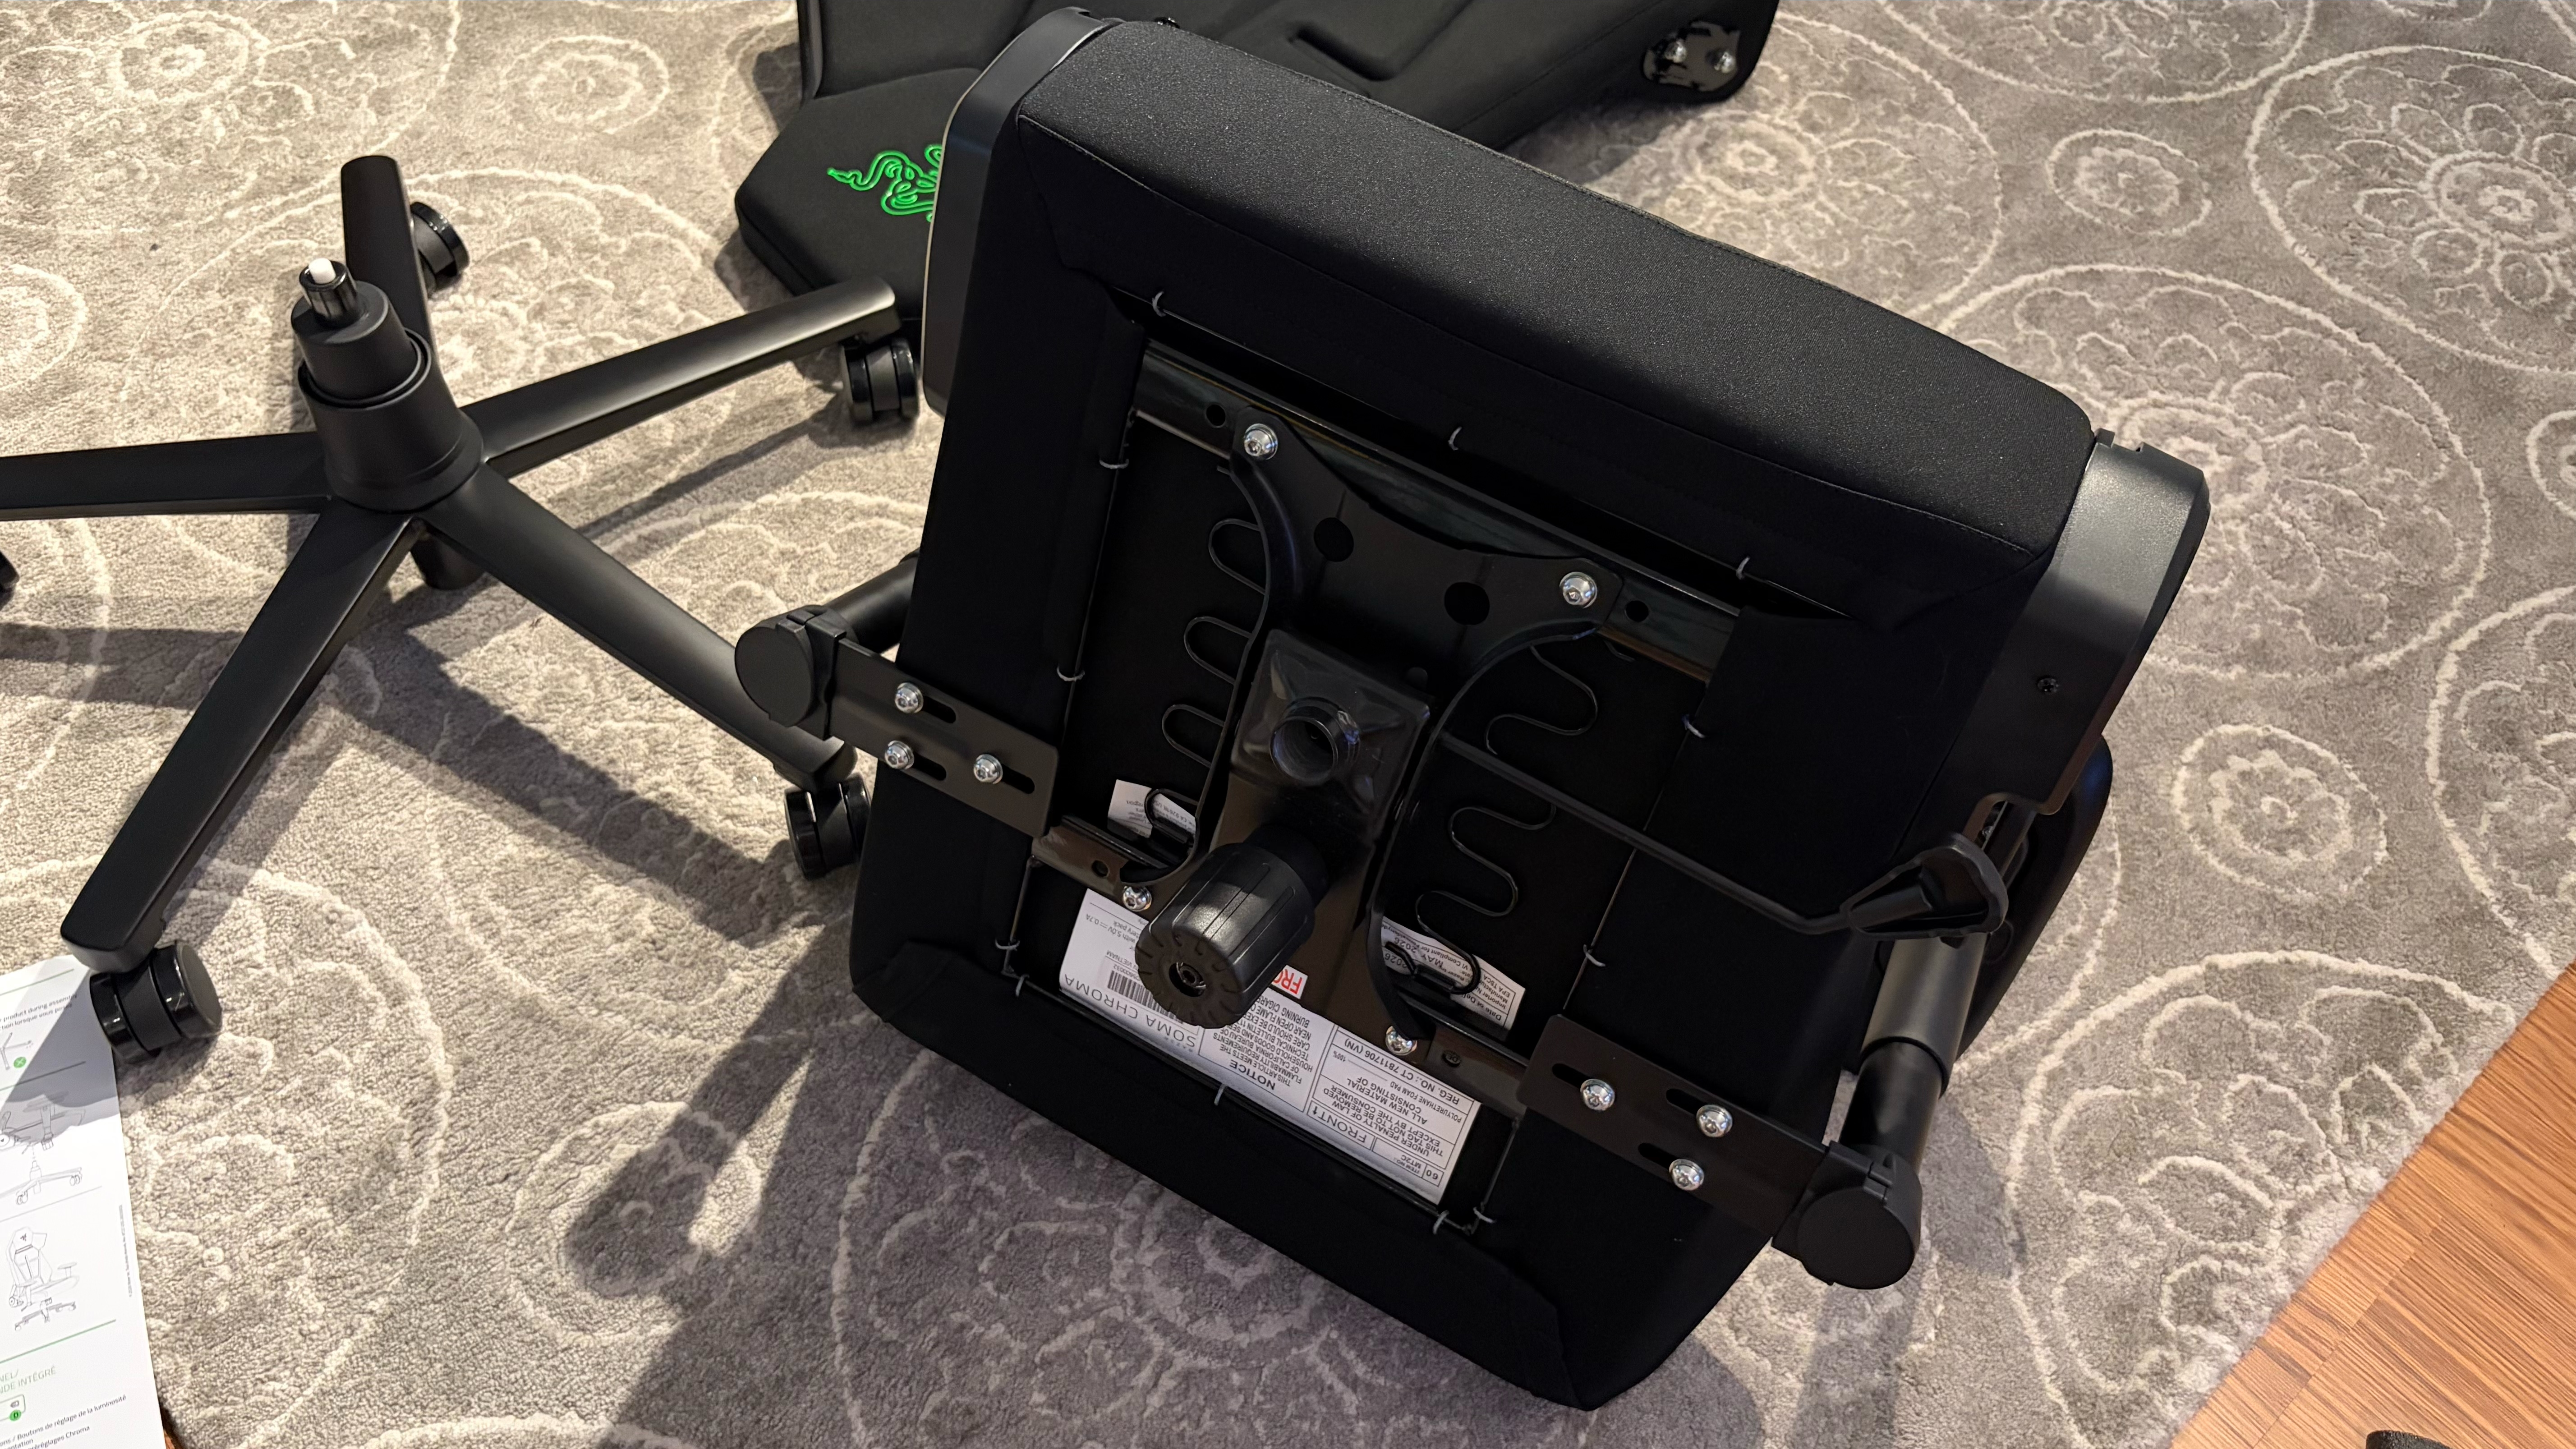
Keycaps

Double-shot PBT

Construction

Plastic chassis
Anodized aluminum top plate

Software

Swarm II

Dimensions (LxWxH)

15.71 x 6.85 x 1.22 inches / 399 x 174 x 31 mm

Weight

1.89lbs / 858g

MSRP / Price at Time of Review

$199.99

Release Date

May 2026

Typing and Gaming Experience on the KB7

The KB7 is a TKL (-ish) keyboard with Turtle Beach's in-house Titan low-profile linear magnetic Hall Effect switches. They have an adjustable actuation point (0.1 - 3.2mm) and a lifecycle rating of 100 million keystrokes. They're not hot-swappable. Like other magnetic Hall Effect switches, they support all the trendy gaming features that will probably get you banned, including Rapid Trigger, multi-input,controller mode, and ReacTap (SOCD).
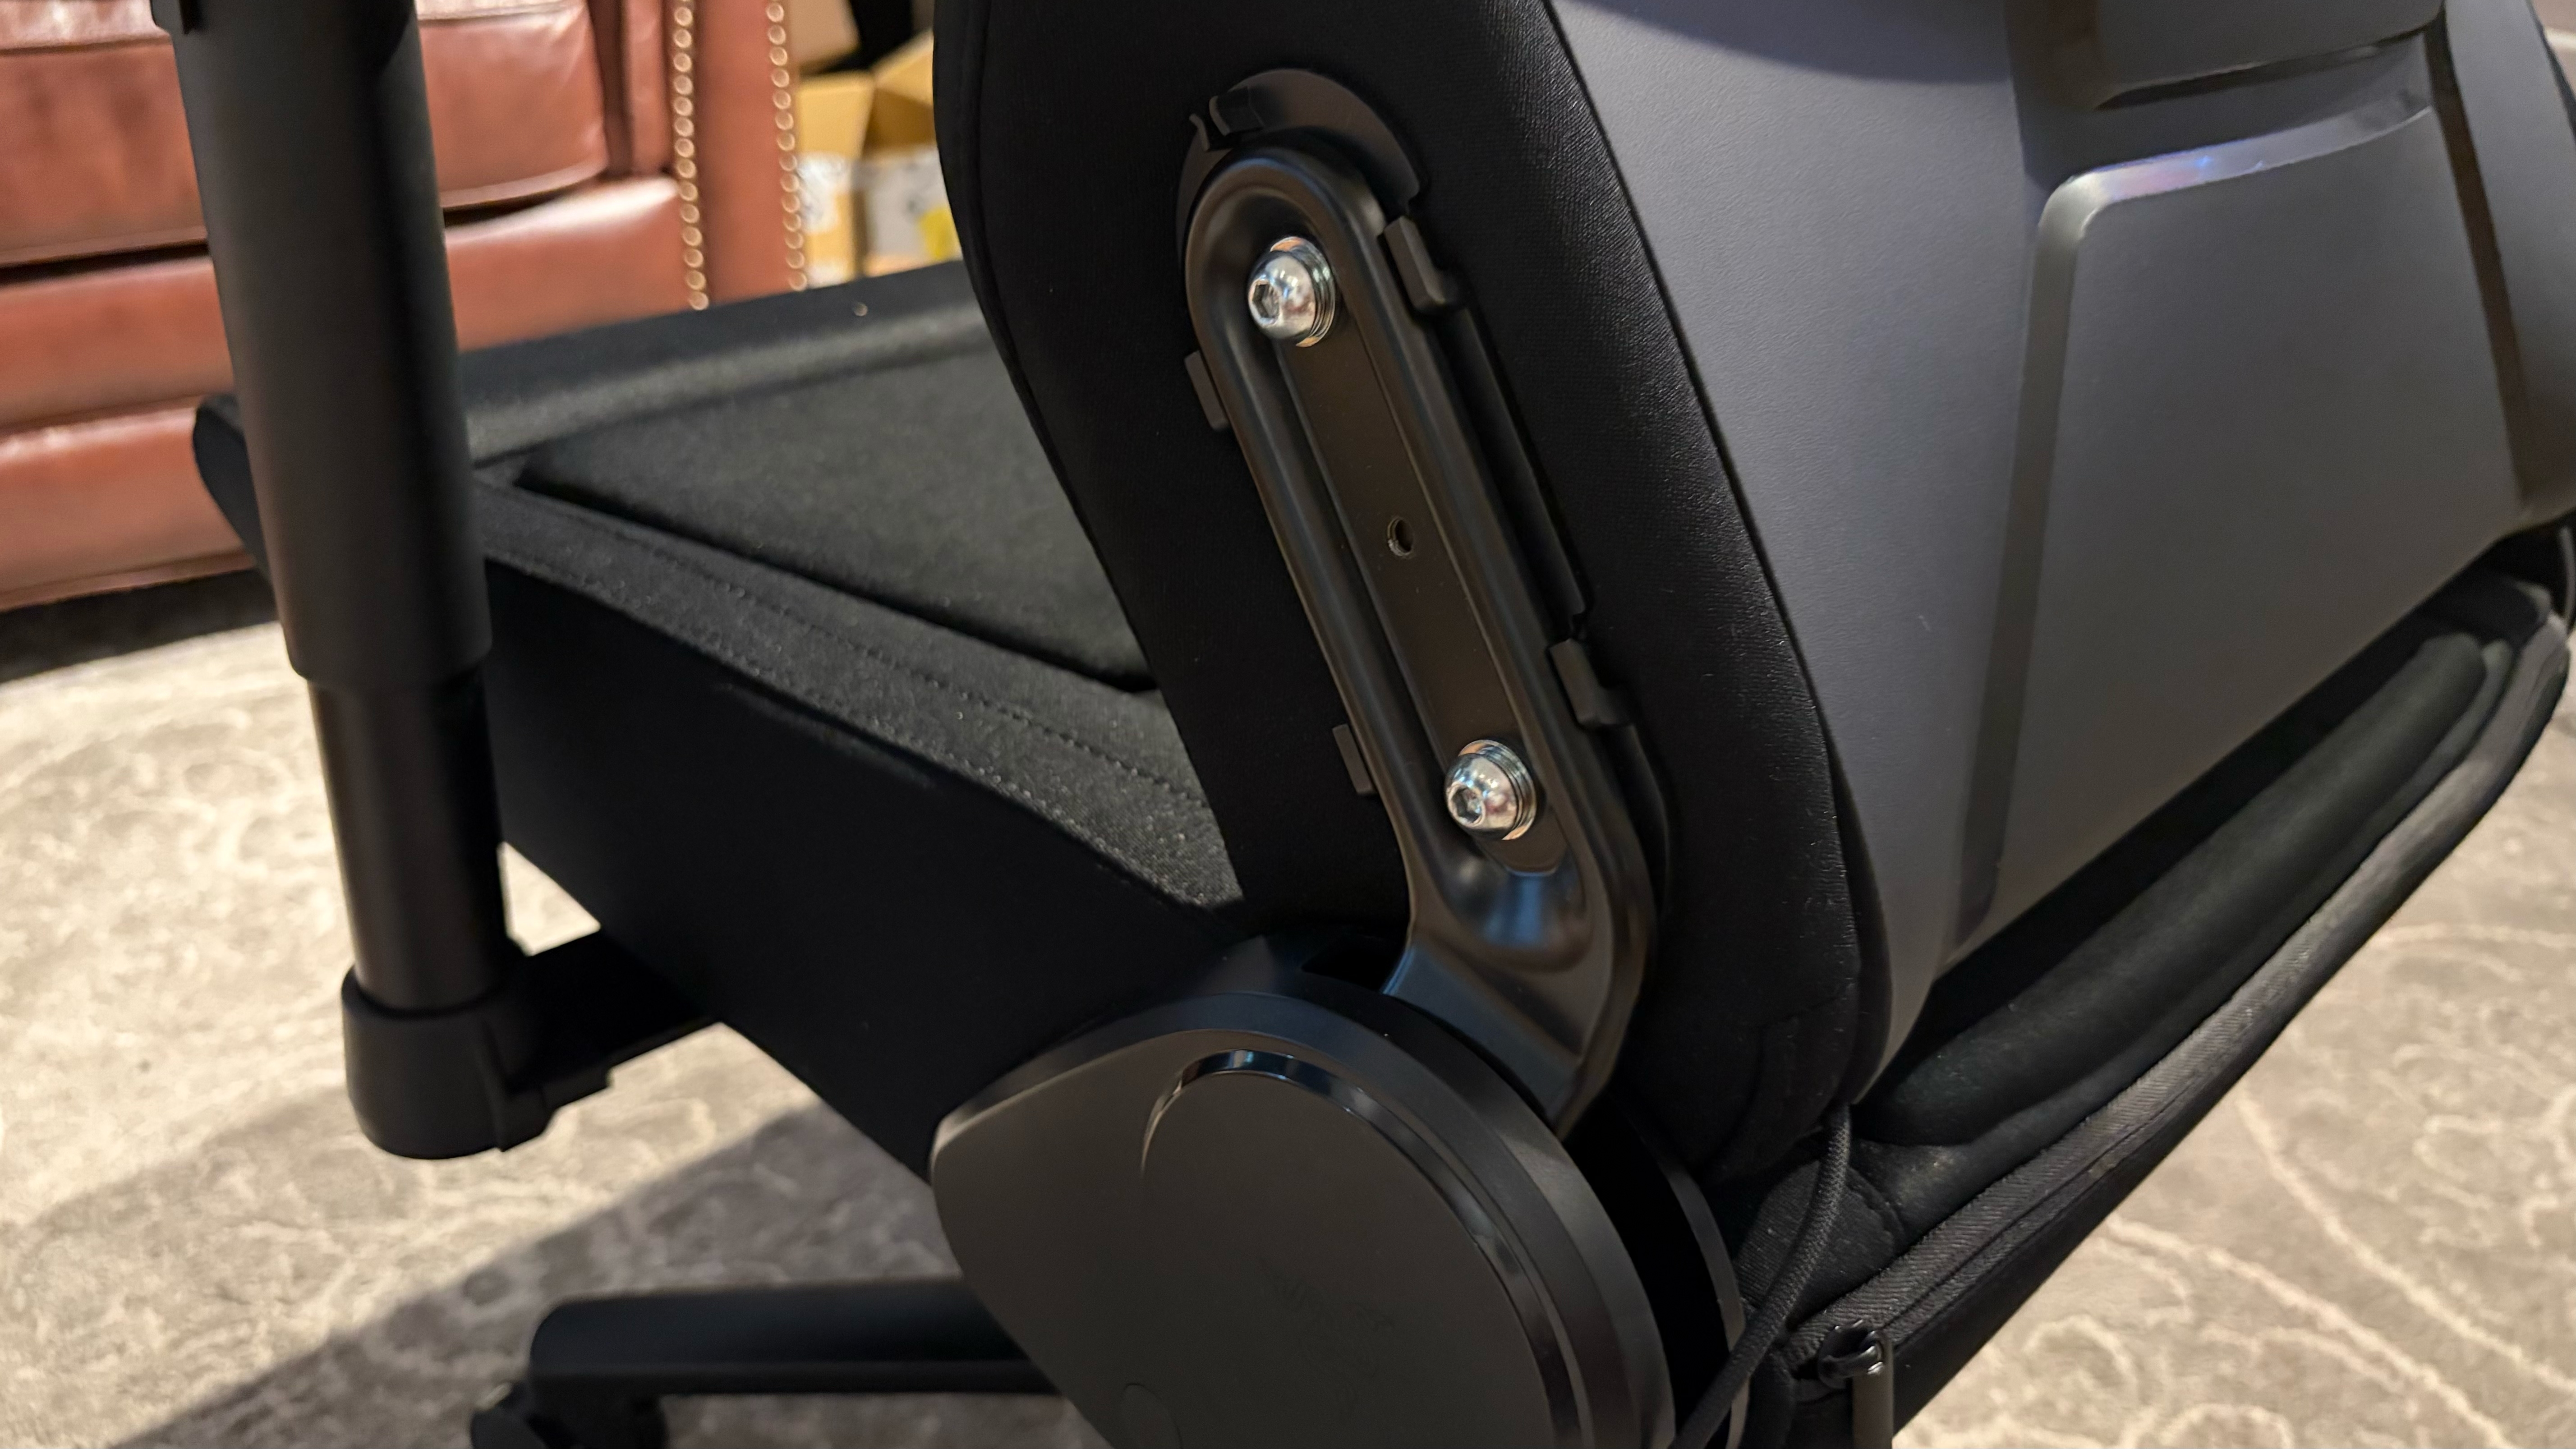
I'll admit that I didn't love the way typing felt on the KB7 initially — the linear magnetic low-profile switches combined with the relatively flat, lightweight double-shot PBT keycaps makes for a much flightier typing experience than I'm used to. It took less than an hour for me to get used to it, however, and all in all it's a pretty solid typing experience considering I don't love linear, low-profile, or magnetic switches. The flat, shine-through keycaps make it easy to move your fingers across the board quickly, and the relatively spacious layout means you won't make too many mistakes once you've gotten used to the feel. The board sounds decent — it's not incredible, or anything, but it gives pretty solid thunky feedback for a mainstream gaming keyboard.

Turtle Beach Command Series KB7

(Image credit: Tom's Hardware)

I did have some issues that definitely weren't related to my "just getting used to the feel of the board," however — issues that could probably be remedied with a firmware update and software that worked, but, well... I'm not going to hold my breath. I had several issues while I was typing this review, including ghost inputs, missed inputs, and repeat glitches. All of these issues were quickly resolved, but having to stop the review six times because the keyboard was acting up does not give me great confidence in the board's ability to perform under pressure. I didn't have any serious issues while I was gaming, but I also don't generally play a lot of fast-paced first-person shooters where latency and input accuracy is wildly important (I play a handful for testing, but that's it). The KB7 does boast a speedy 8,000 Hz polling rate, but that means nothing if you can't get the right keys to actuate.

Turtle Beach Command Series KB7

(Image credit: Tom's Hardware)

The touchscreen performance was decent, though I don't know if I'd trust it in a high-pressure situation. While it registered my inputs quickly and accurately, it's still a touchscreen — hardly the kind of input you want to rely on when you're in the middle of a high-stakes battle for your (digital) life. So, while it's useful for general macro-pad type things, it's not something I'd recommend as part of your ultra-competitive gamer arsenal.

Features and Software of the KB7

The KB7 is customizable via Turtle Beach's Swarm II software, which you can download by pressing the link on the touchscreen. You can use Swarm II to program the keyboard (remapping keys, adjusting actuation, recording macros, etc), the touchscreen, and the keyboard's bright, per-key RGB backlighting.

The keyboard settings are pretty standard for a magnetic switch gaming keyboard — you can turn on and adjust Rapid Trigger, multi-input, and ReacTap, and you can fine-tune the actuation point of every single key individually (a thing that nobody does). You can also remap every single key, except the Windows key and the Fn key, to do what you want — on the primary layer you can only swap around the existing alphanumeric punctuation keys (e.g. if you want to set up an unusual keyboard layout), but on the secondary (Fn) and tertiary (Easy Shift) layers you can set keys to do everything from outputting macros to changing system settings and, of course... launching AI? (Apparently this is such a core functionality that it comes standard in the Swarm II software, now — and it's not just CoPilot. There are options for ChatGPT, Gemini, Deep Seek, and Grok, too.)

Turtle Beach Command Series KB7
Tom's Hardware
Turtle Beach Command Series KB7
Tom's Hardware
Turtle Beach Command Series KB7
Tom's Hardware
Turtle Beach Command Series KB7
Tom's Hardware
Turtle Beach Command Series KB7
Tom's Hardware
Turtle Beach Command Series KB7
Tom's Hardware
Turtle Beach Command Series KB7
Tom's Hardware
Turtle Beach Command Series KB7
Tom's Hardware

But the real customization is, or should be, in the touchscreen. It is, however, unfortunately — but not unexpectedly — limited. There are several native widgets you can swap in, but they're not particularly life-changing: PC performance monitoring (CPU / GPU / RAM), multimedia controls (which there already exist dedicated keys for), opening apps / websites / files / folders, controlling your Turtle Beach devices (by which I mean mouse DPI), executing macros, and a count down timer. There's also a tab for third-party apps, which currently consist of Discord (though you'll need to set it up via the Discord developer portal as an integration), Counter Strike, Steam (which just opens Steam), OBS, and Streamlabs. You can also assign the standard keyboard functions, Windows functions, and shortcuts such as copy / paste, forward / back, launch calculator, etc.

Turtle Beach Command Series KB7

Because of course it does. (Image credit: Tom's Hardware)

It's a start, but it's definitely nowhere near as robust as the functionality you'll find on Elgato's Stream Decks. Still, this limited functionality is probably workable for most people (after all, you can set up a lot of the functionality you get through third-party apps and plugins by just spending some time creating macros) — if it worked. But the software is, well, let's just say finicky... at best. Setting up the touchscreen seemed to be pretty straightforward, but getting it to stay set up was more of a chore. The software frequently failed in my testing — it would reset, restart, shut down, prompt another six-cycle firmware update (this, at least, I was prepared for — it's pretty standard for Turtle Beach devices to require 14 firmware updates out of the box), etc. When the software was working, the touchscreen worked as expected and could probably replace my Stream Deck. But this was only about 85% of the time, which would probably be decent if my Stream Deck didn't work 100% of the time. And so the touchscreen has ultimately been relegated to a fun gimmick, at least for now.

The Bottom Line

After my surprising love affair with the Corsair Galleon 100 SD, I really wanted to love the KB7 — after all, it's basically the Corsair Galleon 100 SD, but with the option of an actual 10-key numberpad, which was my only real gripe with the latter. But Corsair owns Elgato, which has been making Stream Decks for almost a decade — and has the software and the third-party plugins to back them up. And at the end of the day, a highly customizable macro pad is actually only as customizable as its software allows for. While Turtle Beach currently lacks the integrations to fully compete with Elgato, I do think it has a fighting chance... if it can get the Swarm II software to work, like, at all. I can certainly work without built-in Creative Suite integration, but only if there's something to work with.

I still love the idea of the KB7 and I'm fully ready to hop on the Command Center bandwagon, as soon as Swarm II lets me. But given that this is hardly the first time Swarm II has shot itself in the foot, I'll probably keep this Galleon 100 SD around for a little while longer.

Turtle Beach KP7 Review: The accessory that does everything

2026年7月4日 00:26

I realize I'm probably in the minority, but I love full-size keyboards because I love 10-key numberpads. For data entry and for everything else (let's face it, I don't do much data entry). Since I often have to test keyboards that aren't full-size, I'm always on the look out for a great standalone numberpad — but the options usually consist of $15 (and under) bargain bin finds or difficult-to-justify $100+ premium picks.

Turtle Beach KP7
Tom's Hardware
Turtle Beach KP7
Tom's Hardware

Turtle Beach's Command Series KP7 isn't exactly in the middle — it retails for $99.99, after all — but it's an interesting option nonetheless. This 28-key modular gaming keypad is part of the brand's recently-launched Command Series, which consists of several modular, multi-input peripherals (two keyboards, three mice, and this keypad). It's designed to work with the series' flagship Turtle Beach Command Series KB7 keyboard, which is a premium TKL keyboard with a built-in touchscreen. The KP7 hooks onto either side of the KB7, turning it into a full-size keyboard with a numberpad and a bunch of extra macro keys. The KB7 retails for $199.99, so the full set is just shy of $300. But the KP7 is interesting because it works very well on its own — in fact, it might even perform better as a standalone keypad than it does with the KB7 it's designed to complement.

The KP7 is a modular gaming keypad with 28 keys, one clickable, programmable dial, and one (non-programmable) button for switching between numberpad mode and game mode. It can hook onto the right side of the KB7 to function as a typical numberpad, or it can hook onto the left side to function as a gaming keypad — complete with an extendable thumb bar. It features magnetic Hall Effect linear switch, bright per-key RGB backlighting, and its own mini wrist rest. It's available now, as a separate purchase from the KB7, for $99.99.

Design of the KP7

The KP7 is a standalone macropad that consists of a 10-key numberpad surrounded by a bunch of other keys. At the top, there are three additional Fn keys, as well as a profile switch key — it seems Turtle Beach is really trying to push multiple profiles, because if you use this with the KB7 keyboard, this marks the fourth dedicated way to switch profiles. On the right of the numberpad are two columns of keys: The first column consists of the math function keys that usually surround a numberpad, and the second column has four dedicated macro keys.

Turtle Beach KP7
Tom's Hardware
Turtle Beach KP7
Tom's Hardware
Turtle Beach KP7
Tom's Hardware
Turtle Beach KP7
Tom's Hardware

In the bottom right corner there's a programmable knob and an additional thumb button, which is set up by default as a space key. In the upper right corner there's a small button that switches between numberpad mode and game mode — game mode turns the center keys into W / A / S / D (and changes the surrounding keys to the corresponding keys on the left half of the keyboard. It essentially becomes a gaming half-keyboard, sort of like Nordic Game Supply's The Shrimp.

For the times you're using it in gaming mode, the KP7's lower right cluster of keys, including the dial, extend down and right so you can use them with your thumb while you've got your left hand on the center keys. The wrist rest is even cut out to accommodate the keys when extended, which is a nice touch.

Turtle Beach KP7
Tom's Hardware
Turtle Beach KP7
Tom's Hardware
Turtle Beach KP7
Tom's Hardware

The KP7 is well-built for a standalone numberpad — it follows the same design philosophy as Turtle Beach's KB7, with a brushed aluminum top plate and a plastic chassis. It has low-profile linear switches, flat, double-shot PBT keycaps with shine-through legends, and bright, customizable RGB backlighting that extends to its silicon wrist rest, which is like a mini version of the wrist rest that comes with the KB7 (and, previously, the Roccat Vulcan II Max). The wrist rest slots into the bottom of the numberpad and is made of misty, translucent silicon with a grooved pattern that acts as a conduit for the lighting in the keypad. The wrist rest only attaches on one side of the keypad, so the lighting effect isn't quite as bright or mesmerizing as is the lighting effect on the keyboard, but it's still pretty and comfortable.

Turtle Beach KP7
Tom's Hardware
Turtle Beach KP7
Tom's Hardware
Turtle Beach KP7
Tom's Hardware
Turtle Beach KP7
Tom's Hardware

The KP7 has connectors on both sides that are designed to slot into the rails on either side of the Turtle Beach KB7 keyboard. The keypad gets its power from the keyboard when it's connected, so you shouldn't have to plug it in separately via USB-C, which is for when you want to use the keypad alone. However, I found that the keypad's lighting seemed to be inconsistent when it was powered through the keyboard — it flickered and reset itself several times throughout my testing, but this did resolve itself when I plugged it in via its own USB port. Of course, plugging it in via USB port means the KB7 and KP7 keyboard combo takes up either one USB-C and one USB-A port or three USB-A ports, which is a lot for what is essentially a single full-size keyboard.
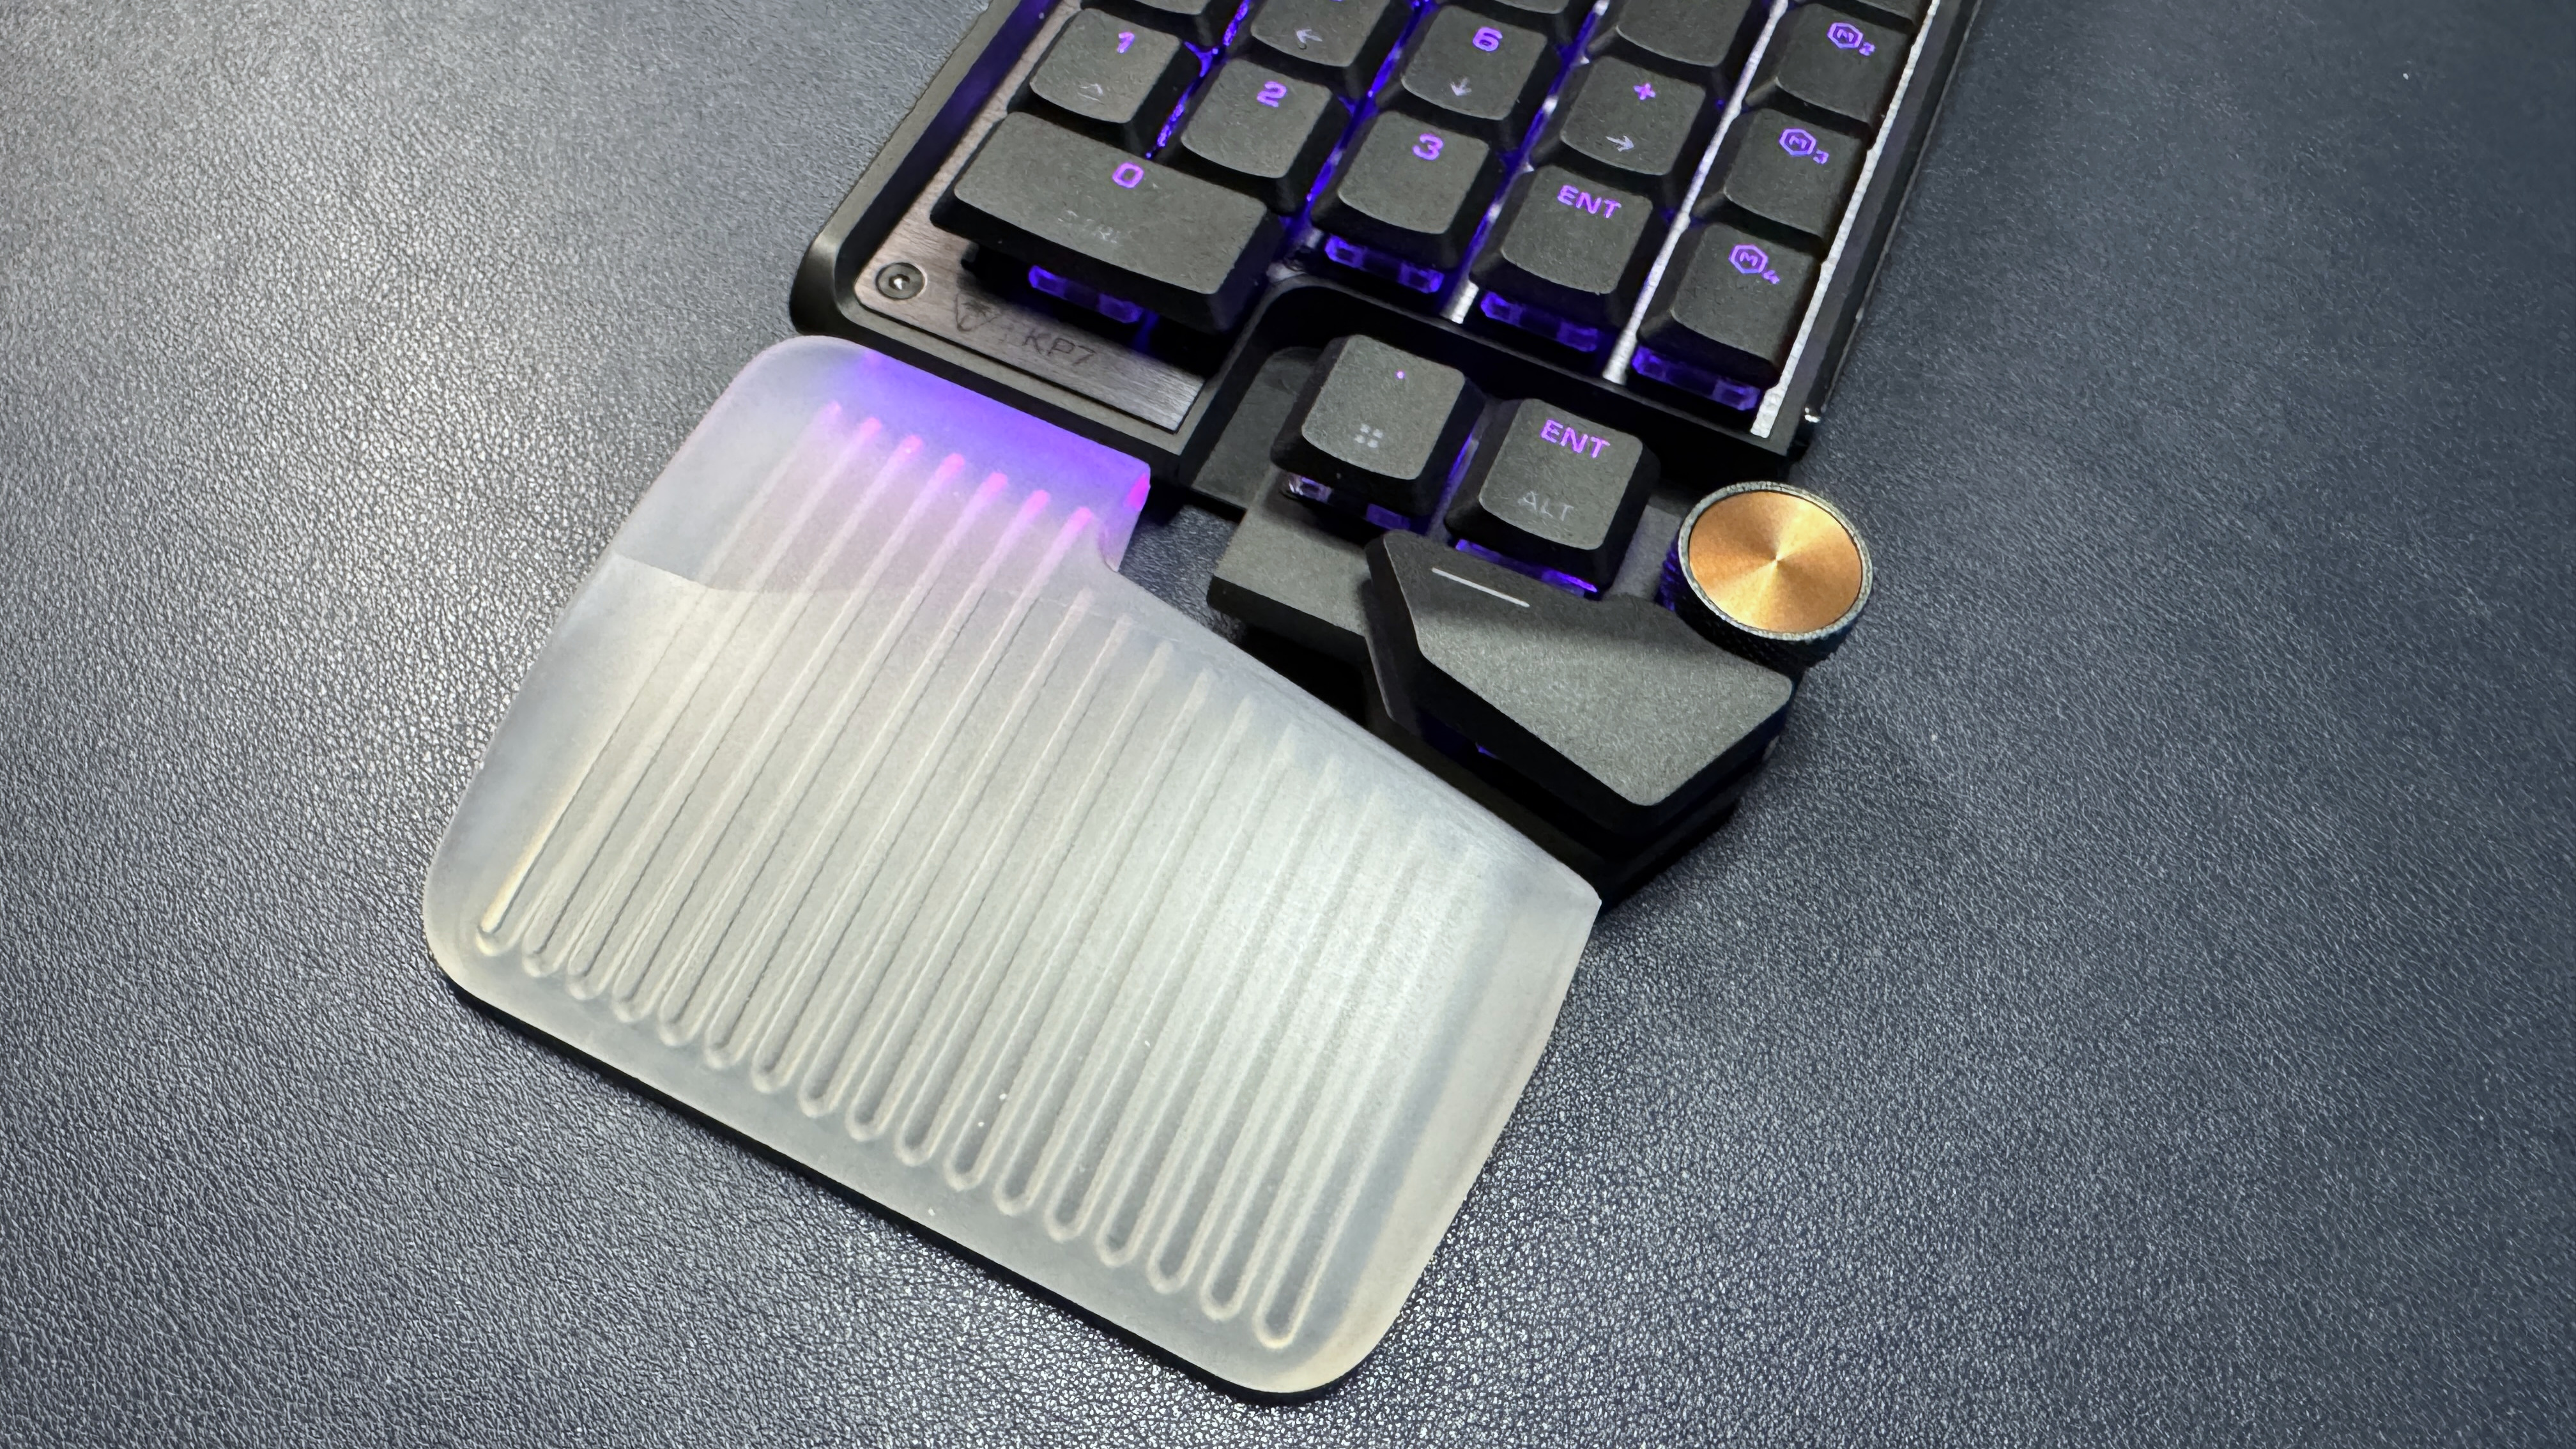
Turtle Beach KP7
Tom's Hardware
Turtle Beach KP7
Tom's Hardware
Turtle Beach KP7
Tom's Hardware

In the box, the KP7 comes with a 5.9-foot (1.8m) detachable braided USB-C to USB-A cable, a silicon wrist rest, and four glossy, textured keys keys (to replace the center W / A / S / D keys, for quicker tactile recognition), and a keycap puller. The back of the keypad has two sets of flip-out feet that raise the typing angle from flat to 5 - 7 degrees. These match the KB7, so you can raise and lower the entire setup as a single unit.
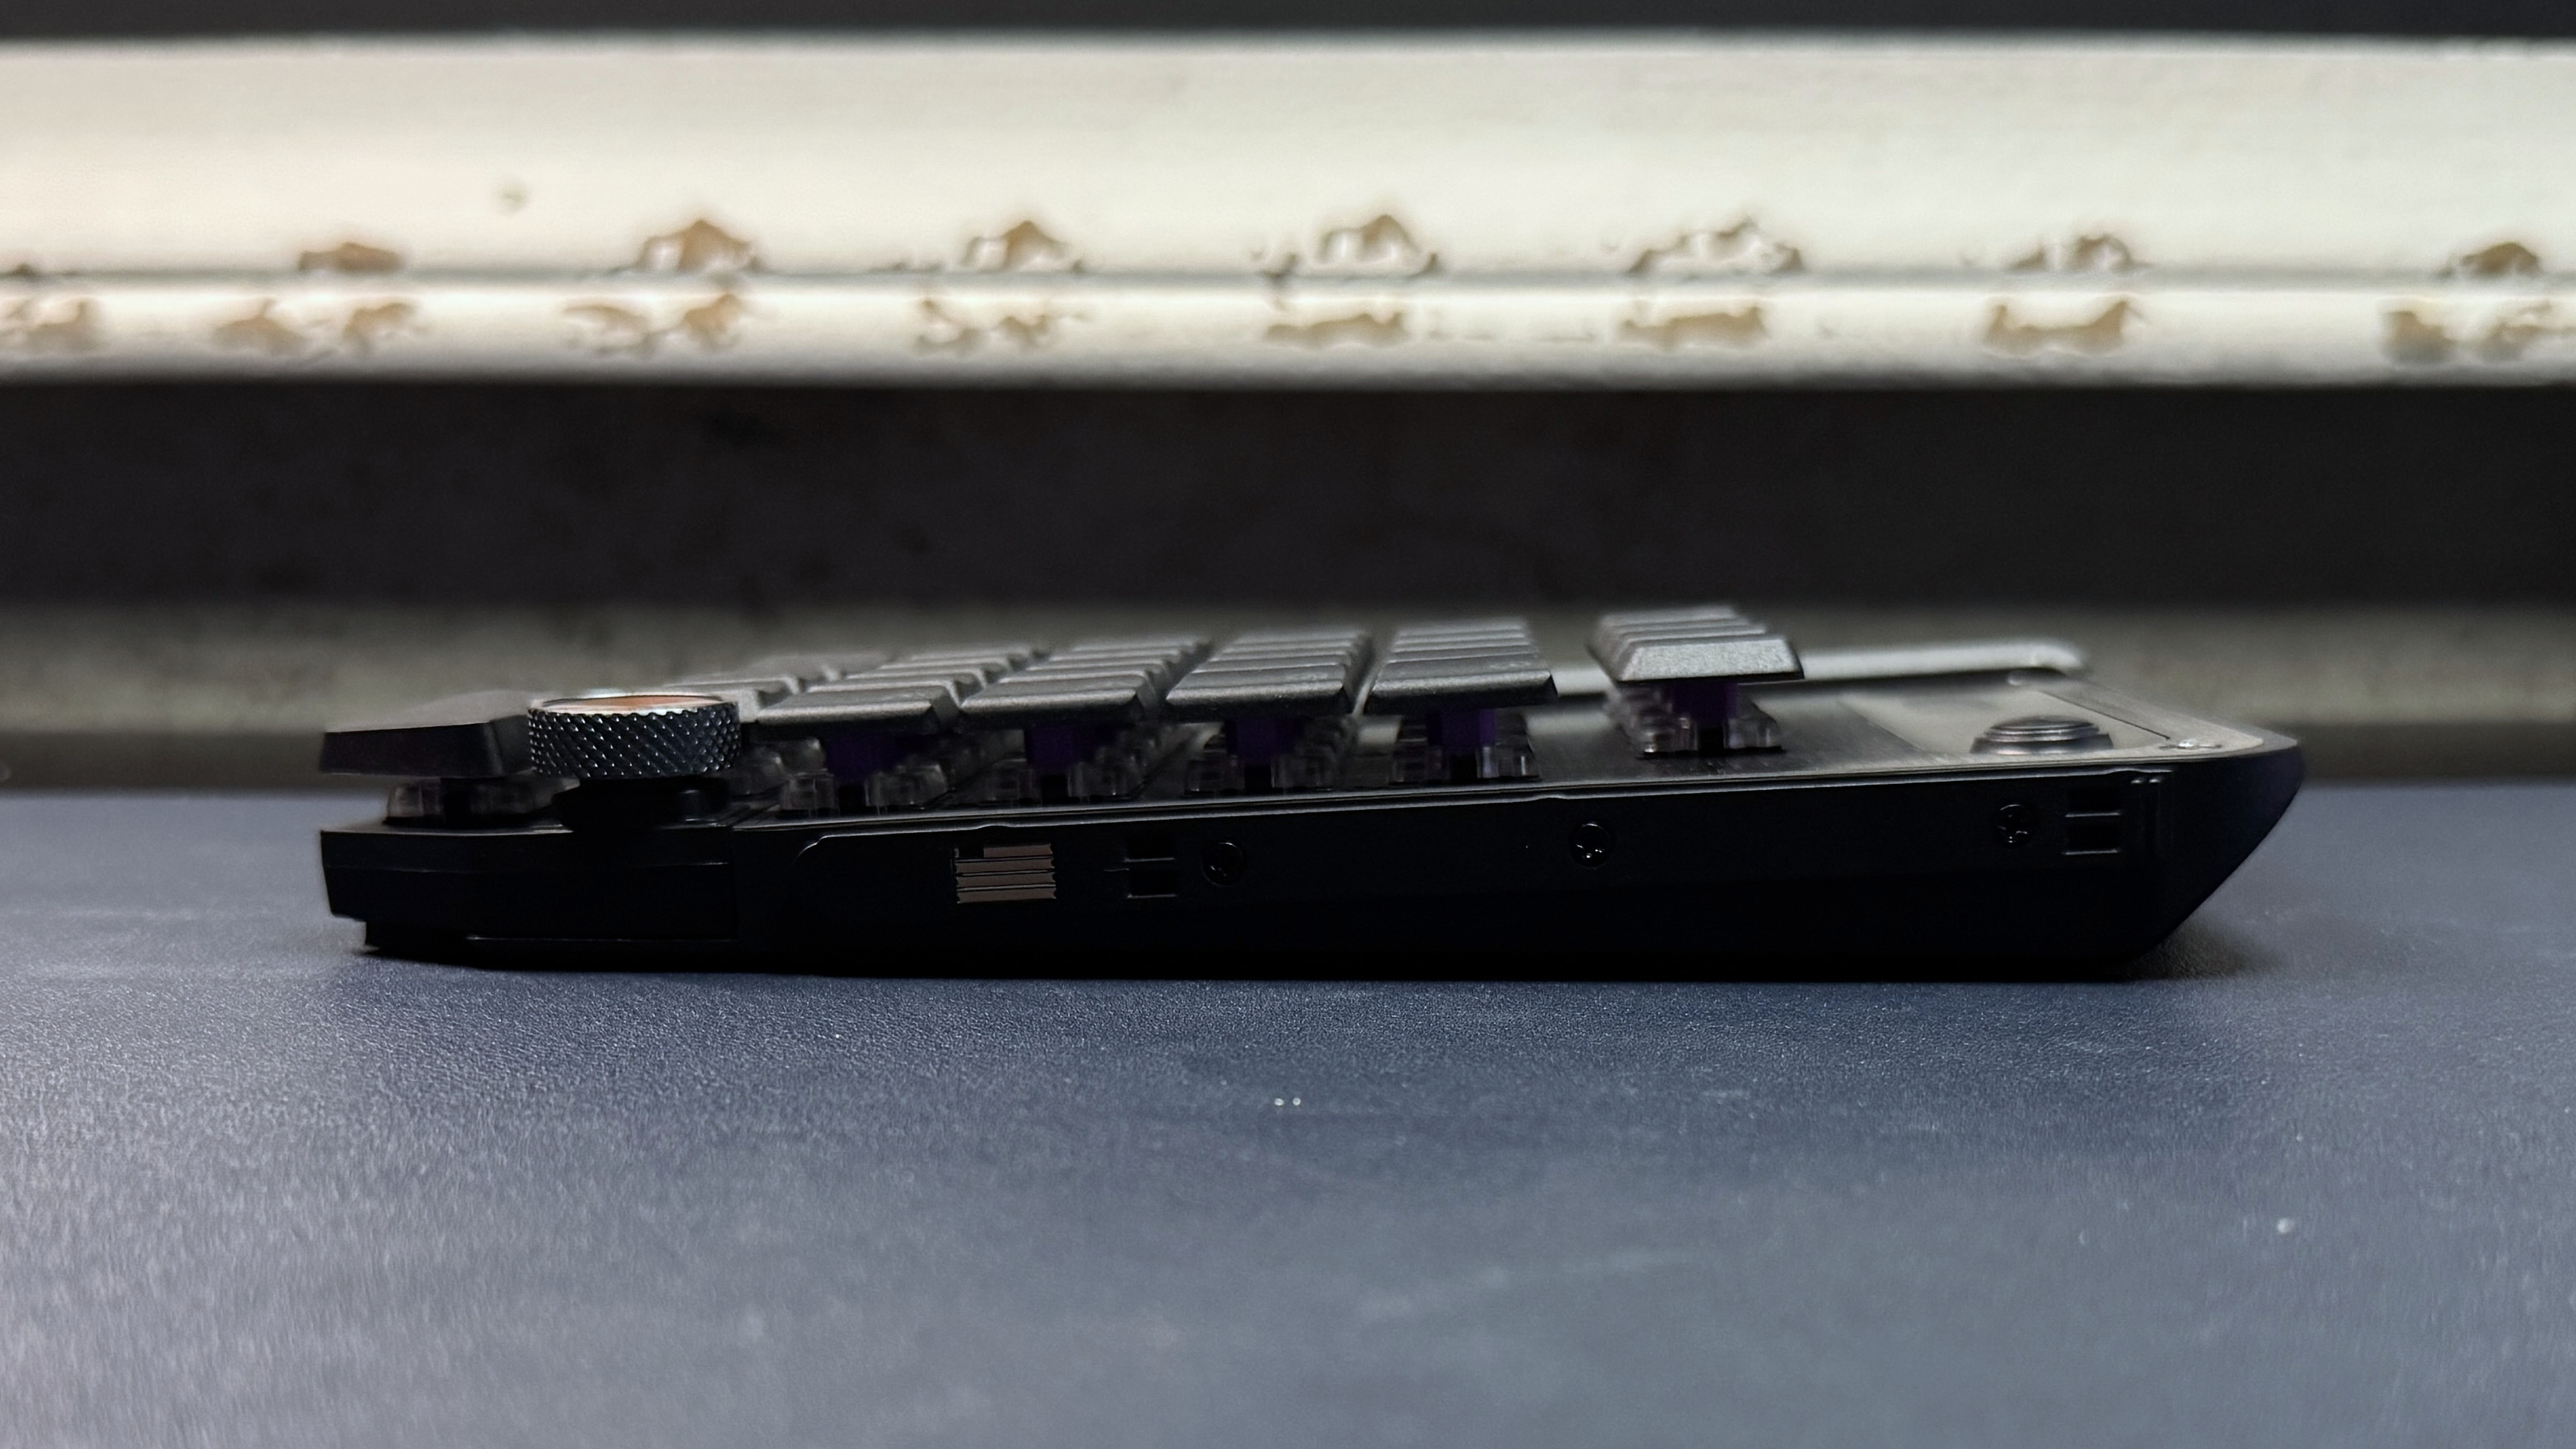
Specs

Buttons (Keys)

28 keys, 1 button, 1 clickable knob

Software

Swarm II

Interface

USB-C

Cable

5.9ft. / 1.8m USB-C to USB-A
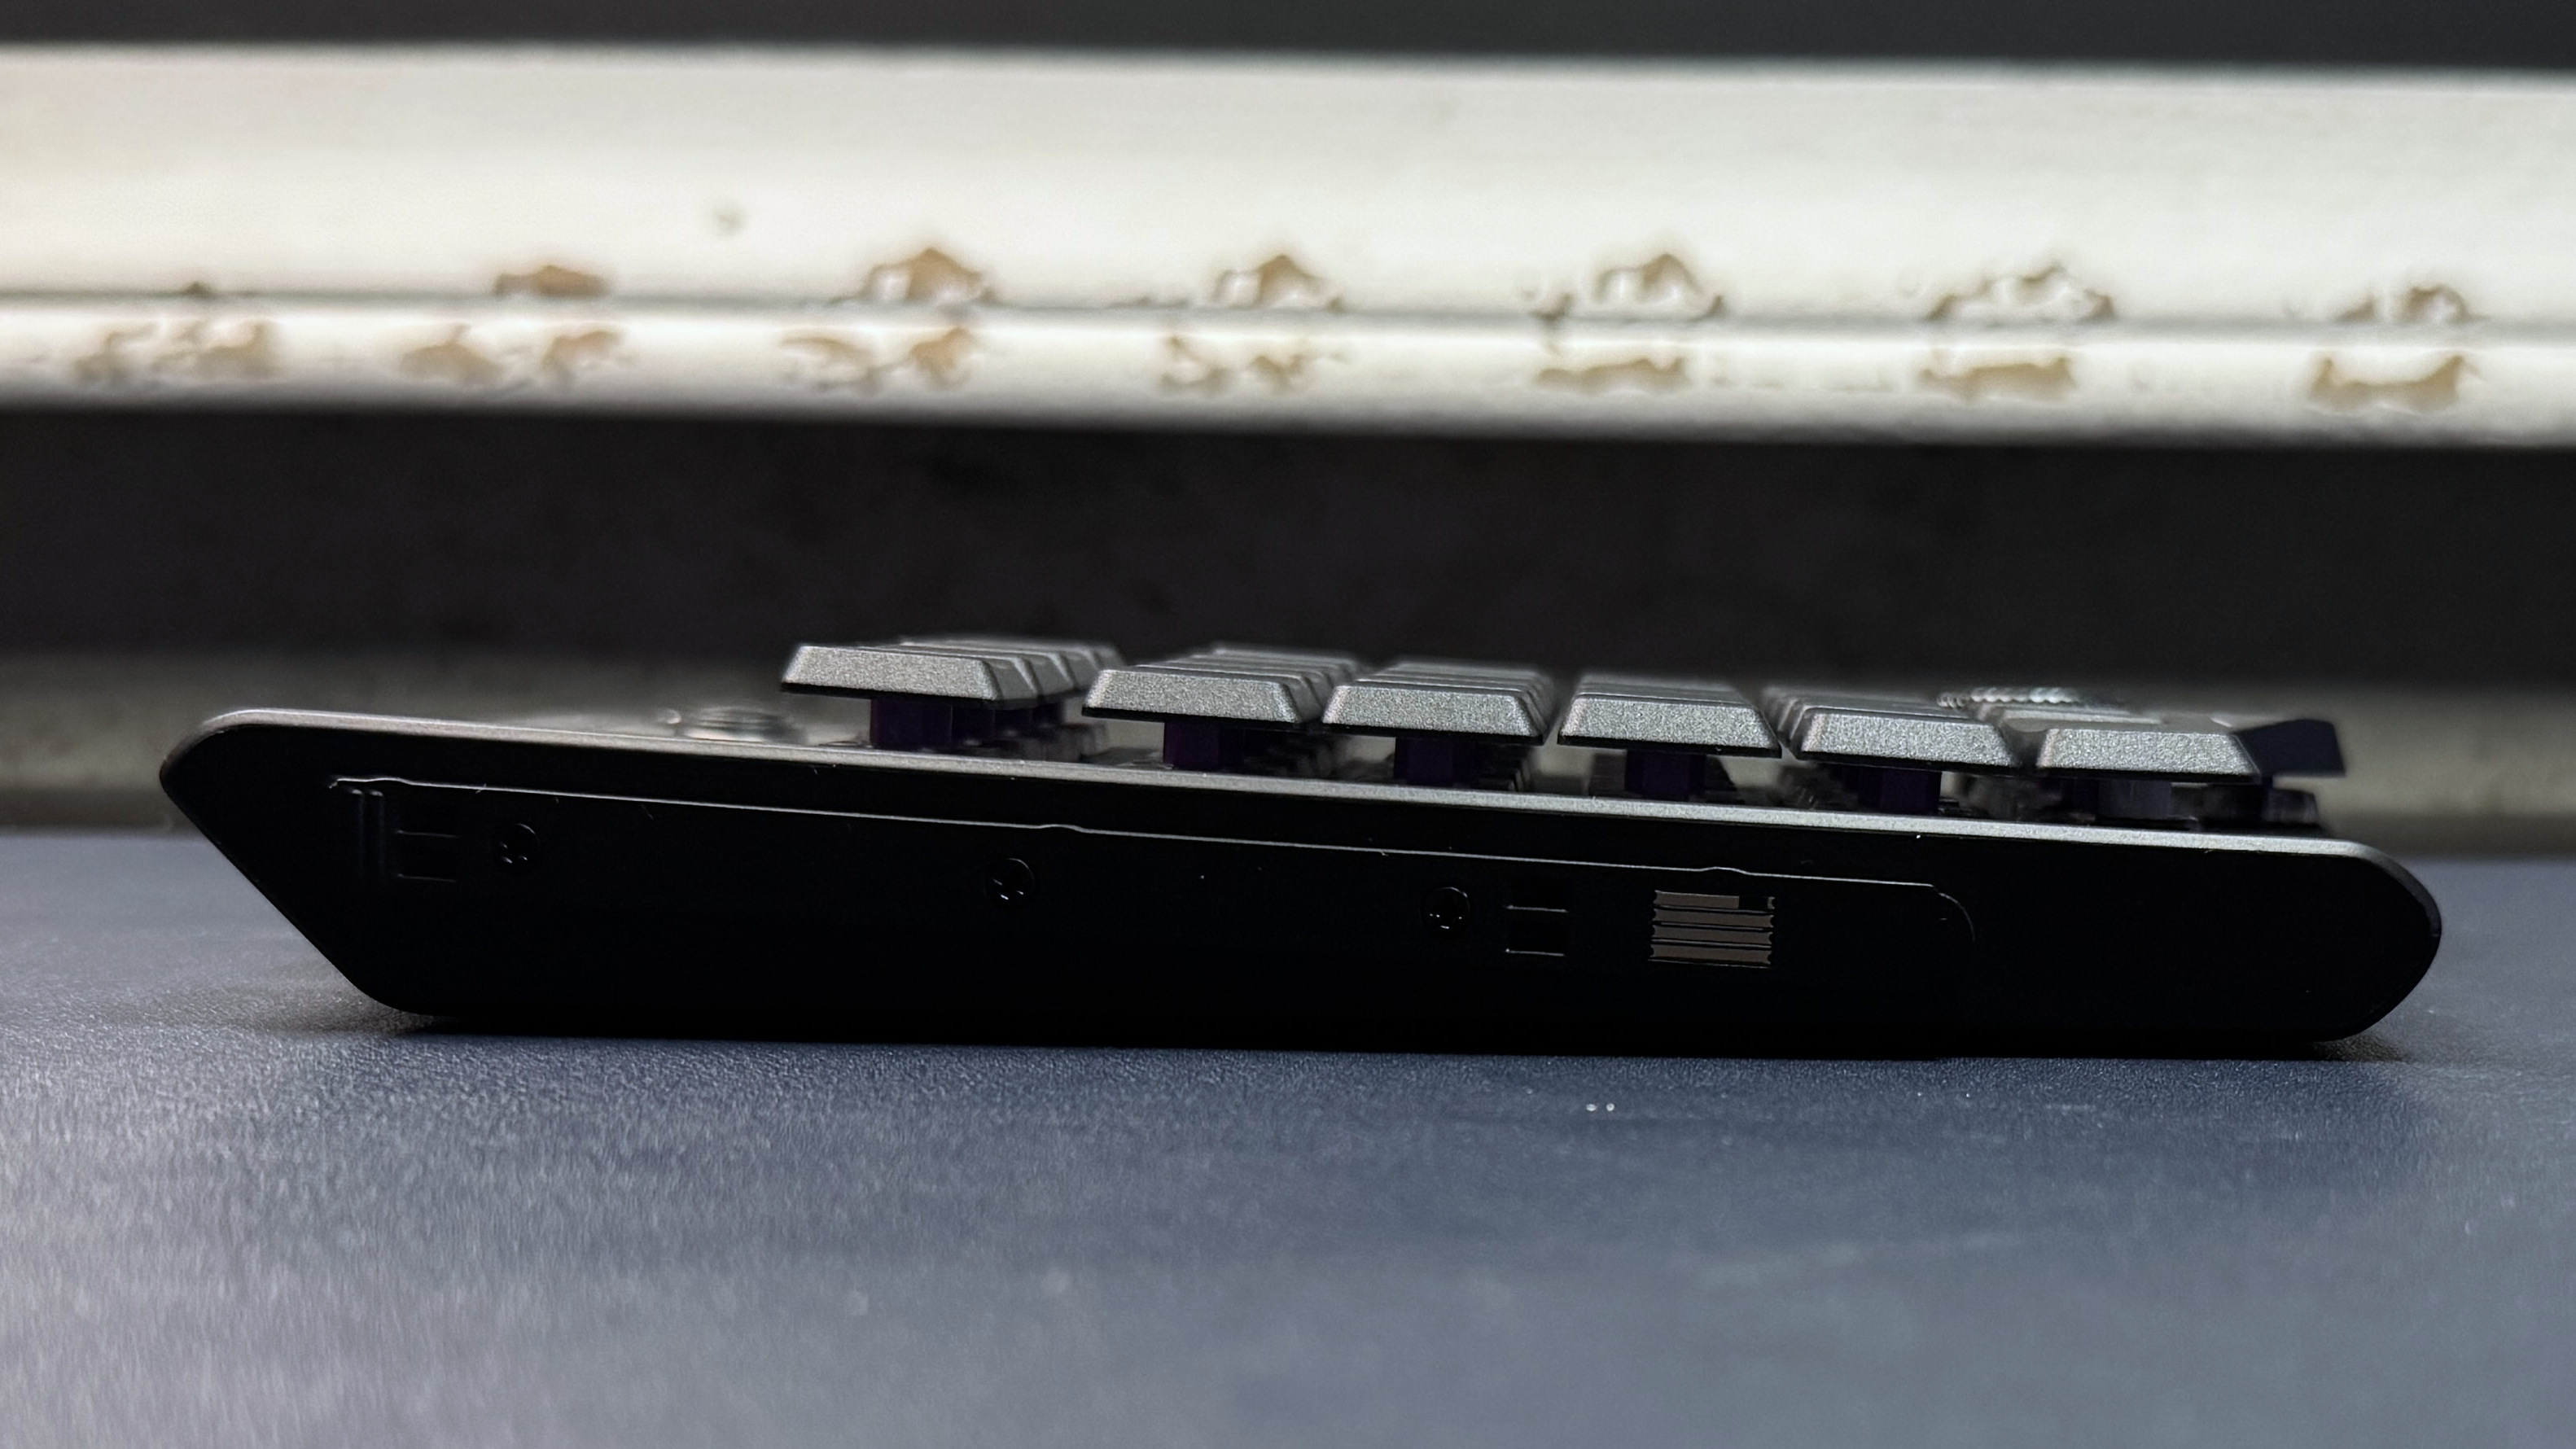
Dimensions (W x H x D)

1008 x 4.45 x 1.14 inches / 256 x 113 x 29 mm

Weight

0.56lbs / 254g

System Requirements

Windows 10 / 11

MSRP / Price at Time of Review

$99.99

Release Date

May 2026

Performance of the KP7

It's hard to judge a keypad's performance on its own, but the KP7 has enough keys that it can function as a single-handed "controller." It features the same linear magnetic Hall Effect switches as we saw in the KB7, with the same functionality — individually adjustable actuation point (between 0.1 and 3.2mm), Rapid Trigger, multi-input, and ReacTap (SOCD). It also sports an 8,000 Hz polling rate, so I guess if you're playing a game that only requires the left half of your keyboard, this might be one way to get the ultra-low latency and speed of an 8,000 Hz magnetic switch keyboard without having to buy the whole keyboard (though it does cost exactly half of what the KB7 costs, and I don't think it's quite half the size).

Turtle Beach KP7
Tom's Hardware
Turtle Beach KP7
Tom's Hardware

The low-profile switches and flat keycaps make for pretty speedy input, and while the layout is slightly different from standard numberpad layouts, it's not too bad — in numberpad mode, the first column to the right of the numbers has five keys, but the bottom two keys are both Enter and the two keys above that are both + (normally, the Enter and + keys are vertical 2U keys). It's not quite the same, but it worked well enough for me for data input and other numberpad tasks.

The switches themselves are pre-lubed linear switches with a smooth, consistent keypress and no tactile or audible bump. Typing on the KP7 (well, for as much typing as you can do) is a surprisingly pleasant experience — it's not going to wow any hardcore keyboard enthusiasts, but the linear switches, slim, flat keycaps, and speedy, lightweight Hall Effect actuation is a great combo for extra gaming keys. And, as the KP7 is entirely tactile, it's much easier to integrate into your work (or game) flow. The extendable thumb bar (which just pulls away from the keyboard in a diagonal / downward direction) is also comfortable when you're using the KP7 as a gamepad. The keys on the thumb bar are well-placed, but I did find the knob difficult to turn without hitting other keys, as it's flush with the keys around it.

Software

The KP7 is programmable via Turtle Beach's Swarm II software, which originally belonged to Roccat. It's designed to work in tandem with the KB7 keyboard, but you can still program it fully without having to depend on the keyboard at all. You can use Swarm II to change the keypad's actuation, toggle on and adjust Rapid Trigger and ReacTap, and set up multi-input. You can also use it to remap keys up to four layers deep (Fn, Game Mode, and Easy Shift).

Turtle Beach KP7
Tom's Hardware
Turtle Beach KP7
Tom's Hardware
Turtle Beach KP7
Tom's Hardware
Turtle Beach KP7
Tom's Hardware

You can customize the KP7's bright, per-key RGB lighting in the software. This works pretty well when you're just customizing the KP7 alone, but I had issues getting the keypad to light up seamlessly alongside the KB7 (they were often out of sync, and/or the KP7 seemed to go into hibernation immediately and often when it was connected to the KB7 — even if it was being powered separately via its own USB-C port.

The Bottom Line

The KP7 is an interesting product — it's designed to work with the KB7, but I actually like it better as a standalone keypad. Partly because it works better as a standalone keypad — it was very finicky in my tests when it was connected to the KB7, regardless of whether it was powered separately or through the keyboard. This is probably because of the software, which, while fairly straightforward for the KP7, still wasn't great. For example, I was prompted to update the KP7's firmware everytime I connected it to the KB7 — but not when I used it as a standalone keypad.

The KP7 isn't the only standalone numberpad-slash-gaming-keypad out there, but it's the only one I've seen that manages to switch between the two modes pretty seamlessly. We tested Nordic Game Supply's The Shrimp mini-keyboard a few years ago, but that was definitely designed as a gaming keypad first and a numberpad... not at all. At $99.99, the KP7 isn't cheap, but it's versatile enough that you can definitely make it worth it.

Up to $129 off Secretlab gaming chairs and desks in July 4 sale — save on the Titan Evo, Magnus, and more

To celebrate July 4, popular gaming chair and desk vendor Secretlab is hosting an Independence Sale with up to $129 off its most popular products. Known for its distinctive gaming aesthetic and bomb-proof build quality, these premium chairs fetch a high price, so discounts like these are rare and not to be sniffed at.

● Check out all of the deals at Secretlab

I've used Secretlab exclusively in my office for years and couldn't ask for better. I have used its Omega, Titan EVO, and new Atlas chair as well as all of its desks and there's very little not to like. Here are the best deals on Secretlab's gear this holiday weekend.

Secretlab July 4 Gaming Chair Deals

This Secretlab Titan Evo comes with the company's trademarked NEO Hybrid Leatherette, which is made to give a soft leather feel that is also durable. View Deal

Secretlab's popular Titan Evo gaming chair is available in a variety of sizes, materials, and colors. Choose between a hybrid leather or softweave fabric covering. A cold-cure foam pebble seat is designed to provide all-day comfort for gaming or work when sitting at your computer. 4D armrests, magnetic headrest, lumbar support, and height adjustment let you customize your seating position.

The Secretlab Titan Evo is available in Small, Regular, and XL sizes. View Deal

Secretlab's latest gaming chair innovation introduces NanoGen to the popular and successful Titan Evo range of gaming chairs. Featuring the same luxury features of the standard Titan Evo, such as 4D armrest, 4-Way L-Adapt lumbar support, and shaped pebble seat, the new Titan Evo Nanogen uses a new soft and durable hybrid leatherette and nanofoam composite. View Deal

Another themed chair, this time for Final Fantasy XIV fans, in the Neo Hybrid Leatherette fabric. Other variations include Harry Potter, Game of Thrones, Assassins Creed, and more, all with Small, Medium, and XL size options.View Deal

I've been using Secretlab chairs since 2019, and I have to say they're some of the most comfortable and durable chairs I've ever sat on. They're all really easy to build and put together, and they all exude a bombproof build quality.

Secretlab July 4 Gaming Desk Deals

Secretlab's flagship standing desk with its latest NanoGen and Magpad tech. It features an integrated power supply column to power your kit with a single cable, a well-hidden (but still accessible) cable management tray, and precision electric height adjustments via a built-in control panel.View Deal

This desk measures 59.1”(L) x 27.6”(W), and is also available in 70.0”(L) x 31.5”(W) if you want something a little larger. This desk is designed to look clean and tidy, with built-in cable management and the power supply hidden in the desk's leg column. The height range goes from 25.5" to 49.2," with the surface being able to use swappable magnetic (Magpad) desk pads in a variety of designs. View Deal

Secretlab's gaming desks all come with a unique integrated control unit that you can use to set the height of the desk. The intervals are precise, and there are profiles so you can save a number of different adjustments. They also have a unique magnetic ecosystem; the desks are entirely magnetic, so you can use lots of different magnetic cable tidies, headphone mounts, and desk accessories, as sold by Secretlab. You can see some below.

Secretlab July 4 Accessories

Get a PlushCell Memory Foam footrest to rest your feet on during the day. 21.7" (L) x 11.8" (W) x 5.1" (H), and featuring a hand-washable fabric cover, it's the perfect addition to any desk. View Deal

This Secretlab Magnus monitor arm is a low-cost upgrade to your office or gaming setup. It will help you to free up your desk from unnecessarily large monitor stands while also providing you with a full range of adjustable positions for the most ergonomic seating position.View Deal

The Secretlab Lumbar Pillow Pro adds extra support and cushioning to your lower back, helping you to reduce fatigue from long gaming sessions in your Secretlab chair. Working in conjunction with the proprietary L-Adapt lumbar support system, this pillow mixes comfortable memory foam with a layer of cooling gel to help dissipate heat. View Deal

Add some extra leg support to your Secretlab chair with this chair addon. Select the correct size and fit for your Secretlab chair and add extra posture support options. The ergonomic recliner simply snaps onto your chair with a toolless installation.View Deal

A Secretlab-branded floor mat will help you to protect hard flooring from damage from the chairs' casters. This mat is designed with a felt upper and a non-slip underlay. View Deal

Don't let an uncomfortable armrest spoil the fun. These Secretlab PlushCell armrest tops magnetically snap onto your Titan Evo gaming chair armrests, providing your arms and wrists with pillow-like softness, thanks to their memory foam construction.View Deal

A pebble-shaped memory foam cushion on a highly adjustable stand, for turning your gaming chair into an even more relaxing seat. View Deal

This Secretlab MAGRGB lighting strip includes 123 individually controllable LEDs that you can control via the Nanoleaf app on your smartphone. This is lighting fit for any gamer's smart home and features embedded magnets for easy attachment to a Secretlab desk.View Deal

Secretlab July 4 Skins Deals

Secretlab lets you either decorate or protect your chair with a new cover, or "skin," as it's called. You can change the color of your chair, or get skins with designs from your favorite games or TV shows. There are plenty of different choices for you to browse through. View Deal

More Tech Deals

Best Tech and PC deals | Best gaming PC deals | Best RAM combo deals | Best 3D printer deals | Best RAM deals | Best gaming laptop deals | Best gaming monitor deals | Best Wi-Fi Router deals | Best GPU deals | Best SSD deals | Best hard drive HDD deals | Best CPU deals | Best gaming chair deals | Best PC building tool deals | Best PC peripherals deals | Best filament and resin deals | Best motherboard deals | Best CPU cooler deals | Best PC case deals | Best Dell and Alienware deals | Best USB charger deals | Best gaming and productivity laptop deals under $1,000 | Best laptop PC deals

Also, you can join the Tom's Hardware deals Discord for up-to-the-minute hardware deals.

Jensen Huang’s iconic signed leather jacket expected to fetch up to $60,000 in charity auction — Sotheby’s says item was worn at a Foxconn Tech Day in 2023 and the signature has been professionally authenticated

2026年7月3日 17:12

One of Jensen Huang’s used leather jackets is up for auction, posted with an estimate of $40,000 to $60,000. Sotheby’s, better known as a purveyor of blockbuster fine art and historic artifacts, is auctioning this item of worn clothing. The storied auction house asserts this is a genuine article, as worn by the Nvidia CEO at an event in Taipei in 2023. It has also made sure the signature within the garment has been professionally authenticated. Having watched a few tech memorabilia auctions lately, I’d say the official estimate is on the low side.

Sotheby's is auctioning off NVIDIA CEO Jensen Huang's signature black leather jacket.Estimate: $40,000 - $60,000. pic.twitter.com/Tnpl0EXExqJuly 2, 2026

Sotheby’s auction is titled ‘The Jensen Jacket: Jensen Huang's Tom Ford Leather Jacket.’ Its catalog notes that this signature black leather jacket has been Huang’s standard attire for more than a decade and has become “associated with some of the most consequential moments in modern technology.” This jacket, or one like it, has been on stage helping to define the rise of artificial intelligence. It may also have been worn by the Nvidia CEO visiting a humble street food vendor in a Taiwan night market.

So, it is important to understand that this is one of many jackets Huang has sported during keynotes, announcements, and special events over the years. Like any good auction house, Sotheby's has thus certified the provenance of this particular garment.

“The Jacket has been photomatched by PSA [Professional Sports Authenticator] to Jensen Huang, co-founder and chief executive officer of Nvidia Corp., during the Hon Hai [Foxconn] Tech Day in Taipei on October 18, 2023,” writes Sotheby’s in its auction catalog. A very specific array of creases and deformities in the right-breast pocket flap appears to confirm that this jacket was worn by the Nvidia CEO at the Hon Hai [Foxconn] Tech Day in Taipei in October 2023. Sotheby’s also states that “The signature has been authenticated by James Spence Authentication.”

Any readers interested in grabbing this jacket will likely be interested in the condition of the garment. There are a few pictures on the catalog page, including a close-up, which was used to ‘photomatch’ this particular 2023 Tom Ford-made sample. As a Sotheby’s account holder, I also read the condition report, which begins with the assertion that “The Jacket and signature are in pristine condition.” But there follows a lot of legal jargon which can be summed up as – the actual condition and appearance of the jacket might not be perfect, nor look exactly like the photographic representations of it.

If you do splash your cash on this old jacket, you should be pleased to know that your hard-earned money will be going to charity. Sotheby’s says that the sale was organized by Long Journey Ventures to benefit the Edge Institute, described as “a non-profit that convenes people working at the frontiers of tech, science, culture, and society in pop-up villages (Edge Cities) to live together and experiment towards a brighter future.”

A low estimate to attract bidders?

Does the $40,000 to $60,000 estimate take into account the jacket's Jensanity factor, or AI inflation? Also, we are in an AI boom right now, with skyrocketing prices and valuations, yet people might have spent more than the top estimate for a mere NFT of this jacket a few years ago.

On a cautious note, though, we aren’t sure how many of these jackets the Nvidia CEO has in his wardrobe. And if there were another 10 or 20 that may someday be released for sale, then the expected price could slide dramatically.

A brand new Tom Ford SS2023 menswear collection jacket, without a sprinkle of genuine Jensanity, costs around $9,000. In that context, Sotheby’s estimate puts only a modest premium on this verified genuine Jensen Huang-worn and signed artifact.

Meta releases version two of its brain-computer interface that can turn thoughts into keypresses — non-invasive magnetoencephalography scanner can measure changes in brain activity

2026年6月30日 21:34

Elon Musk’s Neuralink, along with several other startups, have been experimenting with brain-computer interfaces (BCIs) for years now, allowing patients who have lost mobility to control computers using their minds alone. However, most of these require invasive surgery to install the sensor needed to detect brain signals. Meta is working to change this with its Brain2Qwerty non-invasive BCI. Instead of relying on implants, this system uses a non-invasive magnetoencephalography (MEG) scanner to read the faint changes in a brain’s magnetic fields due to brain activity and then correlate this to keypresses on a virtual keyboard.

The latest release is actually the second version of the non-invasive BCI, with the first one released last year as proof of concept. This second version has significantly increased accuracy after it was trained on ten times more data for each test subject. The company says that its average accuracy now hits 61%, with the best participant capable of hitting as much as 78% word accuracy. By comparison, the previous version only had an average of 40% accuracy, while the best user only achieved 48%.

While this sounds like a big improvement, Meta concedes that this is still not good enough for clinical testing. The 61% average accuracy still feels hit-and-miss and would be difficult to use in everyday conversation. Nevertheless, the company says that it plans to use more data for training the system, and that it’s continuously getting better results from it so far. Another issue it’s facing is the size of MEG sensors. Current MEG technology requires massive hardware — even larger than the user and the chair they’re sitting in. There are promising advancements in MEG sensors, though, which could result in smaller devices that are more manageable to use in clinical settings.

Meta’s non-invasive BCI alternative to Neuralink and other solutions that require brain surgery is still a long way off from allowing patients to control a webcam and play World of Warcraft. But it is still an important development in neuroprosthetics, and it could eventually result in medical devices that patients could use to restore or improve their quality of life. Meta isn’t the only one working on BCIs that don’t require major surgery — a team from Georgia Tech has also developed a tiny BCI that could be easily slid under the scalp, while Valve founder and superyacht enthusiast Gabe Newell also built a startup intent on creating a BCI that doesn’t require a battery.

Grab this epic Razer Wolverine V3 controller for a record-low Amazon price, now just $64.99 — big 46% saving on this esports-friendly gamepad for your PC or console with next-gen TMR thumbsticks and an ultra-fast 8,000Hz polling rate

2026年6月30日 19:34

A PC gamer might think that a keyboard is the weapon of choice for their gameplay needs, but a good gamepad can make all the difference. Most modern PC games now give you the choice to switch between inputs, so if you're lacking in controller options, you'll want to take advantage of this offer on the Razer Wolverine V3 Tournament Edition game controller, down to $64.99 right now.

Check out this deal at Amazon

That's a new record low price for this controller on Amazon, according to the data crunching at Camelcamelcamel, although we have spotted it a touch cheaper on Woot on occasion. That said, this deal makes it $40 cheaper than it was just a few weeks ago.

You're getting everything you'd want and expect in a top-spec modern controller in the Razer Wolverine V3. It has stick drift-resistant next-gen TMR thumbsticks, ultra-precise triggers with customizable actuation points, four mouse-click back buttons, two claw grip bumpers, and an eight-way floating D-pad. This is a wired controller, although a wireless version is available, with an 8,000Hz polling rate. For gaming, that means ultra-fast input speeds that help to almost completely eliminate input lag.

Razer have iterated on this design with improvements over the original and V2 models. The USB-C cable is detachable, and there are some other quality-of-life improvements, including extra paddles on the underside, as well as a change from rubber grip to textured plastic to make it easier to clean. The Wolverine V3 is fully customizable, with Razer's software allowing you to set up your own custom presets and layouts, as well as set your preferred sensitivity levels.

Wired

This wired controller won't fail you in the middle of an intense battle, with its ultra-low latency and precise TMR thumbsticks helping to stay on top of your opponents. The Wolverine V3 has a 8,000Hz polling rate and is fully customizable through Razer's software. View Deal

If you've seen an Xbox controller, you won't be blown away by the Razer Wolverine's layout or design, but don't be fooled. It looks a lot like Microsoft's own, but that's about it. The tech under the hood of this controller is supercharged compared to the OG Xbox gamepad, with the TMR thumbsticks being one area to note.

TMR, or Tunneling Magnetoresistance thumbsticks, help you to eliminate stick drift, a common problem on controllers. The sticks used here rely on magnetics to help determine directional input and are a step up in design compared to the (now common) Hall Effect options used in rivals, including earlier Wolverine models. There are no contacts getting dirty or breaking down, ensuring better longevity for your sticks compared to a standard controller.

The $64.99 sale price for this Razer Wolverine V3 Tournament Edition controller is a steal right now from a brand that gamers trust. Take advantage of this record low price while you can, because this is a deal that has the potential to sell out quickly.

Best Tech and PC deals | Best gaming PC deals | Best RAM combo deals | Best 3D printer deals | Best RAM deals | Best gaming laptop deals | Best gaming monitor deals | Best Wi-Fi Router deals | Best GPU deals | Best SSD deals | Best hard drive HDD deals | Best CPU deals | Best gaming chair deals | Best PC building tool deals | Best PC peripherals deals | Best filament and resin deals | Best motherboard deals | Best CPU cooler deals | Best PC case deals | Best Dell and Alienware deals | Best USB charger deals | Best gaming and productivity laptop deals under $1,000 | Best laptop PC deals

Also, you can join the Tom's Hardware deals Discord for up-to-the-minute hardware deals.

Modded Steam Controller can automatically charge itself like a robot vacuum — enthusiast creates GitHub program that uses the vibration motor to walk it back to its docking station

2026年6月27日 19:00

An aerospace worker and programmer created a GitHub-hosted program that lets your Steam Controller automatically walk back towards its charging puck as soon as you place it down on your desk. The web app, called the Auto-Charge Vision Tracker, uses a camera and computer vision to determine where your controller is, then it uses its powerful built-in motors to make it creep towards its docking station to top itself up when you’re not using it. The great thing about this web app is that you don’t need to install anything on your PC to use it. Just go to the website, connect your Steam Controller, ensure your camera is directly overhead your desk, click the puck, the front, and the back of your controller, and you should be good to go.

I made my Steam Controller automatically charge itself@Dexerto @HardwareSteam @valvesoftware pic.twitter.com/RzCApdq4l4June 25, 2026

This is an interesting use case for the Steam Controller’s haptic motors, which are primarily designed to give feedback to gamers. Although this app, which you can run in the background on your browser, is designed to make recharging your controller more comfortable, you do need a flat surface without any obstructions to ensure that the Steam Controller can reach the charging puck. Aside from that, the vibration and movement on the desk tends to cause abrasion on the controller’s surface, meaning you’ll soon find flat spots appearing on the surface that contact your desk. Ray Foss, the maker of the GitHub repo, said that adding rubber feet should help prevent this and might also give the controller better acceleration and handling.

Another programmer has created something similar before — a web app that uses the controller’s rumble motor to let it slip and slide on your desk. But what makes this project different is that instead of manually “driving” your Steam Controller, it uses computer vision to automatically guide the controller back towards the charging puck, making it look like a robot vacuum.

These apps have limited usability — after all, the Steam Controller would still be unable to hop from the coffee desk in your living room to the TV console where your charging puck and Steam Machine are likely sitting. Nevertheless, it shows Valve’s commitment to making it easy for gamers to use their devices the way they want to. The company even released the CAD files for the Steam Controller and Puck back in May 2026, just a few days after the controller became widely available. But if you want to give this curiosity a try, you can easily do so by going to the Auto-Charge Vision Tracker website. The program’s files are also readily available on GitHub if you want to play around with the program and make your own version.

❌
❌